Introduction
Uninstalling graphics card drivers may sound like a daunting task, but it is an essential process that can help resolve compatibility issues, improve performance, and troubleshoot problems with your computer’s graphics card. Whether you’re upgrading your hardware, experiencing graphics glitches, or simply looking to start fresh, uninstalling your graphics card drivers is a necessary step in the process.
Graphics card drivers are software programs that facilitate communication between your operating system and the graphics card installed in your computer. They ensure that your system can effectively utilize the capabilities of your graphics card, enabling you to enjoy high-quality visuals, smooth animations, and efficient rendering in games, multimedia applications, and other graphics-intensive tasks.
However, over time, these drivers can become outdated or incompatible with newer software and operating system updates, leading to various issues such as system crashes, display artifacts, or performance degradation. In such cases, uninstalling the existing graphics card drivers becomes crucial to resolve these problems and ensure optimal performance.
In this guide, we will explore different methods to uninstall graphics card drivers effectively. We will discuss how to uninstall drivers using the Device Manager, the graphics card manufacturer’s software, and the Display Driver Uninstaller (DDU) utility. Additionally, we will provide some best practices to follow during the uninstallation process to avoid any potential issues.
Before we delve into the uninstallation methods, it is important to note that reinstalling the drivers after the uninstallation process will be necessary to ensure proper functioning of your graphics card. Hence, you should make sure to have the latest drivers available from the manufacturer’s website or through automatic update tools to install them immediately after uninstallation.
Now, let’s move on to the next section to learn how to uninstall graphics card drivers using the Device Manager.
Why Uninstall Graphics Card Drivers?
Uninstalling graphics card drivers may seem counterintuitive, especially since they play a crucial role in ensuring optimal performance and functionality of your graphics card. However, there are several valid reasons why you might need to uninstall these drivers from your computer. Let’s explore some of the main reasons:
- Compatibility Issues: Graphics card drivers can sometimes become incompatible with the operating system or other software installed on your computer. This can result in crashes, glitches, or performance issues. Uninstalling the existing drivers and reinstalling updated ones can help resolve these compatibility problems.
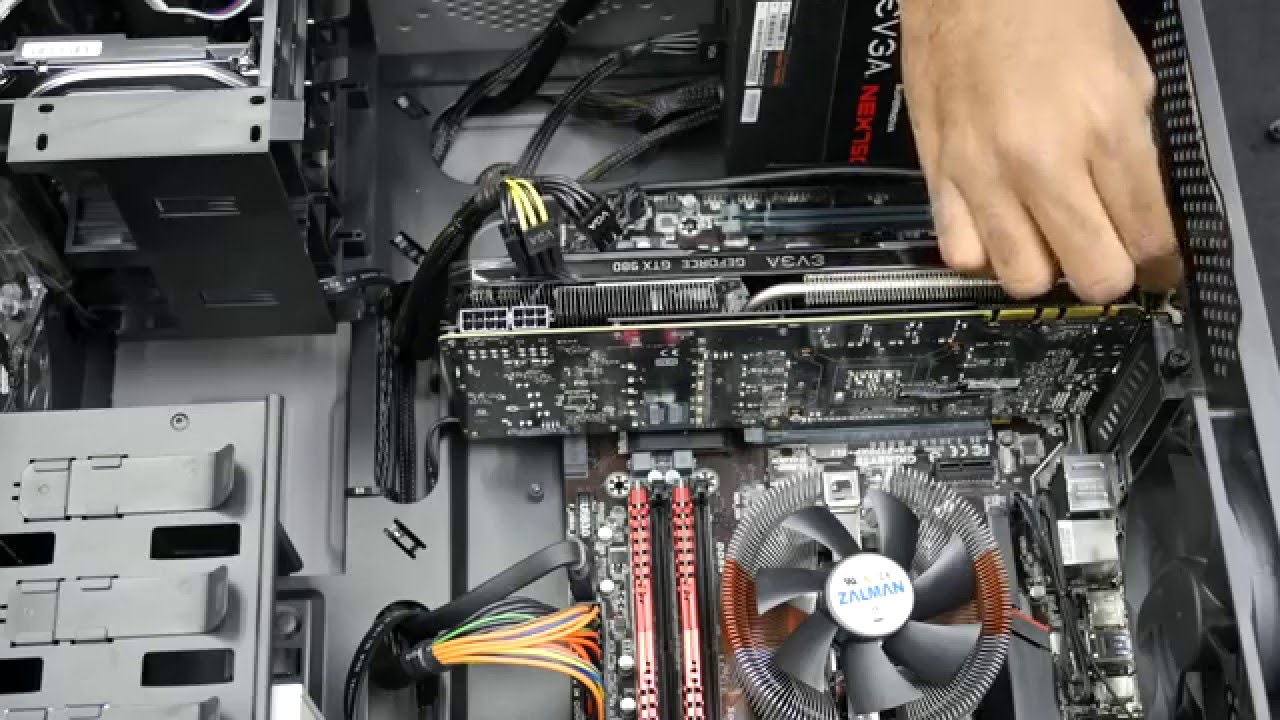
- Upgrading Hardware: If you’re upgrading your graphics card or replacing it with a newer model, you’ll need to uninstall the drivers associated with the previous card. Removing the old drivers ensures a clean installation and ensures that your system can fully utilize the capabilities of the new graphics card.
- Troubleshooting Graphics Issues: If you’re experiencing graphics-related problems such as artifacts, screen tearing, or poor performance, uninstalling and reinstalling the graphics card drivers can help troubleshoot and resolve these issues. It allows you to start fresh with a clean driver installation, eliminating any potential conflicts or corrupted files.
- Driver Updates: Graphics card manufacturers periodically release driver updates to optimize performance, fix bugs, and introduce new features. Uninstalling the current drivers before installing the latest updates ensures a clean installation, preventing any potential conflicts or issues that might arise from the previous driver version.
Overall, uninstalling graphics card drivers can help address compatibility issues, accommodate hardware upgrades, troubleshoot graphics problems, and ensure you have the latest driver updates. By performing a clean uninstallation and installing the latest drivers, you can optimize the performance and stability of your graphics card, enhancing your overall computing experience.
Preparation
Before proceeding with the uninstallation of graphics card drivers, it is essential to make a few preparations to ensure a smooth and hassle-free process. Taking these steps will help you avoid any potential issues that may arise during the uninstallation process. Here are some key preparations to consider:
- Create a System Restore Point: It is always a good practice to create a system restore point before making any significant changes to your system, such as uninstalling graphics card drivers. A system restore point allows you to revert to a previous state if any unforeseen problems occur during the uninstallation process.
- Backup Important Files: Although uninstalling graphics card drivers should not affect your files and documents directly, it is still a good idea to back up any critical files or data before making any system changes. This precautionary measure ensures that your important files are safeguarded against any unforeseen circumstances.
- Download the Latest Driver: Before uninstalling the current graphics card drivers, it is wise to download the latest driver package from the manufacturer’s website. Having the updated driver available will allow you to install it immediately after the uninstallation process, ensuring that your graphics card functions correctly.
- Disconnect from the Internet: To prevent your computer from automatically installing outdated or incompatible drivers during the uninstallation process, it is recommended to disconnect from the internet. This will ensure that you have complete control over the driver installation process after the uninstallation is complete.
- Close Unnecessary Applications: Before uninstalling the graphics card drivers, close any unnecessary applications and programs running on your computer. This will help prevent any conflicts or issues that may arise due to active processes accessing the graphics card drivers.
- Read Documentation and Release Notes: It is advisable to read the documentation and release notes provided by the graphics card manufacturer for any specific instructions or guidance related to uninstalling the drivers. These resources can provide valuable information on the process, ensuring that you follow the recommended steps.
By taking these preparatory measures, you can minimize the risks and ensure a smooth and successful uninstallation of your graphics card drivers. Now that you’re fully prepared, let’s dive into the various methods you can use to uninstall graphics card drivers.
Steps to Uninstall Graphics Card Drivers
When it comes to uninstalling graphics card drivers, there are several methods you can choose from. In this section, we will outline three common methods: using the Device Manager, the graphics card manufacturer’s software, and the Display Driver Uninstaller (DDU) utility. Follow these step-by-step instructions to uninstall your graphics card drivers:
- Method 1: Using Device Manager
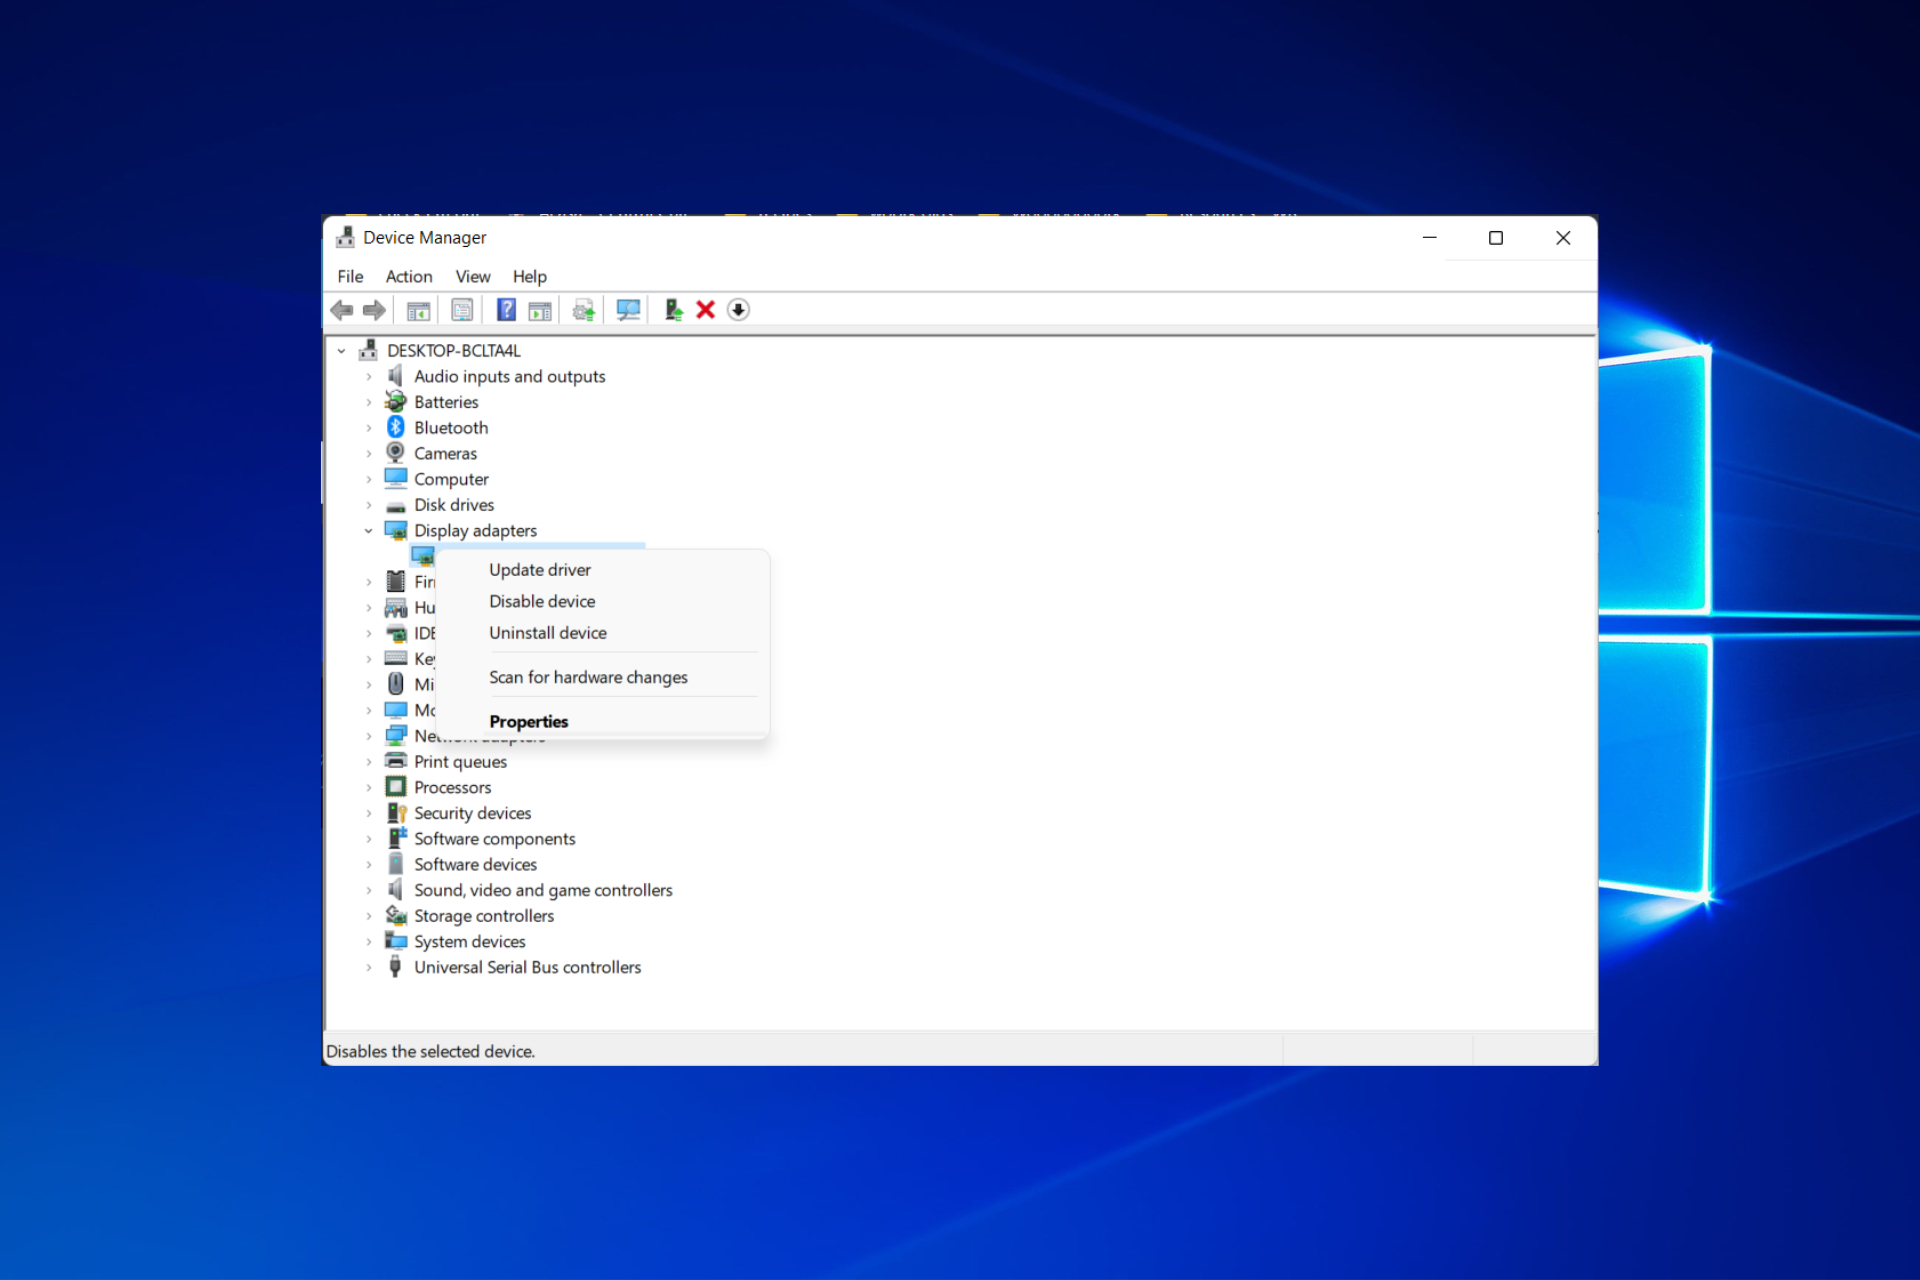
- Press
Win + Xand select Device Manager from the menu. - In the Device Manager window, expand the Display adapters category.
- Right-click on your graphics card driver and select Uninstall device.
- Tick the box that says Delete the driver software for this device and click Uninstall.
- Once the driver is uninstalled, restart your computer.
- Press
- Method 2: Using the Graphics Card Manufacturer’s Software
- Visit the website of your graphics card manufacturer and navigate to the Support or Drivers section.
- Search for your specific graphics card model and download the latest driver package for your operating system.
- Run the downloaded driver installer.
- Select the Custom installation option.
- Make sure to check the box that says Perform a clean installation.
- Follow the on-screen prompts to complete the installation process.
- Method 3: Using Display Driver Uninstaller (DDU)
- Download and run the Display Driver Uninstaller (DDU) utility from a trusted source.
- Extract the downloaded file and run the DDU executable.
- Select your graphics card manufacturer from the drop-down menu.
- Click on the Clean and Restart (Highly Recommended) button to begin the uninstallation process.
- Wait for DDU to remove the drivers and restart your computer.
- After restarting, download and install the latest graphics card drivers from the manufacturer’s website.
These methods provide different approaches to uninstalling graphics card drivers, allowing you to choose the option that works best for your specific needs. Remember, after uninstalling the drivers, you should immediately install the latest drivers to ensure proper functionality of your graphics card.
Method 1: Using Device Manager
Uninstalling graphics card drivers using the Device Manager is a straightforward method that is built into the Windows operating system. Follow the steps below to uninstall your graphics card drivers using this method:
- Press the
Win + Xkeys on your keyboard and select Device Manager from the menu that appears. This will open the Device Manager window. - In the Device Manager window, locate and expand the Display adapters category. This will display the graphics card drivers installed on your computer.
- Right-click on the graphics card driver that you want to uninstall and select Uninstall device from the context menu that appears.
- A warning message may appear, asking if you want to delete the driver software for this device. It is recommended to tick the checkbox that says Delete the driver software for this device to ensure a complete uninstallation. Then, click Uninstall.
- The Device Manager will start uninstalling the graphics card driver. This process may take a few moments.
- Once the driver is uninstalled, restart your computer. Restarting is essential to complete the uninstallation process and prepare your system for installing the new drivers.
After your computer restarts, it will automatically detect the graphics card and install a default driver. To ensure optimal performance, it is important to install the latest graphics card drivers after the restart. You can obtain the latest drivers from the manufacturer’s website or through automatic update tools provided by the graphics card manufacturer.
Uninstalling graphics card drivers using the Device Manager is a quick and convenient method, especially for users who prefer to use native Windows tools. However, if you encounter any issues or prefer a more comprehensive uninstallation, you may consider alternative methods like using the graphics card manufacturer’s software or the Display Driver Uninstaller (DDU) utility. These alternatives provide more advanced options and can help ensure a clean uninstallation of the graphics card drivers.
Method 2: Using the Graphics Card Manufacturer’s Software
Using the graphics card manufacturer’s software to uninstall graphics card drivers provides a more specialized approach that can offer additional features and options. Here’s how you can uninstall your graphics card drivers using the manufacturer’s software:
- Visit the website of your graphics card manufacturer and navigate to the Support or Drivers section.
- Search for your specific graphics card model and download the latest driver package that is compatible with your operating system.
- Run the downloaded driver installer by double-clicking on the file.
- Depending on the manufacturer’s software, you may need to select the Custom installation option instead of the default recommended installation.
- Within the custom installation options, look for a checkbox or an option that says Perform a clean installation or something similar. Ensure that this option is selected.
- Proceed with the installation process by following the on-screen prompts. The driver installer will automatically uninstall the current graphics card drivers and then proceed to install the new drivers.
- Once the installation is complete, restart your computer as recommended by the installer or manually restart your system.
By choosing the custom installation option and selecting the option to perform a clean installation, you can ensure that the previous graphics card drivers are completely removed from your system before installing the updated drivers. This helps to minimize any potential conflicts or issues that may arise from remnants of the old drivers.
Using the graphics card manufacturer’s software to uninstall graphics card drivers provides a more specialized approach and ensures that the uninstallation process is done in accordance with the manufacturer’s recommended practices. It also allows for a seamless transition to the installation of the new drivers, ensuring that your graphics card functions optimally with the latest software updates.
It is important to note that the exact steps and options within the manufacturer’s software may vary depending on the specific graphics card and its associated driver package. Therefore, it is recommended to refer to the documentation or online resources provided by the manufacturer for detailed instructions pertaining to your particular graphics card model.
Method 3: Using Display Driver Uninstaller (DDU)
Display Driver Uninstaller (DDU) is a third-party utility specifically designed to completely remove graphics card drivers from your system. It is a powerful tool that ensures a thorough and clean uninstallation, making it a popular choice among advanced users. Here’s how you can uninstall your graphics card drivers using DDU:
- Download the Display Driver Uninstaller (DDU) utility from a trusted source. It is recommended to get the latest version compatible with your operating system.
- Once the download is complete, extract the files from the downloaded archive to a folder on your computer.
- Locate the extracted DDU executable and double-click on it to run the utility.
- In the DDU interface, select the graphics card manufacturer from the drop-down menu. Choose the appropriate option based on your specific graphics card, such as NVIDIA or AMD.
- Click on the Clean and Restart (Highly Recommended) button to begin the uninstallation process. This will remove all traces of the graphics card drivers from your system.
- The DDU utility will start uninstalling the drivers, which may take a few moments to complete.
- Once the uninstallation process is finished, DDU will prompt you to restart your computer. Choose Yes to restart your system.
- After your computer restarts, the graphics card drivers will be completely uninstalled from your system.
Using Display Driver Uninstaller (DDU) ensures a comprehensive and complete removal of the graphics card drivers, including any leftover files or registry entries. This helps eliminate any potential conflicts or issues that may arise from remnants of previous installations. Additionally, DDU provides a clean environment to install the latest drivers for optimal performance.
It is worth noting that DDU is an advanced tool intended for experienced users. Therefore, it is recommended to exercise caution while using this utility. Be sure to create a restore point or backup your important files before proceeding with the uninstallation process using DDU.
By employing Display Driver Uninstaller (DDU), you can confidently ensure a thorough and clean uninstallation of your graphics card drivers, providing a solid foundation for a fresh installation of the latest drivers.
Best Practices for Uninstalling Graphics Card Drivers
Uninstalling graphics card drivers is a critical process that requires careful attention to ensure a successful and smooth transition. To help you navigate the uninstallation process effectively, here are some best practices to consider:
- Create a System Restore Point: Before uninstalling the graphics card drivers, it is advisable to create a system restore point. This allows you to revert back to a previous state if any unexpected issues arise during the uninstallation process.
- Download the Latest Drivers: Ensure that you have downloaded the latest graphics card drivers from the manufacturer’s official website. This allows you to install the updated drivers immediately after uninstallation, ensuring optimal performance and compatibility.
- Disconnect from the Internet: To prevent your computer from automatically installing outdated or incompatible drivers during the uninstallation process, disconnect from the internet. This ensures that you have full control over the driver installation process after uninstallation.
- Close Unnecessary Applications: Before uninstalling the drivers, close any unnecessary applications and processes running on your computer. This minimizes the chances of interference or conflicts during the uninstallation process.
- Follow Official Documentation: Consult the official documentation or resources provided by the graphics card manufacturer for specific instructions and guidance. Different manufacturers may have variations in the recommended uninstallation procedures.
- Use the Recommended Uninstall Method: While there are multiple methods available for uninstalling graphics card drivers, opt for the recommended method suggested by the graphics card manufacturer. This ensures compatibility and maximizes the chances of a successful uninstallation.
- Restart Your Computer: After uninstalling the graphics card drivers, it is essential to restart your computer. This restart finalizes the uninstallation process and prepares your system for the installation of new drivers.
- Keep Your System Updated: After installing the new drivers, make sure to keep your system updated with the latest operating system updates and graphics card driver updates. Regular updates help ensure optimal performance, stability, and security.
By following these best practices, you can minimize the risk of encountering issues during the uninstallation process and ensure a seamless transition to new graphics card drivers. Remember to always exercise caution and refer to the documentation provided by the graphics card manufacturer for the best results.
Conclusion
Uninstalling graphics card drivers is a necessary process that can help resolve compatibility issues, improve performance, and troubleshoot graphics-related problems. Whether you choose to use the Device Manager, the graphics card manufacturer’s software, or Display Driver Uninstaller (DDU), it is crucial to follow the recommended steps and best practices for a successful uninstallation.
By uninstalling the existing graphics card drivers, you can create a clean slate for the installation of updated drivers. This ensures optimal performance and compatibility with your graphics card, leading to a better overall computing experience.
Remember to make the necessary preparations, such as creating a system restore point, backing up important files, and downloading the latest drivers before uninstalling the current drivers. Disconnecting from the internet and closing unnecessary applications can also help streamline the process.
When choosing a method for uninstallation, consider the specific needs of your system and the guidance provided by the graphics card manufacturer. The Device Manager offers a convenient option within Windows, while using the manufacturer’s software provides additional features and customization. Display Driver Uninstaller (DDU) offers a comprehensive uninstallation for advanced users.
Lastly, make sure to restart your computer after the uninstallation process and install the latest drivers from the graphics card manufacturer’s website. Keeping your system updated with the latest drivers and operating system updates is essential for continued performance and compatibility.
Uninstalling graphics card drivers may appear daunting at first, but by following these methods and best practices, you can effectively manage your graphics card drivers and ensure optimal performance. Don’t hesitate to consult the documentation and resources provided by the graphics card manufacturer for further guidance.
With the right approach, you can navigate the uninstallation process smoothly and enjoy a seamless transition to updated graphics card drivers, ultimately enhancing your computing experience.