Introduction
Subtitles on Disney Plus can greatly enhance your viewing experience by providing text captions for dialogue, sound effects, and other audio elements. Whether you are watching your favorite movies, TV shows, or documentaries, enabling subtitles can help you better understand the content, catch every line of dialogue, and overcome any language or hearing barriers that you may have.
Subtitles can be particularly beneficial in several scenarios. For example, if you are watching a foreign-language film or a show with heavy accents, having subtitles enabled can ensure that you don’t miss out on any important details or struggle to follow the plot. Additionally, subtitles can be helpful for individuals with hearing impairments, allowing them to fully enjoy the content without relying solely on sound cues.
If you’re new to Disney Plus or simply unsure how to enable subtitles, don’t worry – it’s a quick and easy process. In this guide, we will walk you through the steps of turning on subtitles on Disney Plus, so you can start enjoying your favorite content with the added benefit of captions.
Why use subtitles on Disney Plus
Subtitles serve as a valuable tool on Disney Plus, providing numerous benefits that add to the overall viewing experience. Here are some key reasons why you should consider using subtitles when watching content on the popular streaming platform:
- Improved comprehension: Subtitles help you understand the dialogue, particularly in scenes with fast-paced conversations, accents, or unfamiliar languages. They ensure that you catch every word and can follow the plot effortlessly.
- Language learning: If you’re learning a new language or want to improve your language skills, watching Disney Plus content with subtitles can greatly contribute to your language acquisition. You can read along as you listen to the dialogues, helping you match words with their corresponding pronunciations.
- Accessibility: Subtitles make content more accessible for individuals with hearing impairments. By enabling subtitles, those who are deaf or hard of hearing can still fully enjoy movies, TV shows, and documentaries on Disney Plus by reading the dialogue and sound descriptions.
- Noisy environments: When watching Disney Plus in a noisy environment, such as a crowded room or a place with background noise, subtitles can be immensely helpful. They allow you to follow the story and understand the dialogues without having to strain your ears to hear over the noise.
- Spoiler avoidance: Subtitles can be useful for avoiding spoilers. If you accidentally miss an important line or mishear a crucial piece of information, subtitles ensure that you don’t miss any plot twists or surprises.
By utilizing subtitles on Disney Plus, you can enhance your overall viewing experience, boost comprehension, and enjoy content without any language or hearing barriers. It’s a simple feature that adds value to your entertainment and ensures that you don’t miss out on any crucial details.
How to turn on subtitles on Disney Plus
If you’re ready to enable subtitles on Disney Plus and start enjoying content with text captions, follow these simple steps:
- Step 1: Open the Disney Plus App
- Step 2: Choose the desired content
- Step 3: Click on the “Audio & Subtitles” icon
- Step 4: Select the language for subtitles
- Step 5: Adjust subtitle settings (optional)
- Step 6: Start watching with subtitles enabled
Launch the Disney Plus app on your preferred device. Make sure you are signed in to your account.
Select the movie or TV show that you want to watch. You can either search for a specific title or browse through the available options.
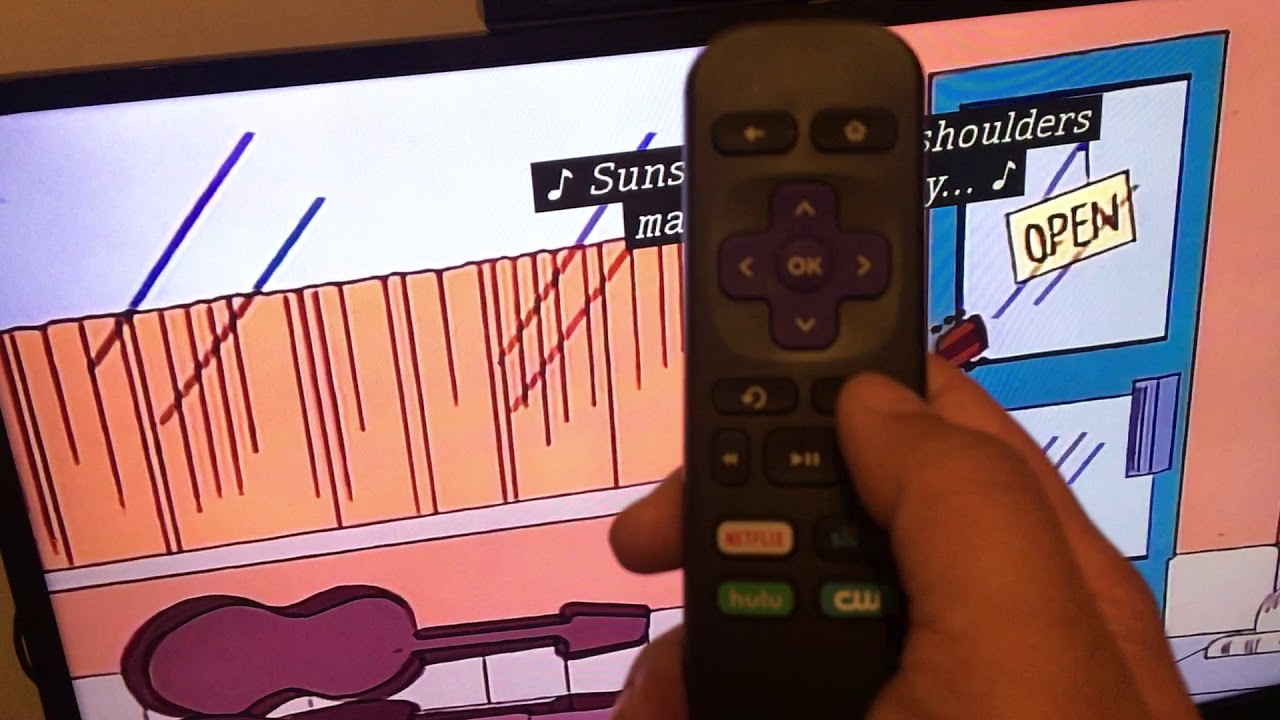
Once you’ve selected the content, look for the “Audio & Subtitles” icon. This is typically represented by a speech bubble or a text caption symbol. Click on it to access the audio and subtitle settings.
A list of available languages will appear on the screen. Choose your preferred language for subtitles. If you want subtitles to match the audio language, you can select the “Match Video Language” option.
If you prefer to customize your subtitle display, Disney Plus may offer additional settings such as font style, size, and color. You can explore these options and adjust them according to your preferences.
Once you have selected the desired subtitle language and adjusted the settings, start playing the content. The subtitles will now appear on the screen, providing you with a text representation of the dialogues and other audio elements.
Congratulations! You have successfully turned on subtitles on Disney Plus. Sit back, relax, and enjoy your favorite movies and TV shows with the added benefit of captions.
Step 1: Open the Disney Plus app
To begin the process of enabling subtitles on Disney Plus, you’ll need to open the Disney Plus app on your chosen device. The app is available on various platforms such as smartphones, tablets, streaming devices, smart TVs, and gaming consoles.
If you’re using a mobile device, locate the Disney Plus app icon on your home screen or in your app drawer. Tap on the icon to launch the app. If you’re using a streaming device, smart TV, or gaming console, navigate to the app section or store and search for “Disney Plus”. Then, select and open the app.
Once the Disney Plus app is open, make sure you are signed in to your account. If you haven’t signed in yet, enter your login credentials to access your Disney Plus profile.
It’s important to note that you need a valid Disney Plus subscription to access the app and its content. If you haven’t subscribed yet, you will need to sign up for a Disney Plus account and choose a subscription plan before proceeding.
After opening the Disney Plus app and signing in, you’re now ready to move on to the next step and choose the content you want to watch with subtitles.
Step 2: Choose the desired content
Now that you have successfully opened the Disney Plus app and logged into your account, it’s time to select the content you want to watch with subtitles.
From the app’s home screen, you’ll find a variety of options to browse and discover content. This may include featured movies, TV shows, recommended titles, or categories like “New Releases” or “Trending Now.” Take your time to explore these sections and find something that catches your interest.
If you have a specific title in mind, you can use the search function within the app. Simply tap on the search icon, usually represented by a magnifying glass, and enter the name of the movie, TV show, or documentary you’re looking for. The app will display a list of relevant results for you to choose from.
Once you have found the content you want to watch, click on its thumbnail or title to open its dedicated page. Here, you’ll find details about the movie or show, including the cast, synopsis, and reviews.
Take a moment to ensure that the selected content offers subtitles. Most Disney Plus originals and licensed content are available with multiple audio and subtitle options, but it’s always a good idea to double-check.
Once you’re confident in your selection and have confirmed that subtitles are available, you’re ready to proceed to the next step and access the “Audio & Subtitles” settings.
Remember to provide the details of the next steps in the upcoming requests.
Step 3: Click on the “Audio & Subtitles” icon
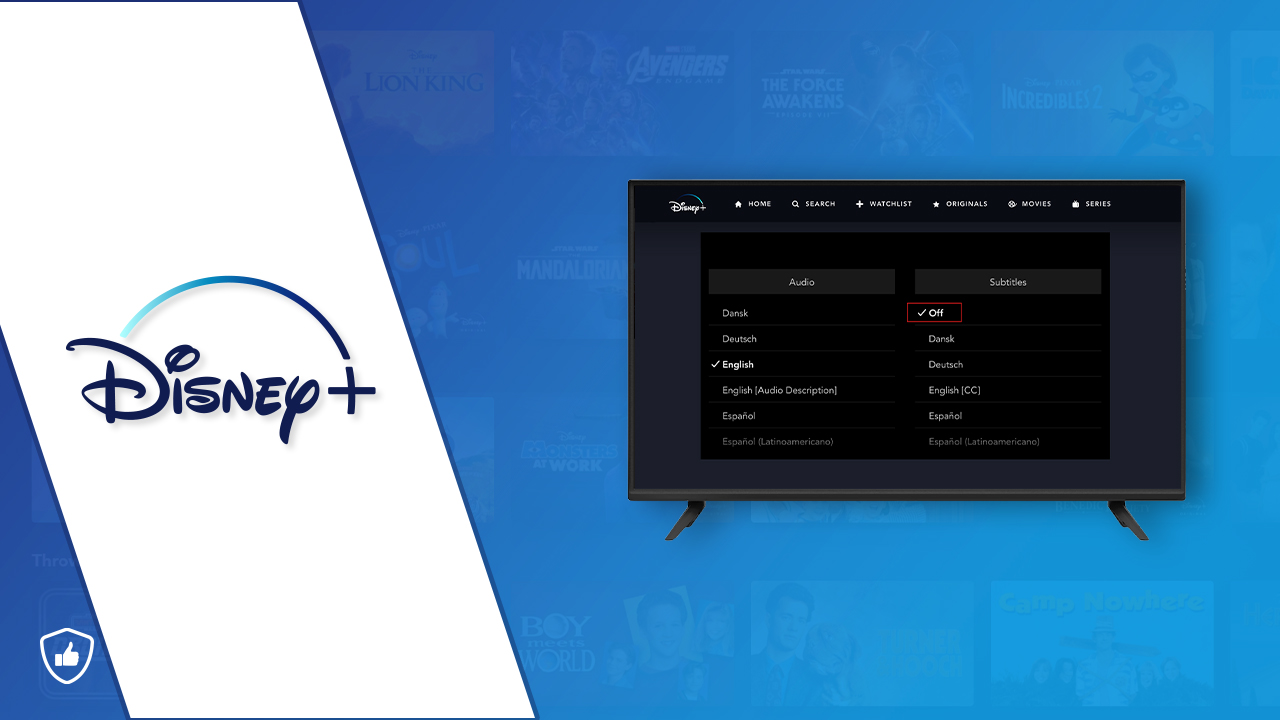
After choosing the desired content on Disney Plus, it’s time to access the “Audio & Subtitles” settings. This step allows you to select the language and customize the display of subtitles for your viewing preference.
On the content’s dedicated page, locate the “Audio & Subtitles” icon. This icon is usually represented by a speech bubble or a text caption symbol. It can typically be found near the playback controls or in the menu bar on the bottom of the screen.
Clicking on the “Audio & Subtitles” icon will open a menu that allows you to customize the audio and subtitle settings for the selected content.
Some devices may display a list of available audio and subtitle languages directly, while others may provide an additional pop-up window or menu to further configure the settings.
Within the “Audio & Subtitles” menu, you will see a list of available subtitle languages. These languages may vary depending on the content and the device you are using to access Disney Plus.
Click on the language you prefer for subtitles. If you want the subtitles to match the audio language, you may have the option to select “Match Video Language” or a similar setting.
It’s worth noting that Disney Plus offers subtitles in multiple languages, allowing viewers to enjoy content in their preferred language or follow along with translated captions.
Once you have chosen the desired subtitle language, you can proceed to the next step to further adjust the subtitle settings, or if you are satisfied with the default settings, you can start watching the content with subtitles enabled.
Congratulations! You’ve successfully accessed the “Audio & Subtitles” settings by clicking on the respective icon. It’s time to move on to the next step and customize any additional subtitle preferences or start enjoying your selected content with subtitles.
Step 4: Select the language for subtitles
Now that you’ve opened the “Audio & Subtitles” menu on Disney Plus, it’s time to select your preferred language for subtitles. This step allows you to choose the language in which the captions will appear while you’re watching your favorite content.
Within the “Audio & Subtitles” menu, you will find a list of available languages for subtitles. The languages displayed may vary depending on the content and the device you’re using.
Take your time to scroll through the list and locate the language you want for the subtitles. Disney Plus offers a wide range of subtitle options to cater to global audiences, so you’re likely to find your preferred language among the choices.
If you want the subtitles to match the audio language, many devices or apps offer a convenient “Match Video Language” option. By selecting this setting, the subtitles will automatically adapt to the language of the audio track you’re watching.
Keep in mind that choosing the right language for subtitles is crucial for your viewing experience. Select the language that you feel most comfortable with or the language that provides the best comprehension of the content.
After selecting the language for subtitles, you can proceed to adjust any additional subtitle settings, such as font style, size, or color, if these options are available on your device.
Once you’ve made your language selection and customized any desired settings, you’re ready to move on to the next step and start watching your selected content with subtitles enabled in your chosen language.
Congratulations! You’ve successfully completed step 4 by selecting the language for subtitles. It’s time to move on to the next step to further customize your subtitle preferences or begin enjoying your content with captions.
Step 5: Adjust subtitle settings (optional)
In addition to selecting the language for subtitles on Disney Plus, you may have the option to further customize the display of captions according to your preferences. Step 5 allows you to adjust various subtitle settings, such as font style, size, color, and more.
While the availability of these settings may vary depending on the device or app you’re using to access Disney Plus, here are some common customization options you might encounter:
- Font style: Choose the style of the subtitles’ text, such as a classic font or a modern style.
- Font size: Adjust the size of the text to suit your comfort and visibility.
- Font color: Select the color of the subtitles’ text to make it more visually appealing or easier to read.
- Text background: Some devices or apps offer the option to add a background behind the subtitles to improve readability.
- Text opacity: Adjust the transparency or opacity level of the subtitles to ensure they don’t obstruct your view of the content.
Take some time to explore the available options and customize the subtitle settings based on your preferences. Experimenting with different font styles, sizes, and colors can help you find the ideal subtitle display that enhances your viewing experience.
Remember that these settings are optional, and if you’re satisfied with the default settings, you can skip this step and proceed to the next one.
Once you’ve adjusted the subtitle settings to your liking, you’re now ready to move on to the final step and start watching your selected content with the customized subtitle display.
Great job! You’ve successfully completed Step 5 by adjusting the subtitle settings (if available). Now, let’s move on to Step 6 and begin enjoying your content with the personalized subtitle display.
Step 6: Start watching with subtitles enabled
Now that you have completed the previous steps and customized your subtitle preferences on Disney Plus, it’s time to start watching your selected content with subtitles enabled.
Ensure that you have made the necessary selections for the language and optional settings for subtitles. If you haven’t done so yet, refer back to the previous steps to make any adjustments as needed.
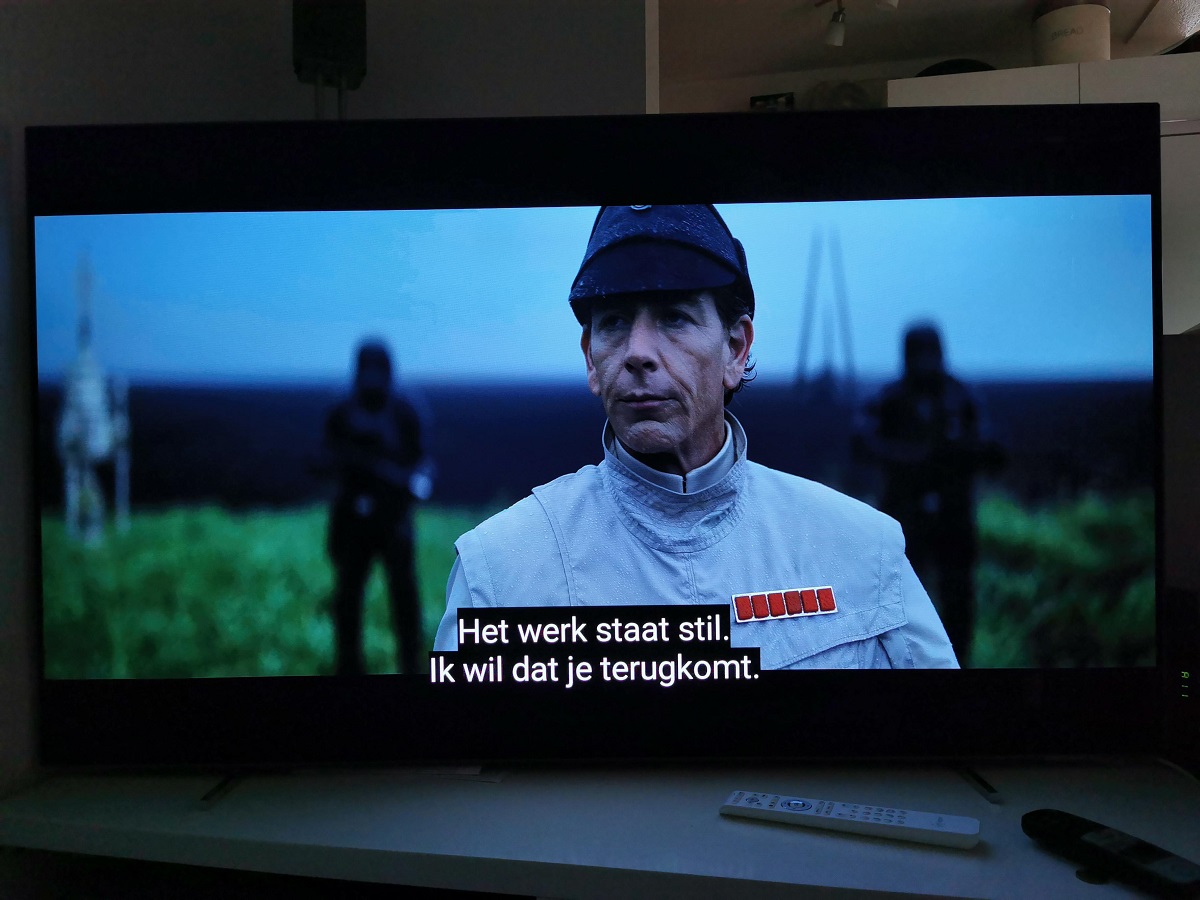
Once you’re satisfied with your subtitle settings, click or tap the play button to start the content playback. As the content begins, the subtitles you configured will appear on the screen, providing text captions for the dialogue, sound effects, and other audio elements.
As you watch the content, pay close attention to the subtitles as they scroll along with the dialogue. This will help you follow the plot, understand the conversations, and fully enjoy the viewing experience.
If at any point during playback you wish to change the subtitle settings, you can typically access the “Audio & Subtitles” menu or settings by clicking on the respective icon or menu option on the video player. From there, you can make adjustments to the subtitle language and personalize the settings based on your preferences.
Whether you’re watching a thrilling action movie, a heartwarming animated film, or an informative documentary, having subtitles enabled can greatly enhance your understanding, immersion, and enjoyment of the content.
Now sit back, relax, and enjoy your selected content on Disney Plus with the added benefit of subtitles. Happy viewing!
Frequently Asked Questions (FAQs)
Here are some common questions and answers regarding enabling subtitles on Disney Plus:
-
Can I enable subtitles on all Disney Plus content?
Yes, most Disney Plus content, including movies, TV shows, and documentaries, offers the option to enable subtitles. However, there may be some older or limited content that does not provide this feature. -
Can I choose different languages for audio and subtitles?
Yes, Disney Plus allows you to select different languages for audio and subtitles. For example, you can watch a movie with English audio while having the subtitles appear in Spanish or any other available language. -
Are subtitles available in multiple languages?
Absolutely! Disney Plus provides subtitles in multiple languages to cater to a global audience. The available languages may vary depending on the content and your location. Check the “Audio & Subtitles” menu to see the list of available languages. -
Can I customize the appearance of the subtitles?
Depending on the device or app you’re using, you may be able to customize the appearance of subtitles on Disney Plus. Settings such as font style, size, color, and text background may be available for you to personalize your subtitle display. -
Can I turn off subtitles during playback?
Yes, if you prefer to watch without subtitles after enabling them, you can easily turn them off during playback. Simply access the “Audio & Subtitles” menu or settings and choose the option to disable subtitles.
If you have any further questions or encounter any issues with enabling subtitles on Disney Plus, it’s recommended to visit the Disney Plus Help Center or reach out to their customer support for assistance.
Now that you’re familiar with these frequently asked questions, you’re better equipped to make the most out of subtitles on Disney Plus.
Conclusion
Enabling subtitles on Disney Plus can significantly enhance your viewing experience by providing text captions for dialogue, sound effects, and other audio elements. Whether you’re watching foreign-language films, shows with heavy accents, or simply want to improve comprehension, subtitles offer a valuable tool.
In this guide, we walked you through the steps of turning on subtitles on Disney Plus. We discussed how to open the app, choose desired content, access the “Audio & Subtitles” settings, select the language for subtitles, adjust subtitle settings (if applicable), and start watching with subtitles enabled.
By following these steps, you can start enjoying your favorite movies, TV shows, and documentaries on Disney Plus with the added benefit of captions. Subtitles not only improve comprehension, but also make content more accessible for individuals with hearing impairments and allow you to enjoy the experience even in noisy environments.
Remember, Disney Plus offers a range of subtitle options in multiple languages, providing global accessibility and flexibility. You may also be able to further customize the appearance of subtitles to suit your personal preferences.
If you have any further questions or encounter any issues, refer to the Disney Plus Help Center or reach out to their customer support for assistance. With subtitles enabled, you can dive into a world of captivating stories and immersive entertainment on Disney Plus.
Now, grab your popcorn, sit back, and enjoy a fantastic viewing experience with subtitles on Disney Plus!