Introduction
Welcome to Disney Plus on Roku, where you can embark on a magical journey through a treasure trove of beloved Disney movies, TV shows, and original content. With the streaming service’s vast collection of entertainment at your fingertips, you can relive childhood classics, discover new favorites, and dive into exclusive content available only on Disney Plus.
In this guide, we will walk you through the process of enabling subtitles on Disney Plus so you can fully immerse yourself in the stories being told and ensure that no dialogue is missed. Subtitles can enhance your viewing experience, especially for those who are hard of hearing, prefer watching content in different languages, or simply want to catch every spoken word and sound effect.
Whether you’re a Roku user who is new to Disney Plus or have been enjoying the platform for some time, we’ll cover everything you need to know to enable and customize subtitles according to your preferences.
So, grab your Roku remote, settle into your favorite viewing spot, and let’s dive into the enchanting world of Disney Plus, where imagination knows no bounds.
Section 1: Setting Up Disney Plus on Roku
Before you can start enjoying all the magic Disney Plus has to offer on your Roku device, you’ll need to set it up. Follow these simple steps to get started:
- Turn on your Roku device and ensure it is connected to the internet. If you haven’t set up your Roku yet, follow the on-screen prompts to connect to your Wi-Fi network and create a Roku account.
- Using your Roku remote, navigate to the Roku Home screen. You can do this by pressing the Home button on your remote.
- Scroll through the available channels and locate the Disney Plus channel. If you don’t see it, you can add it by going to the Roku Channel Store and searching for “Disney Plus”.
- Select the Disney Plus channel and choose the “Add channel” option. This will add the channel to your Roku device.
- Once the channel is added, return to the Roku Home screen and locate the Disney Plus channel. It should now appear on your list of channels.
- Open the Disney Plus channel by selecting it with your remote. You will be prompted to log in to your Disney Plus account.
- Enter your Disney Plus email and password using the on-screen keyboard. If you don’t have a Disney Plus account yet, you can create one by visiting the Disney Plus website or through the Disney Plus mobile app.
- After entering your login credentials, select “Log In” to access your Disney Plus account. You should now be able to browse and stream Disney Plus content on your Roku device.
With Disney Plus successfully set up on your Roku, you’re ready to explore the vast library of Disney movies, TV shows, and originals. In the next section, we’ll guide you on how to navigate to the content and find what you’re longing to watch.
Section 2: Navigating to the Content
Once you have Disney Plus set up on your Roku device, it’s time to start exploring the incredible selection of content available. Here’s how you can easily navigate to the content you want to watch:
- Using your Roku remote, navigate to the Roku Home screen by pressing the Home button.
- Scroll through your list of channels and locate the Disney Plus channel.
- Open the Disney Plus channel by selecting it with your remote.
- On the Disney Plus home screen, you will be presented with a variety of content categories, such as “Originals,” “Trending,” and “Recommended for You.”
- Scroll horizontally through these categories to explore the wide range of options available.
- If you have a specific movie or TV show in mind, you can use the Search function. Select the magnifying glass icon on the Disney Plus home screen and use the on-screen keyboard to type in the title you’re looking for.
- As you navigate through the content, you can browse by genre, explore trending titles, or discover hidden gems in the various curated collections.
- Once you find a movie or TV show you want to watch, select it with your remote to access the details and play the content.
Disney Plus offers a user-friendly interface on Roku, making it easy to discover new content, revisit familiar favorites, and dive into exclusive originals. With the ability to search by title or explore curated collections, you’ll always find something to suit your mood and preferences.
In the next section, we’ll show you how to enable subtitles on Disney Plus so you can fully enjoy your viewing experience.
Section 3: Enabling Subtitles on Disney Plus Roku
Subtitles can be a valuable tool for enhancing your Disney Plus viewing experience on Roku, especially if you want to follow along with the dialogue or need subtitles in a different language. Here’s how you can enable subtitles:
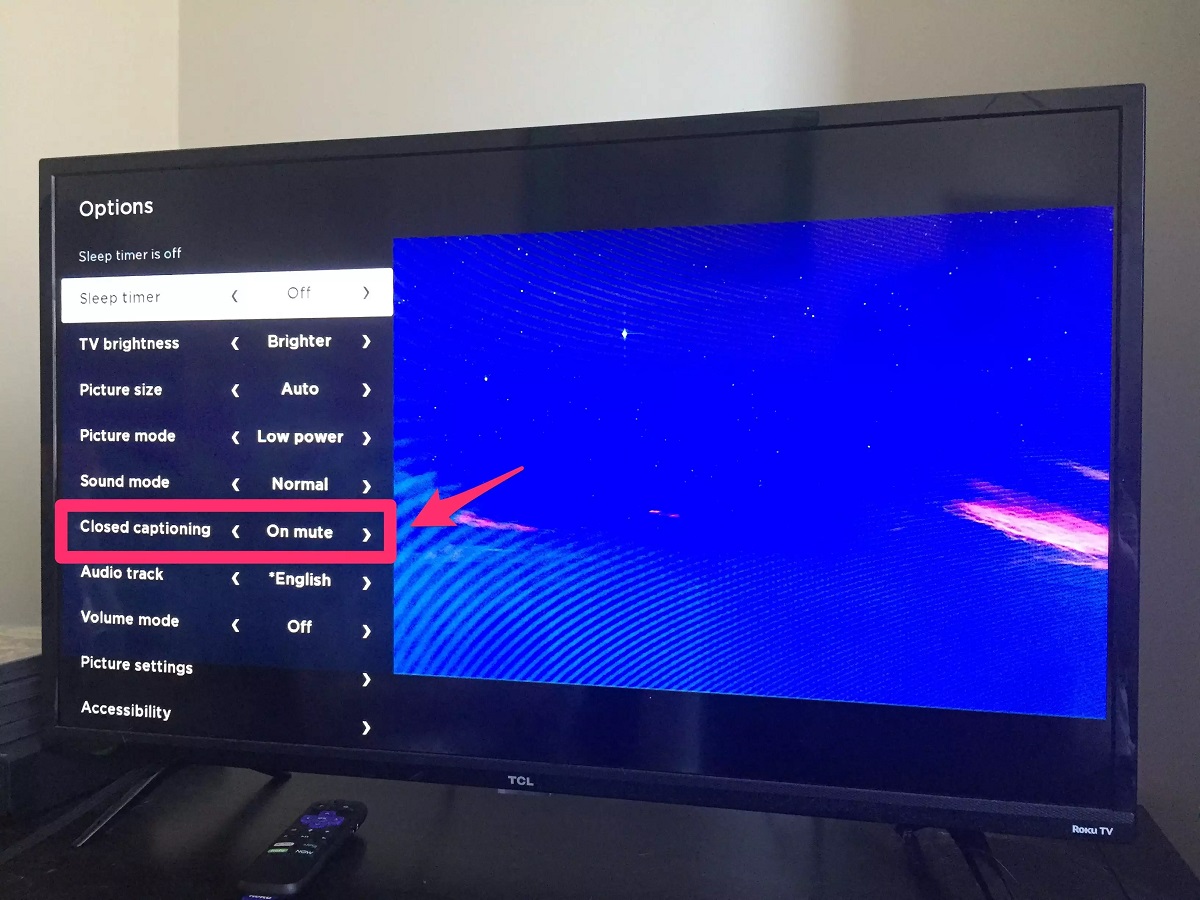
- While streaming a movie or TV show on Disney Plus, pause the content by pressing the pause button on your Roku remote.
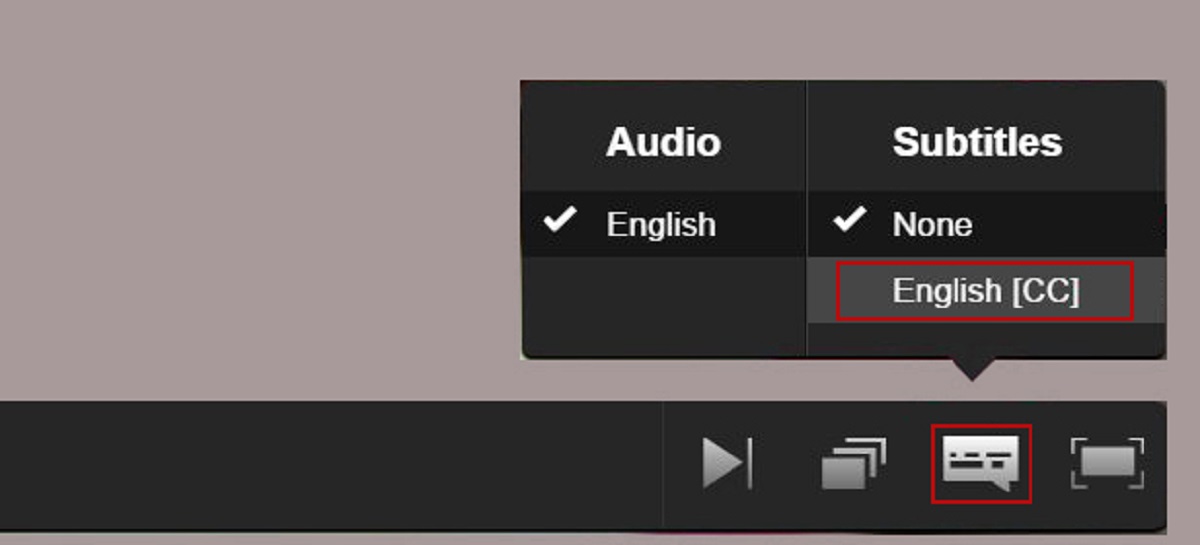
- On the playback screen, navigate to the bottom-right corner, where you will find the “Subtitles” icon. It looks like a speech bubble with text inside.
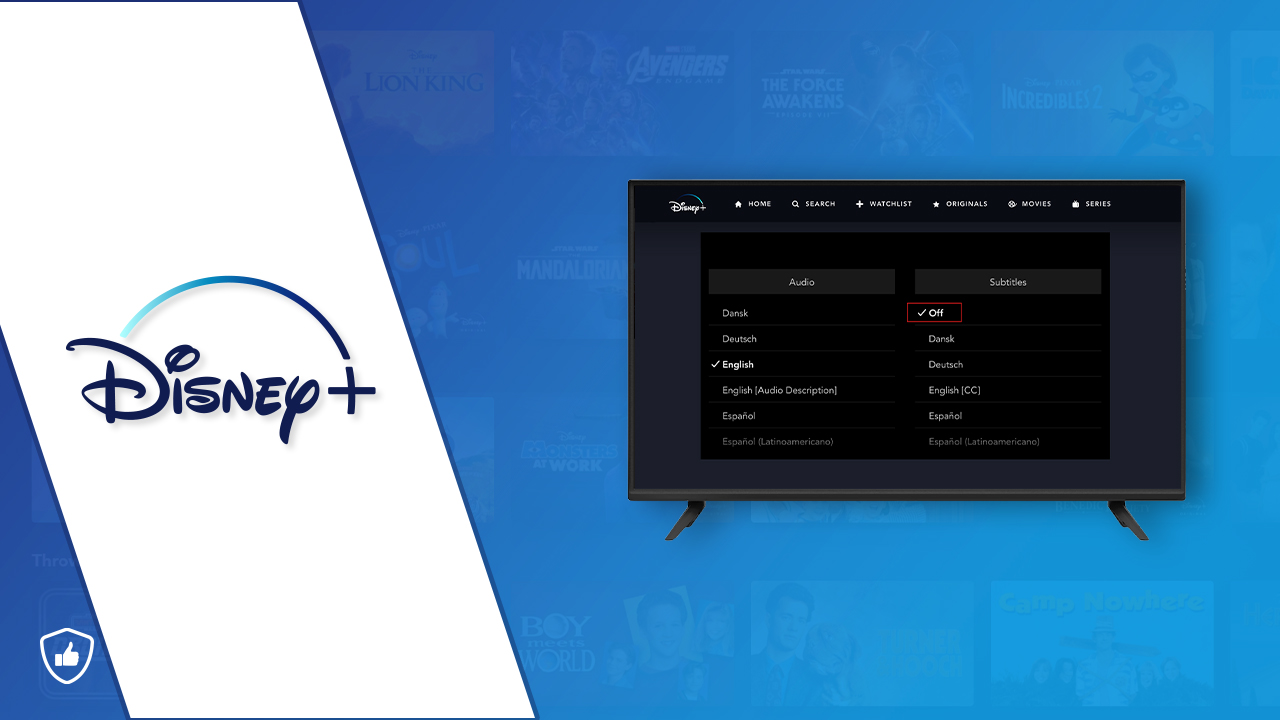
- Click on the “Subtitles” icon to reveal the available subtitle options.
- Select your preferred subtitle language from the list of available languages. If the language you’re looking for is not listed, it may not be available for that particular movie or TV show.
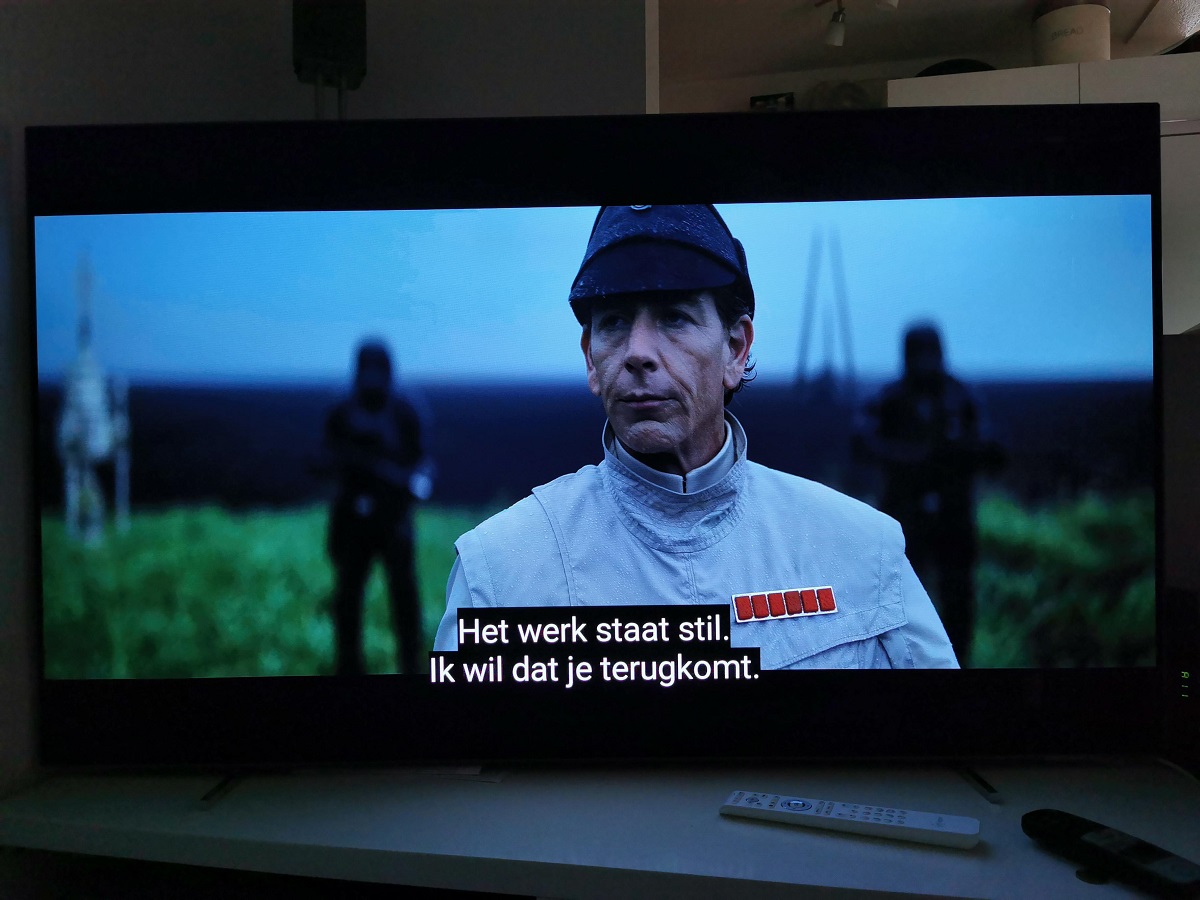
After selecting the desired subtitle language, the subtitles will automatically display on the screen as you resume playing the content. You can adjust the subtitle settings such as color, size, and style through the “Settings” option on the Disney Plus app on your mobile device or on the Disney Plus website. These changes will be reflected on your Roku device as well.
Subtitles can greatly enhance your viewing experience, whether you’re watching a movie with foreign language dialogue, have difficulty hearing, or simply prefer to have subtitles for better comprehension. With subtitles enabled, you can fully immerse yourself in the stories being told on Disney Plus.
Next, let’s delve into how you can customize subtitles settings to suit your preferences and optimize your viewing experience.
Section 4: Customizing Subtitles Settings
Customizing the subtitles settings on Disney Plus allows you to tailor the appearance and style of the subtitles to your liking. Here’s how you can easily customize the subtitles settings:
- Using your mobile device or visiting the Disney Plus website, navigate to the “Settings” option.
- Within the settings, locate the “Subtitle Preferences” or similar option. This may vary slightly depending on the device you’re using.
- Click on “Subtitle Preferences” to access the customization options.
- You will typically find options to adjust the subtitle language, size, color, style, and background opacity.
- Choose your preferred settings for each option. You can preview the changes in real-time to ensure they meet your requirements.
- Once you are satisfied with the customized settings, save your changes.
Now, when you resume watching Disney Plus on your Roku, the subtitles will be displayed according to the customized settings you have selected. You can always revisit the settings if you want to make further adjustments.
Customizing the subtitles settings allows you to create a personalized viewing experience. Whether you prefer larger subtitles for better visibility, a specific color to match your preferences, or a unique style that enhances the overall aesthetic, Disney Plus gives you the flexibility to make it your own.
In the next section, we will address common subtitles issues and provide troubleshooting tips to overcome them.
Section 5: Troubleshooting Subtitles Issues
While enabling and customizing subtitles on Disney Plus Roku is usually a seamless experience, you may encounter occasional issues. Here are some common subtitles issues and troubleshooting tips:
- No subtitles available: If you don’t see any subtitles available for a particular movie or TV show, it’s possible that the content doesn’t have subtitle options. Check if other content on Disney Plus has subtitles to ensure the issue is specific to that particular title.
- Subtitle language not available: If you’re unable to find the desired subtitle language, it may not be available for that specific content. Try selecting a different language or explore other movies or TV shows that offer subtitles in your preferred language.
- Misaligned subtitles: Sometimes, subtitles may appear out of sync with the dialogue on the screen. Try refreshing the content by pausing and resuming, or navigating to a different part of the movie or TV show and returning to the desired scene. This can often realign the subtitles with the audio.
- Subtitle display issues: If you encounter issues with the way the subtitles are displayed (e.g., overlapping, cut off, or too small), adjust the subtitle settings through the Disney Plus website or mobile app. Experiment with different font sizes, styles, or background opacities until you find a setting that works best for your viewing experience.
- Subtitle lag: In certain cases, there might be a delay between the dialogue and the appearance of subtitles. This can be caused by network connectivity issues or a temporary glitch. Make sure you have a stable internet connection and try restarting your Roku device to resolve any potential issues.
If the above troubleshooting tips don’t resolve the subtitles issues, you can also reach out to Disney Plus customer support for further assistance. They will be able to provide specific guidance or address any technical problems that may be affecting the subtitles functionality.
With these troubleshooting tips at your disposal, you can overcome any subtitles issues that may arise and continue enjoying your favorite Disney Plus content seamlessly.
Conclusion
Congratulations! You have now mastered the art of enabling and customizing subtitles on Disney Plus Roku. By following the steps outlined in this guide, you can fully immerse yourself in the magical world of Disney, with the added benefit of subtitles to enhance your viewing experience.
We started by setting up Disney Plus on Roku, guiding you through the process of adding the channel and logging into your Disney Plus account. Then, we explored how to navigate the content library, helping you discover new favorites or find specific movies and TV shows.
Enabling subtitles on Disney Plus allows you to follow along with the dialogue, whether it’s a foreign-language movie, a preference for subtitles, or to improve accessibility. We walked you through the steps of enabling subtitles and showed you how to customize their appearance to suit your preferences.
If you encounter any subtitles issues, we provided troubleshooting tips to help you overcome common challenges, such as subtitle availability, misalignments, or display issues. And in case these tips don’t solve the problem, remember that Disney Plus customer support is always available to assist you.
Now that you’re equipped with the knowledge and tools to enjoy your favorite Disney content with subtitles on Roku, it’s time to relax and embark on an unforgettable journey. Whether you’re diving into classic animations, exploring new releases, or indulging in the magic of Disney originals, the world of Disney Plus is at your fingertips.
So grab your popcorn, snuggle up on the couch, and let Disney Plus and Roku transport you to a world of enchantment, imagination, and endless entertainment!