Introduction
Subtitles are a valuable tool that enhance the viewing experience of videos by providing text translations or captions. They allow viewers to understand and follow the dialogue, especially in foreign language films or videos with audio that may be difficult to comprehend. Subtitles have become an integral part of multimedia and are widely used across various platforms, including popular media players like Windows Media Player.
Windows Media Player is a versatile media player that supports a wide range of formats and provides users with a seamless video playback experience. While it offers many features, including customizable settings and playback controls, adding subtitles to videos is not always straightforward.
In this article, we will explore different methods to add subtitles to Windows Media Player, how to download subtitles for your videos, and adjust subtitle settings to suit your preferences. Whether you are watching a movie in a different language or need subtitles for accessibility reasons, this guide will help you make the most of Windows Media Player and enhance your viewing experience.
So, if you are ready to discover how to use subtitles on Windows Media Player, let’s dive in!
What are subtitles?
Subtitles are text translations or captions that are displayed at the bottom of a video screen. They provide viewers with a written representation of the audio dialogue or commentary in a video. Subtitles are particularly useful for individuals who are deaf or hard of hearing, non-native speakers of the video’s language, or those watching content in noisy environments where it’s difficult to hear clearly. Subtitles can greatly enhance the accessibility and comprehension of videos for a wide range of viewers.
There are two main types of subtitles: open subtitles and closed subtitles. Open subtitles are permanently embedded into the video and cannot be turned off by the viewer. They are commonly used in videos that have been professionally translated or edited for a specific target audience. Closed subtitles, on the other hand, can be enabled or disabled by the viewer. They offer more flexibility as viewers can choose whether or not to display the subtitles based on their preference or language understanding.
Subtitles can also serve different purposes depending on the content of the video. For foreign language films or videos in languages that viewers may not understand, subtitles provide translations of the dialogue, allowing viewers to follow the story and understand the characters’ conversations. Subtitles are also used for videos with accents or dialects that might be difficult to comprehend, ensuring a clearer understanding of the dialogue.
In addition to translation, subtitles can be used for other purposes such as displaying textual information or lyrics. For example, in educational videos or documentaries, subtitles can be used to highlight important points or provide additional context. In music videos, subtitles can display the lyrics of the songs, making it easier for viewers to sing along or understand the meaning behind the lyrics.
Overall, subtitles play a crucial role in making videos more accessible and inclusive to a wider audience. They bridge language barriers, aid comprehension, and provide a better viewing experience. With subtitles, viewers can fully immerse themselves in the content and grasp the nuances of the dialogue, regardless of their language proficiency or hearing abilities.
Why use subtitles?
Subtitles offer numerous benefits and enhance the overall viewing experience for a wide range of viewers. Whether you are watching a foreign film, have hearing difficulties, or simply want to improve comprehension, here’s why you should consider using subtitles:
- Language accessibility: Subtitles are incredibly valuable for individuals watching videos in a language they may not fully understand. They provide translations of the dialogue, enabling viewers to follow the story and fully engage with the content. This is particularly useful for international films or TV series that have gained popularity worldwide.
- Hearing impairment: Subtitles are essential for individuals who are deaf or hard of hearing. They ensure that those with hearing difficulties can still enjoy movies, shows, and other video content by providing a written depiction of the spoken words and sound effects.
- Noise or clarity issues: In situations where the audio quality is poor or the surroundings are noisy, it can be challenging to hear and understand the dialogue. Subtitles assist in overcoming these obstacles by displaying the text, enabling viewers to read along and grasp the intended meaning.
- Language learning: Subtitles are invaluable for language learners as they offer a way to improve vocabulary, pronunciation, and comprehension skills. By watching videos with subtitles in the target language, learners can correlate the written and spoken words, facilitating better understanding and assimilation.
- Improved comprehension: Even for native speakers, certain accents, dialects, or fast-paced dialogue can be difficult to comprehend fully. Subtitles provide an added layer of clarity, ensuring that nothing is missed and enhancing the overall comprehension of the content.
- Multitasking: With subtitles, viewers can keep up with the dialogue and storyline while simultaneously engaging in other activities. Whether it’s cooking, exercising, or working, subtitles allow for a more flexible viewing experience without compromising understanding.
- Shared viewing experience: Subtitles enable individuals with different language abilities to enjoy the same content together. It eliminates barriers and allows for a shared viewing experience among friends, family, and colleagues from diverse linguistic backgrounds.
By utilizing subtitles, viewers can overcome language barriers, enhance comprehension, and enjoy a more inclusive and engaging viewing experience. Subtitles not only make videos accessible to a broader audience but also contribute to personal growth and cultural exchange by facilitating language learning and understanding.
How to download subtitles for a video
Downloading subtitles for a video can take your viewing experience to the next level by allowing you to understand the dialogue more easily. Here are a few methods to download subtitles:
- Using subtitle websites: There are several websites dedicated to providing subtitles for movies and TV shows in different languages. These websites allow you to search for the specific video you are watching and download the corresponding subtitle file. Some popular subtitle websites include Subscene, OpenSubtitles, and Addic7ed.
- Using subtitle extensions: If you are using a web browser to stream videos, you can install subtitle extensions that automatically search and download subtitles for the video you are watching. Extensions like Subtitle Horse, Subtitles for Netflix, and Subtitles for YouTube are available for popular browsers like Google Chrome and Mozilla Firefox.
- Checking video streaming platforms: Many streaming platforms like Netflix, Amazon Prime Video, and Hulu provide built-in subtitle options for their content. You can enable subtitles directly from the video player or settings menu. These platforms often offer subtitles in multiple languages to enhance accessibility.
- Using subtitle downloaders: There are also standalone subtitle downloaders available that allow you to search for and download subtitles for your videos. These programs usually offer advanced search options, multiple language support, and the ability to customize the subtitle format. Examples of subtitle downloaders include Subtitle Seeker, Sublight, and SubDownloader.
Once you have downloaded the subtitle file, it is important to ensure that the file name matches the video file name exactly. This will ensure that the video player recognizes the subtitle file and displays it correctly.
Remember to choose the subtitle file that corresponds to the specific version or release of the video you are watching, as subtitles may vary based on different releases or translations.
With these methods, you can easily find and download subtitles for your favorite movies, TV shows, and online videos. Whether you prefer using dedicated subtitle websites, extensions, or software programs, having accurate and synchronized subtitles will greatly enhance your video viewing experience and help you understand the content more effectively.
Adding subtitles to Windows Media Player
Windows Media Player is a popular media player that offers a range of features, but adding subtitles to videos may require some additional steps. Here are a few methods to add subtitles to Windows Media Player:
- Method 1: Directly load subtitles in Windows Media Player: If you have a separate subtitle file, you can load it directly in Windows Media Player. To do this, make sure both the video file and the subtitle file are in the same location. With the video file open in Windows Media Player, go to the “Play” tab and select “Lyrics, captions, and subtitles” from the options. Choose “On if available” to enable subtitles and then select the subtitle file you want to load.
- Method 2: Renaming subtitles to match video file: In some cases, Windows Media Player can automatically detect and load subtitles if the subtitle file has the same name as the video file. For example, if your video file is named “movie.mp4,” rename the subtitle file to “movie.srt” (for SubRip format). Place both files in the same folder, and Windows Media Player will automatically display the subtitles when playing the video.
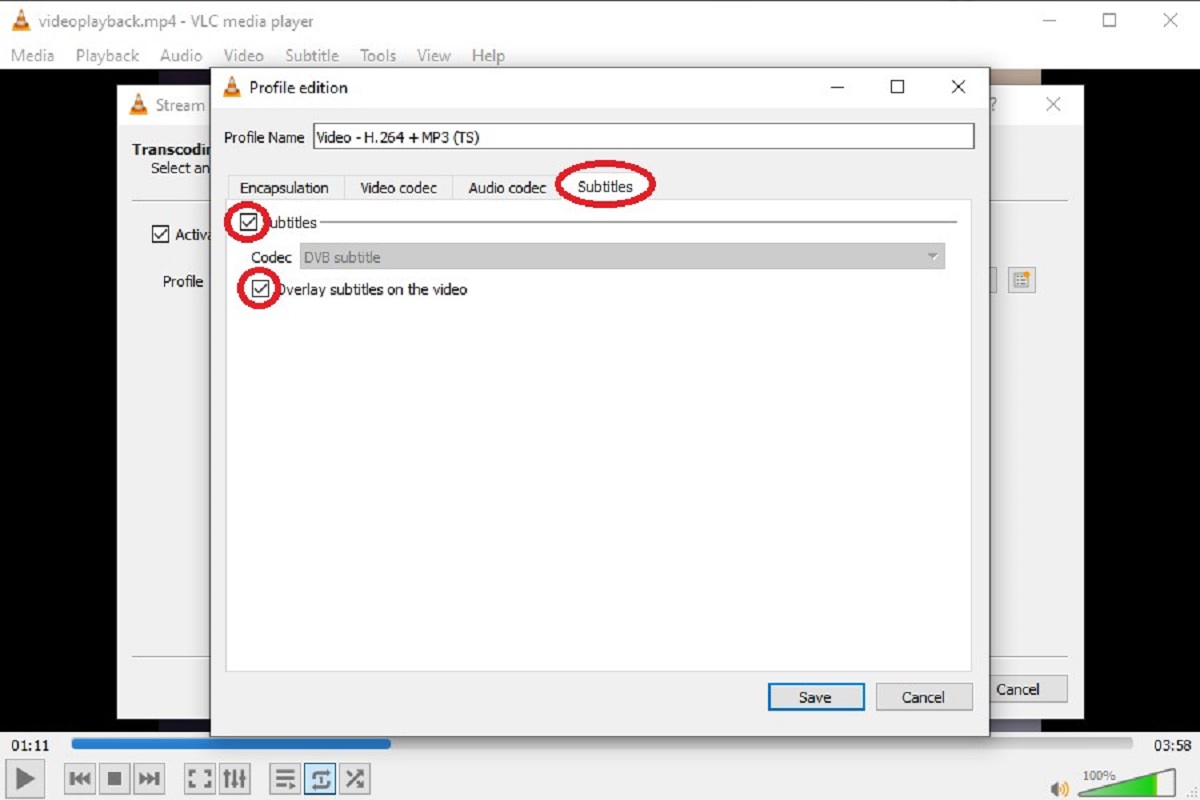
- Method 3: Using a dedicated subtitle player in conjunction with Windows Media Player: If you encounter difficulties with the above methods, you can install a dedicated subtitle player, such as VLC Media Player or MPC-HC, alongside Windows Media Player. These players have built-in subtitle support and can play videos with subtitles seamlessly. Simply open the video file with the subtitle player, and it will display the subtitles correctly.
It is important to note that Windows Media Player may not support all subtitle formats. The most commonly used format is SubRip (.srt). However, if your subtitle file is in a different format, you may need to convert it to a compatible format before adding it to Windows Media Player.
Once the subtitles are added, you can adjust the settings in Windows Media Player to customize the appearance and synchronization of the subtitles.
Adding subtitles to Windows Media Player may require a bit of trial and error, but once you find the method that works best for you, you can enjoy videos with subtitles and enhance your viewing experience on this versatile media player.
Method 1: Directly load subtitles in Windows Media Player
If you have a separate subtitle file that you want to load into Windows Media Player, this method allows you to add subtitles to your videos directly. Follow these steps:
- Make sure both the video file and the subtitle file are in the same folder or directory on your computer.
- Open Windows Media Player and navigate to the location of the video file you want to watch with subtitles.
- With the video file open in Windows Media Player, go to the “Play” tab located on the top menu bar.
- In the “Caption” group, which is usually located on the right side of the menu, click on “Lyrics, captions, and subtitles” from the options.
- Choose the option “On if available” to enable subtitles for the video.
- A list of available subtitles will be displayed. Select the subtitle file (.srt, .sub, .ass, etc.) that corresponds to your video.
- Once you have selected the subtitle file, Windows Media Player will load and display the subtitles while playing the video.
- You can adjust the subtitle settings, such as font, size, and color, by right-clicking on the video window, selecting “Lyrics, captions, and subtitles,” and then choosing “Options” from the context menu.
- Explore the available options to customize the appearance and synchronization of the subtitles according to your preferences.
It’s worth noting that Windows Media Player supports various subtitle formats, including SubRip (.srt), SubStation Alpha (.ssa/.ass), and MicroDVD (.sub/.txt). However, compatibility may vary depending on the version of Windows Media Player you are using.
By following this method, you can easily load subtitles into Windows Media Player and enjoy watching videos with accurate and synchronized text translations or captions.
Method 2: Renaming subtitles to match video file
If you want to add subtitles to a video in Windows Media Player, one simple method is to rename the subtitle file to match the filename of the video. Follow these steps:
- Ensure that both the video file and the subtitle file are located in the same folder or directory on your computer.
- Take note of the filename and the file extension of the video file. For example, if your video file is named “movie.mp4,” remember the name and the “.mp4” extension.
- Rename the subtitle file so that it has the exact same name as the video file. For instance, if your video file is named “movie.mp4,” rename the subtitle file to “movie.srt” (for SubRip format).
- Make sure the subtitle file’s extension matches the corresponding file format. Windows Media Player supports various subtitle formats, such as .srt, .sub, .ass, and .txt.
- Once you have renamed the subtitle file, open the video file in Windows Media Player.
- If the subtitle file is correctly named and located in the same folder as the video file, Windows Media Player will automatically detect and load the subtitles.
- The subtitles will be displayed during the video playback, allowing you to follow along with the dialogue and captions.
- If the subtitles do not appear, check that the video and subtitle files have identical names and are placed in the same folder.
This method leverages the file naming convention to pair the video file with its corresponding subtitle file. By ensuring that both files share the same name, Windows Media Player can recognize and display the subtitles alongside the video.
Remember that this method is dependent on the compatibility of the subtitle format and the version of Windows Media Player you are using. If the subtitles still do not appear, you may need to explore alternative methods or convert the subtitle file to a compatible format.
By following this method and renaming subtitles to match the video file, you can easily add subtitles to your videos in Windows Media Player and enjoy a more engaging and accessible viewing experience.
Method 3: Using a dedicated subtitle player in conjunction with Windows Media Player
If you are encountering difficulties adding subtitles directly in Windows Media Player, an alternative method is to use a dedicated subtitle player alongside it. Here’s how you can incorporate a dedicated subtitle player to enhance your subtitle viewing experience with Windows Media Player:
- Start by choosing a suitable dedicated subtitle player to install on your computer. Popular options include VLC Media Player, MPC-HC (Media Player Classic Home Cinema), or PotPlayer.
- Download and install the preferred subtitle player according to your operating system.
- Once installed, open the subtitle player and navigate to the video file you want to watch with subtitles.
- Select the video file in the subtitle player and open it to begin playback.
- The dedicated subtitle player should automatically detect and load any corresponding subtitle files located in the same folder as the video file.
- Ensure that the displayed subtitles sync properly with the video. Most dedicated subtitle players offer options to adjust subtitle synchronization if necessary.
- While the dedicated subtitle player is playing the video with subtitles, you can use Windows Media Player to control the playback settings, such as play, pause, forward, or rewind.
- Make use of both Windows Media Player and the dedicated subtitle player simultaneously to enjoy a seamless viewing experience with accurate and synchronized subtitles.
Using a dedicated subtitle player in conjunction with Windows Media Player allows you to leverage the capabilities of both applications. While Windows Media Player handles the video playback, the dedicated subtitle player takes care of displaying the subtitles in a synchronized and visually appealing manner.
Moreover, dedicated subtitle players often support a wider range of subtitle formats, offer advanced customization options, and ensure optimal subtitle synchronization with the video. This can be particularly beneficial if you encounter issues with subtitle compatibility or if you prefer more control over the appearance and timing of the subtitles.
By combining the features of a dedicated subtitle player with Windows Media Player, you can enhance your subtitle viewing experience and enjoy videos with accurate and well-aligned subtitles.
Adjusting subtitle settings in Windows Media Player
Windows Media Player allows you to customize the appearance and synchronization of subtitles according to your preferences. Here’s how you can adjust the subtitle settings:
- Open Windows Media Player on your computer.
- Click on the “View” tab located on the top menu bar.
- In the “View” tab, click on “Enhancements” and choose “Play speed settings” from the drop-down menu.
- Under the “Lyrics, captions, and subtitles” section, you will find various options to adjust the subtitle settings:
- Enable or disable subtitles: Choose between “On if available” or “Off” to enable or disable subtitles for videos that have accompanying subtitle files.
- Subtitle style: You can modify the appearance of the subtitles by selecting different font styles, sizes, colors, and background options.
- Subtitle synchronization: Use the “Subtitle timing” feature to manually adjust the synchronization of the subtitles with the video. You can delay or advance the subtitle display time to match the dialogue.
- Experiment with the different settings to find the combination that best suits your preferences.
It’s important to note that the availability of subtitle settings and customization options may vary depending on the version of Windows Media Player that you are using. Some older versions may have limited options for adjusting subtitles.
By exploring and adjusting these subtitle settings in Windows Media Player, you can ensure that the subtitles are displayed in a way that is visually appealing, easily readable, and synchronized accurately with the video. These adjustments allow you to personalize your viewing experience and optimize subtitle comprehension.
Take the time to experiment with the settings until you find the configurations that suit your preferences and enhance your overall video watching experience with subtitles.
Changing the font, size, and color of subtitles
Windows Media Player provides options to customize the font, size, and color of subtitles to suit your visual preferences. Here’s how you can change these settings:
- Open Windows Media Player on your computer.
- Play a video file that has subtitles loaded.
- Right-click inside the video player window to display the context menu.
- In the context menu, hover over “Lyrics, captions, and subtitles” and select “Options” to open the subtitle settings window.
- Within the “Subtitle and Closed Captioning Settings” window, you will find customization options for the font, size, and color of the subtitles:
- Font: Choose a font from the available options to change the style of the subtitles.
- Size: Adjust the size of the subtitles by selecting a different numerical value. Increase the size for easier reading or decrease it for a more compact display.
- Color: Select a color from the palette to change the text color of the subtitles. You can choose a color that contrasts well with the video or suits your personal preference.
- Preview the changes in the “Subtitle Preview” area to see how the modified settings affect the appearance of the subtitles.
- Click “OK” to save the changes and apply the new font, size, and color to the subtitles.
Experiment with different font styles, sizes, and colors to find the combination that offers the best readability and visual appeal for your subtitles.
It’s important to note that these settings are specific to Windows Media Player and may not affect subtitles displayed in other media players or video streaming platforms.
By customizing the font, size, and color of subtitles, you can personalize the appearance of the text and optimize the viewing experience based on your specific preferences and needs.
Synchronizing subtitles with the video
Having properly synchronized subtitles is crucial for a seamless and enjoyable viewing experience. If you find that the subtitles are out of sync with the video in Windows Media Player, you can adjust the timing to ensure accurate subtitle display. Here’s how:
- Open Windows Media Player and play the video file with the subtitles loaded.
- Right-click inside the video player window to display the context menu.
- Hover over “Lyrics, captions, and subtitles” and select “Options” to open the subtitle settings window.
- Within the “Subtitle and Closed Captioning Settings” window, navigate to the “Subtitle timing” section.
- Adjust the subtitle timings using the available options:
- Delay: Increase the delay time in milliseconds if the subtitles appear before the corresponding dialogue. Use this option when the subtitles are ahead of the actual spoken words.
- Advance: Decrease the advance time to bring the subtitles closer to the dialogue if they lag behind. Use this option when the subtitles appear after the spoken words.
- Click the “Apply” button to preview the changes in synchronization.
- Continue adjusting the timing until the subtitles align correctly with the dialogue.
- Click “OK” to save the changes and apply the synchronized subtitles to the video.
It’s important to note that synchronization settings are specific to Windows Media Player and may not affect subtitles in other media players or video streaming platforms.
By synchronizing the subtitles with the video, you can ensure that the text appears exactly when the corresponding dialogue is spoken or when sound effects occur. This helps to maintain a seamless and immersive viewing experience.
If you encounter issues with subtitle synchronization, you may need to adjust the timing manually to compensate for any delays or ahead-of-time displays. With a few adjustments, you can enjoy videos with perfectly synchronized subtitles in Windows Media Player.
Conclusion
Adding subtitles to videos can greatly enhance the viewing experience, making it easier to understand dialogue, improving comprehension, and ensuring accessibility for a wider range of viewers. Windows Media Player offers options to load and customize subtitles, enabling you to enjoy videos with accurate and synchronized text translations or captions.
In this article, we explored different methods to add subtitles to Windows Media Player. Method 1 involved directly loading subtitles into the player, while Method 2 focused on renaming subtitle files to match the video file. When those methods prove challenging, Method 3 suggested using a dedicated subtitle player in conjunction with Windows Media Player for seamless subtitle integration.
We also discussed how to download subtitles for videos from websites, using subtitle extensions, or checking streaming platforms. By utilizing these methods, you can easily find and download subtitles for your favorite movies, TV shows, and online videos.
To provide a customized experience, we covered how to adjust subtitle settings in Windows Media Player, including modifying the font, size, and color of subtitles. Additionally, we explored how to synchronize subtitles with the video to ensure accurate timing of the displayed text.
By implementing these techniques, you can optimize your subtitle viewing experience in Windows Media Player and enjoy videos with enhanced accessibility, clarity, and personalization.
Now that you have a comprehensive understanding of how to use subtitles in Windows Media Player, you can dive into your favorite videos with confidence, whether you’re watching foreign films, improving language skills, or enhancing comprehension.