Preparing for the Transfer
When it comes to optimizing your gaming experience, transferring games to an SSD (Solid State Drive) can significantly enhance loading times and overall performance. However, before diving into the transfer process, there are a few important steps you need to take to ensure a smooth and successful transition.
1. Assess your storage needs: Take the time to evaluate your current storage capacity and determine whether an SSD is the right choice for you. SSDs offer faster read and write speeds compared to traditional HDDs (Hard Disk Drives), but they can be more expensive for larger capacities. Consider the size of your game library and choose an SSD with sufficient storage space.
2. Check system compatibility: Before proceeding with the transfer, check if your computer supports the installation of an additional SSD or if you need to replace your existing HDD. Review your motherboard’s specifications and ensure it has an available slot for the SSD. Additionally, make sure your power supply unit can handle the extra load.
3. Gather necessary tools: To perform the transfer, you’ll need a few tools, including a screwdriver to open your computer case and swap the drives. Some SSD installation kits may come with additional accessories, such as mounting brackets or cables, so make sure you have everything you need before starting.
4. Backup your game files: Before moving any games to the SSD, create a backup of your game files. This step is crucial to prevent any loss or corruption of data during the transfer process. Backing up your games can be as simple as copying the game folders to an external storage device or using a reliable cloud backup service.
5. Organize your game library: Take this opportunity to declutter and organize your game library. Remove any unwanted or unused games from your system to free up space and ensure a smoother transfer process. This will also make it easier to identify and transfer the games you frequently play.
6. Take note of game save files or settings: Some games store save files and settings in locations separate from the game installation folder. Make a note of these locations so that you can transfer them to the new SSD along with the game files. This will ensure that you don’t lose any progress or customized settings when transitioning to the SSD.
By following these essential steps, you’ll be well-prepared for the transfer process and can confidently proceed to the next stage of choosing the right SSD for your gaming needs.
Choosing the Right SSD
Now that you’ve prepared your system for the game transfer, it’s time to choose the right SSD to maximize your gaming performance. With a variety of options available in the market, it’s essential to consider certain factors before making your decision.
1. Capacity: The capacity of the SSD is one of the key considerations. Assess your game library and determine how much storage space you’ll need. Games can vary in size, with some modern titles taking up several dozen gigabytes, so ensure that the SSD you choose offers enough space to accommodate your current and future games.
2. Read and Write Speeds: SSDs are known for their faster read and write speeds compared to traditional hard drives, but the speed can vary across different models. Look for an SSD with high sequential read and write speeds to ensure quick game loading times and smooth gameplay.
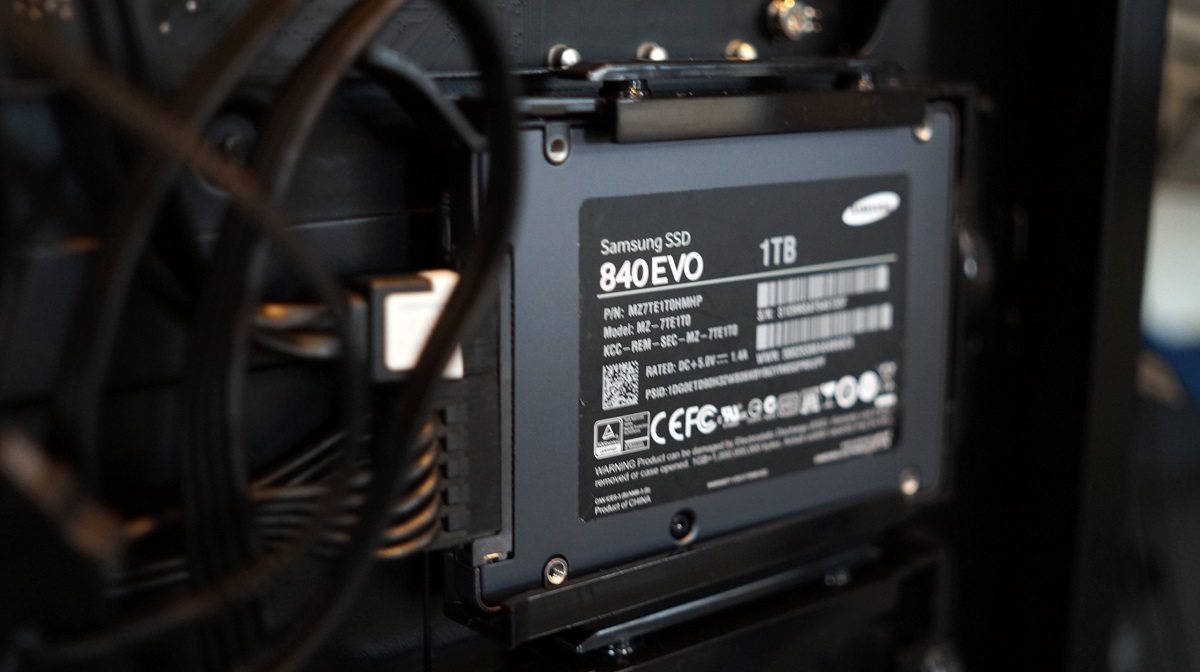
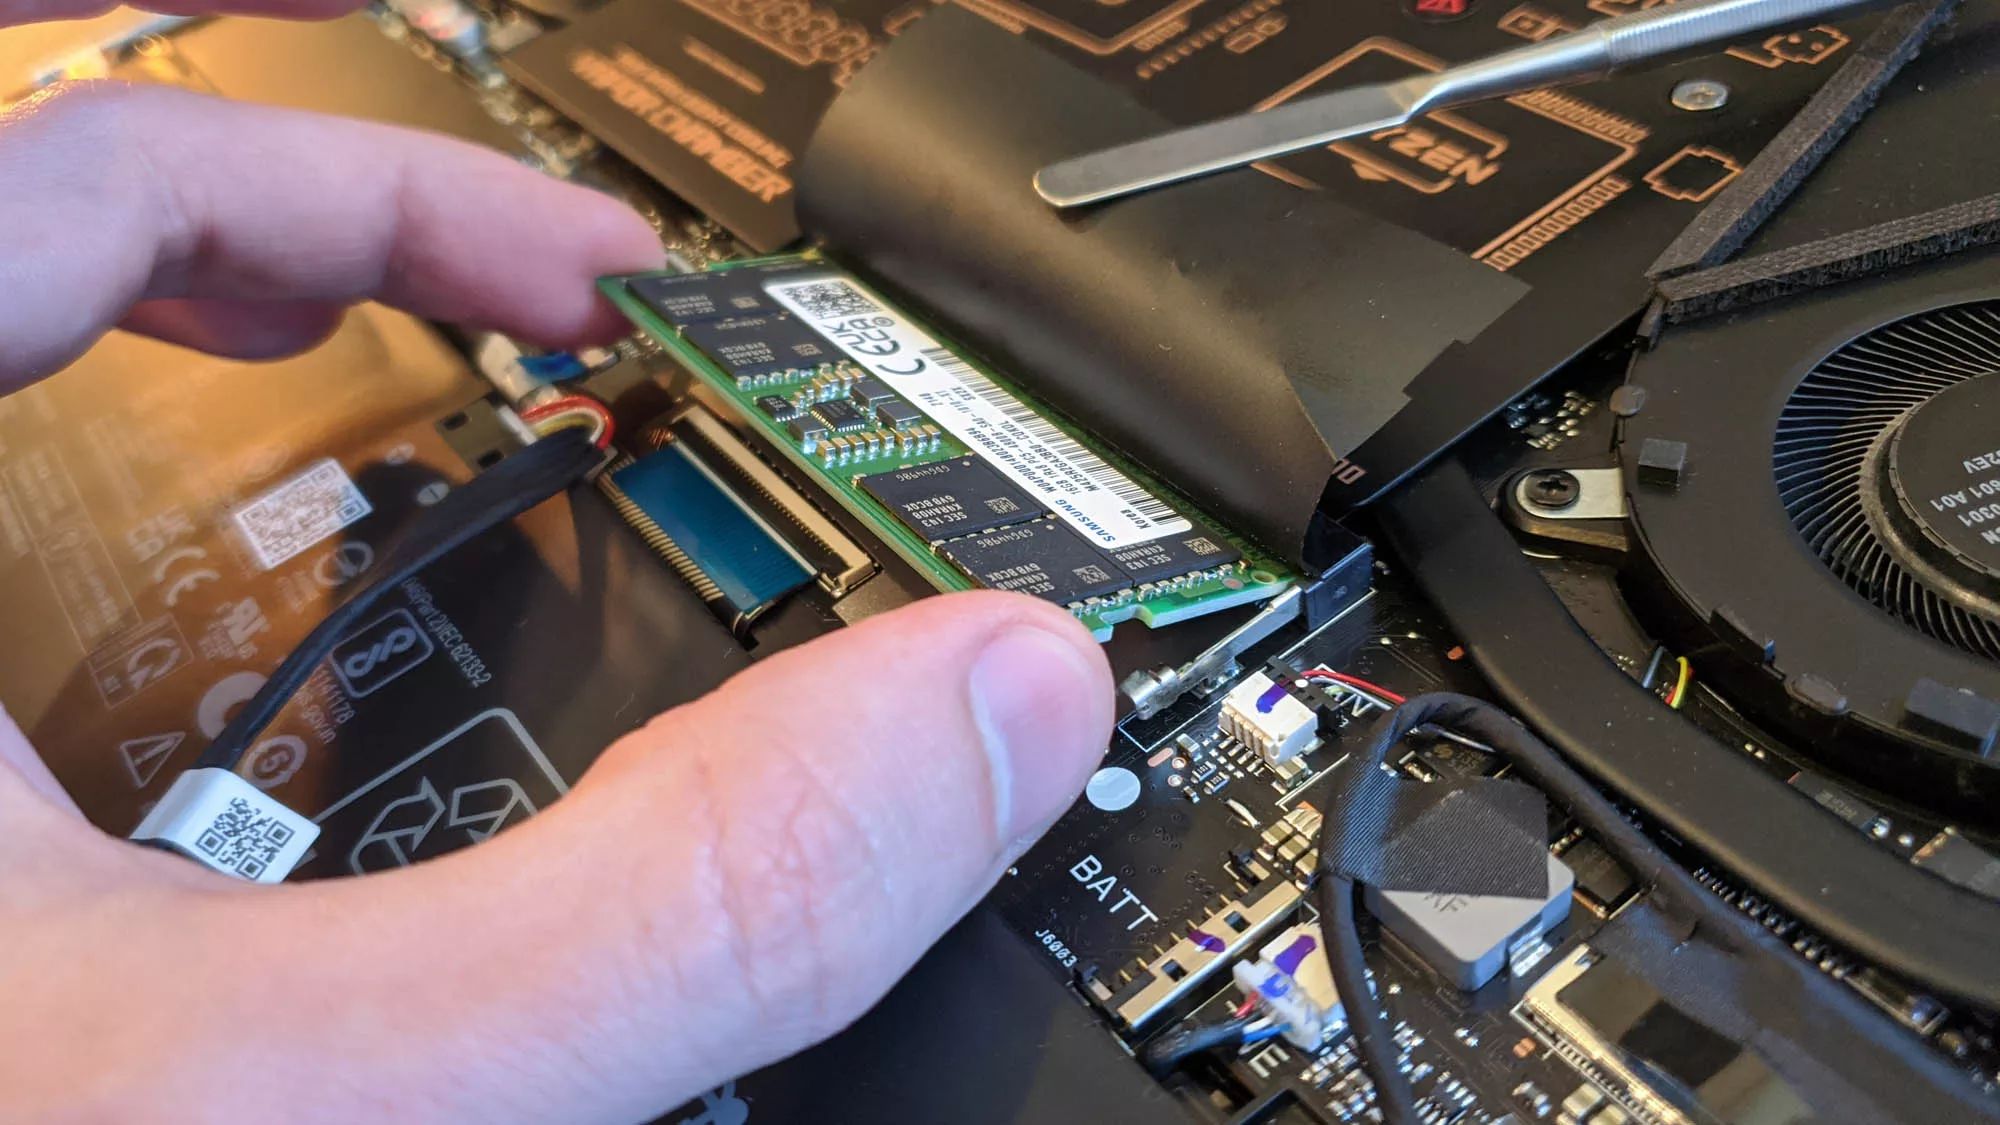
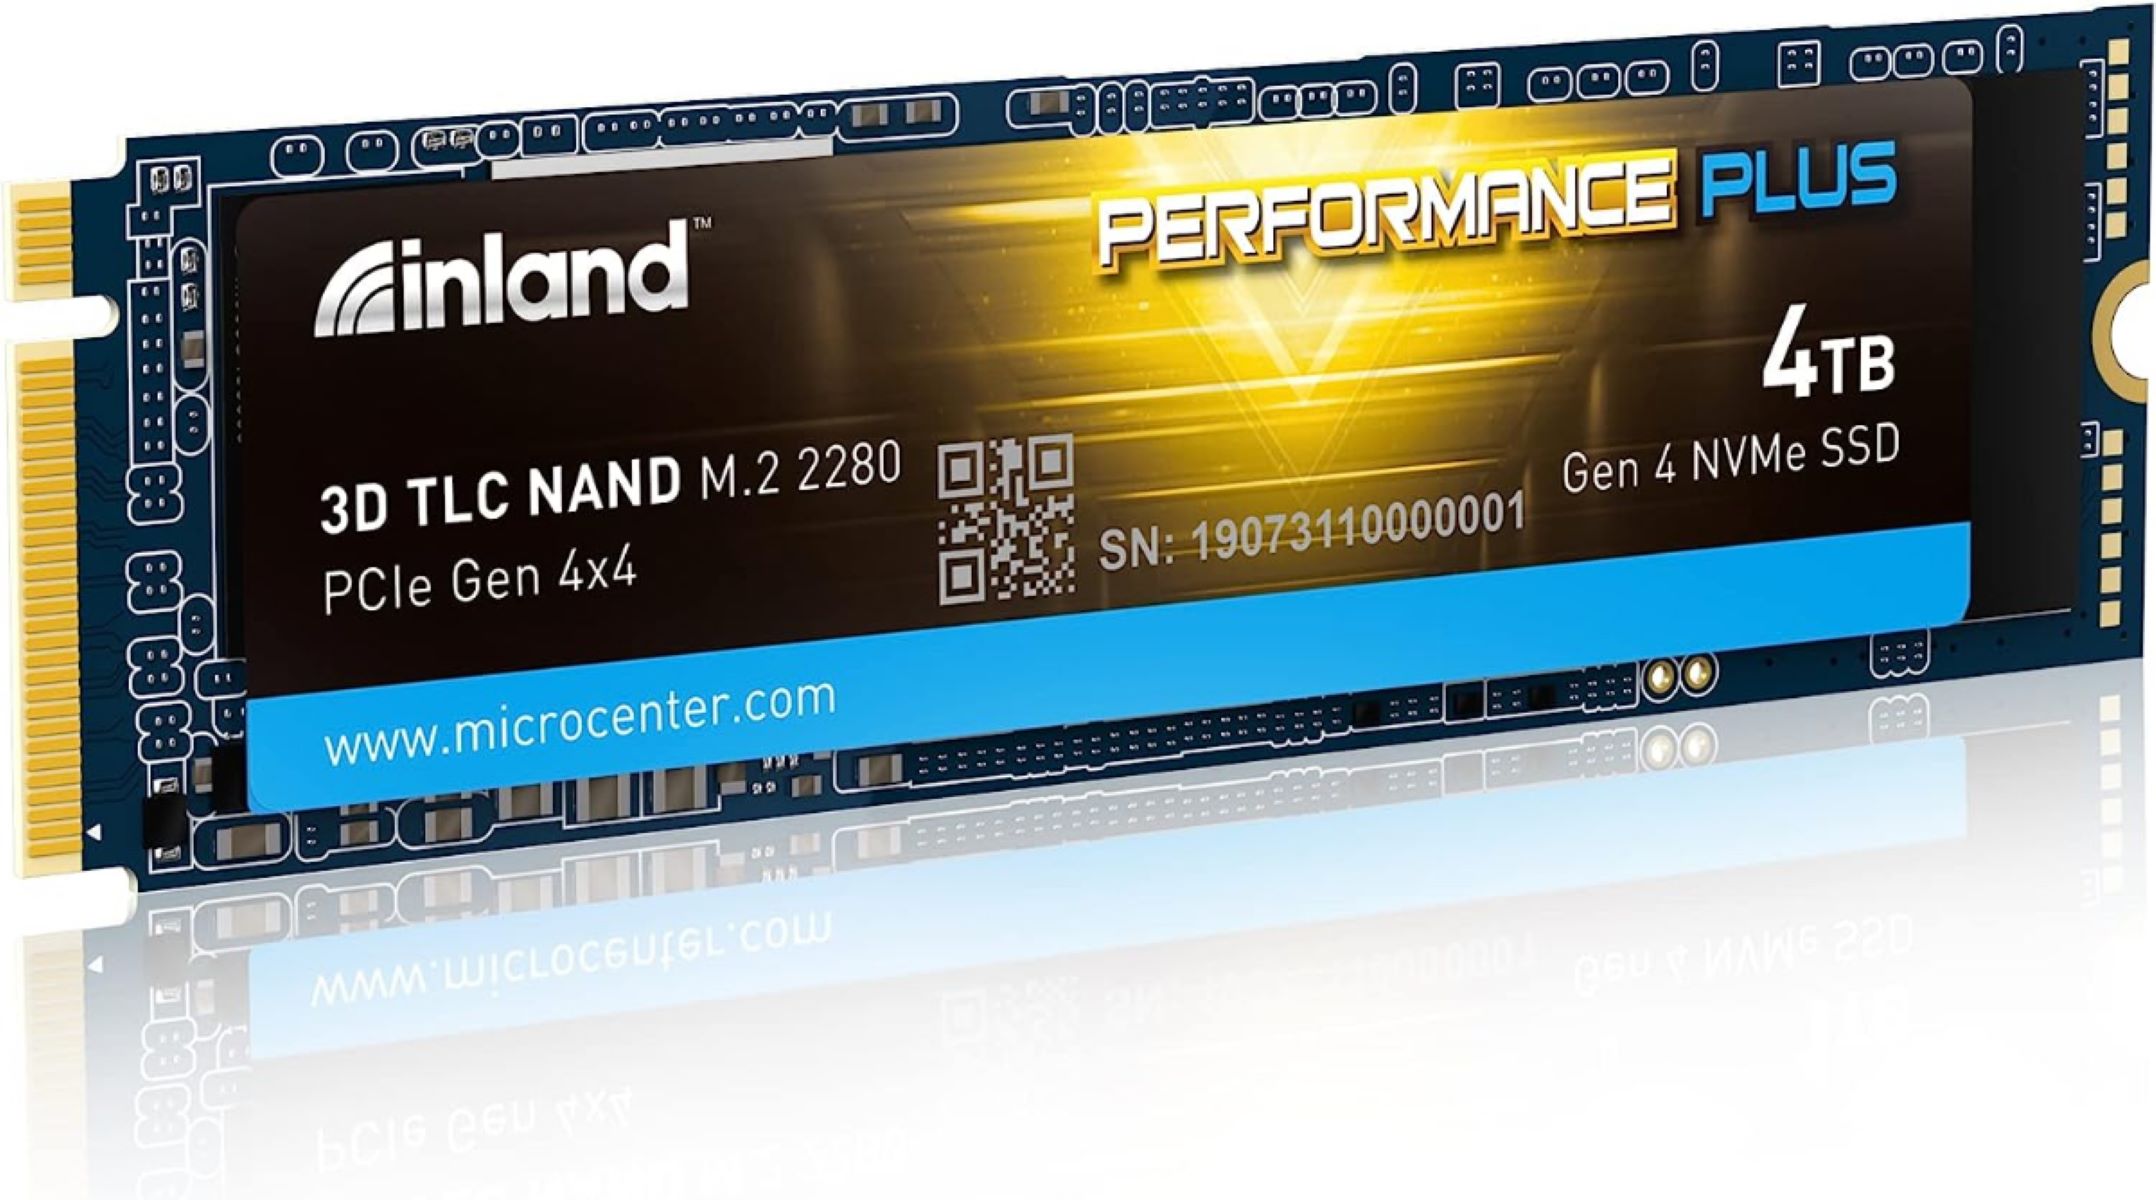
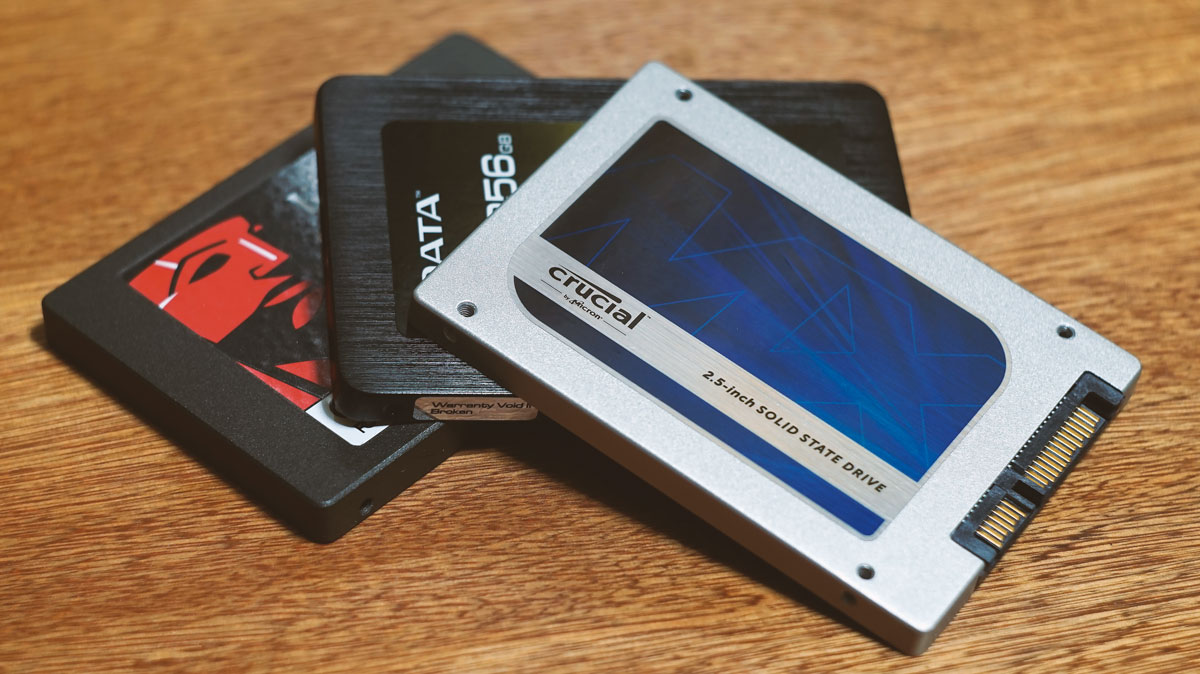
3. Form Factor: Consider the form factor of the SSD to ensure it is compatible with your system. The most common form factor is the 2.5-inch SATA SSD, which is suitable for laptops and desktops. However, if you have a gaming laptop or a small form factor PC, you may need to opt for an M.2 or NVMe SSD, which are smaller and offer faster speeds.
4. Endurance and Reliability: SSDs have a limited number of write cycles before they start to degrade, so it’s important to choose a drive with good endurance ratings. Look for SSDs with high Terabytes Written (TBW) ratings, as they indicate the drive’s lifespan and durability. Additionally, consider brands with a reputation for reliability to ensure that your data will be safe on the SSD.
5. Price: Set a budget for your SSD purchase and compare prices across different models. While SSDs tend to be more expensive than traditional hard drives, they have become more affordable in recent years. Look for SSDs that offer a good balance of price and performance to get the best value for your money.
6. Customer Reviews and Ratings: Before finalizing your choice, take some time to read customer reviews and ratings for the SSD models you are considering. This can provide valuable insights into the performance, reliability, and overall satisfaction of other users. Pay attention to any common issues or concerns mentioned in the reviews.
By considering these factors, you can select an SSD that meets your storage requirements and enhances your gaming experience. Once you’ve chosen the right SSD, you are ready to proceed with the game transfer process.
Backup Your Game Files
Before transferring your games to the SSD, it’s crucial to create a backup of your game files to ensure the safety of your valuable gaming data. Backing up your game files will provide peace of mind and protect against any potential data loss during the transfer process.
1. Determine the backup method: There are a few different approaches you can take to back up your game files. One option is to manually copy the game folders to an external storage device such as a USB drive or external hard drive. This method is straightforward but may be time-consuming, especially if you have a large game library.
2. Utilize cloud storage: Another convenient and secure way to back up your games is by using cloud storage services. Many cloud providers offer a certain amount of free storage space, which can be used to store your game files online. This method ensures that your game data is accessible from anywhere and protects against physical device failure or loss.
3. Use game-specific backup tools: Some games have built-in backup options or dedicated backup tools available. Check if your favorite games offer these features, as they can simplify the backup process and ensure that all relevant files and settings are included. Game-specific backup tools may also provide seamless restoring options.
4. Verify the integrity of backups: Once you have completed the backup process, it’s vital to verify the integrity of the backup files. Take the time to ensure that all necessary game files are correctly copied and that the backup is not corrupted. This step will prevent any potential issues when restoring the games on the SSD.
5. Update your backup regularly: It’s essential to maintain regular backups of your game files, especially if you frequently add new games or make significant progress in existing ones. Set a schedule to update your backups periodically to ensure that your saved games and settings are always up to date.
6. Store backups in a safe location: After creating the backups, make sure to store them in a safe and secure location. If you are using physical storage devices like USB drives or external hard drives, store them in a cool, dry place to protect them from physical damage.
By taking the time to back up your game files, you’ll have the peace of mind knowing that your gaming data is safe and can be easily restored if needed. This step ensures that you can continue gaming seamlessly without worrying about any potential data loss during the transfer to the SSD.
Check the Game’s Specific Requirements
Before proceeding with the transfer of your games to the SSD, it’s essential to check the specific requirements of each game. Different games may have different installation and storage requirements that need to be considered to ensure optimal performance. Here are some important factors to keep in mind:
1. Minimum and recommended system requirements: Review the minimum and recommended system requirements for each game. These requirements typically include specifications such as processor speed, RAM, graphics card, and storage space. Ensure that your computer meets or exceeds these requirements to guarantee smooth gameplay on the SSD.
2. Installation instructions: Pay attention to any specific installation instructions provided by the game developer. Some games may require certain steps to be taken during installation, such as the creation of additional folders or the installation of specific software components. Following these instructions will ensure a proper transfer of the game to the SSD.
3. DRM (Digital Rights Management) restrictions: Some games may have DRM restrictions in place, which can impact the transfer process. Check if the game you wish to transfer has any DRM restrictions, such as activation limits or online authentication requirements. Ensure that your new SSD is compatible with the game’s DRM system to avoid any licensing issues.
4. Mod compatibility: If you have installed mods or custom modifications for your games, check whether they are compatible with transferring the game to a new storage device. Some mods may require specific file paths or configurations that need to be updated after the transfer. Ensure that you back up any mods and reinstall them on the SSD if necessary.
5. Game launcher settings: Many modern games utilize launchers that manage updates, DLCs, and other settings. Take note of any specific settings or configurations within the game launcher, as these may require adjustments after the game transfer. Ensure that the launcher recognizes the new SSD as the storage location for the game.
6. Multiplayer or online functionality: If you play multiplayer or online games, consider any specific server or account settings that may be tied to your existing game installation. Some games may require you to reconfigure your multiplayer settings or log in to your gaming account after the transfer. Ensure that you have the necessary login credentials and make the necessary adjustments after the transfer.
By checking the specific requirements of each game, you can ensure a smooth transfer to the SSD without any compatibility issues or performance degradation. This step will guarantee that you can continue enjoying your favorite games on the SSD with optimized performance and faster loading times.
Install the SSD in Your Computer
Now that you’ve completed the necessary preparations, it’s time to physically install the SSD into your computer. Follow these steps to ensure a smooth installation process:
1. Power off your computer: Before opening your computer case, ensure that your computer is powered off and unplugged. This will protect you from any electrical hazards and prevent any damage to your system.
2. Open your computer case: Depending on your computer model, you may need to remove screws or slide a side panel to access the internal components. Consult your computer’s manual or perform an online search to determine the proper method for opening your specific computer case.
3. Locate an available slot: Identify an available slot in your computer where you can install the SSD. Most computers have dedicated slots for SSDs, such as SATA connectors or M.2 slots. Ensure that you choose the appropriate slot based on the form factor of your SSD.
4. Prepare the SSD: If you are using a traditional 2.5-inch SATA SSD, you may need to attach it to a mounting bracket or adapter before installing it into the computer case. Follow the instructions provided with your SSD or consult the manufacturer’s website for specific guidelines.
5. Connect the SSD: Carefully connect the SSD to the appropriate slot in your computer. For a SATA SSD, use a SATA data cable to connect the SSD to the motherboard. If you are installing an M.2 SSD, insert it into the appropriate M.2 slot and secure it with the necessary screws if required.
6. Secure the SSD: Once the SSD is connected, ensure that it is securely fastened in place. If you are using a mounting bracket or adapter, make sure it is properly screwed into the computer case. This will prevent any movement or disconnection of the SSD during use.
7. Close the computer case: After confirming that the SSD is securely installed, close the computer case and reattach any screws or clips that hold it in place. Ensure that the case is firmly closed to avoid any loose connections or potential damage.
8. Power on your computer: Once the SSD is installed, power on your computer and enter the BIOS or UEFI settings. Verify that the computer recognizes the SSD and make any necessary changes to ensure that the SSD is set as the primary storage device.
By following these steps, you will successfully install the SSD into your computer, setting the stage for the next steps of formatting, cloning, and setting the SSD as the default storage location for your games.
Format the SSD
After installing the SSD in your computer, the next step is to format it to prepare it for use as the storage location for your games. Formatting the SSD ensures that it is recognized by your operating system and ready to receive data. Here’s how you can format your SSD:
1. Open Disk Management: On Windows, you can access Disk Management by right-clicking on the Start button and selecting “Disk Management” from the menu. This will open the Disk Management utility, which allows you to manage your computer’s storage devices.
2. Locate the SSD: In the Disk Management window, locate the SSD that you installed. It should be listed as a new drive or labeled as “Unallocated.” Take note of the SSD’s drive letter, as you will need it for the formatting process.
3. Format the SSD: Right-click on the SSD and select “Format” from the context menu. This will open the Format window, where you can customize the formatting settings.
4. Choose the file system: In the Format window, choose the desired file system for your SSD. For Windows, the recommended file system is NTFS, which offers compatibility and support for larger file sizes. Ensure that the Quick Format option is selected for a faster formatting process.
5. Assign a drive letter: Assign a drive letter to the SSD by selecting an available letter from the drop-down menu. This allows your operating system to identify and access the SSD as a separate storage device.
6. Label the SSD: Optionally, you can provide a label or name for the SSD. This label will help you identify the SSD in the future, especially if you have multiple storage devices.
7. Confirm the format: Double-check your formatting settings and click on the “OK” button to begin the formatting process. A warning message may appear, stating that all data on the SSD will be erased. Ensure that you have backed up any important data before proceeding, as formatting will delete all existing data on the SSD.
8. Wait for the formatting to complete: The formatting process may take a few moments to complete, depending on the size of the SSD. Once the process is finished, you will receive a notification indicating that the formatting was successful.
9. Verify the formatted SSD: After formatting, verify that the SSD is now listed as a healthy, formatted drive in Disk Management. It should be labeled with the assigned drive letter and show the file system you selected.
By following these steps, you will successfully format the SSD, preparing it for the next stage of cloning your games from the previous storage location to the newly formatted SSD.
Clone the Game to the SSD
Now that your SSD is formatted and ready to be filled with games, it’s time to clone the games from their current location to the SSD. Cloning allows you to create an exact replica of the game files, including game data, settings, and save files. Follow these steps to successfully clone your games to the SSD:
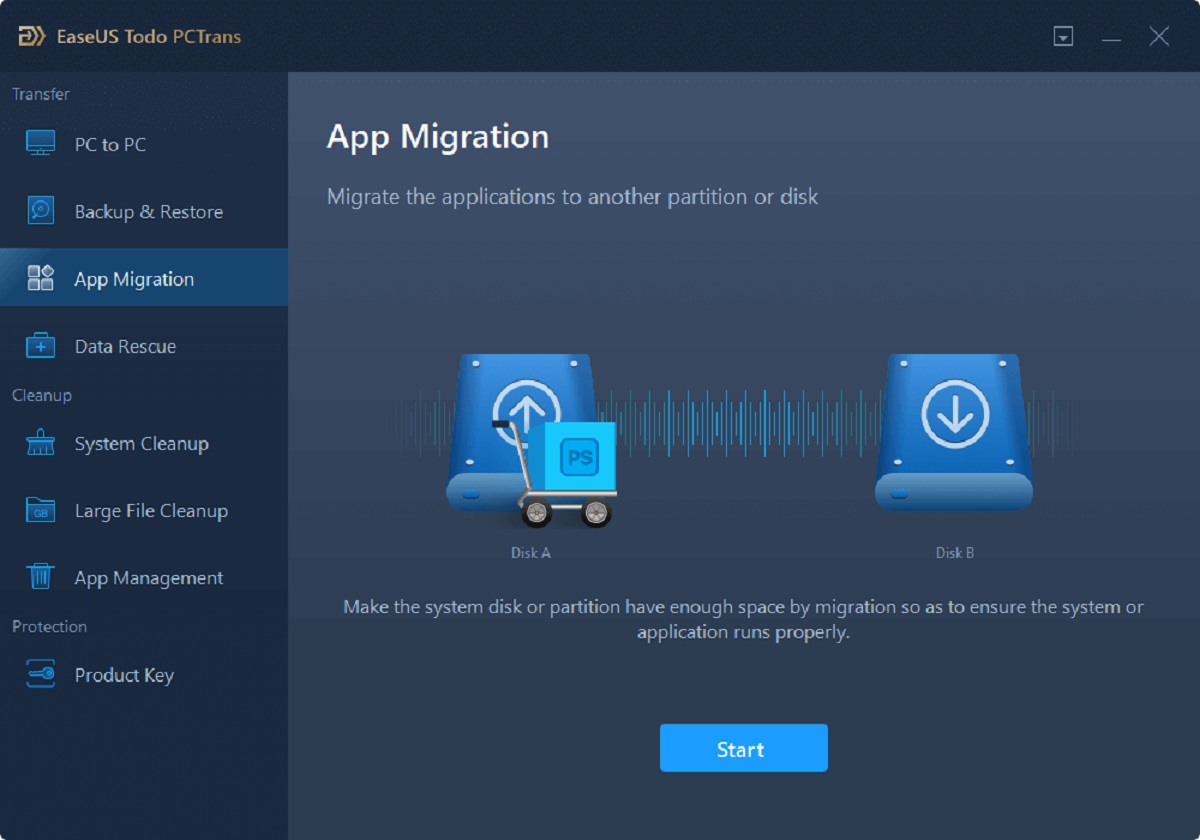
1. Choose a reliable cloning software: Select a trustworthy cloning software that supports game transfers. There are several options available, including paid and free software. Some popular choices include EaseUS Todo Backup, Macrium Reflect, and Clonezilla.
2. Install and open the cloning software: Download and install the chosen cloning software on your computer. Open the program to begin the cloning process.
3. Select the source and destination drives: In the cloning software, choose the current drive where your games are installed as the source drive. Then, select the SSD as the destination drive where you want to clone the games.
4. Customize cloning options: Depending on the cloning software, you may have additional options to customize the cloning process. These options can include selecting specific partitions or folders to clone and adjusting the cloning method. For game transfers, it is recommended to clone all the game files and not just specific partitions or folders.
5. Start the cloning process: Once you have configured the cloning settings, click on the “Start” or “Clone” button to initiate the cloning process. The software will begin copying all the game files from the source drive to the destination SSD.
6. Wait for the cloning to complete: The cloning process may take some time depending on the size of the games being transferred. It’s important to be patient and let the software complete the cloning without interruption. You may monitor the progress if the software provides a progress bar or status updates.
7. Verify the cloned games: After the cloning process finishes, double-check the SSD to ensure that all the games have been successfully cloned. Compare the file sizes and game folders on the SSD to the original source drive to ensure that everything has been transferred accurately.
8. Test the games on the SSD: Before proceeding further, test the games on the SSD to make sure they work properly. Launch each game and verify that all your progress, settings, and customizations have been preserved. Pay attention to any performance improvements in terms of loading times and overall gameplay experience.
9. Keep the original game files as a backup: It’s recommended to keep the original game files on the source drive as a backup until you are certain that the cloned games are working correctly. This allows you to revert back to the original files if any issues arise.
By following these steps, you will successfully clone your games to the SSD, ensuring that you can enjoy faster loading times and improved performance when playing your favorite games.
Set the SSD as the Default Storage Location
Now that your games are successfully cloned to the SSD, it’s time to set it as the default storage location in order to ensure that any new games or installations are automatically saved on the SSD. Here’s how you can set the SSD as the default storage location:
1. Access your computer’s settings: Open the settings menu on your operating system. On Windows, this can be done by clicking on the Start button and selecting “Settings.” On macOS, click on the Apple menu and choose “System Preferences.”
2. Navigate to the storage settings: In the settings menu, look for the “Storage” or “Storage and Backup” section. Depending on your operating system, you may find it under different categories such as “System” or “Storage and Drives.”
3. Choose the default installation location: Within the storage settings, you’ll find an option to select the default installation location for new applications or games. Choose the SSD as the preferred location for future installations.
4. Customize other storage preferences: Depending on your operating system, you may have additional storage customization options. For example, on Windows, you can choose to save documents, pictures, or downloads directly on the SSD. Adjust these settings according to your preferences to prioritize the SSD for all storage needs.
5. Update game launcher or store settings: If you use a game launcher or digital game store, such as Steam or Origin, navigate to their settings and ensure that the SSD is set as the default installation location within the launcher or store settings. This will ensure that any new game downloads or installations are directed to the SSD by default.
6. Manually move existing games (optional): If you have games installed on other drives, you may choose to manually move them to the SSD to consolidate your game library and take advantage of the SSD’s faster performance. You can do this by uninstalling the games from their current location and reinstalling them on the SSD using the game launcher or store.
7. Restart your computer: After making the necessary changes to your storage settings and game launcher preferences, it’s a good idea to restart your computer. This will allow the changes to take effect and ensure that the SSD is recognized as the default storage location.
8. Verify new installations: To confirm that the SSD is set as the default storage location, download or install a small game or application. Check that it is being stored on the SSD. You can verify this by checking the installation path or the storage location within your operating system’s storage settings.
9. Enjoy faster loading times and improved performance: Now that the SSD is set as the default storage location, any new games or installations will automatically be saved on the SSD, providing faster loading times and improved performance. Enjoy your enhanced gaming experience!
By following these steps, you will ensure that future game installations and downloads are automatically directed to the SSD, maximizing the benefits of your faster and more efficient storage device.
Test the Game on the SSD
After transferring your games to the SSD, it’s crucial to test them to ensure everything is functioning properly. Testing the games on the SSD allows you to experience the improved loading times and overall performance. Follow these steps to effectively test the games:
1. Launch the game: Open the game launcher or application and select the game you transferred to the SSD. Click on the “Play” button to launch the game.
2. Monitor loading times: Pay close attention to the loading times after launching the game. Compare the loading times to when the game was installed on the previous storage device. If the game loads significantly faster, you will immediately notice the benefits of using the SSD.
3. Observe gameplay performance: During gameplay, take note of any performance improvements. Monitor the smoothness of the gameplay, frame rates, and any reduction in lag or stuttering. With the faster read and write speeds of an SSD, the game should run more smoothly and deliver a more immersive experience.
4. Evaluate texture and asset streaming: For games with large open-world environments or detailed graphics, observe how quickly textures and assets load as you move around the game world. An SSD can significantly reduce texture pop-in and ensure that the game world appears more visually seamless.
5. Check for audio and video glitches: Pay attention to the sound and video quality during gameplay. If you previously experienced audio or video glitches, such as audio stuttering or video frame drops, see if these issues have been alleviated with the game running from the SSD. The improved read and write speeds can help deliver smoother audio and video playback.
6. Save and load times: Test the save and load times within the game. Saving your game progress should be faster, and loading from a saved point should be significantly quicker compared to when the game was on the previous storage device. These shorter save and load times allow you to get back into the game faster and continue your gaming session without interruption.
7. Verify game settings and customizations: Confirm that all your game settings and customizations, such as graphics settings and controller configurations, have been retained during the transfer to the SSD. Ensure that any changes you made to optimize your gaming experience are still in effect.
8. Test multiple games: Repeat the above steps for multiple games that you have transferred to the SSD. This will allow you to gauge the overall performance improvement provided by the SSD and ensure that the benefits are consistent across various games.
9. Enjoy the enhanced gaming experience: After testing the games on the SSD and confirming their improved performance, you can enjoy the enhanced gaming experience with faster loading times, smoother gameplay, and reduced interruptions. Immerse yourself in your favorite games without any performance limitations.
By thoroughly testing the games on the SSD, you can verify the benefits of transferring them to the faster storage device. Enjoy the optimized performance and smoother gameplay that the SSD brings to your gaming experience.
Uninstall the Game from the Previous Location
Now that you have successfully transferred your games to the SSD and tested them, it’s time to uninstall the games from their previous location to free up space and avoid any conflicts. Removing the games from the previous storage device ensures that you are only using the SSD for your gaming needs. Follow these steps to uninstall the games from the previous location:
1. Locate the game: Open the file explorer or game launcher and navigate to the location where the game is installed on the previous storage device. This is typically in the “Program Files” or “Program Files (x86)” folder on Windows, or the “Applications” folder on macOS.
2. Run the uninstaller: Locate the game’s uninstaller file. This can often be found within the game folder or through the Control Panel on Windows or the Applications folder on macOS. Double-click on the uninstaller file to start the uninstallation process.
3. Follow the uninstallation prompts: During the uninstallation process, you may be prompted with various options or confirmation messages. Follow the prompts and choose the appropriate options to proceed with the uninstallation. You may need administrative privileges to completely remove the game.
4. Remove game-related files: After the uninstallation process is complete, it’s essential to delete any remaining game-related files and folders. These files may include backup files, saved games, configuration files, or temporary files. Check for any residual files in the game’s installation folder and delete them to free up space.
5. Repeat the process for all games: If you had multiple games installed on the previous storage device, repeat the above steps for each game. Ensure that you thoroughly uninstall and remove all game files and folders associated with each game.
6. Empty the recycle bin (optional): Once you have uninstalled and removed all game files from the previous location, consider emptying the recycle bin or trash folder on your computer. This will permanently delete all the game-related files and reclaim storage space on the previous storage device.
7. Verify successful uninstallation: After completing the uninstallation process, confirm that the games no longer appear in the game launcher or file explorer on the previous storage device. Also, check that the game files and folders have been completely removed from the respective installation folders.
8. Maintain backups (optional): If you had created backups of your game files before the transfer, you may choose to keep them stored in a safe location for future reference. This way, you can easily access and reinstall the games if needed.
By following these steps, you can safely uninstall the games from their previous location, freeing up valuable space and ensuring that your games are solely stored and accessed from the SSD. This step helps streamline your storage and optimize your gaming experience on the new SSD.
Enjoy Faster Loading Times on Your Games!
Now that you have transferred your games to the SSD and completed all the necessary steps, it’s time to reap the rewards of improved performance. The use of an SSD can bring a significant boost to your gaming experience, especially when it comes to loading times. Here are the benefits you can enjoy:
1. Reduced loading times: With games installed on the SSD, you can expect significantly faster loading times. Whether it’s launching the game or transitioning between different levels or areas, you’ll experience shorter waiting times and be able to jump into the action more quickly.
2. Smooth gameplay: Games stored on an SSD benefit from quick read and write speeds, resulting in smoother gameplay. You won’t experience as many stutters, frame drops, or texture pop-ins, leading to a more immersive gaming experience.
3. Faster game saves and checkpoints: Saving your game progress or reaching checkpoints is a seamless process with an SSD. The improved read and write speeds allow for faster saving and loading of game data, ensuring your progress is saved quickly and efficiently.
4. Seamless texture streaming: Open-world games or those with detailed graphics benefit greatly from an SSD’s superior data access speeds. You’ll notice improved texture streaming, where textures and graphics load more quickly as you explore the game world, eliminating texture pop-in and enhancing visual fidelity.
5. Reduced lag and latency: An SSD’s faster data access times can help reduce input lag in online multiplayer games, providing a more responsive gaming experience. You’ll enjoy smoother interactions with other players and quicker response times, giving you a competitive edge.
6. Improved overall system performance: Installing games on the SSD not only benefits the games themselves but also enhances the overall performance of your computer. Other applications and system processes can run more smoothly and efficiently while the games access data from the SSD.
7. Enhanced modding capabilities: If you enjoy modding your games, an SSD can significantly speed up the process. Loading mods, applying changes, and launching the game with mods become faster and simpler, allowing you to focus on enjoying a customized and diverse gaming experience.
8. Seamless multitasking: With games stored on the SSD, you can seamlessly switch between running applications without experiencing significant performance drops or delays. Your computer will handle multitasking more efficiently, allowing you to stream, record gameplay, or use other software simultaneously while enjoying your games.
By transferring your games to an SSD, you unlock the potential for faster loading times, smoother gameplay, reduced lag, and an overall improved gaming experience. Enjoy the benefits of your new and enhanced storage solution as you immerse yourself in the world of gaming!