Introduction
Welcome to the ultimate guide on how to tie two PSU (Power Supply Units) together! If you’ve ever wondered about the possibility of combining the power output of two PSUs to meet high power demands, then you’ve come to the right place. In this article, we will walk you through the necessary steps and considerations for successfully tying two PSUs together.
Before we dive into the details, let’s start with a brief introduction to PSUs. A PSU is an essential component in any computer system, responsible for converting the AC power from your wall outlet into DC power that can be used by the various components of your computer. It supplies the necessary voltage and current to ensure their proper functioning. While most standard PSUs provide sufficient power for regular usage, there may be situations where you require more power than a single PSU can provide.
So, why would you want to tie two PSUs together? The most common reason is to accommodate high power demands, particularly in scenarios where you are heavily overclocking your computer, running multiple high-end graphics cards, or operating power-hungry devices such as server systems or mining rigs. Tying two PSUs together allows you to combine their power outputs, effectively increasing the overall power capacity and ensuring stable and reliable performance.
However, it is important to note that tying two PSUs together should only be done by experienced individuals who are familiar with the process and the potential risks involved. It requires careful planning, proper tools, and utmost attention to safety precautions. Improperly tying the PSUs together can result in damage to your computer components or, in extreme cases, pose a fire hazard. Therefore, it is crucial to follow the steps outlined in this guide precisely.
In the next section, we will discuss the important factors to consider before attempting to tie two PSUs together. Understanding these considerations will help you determine if this is the right solution for your power requirements and ensure a successful implementation.
What is PSU?
To fully understand the concept of tying two PSUs together, it’s essential to have a clear understanding of what a PSU is and its role in a computer system.
PSU stands for Power Supply Unit, and it is a critical component that provides electrical power to the various parts of your computer. It converts the alternating current (AC) from your wall outlet into direct current (DC) that can be used by the internal components of your PC.
The PSU is responsible for supplying the correct voltage and current to each component, ensuring that they receive the power they need to function properly. It typically consists of several key components, including a transformer, capacitors, rectifiers, and a cooling fan.
The transformer is responsible for stepping down the high voltage of the AC power from the wall outlet to the lower voltage required by the computer components. Capacitors help smooth out the fluctuations in the power supply, providing a stable and consistent voltage. Rectifiers convert the AC power into DC power, which is then distributed to the various parts of the computer.
The power output of a PSU is measured in watts. The higher the wattage, the more powerful and capable the PSU is. Different computer systems have different power requirements, depending on the components used and their power consumption. It is important to ensure that your PSU can deliver enough power to handle the demands of your system.
PSUs come in various form factors, including ATX, SFX, and TFX, among others. The ATX form factor is the most common and is used in standard desktop computers. SFX and TFX form factors are commonly found in smaller form factor PCs, such as Mini-ITX builds or small form factor gaming machines.
When it comes to tying two PSUs together, it is important to consider the compatibility of the PSUs. They should have compatible connectors and support for linking them together. Some PSUs come with built-in features that allow for easy linking, while others may require additional tools or adapters.
In the next section, we will delve into the reasons why you might want to tie two PSUs together to meet your power requirements. Understanding these reasons will help you determine if this is a suitable solution for your specific needs.
Why would you want to tie two PSUs together?
Tying two PSUs together is primarily done to address situations that require more power than a single PSU can provide. Let’s explore some of the common scenarios where you might consider using this approach:
1. High-End Gaming: If you’re an avid gamer with a high-end gaming rig that includes multiple graphics cards, overclocked processors, and other power-hungry components, you may push the limits of a single PSU. Tying two PSUs together allows you to distribute the power load evenly and ensure stable performance during demanding gaming sessions.
2. Content Creation and Video Editing: Professionals who work with resource-intensive software like video editing or 3D rendering often require powerful systems. These applications place heavy demands on the CPU, GPU, and RAM, which can strain a single PSU. By combining the power output of two PSUs, you can provide the necessary power for these intensive tasks.
3. Mining Rigs: Cryptocurrency mining, particularly for coins like Bitcoin or Ethereum, requires significant computational power and can be extremely power-intensive. Mining rigs often consist of numerous GPUs running at full capacity, consuming a substantial amount of energy. Tying two PSUs together helps meet the high power demands of mining rigs, ensuring efficient and uninterrupted mining operations.
4. Server Systems: Servers that handle heavy traffic, host multiple websites, or run resource-intensive applications need a reliable and robust power supply. By tying two PSUs together, you can ensure consistent power delivery to the server components, minimizing the risk of power shortages or system crashes.
5. Future-Proofing: If you’re building a high-performance system and want to ensure that it can handle future upgrades or additions without any power limitations, tying two PSUs together provides the flexibility and scalability required.
It’s important to note that tying two PSUs together is not necessary for regular computer usage or for most average systems. Standard PSUs are typically designed to deliver sufficient power for everyday computing tasks. However, if you find yourself in any of the above situations, combining PSUs can be a practical solution to meet your power requirements.
In the next section, we will go over the important factors you should consider before attempting to tie two PSUs together. These considerations will help you determine if this approach is feasible and suitable for your specific needs.
Things to consider before tying two PSUs together
Before you proceed with tying two PSUs together, there are several important factors to consider. These considerations will help ensure a safe and successful integration of the power supplies. Let’s take a look at what you need to keep in mind:
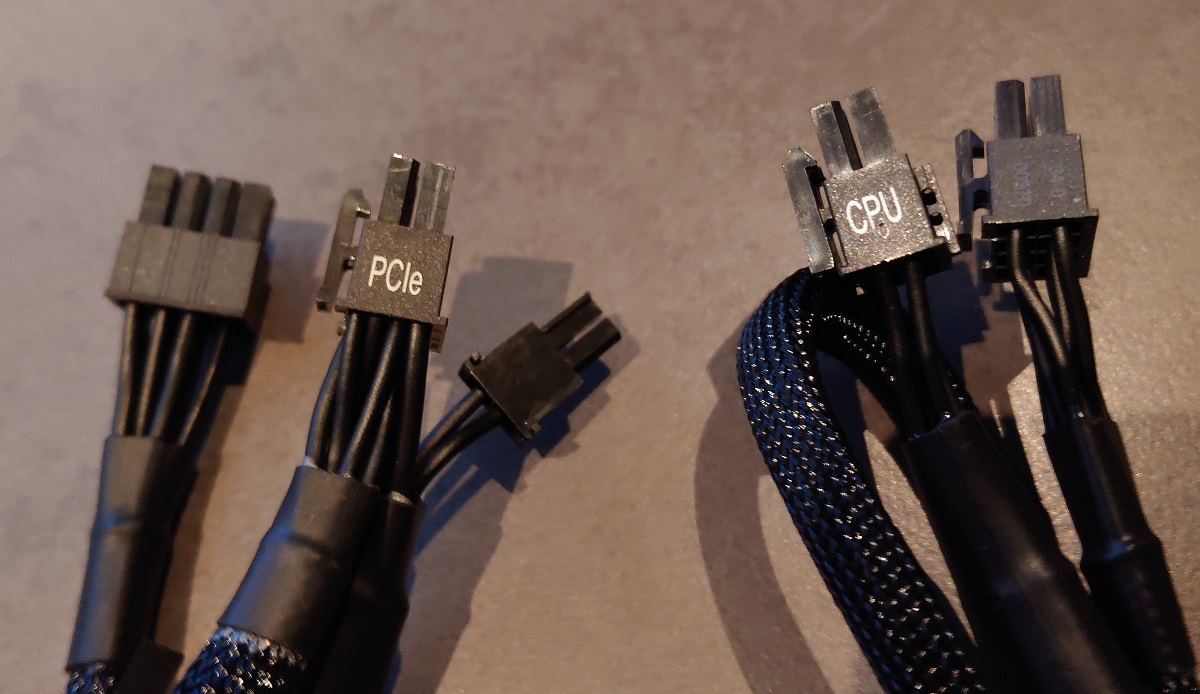
1. Compatibility: Ensure that the two PSUs you plan to tie together are compatible with each other. This includes checking if they have the necessary connectors, cable lengths, and voltage compatibility. Consult the manufacturer’s documentation or website to determine compatibility.
2. Power Requirements: Assess the power needs of your system and determine if tying two PSUs together is necessary. Calculate the wattage requirement of your components, including the central processing unit (CPU), graphics card(s), storage drives, and peripherals. Be sure to account for any future upgrades or additions you may have planned.
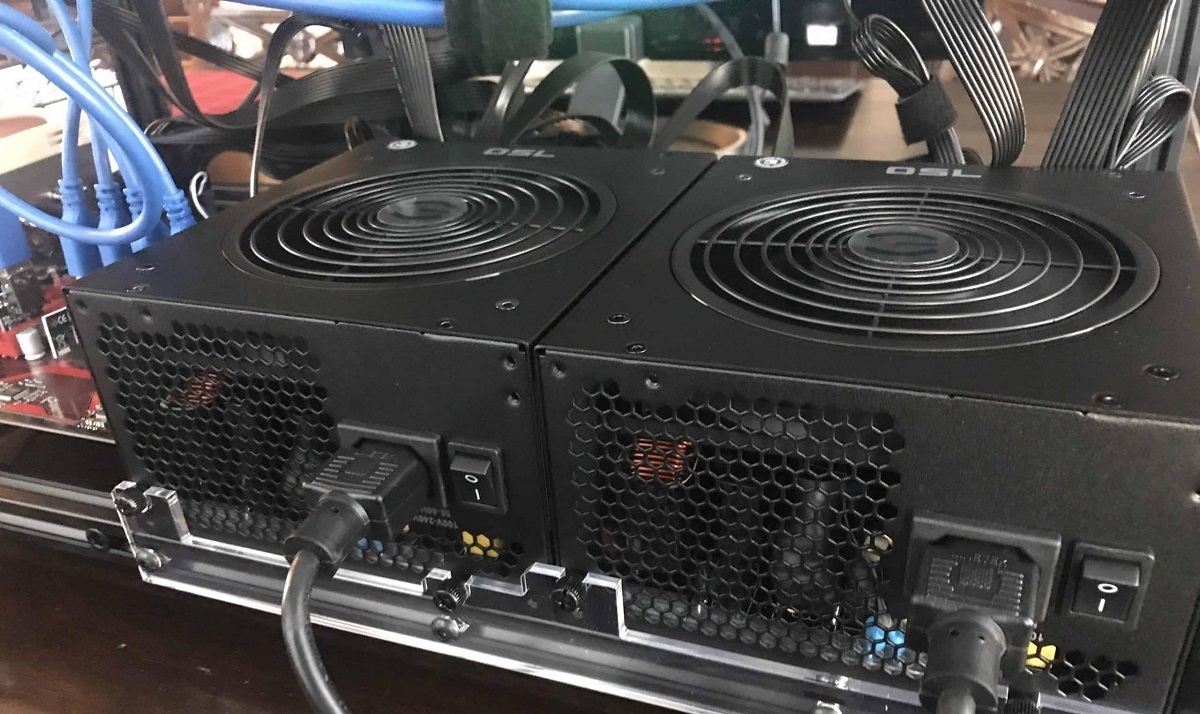
3. PSU Capacity: Consider the individual power capacities of each PSU. It is essential that the combined wattage of the two PSUs is sufficient to handle the power requirements of your system. Exceeding the power capabilities of the PSUs can lead to instability, performance issues, and potentially cause damage to your components.
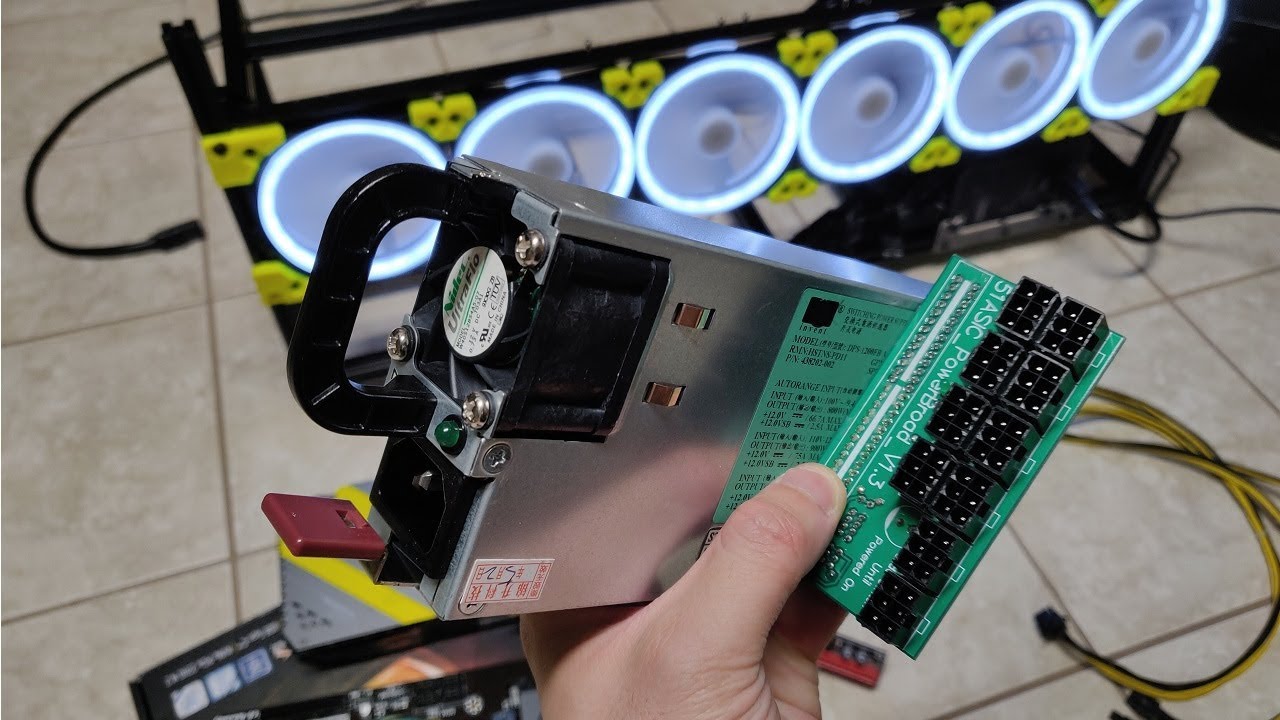
4. Linking Method: Determine the method you will use to tie the two PSUs together. Some PSUs have built-in features that enable them to be linked together using special cables or adapters. If your PSUs do not natively support linking, you may need to use add-on devices, such as a dual power supply adapter or a power supply sharing switch.
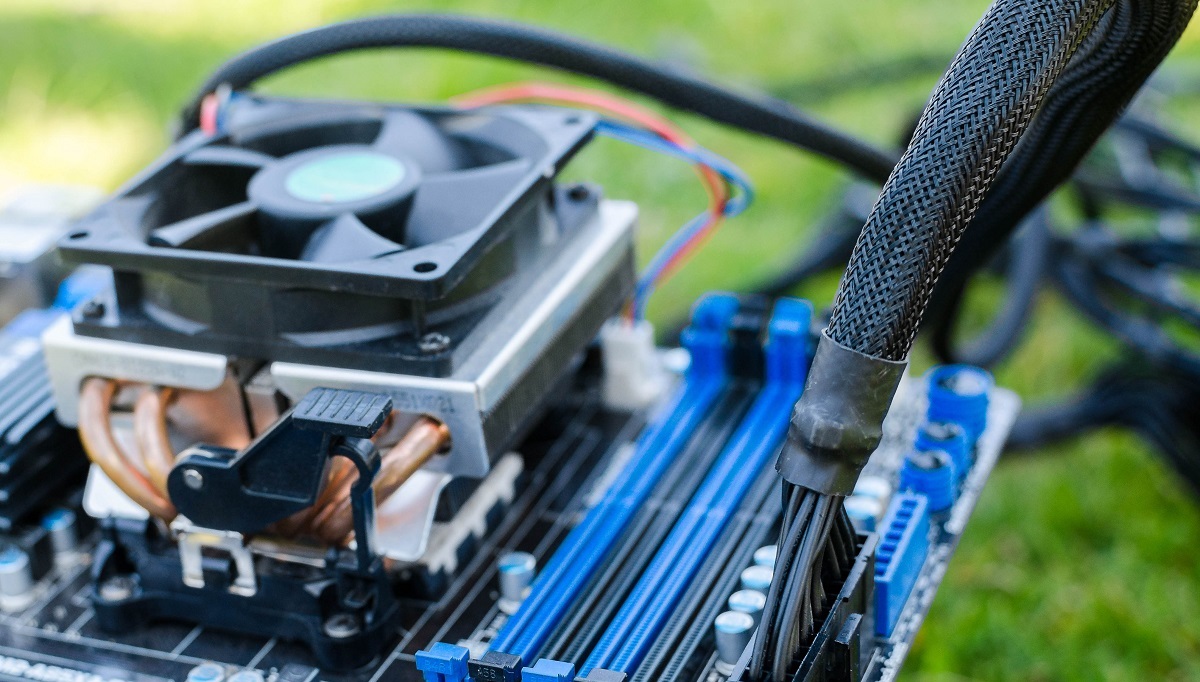
5. Cable Management: Consider the cable management aspect when tying two PSUs together. Ensure that you have enough space and proper placement to accommodate the additional cables and adapters. Proper cable management is vital for airflow and overall system aesthetics.
6. Cooling and Airflow: Combined power supplies generate more heat, so it is important to have adequate cooling and airflow within your system. Ensure that both PSUs have proper ventilation and that the cooling fans are functioning optimally. Consider using additional case fans or liquid cooling solutions for effective heat dissipation.
7. Planning and Installation: Carefully plan the layout and installation process before proceeding. Take note of the location of the PSUs, the routing of cables, and the accessibility of connectors. Ensure that any modifications or additions you make to the system are done correctly and securely.
8. Safety Precautions: Always prioritize safety when working with electricity. Unplug all power cables and switch off the PSU before making any connections or modifications. Avoid handling internal components while the system is powered on. If you are unsure about any aspect of the process, seek assistance from a qualified professional.
By considering these factors before tying two PSUs together, you can mitigate risks, prevent damage to your components, and ensure a stable and efficient power supply for your system. In the next section, we will discuss the tools and materials you will need for this process.
Required tools and materials
To successfully tie two PSUs together, you will need a few essential tools and materials. Ensuring you have the necessary equipment before starting the process will help make the installation smoother and more efficient. Here’s what you’ll need:
1. Two Compatible Power Supply Units (PSUs): Select two PSUs that are compatible with each other and meet the power requirements of your system. Make sure they have the necessary connectors and support for linking them together.
2. Dual PSU Adapter or Power Supply Sharing Switch: Depending on the PSUs you have chosen, you may need a dual PSU adapter or a power supply sharing switch. These devices allow you to connect and manage the power supply from both PSUs effectively. Ensure that the adapter or switch is compatible with your PSUs and supports the necessary connections.
3. Screwdriver: A screwdriver will be necessary for opening the computer case, securing the PSUs in place, and making any necessary adjustments to the installation. Choose a screwdriver that fits the screws typically used in your computer case.
4. Cable Ties or Velcro Straps: Cable ties or Velcro straps are useful for managing and securing the cables after connecting the PSUs. These accessories will help keep the cables organized and prevent them from obstructing airflow or getting tangled.
5. Thermal Paste (Optional): If you plan to remove and re-install the CPU cooler during the process, you may need thermal paste. Ensure that you have a high-quality thermal paste available to reapply onto the CPU surface for effective heat transfer.
6. Anti-static wrist strap (Optional): While not strictly necessary, an anti-static wrist strap can help protect your computer components from electrostatic discharge (ESD) during the installation process. This is especially important if you are working in a static-prone environment.
7. User Manuals: Familiarize yourself with the user manuals of both PSUs and any additional devices you will be using. These manuals will provide you with specific instructions and recommendations for your particular models.
Before starting the process, ensure that you have all the required tools and materials prepared. Double-check the compatibility of the PSUs, adapters, and other devices to avoid any compatibility issues during the installation.
In the next section, we will provide a step-by-step guide on how to tie two PSUs together, ensuring a safe and successful integration into your system.
Step-by-step guide to tie two PSUs together
Now that you have gathered all the necessary tools and materials, it’s time to dive into the step-by-step process of tying two PSUs together. Follow these instructions carefully to ensure a successful integration into your system:
1. Preparation:
– Switch off your computer and unplug all power cables.
– Open your computer case to access the internal components.
– Ground yourself by touching a metal object to discharge any static electricity.
2. Identify the PSUs:
– Identify the primary PSU that will be responsible for powering the motherboard and other essential components.
– Identify the secondary PSU that will provide power to the additional components, such as graphics cards or storage devices.
3. Connect the PSUs:
– Using the dual PSU adapter or power supply sharing switch, connect the primary PSU to the motherboard as you would with a single PSU.
– Connect the secondary PSU to the adapter or switch, ensuring that the connections are secure.
4. Connect the Auxiliary Components:
– If you have additional components that require power from the secondary PSU (such as graphics cards or storage drives), connect them to the appropriate connectors on the secondary PSU.
5. Secure the PSUs:
– Place the PSUs in their designated locations within the computer case.
– Use the screws provided with your case to secure the PSUs in place to prevent them from moving or vibrating during operation.
6. Managing the Cables:
– Carefully route and manage the cables by using cable ties or Velcro straps to secure them in place.
– Ensure that the cables do not obstruct airflow and are neatly arranged to maintain proper system ventilation.
7. Reassemble the Computer Case:
– Close the computer case and secure it using the screws provided.
– Double-check that all connections are secure and that no cables are pinched or tangled.
8. Power On:
– Plug in the power cables and switch on the PSUs.
– Power on your computer and check if all components are receiving power and functioning correctly.
It is vital to note that tying two PSUs together is an advanced procedure and should only be attempted by experienced individuals. If you are unsure about any step, it is recommended to seek the assistance of a qualified professional.
In the next section, we will discuss important safety precautions to keep in mind while tying two PSUs together to ensure the well-being of yourself and your computer system.
Safety Precautions
Tying two PSUs together involves working with electrical components, so it is crucial to prioritize safety throughout the process. Here are some important safety precautions to follow to ensure your well-being and the protection of your computer system:
1. Power Off and Unplug:
– Before starting any work, power off your computer and unplug all power cables from the wall outlet. This will prevent any accidental electrical shocks and ensure your safety during the installation process.
2. Ground Yourself:
– Static electricity can damage sensitive components. To prevent static discharge from damaging your computer, ground yourself by touching a metal object before handling any internal components. Alternatively, an anti-static wrist strap can be used throughout the process to further minimize the risk of electrostatic discharge.
3. Use Caution with Power:
– PSUs carry potentially dangerous current levels, even when not connected to the mains power supply. Avoid touching any exposed connectors or pins on the PSUs to prevent electrical shock.
4. Be Mindful of Heat:
– PSUs generate heat during operation. Do not touch the PSUs while they are powered on or immediately after turning them off, as they may still be hot. Allow them to cool down before handling.
5. Check for Compatibility:
– Ensure that the PSUs you are combining are compatible in terms of their voltage and connectors. Mixing incompatible PSUs can lead to system instability and damage.
6. Follow Manufacturer Guidelines:
– Always refer to the user manuals and guidelines provided by the PSU manufacturer for specific instructions on installation, power requirements, and safety precautions.
7. Secure Cables:
– Proper cable management is essential to avoid cables coming into contact with moving parts, blocking airflow, or causing short circuits. Secure cables with cable ties or Velcro straps to keep them organized and minimize the risk of accidents.
8. Avoid Working on a Powered System:
– Never attempt to make any connections, changes, or modifications to the system while it is powered on. Always ensure the system is completely powered off and unplugged before working on the internal components.
9. Monitor for Overheating:
– After tying two PSUs together, closely monitor system temperatures during operation to ensure that the additional power supply does not lead to overheating. Regularly clean dust filters and ensure proper airflow to prevent heat buildup.
10. If in Doubt, Seek Professional Help:
– If you are uncertain or uncomfortable with any aspect of tying two PSUs together, it is always best to seek guidance from a qualified professional. They have the experience and expertise to safely perform the installation and address any potential issues.
By following these safety precautions, you can minimize the risks associated with tying two PSUs together and ensure the safety of both yourself and your computer system.
In the next section, we will discuss testing and troubleshooting steps to ensure that the tied PSUs are functioning correctly and efficiently.
Testing and Troubleshooting
After successfully tying two PSUs together, it is essential to test the setup to ensure that both PSUs are functioning correctly and that your system is receiving the necessary power. Additionally, troubleshooting any issues that may arise during or after the installation process is crucial for optimal performance. Here’s a step-by-step guide to testing and troubleshooting:
1. Power On:
– Connect the power cables to both PSUs and plug them into the wall outlet.
– Switch on both PSUs and power on your computer.
2. Verify Power Delivery:
– Confirm that all components are receiving power by checking if the motherboard, CPU, GPU, and other peripherals are operating correctly.
– Monitor system temperatures to ensure effective cooling and prevent overheating.
3. Stability Testing:
– Run stress tests or demanding applications to evaluate the stability of the system under heavy loads.
– Monitor system measurements such as temperatures, voltages, and fan speeds using software utilities or BIOS monitoring features.
4. Check for Abnormalities:
– Watch out for abnormal noises, such as unusual fan sounds or buzzing, which may indicate a problem with the PSUs or cooling system.
– Look for any visual abnormalities, such as unusual flickering of lights or smoke emanating from the PSUs. If you notice anything concerning, immediately power off the system and investigate the issue.
5. Troubleshooting:
– If you encounter any issues, such as system instability, crashes, or unexpected shutdowns, evaluate the possible causes.
– Check that all cables and connectors are securely connected and haven’t come loose during the installation process.
– Ensure that the power draw from your components does not exceed the combined wattage capacity of the tied PSUs.
– Test each PSU individually to determine if one of them is faulty.
– Refer to the user manuals of the PSUs and any other components for troubleshooting guidance specific to your setup.
6. Seek Professional Help:
– If you are unable to troubleshoot the issue on your own or are uncertain about the cause of the problem, seek assistance from a qualified professional. They can help diagnose and resolve any complicated issues you may encounter.
By performing rigorous testing and addressing any issues through troubleshooting, you can ensure that the tied PSUs are functioning correctly and delivering the necessary power to your system components.
In the next section, we will wrap up the article by providing a summary of the key points discussed and reiterating the importance of following safety precautions throughout the process.
Conclusion
Tying two PSUs together can be a practical solution for meeting high power demands in scenarios such as high-end gaming, content creation, mining rigs, or server systems. However, it is crucial to approach this process with caution and adhere to the necessary precautions to ensure a safe and successful integration.
In this article, we discussed the importance of understanding what a PSU is and why you might want to tie two PSUs together. We explored the factors to consider before attempting this process, including compatibility, power requirements, and linking methods. We also provided a step-by-step guide on how to tie two PSUs together and discussed the importance of managing cables and reassembling the computer case properly.
Throughout the process, we emphasized the significance of following safety precautions, such as powering off and grounding yourself, to prevent accidents or damage. We also highlighted the importance of testing the tied PSUs and troubleshooting any issues that may arise.
Remember, tying two PSUs together should only be attempted by experienced individuals who are comfortable working with computer hardware and have a good understanding of electrical safety. If at any point you feel unsure or encounter difficulties, it is always recommended to seek assistance from a qualified professional.
By following the guidelines provided in this article and prioritizing safety, you can successfully tie two PSUs together to meet high power demands and ensure the efficient and reliable performance of your computer system.
Thank you for reading this ultimate guide on how to tie two PSUs together. We hope it has provided you with valuable insights and equipped you with the knowledge necessary for a successful integration. Happy computing!