Introduction
Welcome to our guide on how to connect a server PSU to a motherboard. If you are planning to build your own server or upgrade an existing one, understanding how to properly connect the power supply unit (PSU) to the motherboard is crucial. A server PSU provides the necessary power to all the components in your server, ensuring smooth and stable operation.
A server PSU may differ from a regular desktop PSU in terms of power capacity and connector types. It is specifically designed to handle the demands of server-grade hardware, providing a higher wattage, more reliable power delivery, and additional safety features.
Connecting a server PSU to the motherboard is essential for enabling the hardware components to function together seamlessly. The PSU supplies power to the motherboard, which then distributes it to other components such as CPUs, RAM modules, and hard drives. It is crucial to ensure a proper connection to avoid any power-related issues that could lead to system instability or damage to the hardware.
In this guide, we will walk you through the steps required to connect a server PSU to a motherboard. Whether you are working with a new server build or upgrading an existing system, following these steps will help you establish a reliable and efficient power connection.
To begin, it’s essential to verify the compatibility between your server PSU and the motherboard. Each PSU and motherboard combination may have different connector types and configurations. By ensuring compatibility, you can avoid any compatibility issues and potentially damaging your hardware.
So let’s dive in and learn how to connect your server PSU to the motherboard, ensuring a stable power connection and optimal performance for your server.
What is a Server PSU?
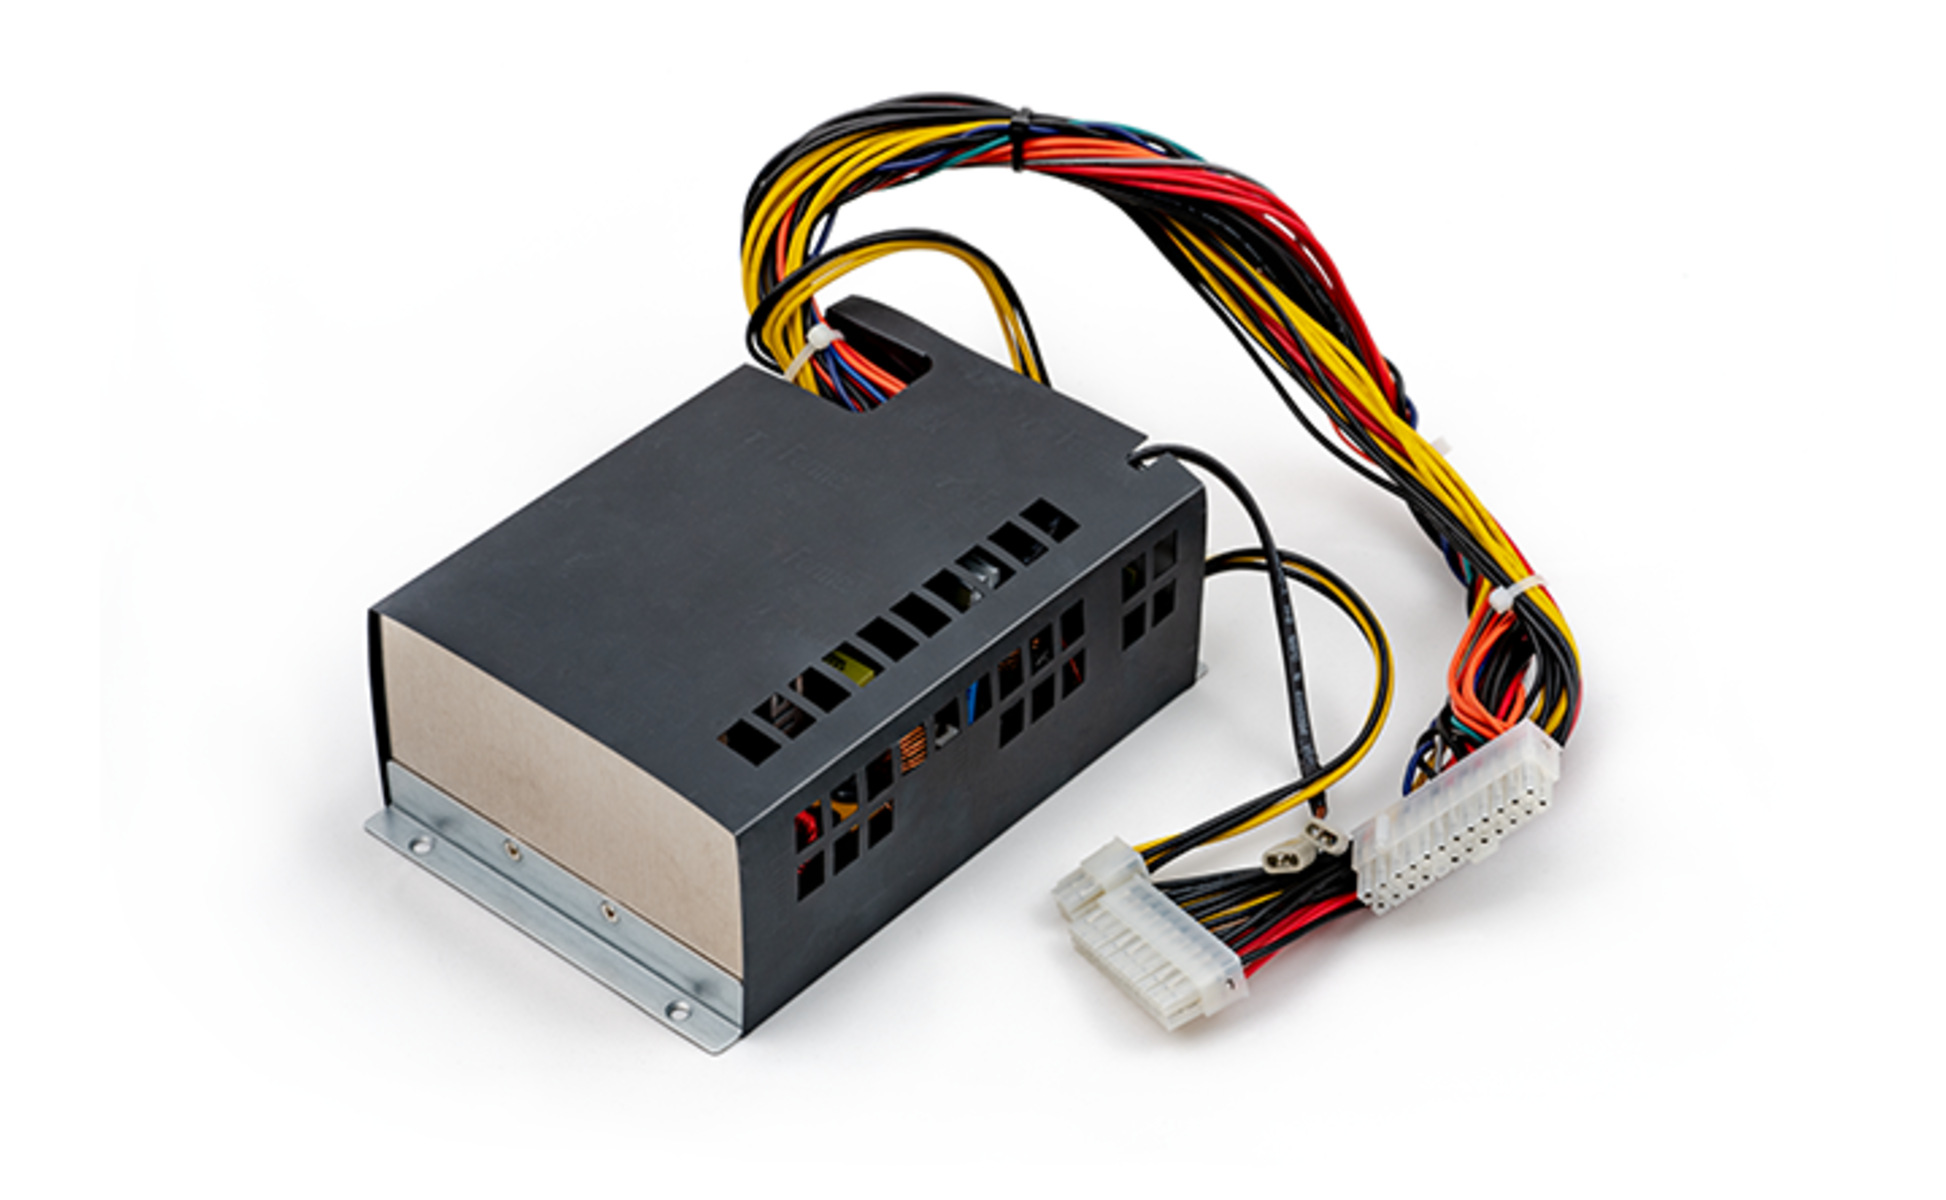
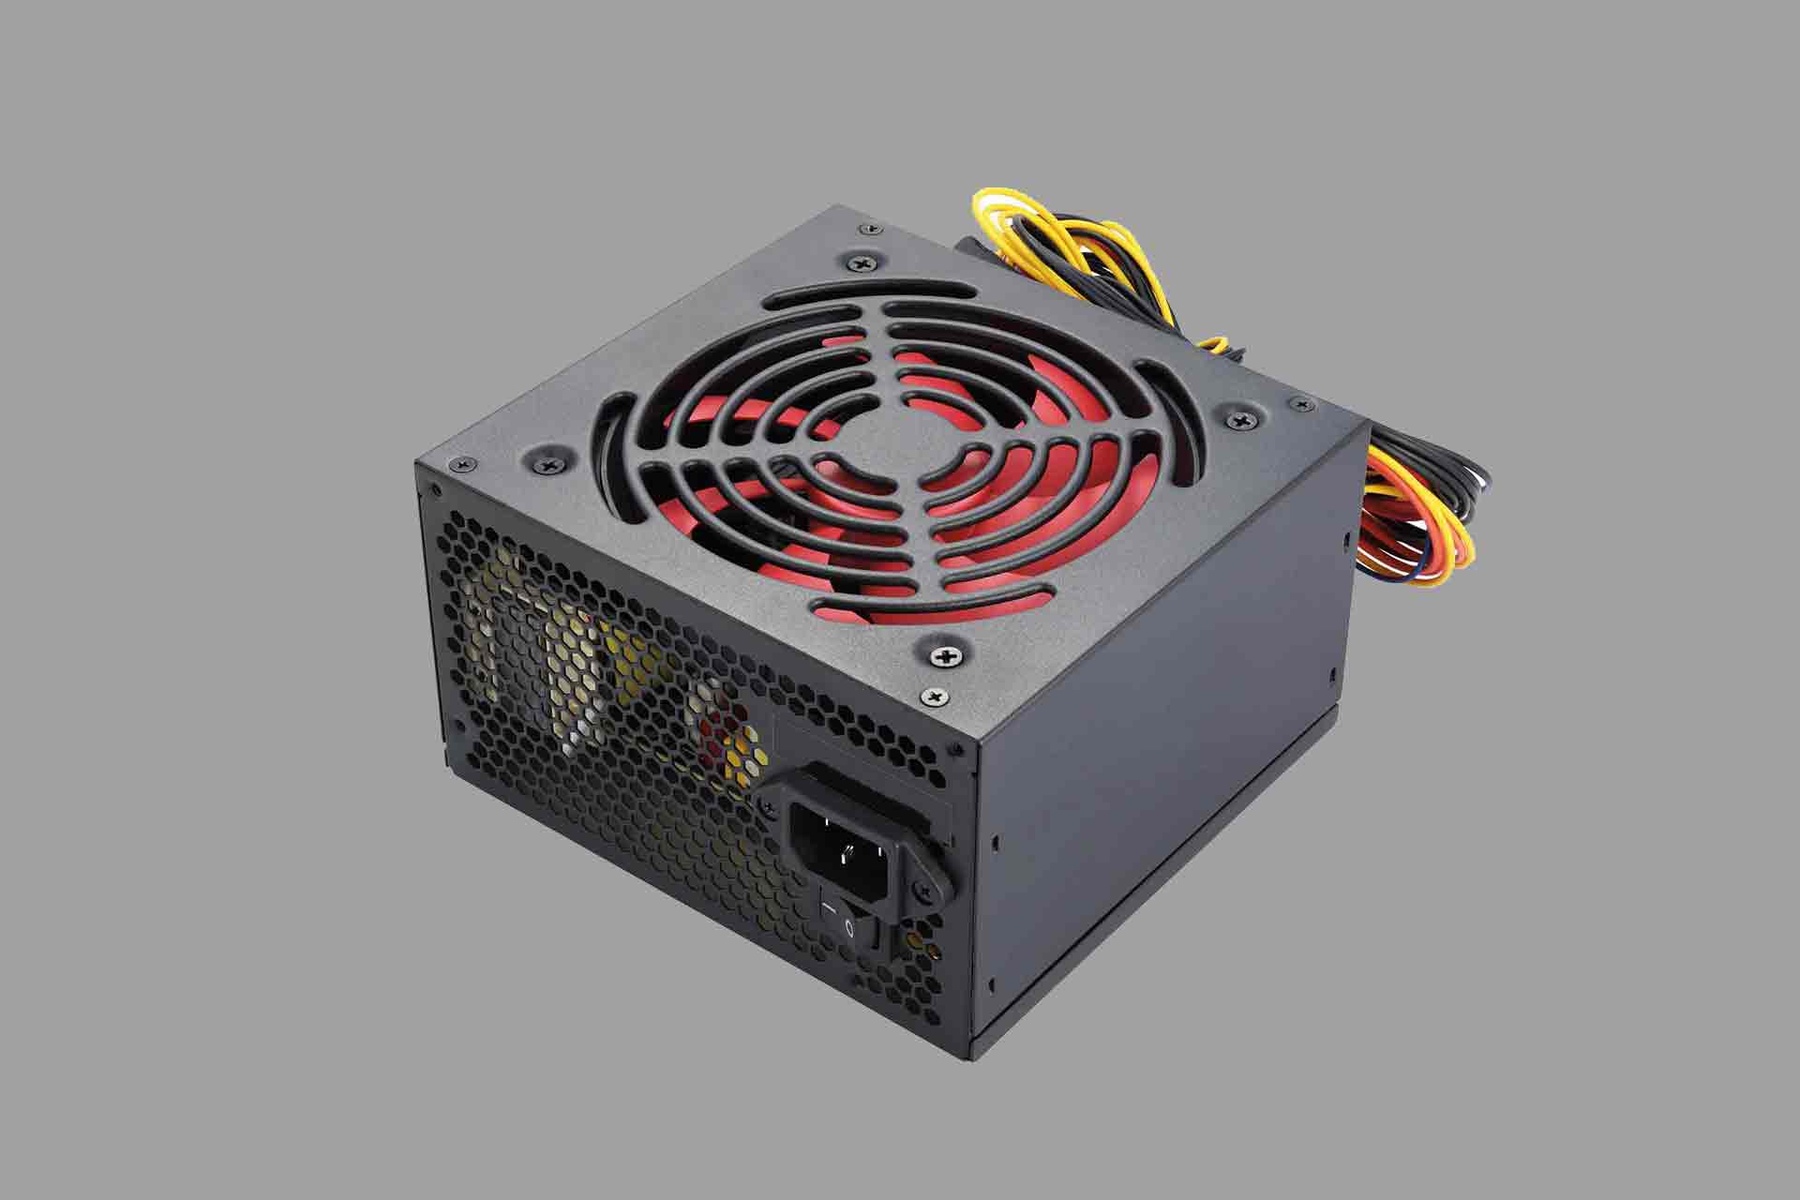
A server PSU, or power supply unit, is a crucial component in any server system. It is responsible for converting the AC (alternating current) power from an electrical outlet into the DC (direct current) power required by the server’s internal components. The PSU delivers power to various hardware components, such as the motherboard, CPUs, RAM, hard drives, and other peripherals.
Compared to a regular desktop PSU, a server PSU has several distinguishing features. Firstly, it typically provides a higher power output, as servers require more power to run multiple demanding components simultaneously. They often come with higher wattage ratings, such as 1000W, 1500W, or even higher, to meet the power requirements of server-grade hardware.
Additionally, server PSUs often come with redundant power options. Redundant PSU configurations involve having multiple PSUs in a server system, allowing for continued operation even if one PSU fails. This redundancy is critical for ensuring uninterrupted uptime and data reliability in server environments.
Server PSUs also incorporate advanced safety features and monitoring capabilities. These include overvoltage protection, undervoltage protection, overcurrent protection, and overtemperature protection to safeguard the server hardware from potential power-related issues.
In terms of physical connectors, server PSUs may utilize different types to accommodate the specific needs of server motherboards. Common connector types include 24-pin ATX connectors, 8-pin CPU connectors, and various SATA or Molex connectors for connecting to storage drives and peripherals.
Overall, a server PSU is designed to provide stable, efficient, and reliable power delivery to all the components within a server system. By utilizing a dedicated server PSU, you can ensure that your server hardware receives the necessary power to operate optimally, minimizing the risk of power-related issues and ensuring maximum uptime.
Why Connect Server PSU to Motherboard?
Connecting a server PSU to the motherboard is an essential step in building or upgrading a server system. Here are several reasons why establishing a proper connection between the PSU and motherboard is crucial:
Power Distribution: The motherboard acts as a central hub for all the components in a server system. By connecting the server PSU to the motherboard, you enable the distribution of power from the PSU to the various hardware components. The motherboard receives power from the PSU and ensures that each component gets the appropriate amount of power to operate effectively.
Compatibility and Functionality: Different server motherboards and PSUs may have specific connector types or configurations. By connecting a compatible PSU to the motherboard, you ensure that all the power connectors fit properly and function as intended. This compatibility is crucial for the seamless operation of the server system without any power-related issues or component failures.
Stability and Performance: A proper connection between the server PSU and motherboard is vital for maintaining system stability and optimal performance. The motherboard relies on a steady and reliable power supply to deliver power to other components, such as CPUs, RAM, and storage devices. A solid power connection helps prevent voltage drops, power surges, and other power-related fluctuations that can lead to system instability or component failures.
Safety: Establishing a secure connection between the server PSU and motherboard ensures the safety of both the hardware and the user. The power connectors are designed to fit securely and prevent accidental disconnections that could disrupt power delivery and damage the components. Additionally, server PSUs often incorporate safety features, including surge protection and overcurrent protection, to prevent hardware damage due to power fluctuations.
Efficiency and Energy Savings: A proper connection between the server PSU and motherboard promotes energy efficiency. Server PSUs are often designed with high-efficiency ratings, enabling them to convert AC power to DC power with minimal energy wastage. By ensuring a solid power connection, you can maximize energy efficiency and reduce the overall power consumption of your server system, leading to potential cost savings in the long run.
By understanding the importance of connecting the server PSU to the motherboard, you can ensure a reliable power supply to your server system, supporting its stability, performance, and longevity.
Step 1: Check the Compatibility
Before connecting a server PSU to a motherboard, it is crucial to check the compatibility between the two. This step ensures that the PSU’s power connectors align with the corresponding motherboard connectors and that the PSU can provide adequate power for the system’s components.
Here’s how you can check the compatibility:
- Read the motherboard manual: The motherboard manual provides detailed information about the power connector types and configurations that the motherboard supports. Look for the specifications section or the diagram illustrating the power connectors.
- Check the PSU documentation: Similarly, refer to the documentation or specifications of the server PSU. Look for information about the compatible motherboard connector types. The PSU documentation should mention the types of connectors the PSU provides, such as 20-pin, 24-pin, or 8-pin connectors.
- Compare the connectors: Once you have the information from both the motherboard and PSU documentation, compare the connector types. Ensure that the PSU’s power connectors match the motherboard’s power connector slots. The most common power connectors on a motherboard include the 24-pin main power connector and the 8-pin CPU power connector.
- Consider power requirements: It is also essential to consider the power requirements of your system’s components. Ensure that the server PSU can deliver sufficient power to support all the hardware components in your system, including CPUs, graphics cards, and storage drives. Check the PSU’s wattage rating and compare it to the power requirements of your system’s components.
- Research compatibility: In case you are unsure about the compatibility between your server PSU and motherboard, you can research online or consult the manufacturer’s support forums. Other users may have encountered similar compatibility issues and can provide valuable insights or solutions.
By thoroughly checking the compatibility between your server PSU and motherboard, you can avoid potential issues that may arise from mismatched connectors or insufficient power delivery. This step ensures a smooth and successful connection process, setting the foundation for a stable and efficient server system.
Step 2: Gather the Required Materials
Before connecting the server PSU to the motherboard, it’s important to gather all the necessary materials. Having everything prepared ahead of time will make the connection process smoother and more efficient.
Here are the materials you will need:
- Server PSU: Ensure you have a server-grade power supply unit (PSU) that is compatible with your motherboard. The PSU should meet the power requirements of your system and have the necessary power connectors.
- Motherboard: Make sure you have the motherboard that you plan to connect the server PSU to. Ensure that it is compatible with the PSU and that the power connectors match.
- Power Cables: Verify that you have all the required power cables for connecting the server PSU to the motherboard. These may include a 24-pin main power cable and an 8-pin CPU power cable. Depending on your system’s configuration, you may also need additional power cables for other components.
- Screwdriver: Have a screwdriver on hand to secure and tighten any necessary screws during the connection process.
- Anti-static Wrist Strap: It is highly recommended to use an anti-static wrist strap to protect your hardware from electrostatic discharge (ESD) during the connection process. This helps prevent damage to sensitive components.
Additionally, it’s a good idea to have the following items for a well-prepared setup:
- Work Surface: Find a clean, well-lit, and static-free work surface to assemble your server system. A large table or desk with ample space will make the process more comfortable.
- User Manuals: Keep the user manuals for both the server PSU and the motherboard handy. These manuals can provide specific instructions and diagrams for the connection process.
- Extra Screws: Have some extra screws available in case you need them for securing the PSU to the case or any other hardware components.
- Cable Management Supplies: Consider having cable ties or Velcro straps to help with cable management once the connection is complete. This will help keep the cables organized and improve airflow within the server system.
Gathering all the necessary materials before starting the connection process will save you time and ensure a smooth installation. It will also help prevent any last-minute delays or frustrations that could arise from missing components or tools.
Step 3: Preparing the Server PSU
Before connecting the server PSU to the motherboard, it is essential to prepare the PSU for installation. This step ensures that the PSU is ready for the connection process and helps facilitate a smooth and secure connection.
Here’s how you can prepare the server PSU:
- Safety First: Before working with any hardware components, ensure that the server PSU is disconnected from the power source. Unplug the PSU from the wall outlet or switch off the power supply.
- Clean the PSU: Inspect the server PSU for any dust or debris accumulation. Use a can of compressed air or a soft brush to gently remove any dirt or particles that may have settled on the PSU. A clean PSU will help prevent any airflow blockages and maintain optimal cooling efficiency.
- Position the PSU: Depending on your server case, decide on the ideal position for the PSU. Most cases have a designated PSU mounting area at the top or bottom. Align the PSU accordingly, ensuring that the fan faces the appropriate direction for optimal cooling airflow.
- Secure the PSU: In the designated PSU mounting area of your server case, use the appropriate screws to secure the PSU in place. Make sure it is tightly fastened to prevent any movement or vibrations that could cause connectivity issues later on.
- Connect Modular Cables (if applicable): If you are using a modular PSU, connect the required modular cables to the PSU based on the components you will be powering. Refer to the PSU manual for guidance on which connectors to use and how to attach them securely.
- Cable Management: Take a moment to organize the cables coming out of the PSU. Use cable ties or Velcro straps to secure and bundle the cables neatly, minimizing clutter and improving airflow within the server case.
- Visual Check: Once the server PSU is properly prepared and secured, visually inspect the connections, ensuring that all cables are firmly attached and free from any obstructions or damage.
By following these preparation steps, you ensure that the server PSU is in optimal condition for the connection process. This will set the stage for a successful and reliable connection between the PSU and the motherboard.
Step 4: Connecting Server PSU to Motherboard
Connecting the server PSU to the motherboard is a critical step in the server build or upgrade process. This step ensures that the power supply unit delivers the necessary power to the motherboard, allowing it to distribute power to other components effectively. Here’s how you can connect the server PSU to the motherboard:
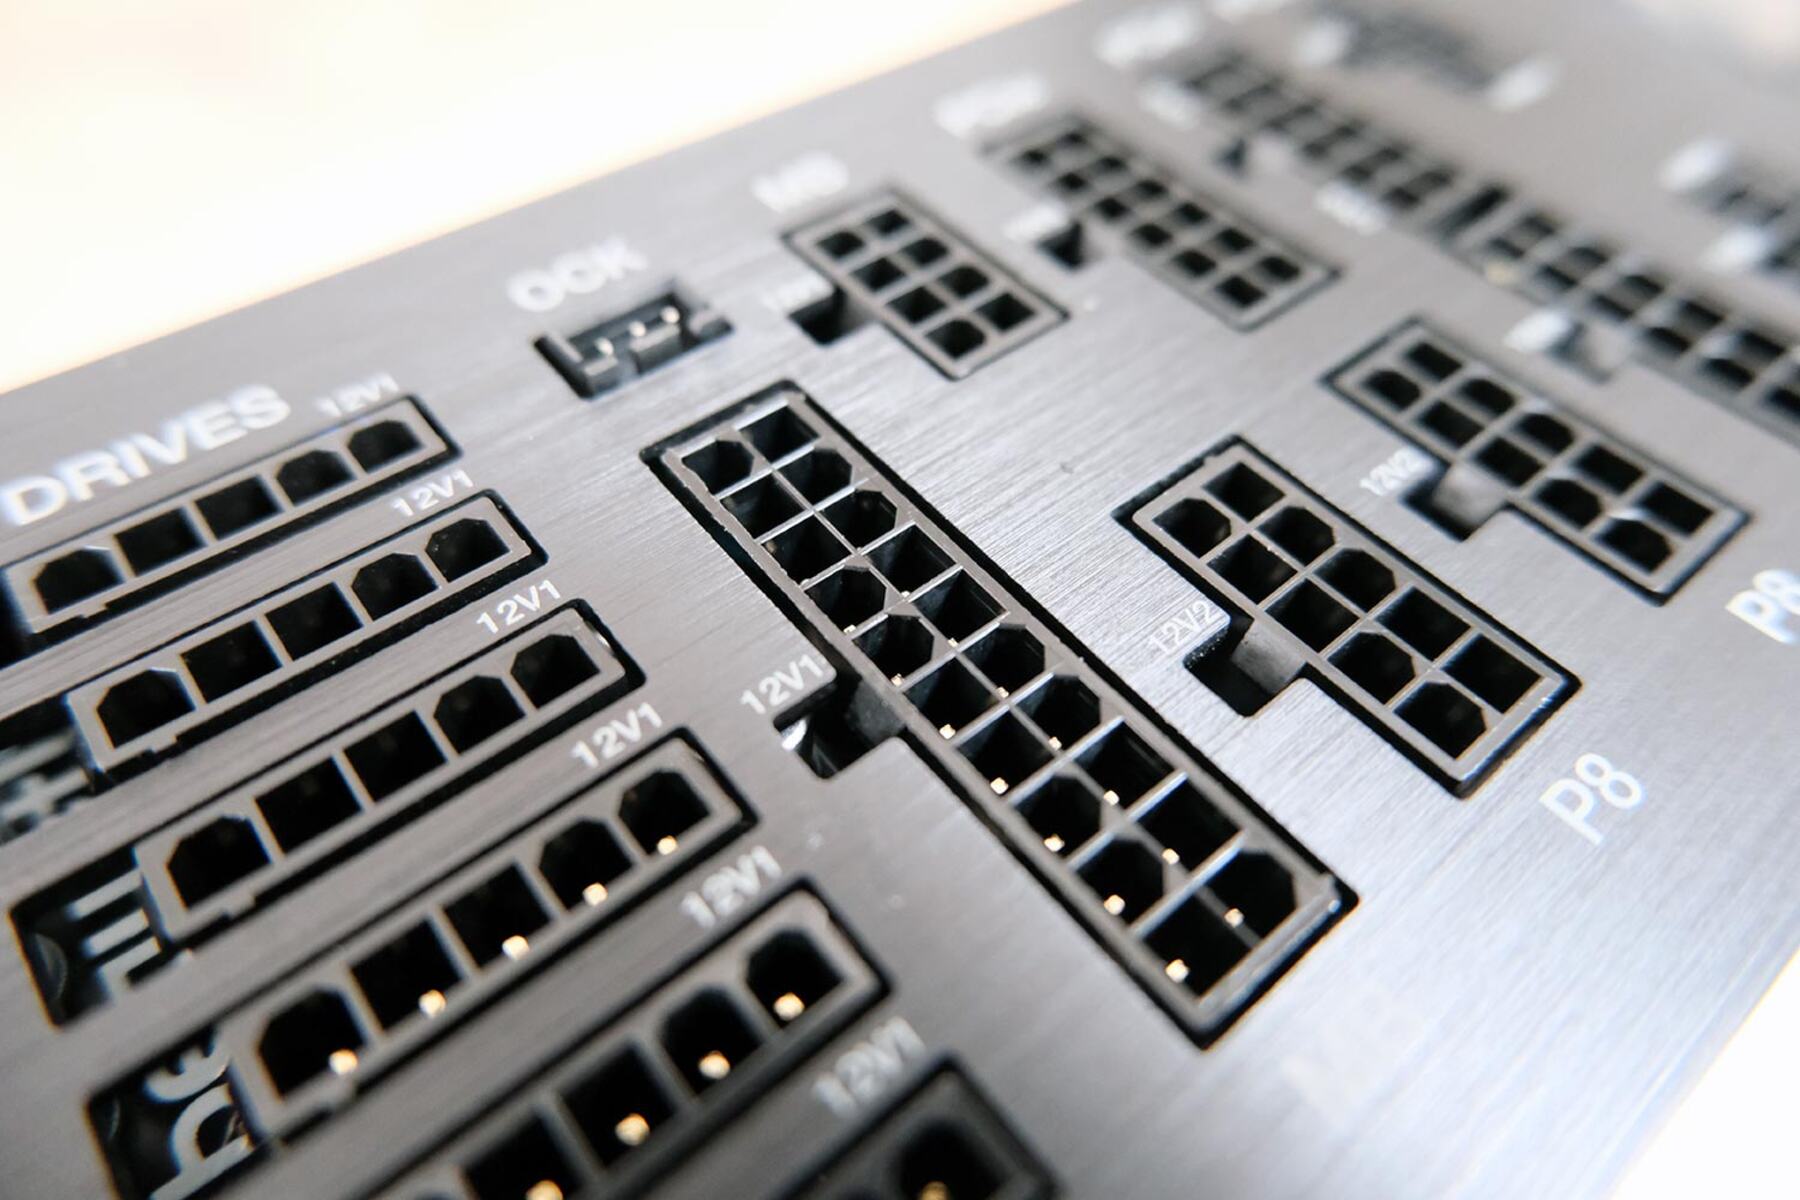
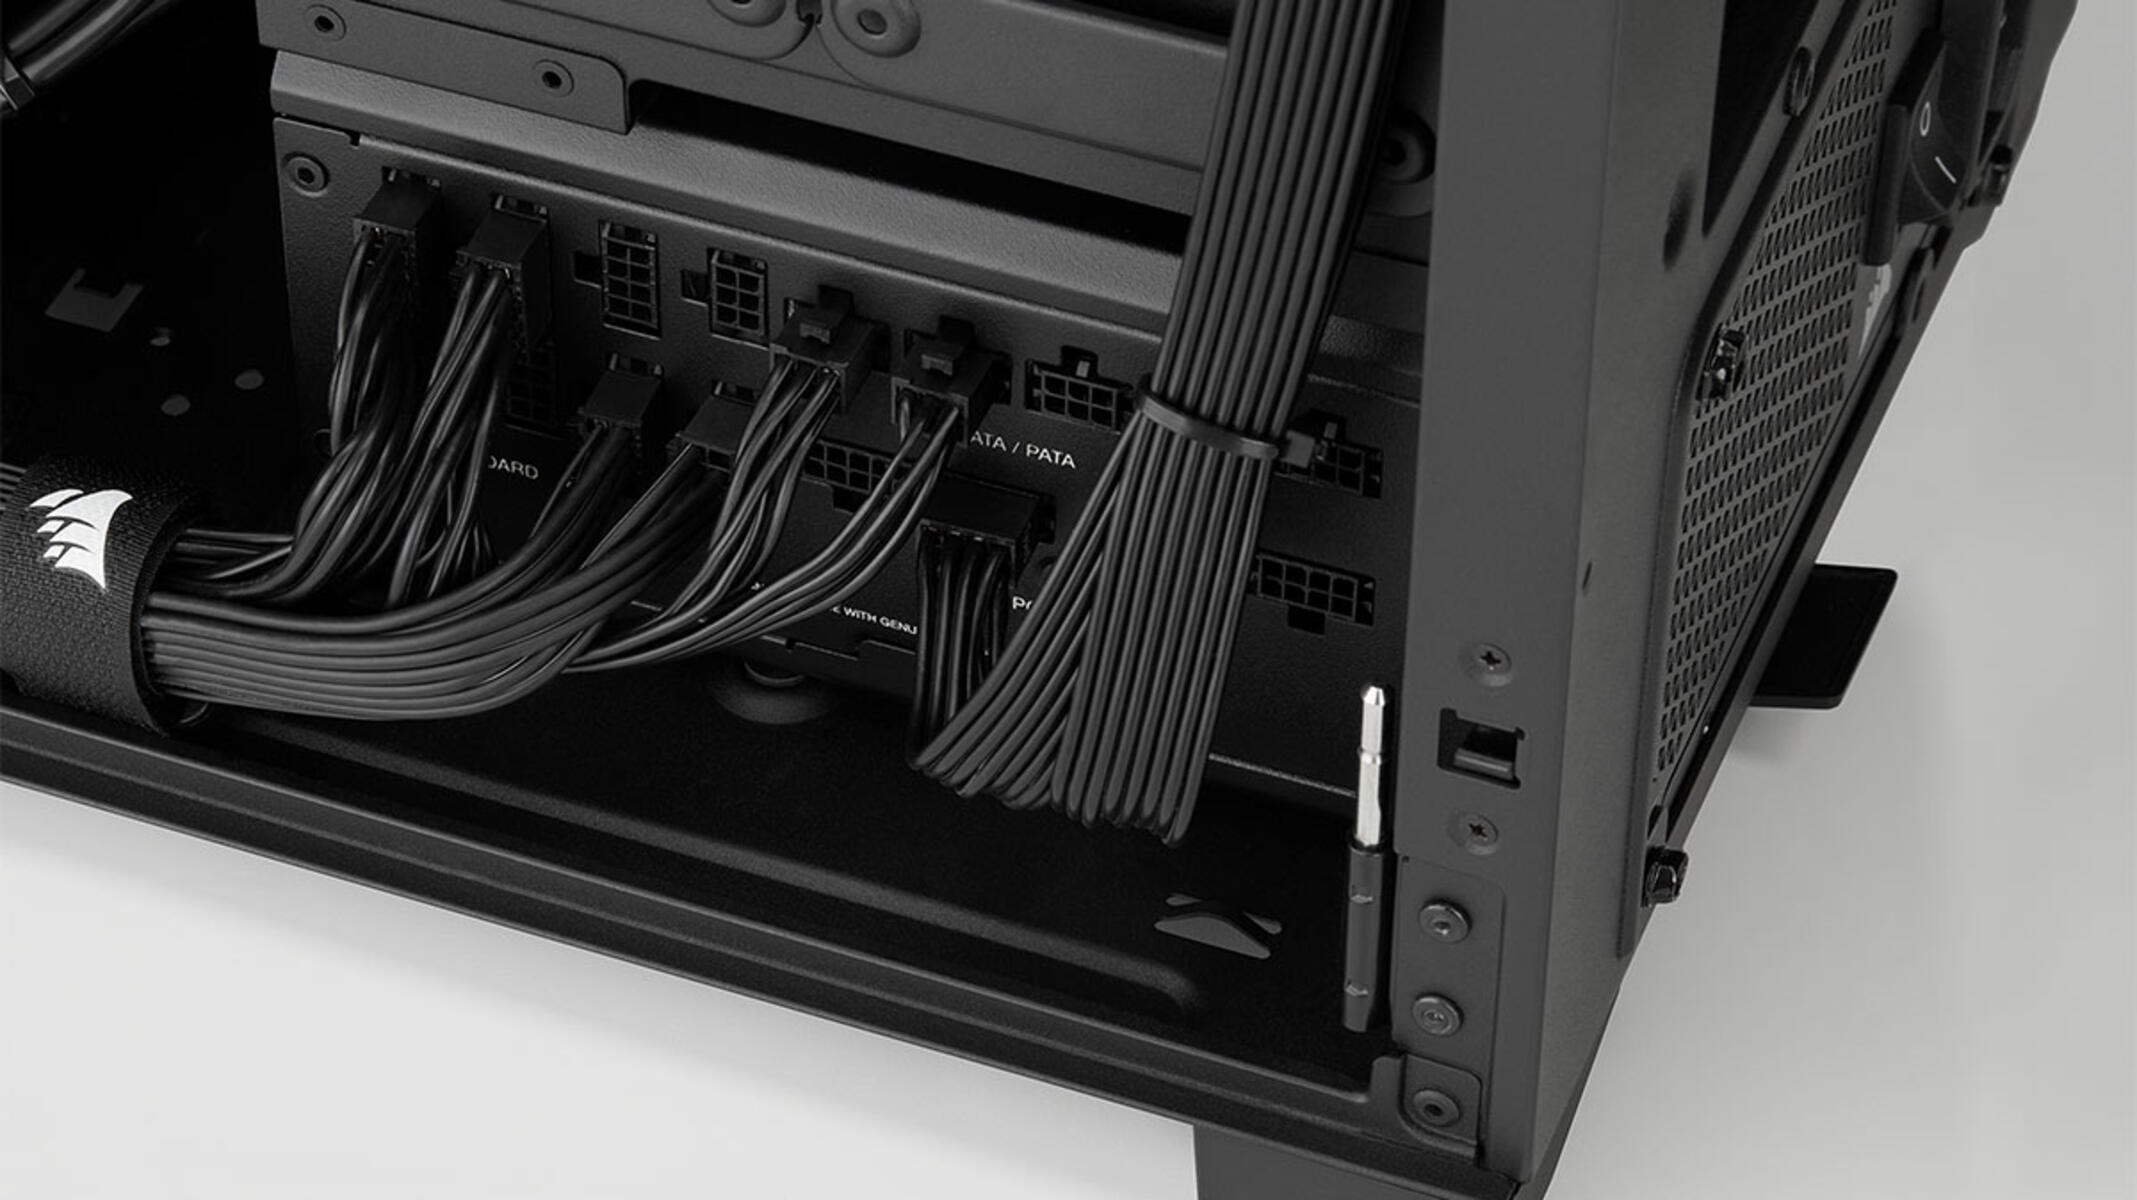
- Locate the Power Connectors: Identify the power connectors on both the server PSU and the motherboard. The most common connectors include the 24-pin main power connector and the 8-pin or 4-pin CPU power connector.
- Align the Connectors: Align the corresponding connectors on the PSU and the motherboard. Ensure that the notches and pins match up and that the connectors fit together correctly. Take care not to force the connectors as they should fit smoothly without excessive pressure.
- Secure the Connections: Once the connectors are aligned, firmly push them together until they lock into place. You may hear a click or feel the connectors snap into position. This ensures a secure and reliable power connection.
- Double-Check the Connections: After connecting the power cables, visually inspect the connections to ensure they are properly seated and fully inserted. Check that the cables are not loose or partially disconnected.
- Connect Other Power Cables (if applicable): Depending on your system’s configuration, you may need to connect additional power cables to other components such as graphics cards, storage drives, or PCIe devices. Refer to the documentation of your specific hardware for guidance on connecting these cables.
- Secure the Cables: Organize and manage the power cables to improve cable management within the server case. Use cable ties or Velcro straps to secure the cables, keeping them neat and tidy.
Once you have connected the server PSU to the motherboard and any other necessary components, you have established the vital power connection within your server system. This step brings your server one step closer to being fully operational.
Step 5: Testing the Connection
Once you have connected the server PSU to the motherboard, it is important to test the connection to ensure that power is being delivered correctly and all components are functioning as expected. Here’s how you can test the connection:
- Reconnect the Power: Plug in the server PSU to the power source or switch on the power supply if previously turned off. Ensure that the power cable is securely connected to the PSU and the wall outlet.
- Power On the System: Turn on the power switch on the back of the server PSU. This will supply power to the motherboard and other connected components.
- Observe LED Lights: Check if the motherboard has any LED lights or indicator lights that signal power. It can be a power LED or any other indicator that shows the system is receiving power.
- Listen for Fans and Beeps: Pay attention to any fan noises or beeping sounds that indicate proper system operation. The CPU fan, case fans, and graphics card fans should start spinning, and the system may emit a single beep to indicate successful boot-up.
- Monitor Display: Connect a monitor to the graphics card or onboard graphics if available. Power on the monitor and check if it displays the appropriate output. If the monitor remains blank, ensure that the display cable is securely connected.
- Check System BIOS: If the system powers on but does not display anything on the monitor, access the system BIOS by pressing the appropriate key (usually Del, F2, or F10) during the startup process. Verify that the PSU and motherboard are recognized in the BIOS settings.
- Run Stability Tests: To further test the connection, consider running stability tests or stress tests to ensure that all hardware components function correctly under load. This can include CPU stress tests, memory tests, or running benchmarking software.
If all the above steps are successful, it indicates that the connection between the server PSU and the motherboard is functioning correctly. In the event of any issues, double-check the connections, consult the motherboard and PSU manuals, and ensure compatibility between the components.
Testing the connection is crucial as it verifies that power is being delivered properly and all hardware components are operational. This step ensures that your server system is ready for use and can handle the demands of your desired tasks or applications.
Conclusion
Connecting a server PSU to a motherboard is a vital step in building or upgrading a server system. By establishing a proper power connection, you ensure that all components receive the necessary power to operate effectively and efficiently.
In this guide, we covered the step-by-step process of connecting a server PSU to a motherboard. We emphasized the importance of checking compatibility between the PSU and motherboard, gathering the required materials, preparing the PSU, and connecting the power cables securely. We also discussed the significance of testing the connection to ensure proper power delivery and system functionality.
Remember, it is crucial to consider the power requirements of your system and ensure compatibility between the PSU and motherboard. Take care when aligning and connecting the power cables, and always double-check for secure and firm connections.
Properly connecting the server PSU to the motherboard sets the foundation for a stable and reliable server system. It ensures the smooth distribution of power to all hardware components, promoting system stability, optimal performance, and longevity.
By following the steps outlined in this guide and maintaining attention to detail, you can confidently connect a server PSU to a motherboard, helping you build or upgrade a powerful and efficient server system to meet your specific needs.