Introduction:
When it comes to upgrading your computer’s graphics card, purchasing a used GPU can be a cost-effective option. However, before making a purchase, it is essential to thoroughly test the used GPU to ensure that it is in good working condition. This will help you avoid any potential disappointments or issues down the line.
In this article, we will guide you through the process of testing a used GPU. We will cover the physical condition examination, compatibility check, stress testing, temperature monitoring, graphics performance evaluation, artifact detection, VRAM performance testing, and verification of the GPU’s specifications. By following these steps, you can make an informed decision and potentially save money by purchasing a reliable used GPU.
Please note that the testing methods outlined here are primarily intended for desktop GPUs. The process may vary slightly for laptop GPUs due to their compact form factor and limited accessibility.
So, if you’re ready to jump in and learn how to test a used GPU effectively, let’s dive into the details and ensure that you make a wise purchase!
Checking the Physical Condition:
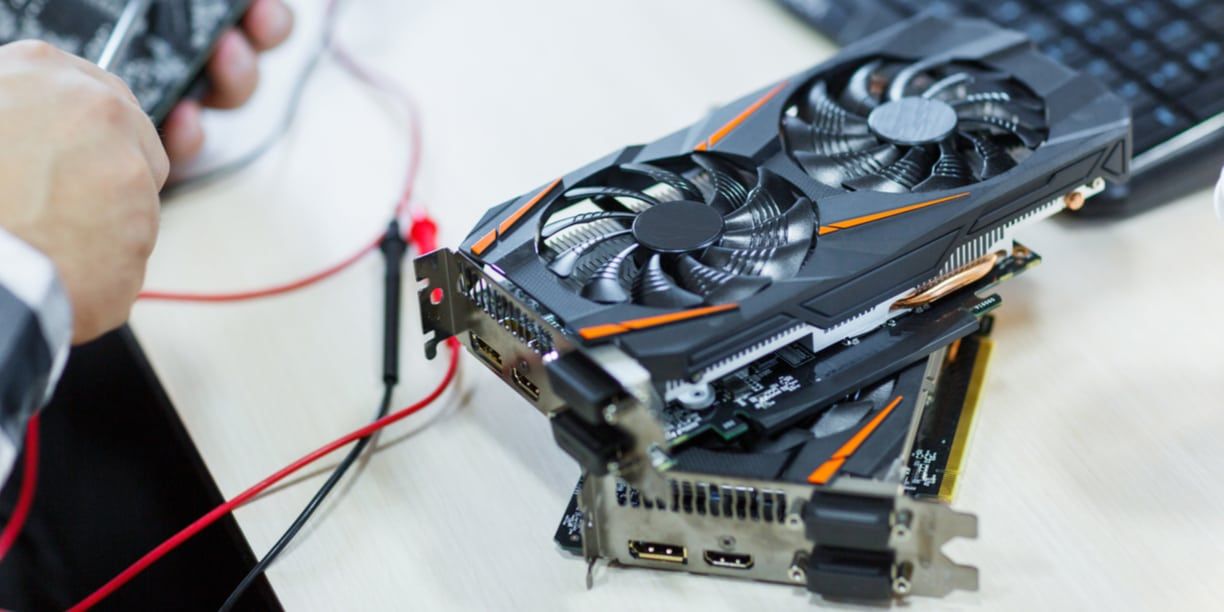
Before delving into the technical aspects of testing a used GPU, it’s important to start by inspecting its physical condition. This step will help you determine if the GPU has been well-maintained and has not suffered any visible damage or wear.
Here are a few key points to consider when examining the physical condition of a used GPU:
- External damage: Carefully look for any visible signs of damage such as cracks, dents, or bent connectors. Additionally, check if all the screws are in place and if the cooling fan is intact.
- Dust accumulation: Excessive dust build-up can impede the GPU’s cooling efficiency and potentially cause overheating issues. Inspect the GPU for dust accumulation in the heatsink and fan area. If there is a substantial amount of dust, it may indicate that the previous owner did not properly clean and maintain the GPU.
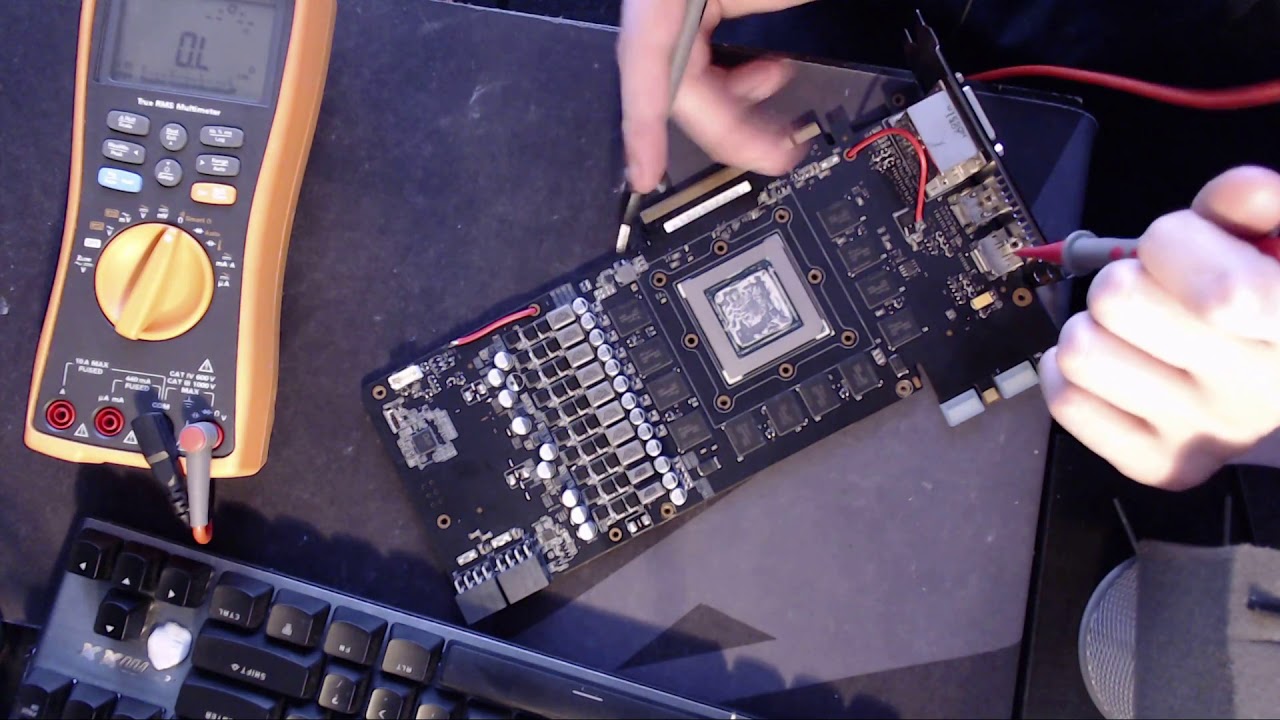
- Connector condition: Check the GPU’s connectors, such as HDMI, DisplayPort, and power connectors, for any signs of damage or bent pins. Ensure that the connectors are in good condition and not physically compromised.
- Thermal paste: Thermal paste is a crucial component that helps facilitate heat transfer between the GPU and the heatsink. Inspect the GPU’s thermal paste to check for any signs of dryness or deterioration. If the thermal paste appears hardened or crusty, it may need to be replaced.
By thoroughly examining the physical condition of the used GPU, you can get an initial idea of its overall health and whether it has been well cared for. While minor cosmetic imperfections may not be a cause for concern, it’s essential to be cautious if you notice significant damage or signs of neglect.
Once you’ve assessed the physical condition of the used GPU, it’s time to move on to the next step: checking its compatibility with your system.
Compatibility with Your System:
When purchasing a used GPU, it’s essential to ensure that it is compatible with your system. Compatibility issues can arise if the GPU’s interface, power requirements, or physical dimensions do not match your computer’s specifications.
Here’s what you need to consider when checking the compatibility of a used GPU with your system:
- Interface: Determine whether the used GPU’s interface, such as PCI Express (PCIe), matches the available expansion slot on your motherboard. Common PCIe versions include PCIe 3.0 and PCIe 4.0. Confirm the version supported by your motherboard and ensure that the used GPU is compatible with it.
- Power requirements: Check the power supply unit (PSU) in your system and its capacity. Compare it with the power requirements of the used GPU. Ensure that your PSU has enough wattage and the necessary power connectors (such as 6-pin or 8-pin PCIe connectors) to support the GPU.
- Physical dimensions: Measure the available space in your computer’s chassis to determine if the used GPU will fit properly. Check the length of the GPU, especially if your system has size limitations, such as small form factor (SFF) cases.
- Operating system compatibility: Verify that the used GPU is compatible with your operating system. Some GPUs may require specific drivers or have limitations on certain operating systems, so ensure that it will work seamlessly with your system.
By carefully assessing the compatibility of the used GPU with your system, you can avoid potential issues and ensure a smooth installation process. It’s important to do thorough research and cross-check the specifications of both your system and the used GPU to avoid incompatibility pitfalls.
Once you have confirmed the compatibility of the used GPU with your system, you can proceed to the next step: stress testing the GPU to evaluate its performance and stability.
Stress Testing the GPU:
Stress testing is a crucial step in evaluating the performance and stability of a used GPU. By subjecting the GPU to intensive tasks, you can uncover any potential issues such as overheating, artifacts, or instability.
Here’s how to stress test a used GPU:
- Software selection: Choose a reputable stress testing software that is specifically designed for GPUs, such as FurMark or MSI Kombustor. These tools are capable of pushing the GPU to its limits and measuring its performance.
- Temperature monitoring: Install and run a temperature monitoring software, such as HWMonitor or GPU-Z, alongside the stress testing software. This will allow you to keep an eye on the temperature levels during the test.
- Stress test settings: Configure the stress testing software to run a demanding graphics workload for an extended period. This will put the GPU under maximum load and stress its components.
- Observe performance and temperature: Monitor the GPU’s temperature and performance during the stress test. Ensure that the temperatures remain within safe limits and that the GPU maintains stable and consistent performance without any crashes or glitches.
- Test duration: Run the stress test for at least 15-30 minutes to simulate a prolonged gaming or graphics-intensive session. This will help identify any issues that may arise during sustained GPU usage.
During the stress test, pay attention to any abnormal behavior such as sudden drops in performance, crashes, or overheating. If the GPU exhibits any of these issues, it may indicate underlying problems that could affect its long-term reliability.
It’s important to note that stress testing can generate high temperatures, so ensure that your system has proper cooling and airflow to dissipate the heat efficiently. If the GPU’s temperature exceeds safe limits or the system becomes unstable, consider addressing the cooling system or reevaluating the purchase decision to avoid potential issues.
Now that we have stress tested the used GPU, let’s move on to the next step: monitoring the GPU’s temperature during regular usage.
Monitoring Temperatures:
Monitoring the temperatures of a used GPU is essential to ensure that it operates within safe limits and doesn’t overheat during regular usage. Overheating can lead to performance issues, stability problems, and even hardware damage. By keeping an eye on the GPU’s temperatures, you can take necessary precautions to prevent overheating.
Here’s how to monitor the temperatures of a used GPU:
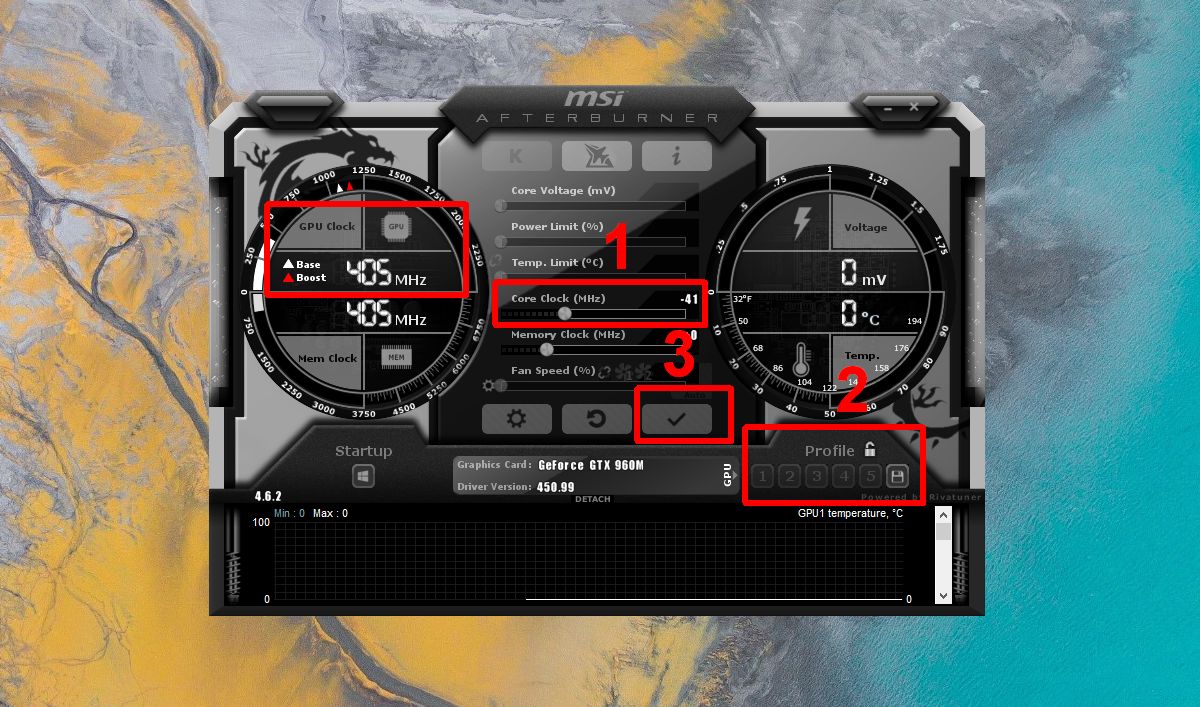
- Software selection: Install a reliable temperature monitoring software, such as HWMonitor, GPU-Z, or MSI Afterburner. These programs provide real-time temperature readings for your GPU.
- Idle temperature: Start monitoring the temperature when the system is idle and no intensive tasks are running. This will provide a baseline for the GPU’s temperature when it’s not under load.
- Load temperature: Launch a demanding application or game that utilizes the GPU’s resources. Monitor the temperature while the GPU is under load to see how it performs in terms of temperature management.
- Safe temperature range: Research and identify the safe temperature range for your specific GPU model. Generally, temperatures below 80-85 degrees Celsius are considered safe, but it’s important to consult the manufacturer’s guidelines for your specific GPU.
- Temperature anomalies: Keep an eye out for any temperature spikes or unusual fluctuations while the GPU is under load. Excessive temperature increases or temperatures consistently exceeding safe limits may indicate cooling issues or GPU problems.
Continuous monitoring of the GPU’s temperatures during regular usage will help you identify any potential overheating issues that may not have surfaced during the stress test. If you notice consistently high temperatures or temperature spikes that are outside the safe range, you may need to take steps to improve cooling, such as cleaning the GPU’s heatsink or adjusting fan speeds.
By closely monitoring the temperatures, you can optimize the GPU’s performance and longevity while ensuring a stable and reliable computing experience.
Next, let’s delve into the process of testing the used GPU’s graphics performance to assess its capabilities.
Testing Graphics Performance:
Assessing the graphics performance of a used GPU is crucial to determine its capabilities and ensure it meets your computing needs. By testing its performance in real-world scenarios and benchmarking it against industry standards, you can gauge its ability to handle graphics-intensive tasks.
Here are the steps to test the graphics performance of a used GPU:
- Benchmarking software: Install a reputable benchmarking software such as 3DMark or Unigine Heaven. These programs provide standardized tests to measure the GPU’s performance in various gaming and graphics scenarios.
- Test selection: Choose benchmark tests that focus on different aspects of graphics performance, such as overall 3D rendering, texture quality, shading, and physics simulations. This will provide a comprehensive evaluation of the GPU’s capabilities.
- Run the tests: Run the selected benchmark tests and observe the GPU’s performance. Take note of the achieved frame rates, average scores, and any anomalies or unexpected behavior during the tests.
- Compare results: Compare the obtained benchmark results with established standards for your GPU model or comparable GPUs of similar specifications. This will give you an idea of how well the used GPU performs relative to others in its class.
- Consider your requirements: Evaluate the obtained results in relation to your specific needs. Consider factors such as the types of applications or games you intend to use, the desired resolution and frame rate, and any future upgrades you may plan. This will help determine if the used GPU meets your performance expectations.
Testing the graphics performance of the used GPU will give you valuable insights into its capabilities and help you assess its suitability for your intended use. It’s important to remember that performance can vary based on factors such as system configuration and driver optimizations.
By conducting thorough performance testing, you can ensure that the used GPU meets your requirements before making a final purchasing decision.
Next, we will explore how to check for artifacts, which can indicate potential issues with the GPU’s display output.
Checking for Artifacts:
Artifacts are visual abnormalities that can appear on the screen when a GPU is under stress or experiencing problems. These anomalies can include flickering pixels, graphical glitches, or distorted images. Checking for artifacts is crucial to identify any potential issues with the used GPU’s display output.
Here’s how to check for artifacts on a used GPU:
- Display a solid color: Set your display to show a solid color background, such as red, green, blue, or white. This will make it easier to spot any distortions or irregularities on the screen.
- Run graphics-intensive applications: Launch demanding graphics applications, such as games or 3D rendering software, that stress the GPU. Pay close attention to the screen during these tasks to identify any artifacts or visual abnormalities.
- Monitor during different scenarios: Test the GPU’s performance across different games, resolutions, and settings. Some artifacts may only appear in specific applications or under certain graphical loads.
- Look for flickering or glitches: Observe the screen closely for any flickering pixels, graphical glitches, or distortions. These can manifest as odd colors, random lines, or sudden screen freezes. If you notice any such abnormalities, it may indicate a problem with the GPU.
- Consider artifact persistence: Note whether the artifacts remain persistent or occur intermittently. Persistent artifacts that consistently appear across different scenarios are more concerning and may indicate a hardware issue.
Checking for artifacts helps you evaluate the display output quality and integrity of the used GPU. It is important to stress test the GPU in different scenarios to get a comprehensive assessment of its performance and ensure that there are no underlying issues affecting its graphical capabilities.
Remember, minor artifacts or occasional glitches may be tolerable, but severe and consistent artifacts should raise concerns and prompt a closer examination of the GPU’s reliability.
Next, let’s move on to testing the VRAM performance of the used GPU, which plays a crucial role in handling graphics-intensive tasks.
Testing VRAM Performance:
The Video Random Access Memory (VRAM) of a GPU is responsible for storing and quickly accessing the graphical data needed for smooth and efficient performance. Testing the VRAM performance of a used GPU is important to ensure that it is functioning properly and capable of handling graphics-intensive tasks.
Here’s how to test the VRAM performance of a used GPU:
- Memory stress test: Use benchmarking tools like MemTestG80 or Video Memory Stress Test (VMT) to stress test the VRAM. These tools specifically target the VRAM and evaluate its stability and reliability under heavy usage.
- Monitor for errors: During the memory stress test, carefully monitor for any error messages or indications of VRAM-related issues. Errors such as memory corruption, freezing, or crashing can be signs of problems with the VRAM.
- Check for artifacts: As mentioned earlier, keep an eye out for any artifacts that may appear during the VRAM stress test. Artifacts can indicate VRAM issues, as improper data retrieval and storage can result in graphical glitches or abnormalities.
- Assess performance under load: Run graphics-intensive applications or games that demand high VRAM usage. Observe how the GPU performs during these tasks and ensure that it can handle the load without significant performance degradation or instability.
- Verify VRAM capacity: Confirm that the listed VRAM capacity matches the actual VRAM of the used GPU. Some sellers may falsely advertise the VRAM capacity, so it’s important to verify this to avoid potential discrepancies.
By testing the VRAM performance, you can determine if the used GPU’s memory is functioning correctly and capable of handling the graphical demands you require. Ensure that there are no significant errors or abnormalities during the VRAM stress test, as this is an indication of potential issues with the GPU’s memory subsystem.
It’s worth noting that VRAM performance is a crucial factor in handling higher resolutions, complex graphics, and future gaming or rendering advancements. Therefore, a well-performing VRAM is essential for a smooth and immersive visual experience.
Finally, let’s move on to the last step: verifying the specifications of the used GPU to ensure accuracy and authenticity.
Verifying GPU Specs:
When purchasing a used GPU, it’s important to verify its specifications to ensure that they align with the advertised details. Verifying the GPU specs helps you confirm the model, clock speeds, memory configuration, and other key features to ensure that you are getting what you paid for.
Here’s how to verify the specifications of a used GPU:
- Manufacturer’s website: Visit the official website of the GPU manufacturer and search for the specific model you are interested in. Compare the specifications listed on the website with the information provided by the seller. Look out for any discrepancies or inconsistencies.
- GPU-Z: Use GPU-Z, a popular GPU monitoring and information tool, to gather detailed specifications about the used GPU. GPU-Z provides accurate information about the GPU model, interface, clock speeds, VRAM capacity, and other relevant details.
- Serial number and markings: Locate the GPU’s serial number and search for it online to ensure that it matches the advertised model. Additionally, check the physical markings on the GPU, such as the model number or brand logo, to verify that they represent the claimed specifications.
- Benchmark results: Compare the performance results obtained from benchmarking tests with the expected performance of the GPU model. This will help you assess if the GPU is performing within the expected range based on its specifications.
- Research online: Utilize online resources such as user forums, reviews, and trusted tech websites to gather information about the specific GPU model and verify its specifications. Users and experts often share their experiences and insights, which can help you confirm the accuracy of the advertised specs.
Verifying the GPU specs is crucial to ensure that you are getting the intended GPU model with the advertised features and capabilities. Pay close attention to the clock speeds, VRAM capacity, and other key specifications that affect the GPU’s performance and compatibility with your system.
If you find any significant discrepancies or inconsistencies in the specifications, it is important to discuss it with the seller or consider alternate options to avoid potential misrepresentation or dissatisfaction with the purchase.
With the specifications verified, you can make an informed decision about the used GPU’s compatibility and performance capabilities.
Now that we have covered the steps for testing a used GPU thoroughly, you are well-equipped to make a wise purchase decision. By checking the physical condition, verifying compatibility, stress testing, monitoring temperatures, assessing graphics performance, checking for artifacts, testing VRAM performance, and verifying GPU specs, you can ensure that the used GPU meets your requirements and expectations.
Conclusion:
Testing a used GPU before making a purchase is crucial to ensure that it is in good working condition and meets your requirements. By following the steps outlined in this article, you can thoroughly evaluate the physical condition, compatibility, stress performance, temperature management, graphics performance, presence of artifacts, VRAM performance, and specifications of the used GPU.
Checking the physical condition allows you to identify any visible damage or signs of neglect. Verifying compatibility ensures that the GPU is compatible with your system’s interface, power requirements, and physical dimensions.
Stress testing the GPU helps evaluate its performance and stability under heavy loads, while monitoring temperatures ensures that it remains within safe limits during regular usage.
Evaluating the graphics performance allows you to assess the GPU’s capabilities and compare them to industry standards. Checking for artifacts helps identify any visual abnormalities that may indicate issues with the GPU’s display output.
Testing the VRAM performance is essential to ensure that the GPU’s memory is functioning correctly and can handle graphics-intensive tasks. Additionally, verifying the GPU’s specifications helps confirm that it aligns with the advertised details.
By conducting these tests and verifications, you can make an informed decision and avoid potential disappointments or issues with the used GPU.
Remember to research the seller, ask questions, and consider factors such as warranty, return policy, and price. It is also beneficial to consult with experts or enthusiasts for their insights and recommendations.
By thoroughly testing and verifying the used GPU, you can potentially save money and have confidence in your purchase, knowing that it will meet your gaming, graphic design, or other computing needs.
So, take your time, follow the steps outlined in this article, and make a wise decision when purchasing a used GPU.