Introduction
Have you ever found yourself overwhelmed by a cluttered desktop screen filled with multiple open windows on your Mac? It can be frustrating and time-consuming to sort through a jumble of applications and documents to find the one you need. Fortunately, there are several ways you can easily see all open windows on your Mac and efficiently organize your workspace.
In this article, we will explore different methods to help you manage multiple windows on your Mac. Whether you’re a multitasker or someone who just wants to declutter their digital space, these techniques will enable you to navigate between windows effortlessly.
By learning about Mission Control, the App Switcher, Exposé, and keyboard shortcuts, you’ll gain the skills to optimize your workflow and increase productivity on your Mac. We’ll also discuss techniques for organizing your workspace to maintain a clean and streamlined desktop.
So, if you’re ready to take control of your open windows and enhance your Mac experience, let’s dive in and discover the various methods for seeing all open windows on your Mac.
Understanding the Basics
Before diving into the different methods for seeing all open windows on your Mac, it’s important to familiarize yourself with the basic terminology and features. Understanding these foundational concepts will make it easier for you to follow along and implement the techniques discussed in this article.
Mission Control is a key feature in macOS that allows you to view all open windows on your Mac in a single space. It provides a bird’s-eye view of your desktop, making it easier to navigate between applications and documents. You can access Mission Control by pressing the Mission Control key on your keyboard (F3) or by using a three-finger swipe gesture on your trackpad or Magic Mouse.
The App Switcher, on the other hand, enables you to quickly switch between open applications on your Mac. By pressing Command + Tab, you can bring up the App Switcher and navigate through your active apps using the Tab key. This is a handy way to jump between different windows within the same application.
Exposé is another Mac feature that allows you to see all open windows for a specific application only. By activating Exposé for an application, you can declutter your desktop and focus on the specific windows you need. To activate Exposé, press Control + Up Arrow or swipe upwards with three fingers on your trackpad.
Lastly, keyboard shortcuts are a convenient way to perform various actions on your Mac without having to navigate through menus or use the mouse. Learning a few key shortcuts can significantly improve your workflow and efficiency when working with multiple windows. For example, Command + Option + H is a useful shortcut to hide all windows except the currently active one.
Now that you have a basic understanding of the terminology and features, you’re ready to explore the different methods for seeing all open windows on your Mac. In the next sections, we will delve into each method in detail, providing step-by-step instructions to help you master these techniques.
Using Mission Control
Mission Control is a powerful feature in macOS that enables you to view all open windows on your Mac in a single space. With Mission Control, you can easily navigate between applications and documents, making it a breeze to manage multiple windows. Here’s how to use Mission Control effectively:
1. To access Mission Control, you can use one of the following methods:
– Press the Mission Control key on your keyboard (F3).
– Swipe up with three fingers on your trackpad or Magic Mouse.
– Click on the Mission Control icon in the Dock, or use the Mission Control gesture on your Magic Trackpad.
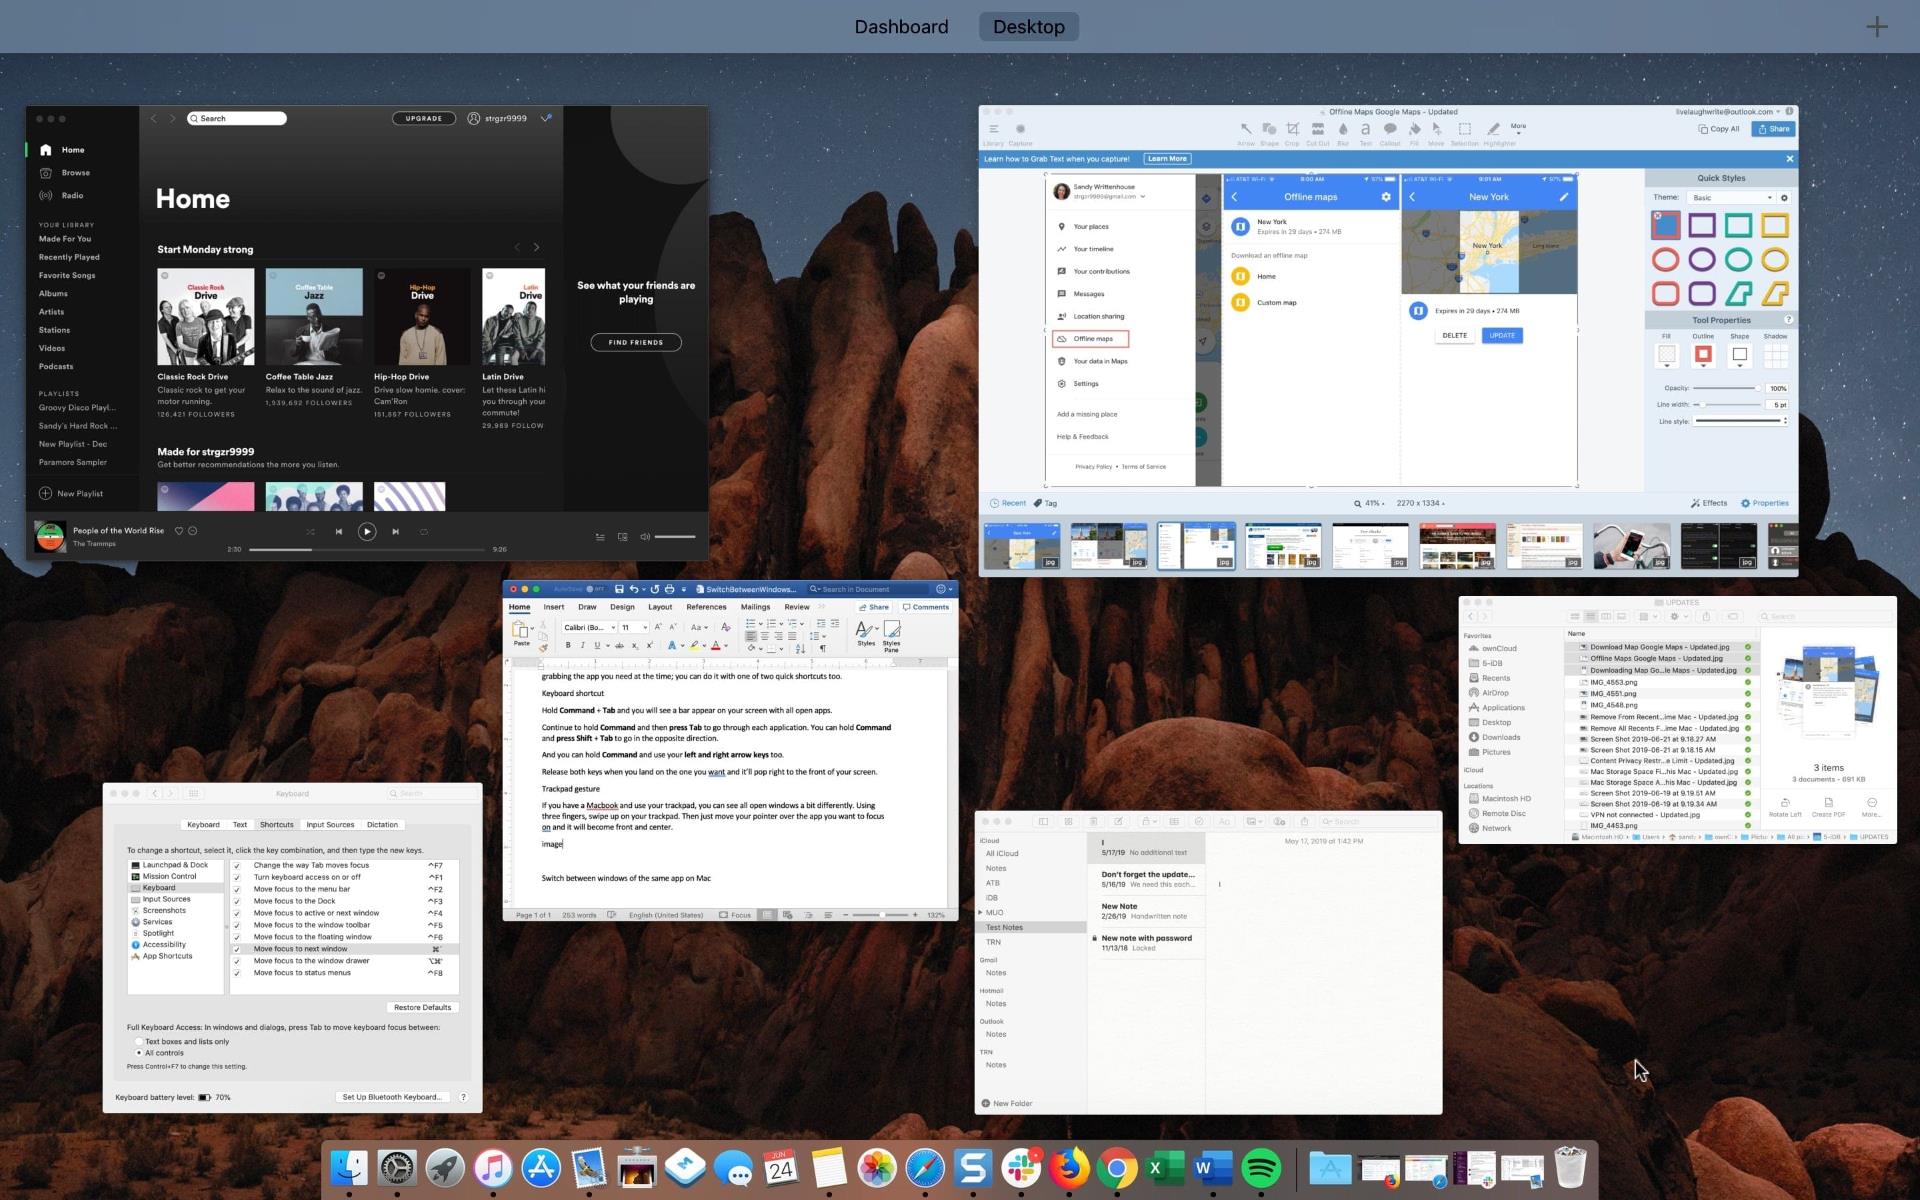
2. Once in Mission Control, you’ll see all open windows displayed as thumbnails, organized in a grid-like layout. You can scroll vertically or horizontally to navigate through the windows.
3. To switch to a specific window, simply click on its thumbnail. This will bring the chosen window to the forefront of your screen.
4. If you have multiple windows for the same application, you can click on the application name displayed at the top of the window grid to expand it and reveal all the windows associated with that application.
5. To close a window, hover your cursor over its thumbnail in Mission Control, and click the “X” button that appears in the upper-left corner of the thumbnail.
6. To exit Mission Control and return to your selected window, click anywhere outside the Mission Control interface or press the Escape key on your keyboard.
Mission Control also offers some additional customization options to suit your preferences:
– You can change the appearance of Mission Control in System Preferences > Mission Control. Here, you can enable or disable features like grouping windows by application or displaying Dashboard as a space.
– You can assign a hot corner for Mission Control, allowing you to access it by simply moving your cursor to a specific corner of your screen. This can be set up in System Preferences > Mission Control > Hot Corners.
– If you prefer using gestures, you can customize trackpad gestures for activating Mission Control in System Preferences > Trackpad > Gestures.
By harnessing the power of Mission Control, you can efficiently manage multiple open windows on your Mac and streamline your workflow.
Using the App Switcher
The App Switcher is another handy feature on macOS that allows you to quickly switch between open applications on your Mac. With the App Switcher, you can seamlessly navigate through different windows within the same application. Here’s how to use the App Switcher effectively:
1. To bring up the App Switcher, press Command + Tab on your keyboard. A bar will appear on your screen, showing the icons of all currently open applications.
2. While holding down the Command key, continue pressing the Tab key to cycle through the open applications. Each press of the Tab key will highlight the next application icon in the App Switcher.
3. As you cycle through the application icons, you’ll notice that each application may have multiple windows. To switch between windows within the same application, continue holding down the Command key and press the ` (backtick) key. This will cycle through the open windows of the selected application.
4. Once you’ve selected the desired application or window, release the Command key to bring it to the forefront of your screen.
5. If you prefer using the trackpad or Magic Mouse, you can also activate the App Switcher by swiping left or right with four fingers on your trackpad or by using the left or right swipe gesture on your Magic Mouse.
6. To quit an application directly from the App Switcher, highlight the application icon or window, and press the Q key while continuing to hold down the Command key.
The App Switcher provides a convenient way to navigate between different applications and windows without having to go back to the desktop. It’s especially useful if you’re a multitasker or if you often work with multiple windows within the same application.
Remember, you can always customize the App Switcher settings to suit your preferences. In System Preferences > Keyboard, you can change the shortcut for activating the App Switcher or adjust the display settings for the application icons.
By mastering the App Switcher, you can enhance your productivity and seamlessly manage your open windows on your Mac.
Using Exposé
Exposé is a powerful feature on macOS that allows you to see all open windows for a specific application at once. It helps you declutter your desktop and focus on the windows you need. Here’s how to use Exposé effectively:
1. To activate Exposé for an application, ensure that you have open windows for that application. Then, press Control + Up Arrow on your keyboard. Alternatively, you can use a three-finger swipe upwards on your trackpad. Exposé will display all open windows for the selected application, and the rest of your screen will be dimmed.
2. In Exposé, you can navigate through the open windows by using the arrow keys on your keyboard or by swiping left or right with three fingers on your trackpad. As you move between windows, the highlighted window will appear in full size while the rest remain scaled down.
3. To bring a window to the forefront, simply click on it in Exposé. The selected window will expand to fill your screen, and the other windows will return to their previous state.
4. To exit Exposé without selecting a window, press the Escape key on your keyboard or perform a three-finger swipe downwards on your trackpad. This will return you to your regular desktop view.
5. If you prefer a different activation method for Exposé, you can customize it in System Preferences > Mission Control. Here, you can assign a different keyboard shortcut or change the gesture for activating Exposé.
Using Exposé is particularly helpful when you have multiple windows open within a specific application, such as multiple Safari windows or multiple Word documents. It allows you to quickly find the window you need and focus on the task at hand.
Additionally, Exposé can be handy when you have a cluttered desktop and want a clear view of the windows associated with a particular application, making it easier to organize your workspace.
By utilizing Exposé, you can declutter your desktop and easily navigate through your open windows, improving your productivity and efficiency on your Mac.
Using Keyboard Shortcuts
Keyboard shortcuts are a time-saving way to perform various actions on your Mac without having to navigate through menus or use the mouse. Learning a few key shortcuts can greatly optimize your workflow and improve your efficiency when working with multiple windows. Here are some useful keyboard shortcuts for managing open windows:
1. Command + Tab: This shortcut brings up the App Switcher, allowing you to quickly switch between open applications. Holding down the Command key while pressing Tab cycles through the available applications, and releasing both keys brings the selected application to the forefront.
2. Command + ` (backtick): When you have multiple windows open within the same application, this shortcut allows you to cycle through them. Holding down Command and continuously pressing the backtick key switches between the windows within the currently selected application.
3. Command + Option + H: If you have numerous open windows and want to quickly hide all windows except the currently active one, this shortcut is a lifesaver. It helps declutter your screen and allows you to focus on the task at hand.
4. Command + Option + Up Arrow: This shortcut activates Mission Control, providing a bird’s-eye view of all your open windows. It’s a great way to navigate between applications or find a specific window quickly.
5. Command + W: Pressing this shortcut closes the currently active window. It’s a handy way to quickly declutter your desktop and close windows you no longer need.
6. Command + Shift + 3 or Command + Shift + 4: These shortcuts capture screenshots of your entire screen or a selected portion, respectively. Screenshots can be useful for reference or documentation purposes when working with multiple open windows.
7. Command + Arrow Keys: When working with documents or webpages, using the arrow keys with the Command key allows you to navigate quickly between different sections of a document or move to the top or bottom of a webpage.
8. Command + Option + Esc: This shortcut opens the Force Quit Applications window, which allows you to close unresponsive applications or those causing issues. It’s a useful way to quickly close problematic windows.
These are just a few examples of the many keyboard shortcuts available on macOS. For a comprehensive list of shortcuts, you can refer to the Keyboard Shortcuts section in the macOS Help menu or the Apple Support website.
By incorporating these keyboard shortcuts into your workflow, you can navigate through and manage open windows much more efficiently, saving time and increasing productivity on your Mac.
Organizing Your Workspace
Having a clutter-free and organized workspace can significantly improve your productivity and make it easier to manage open windows on your Mac. Here are some tips to help you organize your workspace:
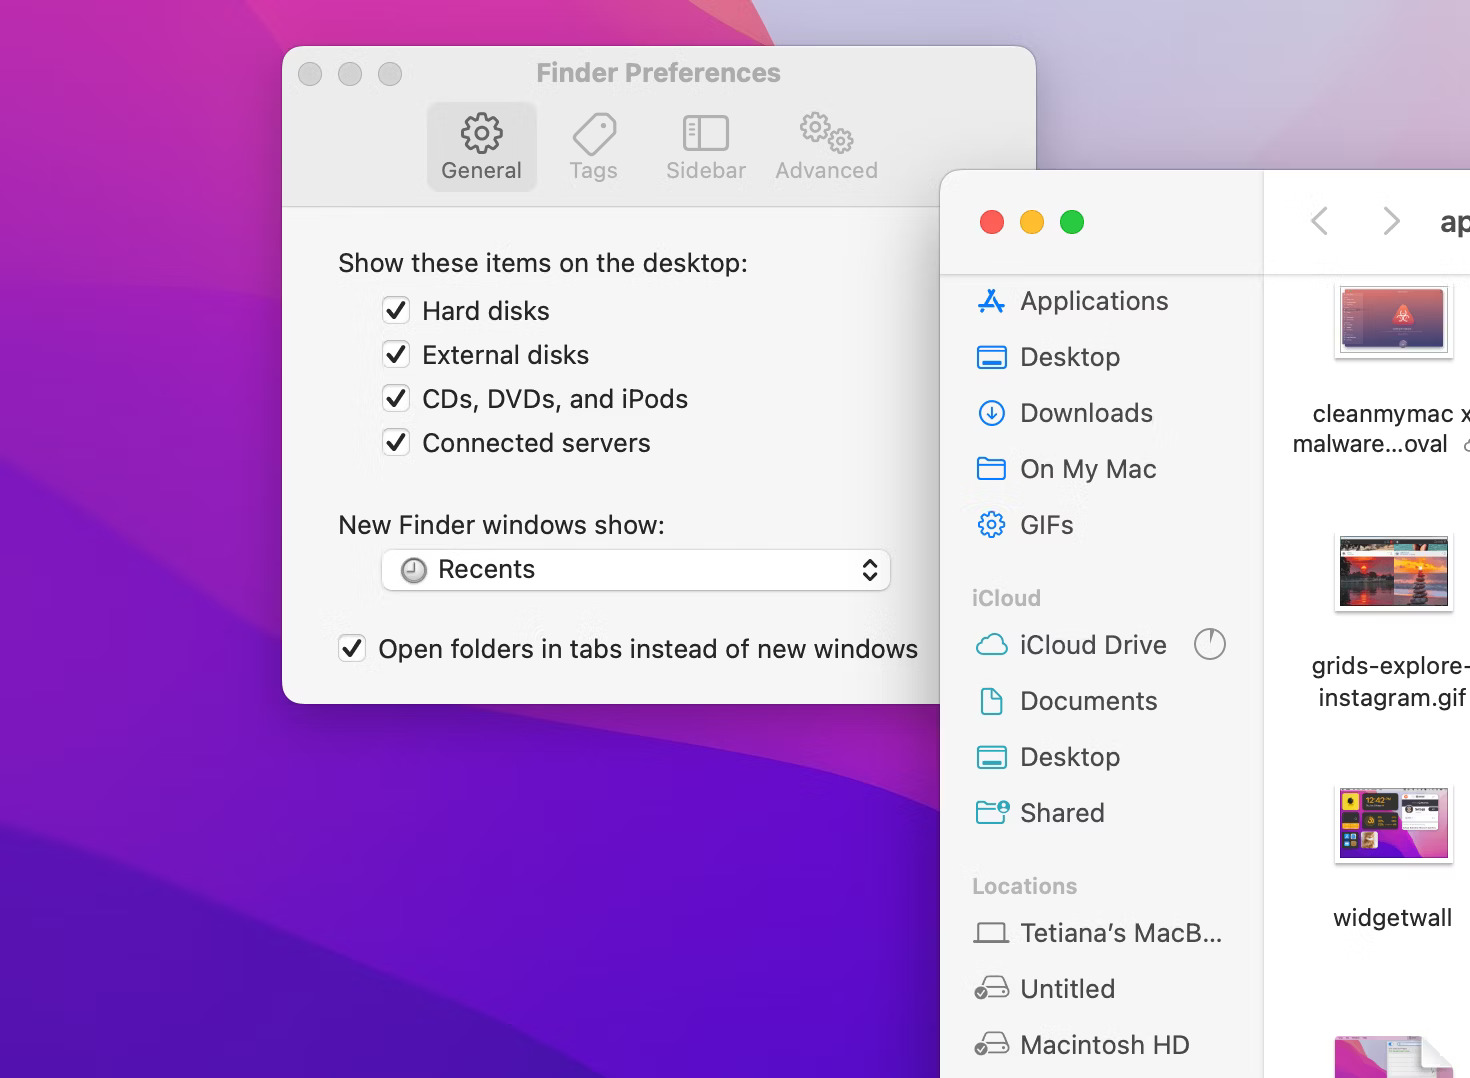
1. Use Desktop Stacks: The macOS provides a feature called Desktop Stacks, which automatically groups files on your desktop into organized stacks based on file type or tags. Enabling Desktop Stacks can help keep your desktop clean and make it easier to locate specific files when needed.
2. Create Folders: Organize your documents, files, and project folders into logical categories. Create folders on your desktop or within Finder to group related items together. This will help you find and access files more quickly, reducing the need to have multiple windows open.
3. Utilize Spaces: Spaces allow you to create separate virtual desktops, each with its own set of open windows. By assigning specific applications or tasks to different spaces, you can better organize and switch between related windows. Use Mission Control to manage and navigate between spaces easily.
4. Customize the Dock: Rearrange and organize your Dock to include your most frequently used applications and folders. This makes it convenient to access them with a single click, reducing the need to search through multiple windows or navigate through Finder.
5. Take advantage of Full-Screen Mode: When working on a specific task or using an application that supports it, enter Full-Screen Mode. This reduces distractions from other windows and allows you to focus solely on the task at hand.
6. Close Unnecessary Windows: Regularly close windows that you no longer need. If you’re finished with a document or application, close it to declutter your workspace. This will make it easier to manage and switch between the remaining open windows.
7. Use Window Snapping: macOS has built-in window snapping functionality that allows you to align and resize windows to specific areas of your screen. Utilize this feature to easily organize and arrange open windows side by side or in a multi-column layout.
By implementing these organizational techniques, you can create a clean and streamlined workspace, making it easier to manage and navigate between open windows on your Mac. Having an organized workspace not only enhances productivity but also promotes a sense of clarity and focus while working.
Closing Thoughts
Managing multiple open windows on your Mac can sometimes feel overwhelming, but with the right techniques and tools, you can take control of your workspace and improve your productivity. By utilizing features like Mission Control, the App Switcher, Exposé, and keyboard shortcuts, you can easily navigate between windows and stay focused on your tasks.
Remember to customize these features according to your preferences and workflow. Explore the different options available in System Preferences to make your Mac experience suit your needs.
Additionally, maintaining an organized workspace plays a crucial role in managing open windows. Take advantage of features like Desktop Stacks, folders, Spaces, and window snapping to keep your desktop decluttered and your files organized.
Finally, don’t be afraid to experiment and find what works best for you. Everyone has different working styles and preferences, so don’t hesitate to try out different methods and adapt them to fit your workflow.
With a little practice and familiarity, you’ll soon be able to effortlessly switch between windows, stay organized, and make the most of your Mac’s capabilities.
Now, armed with these techniques, go ahead and take control of your open windows on your Mac, increasing your productivity and making your work life more organized and efficient.