Introduction
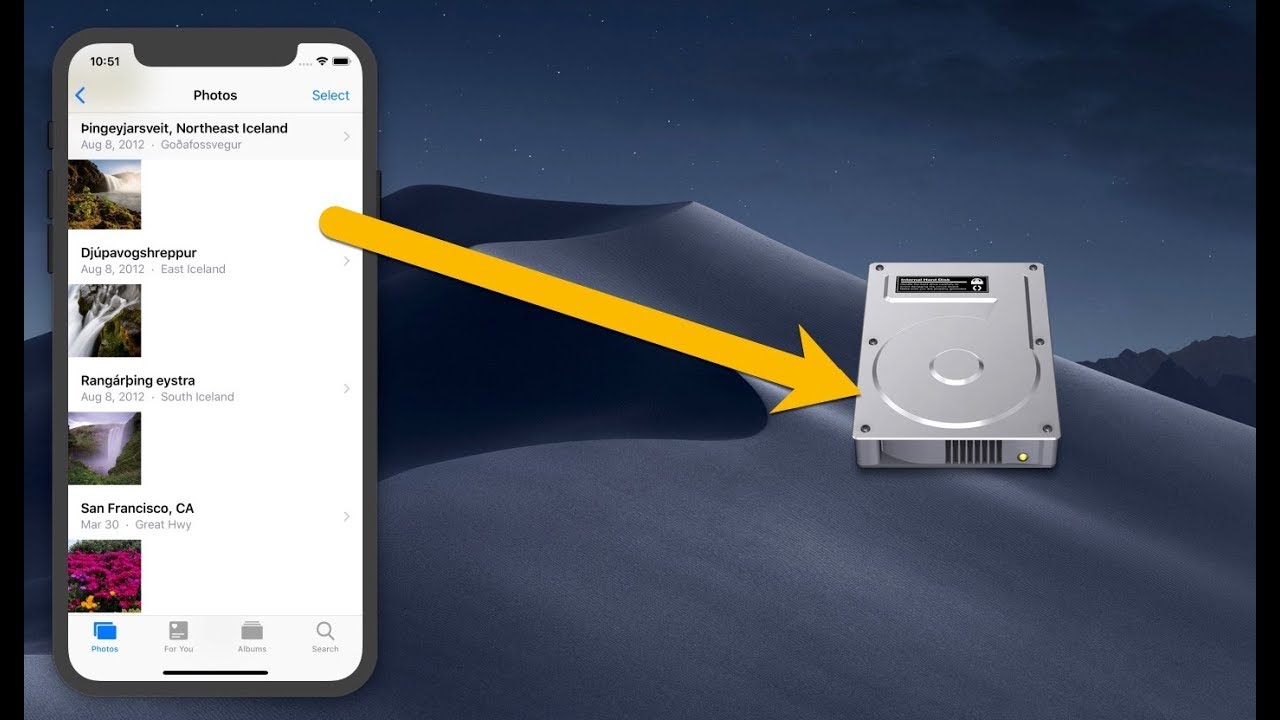
Are you running out of storage space on your Mac due to the ever-increasing number of photos? Don’t worry, you can easily move all your photos to an external hard drive to free up valuable space and keep your precious memories safe. This step-by-step guide will walk you through the process of transferring your entire Photos library from your Mac to an external hard drive.
Having all your photos on an external hard drive offers several advantages. First and foremost, it allows you to reclaim storage space on your Mac, which can significantly improve its performance. Additionally, storing your photos on an external drive provides an extra layer of backup, ensuring that your memories are protected in case anything happens to your computer.
Moving your photos to an external hard drive is a straightforward process that can be completed in just a few simple steps. You don’t need to be a tech-savvy person to accomplish this task. All you need is your Mac, an external hard drive, and a little bit of time. So, without further ado, let’s get started on moving your photos to an external hard drive!
Step 1: Connect the External Hard Drive to Your Mac
The first step in moving your photos from your Mac to an external hard drive is to establish a physical connection between the two devices. Start by locating an available USB or Thunderbolt port on your Mac. Depending on the type of external hard drive you have, you may need a USB-A, USB-C, or Thunderbolt cable.
Once you have identified the appropriate cable for your external hard drive, connect one end to the drive and the other end to the corresponding port on your Mac. Make sure the connection is secure, and the cables are firmly plugged in.
After connecting the external hard drive to your Mac, you may see a popup notification on your screen, indicating that the drive has been detected. If this happens, proceed to the next step. If you don’t see any notification, don’t worry; you can still proceed to the next step as long as the drive is properly connected.
It’s important to mention that depending on the external hard drive you’re using, you may need to power it on separately. Some drives are powered through the USB or Thunderbolt connection, while others require an external power source. Refer to the manufacturer’s instructions for your specific external hard drive to ensure it’s powered on correctly.
Now that your external hard drive is connected and ready to go, you can move on to the next step of the process.
Step 2: Open Finder
With the external hard drive connected to your Mac, it’s time to navigate to the Photos library using the Finder application. Finder is the default file manager for macOS, allowing you to locate, organize, and manage your files and folders.
To open Finder, click on the smiling face icon located in the Dock at the bottom of your screen. Alternatively, you can use the keyboard shortcut “Command + Space” to open Spotlight and search for “Finder.”
Once Finder is open, you will see a window with several locations listed in the sidebar on the left. Look for the “Pictures” or “Documents” folder in the sidebar, as these are the most common locations where the Photos library is stored. If the Photos library is saved in a different location, you can navigate to that specific location using the sidebar navigation.
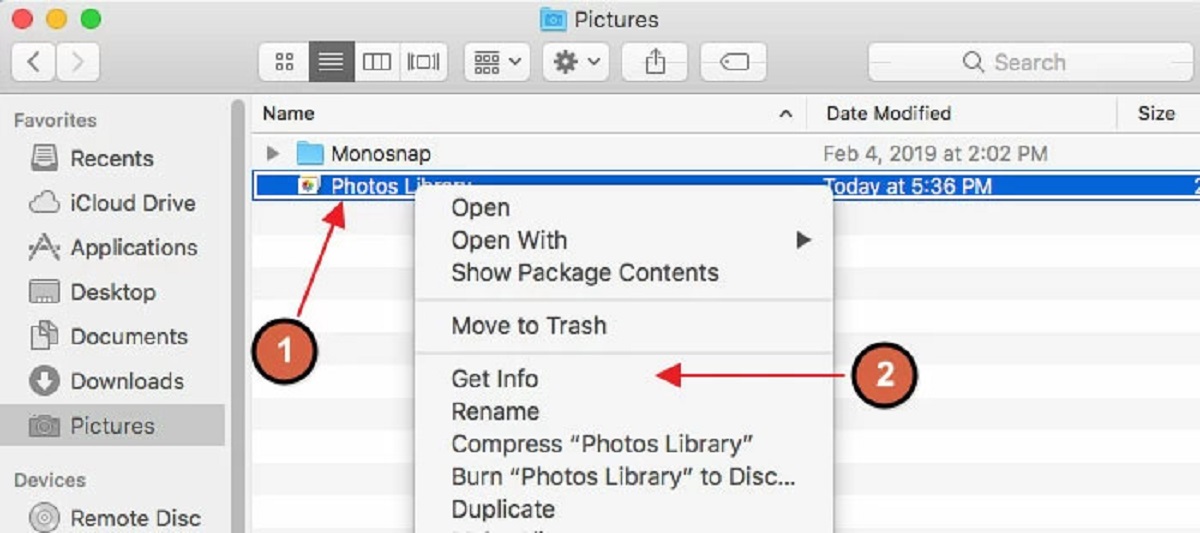
Clicking on the appropriate folder in the sidebar will display the contents of that folder in the main area of the Finder window. Look for the file named “Photos Library” or “Photos Library.photoslibrary” – this is the main file that contains all your photos and data.
Keep in mind that depending on your macOS version and Photos app settings, the file extension may be visible or hidden. Therefore, don’t worry if you see different file names or extensions as long as it mentions “Photos Library” in the file name.
Now that you have located the Photos library file, you’re ready to proceed to the next step and start the process of copying it to the external hard drive.
Step 3: Locate the Photos Library
Now that you have Finder open, it’s time to locate the Photos library file that you want to move to the external hard drive. The Photos library contains all your precious memories, including photos, videos, and albums.
In the Finder window, navigate to the appropriate folder where your Photos library is stored. This is typically the “Pictures” folder or a specific location you have selected for your library. If you are unsure where your Photos library is located, you can use the search bar at the top right corner of the Finder window to search for “Photos Library”.
Upon locating the Photos library file, you will see a file with the extension “.photoslibrary” or simply “Photos Library”. This is the primary file that contains all your photos and associated data.
To ensure you have found the correct file, you can do a quick check by right-clicking on the file and selecting “Get Info”. A window will appear displaying information about the file, including its size and creation date. This will help confirm that you have located the correct Photos library file.
It’s important to note that if you have multiple Photos library files, you need to locate the library that contains all the photos you wish to transfer to the external hard drive. You can switch between libraries in the Photos app by holding the Option key while launching the app and selecting the desired library.
Now that you have successfully located the Photos library file, you are ready to proceed to the next step and start the process of copying it to the external hard drive.
Step 4: Copy the Photos Library to the External Hard Drive
With the Photos library file located, it’s time to make a copy of it and transfer it to the external hard drive. This ensures that your original library remains intact on your Mac, while a duplicate copy is saved on the external drive.
Start by opening a new Finder window. You can either click on the Finder icon in the Dock or use the keyboard shortcut “Command + N”. This will open a new Finder window, which you’ll use to copy the Photos library.
In the new Finder window, navigate to the external hard drive. You can find it listed under the “Locations” section in the sidebar. If you have trouble locating the external drive, make sure it’s properly connected to your Mac and powered on.
Once you have reached the external hard drive location in the Finder window, return to the Finder window containing the Photos library file. Now, click and drag the Photos library file to the destination folder on the external hard drive.
As you hover the file over the external hard drive folder, you can release the mouse or trackpad button to drop the file and start the copying process. Alternatively, you can right-click on the file and select “Copy” from the context menu, then navigate to the external drive and right-click again and select “Paste Item”.
The process of copying the Photos library file will take some time depending on the size of your library and the speed of your external hard drive. It’s crucial not to interrupt the copying process, as it may result in corrupted files or incomplete transfer.
Once the copying process is complete, you will have a duplicate copy of your Photos library on the external hard drive, ready for safekeeping and future access.
Step 5: Wait for the Copy Process to Complete
After initiating the copying process of your Photos library to the external hard drive, it is important to exercise patience and allow the process to complete without interruption. The length of time required for the copy process depends on the size of your library and the speed of your external hard drive.
During the copying process, it is recommended to avoid performing any other tasks that may consume significant processing power or bandwidth on your Mac. This includes running resource-intensive applications, downloading large files, or streaming high-definition content.
It is normal for the copying process to take some time, especially if you have a large library with a substantial number of high-resolution photos and videos. The progress of the copy process can be monitored by observing the progress bar, which indicates the percentage of completion.
While the copy process is underway, it is essential to ensure that your Mac remains powered on and connected to a reliable power source. Interrupting the copying process by shutting down your Mac or disconnecting the external hard drive prematurely can result in data corruption or incomplete transfer.
Depending on the size of your Photos library and the speed of the external hard drive, the copying process can take anywhere from a few minutes to several hours. It’s best to plan accordingly and allow for sufficient time to complete the copying process.
Once the progress bar reaches 100% and the copying process is complete, you can proceed to the next step to verify the transfer of your Photos library to the external hard drive.
Step 6: Verify the Photos Library on the External Hard Drive
After the copy process is complete, it is crucial to verify that your Photos library has been successfully transferred to the external hard drive. This step ensures that all your photos, videos, and albums are intact and accessible from the external drive.
To verify the Photos library on the external hard drive, safely eject the external drive from your Mac. This can be done by either right-clicking on the drive icon on your desktop and selecting “Eject,” or by dragging the drive icon to the Trash bin on your Dock, which will display an eject symbol.
Once the drive is safely ejected, disconnect it from your Mac and re-connect it to ensure proper recognition by your computer. Then, open a new Finder window and navigate to the external hard drive location by clicking on its icon in the sidebar.
Look for the Photos library file that you copied to the external hard drive. The file should have the same name and file extension, such as “.photoslibrary” or “Photos Library”. Double-click on the file to open it and launch the Photos app.
If the Photos app successfully launches and displays your photo library, congratulations! You have verified that the transfer was successful, and your entire Photos library now resides on the external hard drive.
Browse through your photo library and ensure that all your photos, videos, albums, and edits are present and accessible. You can open different photo albums, view individual photos, and even search for specific images to ensure everything is intact.
If you encounter any issues or notice missing content, it is recommended to double-check the copy process and repeat the previous steps to ensure the Photos library is correctly transferred to the external hard drive.
Once you have verified the Photos library on the external hard drive and confirmed its integrity, you can proceed to safely disconnect the external drive from your Mac, as outlined in the next step.
Step 7: Safely Disconnect the External Hard Drive from Your Mac
Now that you have successfully transferred and verified your Photos library on the external hard drive, it’s important to follow the proper procedure for safely disconnecting the drive from your Mac. This ensures that no data loss or corruption occurs and that your external hard drive remains in good working condition.
First, make sure all files and applications related to the external hard drive are closed. This includes the Photos app or any other programs that might be accessing files on the drive. Closing these applications ensures that all data has been written to the external drive before disconnecting it.
Next, navigate to your desktop or any Finder window that displays the external hard drive icon. You can identify the icon by its name or by the specific icon design, which typically represents an external storage device.
Before disconnecting the drive, it is important to safely eject it from your Mac to ensure any ongoing read or write operations are completed and all cached information is flushed to the drive. Right-click on the drive icon and select “Eject” from the context menu. Alternatively, you can drag the drive icon to the Trash bin on your Dock, which will change into an eject icon.
Wait until you see a notification or confirmation message informing you that it is safe to disconnect the external hard drive. This indicates that all data transfers have been completed, and the drive has been properly dismounted from your Mac. Now, you can safely unplug the USB or Thunderbolt cable from your Mac, or turn off the power to the external drive if it requires separate power.
It’s important to note that abruptly disconnecting the external hard drive without following the proper eject process may result in data loss or corruption. By safely ejecting the drive, you ensure that all data is written to and stored on the drive before disconnecting it.
Lastly, store your external hard drive in a safe and secure location, protecting it from physical damage, theft, or other potential risks. Remember to create backups of your Photos library on a regular basis to ensure the safety and redundancy of your valuable photo collection.
Congratulations! You have successfully completed the process of moving your Photos library from your Mac to an external hard drive. With your photos now safely stored on the external drive, you can enjoy more free space on your Mac and have peace of mind knowing that your cherished memories are backed up and secure.
Conclusion
Moving your entire Photos library from your Mac to an external hard drive is a simple yet effective way to free up space and ensure the safety of your valuable memories. Throughout this step-by-step guide, we have covered everything you need to know to successfully transfer and verify your Photos library on an external drive.
By connecting the external hard drive to your Mac, opening Finder, locating the Photos library, and copying it to the external drive, you have taken the necessary steps to safeguard your photo collection. Waiting for the copy process to complete, verifying the transfer, and safely disconnecting the external drive from your Mac are all essential actions to ensure a smooth and successful transition.
Remember, having your Photos library on an external hard drive offers numerous benefits, including reclaiming valuable storage space on your Mac, improving overall performance, and providing an additional layer of backup and protection for your photos. It also allows for easier sharing and access to your photo library on multiple devices.
As you move forward, ensure that you have a reliable backup strategy in place to prevent the loss of your photo library. Regularly update your backup on the external hard drive and consider additional backup solutions such as cloud storage or redundant external drives.
Now that you have successfully moved your Photos library to an external hard drive, take some time to enjoy the newfound space on your Mac, explore your photo collection on the external drive, and continue capturing beautiful moments. Congratulations on taking this important step towards organizing and preserving your cherished memories!