Introduction
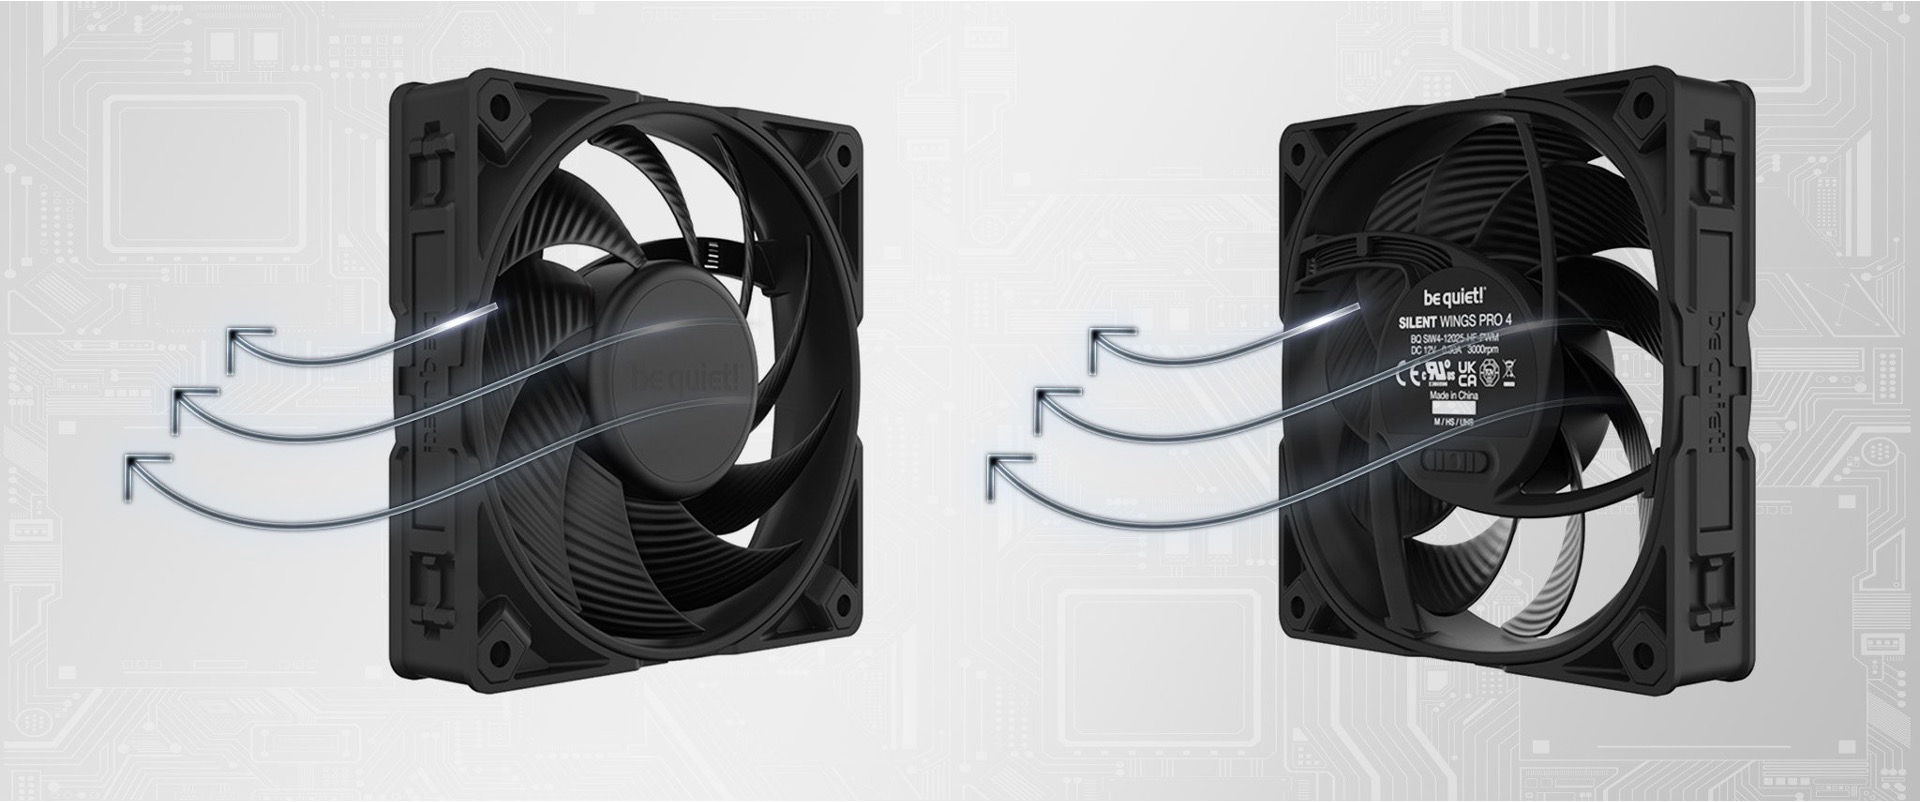
Case fans play a crucial role in maintaining the optimal temperature of your computer by effectively dissipating heat. By default, case fans are installed to blow air out of the computer case, expelling hot air and keeping the components cool. However, there may be instances where reversing the airflow of a case fan can be beneficial. In this guide, we will explore why you might want to reverse a case fan and provide step-by-step instructions on how to do it.
Reversing a case fan can be useful in certain scenarios, such as optimizing airflow within your computer case or creating a positive pressure environment to reduce dust accumulation. Additionally, if you have added components or rearranged them inside the case, reversing the fan direction might be necessary to ensure an efficient cooling system. Before diving into the process, it’s important to note that while reversing a case fan is relatively simple, it may void the warranty of the fan, so proceed with caution.
To reverse a case fan, you will need a few basic tools and materials, such as a screwdriver, an antistatic wrist strap (to protect delicate computer components), and possibly some cable ties or screws, depending on your specific case design. It’s also a good idea to consult your computer’s documentation or manufacturer’s website for any model-specific instructions or precautions.
Please note that reversing a case fan should only be done if you feel comfortable working inside your computer case. If you are unsure or hesitant, it’s best to consult a professional or seek assistance from a knowledgeable friend with experience in computer hardware.
Why would you want to reverse a case fan?
There are several reasons why you might consider reversing the direction of a case fan to change the airflow within your computer system.
One common reason is to optimize the cooling efficiency of your computer. By default, case fans are designed to expel hot air out of the computer case, ensuring that the components stay cool. However, depending on the layout of your computer’s internals, you may find that there are areas that don’t receive sufficient airflow. Reversing a case fan can help redirect the airflow to these areas, ensuring that all components receive proper cooling and preventing any hotspots from developing.
Another reason to reverse a case fan is to create a positive pressure environment inside your computer case. Positive pressure means that there is more air being pushed into the case than being expelled, which helps prevent dust and debris from entering through unfiltered openings. By reversing a case fan to blow air into the case, you can create a positive pressure setup, significantly reducing dust buildup and improving the overall cleanliness of your system.
In some cases, you may have made changes or upgrades to your computer’s internals, such as adding more powerful components or rearranging the layout. This can disrupt the airflow dynamics and require you to reverse a case fan to ensure proper cooling. By reorienting the fan to face the new components, you can effectively channel the airflow to where it’s needed most and maintain ideal temperatures for optimal performance and longevity.
It’s important to note that reversing a case fan may not always be necessary or beneficial. Modern computer cases are designed with carefully planned airflow systems, and altering them without proper consideration can lead to unintended consequences. Before deciding to reverse a case fan, carefully assess the airflow dynamics of your system and consult relevant resources or forums for expert advice.
In the next sections, we will guide you through the step-by-step process of reversing a case fan, ensuring that you can safely and effectively make the necessary changes to suit your specific cooling needs.
Tools and materials needed
Before you begin the process of reversing a case fan, it’s important to gather the necessary tools and materials. Having these items on hand will make the process smoother and ensure that you have everything you need to complete the task. Here are the tools and materials you will need:
- Screwdriver: A standard Phillips screwdriver is typically sufficient for most computer cases. However, it’s always a good idea to check the specific screws used in your case and have a suitable screwdriver on hand.
- Antistatic wrist strap: To protect your computer’s delicate components from static electricity, it’s recommended to wear an antistatic wrist strap. This will help discharge any static buildup and prevent damage to sensitive parts.
- Cable ties or screws: Depending on your computer case’s design, you may need cable ties or screws to secure the case fan in its new position. Check your case’s documentation or visually inspect the case to determine which method is required.
- Documentation or manufacturer’s website: Consult your computer’s documentation or the manufacturer’s website for any model-specific instructions or precautions before proceeding with reversing a case fan. This will ensure that you have all the necessary information and won’t inadvertently void any warranties.
Once you have gathered these tools and materials, you will be ready to proceed with the step-by-step process of reversing your case fan. It’s always a good idea to ensure that you are working in a well-lit and static-free environment to minimize the risk of damage to your computer components. Taking the time to prepare properly will help make the process easier and ensure that you can complete the task successfully.
Step 1: Power off and unplug your computer
Before you begin working inside your computer case, it’s crucial to power off and unplug your computer from the electrical outlet. This initial step is essential to ensure your safety and prevent any potential damage to your computer system.
Shutting down your computer properly by selecting the “Shut down” option from the Start menu is the first step. This ensures that all running programs are closed correctly and that the operating system can safely shut down. It’s important to avoid simply turning off the power supply or pressing the power button on your computer case, as these methods may cause data loss or damage to your system’s internal components.
After your computer has shut down, you should unplug the power cord from the electrical outlet. This step is vital to protect yourself from electric shock when working inside the case.
Once your computer is powered off and unplugged, you can proceed to the next steps with confidence, knowing that you are taking the necessary precautions for a safe and successful case fan reversal process.
It’s worth noting that some power supplies have an integrated switch at the back. If your computer’s power supply has this feature, you can switch it off to provide an additional layer of safety. However, even with the power supply switch turned off, it’s still important to unplug the power cord from the electrical outlet to eliminate any residual electrical charge.
By following this first step and ensuring that your computer is powered off and unplugged, you can proceed with the subsequent steps knowing that you are taking the necessary precautions to protect yourself and your computer system.
Step 2: Open your computer case
Now that your computer is powered off and unplugged, it’s time to open the computer case. Opening the case will provide access to the internal components, allowing you to work on the case fan.
The process of opening a computer case may vary depending on the design of your specific case. However, most computer cases can be opened by following these general steps:
- Locate the screws or latches that secure the side panel of the case. These are typically located on the rear or side of the case.
- Use a screwdriver to remove the screws or release the latches that hold the side panel in place.
- Gently slide or lift the side panel away from the case, exposing the internal components.
It’s important to handle the side panel with care to avoid damage to the case or any internal components. If your case has any cables or wires attached to the side panel, gently disconnect them before fully removing the panel.
Once the side panel is removed, you will have a clear view of the internal components of your computer. Take a moment to familiarize yourself with the layout and location of the case fan you wish to reverse. This will help you proceed with the following steps confidently and efficiently.
Keep the removed side panel in a safe place nearby, as you will need to reattach it later after completing the case fan reversal process.
By opening your computer case, you have successfully gained access to the internal components. You are now ready to proceed with the next steps to reverse the desired case fan and optimize your computer’s cooling system.
Step 3: Identify the case fan you wish to reverse
Before you can start reversing a case fan, you need to identify the specific fan that you want to change the direction of. Most computer cases come with multiple case fans installed, and you may have different reasons for reversing each fan. Here are some tips to help you identify the case fan you wish to reverse:
- Visually inspect the case: Take a look inside your computer case and locate the fans. They are typically square or circular in shape and are positioned strategically to provide airflow to different components.
- Check the documentation: Consult your computer’s documentation or the manufacturer’s website to get detailed information about the fan placements. This can help you identify the exact location and purpose of each fan.
- Observe the fan label: Each fan has a label or sticker on it, which usually includes information such as the make and model. By identifying the fan’s label, you can match it with the information provided in your computer’s documentation.
- Follow the power cables: Trace the power cables from the fans to their respective connectors on the motherboard or fan controller. This can help you identify which fan is connected to which power source.
- Make a note: Once you have identified the case fan you wish to reverse, make a note of its location, make, and model. This will come in handy when reconnecting the fan later in the process.
By carefully identifying the case fan you want to reverse, you can ensure that you work on the correct fan and prevent any accidental changes to unrelated components. Taking the time to locate and note the necessary details will streamline the reversal process and make the subsequent steps easier to follow.
Once you have identified the specific case fan, you can proceed with disconnecting it from its power source and preparing it for reversal, as outlined in the subsequent steps.
Step 4: Disconnect the case fan from its power source
Now that you have identified the case fan you wish to reverse, it’s time to disconnect it from its power source. Disconnecting the fan from its power source is necessary to ensure your safety and prevent any electrical mishaps during the reversal process. Here are the steps to follow:
- Locate the power connector: The case fan is typically connected to the motherboard or a fan controller via a power connector. It usually has a small plastic plug with multiple pins.
- Gently pull out the power connector: Hold onto the connector firmly and gently pull it away from the corresponding socket. Avoid pulling on the wires, as excessive force may damage the connector or wire connections.
- Double-check the disconnection: Once the power connector is removed, visually inspect the connection to ensure that it is fully disconnected and no pins or wires are still attached.
It’s essential to handle the power connector with care to prevent any damage to the connector or the wires. Wiggling the connector while pulling may help loosen it if it feels stuck, but do so gently to avoid bending or breaking any pins.
Once you have disconnected the case fan from its power source, you can proceed to the next step of removing the fan from its current position. Remember to take note of the orientation of the fan before removing it, as it will be essential when reinstalling it in the reversed position.
By following these steps, you have safely disconnected the case fan from its power source, preparing it for the next stage of the reversal process. Make sure to handle the fan and power connector with care, as they are delicate components that require gentle handling.
Step 5: Remove the case fan from its current position
Now that you have disconnected the case fan from its power source, it’s time to remove the fan from its current position in the computer case. Removing the fan will allow you to reorient it in the opposite direction to achieve the desired airflow. Follow these steps to safely remove the case fan:
- Examine the mounting mechanism: Take a look at how the case fan is secured in its current position. Depending on your computer case, the fan may be held in place by screws, clips, or mounting brackets.
- Remove any screws or clips: If your case fan is attached with screws, use a screwdriver to carefully remove them. For fans secured with clips or brackets, gently release the locking mechanism to free the fan.
- Slowly detach the fan: Once any securing mechanisms are undone, gently pull the fan away from its current position. Be cautious not to twist or strain any wires connected to the fan.
As you remove the case fan, take note of how it was situated in its original position. Pay attention to the orientation of the fan blades and the airflow direction. This information will be crucial when reinstalling the fan in the reversed position.
During this step, it’s important to handle the fan with care and avoid excessive force. Be mindful of any delicate wires or connectors attached to the fan and ensure they are not strained or damaged during the removal process.
Once you have successfully removed the case fan, proceed to the next step to reorient the fan in the opposite direction and prepare it for installation.
By following these steps, you have safely removed the case fan from its current position, paving the way for the next stage of the case fan reversal process.
Step 6: Reorient the case fan to face the opposite direction
With the case fan removed from its original position, it’s time to reorient it to face the opposite direction. This step involves adjusting the fan’s position and rotation to ensure the airflow is directed as desired. Follow these steps to successfully reorient the case fan:
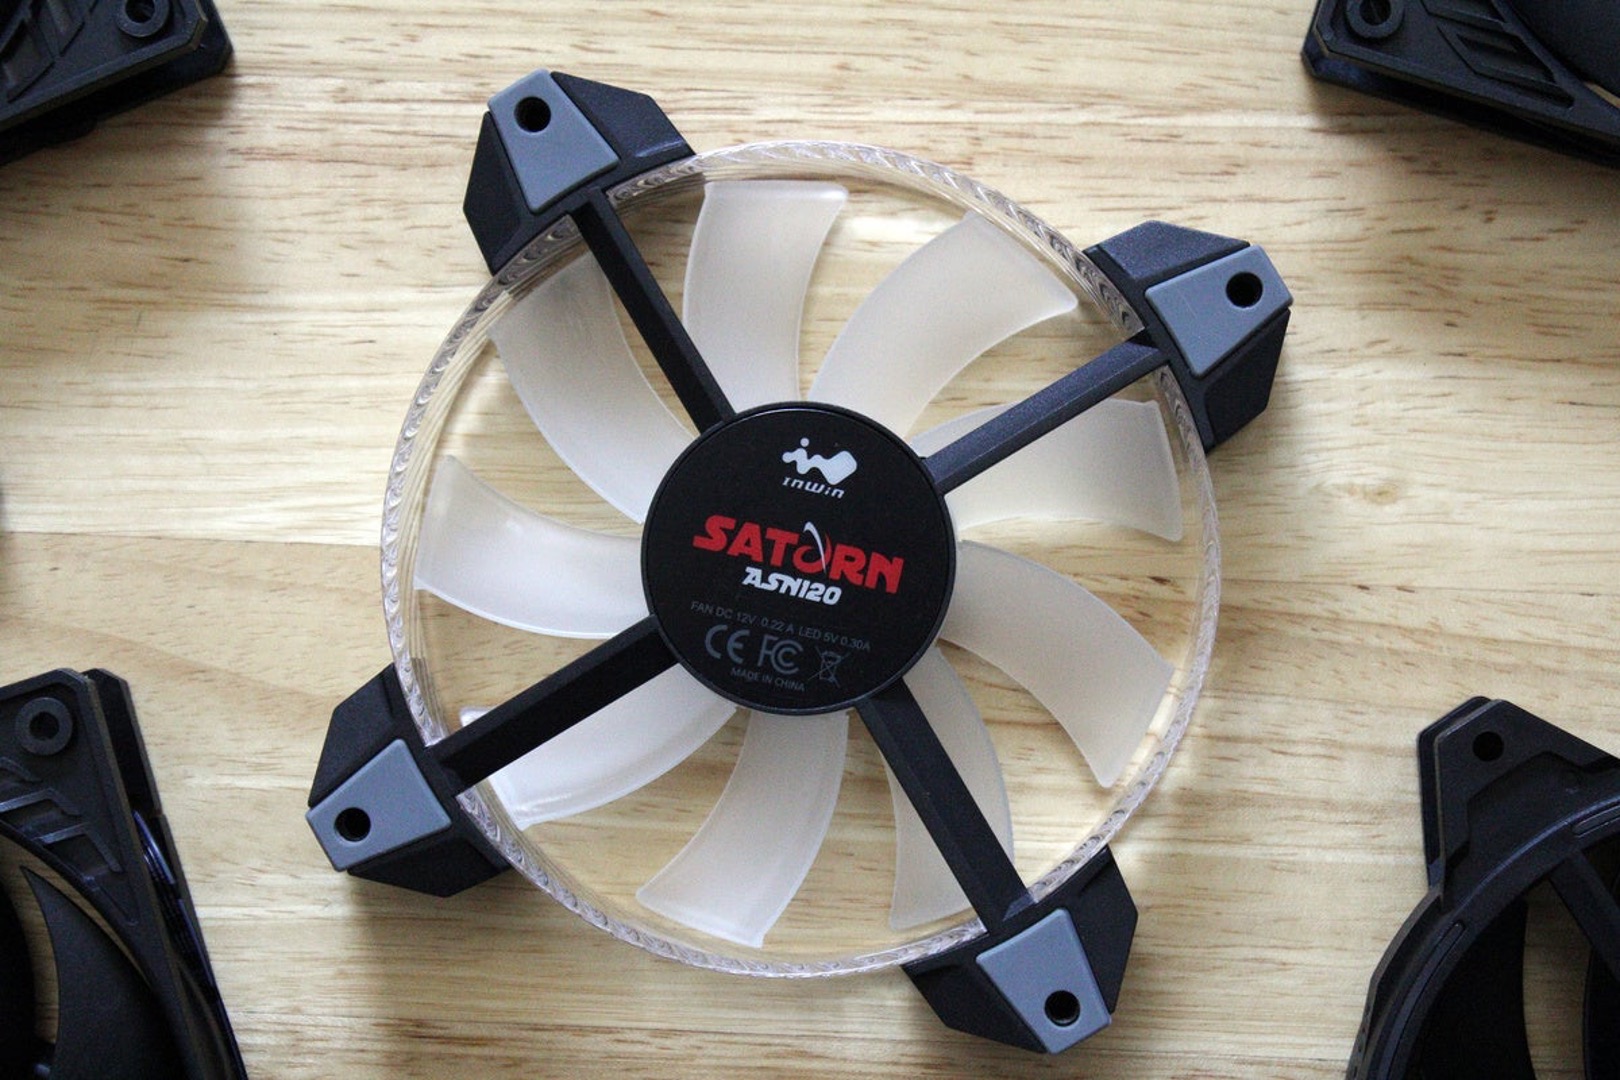
- Inspect the fan blades: Take a moment to examine the fan blades and identify the side that was originally facing outward. This side is typically marked with an arrow or other indicator on the fan frame.
- Turn the fan around: Carefully rotate the fan 180 degrees so that the side with the arrow or indicator is now facing towards the inside of the case.
- Determine the desired airflow direction: Consider your specific cooling needs and the layout of your computer system. Decide whether you want the fan to blow air into the case (creating positive pressure) or extract air out of the case (creating negative pressure).
- Position the fan accordingly: Place the fan back into its new position, aligning it with the mounting holes or clips. Ensure that the airflow direction matches your desired configuration.
- Secure the fan: Use the screws, clips, or mounting brackets to secure the case fan in its new position. Tighten the screws or fasteners firmly, but be careful not to overtighten, as this may cause damage to the fan or the case.
As you reorient the case fan, be mindful of any wires or cables that may restrict its movement. Ensure that the fan is positioned securely and that there is enough clearance around it to allow for proper airflow.
Remember, the goal of this step is to direct the airflow in the desired direction and optimize the cooling efficiency of your computer system. The reversed fan should now be aligned to achieve this objective.
By successfully reorienting the case fan, you have completed an important step in the case fan reversal process. Proceed to the next step to reinstall the case fan in its new position within the computer case.
Step 7: Reinstall the case fan in its new position
Now that you have reoriented the case fan to face the opposite direction, it’s time to reinstall it in its new position within the computer case. Properly securing the fan ensures that it remains stable and allows for optimal airflow. Follow these steps to successfully reinstall the case fan:
- Align the fan with the mounting holes or clips: Carefully position the fan in its new location, ensuring that it aligns with the corresponding mounting holes or clips in the computer case.
- Insert the screws or engage the clips: If your case fan uses screws for mounting, insert them through the fan’s screw holes and thread them into the corresponding holes in the computer case. Alternatively, if the fan uses clips, engage the clips securely to hold the fan in place.
- Tighten the screws or secure the clips: Use a screwdriver to tighten the screws or secure the clips properly, ensuring that the fan is securely fastened but not overly tightened. Over-tightening may damage the fan or the case.
- Verify the fan’s stability: Gently wiggle the fan to ensure that it is securely installed and doesn’t have any excessive movement. If the fan feels loose, double-check the mounting screws or clips and adjust them as necessary.
During this step, be mindful of any wires or cables that may be near the fan’s installation area. Ensure that they are properly managed and not being pinched or obstructing the fan’s movement.
Reinstalling the case fan in its new position ensures that it remains stable and effectively contributes to the airflow within the computer case.
By successfully following these steps, you have completed the process of reinstalling the case fan in its new position. Proceed to the next step to reconnect the case fan to its power source.
Step 8: Reconnect the case fan to its power source
With the case fan securely installed in its new position, the next step is to reconnect it to its power source. Properly connecting the fan ensures that it receives the necessary power to operate correctly and contribute to the cooling of your computer system. Follow these steps to successfully reconnect the case fan:
- Locate the power connector: Identify the power connector on the case fan. It is typically a plastic plug with multiple pins.
- Align the power connector: Align the pins of the power connector with the corresponding socket on the motherboard or fan controller. Ensure that they are properly lined up before proceeding.
- Insert the power connector: Gently insert the power connector into the socket, applying even pressure. Avoid forcing or bending any of the pins, as this may cause damage to the connector or the motherboard.
- Secure the connection: Once the power connector is inserted fully, you may need to secure it using a locking mechanism or latch provided with your motherboard or fan controller. This helps to ensure a stable and reliable connection.
As you reconnect the case fan, be mindful of the orientation of the power connector. Ensure that it matches the socket on the motherboard or fan controller to avoid any potential damage or incorrect power delivery.
After securing the connection, visually inspect the fan and surrounding area to ensure that no wires or cables are obstructing the movement of the fan blades.
In this step, properly reconnecting the case fan to its power source is crucial for its proper functioning. The fan is now ready to receive power and contribute to the cooling of your computer system.
By successfully following these steps, you have completed the process of reconnecting the case fan to its power source. Proceed to the next step to close your computer case.
Step 9: Close your computer case
Now that you have completed the necessary changes to the case fan and reconnected it to its power source, it’s time to close your computer case. Closing the case protects the internal components from dust, foreign objects, and potential damage. Follow these steps to successfully close your computer case:
- Align the side panel: Take the side panel you removed earlier and align it with the corresponding slots or hinges on the computer case.
- Slide or push the side panel into place: Gently slide or push the side panel back onto the case, ensuring that it fits snugly and securely.
- Secure the side panel: Depending on your computer case design, use the screws or latches you removed earlier to secure the side panel in place. Tighten the screws firmly, but be careful not to overtighten.
- Double-check the closure: Verify that the side panel is properly aligned, secure, and flush with the rest of the computer case. A properly closed case ensures proper cooling and protection for your computer components.
It’s important to note that some modern computer cases may have tool-less mechanisms for closing the case, such as latching systems or quick-release buttons. If your case features such mechanisms, follow the manufacturer’s instructions to close it correctly.
Once the case is closed and secured, take a moment to ensure that all external cables and connectors are properly organized and not interfering with the case’s closure.
By following these steps, you have successfully closed your computer case, providing protection for the internal components and ensuring a proper airflow system.
Proceed to the final step to power on your computer and test the reversed case fan.
Step 10: Power on your computer and test the reversed case fan
With your computer case closed and all the necessary changes made, it’s time to power on your computer and test the reversed case fan. This step allows you to ensure that the fan is functioning correctly and contributing to the cooling of your system. Follow these steps to power on your computer and test the reversed case fan:
- Reconnect the power cord: Plug the power cord back into the electrical outlet and ensure it is securely connected to your computer’s power supply.
- Press the power button: Locate the power button on your computer case and press it to turn on your computer. If necessary, follow your computer’s specific startup procedure.
- Listen for fan operation: As your computer starts up, listen for the sound of the case fan spinning. You should hear a gentle whirring sound, indicating that the fan is operational.
- Observe the airflow: Pay attention to the airflow within your computer case. If the case fan is blowing air into the case, you should feel air being pushed out through the exhaust vents. If the fan is extracting air out of the case, you should feel air being pulled into the case through the intake vents.
- Monitor system temperatures: Keep an eye on your computer’s temperature statistics. You can use software tools or the BIOS/UEFI settings to monitor the temperature of your CPU, GPU, and other components. Ensure that the reversed case fan is effectively contributing to the cooling and maintaining optimal temperatures.
- Check for any unusual noises or vibrations: While the case fan is in operation, monitor for any unusual noises or vibrations coming from the fan. Unusual sounds or excessive vibrations could indicate an issue, and you may need to troubleshoot or reposition the fan if necessary.
Testing the reversed case fan allows you to verify that it is functioning correctly and effectively contributing to the cooling of your computer system. It also gives you an opportunity to address any potential issues or fine-tune the fan’s position if needed.
By following these steps and testing the reversed case fan, you have completed the process. Enjoy the improved airflow and cooling efficiency of your computer with the optimized case fan configuration.
Conclusion
Reversing a case fan can be a simple and effective way to optimize the cooling efficiency of your computer and maintain optimal temperatures for your components. By following the step-by-step instructions outlined in this guide, you can safely and successfully reverse a case fan to achieve the desired airflow and cooling configuration.
We discussed the reasons why you might want to reverse a case fan, such as improving airflow to specific areas, creating a positive pressure environment, or accommodating changes in component layout. We also highlighted the importance of gathering the necessary tools and materials, as well as taking the necessary precautions like powering off and unplugging your computer before working inside the case.
Throughout the guide, we walked you through each step of the process, from identifying the case fan to reorienting it, reconnecting it to its power source, and finally closing the computer case. By following these steps carefully, you can ensure a proper and secure installation of the reversed case fan.
After completing the process, it’s important to power on your computer and test the reversed case fan to verify its functionality and contribution to the cooling system. Monitor the airflow, listen for any unusual noises, and keep an eye on the system temperatures to ensure optimal performance.
Remember that the process of reversing a case fan may vary depending on the specific computer case design and fan configurations. It’s always a good idea to consult your computer’s documentation or the manufacturer’s website for any specific instructions or cautionary notes.
By reversing a case fan, you can customize the cooling performance of your computer to suit your specific needs. Enjoy improved airflow, better temperature management, and a more efficient cooling system for your computer.


