Introduction
In today’s digital age, tablets have become an indispensable part of our lives. We use them for work, entertainment, communication, and much more. However, with frequent use, accidents can happen, and one of the most common issues tablet owners face is a cracked or damaged screen. Luckily, with the right tools and know-how, repairing a tablet screen can be a manageable task that you can do yourself.
Repairing a tablet screen not only saves you time and money but also allows you to regain full functionality and enjoy your device without any obstructions. Whether you have accidentally dropped your tablet or it has suffered a minor mishap, this step-by-step guide will help you through the process of repairing your tablet screen.
In this article, we will walk you through each stage of the repair process, from assessing the damage and gathering the necessary tools to disassembling the tablet and installing the new screen. We’ll also provide troubleshooting tips to help you overcome any potential challenges along the way.
Please note that repairing a tablet screen requires patience, attention to detail, and some technical knowledge. It’s important to read through each step carefully and follow the instructions closely to ensure a successful repair. Additionally, it’s worth mentioning that tablet models may differ slightly, so it’s always a good idea to consult your tablet’s user manual for any specific instructions or precautions.
By following this guide, you can breathe new life into your tablet and get back to enjoying all its features and functionalities. So, let’s begin our journey to repairing your tablet screen!
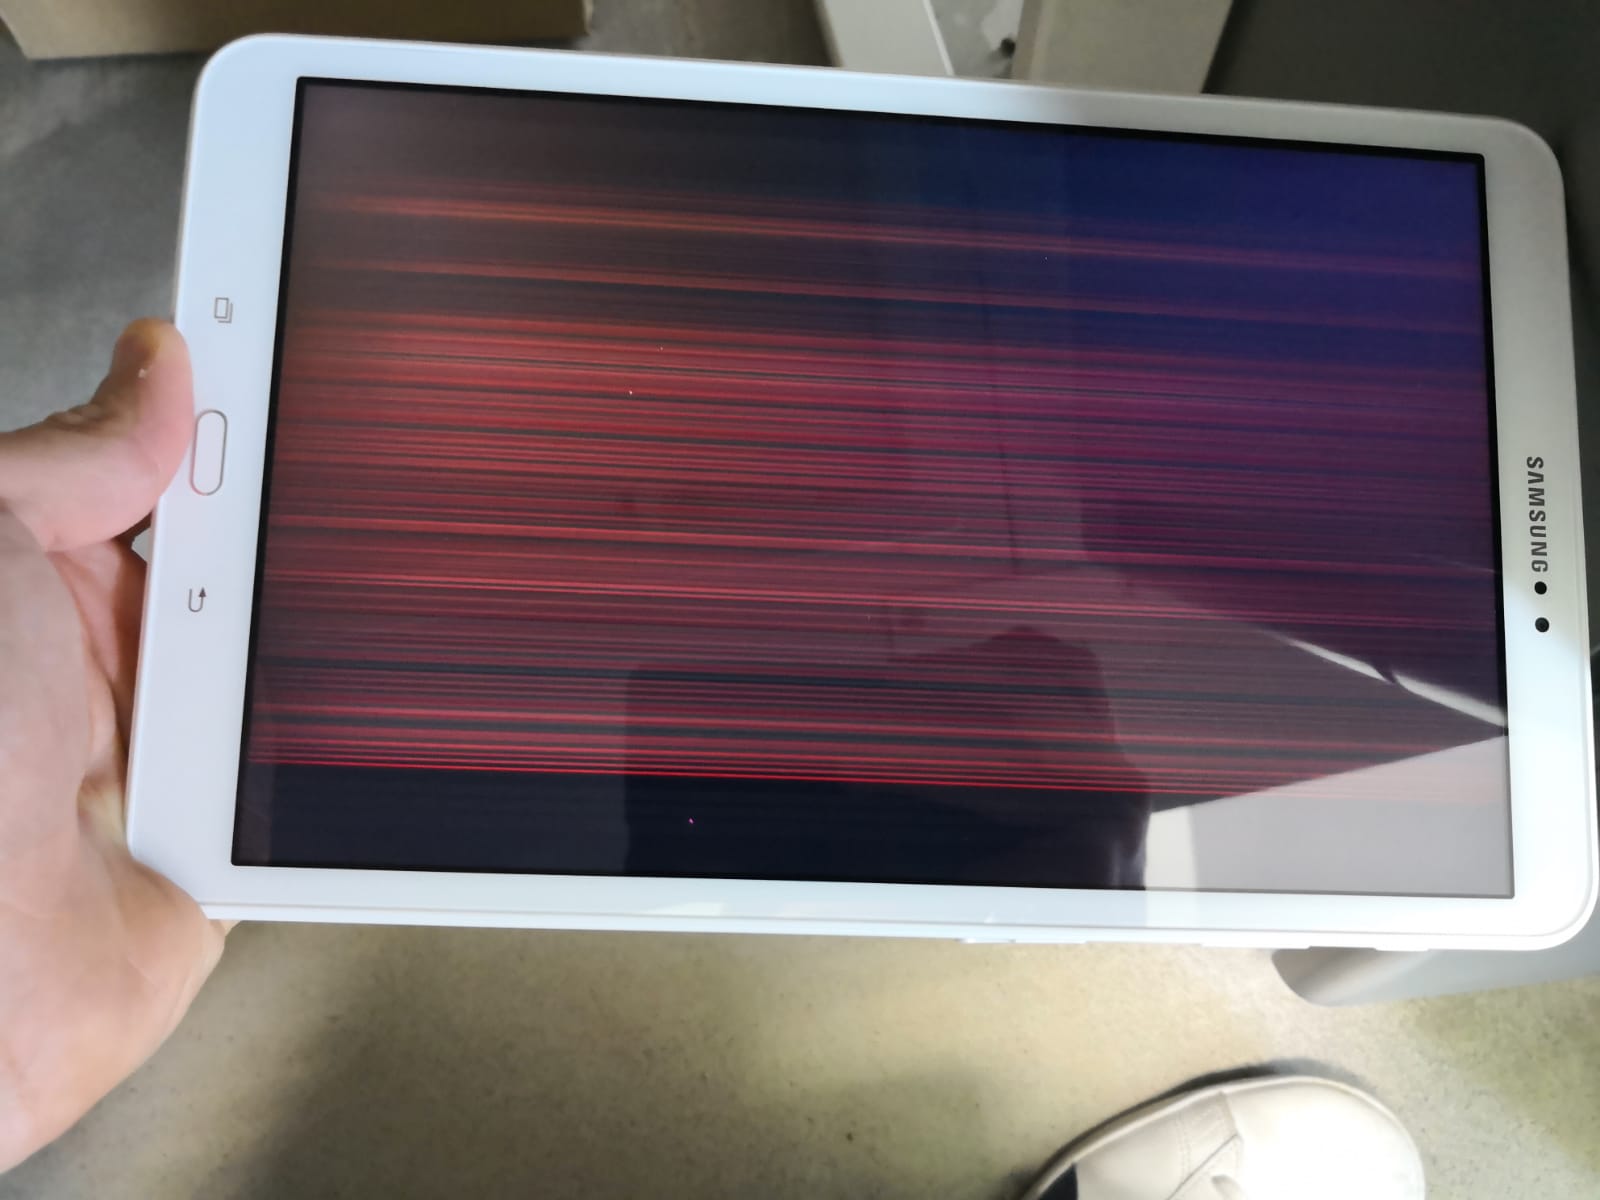
Step 1: Assess the Damage
Before you start the repair process, it’s crucial to assess the extent of the damage to your tablet screen. Carefully examine the screen for any visible cracks, shattered glass, or black spots. Take note of any damage that may extend beyond the physical screen, such as unresponsive touch functions or distorted display.
If the damage is minimal, such as a small crack or scratch, you may opt for a DIY repair. However, if the screen is severely shattered or the display is malfunctioning, it might be best to consult a professional or consider replacing the tablet altogether.
Here are a few key points to consider during the damage assessment:
1. Visible cracks: Check the screen for any visible cracks or breaks. If the cracks are small and do not obstruct your view or affect the touch functionality, a screen replacement might be the solution.
2. Shattered glass: If the glass is shattered into multiple pieces or if you can see broken glass shards sticking out, it’s crucial to handle the tablet with extreme caution to avoid any injuries. In such cases, replacing the entire screen assembly might be necessary.
3. Touch responsiveness: Test whether the touch functionality of your tablet is affected by the damage. If certain areas of the screen are unresponsive or if the touch response is inaccurate, it could indicate a deeper issue that might require professional help.
4. Display abnormalities: Observe the screen for any abnormalities in its display, such as flickering, lines, or discoloration. Such issues can be indicative of underlying problems with the LCD panel or other internal components.
Once you have assessed the damage and have a clear understanding of the extent of the problem, you can proceed to the next step of gathering the necessary tools for the repair process. Remember, taking the time to accurately assess the damage will help you make informed decisions and ensure a successful repair.
Step 2: Gather the Necessary Tools
Before you begin repairing the tablet screen, it’s important to gather all the necessary tools to ensure a smooth and successful repair process. Having the right tools at your disposal will not only make the repair easier but also minimize the risk of causing any further damage to your tablet.
Here are the essential tools you will need for this repair:
- Screwdriver Set: A precision screwdriver set with various screwdriver heads is necessary to remove screws and disassemble the tablet. Make sure to choose a set that includes the appropriate sizes and types of screwdriver heads for your tablet model.
- Plastic Pry Tools: Plastic prying tools are used to gently pry open the tablet’s casing without scratching or damaging it. These tools are critical for safely removing the screen and accessing the internal components. It’s advisable to have a set of different sizes and shapes to cater to the specific requirements of your tablet model.
- Tweezers: Tweezers come in handy for handling small components, such as screws, connectors, and adhesive strips. Opt for a pair of fine-tip tweezers that allow for precise and careful manipulation.
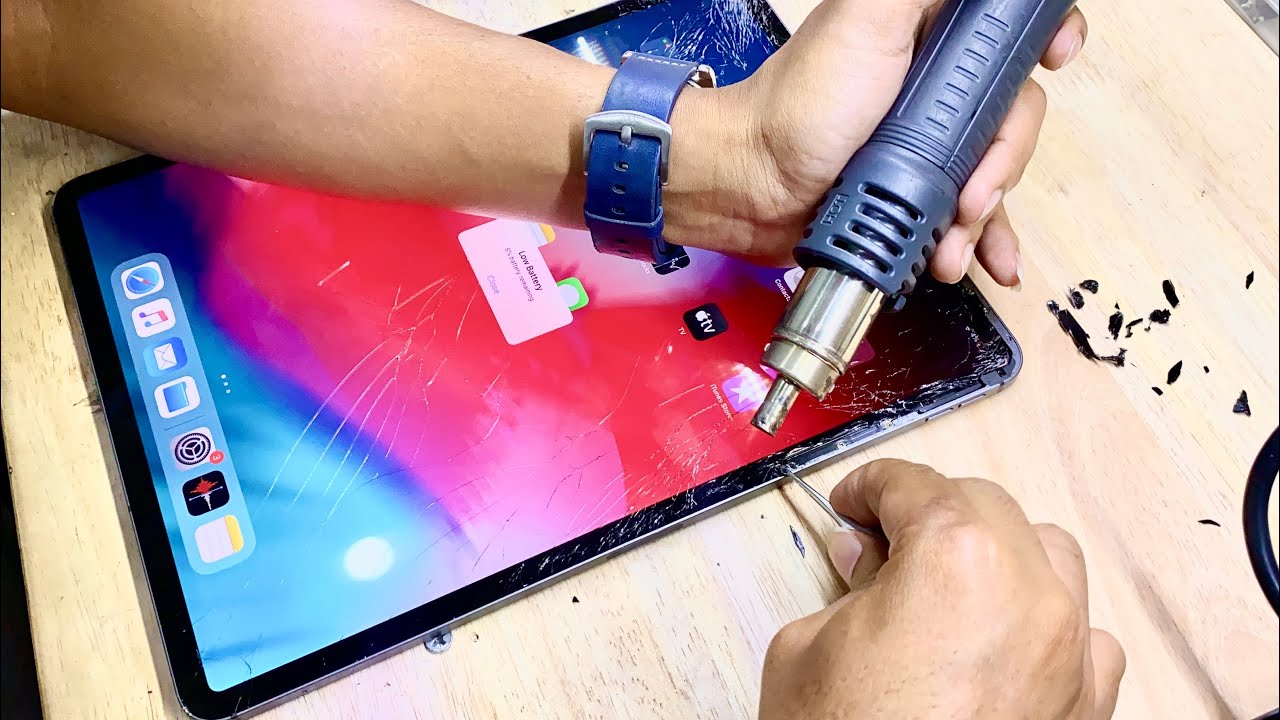
- Heat Gun or Hair Dryer: In certain cases, applying heat to the tablet’s screen can soften the adhesive and make it easier to remove the damaged screen. A heat gun or a hairdryer set on low heat can be used for this purpose. Remember to use heat with caution and avoid overheating the device.
- Microfiber Cloth: A microfiber cloth is essential for wiping away any dust, fingerprints, or smudges from the screen before and after the repair. This lint-free cloth ensures a clean and clear surface for the new screen installation.
- Adhesive Strips or Double-sided Tape: Depending on the tablet model, adhesive strips or double-sided tape may be required to secure the new screen in place. Check the specifications for your tablet model to determine the type and size of adhesive required.
- Replacement Screen: Acquire a compatible replacement screen that matches your tablet’s model and specifications. Ensure that the replacement screen is of high quality to guarantee optimal performance and durability.
It’s always a good idea to gather all the tools and materials before starting the repair process. This will save you time and ensure that you have everything you need readily available. With the necessary tools in hand, you are now ready to move on to the next step of preparing the work area for the tablet screen repair.
Step 3: Prepare the Work Area
Before diving into the tablet screen repair process, it’s essential to set up a clean and organized work area. A well-prepared work area will help you stay focused and ensure that you have enough space to comfortably work on your tablet without any distractions or potential mishaps.
Here are the key steps to follow when preparing your work area:
- Clean and Clear Surface: Start by clearing a flat, well-lit surface to work on. Ensure that the surface is clean and free from any dust or debris that can potentially get into the tablet during the repair process. Placing a clean cloth or mat on the surface can provide added protection for your tablet and prevent any accidental scratches.
- Organize the Tools: Arrange all the necessary tools and materials within reach. Have a designated area or tray to keep the tools organized to avoid any confusion or misplacement during the repair. This will help streamline the process and save you time searching for tools when you need them.
- Remove Distractions: Minimize distractions by turning off any unnecessary electronics or notifications. Repairing a tablet screen requires focus and attention to detail, so it’s important to eliminate any distractions that may hinder your progress.
- Protective Gear: Consider wearing protective gear, such as safety goggles and gloves, to protect yourself from any potential injuries or exposure to harmful substances during the repair. This is especially important when handling broken glass or using tools that generate heat.
- Work in a Well-Ventilated Area: If you are using a heat gun or hairdryer during the repair process, ensure that you are working in a well-ventilated area to prevent the accumulation of fumes or odors. If needed, use a fan or open windows to promote air circulation.
By taking the time to prepare your work area, you create an environment conducive to a successful repair. Having an organized and clean space will help you work efficiently and minimize the risk of any accidents or damage to your tablet.
Now that your work area is ready, it’s time to move on to the next step: disassembling the tablet to access the damaged screen.
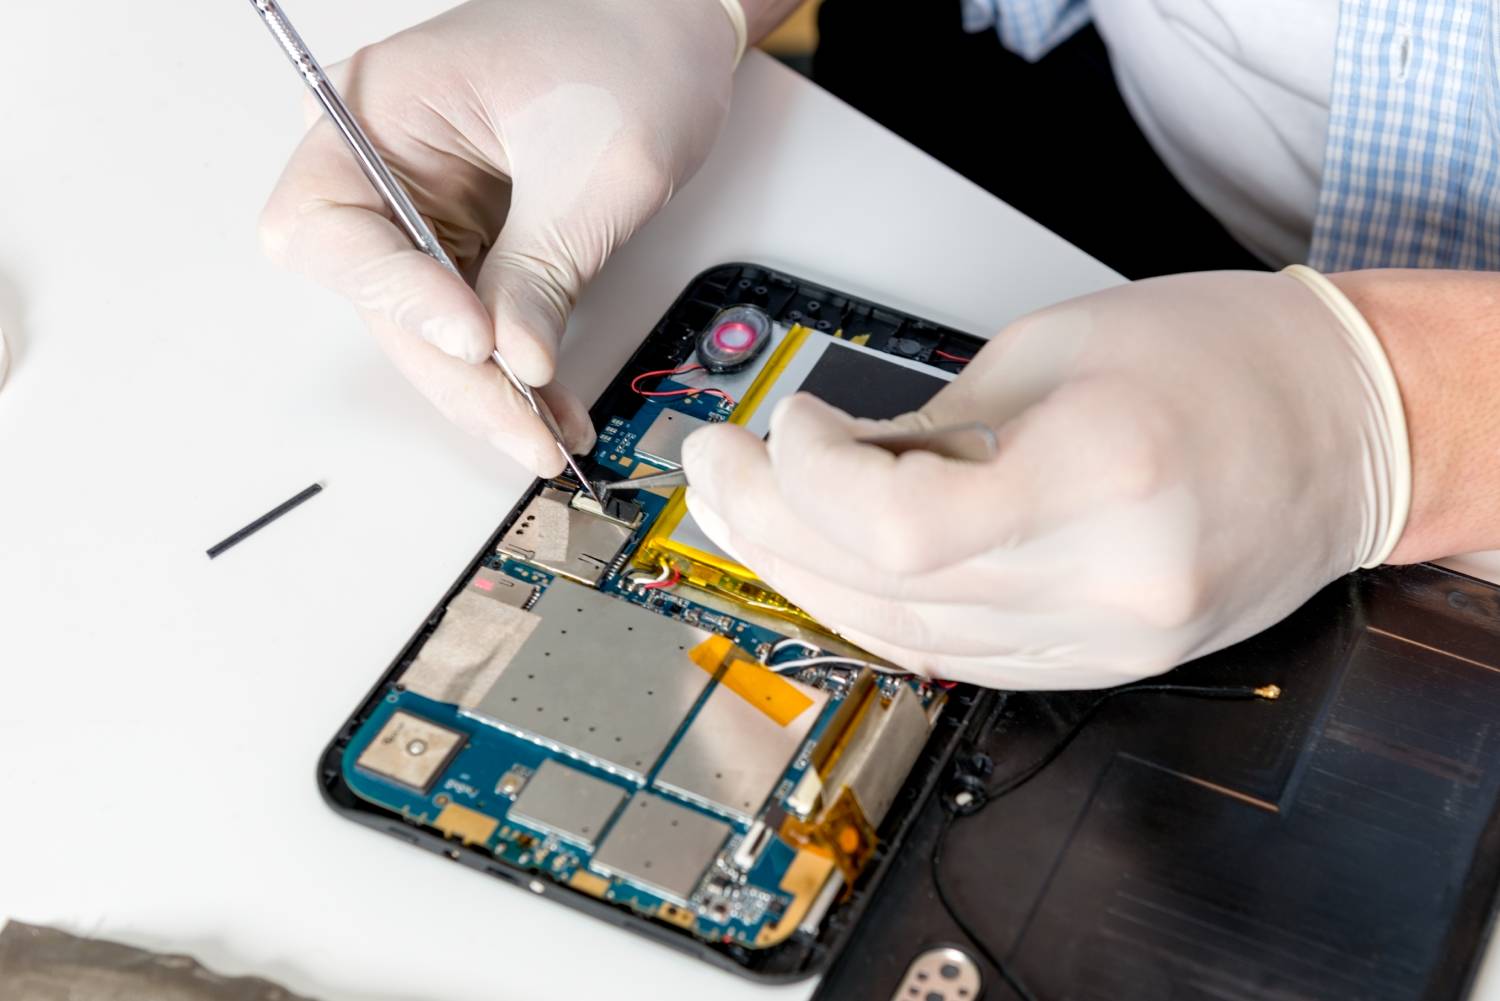
Step 4: Disassemble the Tablet
Now that you have prepared your work area, it’s time to disassemble the tablet to gain access to the damaged screen for replacement. Although the exact disassembly process may vary depending on your tablet model, there are general steps you can follow to dismantle most tablets.
Here’s a general guide on how to disassemble a tablet:
- Power Off: Make sure your tablet is powered off before starting the disassembly process. This will prevent any accidental damage and ensure your safety.
- Remove External Components: Begin by removing any external components, such as the back cover, protective case, or SIM card tray. Use a plastic prying tool or your fingernail to gently pry open any clips or tabs holding these components in place.
- Remove Screws: Use the appropriate screwdriver head to remove any visible screws on the back or edges of the tablet. Keep track of each screw and its location as different screws may have varying sizes or lengths.
- Pry Open the Tablet: Once the screws are removed, use a plastic prying tool to carefully separate the front and back panels of the tablet. Start at a corner and gently insert the tool between the panels, then slowly work your way around the edges, releasing any clips or adhesive holding them together.
- Disconnect Cables and Components: Inside the tablet, you will find various cables and connectors that need to be disconnected to fully separate the front panel from the rest of the device. Take note of their locations and use a plastic prying tool or tweezers to gently disconnect them, being careful not to apply too much force.
- Set Aside Components: As you disassemble the tablet, set aside the screws, cables, connectors, and other components in a safe place. It’s helpful to use a small container or magnetic mat to keep everything organized and prevent any loss or mix-up.
Remember to approach the disassembly process with caution and patience. If you encounter any resistance or are unsure about removing a component, consult your tablet’s user manual or seek professional assistance. Each tablet model may have its own specific disassembly instructions and requirements.
With the tablet successfully disassembled, you’re now ready to move on to the next step: removing the damaged screen and preparing for the installation of the new screen.
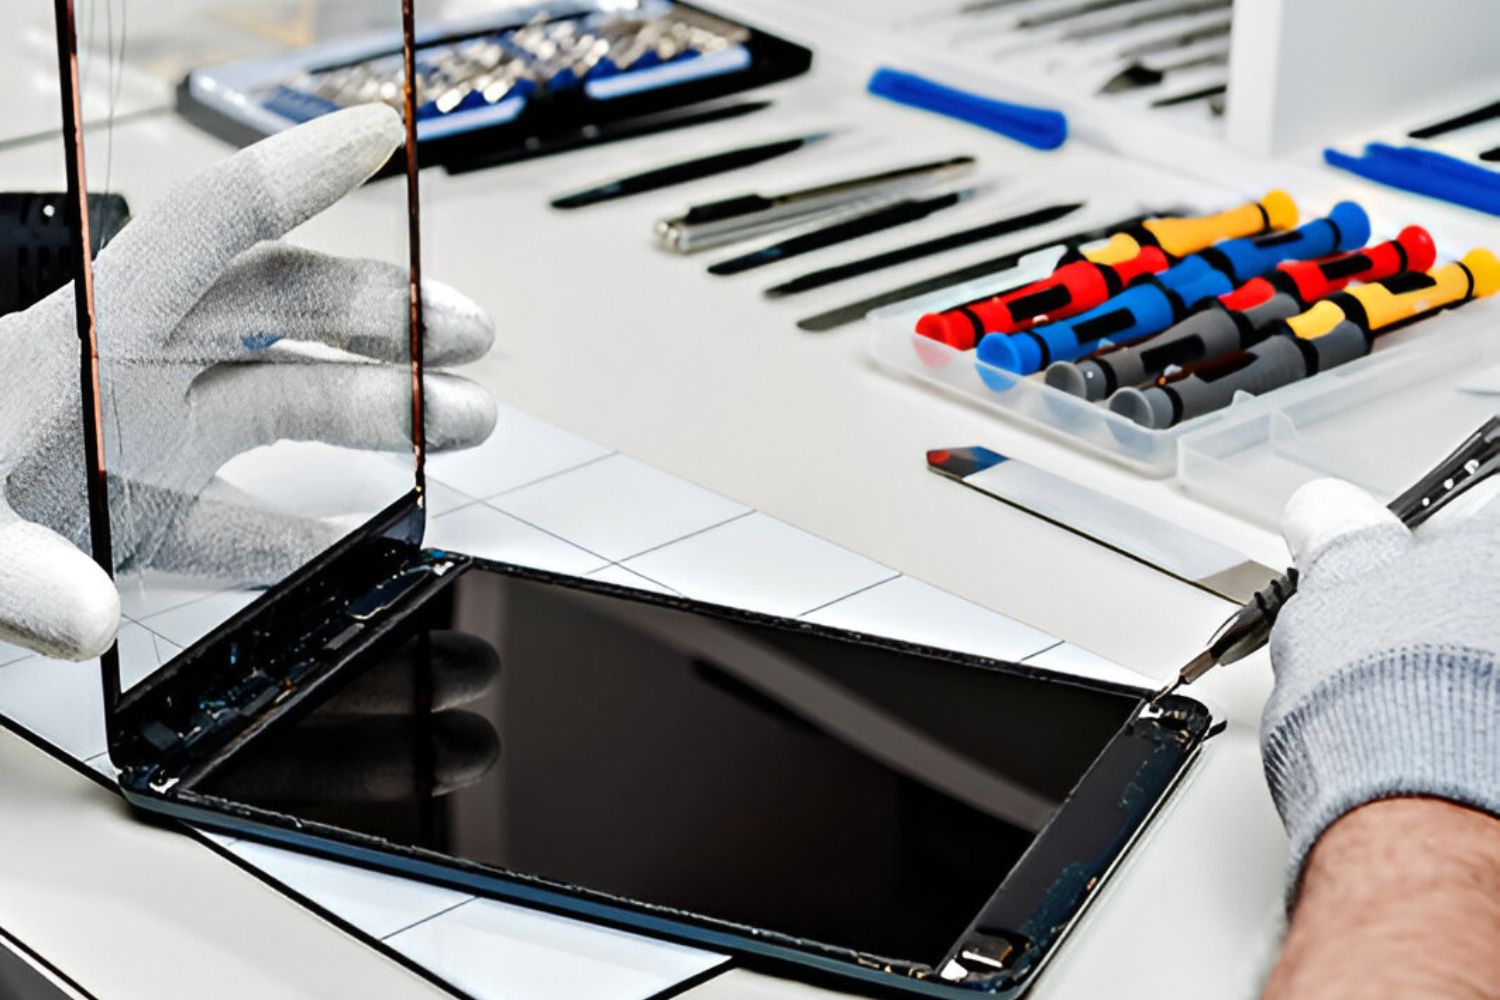
Step 5: Remove the Damaged Screen
With the tablet disassembled, it’s time to remove the damaged screen from the device. Be sure to work carefully and gently to avoid causing any further damage to the tablet.
Here’s a guide on how to remove the damaged screen:
- Inspect the Screen: Take a closer look at the damaged screen to identify any adhesive strips or connectors that are securing it in place. Carefully detach any adhesive strips holding the screen to the frame of the tablet and set them aside if they are still in good condition and reusable.
- Disconnect Flex Cables: Locate the flex cables that connect the screen to the tablet’s logic board. Using a plastic prying tool or tweezers, gently disconnect the flex cables by releasing the locking mechanism or gently pulling them away from their connectors.
- Remove Any Additional Mounting Clips or Screws: In some cases, there may be additional mounting clips or screws securing the screen to the tablet’s frame. Remove these clips or screws using the appropriate screwdriver or prying tool.
- Lift and Remove the Damaged Screen: Once all the adhesive strips, connectors, and mounting clips or screws have been detached, carefully lift the damaged screen from the tablet’s frame. Hold the screen by its edges and avoid applying pressure to the display itself.
- Set Aside the Damaged Screen: Place the removed screen in a safe and clean location, away from any potential damage. If the screen is severely damaged, it is advisable to dispose of it properly or recycle it according to your local electronic waste disposal guidelines.
During the screen removal process, be mindful of delicate cable connections and fragile components. Take your time and ensure that all connections are safely detached before proceeding. If needed, refer to the user manual or consult a professional for specific instructions related to your tablet model.
With the damaged screen successfully removed, you can now proceed to the next step: installing the new screen onto your tablet.
Step 6: Install the New Screen
Now that you have removed the damaged screen, it’s time to install the new screen onto your tablet. This step requires precision and careful handling to ensure a proper fit and functionality of the replacement screen.
Here’s a guide on how to install the new screen:
- Clean the Tablet Frame: Before installing the new screen, use a microfiber cloth to gently clean the tablet frame, removing any dust or debris. Ensuring a clean surface will help the adhesive bond effectively.
- Attach Adhesive Strips or Double-Sided Tape: If the replacement screen requires adhesive strips or double-sided tape, carefully align and attach them to the corresponding areas on the tablet frame. Follow the instructions provided with the replacement screen or refer to the tablet’s user manual for guidance on proper placement.
- Connect Flex Cables: Take the new screen and align the flex cables with their respective connectors on the tablet’s logic board. Attach the cables securely by applying gentle pressure. Ensure that all connectors are properly seated and locked in place.
- Lower the New Screen into Position: Gently position the new screen onto the tablet frame, aligning it with the screw holes and ensuring a snug fit. Be cautious not to touch the display surface directly, as this may leave fingerprints or smudges.
- Secure the Screen: If there were any mounting clips or screws involved in holding the original screen, reattach them to secure the new screen in place. Tighten the screws carefully, being mindful not to overtighten or strip them.
It’s important to follow the instructions provided with the replacement screen or consult the tablet’s user manual to ensure proper installation and alignment. Take your time to align the screen correctly and check that all connections are secure before proceeding.
Once the new screen is installed and properly secured, you can move on to the next step: reassembling your tablet.
Step 7: Reassemble the Tablet
With the new screen successfully installed, it’s time to reassemble your tablet and put all the components back together. This step involves carefully reattaching the back panel, reconnecting any internal cables, and securing all the screws to ensure a complete and functional unit.
Here’s a guide on how to reassemble your tablet:
- Reconnect Internal Cables: Begin by reconnecting any internal cables that were detached during the disassembly process. Carefully align the connectors and gently press them into their respective sockets. Take your time to ensure that they are securely attached.
- Reattach the Back Panel: Place the back panel over the tablet and align it with the edges. Carefully press down or use gentle pressure to snap it into place. Ensure that all clips and tabs are aligned and securely fastened.
- Insert Screws: Use the appropriate screwdriver head to insert the screws back into their designated locations. Refer to any notes or markings you made during the disassembly process to ensure correct placement. Tighten the screws, but be cautious not to overtighten and risk damaging the tablet.
- Check for Proper Fit: Once all the screws are inserted, check that the tablet’s back panel sits flush with the rest of the device and that it feels sturdy.
During the reassembly process, be mindful of any cables or connectors that may get pinched or caught. Take care to align and route them properly to avoid any strain or interference with the tablet’s components.
Double-check that all components are secure and in their correct positions before proceeding. If a component seems loose or out of place, carefully dismantle that section and reattach the component correctly.
With the tablet reassembled, you’re one step closer to completing the repair process. Now, it’s time to move on to the next step: testing the functionality of the new screen.
Step 8: Test the Screen
After reassembling your tablet, it’s crucial to test the functionality of the new screen to ensure that it is working properly. Testing the screen will help you identify any potential issues or errors that may have occurred during the repair process.
Here’s a guide on how to test the new screen:
- Power On the Tablet: Turn on your tablet and wait for it to boot up. Ensure that the device is fully powered on and that all the necessary settings and configurations are properly loaded.
- Check for Display Quality: Examine the screen to ensure that the display quality is clear, vibrant, and free from any abnormalities such as flickering, lines, or discoloration. A properly functioning screen should display content accurately and without any distortion.
- Test Touch Sensitivity: Use your finger or a stylus to touch and interact with various parts of the screen. Check for the responsiveness and accuracy of touch inputs. Ensure that the touch sensitivity is consistent across the entire surface of the screen.
- Perform Multi-Touch Gestures: Test the multi-touch capabilities of the screen by performing gestures such as pinch-to-zoom, swiping, and rotating. Verify that the screen accurately registers multiple touch inputs and responds accordingly.
- Test Functionality of On-Screen Buttons: If your tablet has on-screen buttons, test their functionality by pressing them and ensuring that they respond appropriately.
- Check for Dead Pixels or Backlight Issues: Inspect the screen for any dead pixels, which appear as small dots that do not display any color. Additionally, check for any issues related to the backlight, such as uneven brightness or dark spots.
- Test Auto-Rotation: If your tablet supports auto-rotation, ensure that the screen orientation changes correctly when you rotate the device.
- Test Audio and Video Playback: Play a video or audio file on your tablet to verify that the screen and audio functions are both working properly. Ensure that there are no issues with audio playback or video rendering.
If you encounter any issues during the testing process, double-check the connections and components to ensure that they are correctly installed and securely attached. If you are unable to resolve the issue, it may be necessary to seek professional assistance or consider contacting the manufacturer for further support.
By thoroughly testing the screen, you can ensure that the repair has been successful, and your tablet is fully functional once again.
Step 9: Troubleshooting Tips
Even with careful attention and proper steps, issues may still arise during or after the tablet screen repair process. If you encounter any problems, here are some troubleshooting tips to help you resolve common issues:
- Screen not turning on: Double-check that all connectors are securely connected and that the power button is functioning properly. If the issue persists, try connecting the tablet to a power source to ensure it has sufficient charge.
- Unresponsive touch screen: If the screen is not responding to touch inputs, check the flex cable connections. Make sure they are securely attached and free from any dirt or debris. If the issue persists, consider resetting the tablet to its factory settings or seeking professional assistance.
- Display abnormalities or artifacts: If you notice any flickering, lines, or color distortions on the screen, try restarting the tablet. If the issue persists, it may indicate a problem with the replacement screen itself, and you should consider contacting the supplier for support or obtaining a replacement.
- Uneven brightness or backlight issues: If the screen has areas that are brighter or darker than others, or if you experience backlight issues, double-check the connections and ensure that the backlight cable is securely connected. If the issue persists, professional assistance may be needed.
- Audio or video playback issues: If you encounter problems with audio or video playback after the screen replacement, check the speaker and audio connector connections. Adjust the volume settings and ensure that media software is up to date. If the issue persists, seek further assistance.
- Screen orientation or gyroscope issues: If the auto-rotation feature or gyroscope is not functioning correctly, verify that the necessary components and connectors are properly installed and connected. If the problem continues, it may be a hardware issue that requires professional attention.
If you are unable to resolve the issue on your own, it’s always advisable to seek professional help. Qualified technicians will have the expertise and tools necessary to diagnose and address more complex problems that may arise during the tablet screen repair process.
Remember, troubleshooting is a crucial part of the repair process, and patience is key. Don’t hesitate to seek assistance if needed, as it’s important to ensure a fully functional tablet after the repair.
Conclusion
Repairing a tablet screen may seem like a daunting task, but with the right tools, knowledge, and patience, it can be a rewarding experience. By following the step-by-step guide provided in this article, you can successfully replace a damaged screen and restore full functionality to your tablet.
Remember, it’s essential to assess the damage accurately and determine whether a DIY repair is feasible or if professional assistance is needed. Gathering the necessary tools beforehand and preparing a clean and organized work area will ensure a smooth repair process.
Disassembling the tablet, removing the damaged screen, and installing the new screen require careful handling and attention to detail. Take your time, refer to the user manual or specific instructions for your tablet model, and be mindful of delicate cables and connectors.
Once the new screen is installed, carefully reassemble the tablet, securing all components and screws. Test the functionality of the new screen, ensuring that it displays clearly, responds to touch inputs, and performs as expected. Troubleshoot any issues that may arise, seeking professional assistance if necessary.
By successfully repairing your tablet screen, you can save time and money, and regain full enjoyment of your device. However, it’s important to note that not all tablet screen repairs are straightforward, and complex issues may require professional expertise. If you encounter challenges beyond your skill level or concerns about voiding warranties, it is always wise to consult a professional technician or the manufacturer.
We hope this guide has provided you with the knowledge and confidence to tackle the repair of your tablet screen. Good luck, and may your tablet screen be restored to its optimal condition!