Introduction
Welcome to this comprehensive guide on how to fix your tablet screen. We understand that a cracked or damaged screen can be frustrating, but don’t worry – with the right tools and a little patience, you can restore your tablet to its former glory in no time.
Tablets have become an essential part of our daily lives, providing us with entertainment, productivity, and connectivity on the go. However, accidents happen, and screens can get cracked or shattered. Whether the damage is due to a drop, impact, or even pressure, it’s vital to address the issue promptly to prevent any further complications.
In this step-by-step guide, we will walk you through the process of fixing your tablet screen. But before we dive into the details, it’s important to note that repairing a tablet screen can vary depending on the device’s make and model. Therefore, it’s essential to consult your device’s user manual or do some research specific to your tablet to ensure the best possible outcome.
Throughout this guide, we will provide general tips and instructions that will be useful for most tablet screen repair endeavors. However, it’s crucial to exercise caution and approach the repair process with precision.
Repairing your tablet screen not only helps restore its functionality but also saves you money and reduces electronic waste. So, without further ado, let’s get started on learning how to fix your tablet screen and bring it back to life!
Step 1: Assess the Damage
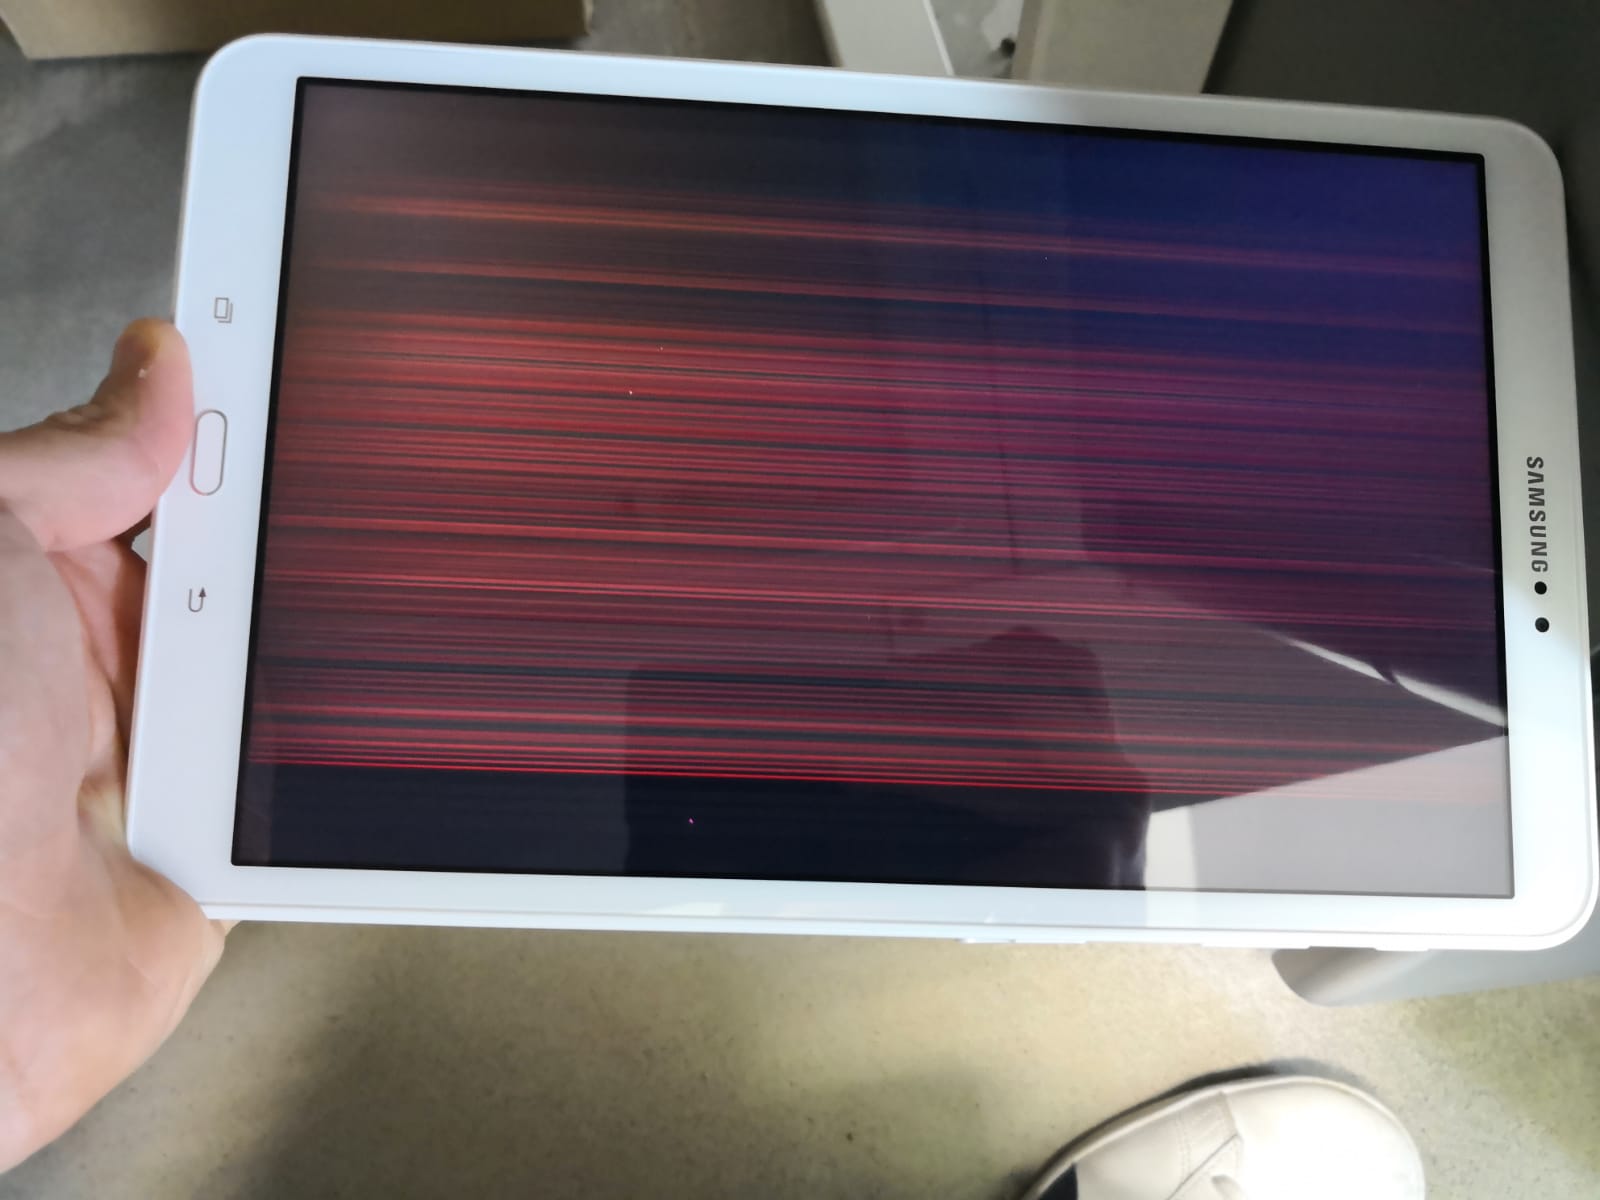
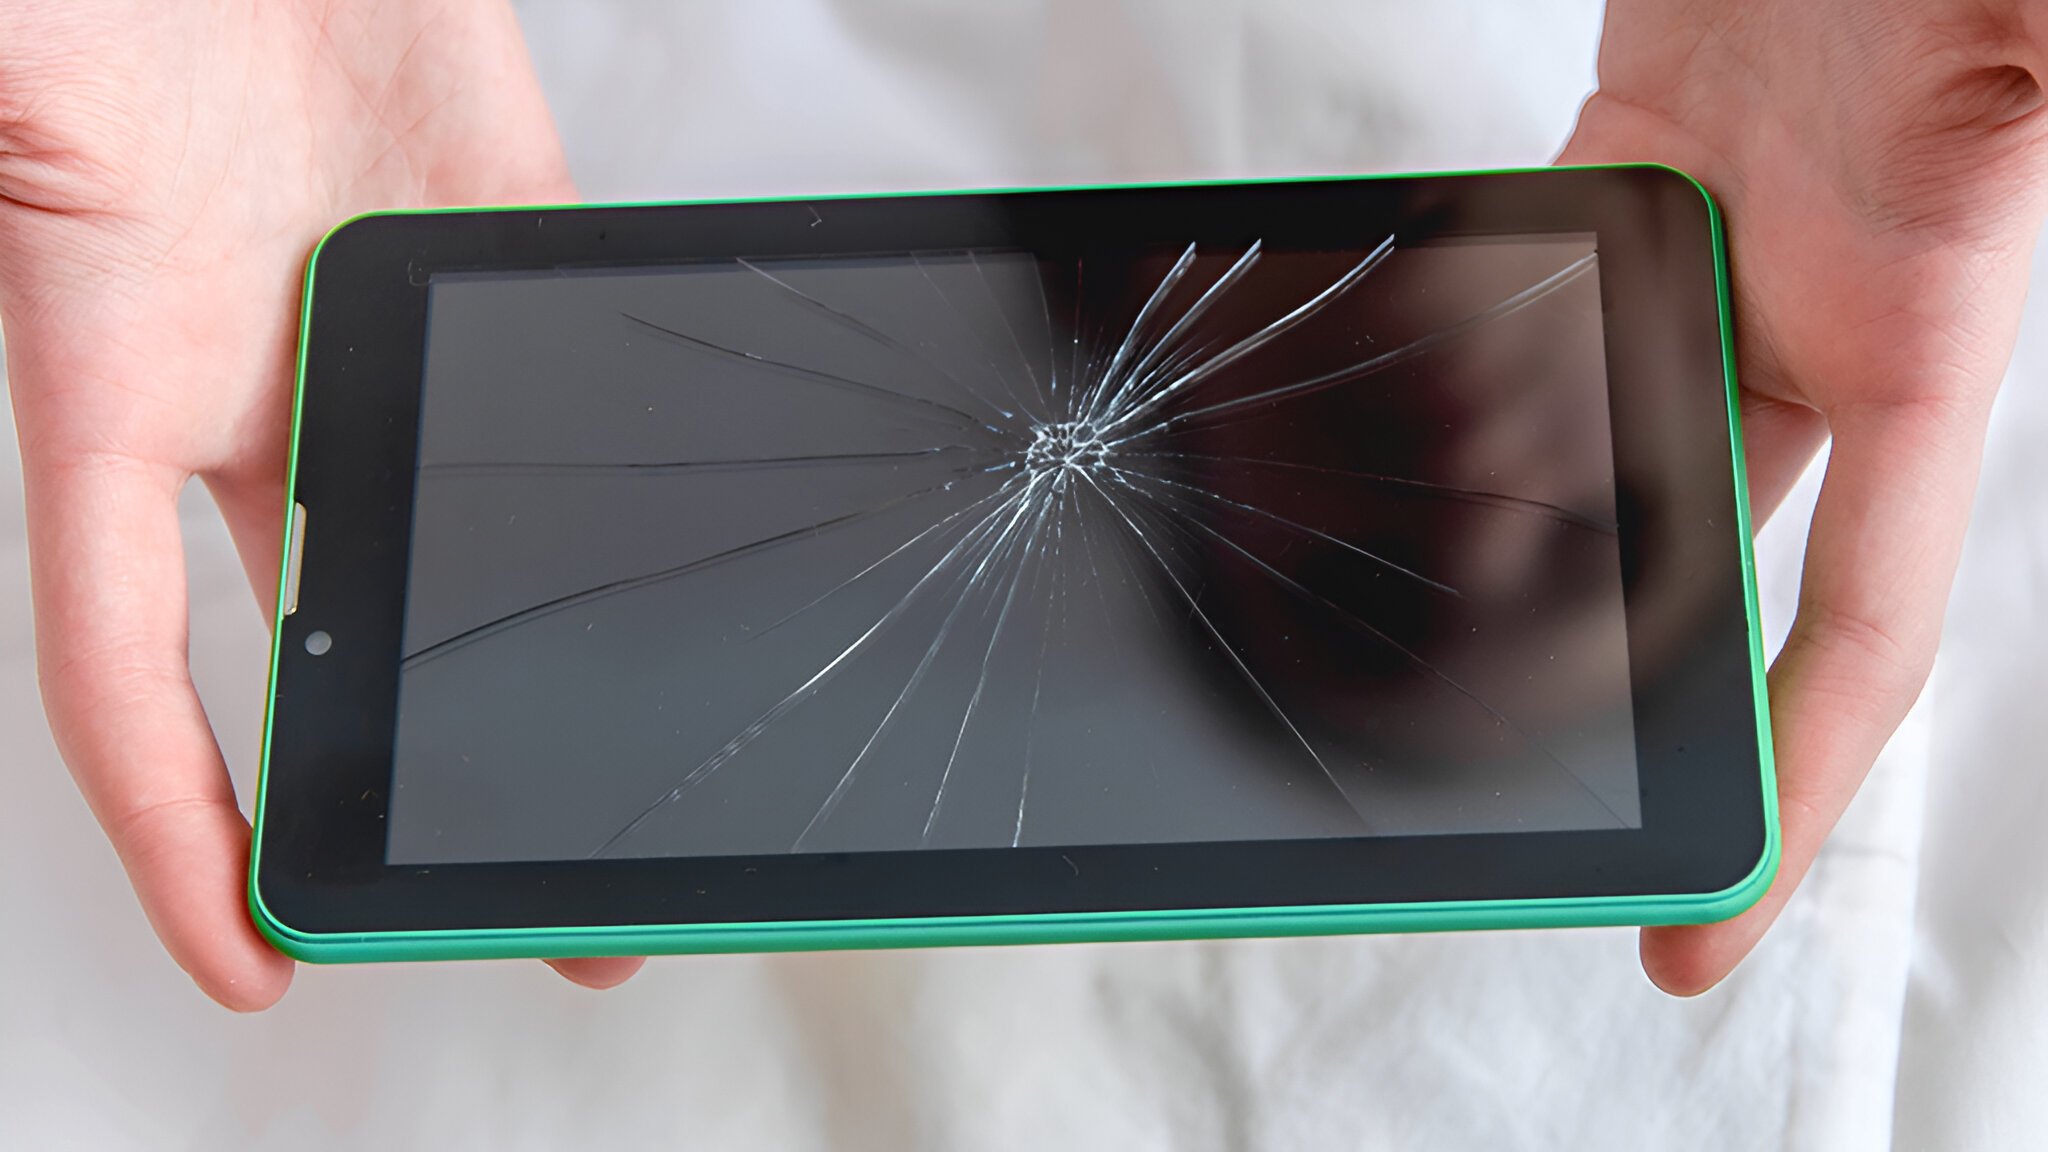
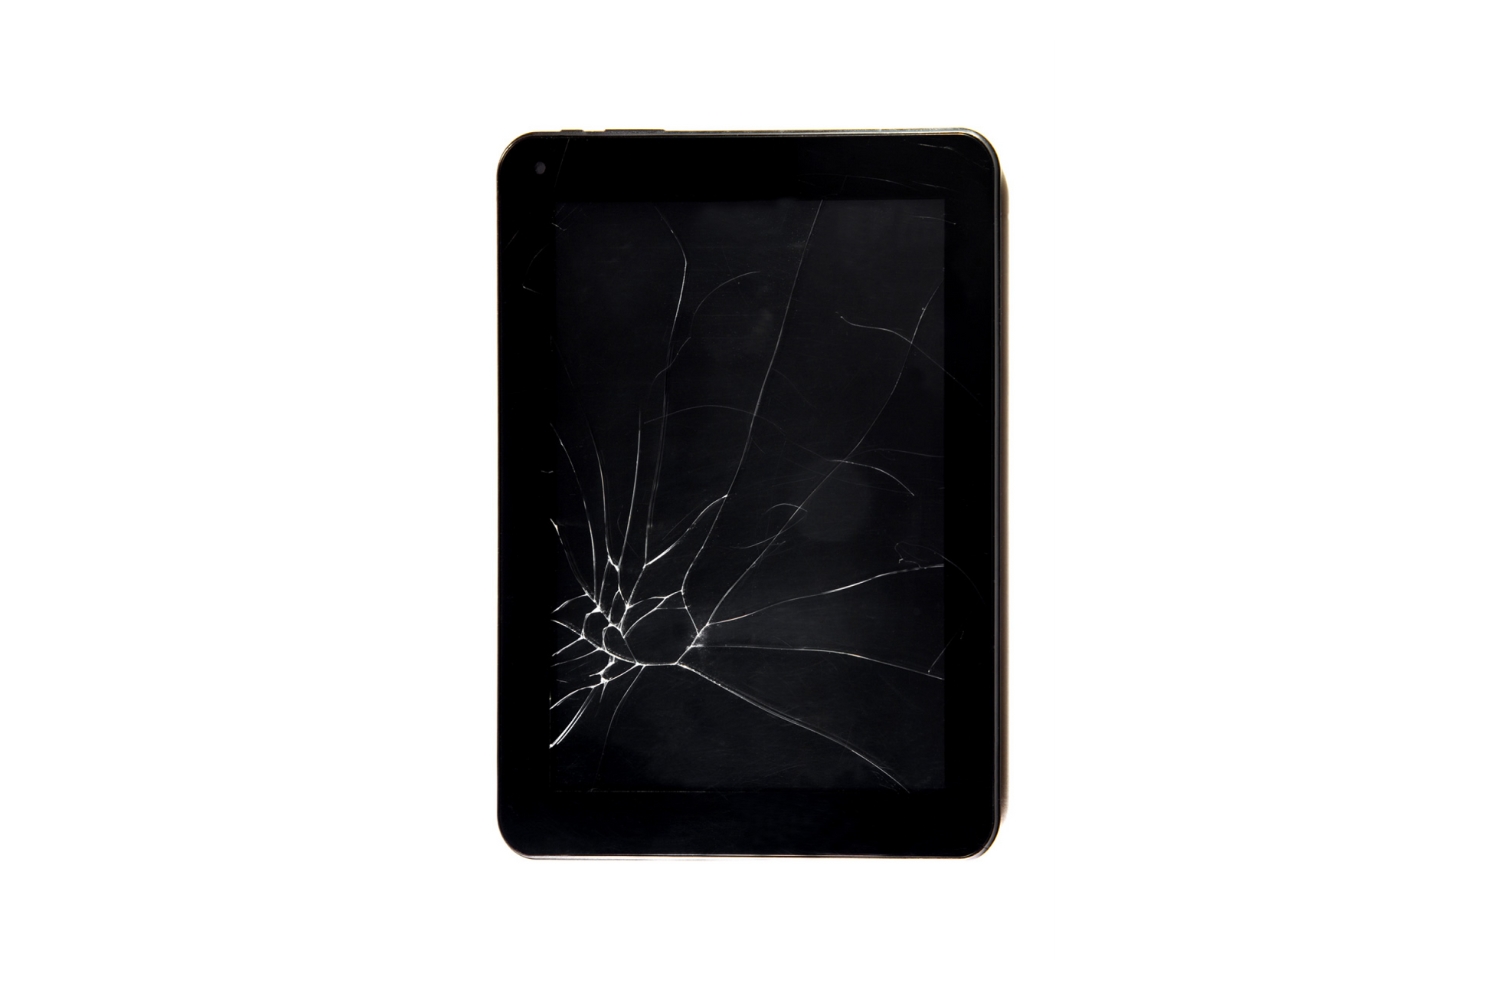
The first step in fixing your tablet screen is to carefully assess the extent of the damage. Take a close look at the screen to determine the severity of the crack or damage. Is it a minor crack or a complete shatter? Are there any other issues, such as unresponsive touch functionality or color distortion?
Assessing the damage will help you determine whether a screen replacement is necessary or if a less invasive fix, such as a screen protector or adhesive, can be applied. It’s important to note that while smaller cracks or scratches may not hinder the tablet’s functionality, they can worsen over time and potentially lead to further damage.
Take note of any additional damage to the tablet’s frame or body. A cracked screen may indicate an impact or drop, which could have affected other internal components as well. Look for any signs of dents, bent edges, or loose parts.
If you’re unsure about the severity of the damage or what steps to take next, it’s recommended to consult a professional or reach out to the tablet’s manufacturer for guidance. They can provide expert advice on the best approach to fixing the screen based on your specific tablet model.
Remember, assessing the damage is a crucial step in the repair process, as it guides you towards the appropriate solution for your tablet screen. So take your time and carefully evaluate the extent of the damage before proceeding to the next steps.
Step 2: Gather the Necessary Tools
Before you begin the tablet screen repair process, it’s essential to gather all the necessary tools. Having the right tools at your disposal will help ensure a smooth and successful repair. Here are some tools you’ll likely need:
- Screwdriver: Depending on your tablet model, you may need a small Phillips or flathead screwdriver to remove screws and access the internal components.
- Plastic Opening Tools: These tools are used to pry open the tablet’s casing without scratching or damaging the device.
- Tweezers: Tweezers are handy for holding small parts or detaching cables during the repair process.
- Screen Protector or Adhesive: If you’re dealing with a minor crack or scratch, a screen protector or adhesive may be all you need to remedy the damage. Make sure to choose a high-quality product that’s compatible with your tablet model.
- New Screen Replacement: If the damage to your tablet screen is significant or the touch functionality is compromised, you’ll need to purchase a compatible replacement screen. Ensure that you source the correct screen size and specifications for your tablet model.
- Cleaning Cloth and Solution: It’s important to clean the tablet screen and remove any dust or debris before installing the new screen. A microfiber cleaning cloth and a mild cleaning solution can help achieve a clean and clear surface.
- Antistatic Wrist Strap: To protect your tablet’s internal components from electrostatic discharge (ESD) damage, consider using an antistatic wrist strap to ground yourself during the repair process.
Make sure to gather all these tools before starting the repair. It’s also a good idea to have a clean, well-lit workspace with ample room to place the tablet and organize the tools.
By having all the necessary tools ready, you’ll be well-prepared to tackle the tablet screen repair with confidence and efficiency.
Step 3: Power Off and Disconnect the Tablet
Before you begin the repair process, it is crucial to power off your tablet and disconnect it from any power source. This step ensures your safety and prevents any potential damage to the device during the repair.
Start by shutting down your tablet completely. If the screen is still functional, you can use the on-screen power-off options. If the screen is unresponsive, you may need to force a shutdown by holding down the power button or removing the battery if it is easily accessible.
Once the tablet is powered off, unplug it from the charger or any other connected cables. This step is essential to prevent any electric shock or short-circuiting hazards during the repair process.
It’s important to note that some tablets have a non-removable battery, and disconnecting the power source may not be possible. In such cases, ensure that the tablet is powered off and avoid touching any exposed metal or electrical components.
If you are uncertain about how to properly power off or disconnect your tablet, consult the user manual or search for specific instructions related to your tablet model. Following the manufacturer’s guidelines will ensure a safe and effective repair process.
By powering off and disconnecting your tablet, you take important precautionary steps to protect yourself and your device from any potential damage during the repair process. So, double-check that your tablet is completely turned off and disconnected before moving on to the next steps.
Step 4: Remove the Protective Cover or Case
If your tablet has a protective cover or case, it’s essential to remove it before proceeding with the screen repair. Removing the cover or case will give you better access to the tablet’s screen and internal components.
The process of removing the protective cover or case may vary depending on the design and type of cover you have. Some covers may simply snap off, while others may require unscrewing or sliding mechanisms.
Carefully inspect the cover or case for any screws, clips, or latches that may be holding it in place. Refer to the manufacturer’s instructions or search online for specific guidance on how to remove the cover or case for your tablet model.
If you are unsure about how to remove the cover or case safely, it’s best to consult the user manual or contact the manufacturer for assistance. Applying excessive force or using the wrong technique can potentially damage the cover or case.
Once you have successfully removed the protective cover or case, set it aside in a safe place where it won’t get damaged or lost. Keep in mind that you may need to reinstall the cover or case after completing the screen repair, so ensure it remains in good condition.
Removing the protective cover or case is an important step in preparing your tablet for screen repair. By doing so, you’ll have a clear view of the screen and the necessary space to work on the repair process smoothly.
Step 5: Inspect for any Loose or Damaged Parts
Before you proceed with the screen replacement, it’s crucial to carefully inspect your tablet for any loose or damaged parts. This step ensures that you address any additional issues or potential problems during the repair process.
Start by visually examining the tablet’s exterior, paying close attention to the frame and edges. Look for any signs of dents, scratches, or cracks that may indicate previous impact or damage. If you notice any significant damage, it’s important to address it before proceeding with the screen replacement.
Next, inspect the internal components of the tablet. Gently remove the back cover if it is removable and check for any loose cables, connectors, or screws. If you notice any components that are not secured or properly connected, take note of their location and make sure to reattach or tighten them as needed.
During the inspection, also pay attention to the tablet’s buttons, speakers, and ports. Check for any signs of wear and tear or malfunctioning components. It’s better to identify and resolve any issues before completing the screen repair.
If you come across any damaged or malfunctioning parts during the inspection, it’s recommended to consult a professional technician or contact the tablet’s manufacturer for advice on how to proceed. They can provide guidance on whether the damaged parts need to be replaced or if there are alternative solutions available.
By thoroughly inspecting your tablet for loose or damaged parts, you ensure that the repair process will not only focus on the screen but also address any additional issues that could affect the tablet’s overall performance and functionality.
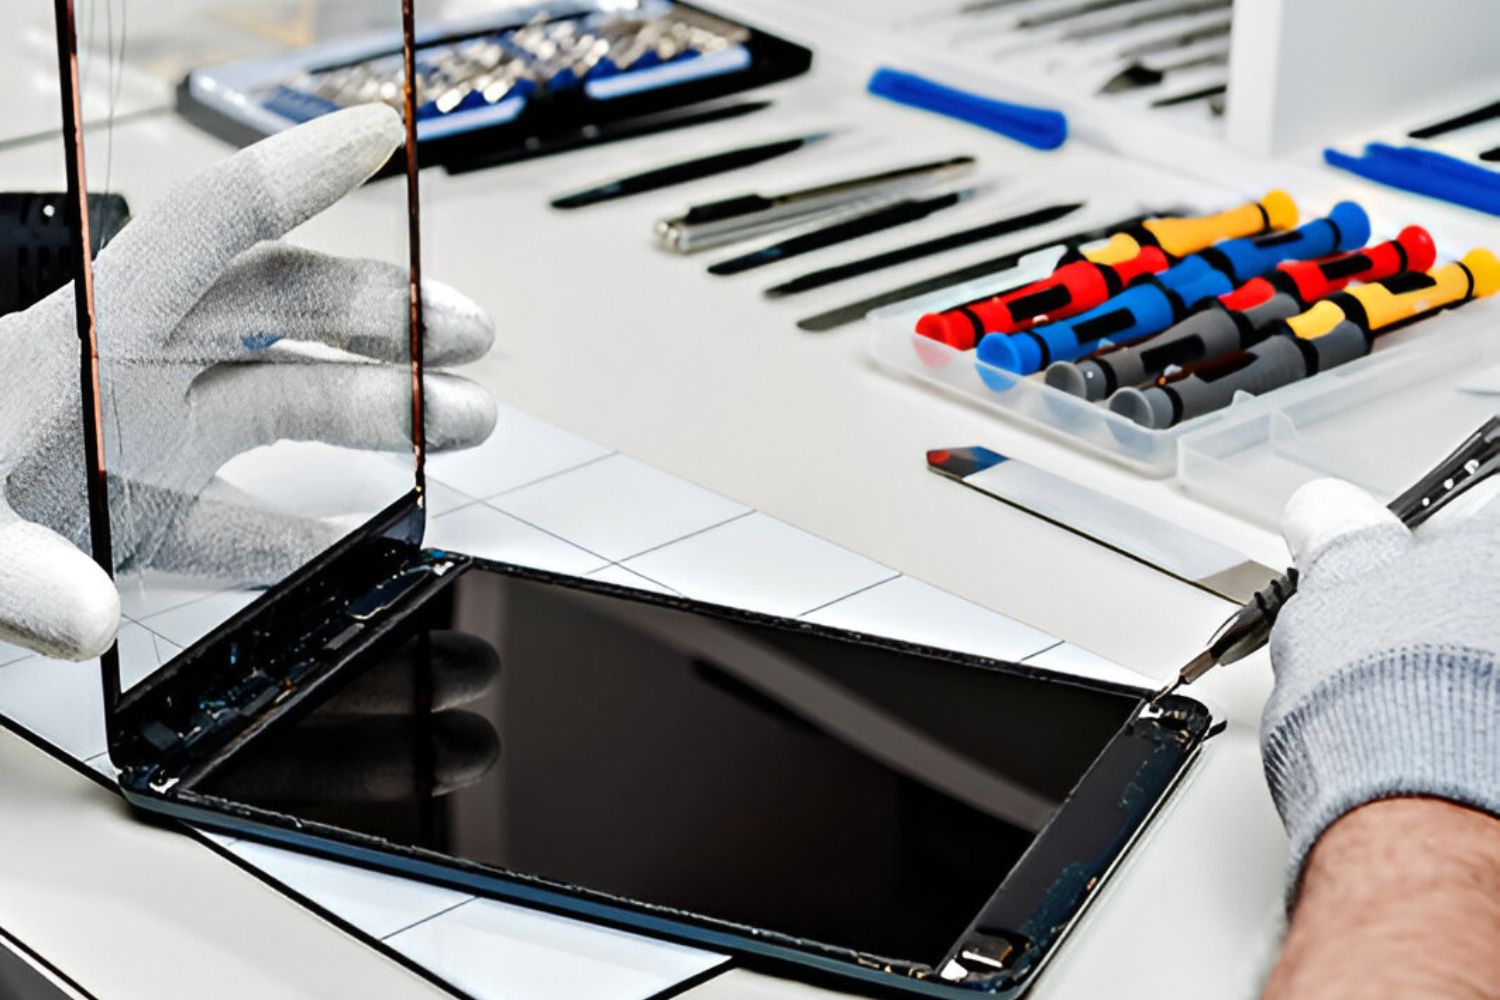
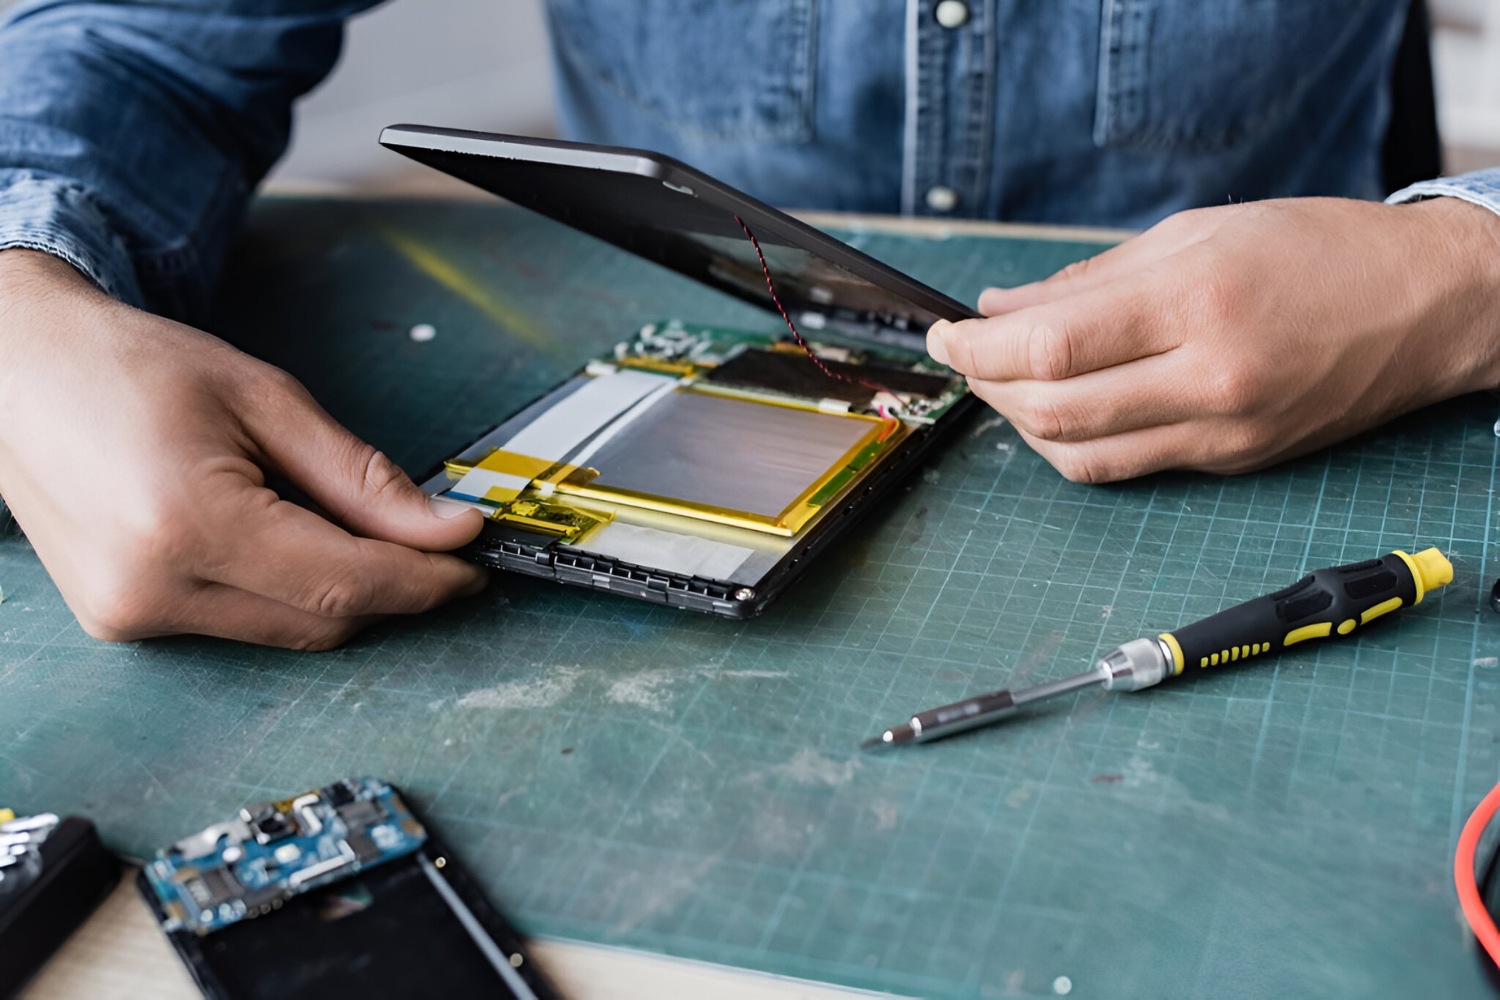
Step 6: Begin the Screen Replacement Process
With the preliminary steps completed, it’s time to begin the screen replacement process for your tablet. This step requires careful attention and precision, so be sure to follow the instructions closely.
Start by positioning your tablet in a stable and secure manner, such as on a clean, flat surface. Ensure that you have adequate lighting and enough space to work comfortably.
Refer to your tablet’s user manual, online guides, or video tutorials specific to your tablet model for detailed instructions on how to disassemble the device. The process may involve removing screws, disconnecting cables, and loosening clips or adhesive.
It’s important to work slowly and methodically, taking note of the order in which components are removed. Keep track of screws and small parts by using a magnetic mat or placing them in a labeled container. This will help you stay organized and prevent any loss or confusion during reassembly.
Once you have disassembled the tablet and gained access to the screen, carefully disconnect any cables that are connecting the screen to the motherboard. Take extra care not to tug or pull forcefully on the cables, as they are delicate and can be easily damaged.
If the screen is attached with adhesive, loosen it by applying gentle heat with a hairdryer or heat gun. Start from one corner and slowly work your way around, loosening the adhesive as you go. Use a plastic opening tool or guitar pick to separate the screen from the frame.
Once the old screen is completely detached, set it aside and get ready for the next step: installing the new screen in your tablet.
Remember, the screen replacement process requires patience and careful attention to detail. Taking your time and following the instructions will help ensure a successful and proper screen replacement for your tablet.
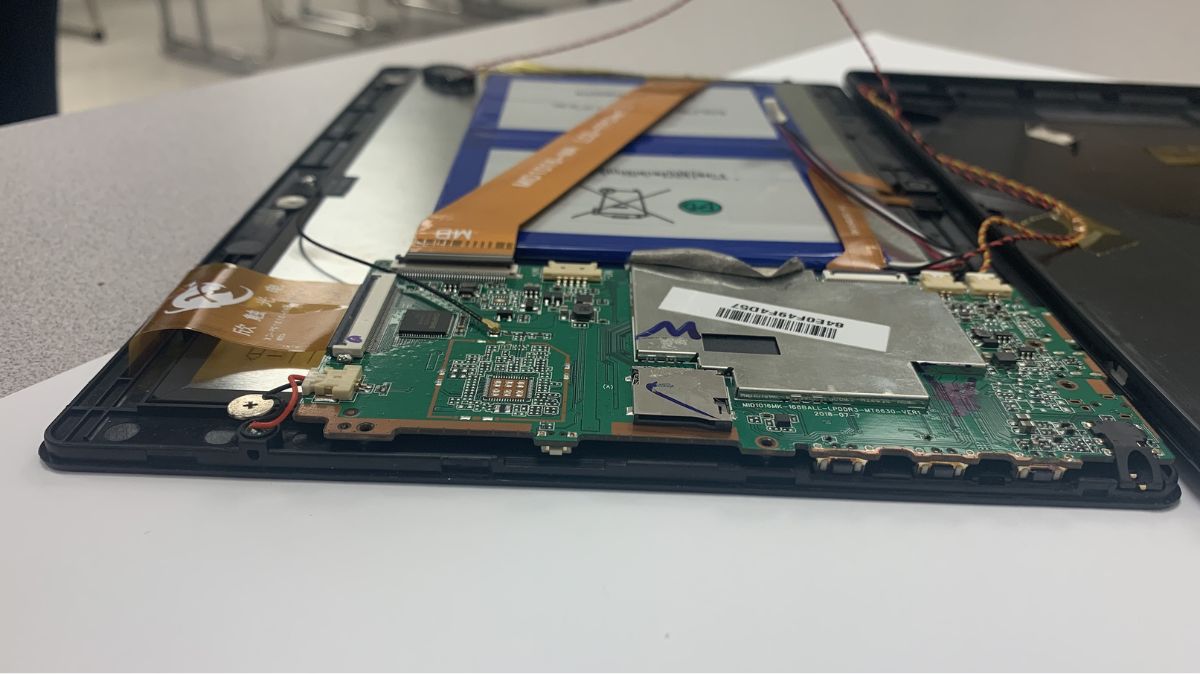
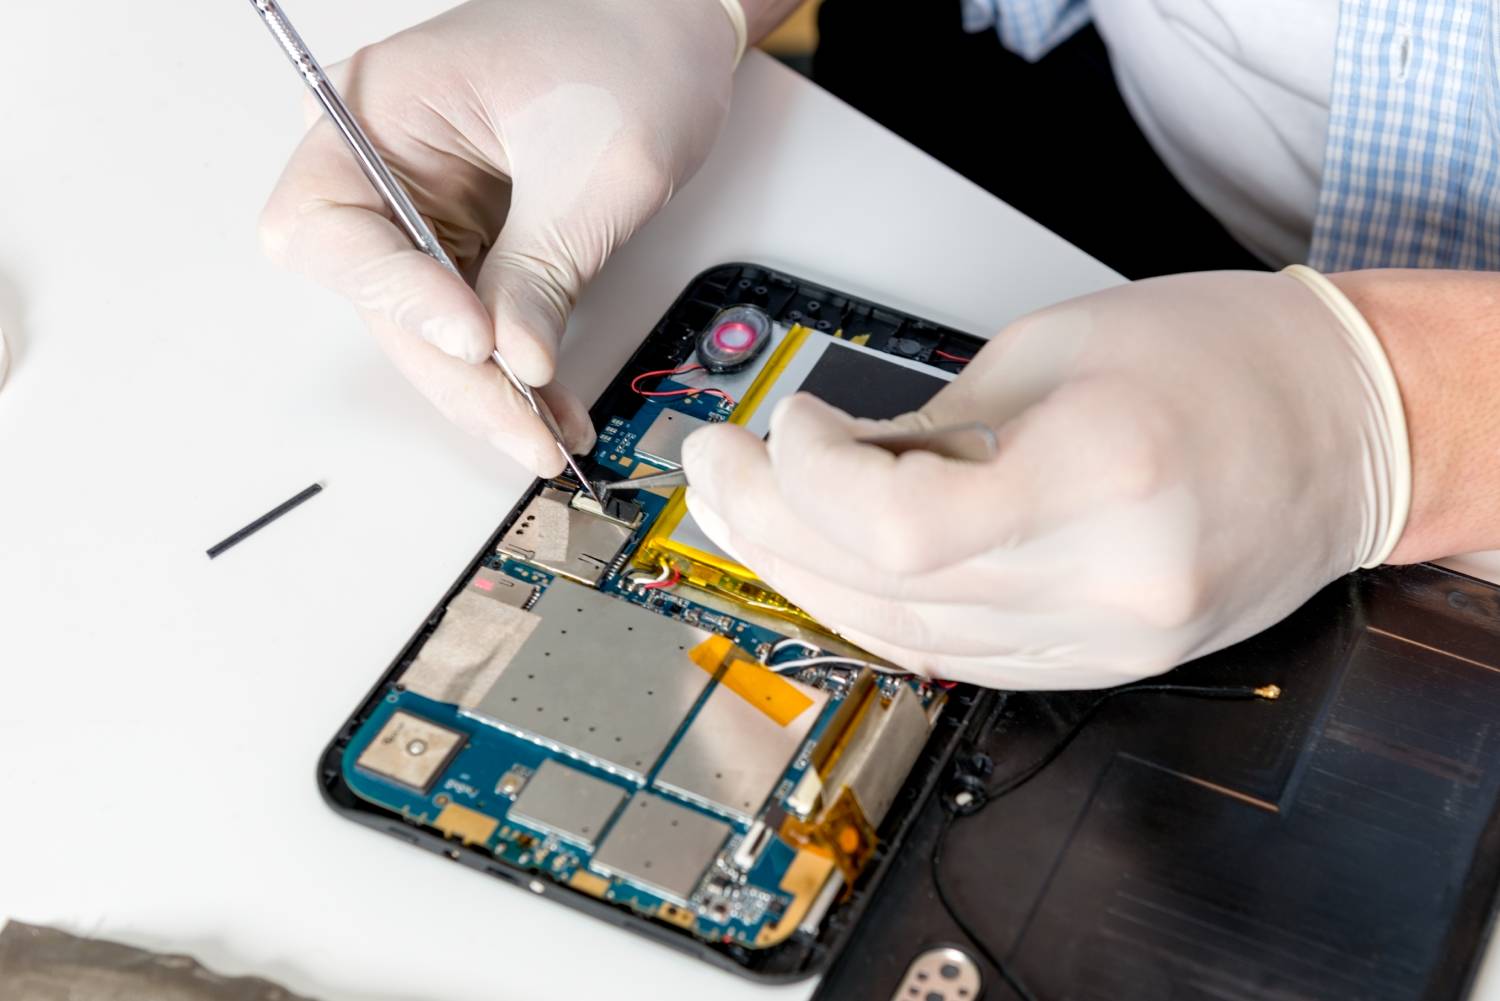
Step 7: Disconnect and Remove the Old Screen
Now that you have reached the step of disconnecting and removing the old screen, it’s time to carefully detach it from your tablet. This step requires precision and caution to avoid causing any further damage.
Start by locating the connectors that attach the old screen to the tablet’s motherboard. These connectors may be ribbon cables, flex cables, or other types of connectors. Take note of how they are connected to ensure proper reconnection later.
Using a plastic opening tool or your fingertips, gently lift the connectors’ retaining flaps or tabs to release the cables. Take care not to apply excessive force or pull on the cables directly, as they can be delicate and easily damaged.
After disconnecting the cables, continue to remove any screws or adhesive that secure the old screen in place. Keep track of the screws by placing them in a labeled container or using a magnetic mat.
Once the old screen is no longer held in place, you can carefully lift it away from the tablet’s frame. Depending on the adhesive used, you may need to use a plastic opening tool to carefully pry the screen away from any remaining adhesive. Take your time and work slowly to avoid damaging the screen or other components.
Set aside the old screen in a safe place, away from any potential hazards or damage. It’s always a good idea to keep it as a reference or for future needs.
With the old screen successfully disconnected and removed, you are ready to move on to the next step: installing the new screen and completing the repair process.
Remember to handle the old screen with care and avoid exposing it to any unnecessary pressure or impact. This will help ensure its integrity and prevent any accidental damage during the repair process.
Step 8: Install the New Screen Properly
Now that you have successfully removed the old screen, it’s time to install the new screen in your tablet. This step requires careful handling and proper alignment to ensure a secure and functional replacement.
Start by inspecting the new screen to ensure it is in good condition and free from any defects or damage. Check that it matches the specifications and size of your tablet model.
Next, carefully align the new screen with the tablet’s frame, ensuring that the connectors on the screen align with the corresponding connectors on the motherboard. Take your time to make sure the alignment is accurate before proceeding.
If the new screen requires adhesive, apply it to the appropriate areas on the tablet’s frame. Be sure to use adhesive that is specifically designed for your tablet model and follow the manufacturer’s guidelines for proper application.
Gently press the new screen into place, ensuring that it sits aligned and flush with the tablet’s frame. Use light and even pressure to avoid damaging the screen or the components inside the tablet.
If there are any screws that secure the new screen, carefully insert and tighten them according to the manufacturer’s instructions. Be cautious not to overtighten the screws, as this can potentially damage the screen or the tablet’s frame.
Once the new screen is securely in place, reconnect the cables to the motherboard. Take care to align the connectors properly and push them in firmly without using excessive force. Ensure that the connectors are fully inserted and any retaining flaps or tabs are securely closed.
Before moving on to the next step, it’s a good idea to perform a quick test to ensure that the new screen is functioning properly. Power on the tablet and check for any display issues, touch responsiveness, or any other abnormalities.
If everything appears to be working correctly, congratulations! You have successfully installed the new screen in your tablet.
Remember to handle the new screen with care throughout the installation process to prevent any accidental damage. Proceed with patience and precision to ensure a successful replacement.
Step 9: Reconnect and Test the Tablet
After installing the new screen, the next step is to reconnect the necessary components and thoroughly test the tablet to ensure that the screen replacement was successful.
Start by carefully reattaching any cables or connectors that were disconnected during the screen replacement process. Take your time to align the connectors properly and push them in firmly without applying excessive force. Ensure that they are fully inserted and securely fastened.
Once the connectors are reconnected, it’s time to power on the tablet and test the functionality of the new screen. Press the power button to turn on the tablet and observe the display.
Check for any abnormalities such as flickering, color distortion, or unresponsive touch functionality. Test the touch screen by swiping and tapping on different areas to ensure that it registers your inputs accurately.
If the screen and touch functionality work as expected, proceed to test other features of the tablet, such as the volume buttons, home button, camera, and any other relevant functions. Ensure that all components and features are functioning properly.
If you encounter any issues or abnormalities during the testing process, it is important to troubleshoot the problem before proceeding. Double-check the connections, ensure that all components are securely in place, and consult the tablet’s user manual or seek professional assistance if needed.
It’s important to thoroughly test the tablet after a screen replacement to catch any potential problems early on. By taking the time to reconnect and test the tablet, you can ensure that the repair was successful and that your tablet is fully functional.
Remember, testing the tablet is a crucial step to guarantee that the screen replacement was done correctly and that the tablet is in optimal working condition.
Step 10: Reassemble the Tablet
After successfully testing the tablet and ensuring that the screen replacement was a success, it’s time to reassemble the tablet and put all the components back together.
Carefully follow these steps to reassemble the tablet:
- Start by aligning the back cover or case with the tablet’s frame. Make sure all the openings for buttons, ports, and speakers are properly aligned.
- If there were any screws that were removed earlier, insert them back into their respective positions and tighten them securely, but not overly tight. Refer to the user manual or online guides for proper screw placement.
- If your tablet uses clips or latches to secure the back cover, make sure they are all engaged and securely fastened.
- Carefully snap or slide the back cover into place, ensuring it is fully seated and flush with the tablet’s frame.
Once the tablet is reassembled, power it on and perform another quick test to verify that all components are working properly. Check the screen, touch functionality, buttons, ports, and any other features that are important to your tablet’s operation.
If everything is functioning correctly, congratulations! You have successfully reassembled your tablet after the screen replacement process.
Remember to handle the tablet with care during the reassembly process to avoid any accidental damage. Take your time and follow the steps diligently to ensure a proper and secure fit for all the components.
If you encounter any issues during the reassembly process or notice any abnormalities in the tablet’s functionality, it’s important to retrace your steps, double-check all connections, and consult the user manual or seek professional assistance if needed.
By reassembling the tablet carefully and methodically, you can ensure that all components are properly aligned and secured, resulting in a fully functional tablet.
Conclusion
Congratulations on successfully completing the screen repair process for your tablet! By following the step-by-step guide, you have learned how to assess the damage, gather the necessary tools, disconnect and remove the old screen, install the new screen, and reassemble your tablet.
Repairing a tablet screen can be a daunting task, but with the right tools, patience, and attention to detail, it can be accomplished. Not only does fixing your tablet screen save you money, but it also allows you to extend the lifespan of your device, reducing electronic waste.
Remember, each tablet model may have specific nuances and variations in the repair process, so it’s important to consult the user manual or seek guidance for your specific device. If you ever feel unsure or uncomfortable with any step, it’s always a good idea to seek professional assistance.
By taking the time to carefully assess the damage, gather the necessary tools, and follow the steps with precision, you have successfully given your tablet a new lease on life. Enjoy using your fully functional tablet once again!
We hope you found this guide helpful and that it empowered you to take on the challenge of fixing your tablet screen. Whether you use your tablet for work, entertainment, or staying connected with loved ones, having a clear and functional screen will enhance your overall experience.
Thank you for choosing this guide, and we wish you the best of luck with your tablet screen repair endeavors!