Introduction
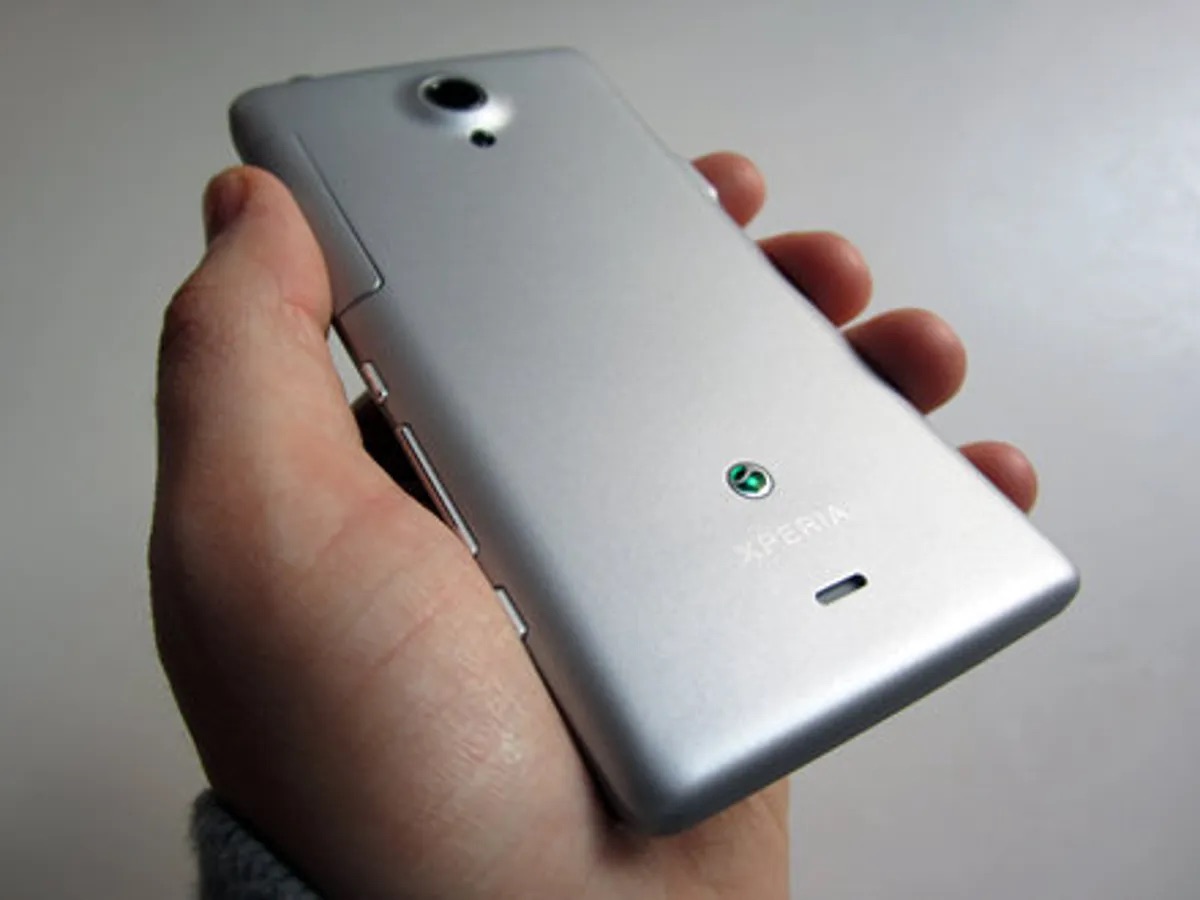
The Sony Xperia Play Tablet is a versatile and powerful mobile device that has become an indispensable part of our daily lives. Whether it's for work, entertainment, or staying connected with loved ones, this tablet offers a seamless and immersive experience. However, like any electronic device, the Sony Xperia Play Tablet is susceptible to wear and tear over time. From cracked screens to battery issues, encountering problems with your tablet is not uncommon.
Fortunately, with the right knowledge and tools, many of these issues can be resolved without the need for professional assistance. This do-it-yourself (DIY) repair guide aims to empower Sony Xperia Play Tablet owners to tackle common problems and perform repairs with confidence. By following the step-by-step instructions provided in this guide, you can save time and money while extending the lifespan of your beloved device.
Whether you're a tech enthusiast looking to delve into the inner workings of your tablet or a budget-conscious individual seeking to avoid costly repair services, this DIY repair guide is designed to cater to your needs. From disassembly and troubleshooting to replacing components such as the screen and battery, this comprehensive guide will equip you with the knowledge and skills necessary to address a wide range of issues that may arise with your Sony Xperia Play Tablet.
By taking the initiative to learn about the inner workings of your device and how to address common problems, you'll gain a deeper understanding of its functionality and build confidence in your ability to perform repairs. Additionally, by prolonging the lifespan of your tablet through timely maintenance and repairs, you can continue to enjoy its features and benefits for years to come.
In the following sections, we will explore the tools and materials needed for DIY repairs, as well as provide detailed instructions for disassembly, troubleshooting common issues, and performing specific repairs. Whether you're a novice or an experienced DIY enthusiast, this guide is tailored to help you navigate the process with ease and achieve successful results. Let's embark on this DIY repair journey and unlock the potential to restore and enhance the performance of your Sony Xperia Play Tablet.
Tools and Materials Needed
When embarking on the journey of DIY repair for your Sony Xperia Play Tablet, it's essential to gather the necessary tools and materials to ensure a smooth and successful repair process. Having the right equipment at your disposal will not only streamline the repair tasks but also contribute to the overall safety and precision of the operation. Here's a comprehensive list of tools and materials you'll need to have on hand before initiating any repair work on your Sony Xperia Play Tablet:
Tools:
-
Precision Screwdriver Set: A set of precision screwdrivers with various head types and sizes is indispensable for disassembling the tablet and accessing internal components. Ensure that the screwdriver set includes Phillips, flathead, and Torx screwdriver heads to accommodate different screw types.
-
Plastic Opening Tools: These non-conductive and non-marring tools are essential for prying open the tablet's casing without causing damage. Plastic opening tools help in separating the components and accessing the internal circuitry safely.
-
Spudger or Nylon Pry Tool: A spudger or nylon pry tool is useful for gently disconnecting cables and connectors without risking damage to delicate components. It aids in maneuvering and releasing internal connections during the disassembly process.
-
Suction Cup: For repairs involving the screen or front panel, a suction cup can assist in lifting and separating the components without causing undue stress or damage.
-
Tweezers: Precision tweezers are invaluable for handling small screws, connectors, and delicate components during disassembly and reassembly. They provide dexterity and control when working with intricate parts.
-
Heat Gun or Hair Dryer: In cases where adhesive needs to be softened for component removal, a heat gun or hair dryer can be used to apply gentle heat, facilitating the separation of components without causing damage.
-
Anti-Static Wrist Strap: To prevent electrostatic discharge (ESD) from damaging sensitive electronic components, an anti-static wrist strap should be worn during the repair process. This helps to dissipate any static charge from the body, ensuring the safety of the tablet's internal circuitry.
Materials:
-
Replacement Parts: Depending on the specific repair task, you may need replacement parts such as a new screen, battery, camera module, or other components. Ensure that you have the correct replacement parts tailored to your Sony Xperia Play Tablet model.
-
Adhesive Strips or Adhesive Tape: When reassembling the tablet, adhesive strips or adhesive tape may be required to secure components in place, particularly for the screen and battery.
-
Cleaning Supplies: Isopropyl alcohol, microfiber cloths, and compressed air can aid in cleaning components and removing dust, fingerprints, or adhesive residue during the repair process.
By assembling these essential tools and materials, you'll be well-prepared to tackle a wide range of repair tasks for your Sony Xperia Play Tablet. With the right equipment at your disposal, you can approach the DIY repair process with confidence and precision, setting the stage for successful repairs and the restoration of your tablet's functionality.
Disassembly and Opening the Device
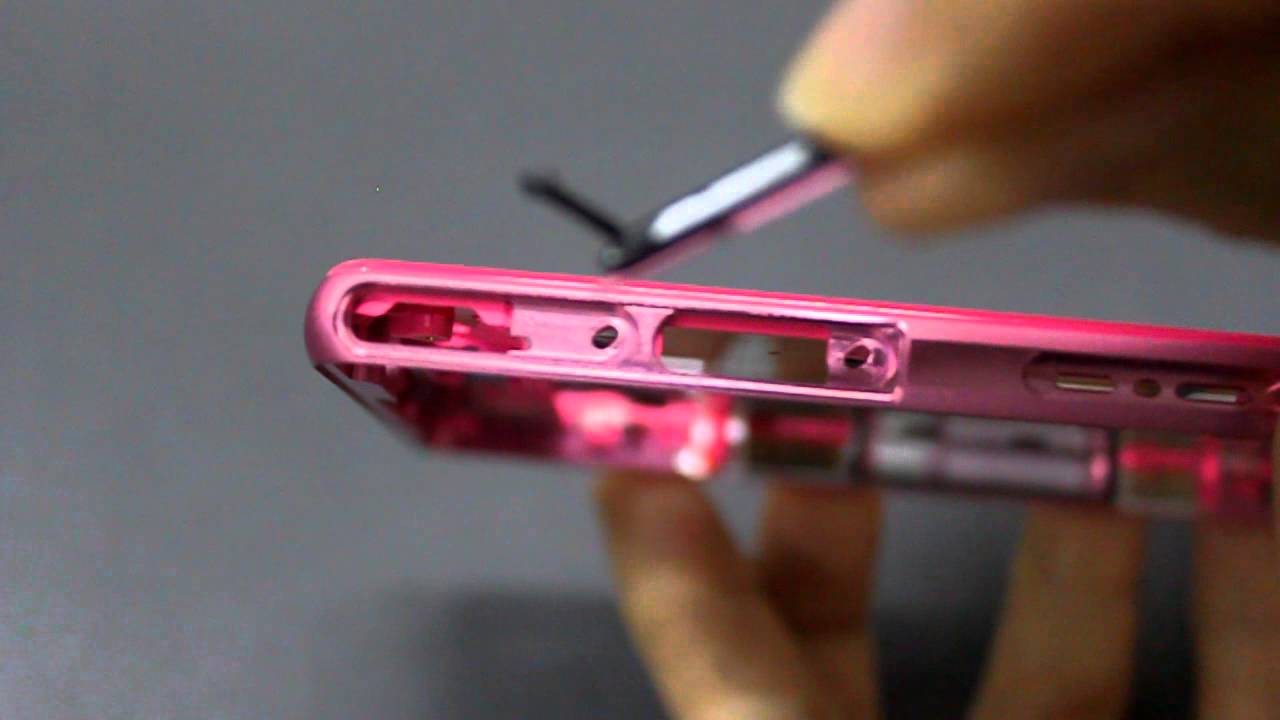
Disassembling the Sony Xperia Play Tablet is a crucial step in accessing its internal components for repair or maintenance. Before initiating the disassembly process, it's essential to ensure a clean and well-lit workspace, free from any potential hazards. Additionally, it's advisable to power off the tablet and disconnect any charging cables before proceeding with the disassembly.
-
Prepare the Work Surface: Lay down a soft, clean cloth or a non-conductive mat to protect the tablet's screen and casing during disassembly. This helps prevent scratches or damage to the device while providing a stable surface for the repair process.
-
Remove External Screws: Using the appropriate precision screwdriver from your set, carefully remove the external screws securing the tablet's casing. Keep the screws organized and labeled to ensure they can be reinstalled correctly during reassembly.
-
Separate the Casing: Utilize plastic opening tools to gently pry open the tablet's casing. Start at a corner and work your way around the edges, gradually releasing the clips securing the casing. Exercise caution and patience to avoid damaging the casing or internal components.
-
Disconnect Internal Components: Once the casing is removed, you'll gain access to the internal components of the tablet. Use a spudger or nylon pry tool to disconnect the battery, display, and other relevant connectors. Take note of the cable routing and connector types to facilitate reassembly.
-
Handle with Care: Throughout the disassembly process, handle the internal components with care to avoid static discharge or physical damage. When removing the display or other delicate components, use a suction cup or plastic tools to lift and separate them from the housing.
-
Document the Disassembly: Consider taking photographs or making notes as you disassemble the tablet. This documentation can serve as a helpful reference during the reassembly phase, ensuring that components are reconnected and positioned correctly.
By following these steps and exercising patience and precision, you can successfully disassemble the Sony Xperia Play Tablet, gaining access to its internal components for repair or maintenance. Remember to keep track of the disassembled parts and screws, and approach the process methodically to facilitate a seamless reassembly later on.
Troubleshooting Common Issues
When encountering issues with your Sony Xperia Play Tablet, it's essential to be equipped with troubleshooting techniques to identify and address common problems effectively. By understanding the symptoms and potential causes of these issues, you can take proactive steps to diagnose and resolve them, restoring your tablet's functionality. Here are some common issues that users may encounter and the corresponding troubleshooting steps:
1. Power and Charging Problems
- Symptoms: The tablet fails to power on, doesn't hold a charge, or experiences erratic charging behavior.
- Troubleshooting Steps:
- Ensure that the charging cable and power adapter are functioning properly by testing them with another device.
- Clean the charging port of the tablet using compressed air and inspect for any debris or damage.
- Attempt to charge the tablet using a different power source or USB port to rule out potential issues with the original power supply.
2. Screen Display Issues
- Symptoms: The screen remains blank, exhibits flickering, or displays abnormal colors or patterns.
- Troubleshooting Steps:
- Perform a soft reset by holding down the power button for 10-15 seconds to restart the tablet.
- Check for physical damage to the screen and ensure that it is free from cracks or impact-related issues.
- Adjust the screen brightness and display settings to determine if the issue is related to software configurations.
3. Audio and Speaker Malfunctions
- Symptoms: No sound output from the speakers, distorted audio, or intermittent audio playback.
- Troubleshooting Steps:
- Verify that the volume settings are adjusted correctly and that the tablet is not in silent or do-not-disturb mode.
- Test audio playback using different media sources to isolate potential software-related issues.
- Inspect the speaker grilles for any obstructions or debris that may impede sound output.
4. Connectivity and Network Problems
- Symptoms: Wi-Fi or Bluetooth connectivity issues, intermittent signal loss, or inability to connect to networks.
- Troubleshooting Steps:
- Restart the tablet and router to refresh the network connections and address temporary connectivity issues.
- Reset network settings on the tablet to clear any configuration-related conflicts.
- Update the tablet's software to the latest version to potentially resolve compatibility issues with network protocols.
5. Performance and Software Glitches
- Symptoms: Slow responsiveness, app crashes, or freezing during operation.
- Troubleshooting Steps:
- Clear the tablet's cache and temporary files to optimize performance and address software-related bottlenecks.
- Uninstall recently installed apps or updates that may be causing conflicts or instability.
- Perform a factory reset as a last resort to restore the tablet to its default state and resolve persistent software issues.
By systematically troubleshooting these common issues and applying the corresponding steps, you can effectively diagnose and address problems that may arise with your Sony Xperia Play Tablet. It's important to approach troubleshooting with patience and methodical observation to pinpoint the root causes of the issues and implement targeted solutions for resolution.
Replacing the Screen
When the screen of your Sony Xperia Play Tablet becomes damaged or non-responsive, replacing it can breathe new life into the device. Before initiating the screen replacement process, ensure that you have the necessary replacement screen specifically designed for your tablet model. Additionally, gather the tools and materials mentioned earlier in this guide to facilitate a seamless and successful screen replacement.
-
Prepare the Work Area: Find a clean and well-lit workspace to perform the screen replacement. Lay down a soft cloth or non-conductive mat to protect the tablet's surface during the repair process.
-
Disassemble the Tablet: Follow the disassembly steps outlined earlier in this guide to access the internal components of the tablet. Carefully disconnect the battery and display connectors, ensuring that you handle the delicate components with precision and caution.
-
Remove the Damaged Screen: Once the tablet is disassembled, identify the damaged screen and its securing components. Use the appropriate tools, such as a heat gun or hair dryer, to soften the adhesive securing the screen to the tablet's frame. Gently lift and separate the damaged screen from the housing, taking care not to damage the surrounding components.
-
Install the Replacement Screen: Position the replacement screen carefully, aligning it with the tablet's frame and ensuring a snug fit. Secure the new screen in place using adhesive strips or adhesive tape, following the original placement pattern to maintain a secure bond.
-
Reassemble the Tablet: Reconnect the display and battery connectors, ensuring that they are properly seated and secured. Carefully reassemble the tablet by following the disassembly steps in reverse order, ensuring that all components and screws are reinstated correctly.
-
Test the New Screen: Power on the tablet and test the functionality of the new screen. Verify touch responsiveness, display clarity, and color accuracy to ensure that the replacement screen is functioning as intended.
By following these steps with precision and attention to detail, you can successfully replace the screen of your Sony Xperia Play Tablet, restoring its visual functionality and usability. Remember to approach the process methodically and patiently, taking care to handle the delicate components with the necessary caution and expertise. With the right tools, materials, and guidance, you can breathe new life into your tablet through a successful screen replacement.
Replacing the Battery
Replacing the battery of your Sony Xperia Play Tablet is a crucial maintenance task that can revitalize the device's longevity and overall performance. Over time, the battery capacity of electronic devices naturally diminishes, leading to reduced usage time and potential power-related issues. By undertaking the battery replacement process, you can breathe new life into your tablet, ensuring prolonged usability and uninterrupted functionality. Before commencing the battery replacement, it is imperative to procure a compatible replacement battery designed for your specific tablet model. Additionally, gather the essential tools and materials mentioned earlier in this guide to facilitate a seamless and successful battery replacement.
-
Prepare the Work Area: Find a well-lit and organized workspace to perform the battery replacement. Lay down a soft cloth or non-conductive mat to protect the tablet's surface during the repair process.
-
Disassemble the Tablet: Follow the disassembly steps outlined earlier in this guide to access the internal components of the tablet. Carefully disconnect the existing battery from the tablet's circuitry, ensuring that you handle the delicate connectors with precision and caution.
-
Remove the Old Battery: Identify the location of the existing battery within the tablet's housing. Utilize appropriate tools, such as a spudger or nylon pry tool, to gently release the adhesive securing the battery in place. Exercise caution to avoid damaging surrounding components as you carefully lift and remove the old battery from its position.
-
Install the Replacement Battery: Position the replacement battery securely within the designated compartment, ensuring proper alignment with the connector ports. If the replacement battery includes adhesive tabs, utilize them to secure the battery in place, maintaining a stable and reliable connection.
-
Reassemble the Tablet: Reconnect the battery to the tablet's circuitry, ensuring a secure and snug fit. Carefully reassemble the tablet by following the disassembly steps in reverse order, ensuring that all components and screws are reinstated correctly.
-
Test the New Battery: Power on the tablet and verify the functionality of the new battery. Ensure that the tablet powers on smoothly and exhibits consistent battery performance. Monitor the battery's charging behavior and usage duration to confirm its optimal functionality.
By meticulously following these steps and exercising precision throughout the battery replacement process, you can effectively rejuvenate your Sony Xperia Play Tablet with a new and reliable power source. With the right tools, materials, and attention to detail, the battery replacement endeavor can contribute to the sustained performance and extended lifespan of your cherished tablet.
Fixing Audio and Speaker Problems
Addressing audio and speaker problems with your Sony Xperia Play Tablet is essential to ensure an immersive and uninterrupted multimedia experience. When encountering issues such as distorted audio, no sound output, or intermittent playback, it's crucial to employ effective troubleshooting and repair techniques to restore the tablet's audio functionality. Here's a detailed guide on fixing common audio and speaker problems:
1. Verify Audio Settings
Begin by checking the tablet's audio settings to ensure that the volume levels are appropriately adjusted and that the device is not in silent or do-not-disturb mode. Additionally, inspect the audio output settings to confirm that the correct audio output source is selected, whether it's the built-in speakers or connected headphones.
2. Test Different Media Sources
To isolate potential software-related issues, test audio playback using various media sources such as music, videos, and applications. By assessing the audio performance across different media, you can determine if the problem is specific to certain applications or if it persists across the tablet's entire audio output.
3. Inspect Speaker Grilles
Examine the tablet's speaker grilles for any obstructions or debris that may impede sound output. Clearing any accumulated dust or particles from the speaker openings can improve audio clarity and volume. Use compressed air to gently remove any foreign particles without causing damage to the speakers.
4. Software Updates and Resets
Ensure that the tablet's software is up to date by checking for available system updates. Software updates often include bug fixes and optimizations that can address audio-related issues. If persistent problems are encountered, consider performing a soft reset or factory reset to restore the tablet's audio settings to default configurations.
5. External Audio Accessories
If the tablet's built-in speakers exhibit issues, testing external audio accessories such as headphones or Bluetooth speakers can help determine if the problem is isolated to the tablet's internal audio components. Connecting external audio devices can provide insights into the source of the audio problems and guide further troubleshooting steps.
6. Professional Assessment
In cases where the above steps do not resolve the audio and speaker issues, seeking professional assessment from authorized service centers or technicians may be necessary. Professional diagnosis and repair services can address underlying hardware issues that may require specialized expertise and equipment.
By systematically addressing audio and speaker problems with your Sony Xperia Play Tablet, you can enhance the overall audio experience and ensure consistent sound output. Employing these troubleshooting and repair techniques empowers you to identify and resolve common audio issues, ultimately restoring the tablet's audio functionality for an enriched multimedia experience.
Repairing the Camera
Repairing the camera of your Sony Xperia Play Tablet is a pivotal endeavor to restore its imaging capabilities and ensure seamless capture of precious moments. Whether facing issues such as blurry images, camera app malfunctions, or complete camera failure, addressing these concerns through effective repair techniques can revitalize the tablet's photography and videography functionalities.
Troubleshooting Camera Issues
Before delving into the repair process, it's essential to troubleshoot the camera issues to pinpoint the root cause of the problems. Begin by verifying the camera app settings and permissions, ensuring that the app has access to the camera hardware and necessary features. Test the camera across different lighting conditions and shooting modes to assess the consistency of the issues and identify any specific triggers.
Disassembly and Accessing the Camera Module
To access the camera module for repair, follow the disassembly steps outlined earlier in this guide to open the tablet and gain access to the internal components. Carefully disconnect the camera module from the tablet's circuitry, taking note of the cable routing and connector types to facilitate reassembly. Handle the delicate camera module with precision and caution to avoid damage during the removal process.
Inspecting and Cleaning the Camera Components
Once the camera module is accessible, inspect the lens, sensor, and surrounding components for any signs of dust, debris, or physical damage. Utilize compressed air and microfiber cloths to gently clean the camera components, ensuring that the lens is free from smudges or obstructions that may impact image quality. Thorough cleaning can often resolve issues related to blurry or distorted images.
Testing and Replacement
After cleaning the camera components, reassemble the tablet and test the camera functionality. Verify the image quality, autofocus performance, and overall camera responsiveness. If the issues persist despite cleaning and troubleshooting, consider replacing the camera module with a compatible replacement part designed for your tablet model. Securely install the replacement camera module and reassemble the tablet to complete the repair process.
By meticulously addressing camera issues and employing effective repair techniques, you can rejuvenate the imaging capabilities of your Sony Xperia Play Tablet, ensuring that it continues to capture memorable moments with clarity and precision. Through systematic troubleshooting, cleaning, and potential replacement, the repair process can contribute to the sustained functionality and enhanced user experience of the tablet's camera.
Conclusion
In conclusion, embarking on the journey of DIY repair for your Sony Xperia Play Tablet empowers you to take control of the maintenance and longevity of your beloved device. By equipping yourself with the necessary tools, materials, and knowledge, you can address common issues and perform essential repairs with confidence and precision.
Throughout this comprehensive DIY repair guide, we have delved into the intricacies of disassembly, troubleshooting, and specific repair tasks, including screen and battery replacements, as well as addressing audio, speaker, and camera issues. Each step of the repair process has been meticulously outlined to provide a clear and methodical approach to resolving common problems that may arise with the Sony Xperia Play Tablet.
By embracing the DIY repair journey, you not only save time and money but also gain a deeper understanding of your tablet's internal workings and components. This hands-on experience fosters a sense of empowerment and self-sufficiency, allowing you to proactively maintain and extend the lifespan of your device.
Furthermore, the DIY repair approach promotes environmental sustainability by reducing electronic waste and minimizing the need for premature device replacements. By breathing new life into your tablet through repairs, you contribute to a more sustainable and eco-conscious approach to technology ownership.
As you navigate the DIY repair process, remember to approach each task with patience, attention to detail, and a commitment to safety. Whether it's disassembling the tablet, troubleshooting issues, or replacing components, precision and care are paramount to achieving successful repair outcomes.
Ultimately, this DIY repair guide serves as a valuable resource for Sony Xperia Play Tablet owners, empowering them to overcome common challenges and maintain the functionality and performance of their devices. By embracing the spirit of DIY repair, you embark on a journey of skill development, resourcefulness, and a deeper connection with your technology.
With the knowledge and insights gained from this guide, you are well-equipped to embark on your DIY repair endeavors, ensuring that your Sony Xperia Play Tablet continues to enrich your digital experiences for years to come.