Introduction
Welcome to our guide on how to remove the screen on an ultrabook. Ultrabooks are sleek and lightweight laptops that offer portability and high performance. However, there may come a time when you need to replace the screen due to damage or a malfunction. Knowing how to remove the screen properly is essential to ensure a smooth and successful replacement process.
Before we begin, it’s important to note that removing the screen on an ultrabook requires a certain level of technical expertise and caution. If you’re not confident in your abilities, it’s best to seek professional help or refer to the manufacturer’s instructions. Additionally, make sure to have all the necessary tools and follow the steps carefully to avoid any damage.
In this guide, we will take you through the step-by-step process of removing the screen on an ultrabook. We will provide detailed instructions on disconnecting cables, removing screws, and safely separating the screen assembly from the rest of the ultrabook. Additionally, we’ll touch upon installing a new screen if needed and reassembling the ultrabook.
Keep in mind that each ultrabook model may have slight variations in the process, so it’s crucial to consult the user manual or online resources specific to your device. With that said, let’s dive into the first step: gathering the necessary tools.
Step 1: Gather the necessary tools
Before you begin the process of removing the screen on your ultrabook, it’s essential to gather the necessary tools to ensure a smooth and efficient procedure. Here are some tools you’ll likely need:
- Screwdriver set: You’ll need a screwdriver that matches the type of screws used in your ultrabook. Most ultrabooks use small Phillips or Torx screws, so having a set with different sizes will come in handy.
- Prying tool: A plastic or metal prying tool is necessary to safely remove the back cover and separate the screen assembly from the rest of the ultrabook. It helps avoid damaging any delicate components.
- Antistatic wrist strap: To protect your ultrabook from static electricity, which can cause damage to sensitive electronic parts, it’s recommended to use an antistatic wrist strap. This ensures that you’re properly grounded throughout the process.
- Microfiber cloth: A soft microfiber cloth is useful for wiping down the screen and removing any dust or smudges. It’s important to work in a clean environment to prevent any debris from getting inside the ultrabook during the disassembly process.
- Patience and attention to detail: While not a physical tool, these qualities are crucial when working on delicate electronic devices like ultrabooks. Take your time, double-check each step, and stay focused to avoid any mistakes or mishaps.
Having these tools ready before you begin will make the process much easier and help you avoid any unnecessary frustrations. It’s better to be prepared rather than having to stop midway to search for a missing tool.
Now that you have gathered all the necessary tools, it’s time to move on to the next step: powering off and disconnecting the ultrabook.
Step 2: Power off and disconnect the ultrabook
Before getting started with disassembling your ultrabook, it’s crucial to power it off and disconnect it from any power source to prevent any potential electrical shocks or accidents. Follow these steps to power off and safely disconnect your ultrabook:
- Save your work and close all open programs: Before shutting down your ultrabook, make sure to save any unsaved work and close all running programs to prevent data loss.
- Shut down the ultrabook: Click on the Start menu and select “Shut down” or “Power off”. Wait for the operating system to fully shut down and power off the device.
- Unplug the power cord: If your ultrabook is connected to a power source, unplug the power cord from the device. This step is essential to avoid any potential electrical hazards.
- Disconnect any peripherals: If there are any external devices or peripherals connected to your ultrabook, such as USB drives, headphones, or external monitors, unplug them from the device.
- Ground yourself: Before opening the ultrabook, it’s crucial to discharge any static electricity from your body to avoid damaging sensitive components. You can do this by touching a grounded object or using an antistatic wrist strap.
By following these steps, you ensure that your ultrabook is safely powered off and disconnected from any power sources. This reduces the risk of electrical accidents and protects both you and your device. Now that you’ve completed this step, you’re ready to move on to the next phase of the screen removal process.
Step 3: Remove the screws on the back cover
With your ultrabook powered off and disconnected, it’s time to remove the screws that secure the back cover. Follow these steps to successfully remove the screws:
- Place your ultrabook on a clean and flat surface: Find a suitable workspace where you can comfortably work on your ultrabook. A flat and well-lit surface is ideal.
- Identify the screws: Take a close look at the back cover of your ultrabook and locate the screws that hold it in place. These screws are usually located around the edges or at the corners of the back cover.
- Choose the right screwdriver: Select the appropriate screwdriver from your set that fits the screws on your ultrabook. Using the wrong size screwdriver may strip the screws, making them difficult to remove.
- Loosen and remove the screws: Insert the screwdriver into the screw head and turn it counterclockwise to loosen and remove the screws. Make sure to keep track of the screws and place them in a safe spot so that you don’t lose them.
- Repeat for all screws: Continue removing all the screws that secure the back cover. Depending on your ultrabook model, there may be several screws to remove. Take your time and be cautious while handling the delicate components.
Once you have removed all the screws, carefully set them aside. It’s a good practice to keep the screws organized or place them in labeled compartments to avoid confusion during reassembly.
Note: Some ultrabook models may have hidden screws or additional screws under rubber feet or stickers. Double-check your ultrabook’s user manual or online resources for any specific instructions related to screw removal.
Now that you have successfully removed the screws from the back cover, you’re ready to move on to the next step: prying off the back cover.
Step 4: Carefully pry off the back cover
With the screws removed, the next step in removing the screen on your ultrabook is to carefully pry off the back cover. Here’s how to do it:
- Locate the notches or clips: Examine the edges of the back cover and look for notches or clips that hold it in place. These notches or clips are usually located along the sides or corners of the ultrabook.
- Choose a prying tool: Select a plastic or metal prying tool that is suitable for your ultrabook model. Avoid using metal tools with sharp edges to prevent any scratches or damage to the ultrabook’s surfaces.
- Start prying off the back cover: Gently insert the prying tool into one of the notches or clips and carefully apply pressure to start prying off the back cover. Work your way around the edges, gradually releasing the clips or notches one by one.
- Be patient and gentle: Take your time and be patient while prying off the back cover. Apply even pressure and avoid using excessive force, as this may cause the plastic clips or notches to break or snap.
- Work on all sides: Once you have successfully released one side, move on to the next side and continue prying off the back cover. Repeat this process for all sides until the back cover is completely detached.
As you remove the back cover, you may hear some snapping or clicking sounds. This is normal and indicates that the clips or notches are being released. However, if you encounter any resistance or difficulty, double-check that all screws have been removed and reassess your prying technique.
Once the back cover is completely detached, set it aside in a safe place. Take care not to damage any cables or connectors that may be connected to the back cover.
With the back cover removed, you have successfully completed the fourth step. Now, let’s move on to the next step: disconnecting the screen cables.
Step 5: Disconnect the screen cables
After successfully removing the back cover, the next step in removing the screen on your ultrabook is to disconnect the screen cables. Follow these steps to safely disconnect the screen cables:
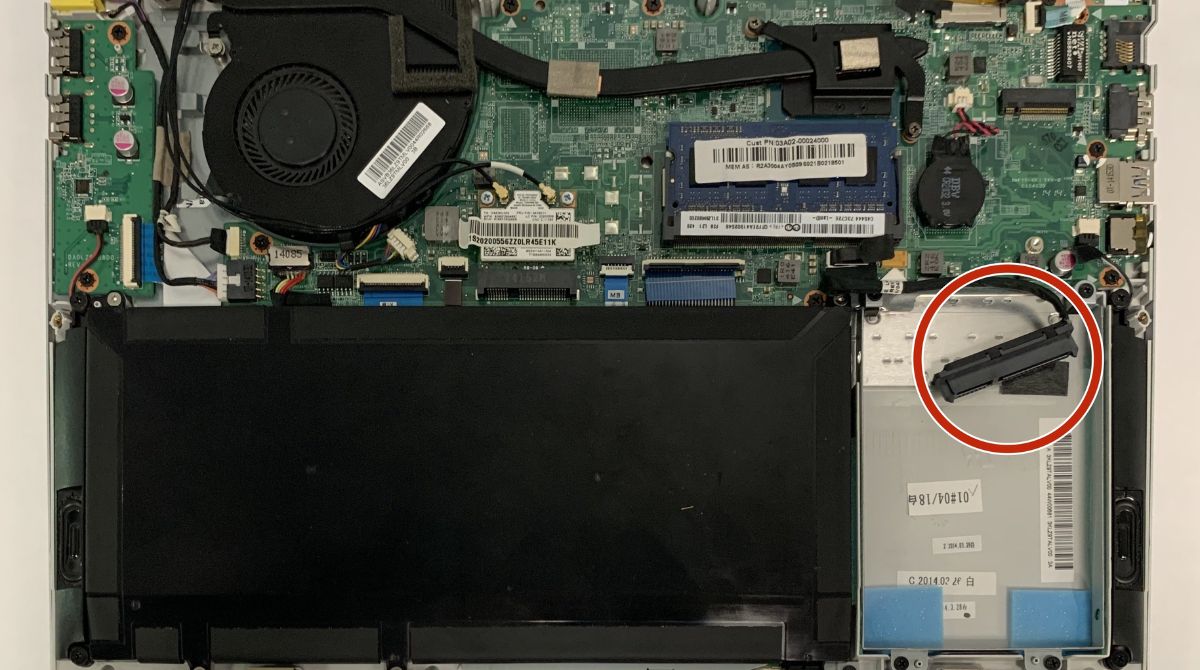
- Identify the screen cables: Take a close look at the bottom of the screen assembly and locate the various cables that are connected to it. Common screen cables include the display cable, webcam cable, and wireless antenna cables.
- Identify the connectors: Each cable is connected to the screen assembly through small connectors. These connectors may be secured with adhesive tape, latches, or small screws. Take note of the type of connectors used.
- Disconnect the connectors: Depending on the type of connectors, carefully release them one by one. For connectors secured with adhesive tape, gently peel off the tape. For connectors secured with latches, release the latch by flipping it up. For connectors secured with screws, use a screwdriver to remove the screws.
- Ensure a firm hold: When disconnecting the connectors, hold onto the actual connector and not the cable itself. This helps prevent damaging the cables or connectors and ensures a secure grip.
- Double-check for any additional cables: Some ultrabooks may have other cables, such as the touchpad cable or speaker cables, that are connected to the screen assembly. Take a careful look to ensure all cables are properly disconnected before proceeding.
It’s important to handle the screen cables delicately to avoid any damage. Pay close attention to the connectors and take note of their original position for easier reassembly later.
Once all the screen cables are disconnected, set them aside or gently move them out of the way. Be cautious not to place them in a position where they could be easily damaged or tangled while working on the rest of the ultrabook.
With the screen cables safely disconnected, you have completed the fifth step. Now, let’s move on to the next step in the process: removing the screws holding the screen assembly.
Step 6: Remove the screws holding the screen assembly
Now that the screen cables are safely disconnected, it’s time to remove the screws that hold the screen assembly in place. Follow these steps to remove the screws:
- Inspect the screen bezel: Take a close look at the edges of the screen assembly and locate the screws that secure the screen bezel. These screws are typically hidden under small rubber covers or plastic tabs.
- Remove the rubber covers or plastic tabs: Use a prying tool or your fingers to gently lift and remove the rubber covers or plastic tabs that cover the screws. Be careful not to damage them, as they will need to be reattached later.
- Choose the appropriate screwdriver: Select the screwdriver from your set that corresponds to the size and type of screws used to secure the screen assembly. Make sure the screwdriver fits securely into the screw heads to prevent any slipping or damage.
- Loosen and remove the screws: Insert the screwdriver into each screw head and turn it counterclockwise to loosen and remove the screws. Keep the screws in a safe place, such as a small container or magnetic tray, to prevent loss.
- Continue removing all screws: Depending on your ultrabook model, there may be several screws holding the screen assembly. Take your time and ensure that all screws are removed before proceeding.
As you remove the screws, be cautious not to exert excessive force or strip the screw heads. If you encounter any resistance, double-check that all screws have been loosened and assess your screwdriver technique.
Once all the screws are removed, set them aside and keep them organized. It’s helpful to arrange them in the order and position they were removed, making reassembly easier later on.
With the screws holding the screen assembly now removed, you have completed the sixth step. Next, we will move on to the next phase: separating the screen from the ultrabook.
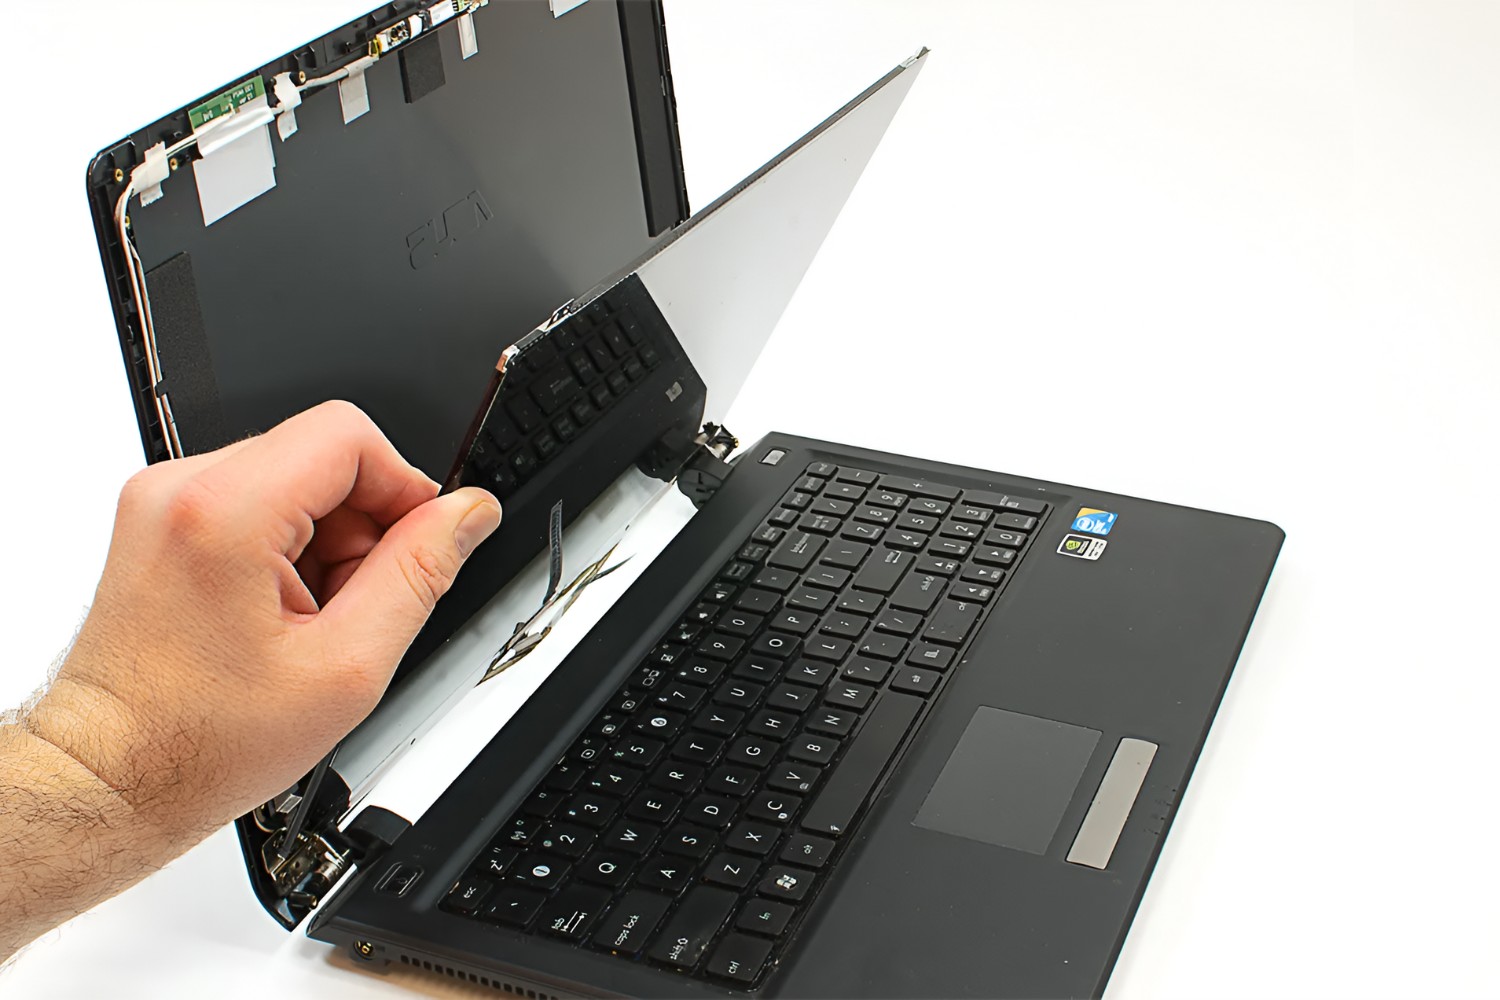
Step 7: Separate the screen from the ultrabook
With the screws holding the screen assembly removed, it’s time to carefully separate the screen from the rest of the ultrabook. This step requires caution and precision to avoid any damage. Follow these steps to successfully separate the screen:
- Hold the ultrabook securely: With one hand, firmly hold the base of the ultrabook to ensure stability and prevent it from sliding or moving during the separation process.
- Gently lift the screen assembly: Using your other hand, gently lift and tilt the screen assembly away from the base of the ultrabook. Apply even pressure, supporting the weight of the screen assembly as you lift.
- Be mindful of any remaining connections: While lifting the screen assembly, carefully check for any remaining connections or cables that may still be attached. Make sure all connectors and cables are properly disconnected before proceeding.
- Slowly separate the screen assembly: With both hands, continue lifting and separating the screen assembly from the ultrabook. Take your time and ensure a gradual separation to prevent any strain on the cables or connectors.
- Set aside the screen assembly: Once fully separated, place the screen assembly on a soft and clean surface, ensuring it doesn’t come into contact with any sharp objects or debris.
Throughout the process, it’s important to handle the screen assembly with care to avoid any damage to the screen or other delicate components. Be mindful of the cables and connectors, ensuring they don’t get tangled or snagged as you separate the screen.
By successfully separating the screen assembly from the ultrabook, you have completed the seventh step. Now, let’s move on to the next step, which pertains to installing a new screen if required.
Step 8: Install the new screen (if applicable)
If you are replacing the screen on your ultrabook, this step will guide you through the installation process. However, if you are not installing a new screen and instead need to skip this step, you can proceed to the next step in the process. Here’s how to install a new screen:
- Ensure compatibility: Before proceeding with the installation, make sure that the new screen is compatible with your ultrabook model. Confirm the specifications, size, and connector type to ensure a proper fit.
- Align the new screen: Carefully position the new screen in the designated area, aligning the screw holes and connectors with those on the ultrabook’s frame. Take your time to properly align the screen to avoid any misalignment issues.
- Secure the screen with screws: Using the screws you removed earlier or the new screws provided with the screen, gently tighten and secure the screen into place. Begin by loosely inserting the screws before gradually tightening them in a diagonal pattern.
- Double-check the connections: Ensure that all the necessary screen cables are properly connected to the new screen. Reconnect them according to their respective connectors, making sure they are secure and snug.
- Test the new screen: Once the new screen is installed and all connections are secure, power on your ultrabook and test the functionality of the screen. Look for any abnormalities such as flickering, lines, or discoloration.
If the new screen functions properly and meets your expectations, continue with the reassembly process. If you encounter any issues, double-check the connections and ensure that the screen is compatible with your ultrabook model. If problems persist, consult a professional for assistance.
However, if you are not installing a new screen, proceed to the next step: reattaching the screen cables.
Step 9: Reattach the screen cables
After completing any necessary screen replacement, the next step is to reattach the screen cables. Follow these steps to ensure a secure and proper connection:
- Identify the screen cables: Take a close look at the connectors on the screen assembly and locate the corresponding cables that need to be reattached.
- Align the connectors: Carefully align the connectors on the cables with the corresponding connectors on the screen assembly. Ensure that they are correctly oriented before proceeding.
- Reconnect the cables: With the connectors aligned, gently but firmly push the cables into their respective connectors. Apply equal pressure to ensure a snug and secure connection. You may hear a click or feel a slight resistance as the connectors lock into place.
- Double-check the connections: Once all cables are reattached, double-check each connection to ensure they are secure and properly seated. Verify that there are no loose connections or cables that could potentially interfere with the screen’s functionality.
During this process, be mindful of the delicate nature of the cables and connectors. Handle them with care to prevent bending or damage that could affect the screen’s performance.
After reattaching the screen cables, you have completed the ninth step. Now, let’s move on to the next step: securing the screen assembly with screws.
Step 10: Secure the screen assembly with screws
With the screen cables reattached, the next step is to secure the screen assembly back into place using the screws. Follow these steps to ensure a secure fit:
- Hold the screen assembly in position: Carefully lift the screen assembly and hold it in the correct position against the frame of the ultrabook. Make sure that all the screw holes in the assembly align with the corresponding holes in the frame.
- Insert and tighten the screws: Begin by inserting one screw into a hole, aligning it correctly. Gently tighten the screw clockwise using your screwdriver, being careful not to apply excessive force. Repeat this process for all the remaining screws.
- Use a diagonal pattern: To ensure even pressure distribution and prevent any uneven stress on the screen assembly, tighten the screws in a diagonal pattern. For example, tighten the top-left screw, then the bottom-right screw, followed by the top-right, and finally the bottom-left.
- Check for proper alignment: As you tighten each screw, periodically check the alignment of the screen assembly. Make sure it remains flush with the rest of the ultrabook’s frame. Adjust the positioning if necessary before fully tightening all the screws.
Take care not to overtighten the screws as this can potentially damage the ultrabook or the screen assembly. Tighten them until they are secure, but be mindful of the level of force being applied.
Once all the screws are tightened and the screen assembly is securely in place, you have completed the tenth step. Now, let’s move on to the next step in the process: reattaching the back cover.
Step 11: Reattach the back cover
With the screen assembly securely in place, the next step is to reattach the back cover of your ultrabook. Here’s how to do it:
- Align the back cover: Position the back cover over the ultrabook, ensuring that it aligns properly with the edges and corners of the device. Take your time to align it accurately before proceeding.
- Press down gently: Once aligned, apply gentle pressure and firmly press down on the back cover. Make sure it sits flush with the rest of the ultrabook and is properly seated in place.
- Listen for clicks or snaps: As you press down on the back cover, you may hear clicking or snapping sounds. These indicate that the plastic clips or notches are locking the cover securely into place.
- Work your way around: Starting from one edge, move along the sides of the ultrabook, pressing and securing the back cover as you go. Use even pressure and be mindful not to apply excessive force that could potentially damage the cover or other components.
- Ensure a proper fit: Once the back cover is fully reattached, check all sides and corners to confirm that it is properly seated. It should be flush with the ultrabook’s frame and not bulge or feel loose in any areas.
When reattaching the back cover, be careful not to damage any internal components, cables, or connectors. Take your time during this step to ensure a secure and proper fit.
With the back cover reattached, you have completed the eleventh step. Now, let’s move on to the next step: powering on and testing the ultrabook screen.
Step 12: Power on and test the ultrabook screen
Now that you’ve completed the reassembly process, it’s time to power on your ultrabook and test the newly installed or reconnected screen. Follow these steps to ensure everything is functioning properly:
- Double-check the power and connections: Before powering on the ultrabook, verify that all connections, cables, and screws are properly secured. Ensure that there are no loose or dangling cables that could potentially interfere with the screen’s functionality.
- Connect the power source (if disconnected): If you had disconnected any power sources, such as the power cord or battery, make sure to reconnect them securely. This step ensures that your ultrabook has sufficient power for testing.
- Power on the ultrabook: Press the power button or key to turn on your ultrabook. Wait for it to boot up and reach the operating system’s desktop or login screen.
- Observe the screen: Take a close look at the screen and carefully inspect it for any irregularities. Look for flickering, lines, distorted colors, or other anomalies that could indicate a problem.
- Test screen functionality: Interact with your ultrabook by opening programs, viewing images or videos, and performing tasks that usually involve screen usage. Test the screen responsiveness, brightness, and any touch or stylus capabilities (if applicable).
- Check for proper resolution and alignment: Confirm that the screen’s resolution is correct and that the content displayed is sharp and properly aligned. Make any necessary adjustments in the display settings if needed.
If you notice any issues with the screen, such as flickering, artifacts, or unresponsive touch functionality, it may indicate a problem with the installation or the screen itself. In such cases, consult the manufacturer’s troubleshooting guide or seek professional assistance for further evaluation and resolution.
Once you are satisfied with the screen’s functionality and performance, you have successfully completed the final step. Congratulations! You have successfully removed or replaced the screen on your ultrabook. It’s time to enjoy your newly restored device.
Conclusion
Removing or replacing the screen on your ultrabook may seem like a daunting task, but with the right tools, patience, and careful attention to detail, it can be successfully accomplished. By following the step-by-step guide outlined in this article, you have learned how to safely remove the screen, disconnect cables, and reattach a new screen if needed.
Throughout the process, it’s crucial to prioritize safety and take precautions to protect both yourself and your ultrabook. Remember to power off and disconnect the device before beginning any disassembly. Use the appropriate tools for each step and handle delicate components with care to avoid damage.
Additionally, it’s important to ensure compatibility when replacing the screen, so you don’t encounter any issues during installation or functionality. Double-check specifications and consult your ultrabook’s user manual or online resources for specific instructions tailored to your device.
Finally, always test the screen functionality after reassembly to ensure that it is working properly. Take note of any irregularities and address them promptly if necessary.
If at any point you feel uncomfortable or uncertain about the process, it’s recommended to seek professional assistance or refer to the manufacturer’s instructions. Some ultrabook models may have unique variations that require specialized expertise.
By successfully completing the process, you have acquired valuable skills and knowledge that can be applied to future screen replacements or repairs. Now, you can enjoy your ultrabook with a properly functioning screen and the satisfaction of having accomplished the task yourself.