Introduction
When it comes to computing devices, the BIOS (Basic Input/Output System) is an integral component that ensures the proper functioning of the hardware. In order to protect the system from unauthorized access, many users choose to set a BIOS password. This security measure acts as a safeguard against unauthorized individuals booting up the computer or making changes to the system settings.
However, there might be instances where you need to remove the BIOS password on your ASUS Ultrabook. Perhaps you have forgotten the password, or maybe you have purchased a used device that still has the password set. Regardless of the reason, it is important to know how to remove the BIOS password properly.
Removing the BIOS password can be a delicate process, as it involves accessing the system at a fundamental level. Therefore, it is crucial to follow the correct methods and precautions to ensure the safety and functionality of your ASUS Ultrabook.
In this article, we will explore various methods that can be used to remove the BIOS password on an ASUS Ultrabook. We will discuss the precautions you need to take before attempting any of these methods, and the steps involved in each method.
It is important to note that the methods mentioned in this article are intended for educational purposes only, and should not be used for any illegal or unethical activities. Always make sure you have the legal right to access and modify the BIOS settings of the Ultrabook in question.
Now, let’s dive into the different methods that can help you remove the BIOS password on your ASUS Ultrabook.
What is BIOS Password?
The BIOS password is a security measure implemented by computer manufacturers to prevent unauthorized access to the BIOS settings. The BIOS acts as the interface between the computer’s hardware and software, and it contains important configuration settings that control the functioning of the system.
When a BIOS password is set, it serves as a barrier that prevents unauthorized users from accessing or modifying these settings. It is typically required to enter the password before the system can boot up or make changes to the BIOS configuration.
The BIOS password can be set on various levels, depending on the computer manufacturer and model. Some computers may provide the option to set a user-level password, which only restricts certain operations, such as changing the boot device or accessing specific settings. Other computers may have a supervisor-level password, which controls all aspects of the BIOS configuration.
The purpose of the BIOS password is to enhance the security of the system by preventing unauthorized individuals from tampering with crucial settings or gaining unauthorized access to the computer. This can be particularly important in business or educational environments where sensitive data or confidential information may be stored on the computer.
It is important to note that the BIOS password is stored in a non-volatile memory chip, which means that it is not erased when the computer is powered off. This ensures that the password remains intact even if the computer loses power. However, this also means that if you forget the BIOS password, it can be quite challenging to regain access to your system without the proper methods or tools.
Now that we understand what a BIOS password is and its purpose, let’s explore why you may need to remove the BIOS password on your ASUS Ultrabook.
Why do you need to remove BIOS password?
While the BIOS password provides an extra layer of security for your ASUS Ultrabook, there are a few situations where you may need to remove it:
1. Forgotten password: One common scenario is when you have forgotten the BIOS password. It can be frustrating to be locked out of your own device, especially if you need to make critical system changes or access certain settings. In such cases, removing the BIOS password becomes necessary to regain control over your ASUS Ultrabook.
2. Used device: If you have purchased a used ASUS Ultrabook, there’s a chance that the previous owner had set a BIOS password. While it may seem safer for them to leave the password intact, it can cause inconvenience for the new owner. Removing the BIOS password allows you to personalize the device and configure it according to your needs.
3. Troubleshooting: In some cases, the BIOS password can interfere with troubleshooting efforts. For example, if you’re facing booting issues or need to change certain hardware settings, the BIOS password can restrict your ability to do so. By removing the BIOS password, you can troubleshoot and resolve any hardware or software-related problems more effectively.
4. System upgrades: When upgrading the hardware components of your ASUS Ultrabook, you may encounter compatibility issues that require changes in the BIOS settings. However, with a BIOS password in place, you won’t be able to make the necessary adjustments. Removing the password allows you to make the required changes and successfully upgrade your system.
5. Reinstallation of operating system: In the event that you need to reinstall or upgrade the operating system on your ASUS Ultrabook, you may need to access the BIOS settings to configure the boot options. If a BIOS password is set, it can prevent you from modifying the settings required for a successful operating system installation. Removing the BIOS password allows you to proceed with the reinstallation process smoothly.
In summary, the need to remove the BIOS password on your ASUS Ultrabook may arise due to forgotten passwords, the purchase of a used device, troubleshooting requirements, system upgrades, or OS reinstallation. By removing the BIOS password, you can regain control over your device and perform necessary actions without restrictions.
Precautions Before Removing BIOS Password
Before proceeding with the removal of the BIOS password on your ASUS Ultrabook, it is crucial to take certain precautions to ensure a smooth and successful process. Here are some important steps to consider:
1. Backup important data: Before making any changes to the BIOS settings or removing the password, it is highly recommended to back up any important data on your ASUS Ultrabook. This ensures that you don’t lose any valuable information in case something goes wrong during the password removal process.
2. Research your specific model: Different ASUS Ultrabook models may have different methods and procedures for removing the BIOS password. It is important to research and understand the specific requirements and steps for your particular model. Visit the ASUS support website or refer to the user manual for detailed instructions relevant to your device.
3. Seek professional assistance (if necessary): If you are not confident in your technical abilities or unsure about the consequences of removing the BIOS password, it is advisable to seek professional assistance. Computer technicians or ASUS customer support can provide guidance and perform the password removal process for you, ensuring that it is done correctly and without any complications.
4. Prepare necessary tools: Depending on the method you choose to remove the BIOS password, you may need specific tools or equipment. For example, if you plan on clearing the CMOS battery, you may need a screwdriver to access the motherboard. Make sure you have all the necessary tools readily available to avoid any delays or difficulties during the password removal process.
5. Document BIOS settings: It is important to take note or capture screenshots of the current BIOS settings before removing the password. This will help you restore the settings later if needed or serve as a reference point for any specific configurations you have made. It’s a good practice to have a record of your original BIOS settings for troubleshooting purposes.
6. Proceed with caution: Removing the BIOS password involves accessing sensitive system settings, so it is important to proceed with caution. Follow the instructions carefully, double-check each step, and avoid making unnecessary changes to other BIOS settings not related to the password removal process. This minimizes the risk of any unintended consequences or system instability.
By taking these precautions, you can mitigate potential risks and ensure a smooth and successful removal of the BIOS password on your ASUS Ultrabook. It’s always better to be prepared and well-informed before making any changes to the BIOS settings of your device.
Method 1: Use the Backdoor Password
In some cases, certain manufacturers may include a backdoor password that can be used to bypass or reset the BIOS password. These backdoor passwords are often a default password set by the manufacturer and can provide access to the BIOS settings without requiring the original password.
Here are the steps to use the backdoor password on your ASUS Ultrabook:
1. Research the backdoor passwords: Conduct some research to identify any known backdoor passwords specific to your ASUS Ultrabook model. These passwords are often manufacturer-specific, so make sure to search for ASUS backdoor passwords. Some common backdoor passwords might be “admin,” “password,” “123456,” or “administrator.” Check reputable websites, forums, or ASUS support resources for a list of backdoor passwords that may work for your model.
2. Restart the Ultrabook: Start by shutting down your ASUS Ultrabook completely. Once it is powered off, wait a few seconds, and then press the power button to turn it on.
3. Enter the backdoor password: As the Ultrabook powers up, you may see the manufacturer’s logo or a splash screen. During this screen, quickly press the designated key to enter the BIOS settings. This key varies depending on your model, but it is often the “Delete,” “F2,” or “F10” key. Consult your device’s documentation or the ASUS support website for the correct key.
4. Enter the backdoor password: Once you are inside the BIOS settings, locate the field where the password is entered. Use the researched backdoor password to enter the field instead of the actual password. If the backdoor password is valid for your model, you should be granted access to the BIOS settings without needing the original password.
5. Remove or reset the BIOS password: After gaining access, locate the section in the BIOS settings that allows you to modify or remove the BIOS password. This section might be named “Security” or “Password” settings. Follow the on-screen instructions to remove or reset the password. Save the changes and exit the BIOS settings.
6. Test the change: Restart your ASUS Ultrabook to ensure that the BIOS password has been successfully removed or reset. If you can access the system without being prompted for a password, then the backdoor password method has worked.
Note that the effectiveness of using the backdoor password method may vary depending on the manufacturer, model, and BIOS version. It is not guaranteed to work in all cases, but it is worth trying as an initial step before moving on to more advanced methods.
Now that you have learned how to use the backdoor password method, let’s explore another approach in removing the BIOS password on your ASUS Ultrabook.
Method 2: Clear the CMOS Battery
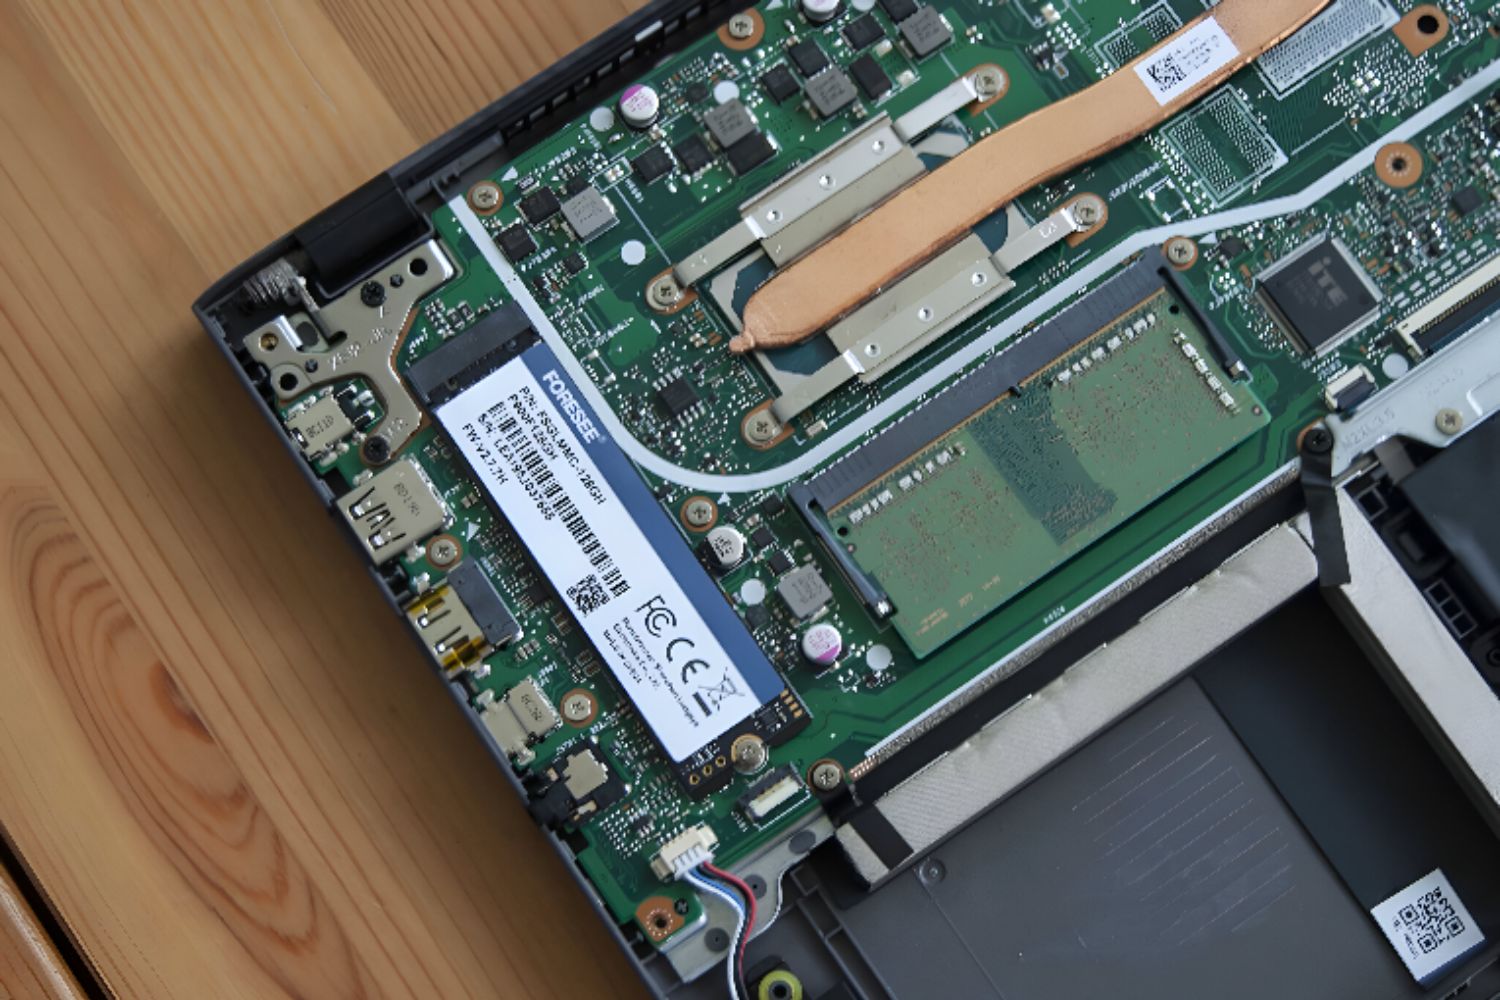
If the backdoor password method did not work or is not applicable to your ASUS Ultrabook model, you can try clearing the CMOS (Complementary Metal-Oxide-Semiconductor) battery. The CMOS battery is a small battery located on the motherboard that stores the BIOS settings, including the password.
Here are the steps to clear the CMOS battery on your ASUS Ultrabook:
1. Power off the Ultrabook: Start by completely shutting down your ASUS Ultrabook. Make sure it is not connected to any external power source and remove any peripherals or accessories.
2. Open the Ultrabook case: To access the CMOS battery on the motherboard, you will need to open the Ultrabook case. Refer to your device’s user manual or manufacturer’s website for detailed instructions on how to properly open the case without causing any damage.
3. Locate the CMOS battery: Once the case is open, locate the CMOS battery on the motherboard. It is typically a small, round battery with a silver or black casing. Take note of its position and how it is connected to the motherboard.
4. Disconnect the CMOS battery: Carefully disconnect the CMOS battery from the motherboard. Depending on the connector type, you may need to gently pull or lift a latch to release the battery. Take caution not to damage the battery, connectors, or other components while doing so.
5. Wait for a few minutes: After disconnecting the CMOS battery, wait for at least a few minutes. This allows any residual charge in the system to dissipate and ensures that the BIOS settings, including the password, are completely cleared. Some sources recommend waiting for 5 to 10 minutes, while others suggest waiting for up to 30 minutes.
6. Reconnect the CMOS battery: Carefully reconnect the CMOS battery to its original position on the motherboard. Make sure it is securely connected and properly aligned with the connector. Ensure that no cables or other components interfere with the battery’s connection.
7. Close the Ultrabook case: Once the CMOS battery is reconnected, close the Ultrabook case following the proper instructions. Ensure that all screws are tightened securely, and there are no loose parts or cables inside the case that may cause damage or hinder proper functionality.
8. Power on the Ultrabook: Power on your ASUS Ultrabook and check if the BIOS password has been successfully cleared. If successful, you should be able to access the system without being prompted for a password.
Clearing the CMOS battery is a commonly used method to remove BIOS passwords on various computer systems, including ASUS Ultrabooks. However, it is important to note that this method may differ depending on the specific model and motherboard configuration. Always refer to your device’s documentation or consult ASUS support for accurate instructions applicable to your Ultrabook.
If the backdoor password method and clearing the CMOS battery method did not work for your ASUS Ultrabook, don’t worry. There are still a couple of more methods you can try to remove the BIOS password, which will be discussed in the upcoming sections.
Method 3: Use the BIOS Master Password Generator
If the previous methods were unsuccessful in removing the BIOS password on your ASUS Ultrabook, you can try using a BIOS Master Password Generator. This method involves generating a unique master password based on the unique system information of your Ultrabook.
Here is how you can use a BIOS Master Password Generator:
1. Identify your Ultrabook system information: Before using a BIOS Master Password Generator, you will need to gather specific system information from your ASUS Ultrabook. This typically includes the brand, model, and system code. You can find this information on the bottom of your Ultrabook or in the device’s documentation.
2. Find a reliable BIOS Master Password Generator: Search for a reputable BIOS Master Password Generator tool online. There are various websites and forums that provide such tools. Make sure to use a trusted source to avoid any potential security risks or malware infections.
3. Enter the required information: Open the BIOS Master Password Generator tool and enter the requested information, which usually includes the brand, model, and system code of your ASUS Ultrabook. Follow the on-screen instructions and input the necessary details accurately.
4. Generate the master password: Once you have entered the required information, click on the “Generate Password” button or a similar option on the tool. The tool will use the system information to generate a unique master password specific to your ASUS Ultrabook.
5. Try the generated master password: Note down the generated master password. Restart your ASUS Ultrabook and enter the BIOS settings. When prompted for the password, enter the generated master password. If it is successful, you will gain access to the BIOS settings without needing the original password.
6. Remove or reset the BIOS password: After entering the BIOS settings, locate the section that allows you to remove or reset the BIOS password. Follow the instructions provided in the BIOS settings to remove or reset the password. Save the changes and exit the BIOS settings.
7. Test the changes: Restart your ASUS Ultrabook to ensure that the BIOS password has been successfully removed or reset. If you can access the system without being prompted for a password, then the BIOS Master Password Generator method has worked.
Keep in mind that using a BIOS Master Password Generator may not work for all ASUS Ultrabook models. Results can vary depending on the BIOS version and other factors. It is also important to use these tools responsibly and only for legitimate purposes.
Now that you are familiar with the BIOS Master Password Generator method, let’s move on to the next method to remove the BIOS password on your ASUS Ultrabook.
Method 4: Flash the BIOS Firmware
If all other methods have failed to remove the BIOS password on your ASUS Ultrabook, you can consider flashing the BIOS firmware. This method involves updating or reinstalling the BIOS firmware, which can often clear any existing BIOS passwords. However, it is important to approach this method with caution, as improper BIOS flashing can lead to permanent damage to the system.
Follow these steps to flash the BIOS firmware on your ASUS Ultrabook:
1. Backup important data: Before proceeding with flashing the BIOS firmware, make sure to back up all important data on your Ultrabook. This will ensure that you have a copy of your files in case of any issues that may occur during the flashing process.
2. Identify the correct BIOS firmware: Visit the ASUS support website and navigate to the product support page for your specific Ultrabook model. Look for the latest BIOS firmware update available for your device. Download the correct BIOS firmware file and make sure it matches your Ultrabook model and version.
3. Prepare a bootable USB drive: Format a USB drive and create a bootable USB drive using appropriate software. Copy the downloaded BIOS firmware file onto the bootable USB drive. Ensure that the USB drive is properly configured to be bootable and can be recognized by your Ultrabook.
4. Restart the Ultrabook: Insert the bootable USB drive into your Ultrabook and restart the system. As the Ultrabook powers up, quickly press the designated key (such as “F2” or “F10”) to enter the boot menu or BIOS settings.
5. Enter the boot menu: In the boot menu or BIOS settings, navigate to the option that allows you to choose the boot device. Select the USB drive as the primary boot device and save the changes.
6. Start the BIOS firmware update: Once the Ultrabook boots from the USB drive, follow the on-screen instructions to start the BIOS firmware update process. This typically involves running a specific executable file or selecting the BIOS firmware update option.
7. Follow the firmware update instructions: Carefully follow the instructions provided during the firmware update process. Make sure not to interrupt the process or turn off the Ultrabook while the firmware update is in progress. This can cause irreparable damage to the BIOS and the system.
8. Restart and test: Once the firmware update is complete, restart the Ultrabook and check if the BIOS password has been successfully cleared. If successful, you should be able to access the system without being prompted for a password.
It is important to note that flashing the BIOS firmware is a technical and potentially risky procedure. If you are not comfortable performing these steps, consider seeking assistance from a professional or contacting ASUS support for guidance.
With this method, we have explored various approaches to remove the BIOS password on your ASUS Ultrabook. It’s essential to proceed with caution and choose the method that suits your expertise and situation best.
Conclusion
Removing the BIOS password on your ASUS Ultrabook can be a challenging process, but it is necessary in certain situations. We have explored four different methods that can help you in removing the BIOS password: using the backdoor password, clearing the CMOS battery, using the BIOS Master Password Generator, and flashing the BIOS firmware.
The backdoor password method is a simple approach that relies on manufacturer-provided default passwords. However, its effectiveness may vary depending on your specific Ultrabook model and BIOS version. Clearing the CMOS battery involves disconnecting the battery to reset the BIOS settings, but it may require careful handling and knowledge of the Ultrabook’s internal components.
Using the BIOS Master Password Generator can provide a unique master password specific to your Ultrabook. However, it is essential to use reputable sources and exercise caution when using these tools. Finally, flashing the BIOS firmware is a more technical method that involves updating or reinstalling the BIOS, but it carries the risk of permanent damage if not done correctly.
Before attempting any of these methods, it is crucial to follow precautions, including backing up your data, researching your specific model, and seeking professional assistance if needed. Each method has its own considerations and effectiveness, so choose the method that aligns with your expertise and circumstances.
Remember, while these methods have been meant for legitimate purposes, it is important to use them responsibly and for authorized access only. Always ensure that you have the legal right to access and modify the BIOS settings of your ASUS Ultrabook.
In conclusion, removing the BIOS password on your ASUS Ultrabook requires careful consideration, research, and proper execution. By following the appropriate methods and taking necessary precautions, you can regain control over your Ultrabook and overcome the challenges presented by the BIOS password.