Introduction
Are you looking to remove an email account from your Amazon Fire Tablet? Whether you no longer use the email address associated with the account or simply want to declutter your device, removing an email account can help streamline your digital experience. In this guide, we will walk you through the step-by-step process of removing an email account from your Amazon Fire Tablet.
Amazon Fire Tablets are versatile devices that allow you to access your email accounts, browse the web, and enjoy various multimedia content. However, if you have multiple email accounts set up on your device and find yourself frequently switching between them, it might be time to consider removing the ones you no longer need or use.
By removing unnecessary email accounts, you can declutter your tablet’s interface and ensure that you only see the emails that matter to you. Additionally, removing an email account from your device can help improve its performance and free up storage space. So, if you’re ready to simplify your email experience on your Amazon Fire Tablet, let’s get started with the step-by-step process.
Step 1: Open Settings
The first step to remove an email account from your Amazon Fire Tablet is to open the Settings menu. To access the Settings, follow these simple steps:
- Unlock your Amazon Fire Tablet by swiping up or entering your PIN code.
- From the home screen, swipe down from the top to reveal the notification panel.
- Tap on the gear icon located at the top right corner of the screen. This will open the Settings menu.
Once you’ve successfully entered the Settings menu, you are now ready to proceed to the next step and remove the email account from your Amazon Fire Tablet.
Tips:
- If you have trouble finding the Settings icon, you can also access the Settings menu by tapping on the “Apps” option from the home screen and then selecting “Settings”.
- Make sure your Amazon Fire Tablet is connected to the internet for smooth navigation and account removal process.
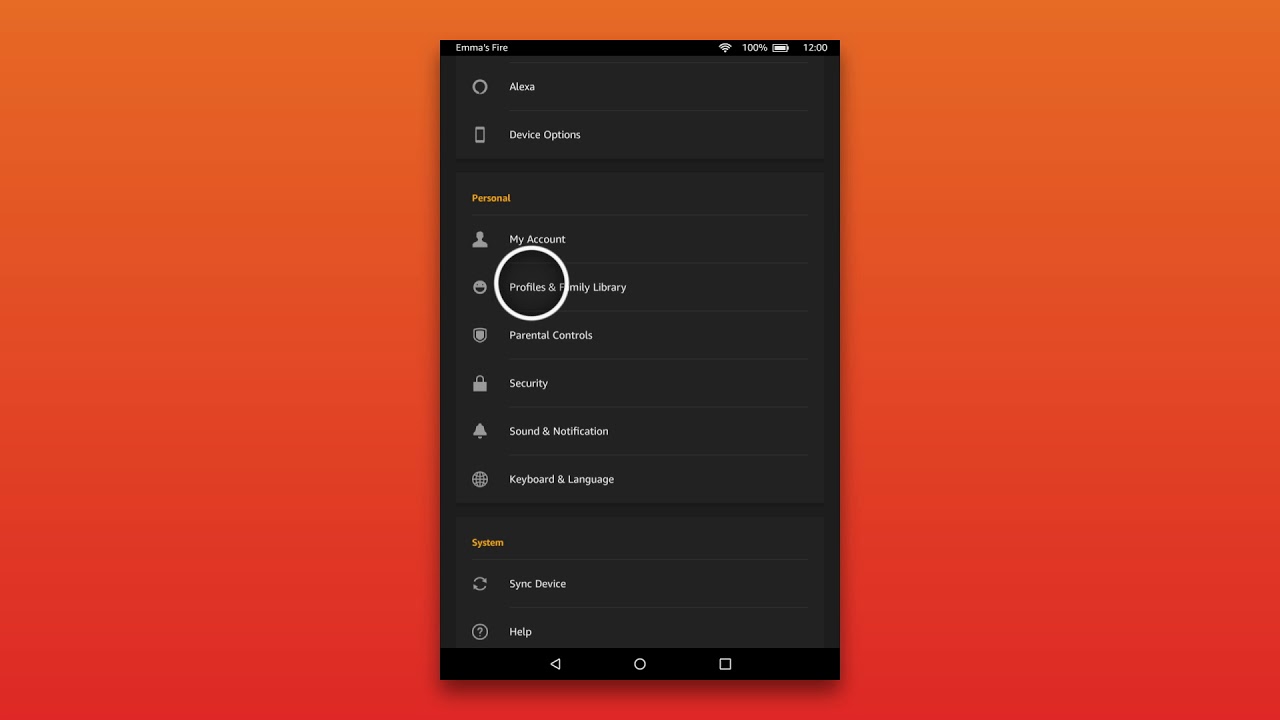
Step 2: Select “Accounts & Backup”
Now that you’ve successfully opened the Settings menu on your Amazon Fire Tablet, the next step is to navigate to the “Accounts & Backup” section. Here’s how you can do it:
- Scroll down the Settings menu until you find the section labeled “Accounts & Backup”.
- Tap on “Accounts & Backup” to access the account management options.
Once you’re in the “Accounts & Backup” section, you will see a list of all the accounts linked to your Amazon Fire Tablet, including email accounts, social media accounts, and more. This is where you can manage and remove the email account you no longer wish to have on your device.
Tips:
- If you’re having trouble finding the “Accounts & Backup” section, you can use the search function within the Settings menu. Simply tap on the magnifying glass icon at the top of the screen, type in “Accounts”, and select the relevant option.
- If your Amazon Fire Tablet has a different layout or version of the operating system, the location of the “Accounts & Backup” section may vary slightly. However, it should still be easily accessible from the Settings menu.
Step 3: Choose the Email Account to Remove
After selecting the “Accounts & Backup” section in the Settings menu, you are now ready to choose the specific email account that you want to remove from your Amazon Fire Tablet. Follow these steps:
- Within the “Accounts & Backup” section, scroll through the list of accounts until you find the email account that you wish to remove.
- Tap on the email account to access the account settings.
Upon selecting the email account, you will be presented with various options and settings associated with it. This is where you can manage and modify the account settings according to your preferences. However, for the purpose of removing the account, we will proceed to the next step where you can find the option to remove it entirely from your device.
Tips:
- If you have multiple email accounts listed in the “Accounts & Backup” section, ensure that you select the correct one to avoid removing the wrong account.
- If you’re unsure which account to remove, you can double-check the account name and associated email address to make sure you’re removing the intended account.
Step 4: Tap on “Remove Account”
Now that you’ve chosen the email account you want to remove from your Amazon Fire Tablet, it’s time to proceed with the account removal process. Follow these simple steps:
- Within the email account settings, scroll down until you find the option labeled “Remove Account” or a similar term that indicates the removal action.
- Tap on the “Remove Account” option to initiate the account removal process.
By tapping on “Remove Account,” you are indicating your intention to unlink the selected email account from your Amazon Fire Tablet. However, please note that this action is irreversible, and all associated data, including emails and synchronization settings, will be permanently deleted from your device.
Tips:
- Before proceeding with the removal, make sure to back up any important emails or data associated with the email account you are about to remove. This will ensure that you don’t lose any valuable information.
- If you’re having trouble finding the “Remove Account” option, it may be located within a sub-menu or labeled differently based on your device’s operating system version. Take your time to explore the account settings and look for any options related to account removal.
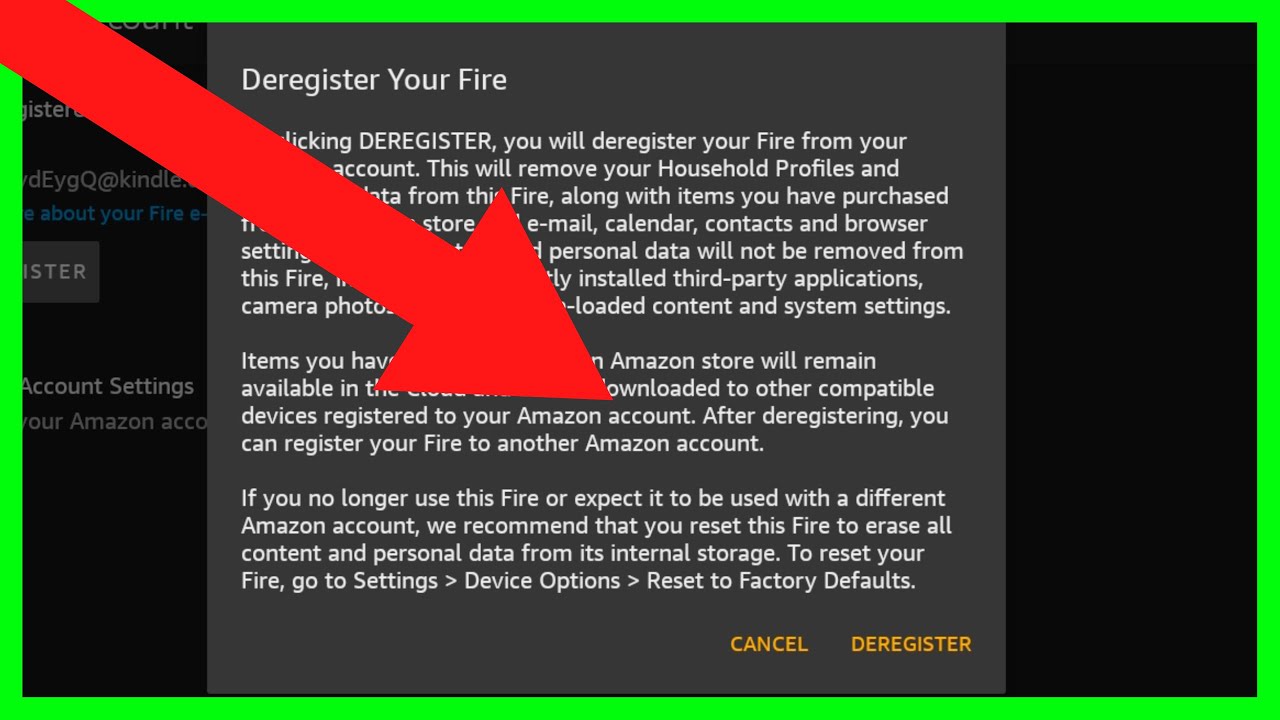
Step 5: Confirm the Account Removal
After tapping on the “Remove Account” option in the previous step, you will now be prompted to confirm the removal of the email account from your Amazon Fire Tablet. Here’s how you can proceed with the confirmation:
- A confirmation dialogue box will appear on your screen, displaying a message similar to “Remove account [email address]?”.
- Read the confirmation message carefully to ensure that you have selected the correct email account.
- If you are certain about removing the account, tap on the “Confirm” or “Remove” button to proceed.
By confirming the account removal, you are acknowledging that all associated data and settings will be permanently deleted from your device. Once the confirmation is made, the removal process will begin, and your Amazon Fire Tablet will unlink the selected email account.
Tips:
- Take a moment to double-check the email address mentioned in the confirmation message to ensure that you are removing the intended account.
- If you have second thoughts about removing the account, you can tap on the “Cancel” or “Go Back” option to abort the removal process.
Step 6: Verify Account Removal
After confirming the removal of the email account in the previous step, it is important to verify that the account has been successfully removed from your Amazon Fire Tablet. Follow these steps to ensure the account removal:
- Return to the main Settings menu by tapping on the back arrow or using the navigation options provided.
- Scroll down and select the “Accounts & Backup” section again.
- Check the list of accounts to ensure that the email account you removed is no longer listed.
If the email account is no longer present in the “Accounts & Backup” section, you can be confident that the removal process was successful. Congratulations, you have successfully removed the email account from your Amazon Fire Tablet!
Tips:
- If the removed email account is still visible in the “Accounts & Backup” section, double-check that you followed the previous steps correctly. It is possible that the removal process was not initiated successfully, and you may need to repeat the steps.
- In some cases, the removal of an email account may take a few moments to reflect in the Settings menu. If you don’t see the account immediately after removal, give it a little time and check again later.
Conclusion
Removing an email account from your Amazon Fire Tablet is a simple process that can help declutter your device and streamline your digital experience. By following the step-by-step guide outlined above, you can easily remove email accounts that are no longer needed or in use.
Start by opening the Settings menu on your Amazon Fire Tablet and navigating to the “Accounts & Backup” section. From there, choose the specific email account you want to remove and tap on the “Remove Account” option. Confirm the removal and verify that the account has been successfully removed from your device.
Keep in mind that removing an email account will permanently delete all associated data, including emails and synchronization settings. Therefore, it is recommended to back up any important information before proceeding with the removal.
By removing unnecessary email accounts, you can declutter your device’s interface, improve performance, and free up storage space. This allows you to focus on the email accounts that matter to you and streamline your digital workflow.
We hope this guide has helped you successfully remove an email account from your Amazon Fire Tablet. If you have any further questions or need additional assistance, don’t hesitate to consult the device’s user manual or reach out to Amazon’s customer support for further guidance.