Introduction
Welcome to the world of Fire Tablets! These innovative and versatile devices from Amazon offer a convenient and immersive way to enjoy your favorite books, movies, games, and more. Whether you’re a tech-savvy enthusiast or a novice user, this guide will walk you through the process of setting up your Fire Tablet from start to finish.
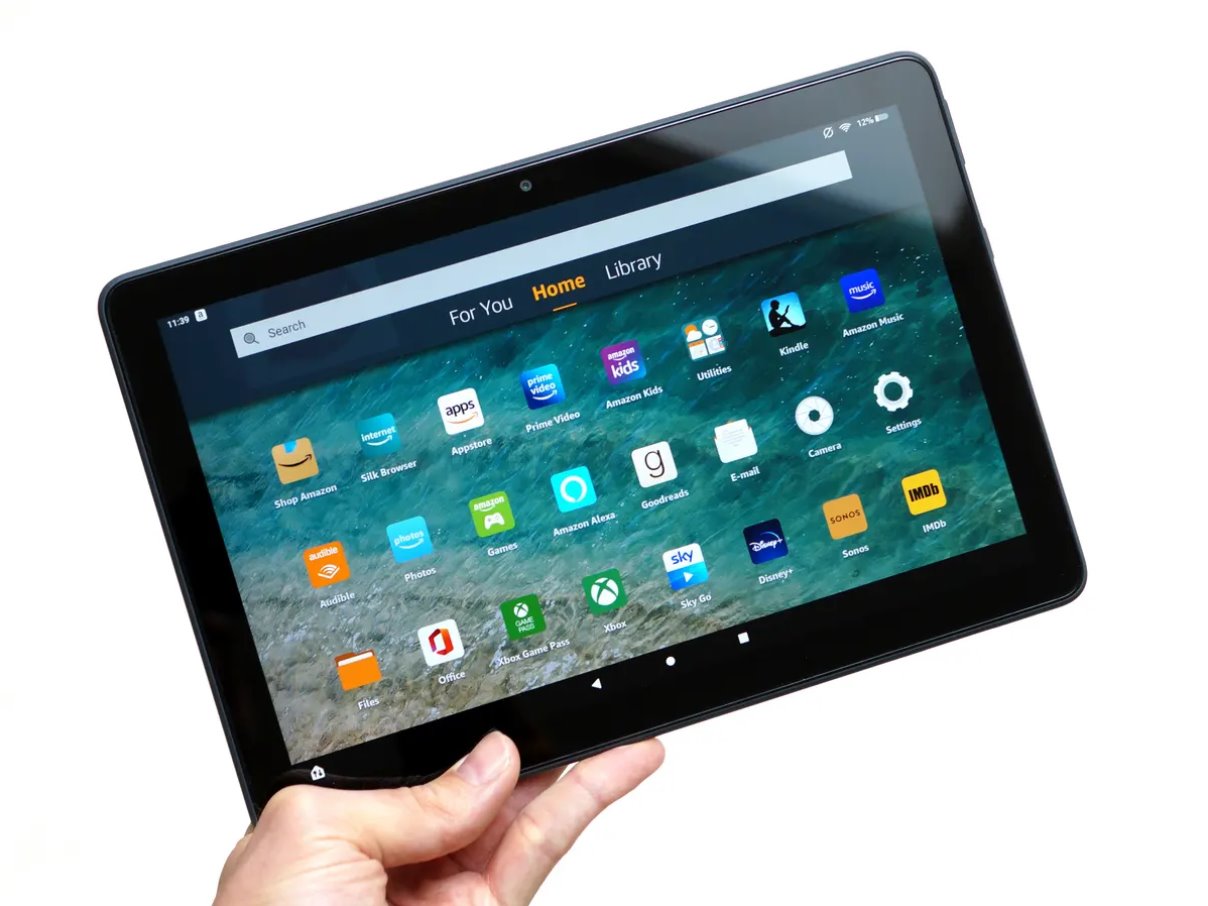
Featuring a user-friendly interface and a powerful operating system, Fire Tablets give you access to a wide range of apps, entertainment, and productivity tools. Whether you’re looking to stay connected with friends and family, stream movies and TV shows, or browse the web, your Fire Tablet has you covered.
With its sleek design and stunning display, using a Fire Tablet is a pleasure for both work and play. The crisp resolution and vibrant colors bring your favorite content to life, making every experience enjoyable and immersive. Plus, the long-lasting battery life ensures that you can stay connected and entertained throughout the day.
Setting up your Fire Tablet is a simple and straightforward process. In this guide, we’ll walk you through each step, providing clear instructions and helpful tips along the way. From unboxing your device to customizing your settings, we’ll cover everything you need to know to get your Fire Tablet up and running in no time.
Whether you’re a first-time user or a seasoned pro, this guide will ensure that you have a seamless and enjoyable experience with your new Fire Tablet. So, let’s dive in and get started with the exciting journey of setting up your Fire Tablet!
Step 1: Unboxing your Fire Tablet
Congratulations on your new Fire Tablet! The first step to getting started is unboxing your device. Follow these simple instructions to unbox your Fire Tablet:
- Locate the box that your Fire Tablet was delivered in.
- Remove any protective packaging or tape from the outside of the box.
- Gently open the box by lifting the lid or sliding it off.
- Inside the box, you will find your Fire Tablet resting on top of additional accessories and documentation.
- Lift the Fire Tablet out of the box and set it aside.
- Underneath the tablet, you will find a charging cable and adapter. These accessories are essential for powering and charging your Fire Tablet.
- Take a moment to review the included documentation, such as the user manual and warranty information.
Once you have unboxed your Fire Tablet and familiarized yourself with the included accessories, you are ready to move on to the next step: powering on and initial setup.
Remember to keep the box and packaging materials in a safe place, as they may be useful for storage or transportation in the future. Now that your Fire Tablet is out of the box, let’s continue with the setup process.
Step 2: Powering On and Initial Setup
Now that you’ve unboxed your Fire Tablet, it’s time to power it on and go through the initial setup. Follow these steps to get your tablet up and running:
- Locate the power button on your Fire Tablet. It is usually located on the top or side of the device.
- Press and hold the power button for a few seconds until the screen lights up.
- Once the device turns on, you will be greeted with the Amazon logo and a loading screen.
- Next, you will be prompted to select your language preference. Swipe up or down to scroll through the available options, and tap on your desired language.
- On the next screen, you will need to connect your Fire Tablet to a Wi-Fi network. Tap on the name of your network to select it. If your network is password-protected, enter the password using the on-screen keyboard.
- After connecting to Wi-Fi, your tablet will check for any available software updates. If an update is found, it is recommended to install it for optimal performance and security.
- Once the update is complete, your Fire Tablet will ask you to sign in to your Amazon account. If you already have an account, enter your email address and password. If you don’t have an Amazon account, tap on “Create a New Amazon Account” and follow the on-screen instructions.
- After signing in to your Amazon account, you will have the option to set up a secure lock screen for your tablet. You can choose from options like a PIN, password, or fingerprint unlock, depending on the model of your Fire Tablet. Select your preferred method and follow the prompts to set it up.
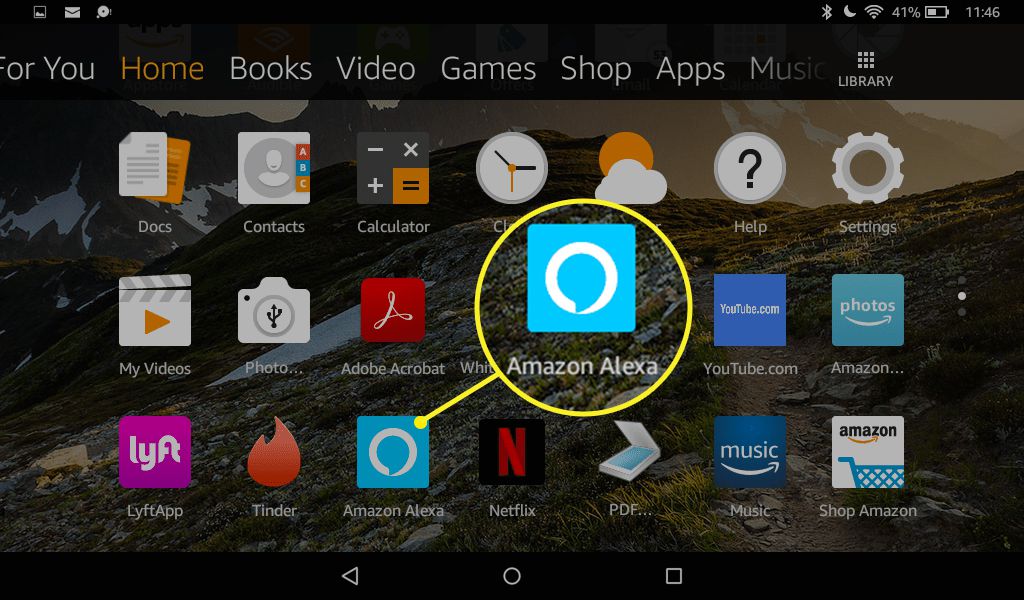
- Finally, you will be asked if you would like to enable or disable the Alexa voice assistant feature on your tablet. Choose your preference and proceed to the next step.
Once you’ve completed these steps, your Fire Tablet will be ready to use. You can now explore the various features and settings, download apps, and enjoy your favorite content. Congratulations on setting up your Fire Tablet!
Step 3: Connecting to Wi-Fi
After powering on your Fire Tablet and going through the initial setup, the next step is to connect your tablet to a Wi-Fi network. Follow these simple instructions to get connected:
- On the home screen of your Fire Tablet, swipe down from the top of the screen to open the Quick Actions panel.
- In the Quick Actions panel, tap on the Wi-Fi icon to open the Wi-Fi settings.
- A list of available Wi-Fi networks will appear. Tap on the name of your desired network.
- If the network is password-protected, a prompt will appear asking you to enter the password. Use the on-screen keyboard to enter the password, and then tap on Connect.
- Your Fire Tablet will attempt to connect to the selected network. Once connected, the Wi-Fi icon in the status bar at the top of the screen will turn solid.
It’s important to note that your Fire Tablet will remember the Wi-Fi networks it has previously connected to. This means that whenever you are within range of a known network, your tablet will automatically connect without requiring you to enter the password again.
In case you are unable to connect to a Wi-Fi network, here are a few troubleshooting tips:
- Ensure that you are within range of the Wi-Fi network.
- Double-check that you are entering the correct password.
- Restart your Fire Tablet and try reconnecting to the network.
- If the problem persists, try restarting your Wi-Fi router.
- If all else fails, you can try forgetting the network on your Fire Tablet and then reconnecting to it.
By connecting your Fire Tablet to a Wi-Fi network, you gain access to a wide range of online features and services. You can browse the web, download apps and games, stream movies and TV shows, and much more.
With a stable Wi-Fi connection, you can enjoy all the benefits of your Fire Tablet and make the most of its capabilities. So, ensure that you are connected to a reliable network to fully experience the functionality of your device.
Step 4: Logging in to Your Amazon Account
Once you have connected your Fire Tablet to a Wi-Fi network, the next step is to log in to your Amazon account. Logging in to your Amazon account allows you to access your digital content, manage your settings, and make purchases from the Amazon Store. Here’s how you can log in to your Amazon account:
- On the home screen of your Fire Tablet, swipe down from the top of the screen to open the Quick Actions panel.
- In the Quick Actions panel, tap on the “Settings” icon to open the Settings menu.
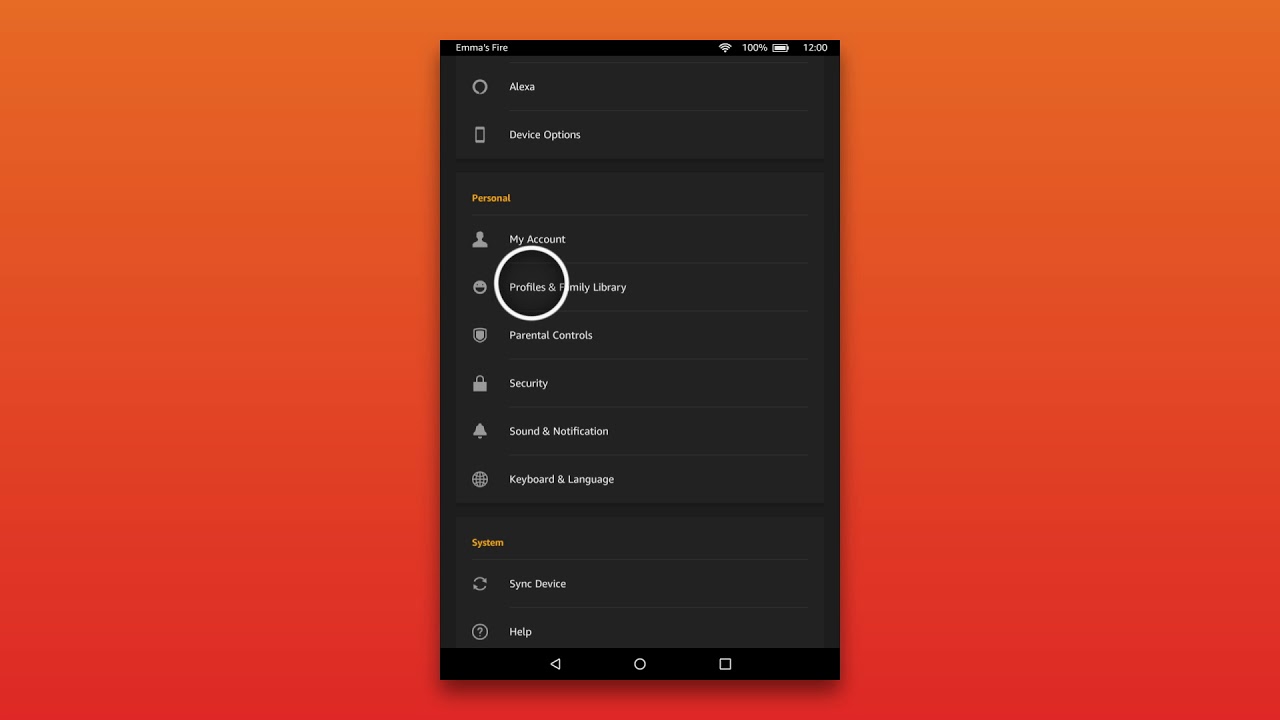
- In the Settings menu, scroll down and tap on “Accounts & Profiles”.
- Under the “Accounts” section, tap on “Add a New Account”.
- A list of supported accounts will appear. Tap on “Amazon” to proceed.
- If you already have an Amazon account, enter your email address and password on the login screen.
- If you don’t have an Amazon account yet, tap on “Create a New Amazon Account” and follow the on-screen instructions to set up a new account.
- Once you have entered your login information, tap on “Sign in” to log in to your Amazon account.
After logging in, your Fire Tablet will sync with your Amazon account, allowing you to access your purchased content, such as eBooks, audiobooks, and apps. You can also customize your settings, manage your payment methods, and explore personalized recommendations based on your preferences.
It’s worth mentioning that logging in to your Amazon account is essential for accessing many of the features and services available on your Fire Tablet. With an Amazon account, you can enjoy a seamless and personalized experience that enhances your tablet usage.
If you encounter any login issues or forgot your Amazon account password, you can tap on the “Forgot your password?” link on the login screen for assistance with resetting your password.
Once you’re successfully logged in to your Amazon account on your Fire Tablet, you’re ready to move on to the next steps of personalizing your tablet and exploring its vast array of content and functionalities.
Step 5: Personalizing Your Fire Tablet
Now that you’ve logged in to your Amazon account on your Fire Tablet, it’s time to personalize your device to make it uniquely yours. Personalization allows you to customize various aspects of your tablet’s appearance and functionality. Here are some ways to personalize your Fire Tablet:
- Changing the Wallpaper: To give your tablet a personal touch, you can change the wallpaper. Long-press on the home screen and tap on “Wallpapers” to choose from a variety of pre-installed wallpapers or use your own photos.
- Adding Widgets: Widgets are a great way to enhance your tablet’s home screen. Long-press on the home screen, tap on “Widgets,” and select the widgets you want to add, such as weather, calendar, or music player.
- Organizing Apps: Arrange your apps in a way that makes them easily accessible. Long-press on an app and drag it to move it around. You can also create folders by dragging one app onto another.
- Customizing the Notification Panel: Swipe down from the top of the screen to open the notification panel. Tap on the “Gear” icon to access the Settings menu. From here, you can customize which settings toggles appear in the panel.
- Changing Display Settings: To adjust the brightness, font size, or screen timeout, go to Settings > Display & Brightness. Explore the settings to find options that suit your preferences.
- Configuring Sound Settings: Customize the volume, notification sounds, and other audio settings by going to Settings > Sounds & Haptics. You can also set up Do Not Disturb mode to silence notifications during specific times.
- Setting up a Screen Lock: Protect your device and data by setting up a screen lock option. Go to Settings > Security & Privacy and choose a PIN, password, or fingerprint unlock method.
These are just a few examples of how you can personalize your Fire Tablet. Feel free to explore the Settings menu to discover even more customization options that suit your preferences.
Remember, personalizing your Fire Tablet not only adds a personal touch but also enhances your overall user experience. By making your tablet reflect your style and needs, you’ll enjoy using it even more!
Step 6: Managing Apps and Content
Once you have personalized your Fire Tablet to your liking, it’s time to manage your apps and content. Managing apps and content allows you to organize and optimize your device’s storage, install new apps, and manage your downloaded content. Here’s how you can effectively manage your apps and content:
- Accessing Your Apps: To view all installed apps, swipe up from the bottom of the screen to open the App Grid. From here, you can browse and open any app on your tablet.
- Downloading New Apps: To install new apps, open the Amazon Appstore or the Google Play Store app on your tablet. Use the search function or browse the categories to find the app you want, then tap on Install to download it.
- Moving and Deleting Apps: To manage your apps, long-press on an app icon. This will trigger the app management mode, allowing you to move the app to a different screen or folder, or uninstall it if desired.
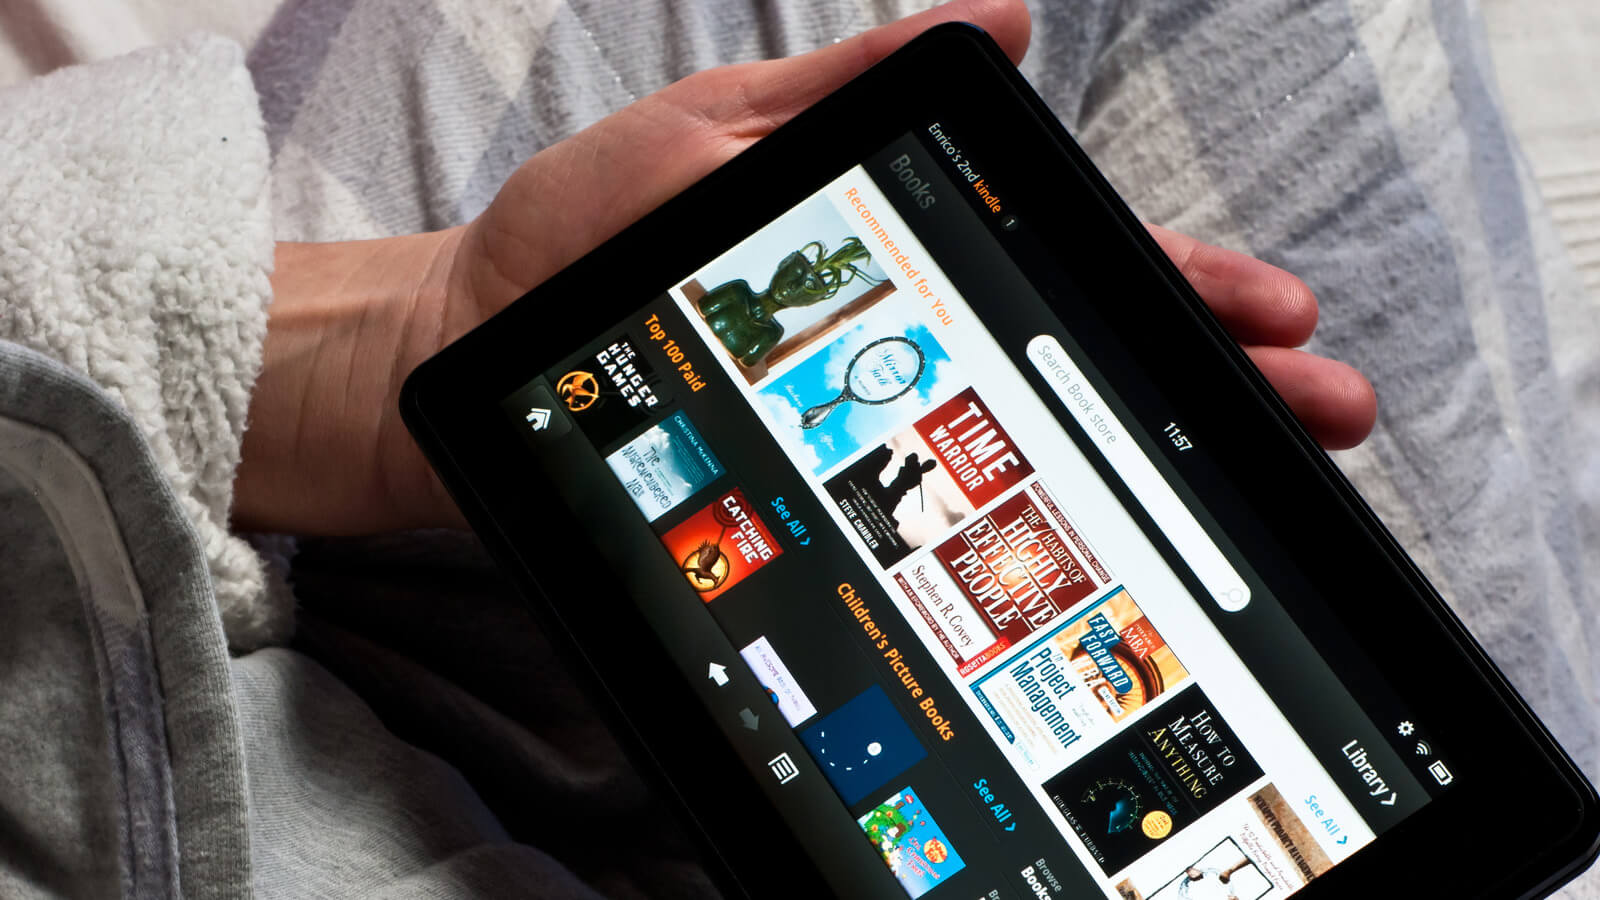
- Organizing Content: Use the various content libraries on your Fire Tablet to manage your eBooks, audiobooks, music, and videos. You can create collections, playlists, and favorites to keep your content organized and easily accessible.
- Using the Cloud: If you are running out of device storage, take advantage of the cloud storage options provided by Amazon. You can upload your content to the cloud and access it anytime, freeing up space on your tablet.
- Managing Downloads: To view and manage your downloaded content, swipe down from the top of the screen to open the notification panel. Tap on “Downloads” to see a list of your recent downloads. From here, you can open, delete, or share downloaded files.
- Automatic Updates: It is recommended to enable automatic app updates on your Fire Tablet to ensure that you have the latest features and bug fixes. Go to Settings > Apps & Notifications > Appstore > Automatic Updates and toggle it on.
By effectively managing your apps and content, you can ensure that your Fire Tablet is organized, up-to-date, and optimized for your needs. Whether it’s installing new apps, arranging your content libraries, or freeing up storage, taking control of your apps and content will enhance your overall user experience.
Remember to regularly review and clean up your apps and content to keep your tablet running smoothly and efficiently. By eliminating unnecessary clutter, you’ll have more space for the apps and content that truly matter to you.
Step 7: Setting Up Parental Controls
Parental controls are an essential feature when it comes to ensuring a safe and child-friendly experience on your Fire Tablet. With parental controls, you can set limits on access to certain apps, content, and features, providing a secure environment for your children. Here’s how you can set up parental controls on your Fire Tablet:
- Open the Settings menu by swiping down from the top of the screen and tapping on the “Gear” icon.
- Scroll down and tap on “Parental Controls.”
- If you haven’t set up parental controls before, tap on “Enable Parental Controls” and follow the on-screen prompts to create a parental control password.
- Once you have set up the password, you can begin customizing the parental control settings.
- Under the Content & Privacy section, you can choose to enable or disable access to specific types of content, such as apps, books, videos, and websites.
- You can also set age restrictions for content by adjusting the age range settings.
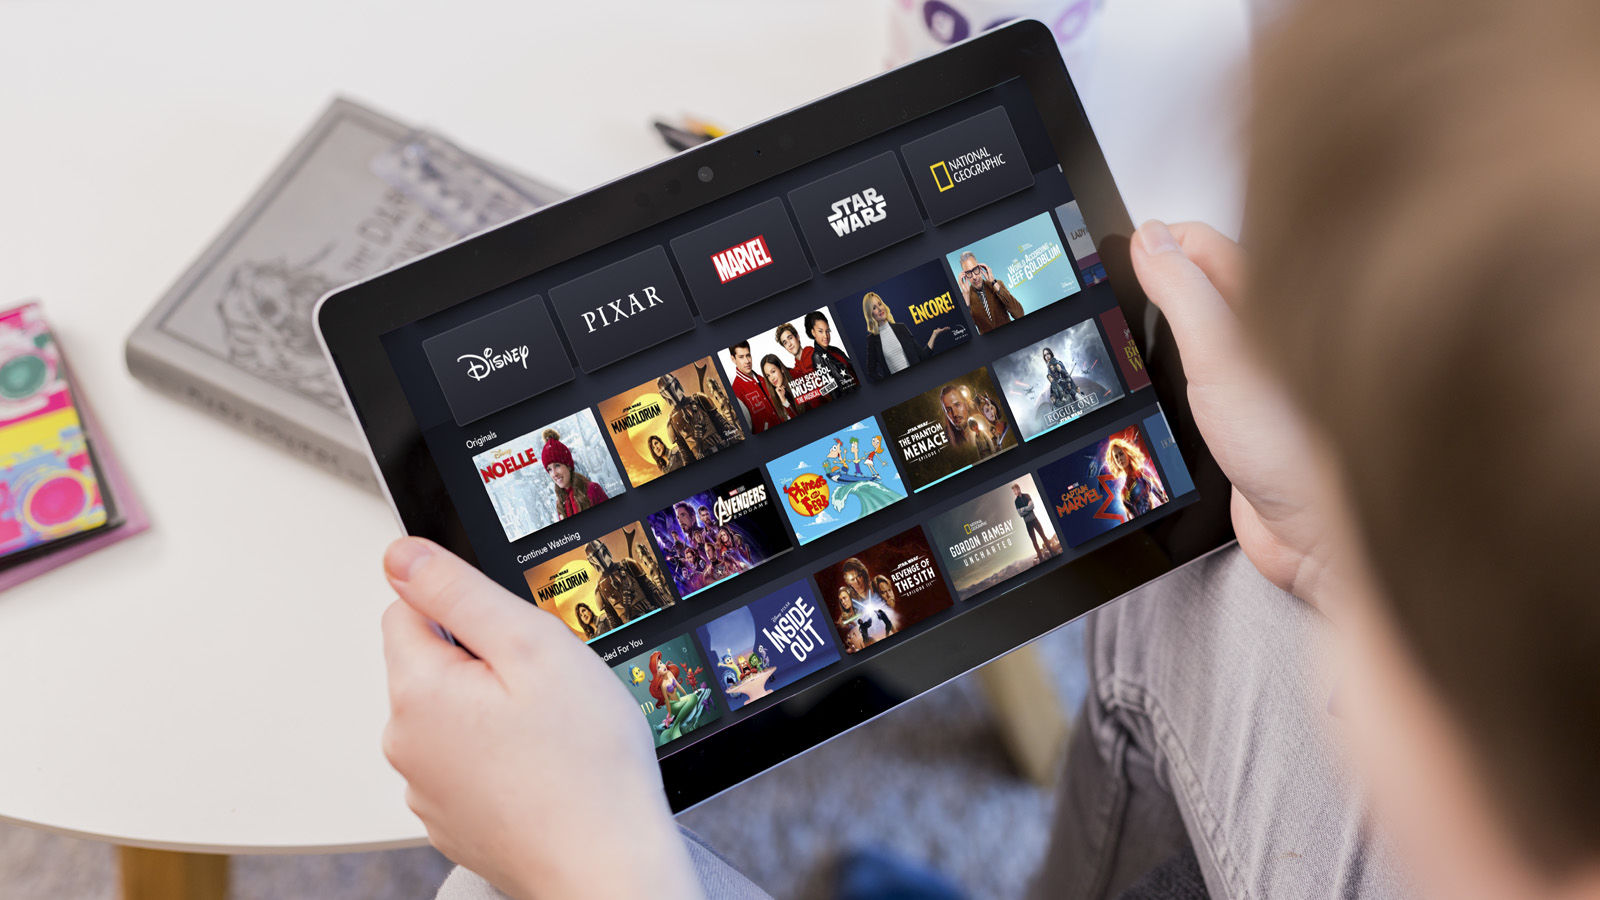
- Under the FreeTime section, you can set up a separate profile for your child, allowing you to control the apps and content they have access to.
- Within the FreeTime settings, you can create a child’s profile, choose their age range, and select appropriate content for their profile.
- You can also set time limits for how long your child can use the tablet and manage their daily screen time.
Parental controls are a powerful tool for ensuring that your child has a safe and age-appropriate experience on their Fire Tablet. By setting up these controls, you can have peace of mind knowing that your child is protected from inappropriate content and can only access content that is suitable for their age.
Make sure to periodically review and update your parental control settings as your child grows, to ensure that they continue to have a safe and enjoyable experience on their Fire Tablet.
With parental controls in place, you can confidently allow your child to explore and learn through their Fire Tablet, knowing that they are protected and their digital experience is under your guidance and supervision.
Step 8: Adjusting Display and Sound Settings
Adjusting the display and sound settings on your Fire Tablet allows you to customize the visual and audio experience to suit your preferences. By making adjustments to brightness, screen timeout, volume, and more, you can ensure an optimal viewing and listening experience. Here’s how you can adjust the display and sound settings on your Fire Tablet:
- Open the Settings menu by swiping down from the top of the screen and tapping on the “Gear” icon.
- In the Settings menu, tap on “Display & Brightness” to access the display settings.
- Within the display settings, you can adjust the brightness level by moving the slider. You can also enable or disable Adaptive Brightness, which automatically adjusts the screen brightness based on ambient lighting conditions.
- Additionally, you can adjust the font size to make text more comfortable to read, and choose a screen timeout duration to conserve battery life.
- To adjust the sound settings, go back to the Settings menu and tap on “Sounds & Notifications.”
- Within the sound settings, you can control the volume by adjusting the media, alarm, and notification sliders.
- You can also enable or disable vibration for various notifications, adjust the default notification sound, and customize the haptic feedback settings.
- Furthermore, you can enable the Dolby Atmos feature, if available on your Fire Tablet, for an enhanced audio experience.
By adjusting the display and sound settings on your Fire Tablet, you can tailor the device to your liking and ensure an enjoyable multimedia experience. Whether you prefer a brighter or dimmer display, higher or lower volume levels, or customized notification sounds, these settings allow you to personalize your tablet to your preferences.
Take some time to experiment with the display and sound settings to find the optimal configuration that suits your needs. By fine-tuning these settings, you can enhance your overall visual and audio experience while using your Fire Tablet.
Remember to periodically review and readjust your display and sound settings as lighting conditions or personal preferences change, ensuring that your tablet continues to deliver an optimal visual and audio experience over time.
Step 9: Managing Storage on Your Fire Tablet
Managing storage on your Fire Tablet is essential to ensure that you have enough space for apps, games, media, and other files. By effectively managing storage, you can maintain optimal device performance and avoid running out of space. Here’s how you can manage storage on your Fire Tablet:
- Open the Settings menu by swiping down from the top of the screen and tapping on the “Gear” icon.
- Scroll down and tap on “Storage & USB” to access the storage settings and view the available space on your device.
- From the storage settings, you can view a breakdown of how storage is being used, such as apps, photos, videos, and more.
- To free up space, you can tap on “Apps & Games” to view a list of installed apps and their respective sizes.
- Tap on an app to see options for clearing its cache, removing updates, or uninstalling it altogether.
- You can also tap on “Files & Downloads” to explore and delete unnecessary files and downloads that are taking up space.
- If you are running low on storage, consider transferring files to cloud storage services like Amazon Drive or Google Drive.
- Another option is to use a microSD card to expand your device’s storage capacity. Insert a compatible microSD card into the card slot of your Fire Tablet and follow the on-screen prompts to format and use the card as additional storage.
Regularly managing storage on your Fire Tablet ensures that you have enough space for new apps, games, and media. It also helps improve overall device performance and responsiveness.
Remember to regularly review your installed apps and files to see if there are any that you no longer use or need. By periodically clearing out unnecessary files and uninstalling unused apps, you can keep your device clutter-free and running smoothly.
By effectively managing storage, you can make the most of your Fire Tablet’s capabilities, ensuring that you always have ample room for new content and a seamless user experience.
Step 10: Setting Up Email and Social Media Accounts
Setting up email and social media accounts on your Fire Tablet allows you to stay connected with friends, family, and colleagues while on the go. Whether you want to check your emails, browse your social media feeds, or send messages, this step is crucial for keeping up with your digital communication. Here’s how you can set up email and social media accounts on your Fire Tablet:
- Open the Settings menu on your Fire Tablet by swiping down from the top of the screen and tapping on the “Gear” icon.
- Scroll down and tap on “Accounts & Profiles.”
- Tap on “Add a New Account.”
- To set up an email account, select the email provider you use (such as Gmail, Yahoo Mail, or Outlook), and follow the on-screen prompts to enter your email address and password.
- Your Fire Tablet will automatically configure the settings for the selected email provider. Once the setup is complete, you will be able to access your email from the native email app on your tablet.
- To set up a social media account, select the social media platform you want to connect (such as Facebook, Twitter, or Instagram), and follow the on-screen prompts to enter your login credentials.
- Once the setup is complete, you will be able to access the social media app from your Fire Tablet and engage with your friends and followers.
- You can repeat the process to add multiple email and social media accounts, allowing you to manage all your communications from one device.
Setting up email and social media accounts on your Fire Tablet ensures that you can easily access and manage your digital communication while on the go. Whether you need to send an important email or stay updated on social media, having these accounts set up allows you to stay connected and informed.
Remember to regularly check and manage your email and social media accounts to stay organized and respond to any important messages or notifications in a timely manner. By staying connected, you can make the most of your Fire Tablet’s capabilities and never miss out on important updates from your personal and professional networks.
Now that you have set up your email and social media accounts, get ready to stay connected and engage with your digital world with ease on your Fire Tablet.
Step 11: Installing and Updating Apps
One of the great advantages of owning a Fire Tablet is the ability to access and enjoy a wide range of apps. Whether you’re looking for productivity tools, entertainment apps, or games, installing and updating apps on your Fire Tablet is quick and easy. Here’s how to install and update apps:
- Open the Amazon Appstore on your Fire Tablet. The Appstore icon can usually be found on the home screen or in the app drawer.
- Use the search bar to find the app you want to install. You can also browse through the featured, top charts, or category sections.
- Tap on the app you wish to install to access its details page.
- On the app’s details page, tap on the “Install” button to begin the installation process.
- Wait for the app to download and install. Once it’s finished, you’ll see the “Open” button, which you can tap to launch the app.
- To update your apps, open the Amazon Appstore, and tap on the “Menu” button (three horizontal lines) in the top-left corner of the screen.
- Select “My Apps” from the menu options. Here, you’ll see a list of all the apps installed on your Fire Tablet.
- If an update is available for an app, you’ll see an “Update” button next to it. Tap on “Update” to download and install the latest version.
- You can also enable automatic app updates to ensure that your apps are always up to date. To do this, go to Settings > Apps & Notifications > Appstore > Automatic Updates and toggle it on.
Installing and updating apps is a great way to enhance your Fire Tablet experience and take advantage of its full potential. Explore the vast selection of apps available in the Amazon Appstore to find the ones that suit your interests and needs.
Remember to regularly check for updates for your installed apps, as updates often bring new features, bug fixes, and performance improvements. Keeping your apps up to date ensures that you’re getting the best and most secure experience with them.
With the ability to easily install and update apps on your Fire Tablet, you can customize your device, access new functionalities, and enjoy a wide range of entertainment and productivity options at your fingertips.
Step 12: Customizing Home Screen and Notification Settings
Customizing the home screen and notification settings on your Fire Tablet allows you to personalize your device’s appearance and control how you receive and manage notifications. By customizing these settings, you can create a home screen layout that suits your preferences and ensure a streamlined notification experience. Here’s how you can customize your home screen and notification settings:
- On the home screen, long-press on an app or widget to trigger the customization mode.
- From here, you can move, delete, or resize the app icons and widgets on the home screen by dragging them to your desired locations.
- To add widgets or other shortcuts, long-press on an empty space on the home screen and tap on the “+” icon or the “Widgets” option.
- Tap and hold an app icon to enter edit mode, allowing you to rename the app, remove it from the home screen, or even create app folders.
- To manage notification settings, swipe down from the top of the screen to open the notification panel.
- Tap on the “Gear” icon to access the Settings menu, and select “Sounds & Notifications.”
- Here, you can adjust the volume, toggle on/off sounds and vibration, enable or disable lock screen notifications, and customize the behavior of individual apps’ notifications.
- You can also choose the type of notifications you want to see and decide whether you want the device to show content previews in notifications.
Customizing the home screen and notification settings on your Fire Tablet allows you to create a personalized and organized user experience. By arranging app icons, adding widgets, and managing notifications, you can optimize your device for efficiency and quick access to your preferred apps and information.
Take some time to experiment and find a home screen layout and notification setup that suits your needs. Rearrange and adjust settings until you’re satisfied with the layout and notification handling on your Fire Tablet.
By customizing your home screen and notification settings, you can tailor your Fire Tablet to your preferences and ensure a seamless and personalized user experience.
Step 13: Syncing Your Fire Tablet with Other Devices
Syncing your Fire Tablet with other devices allows you to access and transfer your data, settings, and content seamlessly across multiple devices. Whether you want to sync your contacts, calendars, or files, this step enables you to stay connected and keep your information up to date. Here’s how to sync your Fire Tablet with other devices:
- Open the Settings menu on your Fire Tablet by swiping down from the top of the screen and tapping on the “Gear” icon.
- In the Settings menu, tap on “Accounts & Profiles.”
- Tap on “Add a New Account” and select the type of account you want to sync.
- Enter your login credentials for the selected account and follow the on-screen prompts to complete the setup process.
- Once the account is added, make sure that the relevant data types, such as contacts, calendars, or files, are selected for syncing.
- Your Fire Tablet will now sync with the added account, ensuring that the specified data is up to date and accessible on your device.
- To sync files with other devices, you can use cloud storage services like Amazon Drive or third-party apps like Dropbox or Google Drive. Install the relevant app on your Fire Tablet and sign in to your account to access your files.
- Make sure that your other devices are also set up to sync with the same accounts or cloud storage services for streamlined data transfer and access.
Syncing your Fire Tablet with other devices provides a seamless and connected experience across multiple platforms. It enables you to access your data, content, and settings from various devices, ensuring that you can stay productive and organized on the go.
By syncing your Fire Tablet, you can ensure that important information, such as contacts, appointments, and files, are always up to date and accessible wherever you need them.
Take advantage of the syncing capabilities of your Fire Tablet to effortlessly transfer and access your data across multiple devices, streamlining your digital experience and keeping everything in sync.
Step 14: Troubleshooting Tips and Tricks
While your Fire Tablet is designed to provide a smooth and seamless experience, you may occasionally encounter issues or glitches. Knowing some troubleshooting tips and tricks can help you overcome common problems and ensure that your tablet is running smoothly. Here are some troubleshooting tips and tricks for your Fire Tablet:
- Restart Your Device: If you notice any performance issues or unresponsiveness, try restarting your Fire Tablet. Simply press and hold the power button, and select “Restart” from the power menu.
- Clear App Cache: If an app is misbehaving or crashing frequently, clearing its cache can often resolve the issue. Go to Settings > Apps & Notifications > App Management and select the app. Tap on “Storage & Cache” and then “Clear Cache.”
- Check for Software Updates: Keep your Fire Tablet up to date by checking for and installing the latest software updates. Go to Settings > Device Options > System Updates and tap on “Check for Updates.”
- Optimize Storage: If you’re running low on storage, you can optimize storage by tapping on Settings > Storage & USB > Optimize Storage. This feature automatically removes downloaded files and unused apps to free up space.
- Reset App Preferences: If you’re facing issues with certain apps or notifications, resetting app preferences can help. Go to Settings > Apps & Notifications > Reset App Preferences. This will restore default app settings.
- Disable Battery Optimization: If you’re experiencing issues with background apps or notifications not appearing on time, you can disable battery optimization for specific apps. Go to Settings > Apps & Notifications > Battery > Battery Optimization and select the desired app.
- Perform a Factory Reset: If all else fails, performing a factory reset can resolve serious issues. Keep in mind that this will erase all data on your device, so make sure to backup your important files and data before proceeding.
These troubleshooting tips and tricks can help you resolve common issues and ensure a smooth user experience on your Fire Tablet. However, if you encounter persistent or complex problems, it’s always best to reach out to Amazon Customer Support for further assistance.
By familiarizing yourself with these troubleshooting techniques, you can quickly address any issues that may arise and get back to enjoying your Fire Tablet’s features and functionalities.
Remember, patience and persistence are key when troubleshooting. With a little troubleshooting know-how, you can overcome any obstacles and make the most of your Fire Tablet.
Conclusion
Congratulations on successfully setting up and customizing your Fire Tablet! The step-by-step guide has walked you through the process of unboxing your device, powering it on, connecting to Wi-Fi, logging in to your Amazon account, and personalizing your tablet to your liking.
You have also learned how to manage apps and content, set up parental controls for a safer experience, adjust display and sound settings, and effectively manage storage on your device. Additionally, you have gained insights into setting up email and social media accounts, installing and updating apps, customizing the home screen and notification settings, syncing your tablet with other devices, and troubleshooting common issues.
With these skills and knowledge, you can make the most of your Fire Tablet and enjoy a personalized and seamless user experience. Whether you’re using your tablet for work, entertainment, or staying connected, you now have the tools and understanding to optimize its functionality and meet your specific needs.
Remember to keep exploring your Fire Tablet, discovering new apps, and staying up to date with the latest software updates to unlock even more possibilities and features. And if you ever encounter any further questions or issues, don’t hesitate to seek support from Amazon Customer Support.
Enjoy your Fire Tablet and all the amazing experiences it has to offer!