Introduction
When it comes to Dell laptops, removing the battery might be necessary for various reasons. Whether you need to replace a faulty battery or want to troubleshoot an issue with your laptop, knowing how to safely remove the battery is essential. By following a few simple steps, you can easily remove the battery from your Dell laptop without causing any damage.
Before we dive into the process, it’s important to note that removing the battery should only be done when the laptop is powered off. This ensures your safety and prevents any potential damage to the internal components. Additionally, make sure you have a clean and stable work surface to perform the battery removal procedure.
In this guide, we will take you through a step-by-step process to remove the battery from your Dell laptop. From powering off the laptop to re-installing the battery, we’ve got you covered. So, let’s get started!
It’s important to note that the battery removal process may vary slightly depending on the specific model of your Dell laptop. Therefore, we recommend referring to the user manual or Dell’s official support website for model-specific instructions. This guide will provide general instructions applicable to most Dell laptops.
Step 1: Power Off the Laptop
The first step in removing the battery from your Dell laptop is to ensure that the device is powered off. This is crucial to avoid any potential electrical shocks or damage to the internal components while handling the battery.
To power off your Dell laptop, simply locate the power button, which is usually located on the top or side of the keyboard. Press and hold the power button until the screen shuts off and the device completely powers down.
It’s essential to wait for a few moments to ensure that the laptop is completely turned off. This will allow any residual electrical charges to dissipate, reducing the risk of electric shock when handling the battery.
Additionally, it’s a good practice to unplug any external devices or peripherals connected to your laptop, such as USB drives or charging cables. Disconnecting these devices minimizes the risk of accidentally damaging them or the laptop during the battery removal process.
In some Dell laptop models, you may also need to remove any discs from the optical drive before proceeding. Check the user manual or Dell’s official support website for model-specific instructions on removing discs if necessary.
Once you have ensured that the laptop is powered off and all external devices are disconnected, you’re ready to move on to the next step.
Step 2: Disconnect the AC Adapter
After powering off your Dell laptop, the next step is to disconnect the AC adapter. This is the charger that supplies power to your laptop and keeps the battery charged.
To disconnect the AC adapter, locate the power cord where it is connected to your laptop. Depending on the model, the power cord may connect to the side, back, or bottom of the laptop. Look for the rectangular or round socket on the laptop and follow the cable to find the point of connection.
Gently unplug the AC adapter from the laptop by firmly gripping the connector and pulling it straight out. Avoid yanking or pulling at an angle, as this can damage the connector or the port on the laptop.
Once the AC adapter is disconnected, carefully inspect the cable and connector for any signs of damage or fraying. If you notice any damage, it is advisable to have it repaired or replaced before continuing.
Disconnecting the AC adapter is an important step as it ensures that there is no power source connected to the laptop. This eliminates the risk of electrical shocks or short circuits during the battery removal process. It also allows you to work safely without the potential interference of the charging process.
With the AC adapter safely disconnected, you’re ready to proceed to the next step of removing the battery from your Dell laptop.
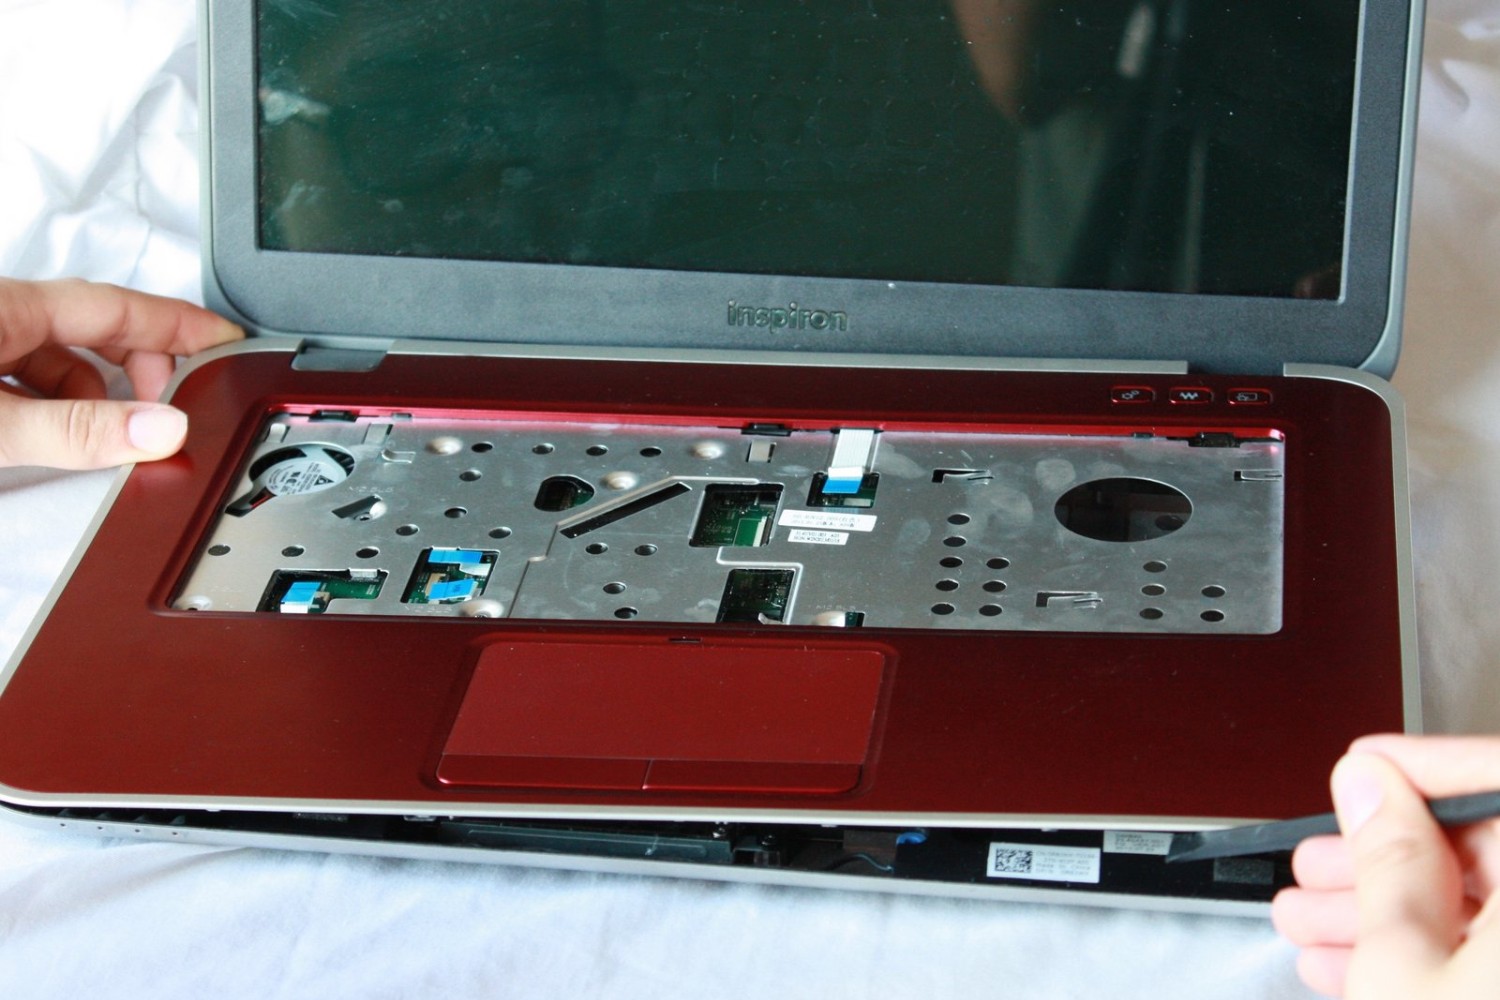
Step 3: Flip the Laptop Upside Down
Now that you have powered off your Dell laptop and disconnected the AC adapter, it’s time to flip the laptop upside down. This will allow you to access the battery compartment and prepare for the battery removal process.
Find a clean and stable surface to work on, such as a table or desk. Place a soft cloth or a non-slip mat on the surface to prevent any scratches or damage to the laptop’s exterior.
Hold the laptop firmly with both hands and gently flip it over, making sure to keep a secure grip throughout the process. Most Dell laptops have rubber feet on the bottom, which will prevent the laptop from sliding around while it is inverted.
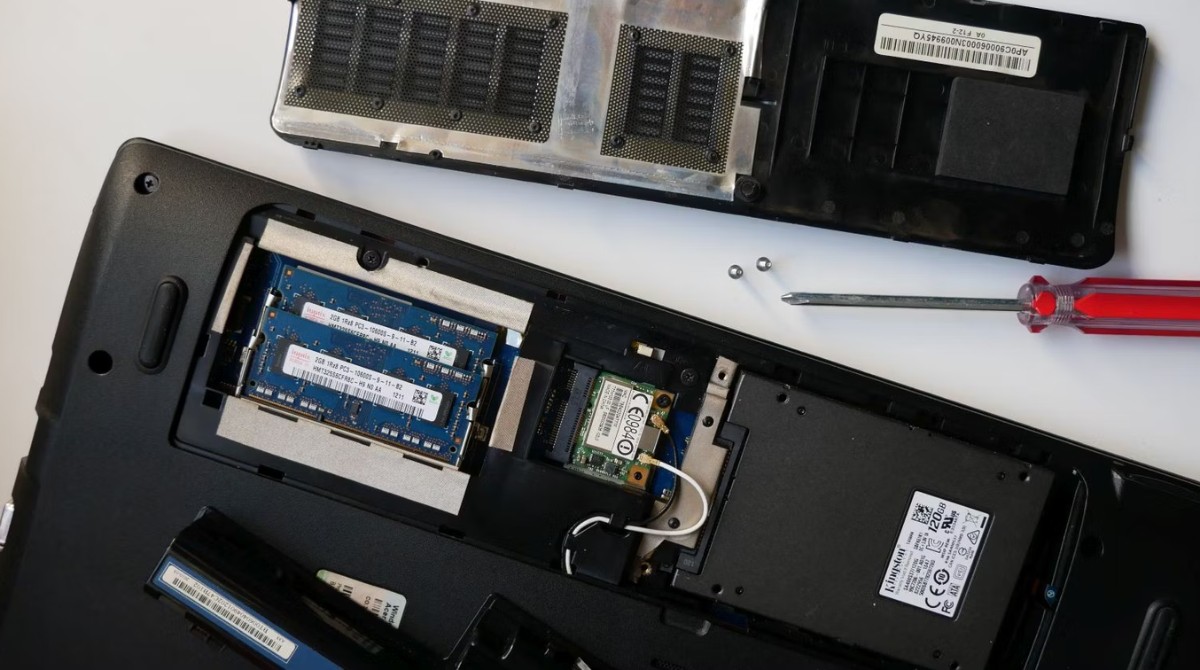
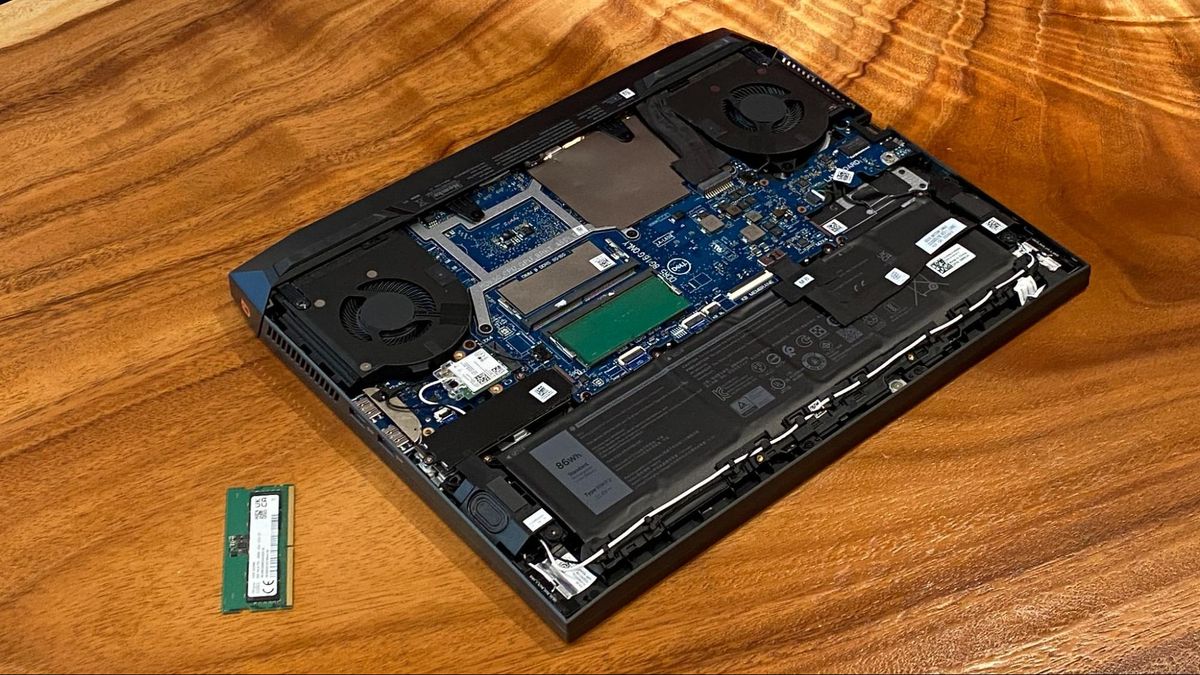
Once the laptop is upside down, you will have a clear view of the bottom panel. This is where the battery compartment is usually located, although the exact placement may vary depending on the model of your Dell laptop.
Take a moment to familiarize yourself with the layout of the bottom panel. Identify any screws, latches, or release mechanisms that may be securing the panel in place. This will help you in the next step when you need to access the battery compartment.
Flipping the laptop upside down is an essential step as it allows for easy access to the battery compartment. By preparing the laptop in this position, you are ready to move on to the next step of unlocking and removing the battery from your Dell laptop.
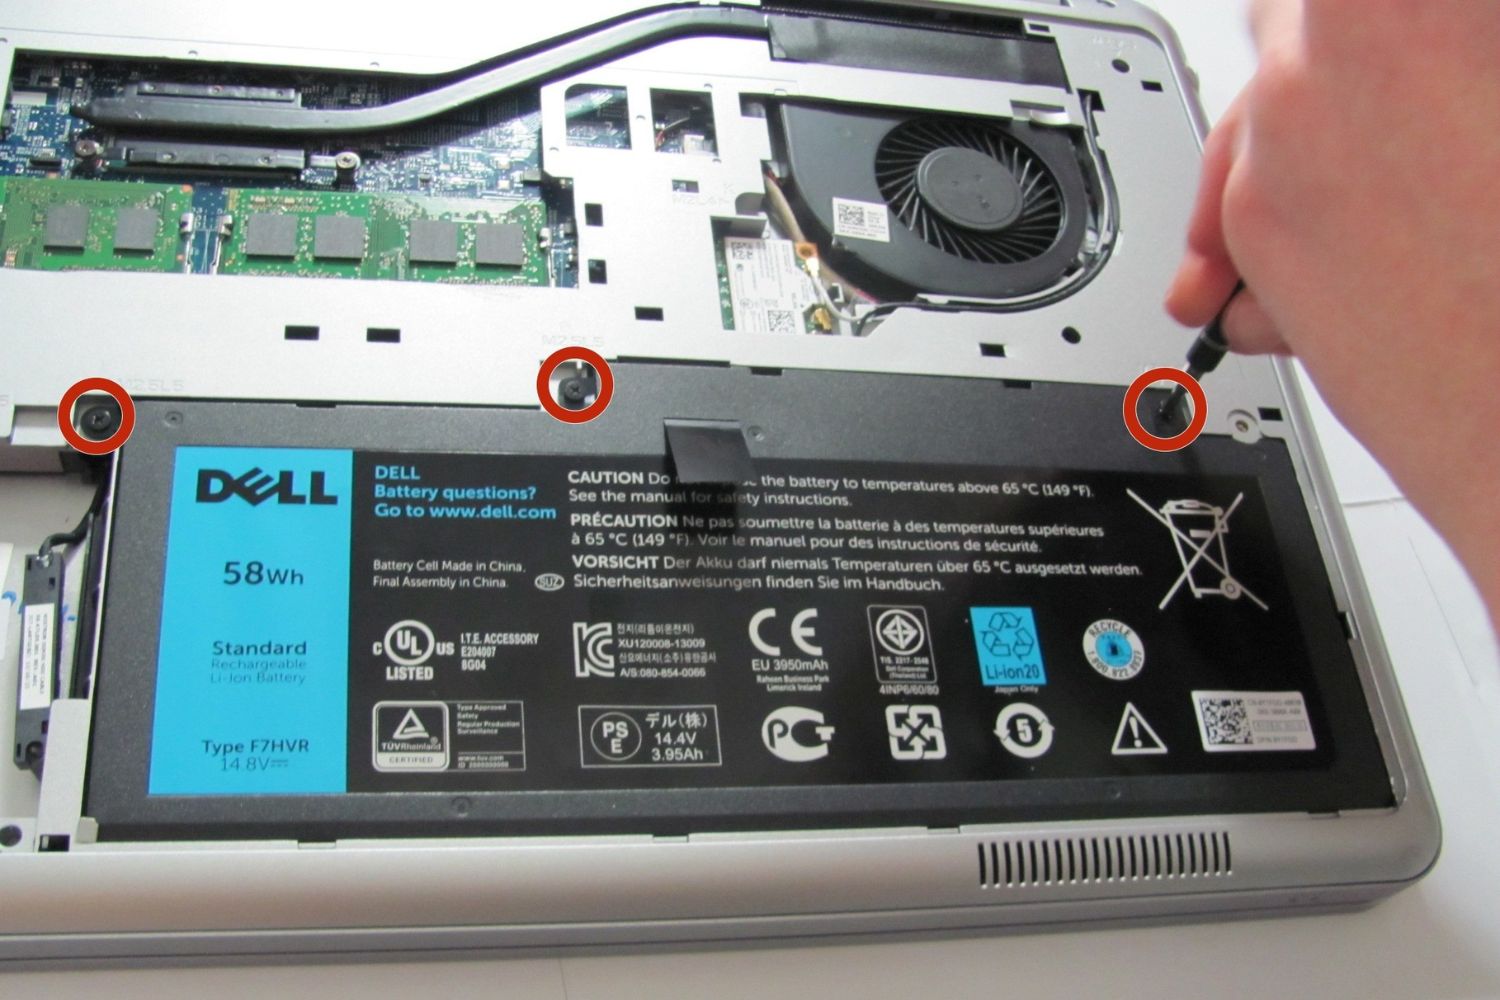
Step 4: Locate the Battery Release Latch
Now that your Dell laptop is flipped upside down, it’s time to locate the battery release latch. The battery release latch is a mechanism that holds the battery in place and needs to be unlocked before removing the battery.
Inspect the bottom panel of your laptop and look for a small sliding latch or a release lever. This latch is usually located near the battery compartment or towards the edge of the laptop. It may be marked with a battery icon or a lock symbol, indicating its purpose.
Depending on the model of your Dell laptop, the battery release latch may be a small switch that you can slide or a button that you need to press. In some cases, you may need to use a small flathead screwdriver or a coin to engage the latch.
Take a moment to understand the functionality of the battery release latch. Make sure you know the correct way to engage or disengage it before proceeding to the next step. Refer to the user manual or Dell’s official support website for model-specific instructions if you are unsure about the location or operation of the battery release latch.
Locating the battery release latch is an important step as it allows you to unlock the battery from the laptop’s body. By understanding the position and functionality of the latch, you are now ready to proceed with unlocking and removing the battery in the next step.
Step 5: Slide the Battery Release Latch to Unlock
With the battery release latch located, it’s time to unlock the battery from your Dell laptop. This step involves engaging the latch and releasing it to allow the battery to be removed easily.
Using your finger or a small tool, slide or press the battery release latch in the direction indicated. This action will disengage the latch mechanism, allowing the battery to be unlocked from the laptop’s body.
As you slide or press the battery release latch, you may feel a click or a slight resistance. This is a sign that the latch has been successfully engaged or disengaged. Take care not to apply excessive force, as this could potentially damage the latch mechanism or other components of the laptop.
Once the battery release latch has been properly unlocked, you should be able to visibly see that the latch is in the open position. This indicates that the battery is ready to be removed.
It’s always a good idea to double-check that the latch is fully disengaged before proceeding to the next step. This ensures that the battery is not accidentally held in place and allows for a smooth and safe removal process.
Sliding the battery release latch to unlock is a crucial step as it prepares the battery for removal from the laptop. By successfully disengaging the latch, you are now ready to proceed with the next step of removing the battery from your Dell laptop.
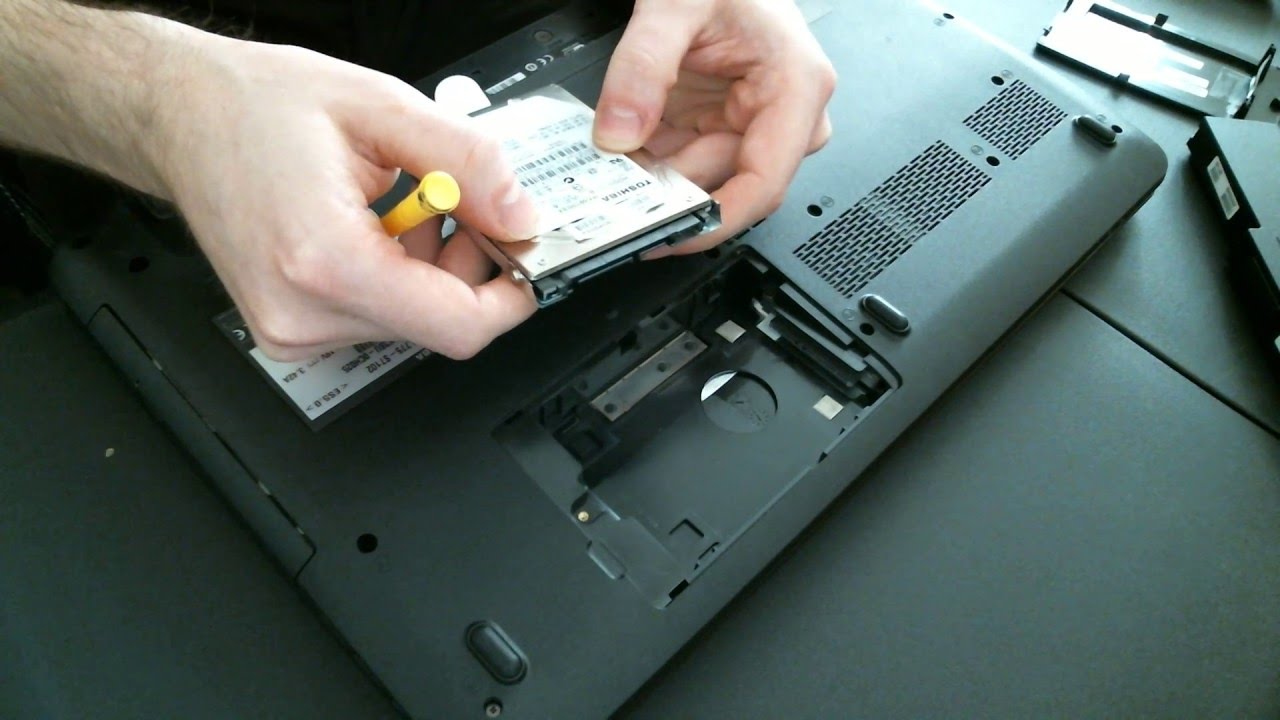
Step 6: Remove the Battery
Now that the battery release latch is unlocked, it’s time to remove the battery from your Dell laptop. This step involves carefully lifting the battery out of its compartment to ensure a smooth and safe removal.
Using your fingers or the provided tabs, gently lift the battery up and out of the laptop. Be cautious not to scratch or damage the laptop’s surface during this process.
If the battery is secured with screws, remove them using the appropriate screwdriver. Once the screws have been removed, lift the battery out of the compartment using the tabs or other designated handles.
While removing the battery, it’s important to handle it with care. Avoid any sudden movements or excessive force that could potentially damage the battery or other internal components of the laptop.
If you encounter any resistance while attempting to lift the battery, double-check that the battery release latch is fully disengaged. Ensure that no other obstructions, such as cables or connectors, are preventing the battery from being removed.
Once the battery is successfully lifted out of the compartment, place it on a clean and stable surface. You can also use an anti-static bag or a battery case if available to protect the battery from any potential damage.
Removing the battery is an essential step as it allows for easy access to other components of the laptop and facilitates battery replacement or troubleshooting. With the battery successfully removed, you are now ready to proceed with the next steps or continue with any necessary maintenance or repairs.
Step 7: Reinstalling the Battery
After removing the battery from your Dell laptop, you may need to reinstall it either because you have completed maintenance tasks or are replacing it with a new battery. The process of reinstalling the battery is straightforward and ensures that it is securely placed back in its compartment.
Begin by carefully aligning the battery with the compartment. Note the orientation of the battery and the compartment to ensure a proper fit. Take care not to force the battery into the compartment as this may cause damage or prevent it from seating correctly.
Gently lower the battery into the compartment, ensuring that it is fully inserted and aligned with the connectors. If there are any screws that hold the battery in place, use the appropriate screwdriver to reinstall them and secure the battery.
Once the battery is securely installed, check that it is sitting flush and level with the laptop’s body. It should not be loose or wobble when pressed. This ensures a proper connection and prevents any performance issues or unexpected shutdowns.
After reinstalling the battery, connect the AC adapter to the laptop and plug it into a power outlet. This will allow the battery to start charging if it is not already at full capacity.
Observe the charging indicator on your laptop to confirm that the battery is being recognized and is charging properly. Depending on your Dell laptop model, the charging light may turn on or flash to indicate that the battery is charging.
It is recommended to allow the battery to fully charge before using your laptop again. This will ensure maximum battery life and performance.
Reinstalling the battery is a crucial step as it allows your Dell laptop to function on battery power and provides uninterrupted usage. By following the proper installation procedure, you can ensure that the battery is securely in place and ready for use.
Conclusion
Removing the battery from your Dell laptop may be necessary for various reasons, such as replacing a faulty battery or troubleshooting issues. By following the step-by-step process outlined in this guide, you can safely remove and reinstall the battery without causing any damage to your laptop.
Remember to always power off your laptop and disconnect the AC adapter before attempting to remove the battery. This ensures your safety and prevents any potential electrical shocks. Additionally, flipping the laptop upside down and locating the battery release latch are key steps in preparing the laptop for battery removal.
Unlocking and removing the battery should be done with caution, ensuring that you handle the battery carefully and avoid any unnecessary force. If at any point you encounter resistance or difficulties, double-check the battery release latch and look for any obstructions.
Finally, when reinstalling the battery, make sure to align it properly with the compartment and secure it according to the manufacturer’s instructions. Keeping your battery charged and allowing it to fully charge before use will help maintain its longevity and performance.
By following these steps, you can confidently remove and reinstall the battery in your Dell laptop. However, it’s important to note that the process may vary slightly depending on your specific laptop model, so it’s always a good idea to consult the user manual or Dell’s official support resources for detailed instructions.
Now that you have the knowledge and understanding of the battery removal process, you can perform this task safely and efficiently whenever needed. Remember to exercise caution and take your time to ensure a successful battery removal and reinstallation experience.