Introduction
Welcome to this step-by-step guide on how to replace the battery in your Dell Inspiron 15Z Ultrabook. Over time, the battery in your laptop may start to lose its capacity, resulting in decreased battery life and the need for more frequent charging. Replacing the battery can help restore your laptop’s performance and allow you to use it on-the-go without interruptions.
Before we get started, it’s important to note that replacing the battery requires some technical knowledge and careful handling. Be sure to follow the instructions closely to ensure a successful battery replacement.
In this guide, we will walk you through the process of replacing the battery in your Dell Inspiron 15Z Ultrabook, from gathering the necessary tools to testing the new battery. Whether you’re a tech enthusiast or a beginner, this guide is designed to help you replace the battery with ease.
Remember, always take precautions when working with electronic devices. Make sure to disconnect the power source and handle the components gently to avoid any damage. Now, let’s dive into the step-by-step instructions for replacing the battery in your Dell Inspiron 15Z Ultrabook!
Step 1: Gather the necessary tools
Before you begin the battery replacement process, ensure that you have all the necessary tools. Having the right tools will make the process smoother and minimize the risk of damaging any components.
Here are the tools you will need:
- Phillips-head screwdriver: This is the most common type of screwdriver and is typically used to remove screws in electronic devices. Make sure the size of the screwdriver matches the screws on your Dell Inspiron 15Z Ultrabook.
- Static wristband: This optional but highly recommended tool helps ground you and prevents static electricity from damaging the sensitive components of your laptop. If you don’t have a static wristband, make sure to touch a grounded metal object before handling any internal components.
- Replacement battery: You’ll need a compatible replacement battery specifically designed for the Dell Inspiron 15Z Ultrabook. Ensure that the replacement battery has the same voltage and capacity as the original one.
- Anti-static mat: Again, this is an optional tool, but it provides an extra layer of protection against static electricity during the battery replacement process. It’s a good investment if you frequently work with electronic devices.
- Clean cloth: This will come in handy to clean any dust or debris that may have accumulated around the battery area.
Once you have gathered all the necessary tools, you’re ready to move on to the next step: powering down the laptop and unplugging it.
Step 2: Power down the laptop and unplug it
Before you start working on replacing the battery, it’s crucial to power down your Dell Inspiron 15Z Ultrabook and unplug it from any power sources. This will help prevent any accidental damage and ensure your safety during the battery replacement process.
Follow these steps to power down your laptop and unplug it:
- Save your work and close all applications: Make sure to save any unsaved files and close all running applications to avoid data loss.
- Shut down the laptop: Click on the “Start” button in the Windows taskbar, then select “Shutdown. Wait for your laptop to completely turn off before proceeding.
- Unplug all connected peripherals: Disconnect any external devices, such as USB drives, headphones, or external monitors, from your laptop’s ports. This will ensure there are no loose connections or potential sources of interference during the battery replacement process.
- Disconnect the power adapter: Locate the power adapter connected to your laptop and unplug it from both the laptop and the power outlet. This will ensure that there is no power running through the laptop while you work on replacing the battery.
Once you have completed these steps, you can proceed to the next step, which involves removing the battery cover.
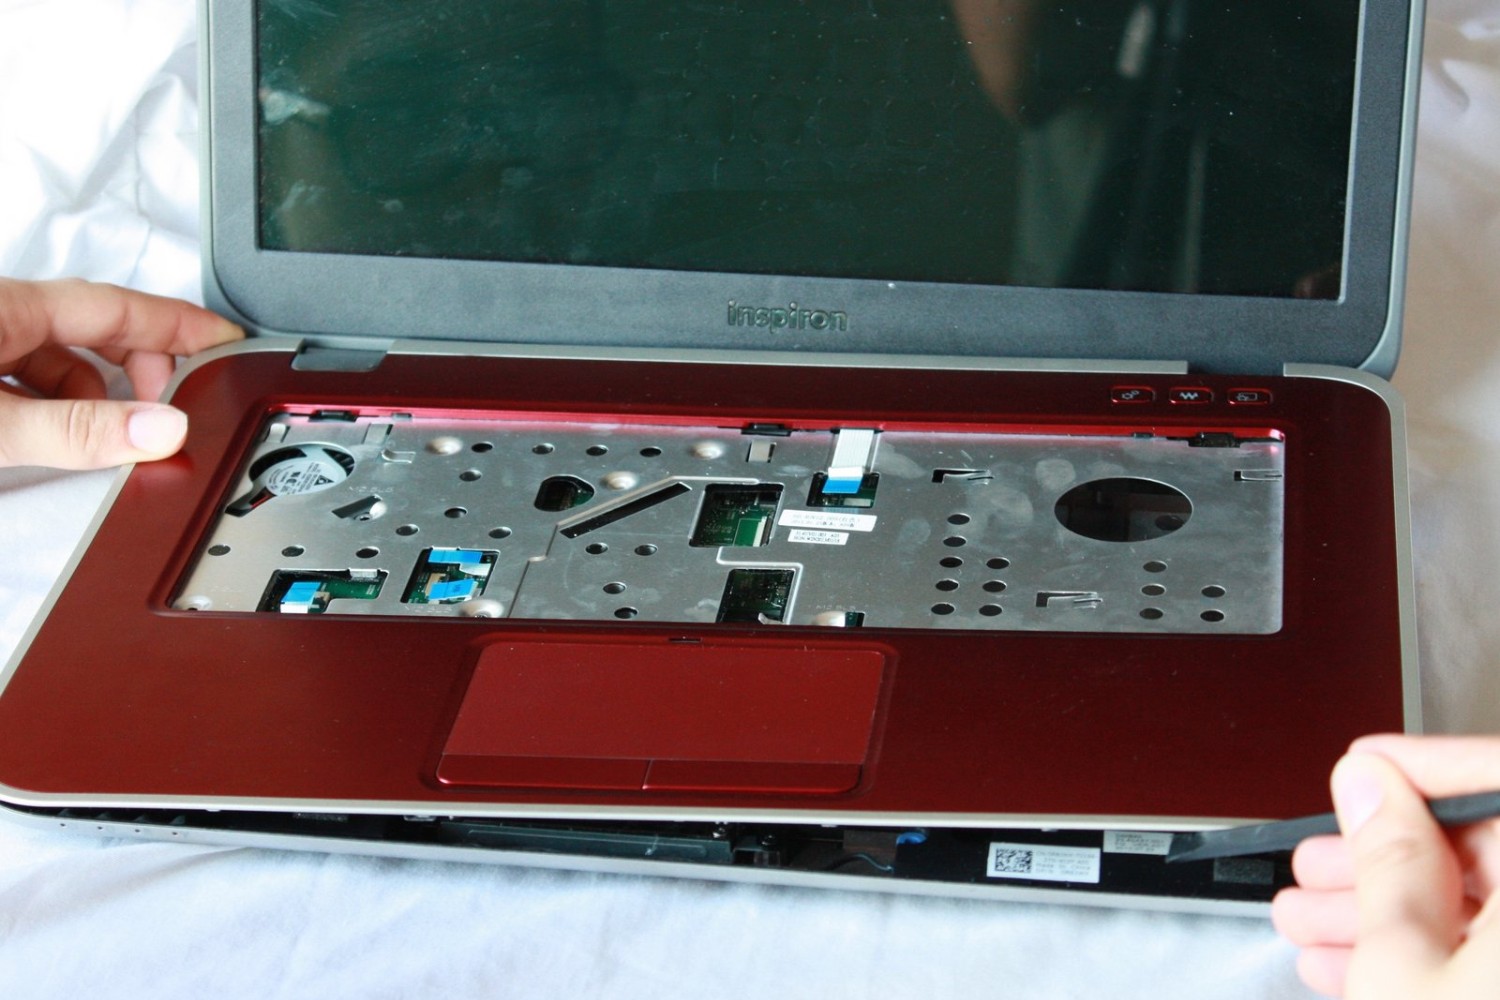
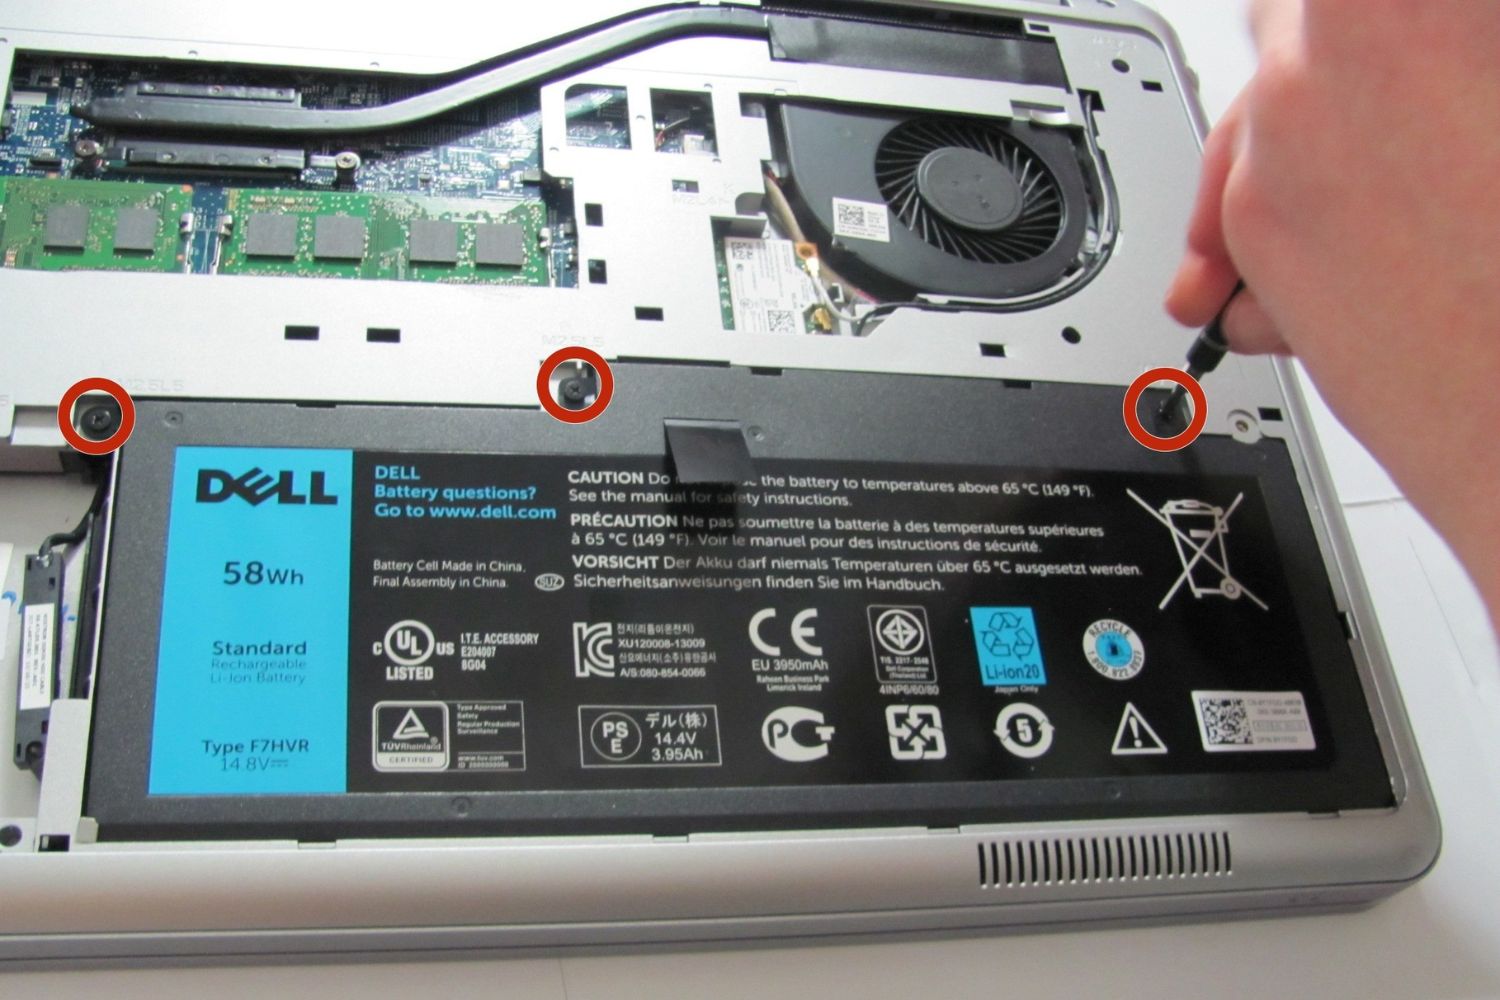
Step 3: Remove the battery cover
With your Dell Inspiron 15Z Ultrabook powered down and unplugged, it’s time to remove the battery cover. The battery cover is the protective panel that secures the battery in place.
Follow these steps to remove the battery cover:
- Locate the battery cover: Flip your laptop over and look for a panel with screws near the bottom. This panel is usually labeled with a battery icon or the word “battery”.
- Remove the screws: Use a Phillips-head screwdriver to carefully unscrew the screws holding the battery cover in place. Place the screws in a safe location to avoid losing them.
- Take off the battery cover: Once the screws are removed, gently pry off the battery cover using your fingertips or a plastic opening tool. Be cautious not to use excessive force to avoid damaging the cover or other components.
After successfully removing the battery cover, you will have access to the battery itself. In the next step, we will learn how to disconnect the battery from the laptop.
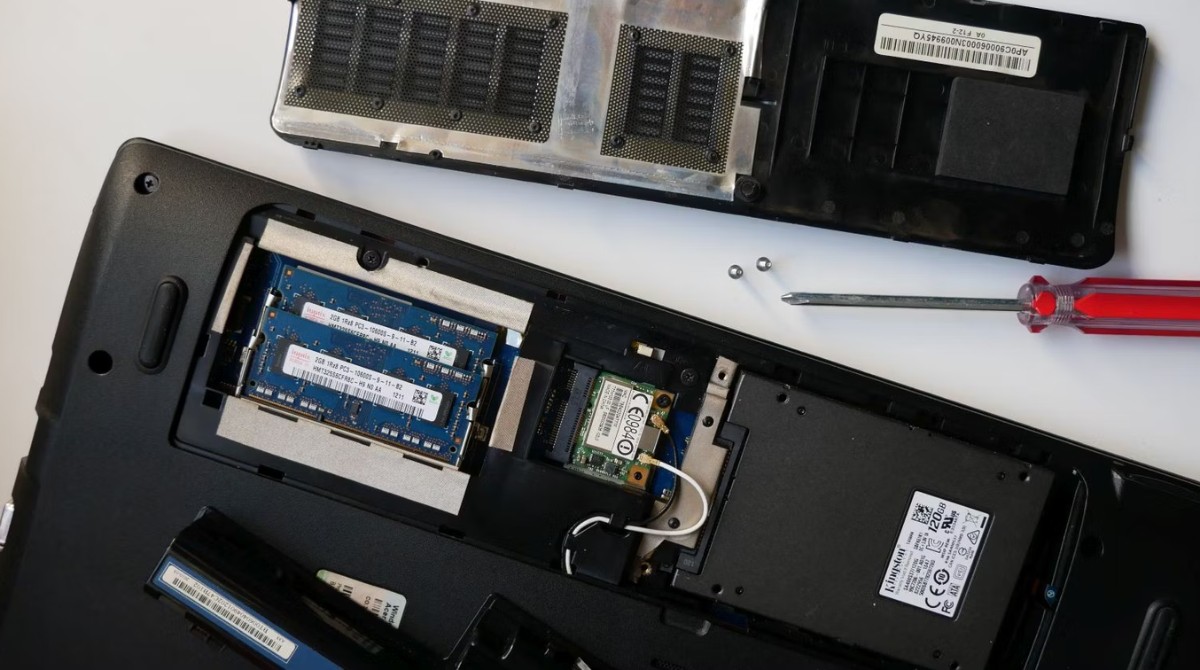
Step 4: Disconnect the battery
Now that you have removed the battery cover, it’s time to disconnect the battery from the Dell Inspiron 15Z Ultrabook. This step is crucial to ensure your safety and prevent any electrical damage during the battery replacement process.
Follow these steps to disconnect the battery:
- Locate the battery connector: Look for a small connector attached to the battery. It may have a ribbon cable or a wire connected to it.
- Disconnect the battery connector: Using your fingers or a pair of tweezers, gently pull the battery connector away from the motherboard. Be careful not to pull on the wires or ribbon cable too forcefully to avoid causing any damage to the connector.
- Ensure the battery is fully disconnected: After disconnecting the battery connector, check to make sure that there are no visible connections between the battery and the laptop. This ensures that the battery is completely disconnected and ready to be replaced.
Once you have successfully disconnected the battery, you can proceed to the next step, which involves replacing the old battery with the new one.
Step 5: Replace the old battery with the new one
With the old battery disconnected, it’s time to replace it with a new one. Make sure to have the compatible replacement battery specifically designed for the Dell Inspiron 15Z Ultrabook ready.
Follow these steps to replace the old battery with the new one:
- Take out the old battery: Gently lift the old battery out of its compartment. Be cautious not to apply too much force or twist the battery, as it should come out smoothly.
- Insert the new battery: Carefully align the new battery with the battery compartment, making sure the connectors are facing the correct direction. Gently slide the new battery into place until it is securely seated.
- Ensure the battery is properly installed: Double-check that the new battery is firmly inserted and the connectors are properly aligned. This ensures a stable connection and optimal performance.
It’s important to note that each laptop model may have a slightly different battery installation process. Consult the user manual or Dell’s support resources for specific guidance tailored to your Dell Inspiron 15Z Ultrabook model.
Once you have successfully replaced the old battery with the new one, you can proceed to the next step, which entails reconnecting the battery and putting the battery cover back on.
Step 6: Reconnect the battery and put the battery cover back on
Now that you have replaced the old battery with a new one, it’s time to reconnect the battery and secure it in place by putting the battery cover back on your Dell Inspiron 15Z Ultrabook.
Follow these steps to reconnect the battery and put the battery cover back on:
- Reconnect the battery connector: Take the battery connector you disconnected earlier and carefully reconnect it to the motherboard. Ensure that the connector is inserted fully and securely into its socket.
- Place the battery cover: Line up the battery cover with the screw holes on your laptop and gently press it into place. Make sure it fits snugly without any gaps or misalignments.
- Screw in the battery cover: Use a Phillips-head screwdriver to tighten the screws and secure the battery cover. Be cautious not to overtighten the screws, as it may damage the cover or strip the screw threads.
Once you have successfully reconnected the battery and put the battery cover back on, you can proceed to the final step: powering on the laptop and testing the new battery.
Step 7: Power on the laptop and test the new battery
After successfully reconnecting the battery and securing the battery cover, it’s time to power on your Dell Inspiron 15Z Ultrabook and test the new battery. This final step is crucial to ensure that the replacement battery is functioning properly and providing the expected performance.
Follow these steps to power on the laptop and test the new battery:
- Plug in the power adapter: Connect your laptop to a power source using the power adapter that came with the laptop. This will ensure that the laptop has sufficient power to turn on and run the necessary tests.
- Press the power button: Locate the power button on your laptop and press it to turn on the laptop. Wait for the operating system to boot up and load the desktop.
- Check the battery icon: Look for the battery icon in the system tray or menu bar. It should display the battery level and indicate that it is charging.
- Allow the battery to charge fully: Keep the laptop plugged in and allow the new battery to charge fully. This may take some time, depending on the battery’s initial charge level.
- Unplug the laptop and test battery life: Once the battery is fully charged, unplug the laptop from the power source. Use your laptop as you normally would and observe its battery life. Pay attention to any improvements or changes compared to the old battery.
If you notice any issues with the new battery, such as poor battery life or erratic behavior, double-check the battery connections and make sure it is properly installed. If the problem persists, consider contacting Dell’s customer support for further assistance.
Congratulations! You have successfully replaced the battery in your Dell Inspiron 15Z Ultrabook. Enjoy the improved battery life and the freedom to use your laptop without constantly worrying about running low on power.
Conclusion
Replacing the battery in your Dell Inspiron 15Z Ultrabook is a straightforward process that can help restore the performance and extend the battery life of your laptop. By following the steps outlined in this guide, you can easily replace the battery and ensure its proper functionality.
Remember to gather the necessary tools, power down the laptop, remove the battery cover, disconnect the old battery, replace it with a new one, reconnect the battery, and put the battery cover back on. Finally, power on the laptop and test the new battery to ensure it is working as expected.
It’s worth noting that if you are unsure or uncomfortable with performing the battery replacement yourself, it’s always a good idea to seek professional assistance. Dell offers customer support and authorized service providers that can help with battery replacements and any other technical issues you may encounter.
We hope this guide has been helpful in guiding you through the battery replacement process for your Dell Inspiron 15Z Ultrabook. Enjoy the improved battery life and uninterrupted performance of your laptop!