Introduction
Welcome to this guide on how to upgrade the RAM in your Dell Inspiron 3558 laptop. If you’ve noticed that your laptop’s performance has been slowing down or you’re running out of memory when running multiple applications, upgrading the RAM can be a cost-effective solution. Increasing the amount of RAM will allow your laptop to handle more tasks simultaneously, resulting in improved overall performance and a smoother computing experience.
Before we dive into the step-by-step process, it’s important to note that upgrading the RAM in your Dell Inspiron 3558 requires some technical knowledge and careful handling of computer components. It’s always a good idea to back up your data and take necessary precautions to avoid any damage to your laptop during the installation process.
In this guide, we’ll walk you through the process of upgrading the RAM in your Dell Inspiron 3558, from gathering the necessary tools and materials to installing the new RAM modules and testing their functionality. By following these instructions, you’ll be able to give your laptop a performance boost without having to replace the entire system.
Before we proceed, it’s important to determine the maximum amount of RAM your Dell Inspiron 3558 can support. This information can usually be found in the laptop’s user manual or on the manufacturer’s website. It’s essential to choose RAM modules that are compatible with your laptop’s specifications to ensure a successful upgrade.
Now that we have a basic understanding of the purpose behind upgrading the RAM and the precautions to take, let’s move on to the first step: gathering the necessary tools and materials for the upgrade.
Step 1: Gather the necessary tools and materials
Before we begin the RAM upgrade process, it’s important to ensure that you have all the necessary tools and materials at hand. Here’s a list of items you’ll need:
- A small Phillips screwdriver
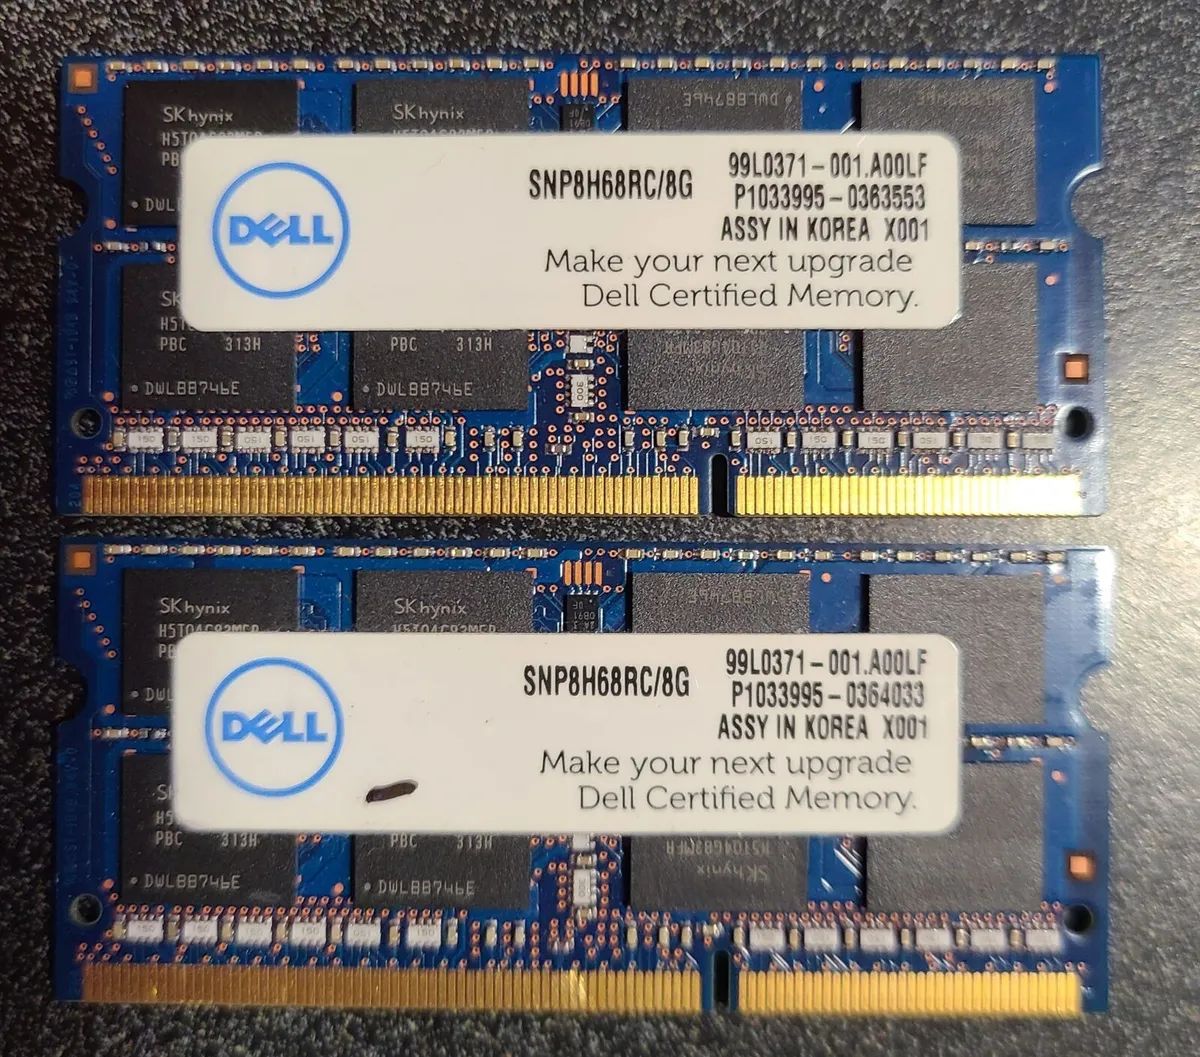
- New RAM modules (make sure they are compatible with your Dell Inspiron 3558)
- An anti-static wrist strap (optional but recommended)
- A clean and soft cloth
The Phillips screwdriver will be used to remove screws holding the laptop’s back cover in place. Make sure you have the appropriate size to fit the screws on your Dell Inspiron 3558.
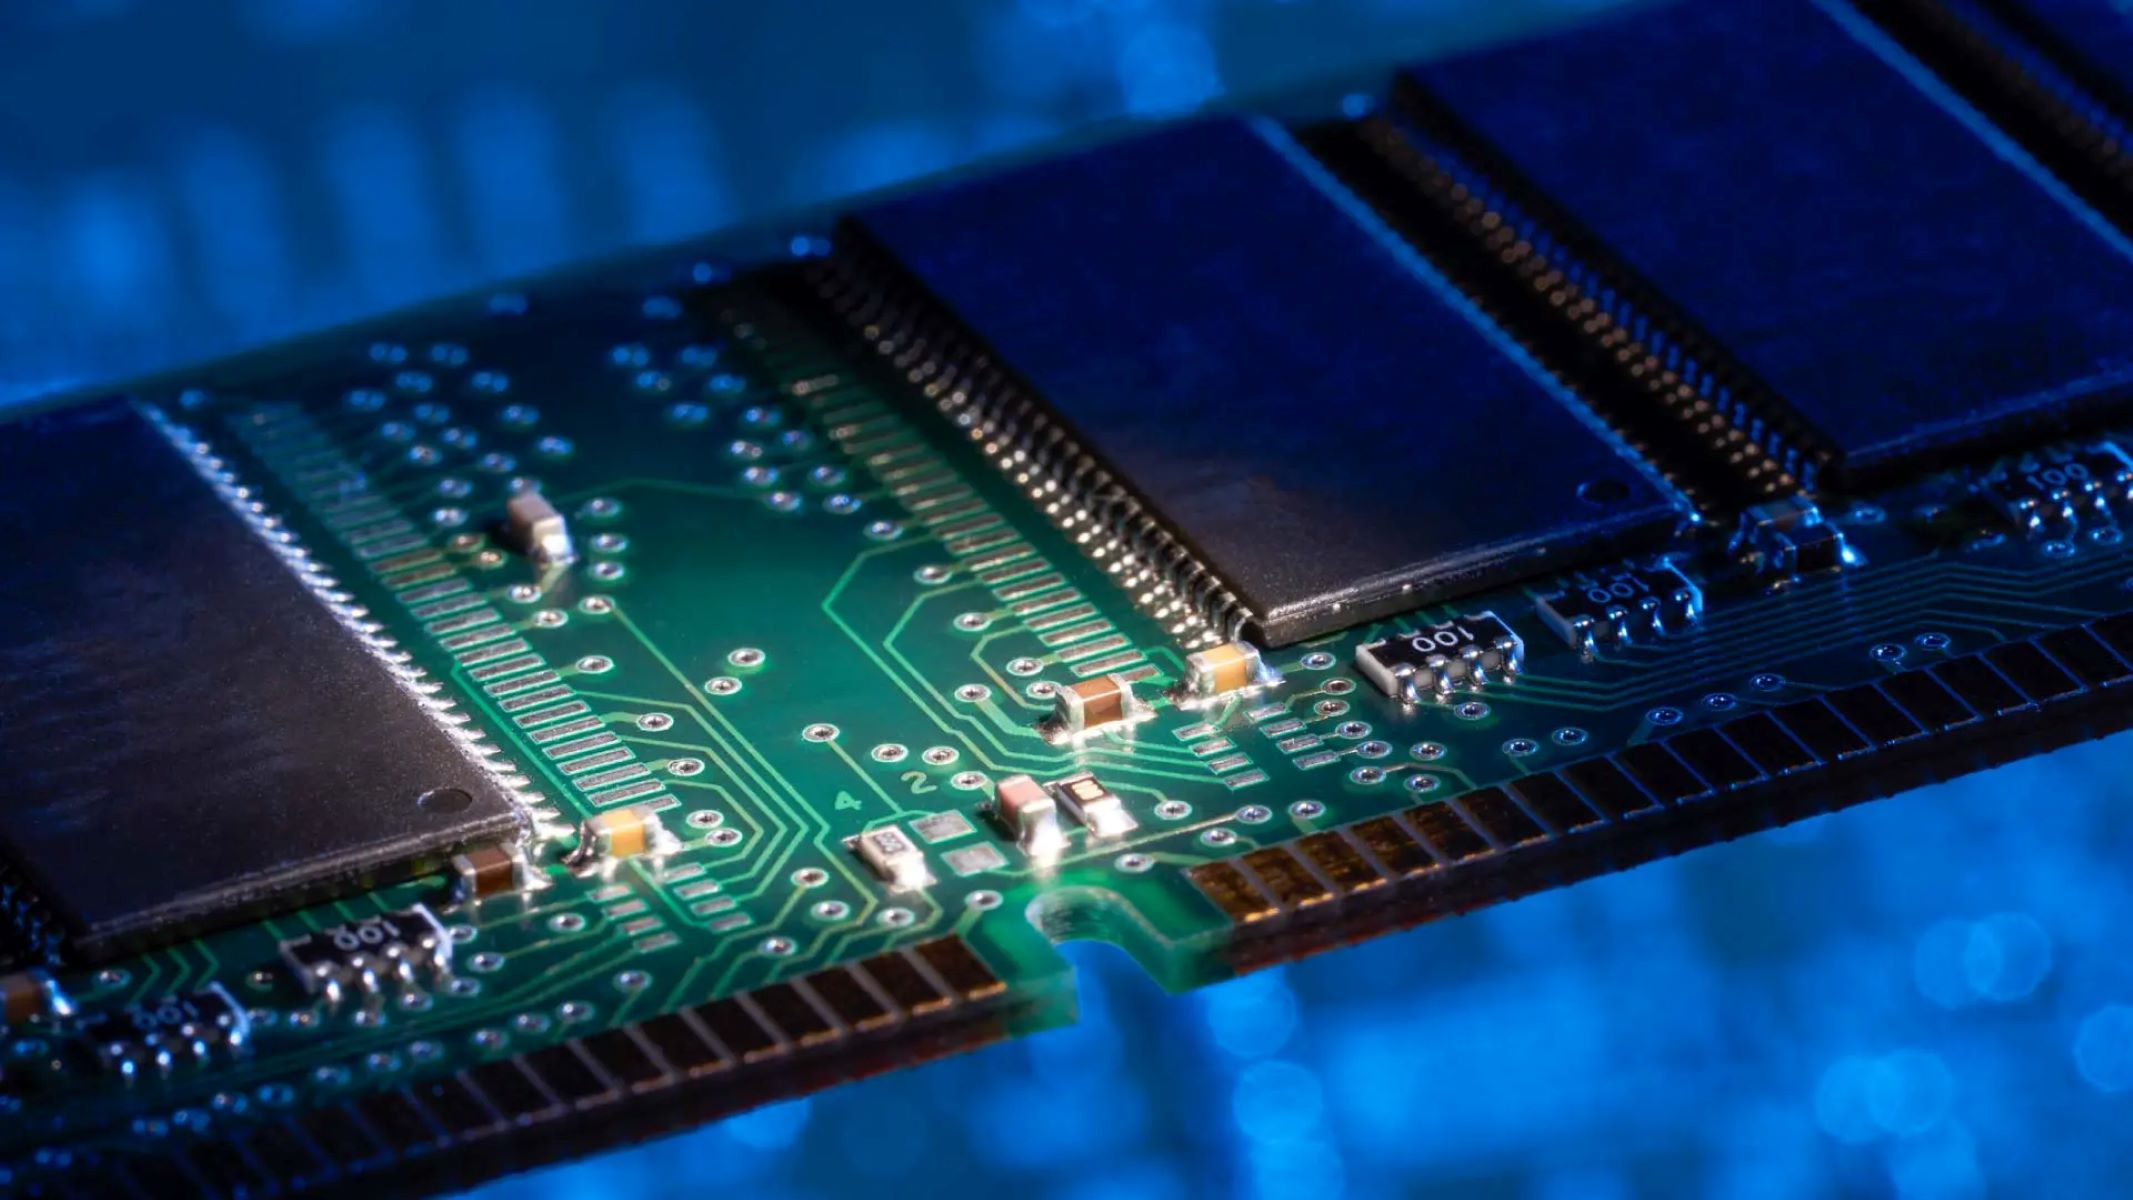
When choosing the new RAM modules, ensure that they meet the specifications of your laptop. Check the type, speed, and capacity requirements to find compatible RAM modules. It’s best to consult the user manual or visit the manufacturer’s website for detailed information.
An anti-static wrist strap is not mandatory but highly recommended. This strap helps to prevent the build-up and discharge of static electricity, which can damage sensitive computer components. If you don’t have an anti-static wrist strap, make sure to touch a grounded metal object like a table leg before handling any internal components.
A clean and soft cloth is useful for wiping any dust or debris from the laptop’s internals and ensuring a clean workspace during the upgrade process.
With all the necessary tools and materials gathered, you’re now ready to move on to the next step: powering off the laptop and removing the battery.
Step 2: Power off the laptop and remove the battery
The next step in upgrading the RAM of your Dell Inspiron 3558 is to power off the laptop and remove the battery. This ensures the safety of both the components and yourself during the process.
Follow these steps to power off the laptop and remove the battery:
- Save any unsaved work and close any open applications on your laptop.
- Shut down your Dell Inspiron 3558 by clicking on the “Start” button, selecting “Power,” and then choosing “Shut down.”
- Once the laptop is completely powered off, flip it over and locate the battery release latch or switch.
- Slide the latch or move the switch to the unlocked position, usually indicated by an open lock icon.
- With the latch or switch unlocked, slide the battery release tabs or levers, and gently lift the battery out of its compartment.
It’s essential to handle the battery with care and avoid applying excessive force. If your battery is not easily removable, consult the user manual or visit the manufacturer’s website for specific instructions on removing the battery.
Removing the battery ensures that there is no power flowing through the laptop, reducing the risk of electrical shock and protecting the internal components from accidental damage.
Once the battery is removed, place it in a safe location away from your workspace. Now that we have powered off the laptop and removed the battery, we can move on to locating the RAM compartment in the next step.
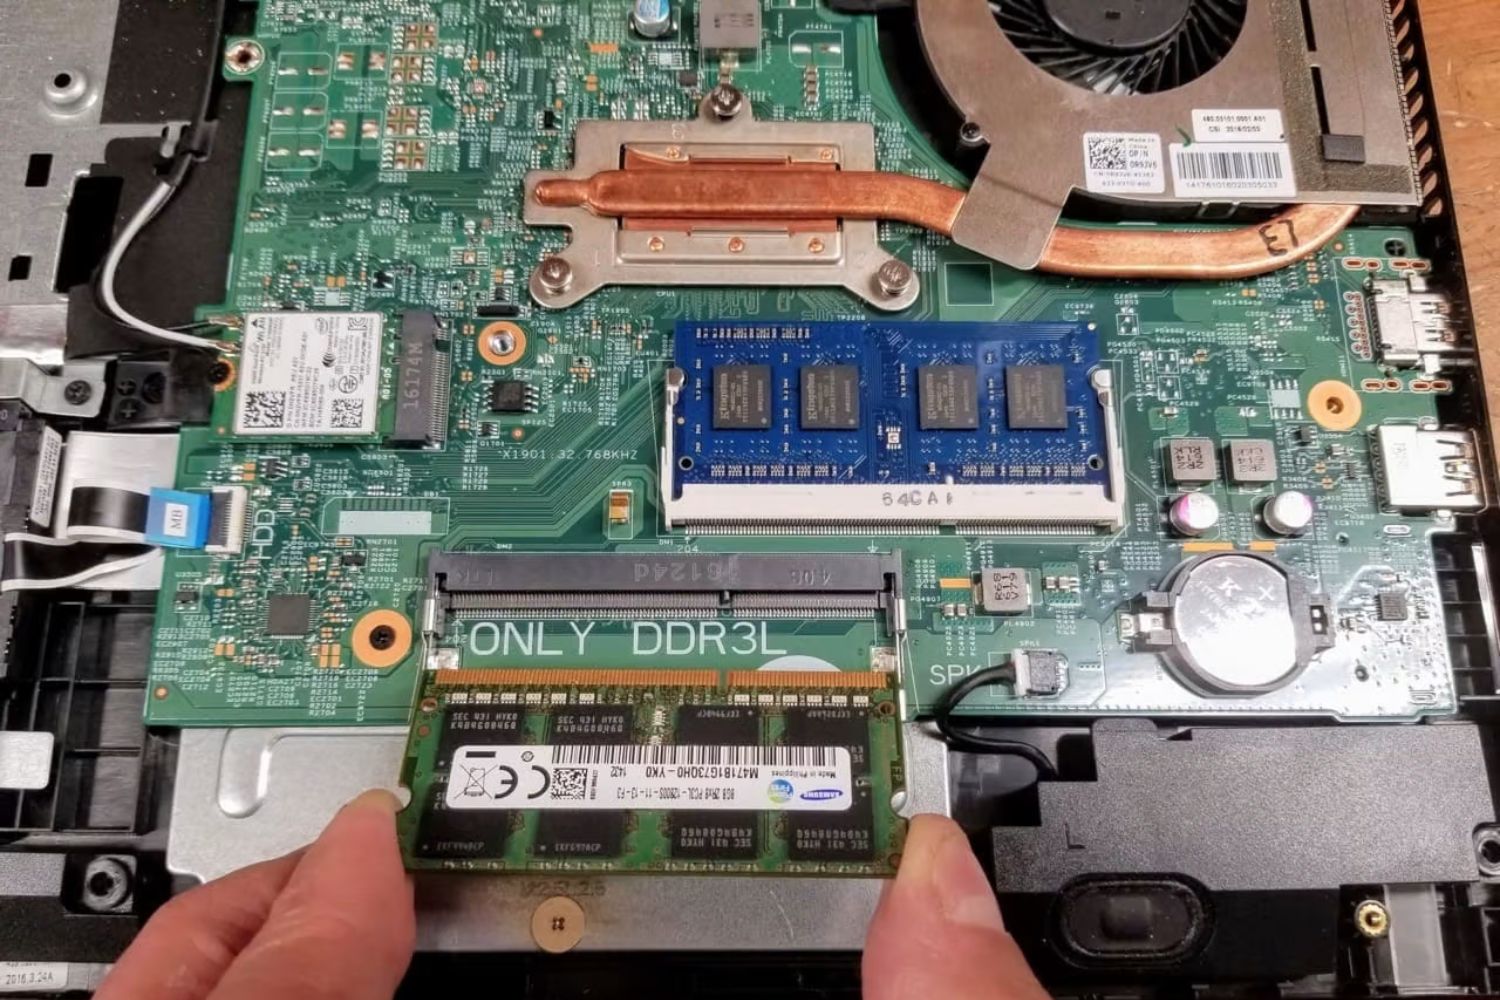
Step 3: Locate the RAM compartment
After powering off the laptop and removing the battery, the next step in upgrading the RAM of your Dell Inspiron 3558 is to locate the RAM compartment. The RAM compartment is where the existing RAM modules are installed, and it’s usually located at the bottom of the laptop.
Follow these steps to locate the RAM compartment:
- Place your Dell Inspiron 3558 on a flat and stable surface with the bottom facing up.
- Inspect the laptop’s bottom cover and look for any markings or symbols related to RAM.
- Some laptops may have a dedicated RAM compartment cover, while others may have a more general panel that covers multiple components.
- Look for screws holding the RAM compartment cover or panel in place.
- Use the appropriate Phillips screwdriver to remove the screws and set them aside in a safe place.
- Gently lift the RAM compartment cover or panel and set it aside.
Once the RAM compartment is exposed, you will see one or more RAM slots. These slots are where the RAM modules are installed. It’s important to handle the RAM modules with care and avoid touching the metal contacts.
Keep in mind that the exact location and design of the RAM compartment may vary depending on your specific laptop model. Consult the user manual or visit the manufacturer’s website for detailed instructions or illustrations specific to your Dell Inspiron 3558.
Now that you have located the RAM compartment, we can move on to the next step, which is removing the existing RAM modules.
Step 4: Remove the existing RAM modules
With the RAM compartment located, it’s time to remove the existing RAM modules from your Dell Inspiron 3558. Removing the old RAM modules will make way for the installation of the new ones.
Follow these steps to remove the existing RAM modules:
- Ensure that you are grounded by either wearing an anti-static wrist strap or touching a grounded metal object to discharge any static electricity.
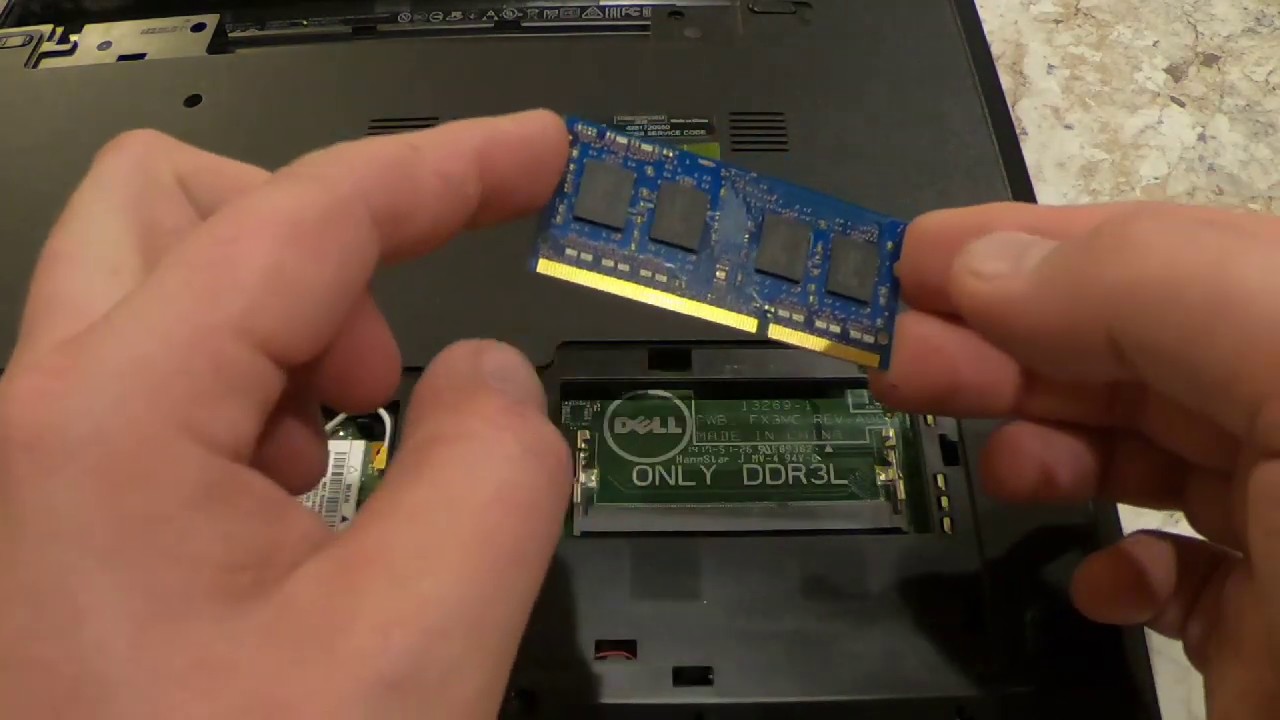
- Locate the retaining clips on each side of the RAM module(s) in the RAM slots.
- Gently push the retaining clips away from the RAM module until it pops up at a 45-degree angle.
- Hold the RAM module by the edges and carefully slide it out of the RAM slot.
- Place the removed RAM module(s) in an anti-static bag or on a non-conductive surface to prevent damage.
- If you have multiple RAM modules installed, repeat the process for each module.
It’s important to handle the RAM modules with care, ensuring that you do not touch the gold contacts. Any excessive force or mishandling can lead to damage.
Once you have successfully removed all the existing RAM modules, it’s a good idea to inspect the RAM slots for any dust, debris, or corrosion. Use a can of compressed air or a soft brush to carefully clean the slots if necessary.
Now that you have removed the old RAM modules, you’re ready to move on to the next step, which involves installing the new RAM modules.
Step 5: Install the new RAM modules
Now that you’ve successfully removed the existing RAM modules from your Dell Inspiron 3558, it’s time to install the new RAM modules. Installing the new RAM modules will enhance your laptop’s performance by increasing its memory capacity.
Follow these steps to install the new RAM modules:
- Take the new RAM module(s) out of their packaging, being careful not to touch the gold contacts.
- Align the notch(es) on the RAM module(s) with the corresponding slot(s) in the RAM compartment.
- Hold the RAM module(s) at a 45-degree angle and gently insert it into the slot(s).
- Apply even pressure on the top edges of the RAM module(s) until it clicks into place.
- Ensure that the retaining clips on each side of the RAM slot(s) are properly locked into position, securing the module(s) in place.
- If you have multiple RAM modules, repeat the above steps for each module, ensuring they are installed in the correct slots.
It’s crucial to double-check that the RAM module(s) are fully seated in the slot(s) and securely locked in place. Improperly installed RAM modules can cause performance issues or system instability.
Once the new RAM modules are installed, you can optionally take a moment to clean any fingerprints or smudges off the laptop’s components using a clean, soft cloth.
With the new RAM modules successfully installed, you’re now ready to move on to the next step: reassembling the laptop.
Step 6: Reassemble the laptop
After installing the new RAM modules in your Dell Inspiron 3558, it’s time to reassemble the laptop. Reassembling the laptop involves putting back the components you previously removed, such as the RAM compartment cover and the battery.
Follow these steps to reassemble the laptop:
- Take the RAM compartment cover or panel and carefully align it with the screw holes on the bottom of the laptop.
- Secure the cover or panel in place by tightening the screws you previously removed with the Phillips screwdriver. Be careful not to overtighten the screws.
- Retrieve the battery you removed earlier and ensure it is in good condition. Align the battery with the battery compartment’s guides and slide it in until it clicks and is securely in place.
- If your laptop has any additional components or peripherals that were removed, such as the optical drive or bottom cover, carefully reattach them, following the manufacturer’s instructions if necessary.
As you reassemble the laptop, take your time to ensure that all components are properly aligned and securely attached. Avoid forcing any parts into place, as this can cause damage or misalignment.
Once you have reassembled the laptop and all components are in their proper places, take a moment to give it a final inspection. Make sure there are no loose screws or any visible damage.
Now that the laptop is reassembled, you’re ready for the final step: powering on the laptop and testing the new RAM modules.
Step 7: Power on the laptop and test the new RAM
With the Dell Inspiron 3558 reassembled after upgrading the RAM, it’s time to power on the laptop and test the new RAM modules. This step will ensure that the new RAM is functioning correctly and that your laptop is benefiting from the upgrade.
Follow these steps to power on the laptop and test the new RAM:
- Connect the power adapter to the laptop and plug it into a power source.
- Make sure the battery is inserted properly and that it is charged.
- Press the power button to turn on the laptop.
- As the laptop boots up, pay close attention to the screen for any messages or prompts related to the RAM upgrade.
- Once the operating system has loaded, open task manager or a system information tool to verify that the new RAM capacity is being detected correctly.
- Test the laptop’s performance by running multiple applications or tasks simultaneously to see if the performance has improved. You should notice faster and smoother multitasking.
If everything is functioning as expected, and the laptop is running smoothly without any errors or performance issues, then congratulations! You have successfully upgraded the RAM in your Dell Inspiron 3558.
However, if you encounter any issues, such as the laptop not booting or encountering errors, it’s possible that the RAM modules are not installed correctly or are not compatible. In that case, you may need to consult the user manual, seek assistance from technical support, or consider reseating the RAM modules.
Once you have tested the new RAM and are satisfied with its performance, you can start enjoying a faster and more efficient computing experience on your Dell Inspiron 3558.
Conclusion
Upgrading the RAM in your Dell Inspiron 3558 is a valuable way to enhance its performance and improve multitasking capabilities. By following the step-by-step process outlined in this guide, you can successfully upgrade the RAM and enjoy a faster and more efficient laptop experience.
Throughout this guide, we covered the necessary preparations, including gathering the tools and materials and locating the RAM compartment. We also discussed how to power off the laptop, remove the battery, and remove the existing RAM modules.
Then, we walked through the installation of the new RAM modules, ensuring proper alignment and secure installation. Reassembling the laptop and performing a final inspection of the components were also covered.
Finally, we powered on the laptop, tested the new RAM, and highlighted the importance of checking for any errors or issues during the testing phase. If any problems arise, revisiting the installation steps or seeking professional assistance is recommended.
By upgrading the RAM in your Dell Inspiron 3558, you can expect improved performance, faster application loading times, smoother multitasking, and an overall enhanced computing experience. Whether you’re a casual user or a professional who demands high performance, this upgrade can help meet your computing needs.
Remember, always consult the user manual or the manufacturer’s website for specific instructions and compatibility requirements. Take precautions to ensure your safety and the proper handling of computer components during the upgrade process.
With your newly upgraded RAM, enjoy the increased speed and responsiveness of your Dell Inspiron 3558 as you tackle tasks and work with ease.