Introduction
Pairing AirPods with an Android device may seem like a daunting task for some, but it is actually a fairly simple process. While AirPods are primarily designed for use with Apple devices, they can still be connected to Android smartphones and tablets. This allows Android users to enjoy the convenience and superior sound quality that AirPods have to offer.
By following a few easy steps, you can quickly pair your AirPods with your Android device and start enjoying wireless audio on the go. In this guide, we will walk you through the process of connecting AirPods to an Android device, ensuring a seamless and hassle-free pairing experience.
Whether you’ve recently made the switch from an iPhone to an Android device or you simply want to use your AirPods with an Android phone, this guide will provide you with all the necessary steps to get started. So, grab your AirPods and Android device, and let’s dive into the world of wireless audio!
Step 1: Enable Bluetooth on your Android device
The first step in pairing your AirPods with an Android device is to ensure that Bluetooth is enabled on your device. Bluetooth is a wireless technology that allows devices to connect and communicate with each other without the need for cables.
To enable Bluetooth on your Android device, follow these simple steps:
- Unlock your Android device and go to the home screen.
- Swipe down from the top of the screen to open the notification shade.
- Look for the Bluetooth icon in the quick settings panel. If you don’t see the Bluetooth icon, you may need to swipe left or right to see all the available icons.
- If the Bluetooth icon is grayed out or crossed out, it means Bluetooth is currently disabled. Tap on the Bluetooth icon to enable it.
- Once Bluetooth is enabled, the icon will turn blue or white, indicating that Bluetooth is active and ready to use.
It’s important to note that the steps to enable Bluetooth may vary slightly depending on the make and model of your Android device. However, the general process should be similar, and you should be able to find the Bluetooth settings in the quick settings panel or the device settings menu.
Now that Bluetooth is enabled on your Android device, you are ready to move on to the next step: opening the AirPods charging case.
Step 2: Open the AirPods charging case
Before you can pair your AirPods with your Android device, you’ll need to take them out of the charging case. The AirPods charging case not only protects your AirPods when they’re not in use but also serves as the means to initiate the pairing process.
To open the AirPods charging case:
- Locate your AirPods charging case.
- Hold the charging case in one hand.
- Using your other hand, locate the lid of the charging case.
- Gently lift the lid of the charging case to reveal the AirPods inside.
Once the charging case is open, ensure that the AirPods are properly seated inside the case, with the charging contacts making good contact. If the AirPods have been removed from the case for an extended period or if the case is not fully charged, you may need to charge the case before proceeding with the pairing process.
Now that you have the AirPods out of the charging case, it’s time to move on to the next step: pressing and holding the pairing button on the back of the AirPods case.
Step 3: Press and hold the pairing button on the back of the AirPods case
In order to put your AirPods into pairing mode, you’ll need to press and hold the pairing button located on the back of the AirPods case. This will allow your Android device to detect and connect to the AirPods.
To press and hold the pairing button on the AirPods case:
- Make sure the AirPods are still inside the charging case.
- Turn the charging case around so that the back side is facing you.
- Locate the small button on the back of the charging case.
- Using your finger, press and hold down the button for a few seconds.
- You should see a light indicator on the front of the charging case start flashing white. This indicates that the AirPods are now in pairing mode.
It’s important to note that the pairing button on the AirPods case is only present on the second generation AirPods or later. If you have the first generation AirPods, you won’t find a pairing button on the case.
Now that your AirPods are in pairing mode, it’s time to proceed to the next step: going to the Bluetooth settings on your Android device.
Step 4: Go to the Bluetooth settings on your Android device
After putting your AirPods into pairing mode, you’ll need to navigate to the Bluetooth settings on your Android device to find and connect to your AirPods.
To go to the Bluetooth settings on your Android device:
- Unlock your Android device and go to the home screen.
- Swipe down from the top of the screen to open the notification shade.
- Look for the Bluetooth icon in the quick settings panel and tap on it. If you can’t find the Bluetooth icon, you may need to swipe left or right to reveal all the available icons.
- Alternatively, you can also go to the Settings app on your Android device and search for “Bluetooth” in the search bar at the top of the screen.
- Tap on the “Bluetooth” option to open the Bluetooth settings.
Once you’re in the Bluetooth settings menu, your Android device will start scanning for nearby Bluetooth devices, including your AirPods.
Note that the steps to access the Bluetooth settings may vary slightly depending on the make and model of your Android device and the specific version of Android you are using. However, the general process should be similar, and you should be able to find the Bluetooth settings in either the quick settings panel or the device settings menu.
Now that you’re in the Bluetooth settings menu, it’s time to move on to the next step: tapping on the AirPods from the list of available devices.
Step 5: Tap on the AirPods from the list of available devices
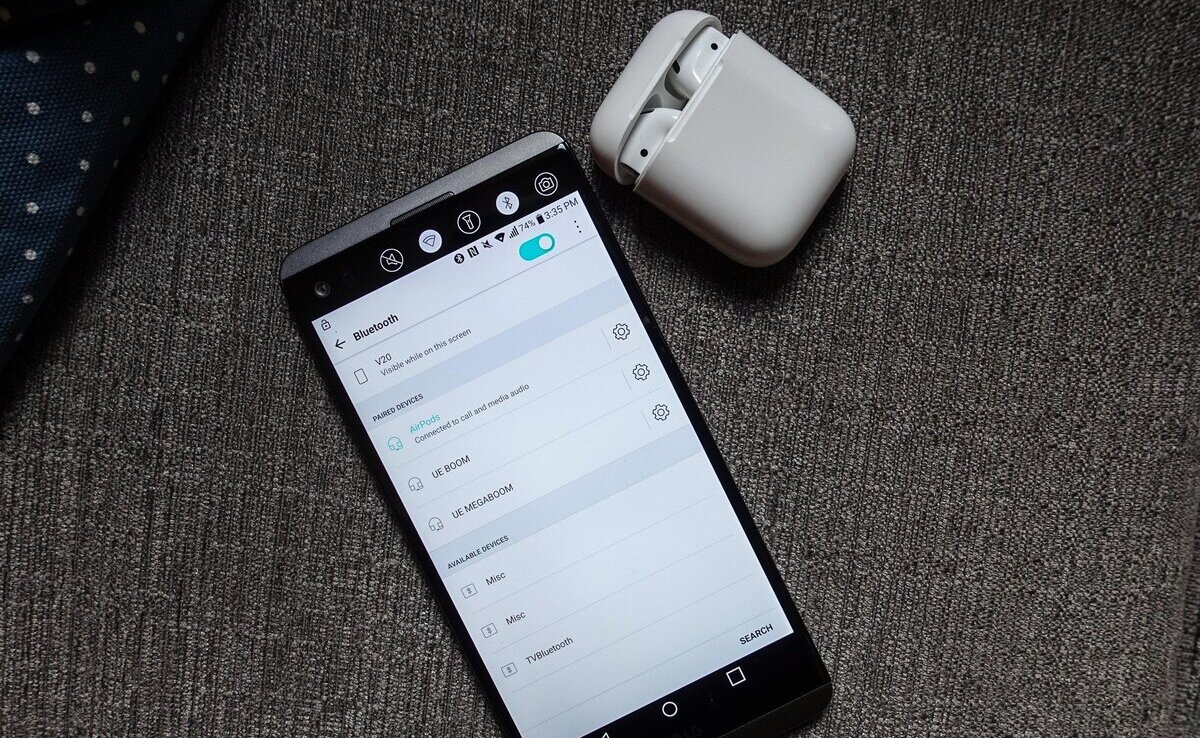
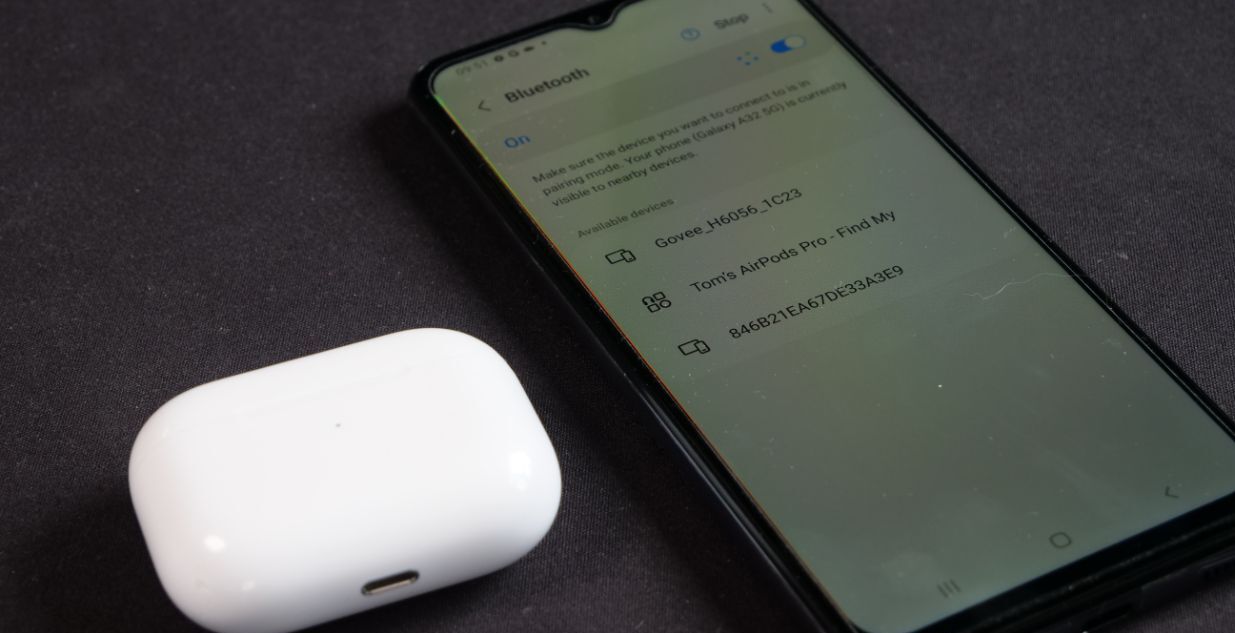
Now that you’re in the Bluetooth settings menu on your Android device, you should see a list of available devices that are within range. This list will include your AirPods if they are in pairing mode.
To connect your AirPods to your Android device, follow these steps:
- In the Bluetooth settings menu, look for the name of your AirPods in the list of available devices. The name typically starts with “AirPods” followed by a series of numbers, but it may vary depending on how you’ve named your AirPods.
- Tap on the name of your AirPods to select them. Your Android device will then attempt to establish a connection with the AirPods.
- Wait for the connection process to complete. This may take a few seconds or longer depending on your device.
- Once the connection is established, you’ll see a notification on your Android device confirming the successful pairing of the AirPods.
If you don’t see your AirPods in the list of available devices, ensure that they are still in pairing mode by checking the white flashing light on the front of the charging case. You may need to press and hold the pairing button on the back of the case again to put them back into pairing mode.
Now that your AirPods are successfully paired with your Android device, it’s time to proceed to the next step: confirming the pairing on both devices.
Step 6: Confirm the pairing on both devices
Once you have selected your AirPods from the list of available devices and established a connection with your Android device, it’s important to confirm the pairing on both devices to ensure a seamless connection.
To confirm the pairing on your Android device:
- Unlock your Android device and go to the home screen.
- Open any audio or media app on your Android device, such as music player or video player.
- Start playing some audio or video content.
- Ensure that sound is coming from your AirPods instead of the device’s built-in speakers. If the sound is still coming from the device’s speakers, you may need to manually select the AirPods as the audio output device in the app’s settings.
To confirm the pairing on your AirPods:
- Put the AirPods in your ears.
- Listen for the audio playback and make sure the sound quality is clear and consistent.
- Try adjusting the volume using the volume controls on your Android device to ensure that the AirPods are properly synced.
If you encounter any issues with the audio playback or syncing, you may need to disconnect and reconnect the AirPods from the Bluetooth settings menu on your Android device. This can be done by tapping on the “Forget” or “Disconnect” option next to the name of your AirPods and then repeating the pairing process from Step 4.
Once you have confirmed the pairing on both your Android device and AirPods, you can proceed to the final step: enjoying the seamless wireless audio experience with your AirPods and Android device.
Step 7: Enjoy using your AirPods with your Android device
Congratulations! You have successfully paired your AirPods with your Android device. Now, it’s time to sit back, relax, and enjoy the wireless audio experience that AirPods have to offer.
With your AirPods connected to your Android device, you can enjoy high-quality sound without the hassle of tangled wires. Whether you’re listening to music, watching videos, or making phone calls, the AirPods provide crystal-clear audio and a seamless connection.
Here are a few tips to enhance your experience with AirPods and your Android device:
- Control playback: You can control the audio playback on your Android device using the controls on your AirPods. Tap the AirPods once to play or pause the audio, double-tap to skip to the next track, and triple-tap to go back to the previous track.
- Activate voice assistant: By double-tapping on either AirPod, you can activate the voice assistant on your Android device, allowing you to make calls, send messages, and more, without taking your device out of your pocket.
- Customize controls: Some Android devices allow you to customize the controls for your AirPods. Check the device settings or download third-party apps to explore additional functionality and customization options.
- Keep your AirPods charged: Remember to regularly charge your AirPods and the charging case to ensure uninterrupted usage. The AirPods will automatically connect to your Android device when they are in close proximity and have sufficient battery life.
Now that you know how to pair AirPods with your Android device, you can enjoy the freedom and convenience of wireless audio on the go. Whether you’re working out, commuting, or simply relaxing at home, your AirPods will provide an immersive audio experience.
So put on your AirPods, crank up the volume, and enjoy your favorite music, podcasts, and more with the unbeatable combination of AirPods and your Android device.
Conclusion
Pairing AirPods with your Android device can open up a world of wireless audio convenience and superior sound quality. While AirPods are primarily designed for Apple devices, they can still be used with Android smartphones and tablets.
In this guide, we covered the step-by-step process of pairing AirPods with an Android device. We started by enabling Bluetooth on the Android device and then opened the AirPods charging case. From there, we pressed and held the pairing button on the back of the case, went to the Bluetooth settings on the Android device, and tapped on the AirPods from the list of available devices. Next, we confirmed the pairing on both devices and finally, we could enjoy using the AirPods with the Android device.
Now that you know how to pair AirPods with your Android device, you can experience the convenience and freedom of wireless audio wherever you go. Whether you’re listening to music, watching videos, or making phone calls, AirPods deliver clear sound and a seamless connection.
Remember to keep your AirPods charged and customize the settings to suit your preferences. With these tips in mind, you can maximize your enjoyment of the AirPods and enhance your overall audio experience.
So, grab your AirPods, connect them to your Android device, and immerse yourself in a world of wireless audio bliss. Enjoy the freedom, convenience, and exceptional sound quality that AirPods bring to your Android device.


