Introduction
The convenience and portability of AirPods have made them a popular choice among tech-savvy individuals. These wireless earbuds pack advanced features and impressive battery life, making them ideal for on-the-go use. However, one common concern amongst AirPods users is how to know if their AirPods are charging. Fortunately, Apple has designed various methods to help you keep track of the charging status of your AirPods.
In this article, we will explore different ways to determine if your AirPods are charging. We will cover step-by-step instructions for checking the battery status on iPhone, iPad, Mac, Apple Watch, and even Android devices. Additionally, we will provide tips on using the charging case effectively and troubleshooting common charging issues.
Whether you’re a new AirPods owner or someone who has been using them for a while, understanding how to monitor the charging status will ensure that you never run out of battery unexpectedly. So, let’s dive into the various methods and techniques that will help you stay informed about the charging status of your AirPods.
Checking the Battery Status on iPhone
Apple has made it easy to check the battery status of your AirPods directly from your iPhone. Here’s how you can do it:
- Make sure your AirPods are connected to your iPhone.
- Open the charging case lid with the AirPods inside.
- On your iPhone, go to the Home screen and swipe down from the top-right corner to access the Control Center.
- Locate the “Now Playing” widget at the top-right corner of the Control Center. If you don’t see it, swipe right to access the widgets.
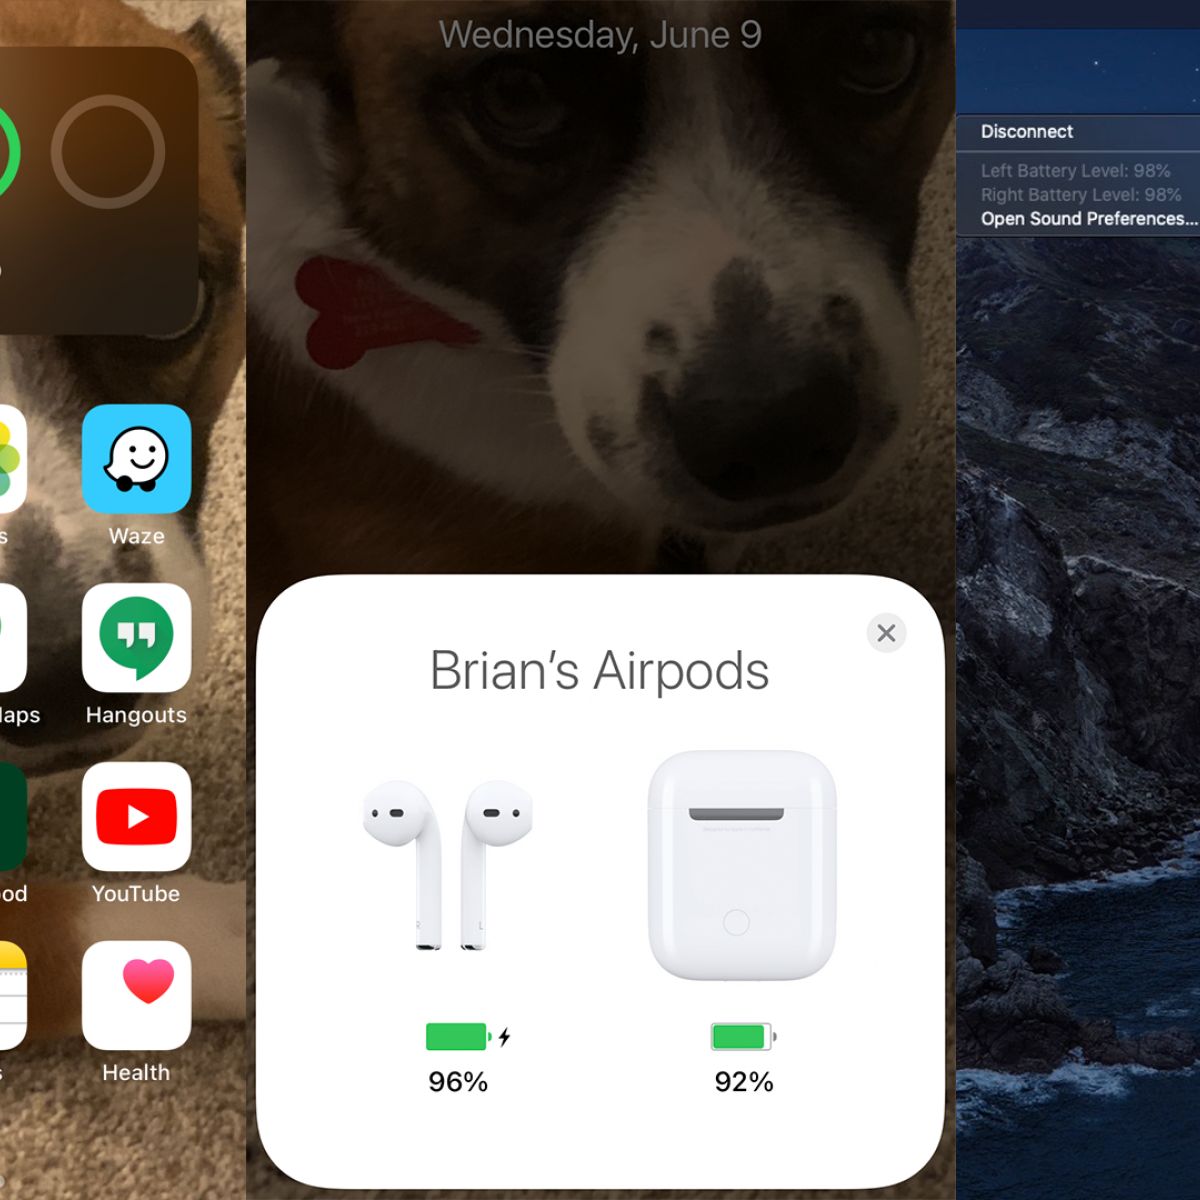
- In the “Now Playing” widget, you will see the battery status of your AirPods along with the connected device(s).
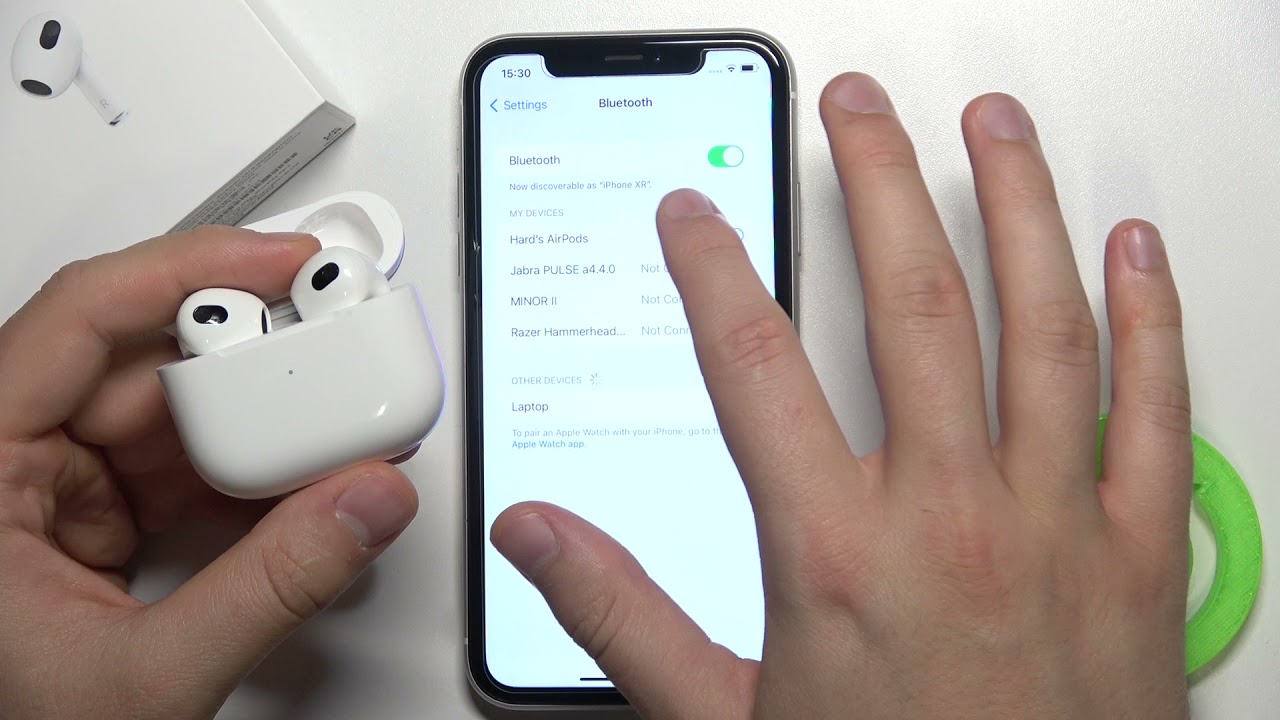
If your AirPods are not connected to your iPhone, you can still check the battery status through the Bluetooth settings:
- Go to the Home screen and open the Settings app.
- Scroll down and tap on “Bluetooth”.
- Find your AirPods in the list of available devices and tap on the “i” icon next to them.
- Under the “AirPods” section, you will see the battery percentage of both the left and right AirPods, as well as the charging case.
By following these simple steps, you can quickly check the battery status of your AirPods and charging case right from your iPhone. This information will help you plan your usage and ensure that you have enough battery life for your needs.
Checking the Battery Status on iPad or iPod Touch
If you own an iPad or an iPod Touch and want to check the battery status of your AirPods, you can easily do so using the following steps:
- Ensure that your AirPods are connected to your iPad or iPod Touch.
- Open the charging case lid with the AirPods inside.
- On your device, go to the Home screen and swipe down from the top-right corner to access the Control Center.
- Locate the “Now Playing” widget at the top-right corner of the Control Center. If you cannot see it, swipe right to access more widgets.
- In the “Now Playing” widget, you will find the battery status of your AirPods, along with any connected devices.
If your AirPods are not connected to your iPad or iPod Touch, you can check the battery status through the Bluetooth settings:
- Go to the Home screen and open the Settings app.
- Scroll down and tap on “Bluetooth”.
- Find your AirPods in the list of available devices and tap on the “i” icon next to them.
- Under the “AirPods” section, you will see the battery percentage of both the left and right AirPods, as well as the charging case.
By following these simple steps, you can easily monitor the battery status of your AirPods on your iPad or iPod Touch. This information will help you keep track of the remaining battery life and plan your usage accordingly.
Checking the Battery Status on Mac
If you want to check the battery status of your AirPods using your Mac, you can do so by following these steps:
- Ensure that your AirPods are connected to your Mac. You can do this by opening the Bluetooth settings and connecting your AirPods to your Mac.
- Click on the Bluetooth icon on the menu bar at the top-right corner of your screen. If you don’t see the icon, you can enable it by going to System Preferences > Bluetooth and checking the box for “Show Bluetooth in menu bar”.
- In the drop-down menu, you will see your connected AirPods listed. Hover your cursor over them to see the battery status.
If you prefer a more detailed view of the battery status, you can open the “Bluetooth” section in System Preferences:
- Click on the Apple menu () in the top-left corner of your screen and select “System Preferences”.
- Click on “Bluetooth” in the System Preferences window.
- In the left sidebar, you will see your AirPods listed. Select them to view the battery status and other details.
Now you can easily check the battery status of your AirPods using your Mac. This allows you to stay informed about the remaining battery life and plan your usage accordingly.
Checking the Battery Status on Apple Watch
If you own an Apple Watch and want to check the battery status of your AirPods, you can do so conveniently with the following steps:
- Ensure that your AirPods are connected to your Apple Watch. You can connect them by opening the Settings app on your Apple Watch, selecting Bluetooth, and pairing your AirPods.
- On your Apple Watch, swipe up from the bottom of the screen to access the Control Center.
- In the Control Center, look for the battery icon. It will display the battery percentage of both your AirPods and the Apple Watch.
By checking the battery status directly on your Apple Watch, you can easily keep track of how much charge is remaining in your AirPods. This information is especially useful when you’re on the go and want to ensure that you have enough battery life for your listening needs.
Checking the Battery Status on Android
If you’re using AirPods with an Android device and want to check the battery status, you can follow these steps:
- Make sure that your AirPods are connected to your Android device via Bluetooth.
- Open the Bluetooth settings on your Android device. You can usually find this in the Settings menu.
- Under the list of paired devices, locate your AirPods and tap on them.
- You should now see the battery status of your AirPods displayed on the screen.
While the battery status displayed on Android might not be as detailed as on Apple devices, it will give you an idea of how much charge is left in your AirPods. This way, you can plan your usage accordingly and ensure that you don’t run out of battery power unexpectedly.
Note that some Android devices may also have third-party apps available on the Google Play Store that allow you to check the battery status of your AirPods with more features and customization options. You can explore these apps if you prefer a more enhanced experience.
Using the Charging Case
The AirPods charging case not only provides a convenient way to store and protect your AirPods but also serves as a portable charging solution. Here’s how you can effectively use the charging case:
- Ensure that the charging case itself has enough battery power. You can charge the case by connecting it to a power source using the included Lightning cable.
- To charge your AirPods, simply place them back into the charging case with the contacts aligned.
- Close the lid of the charging case. The AirPods will start charging automatically.
- You can check the charging status of your AirPods by opening the charging case lid.
- If the LED light on the front of the case is green, it means the AirPods are fully charged. If the LED light is orange, it indicates that the AirPods and/or the case battery is low and needs to be charged.
- When you’re ready to use your AirPods, simply open the charging case lid again. They will automatically connect to your device as long as it is within range.
The charging case ensures that your AirPods are always ready for use by keeping them charged whenever they are stored inside. This is especially useful during travel or when you need to quickly top up the battery while on the go.
Remember to periodically charge the case itself to ensure that it has sufficient battery power to charge your AirPods. You can charge the case by connecting it to a power source using the Lightning cable that came with your AirPods.
Verifying the Charging Status via the LED Light on the AirPods Case
The AirPods charging case features an LED light on the front that provides information about the charging status of both the case and the AirPods. Here’s how you can interpret the LED light indicators:
- Green LED light: When you open the AirPods case while they are inside, and the LED light flashes green, it means that both the AirPods and the case have sufficient battery power.
- Amber/Orange LED light: If the LED light flashes amber or orange, it indicates that either the AirPods or the case battery is low and needs to be charged.
- No LED light: If there is no LED light when you open the case, it could mean that the AirPods are not properly seated in the case or that the case itself has run out of battery and needs to be charged.
- Blinking white LED light: When you begin the initial setup process or reset your AirPods, the LED light will blink white to indicate that they are ready for pairing with a device.
It is important to pay attention to the LED light on the AirPods case to ensure that you are aware of the charging status. This will help you determine when to charge the case or when to start using the charged AirPods.
Remember, depending on your usage and battery health, the LED light indications may vary. It’s always a good idea to charge the case regularly to keep your AirPods ready for use when you need them.
Monitoring the Charging Status on iPhone or iPad
Keeping track of the charging status of your AirPods on your iPhone or iPad is essential to ensure that they are ready for use whenever you need them. Here are a few ways to monitor the charging status:
Using the Batteries Widget:
- Swipe right from your Home screen or lock screen to access the Today View.
- Scroll to the bottom of the Today View and tap “Edit”.
- Add the “Batteries” widget to your Today View. This widget will show the battery level of your AirPods, along with other connected devices, such as your iPhone and Apple Watch.
- You can now view the battery status of your AirPods by swiping to the Today View.
Using the Control Center:
- Swipe down from the top-right corner of your screen to open the Control Center.
- Look for the “Batteries” section that displays the battery levels of your connected devices.
- If your AirPods are connected, you’ll see their battery status listed.
By utilizing the Batteries widget or the Control Center, you can easily keep an eye on the charging status of your AirPods. This way, you can plan your usage and ensure that your AirPods have enough battery life for your needs.
It’s worth noting that the battery status displayed may not update in real-time and may vary based on several factors, including usage and battery health. Therefore, it’s advisable to periodically check the battery status and charge your AirPods as needed to avoid running out of power when you want to use them.
Monitoring the Charging Status on Mac
If you primarily use your Mac to connect and charge your AirPods, monitoring their charging status is important to ensure a seamless listening experience. Here’s how you can monitor the charging status on your Mac:
Menu Bar:
- Click on the battery icon in the menu bar at the top-right corner of your screen.
- If your AirPods are connected to your Mac, you’ll see a drop-down menu that shows the battery percentage of the connected devices, including your AirPods.
Bluetooth Settings:
- Click on the Apple menu () in the top-left corner of your screen and select “System Preferences”.
- Click on “Bluetooth” in the System Preferences window.
- In the left sidebar, locate your AirPods and you’ll see the battery percentage next to them.
By utilizing the menu bar or the Bluetooth settings, you can easily keep track of the charging status of your AirPods on your Mac. This information allows you to plan your usage accordingly and ensure that your AirPods have enough battery life for your needs.
Note that the battery status displayed may not update in real-time and may vary based on various factors, including usage and battery health. Therefore, it’s recommended to periodically check the battery status of your AirPods and charge them as needed to avoid any unexpected interruptions during your listening sessions.
Troubleshooting Common Charging Issues
While AirPods are designed to be reliable and convenient, you may encounter some common charging issues. Here are a few troubleshooting steps you can take to address these problems:
1. Ensure Proper Connection:
- Make sure that your AirPods are placed correctly in the charging case with the contacts aligned.
- Verify that the charging case is securely connected to a power source and the Lightning cable is properly inserted.
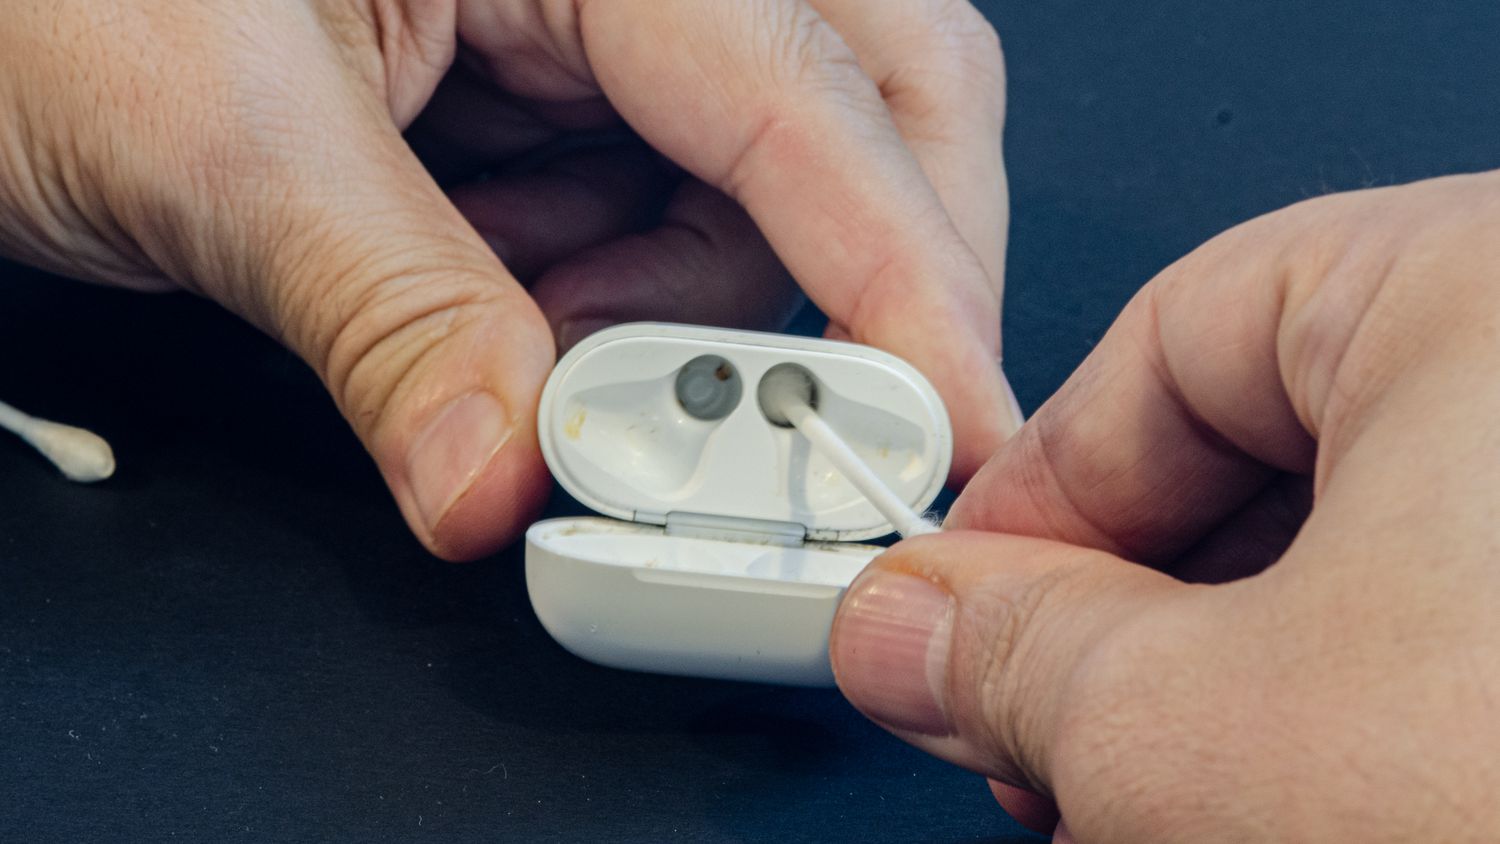
2. Clean the Charging Contacts:
- Dirt and debris can accumulate on the charging contacts of both the AirPods and the case, which can affect the charging process. Use a clean, soft cloth to gently wipe the contacts and remove any dirt or residue.
3. Restart and Reset:
- If you’re experiencing charging issues, try restarting your connected device, such as your iPhone or Mac, and reconnect your AirPods.
- In some cases, you may need to reset your AirPods by pressing and holding the setup button on the back of the charging case until the LED light flashes amber, followed by white. Then, re-pair your AirPods with your device.
4. Check for Updated Firmware:
- Make sure that your AirPods are running the latest firmware. To do this, connect your AirPods to your iPhone or iPad, open the Settings app, go to “General”, and then select “Software Update”.
5. Contact Apple Support:
- If you’ve tried the above troubleshooting steps and are still experiencing charging issues with your AirPods, it may be beneficial to reach out to Apple Support for further assistance.
By following these troubleshooting steps, you can resolve common charging issues you may encounter with your AirPods. However, if the problem persists, it is recommended to seek professional support to ensure the optimal performance and functionality of your AirPods.
Conclusion
Knowing how to check the battery status and monitor the charging status of your AirPods is crucial for a seamless and uninterrupted listening experience. Whether you’re using an iPhone, iPad, Mac, or even an Android device, Apple has provided various methods to help you stay informed about the battery life of your AirPods.
By following the steps outlined in this article, you can easily check the battery status of your AirPods directly from your devices or through the charging case. Monitoring the charging status allows you to plan your usage, ensuring that your AirPods are always charged and ready for use when you need them. Additionally, we provided troubleshooting tips for common charging issues that you may encounter, enabling you to resolve any problems that may arise.
Remember to keep your AirPods and charging case clean, regularly charge your case to maintain optimal battery life, and ensure that your devices are running on the latest firmware. If you encounter persistent issues, reach out to Apple Support for assistance.
With these tips and techniques, you can make the most of your AirPods and enjoy uninterrupted listening wherever you go. Happy charging and happy listening!