Introduction
Having a slow and sluggish PC can be a frustration for many computer users. Slow performance can hinder productivity and make even the simplest tasks feel time-consuming. If you find yourself constantly waiting for your computer to load programs, open files, or even access the internet, it may be time to optimize your PC.
PC optimization involves implementing various techniques to improve the overall performance and speed of your computer. By following a few simple steps, you can significantly enhance your PC’s functionality and ensure it runs smoothly.
In this article, we will discuss nine effective strategies to optimize your PC and maximize its performance. These methods include cleaning up the hard drive, updating Windows and drivers, uninstalling unnecessary programs, removing malware and viruses, managing startup programs, optimizing power settings, adjusting visual effects, defragmenting the hard drive, and upgrading hardware components.
By implementing these strategies, you can not only enhance your computer’s speed and performance but also prolong its lifespan. Whether you are experiencing slowdowns due to excessive clutter on your hard drive, outdated software, or other issues, these optimizations will help your PC run like new.
It is important to note that PC optimization does not require advanced technical skills. With a little patience and attention to detail, you can successfully optimize your PC and enjoy a smooth and efficient computing experience.
So, let’s dive into these optimization techniques and transform your sluggish PC into a high-performance machine!
Cleaning up the hard drive
Over time, your computer’s hard drive can become cluttered with unnecessary files, which can have a significant impact on performance. By cleaning up your hard drive, you can free up valuable storage space and improve the speed of your PC.
Start by removing temporary files and folders. These files are created by various applications and can accumulate over time, taking up valuable space on your hard drive. To do this, you can use the built-in Disk Cleanup tool in Windows. Simply search for “Disk Cleanup” in the Start menu, select the drive you want to clean, and let the tool scan for unnecessary files. Once the scan is complete, you can choose which files to delete.
In addition to temporary files, it’s also important to get rid of duplicate files. Duplicate files not only take up valuable space but can also cause confusion when searching for specific files. There are several third-party tools available that can help you find and remove duplicate files swiftly.
Another way to clean up your hard drive is to uninstall or delete software and applications that you no longer use. Many times, we install programs and forget about them, leaving them to take up space unnecessarily. By removing these unused programs, you can free up additional storage space and improve system performance.
Furthermore, organizing files into appropriate folders can help declutter your hard drive. Create specific folders for documents, pictures, videos, and other file types, and move files into their respective folders. This not only helps in organizing your files but also makes it easier to locate them when needed.
Lastly, consider using a disk defragmentation tool to optimize the placement of files on your hard drive. Fragmented files can slow down your computer as it takes longer for the system to access scattered data. A defragmentation tool rearranges the files on your hard drive, placing them in contiguous clusters, resulting in faster access times.
By regularly cleaning up your hard drive and removing unnecessary files, you can optimize your PC’s performance and ensure it runs smoothly. Not only will this improve overall speed, but it will also reduce clutter and enhance your overall computing experience.
Updating Windows and drivers
Keeping your Windows operating system and device drivers up to date is crucial for optimal PC performance and security. Outdated software and drivers can lead to compatibility issues, system errors, and even vulnerabilities that can be exploited by malicious entities. Therefore, regularly updating Windows and drivers is essential to ensure a smooth and secure computing experience.
Start by checking for Windows updates. Windows regularly releases updates that not only introduce new features but also address security vulnerabilities and improve system stability. To check for updates, go to the Windows Start menu and search for “Windows Update.” Open the Windows Update settings, and if there are any available updates, download and install them. It is recommended to set Windows to automatically install updates so that your PC stays up to date without manual intervention.
In addition to Windows updates, it is equally important to keep your device drivers up to date. Device drivers are software that facilitate communication between your hardware devices and the operating system. Outdated or incompatible drivers can cause performance issues and crashes. To update drivers, you can visit the manufacturer’s website for each specific device or use driver update software that automatically scans your system and installs the latest drivers.
Graphics card drivers are particularly important for gamers or users who rely heavily on graphics-intensive applications. Outdated graphics drivers can result in poor performance, visual glitches, or even system crashes. In most cases, graphic card manufacturers, such as NVIDIA or AMD, provide their own software that makes it easy to update drivers. Alternatively, you can manually download the latest drivers from their respective websites.
Updating other hardware drivers, such as sound cards, network adapters, or printers, is also recommended to ensure compatibility and optimal performance. The manufacturer’s website is the best place to find the latest drivers for your specific hardware.
Regularly updating Windows and drivers not only ensures that your system is up to date with the latest features and improvements but also helps maintain system stability and security. By investing a little time in keeping your software and drivers updated, you can optimize the performance of your PC and enjoy a seamless computing experience.
Uninstalling unnecessary programs
Over time, we accumulate a multitude of programs and applications on our computers, many of which we no longer use or need. Unnecessary programs can consume valuable system resources, take up disk space, and even run background processes that slow down your PC. Therefore, it is essential to regularly review and uninstall programs that are no longer necessary.
To begin, open the Control Panel on your Windows PC. You can access the Control Panel by searching for it in the Start menu. From there, click on the “Programs” or “Programs and Features” option, which will display a list of installed programs.
Take your time to go through the list and identify any programs that you no longer use or recognize. It’s important to exercise caution and ensure that you are uninstalling programs that you genuinely don’t need, as removing critical system files or software can cause issues. If you are unsure about a specific program, you can search online to determine its role and necessity.
Select the program you want to uninstall and click on the “Uninstall” button. Follow the prompts and instructions provided by the uninstaller. Some programs may require you to restart your PC after the uninstallation process is complete.
While removing unnecessary programs, it’s also worth considering the impact of browser extensions and plugins. These can often accumulate over time and slow down your web browsing experience. Open your web browser and navigate to the settings or extensions menu. From there, review the list of installed extensions and plugins and disable or remove any that you no longer use or recognize.
By regularly uninstalling unnecessary programs, you can free up disk space, reduce system clutter, and improve overall PC performance. It’s a simple yet effective way to optimize your computer and ensure that it runs efficiently.
Removing malware and viruses
The presence of malware and viruses on your PC not only poses a significant security risk but can also severely impact its performance. Malicious software can slow down your system, cause crashes, steal sensitive information, and even turn your computer into a part of a botnet. Therefore, it is crucial to regularly scan and remove malware and viruses from your PC to ensure its optimal functioning and protect your data.
Start by installing reputable antivirus software and keeping it up to date. Antivirus software is specifically designed to detect and remove malware, viruses, and other malicious threats. There are many reliable antivirus programs available in the market, both free and paid. Choose one that suits your needs and regularly update it to ensure the latest protection against emerging threats.
Perform a full system scan using your antivirus software. This will thoroughly examine all files and folders on your PC for any signs of malware or viruses. If any threats are detected, follow the prompts provided by the antivirus software to remove or quarantine them. It is recommended to scan your system at least once a week, or more frequently if you frequently download files or visit potentially risky websites.
In addition to antivirus software, it is also important to have a reliable antimalware tool installed. Antimalware software works alongside your antivirus software to provide additional layers of protection against malware. These programs are specifically designed to detect and remove potentially unwanted programs (PUPs) and adware, which can also impact system performance and security.
Aside from relying on software, it’s crucial to practice safe browsing habits and exercise caution while downloading files or opening email attachments. Be wary of suspicious websites, pop-up ads, and emails from unknown senders. These are often vectors for spreading malware and viruses. Avoid clicking on suspicious links and only download software from trusted sources.
In cases where your system is heavily infected or the antivirus software fails to remove persistent threats, it may be necessary to seek professional help. Professional computer technicians have access to advanced tools and techniques to thoroughly clean and restore your PC.
By regularly scanning for and removing malware and viruses, you can ensure the optimal performance and security of your PC. Maintaining a clean and secure system will not only enhance your computing experience but also protect your personal data and sensitive information.
Managing startup programs
When you start your computer, there are often several programs and applications that automatically launch. While some startup programs are necessary for the smooth functioning of your system, others can significantly slow down your PC’s startup time and overall performance. Managing startup programs allows you to take control of which programs launch at startup, optimizing your computer’s boot time and system resources.
To manage startup programs in Windows, you can use the Task Manager. To access the Task Manager, right-click on the taskbar and select “Task Manager” from the menu that appears. Once the Task Manager is open, navigate to the “Startup” tab.
On the Startup tab, you will see a list of programs that are configured to start when your computer boots up. Take the time to carefully review the list and determine which programs are necessary and which can be disabled. Keep in mind that not all startup programs are visible by their actual program names. Some may appear as background processes or system services, so it’s essential to research the program or process if you’re unsure.
To disable a startup program, right-click on it and select “Disable.” Disabling a program does not uninstall it; it simply prevents it from launching at startup. Be cautious when disabling programs, as some may be essential for specific tasks or functions on your computer.
As you consider which programs to disable, focus on applications that you rarely use or are non-essential. Common examples include chat or messaging software, media players, file-sharing programs, or programs that came pre-installed with your computer. However, be sure to avoid disabling critical system processes or antivirus software.
Avoiding clutter in your startup programs not only helps improve your computer’s boot time but also enhances overall system performance. With fewer programs running in the background, your PC can allocate more resources to the tasks and programs you actively use.
It’s worth mentioning that some programs may offer the option to disable their startup entry within their own settings. For example, many antivirus software tools have an option within their settings to disable their startup entry. These settings allow you to manage startup programs on a per-application basis.
By managing startup programs effectively, you can optimize your PC’s boot time and free up system resources, resulting in a faster and more efficient computing experience.
Optimizing power settings
Power settings play a crucial role in determining the performance and energy efficiency of your PC. By optimizing power settings, you can strike a balance between power consumption and performance, ensuring that your computer meets your needs while conserving energy. This not only helps reduce electricity costs but can also improve the overall lifespan and performance of your PC.
In Windows, you can access the power settings by going to the Control Panel and selecting “Power Options.” Within the power options, you will find different power plans, such as Balanced, Power Saver, and High Performance. Each power plan has its own settings, allowing you to customize how your computer uses power.
The “Balanced” power plan is the default option and aims to provide a balance between performance and energy efficiency. It is suitable for everyday use and is recommended for most users. However, if you want to optimize for battery life or performance, you can choose the “Power Saver” or “High Performance” power plans, respectively.
Within each power plan, you can further fine-tune the settings by clicking on “Change plan settings.” Here, you can adjust options such as when the display turns off, when the computer goes to sleep, and the power usage of the processor. Optimizing these settings can have a significant impact on power consumption and performance.
For instance, if you are using a laptop and want to conserve battery life, you can set a lower time for the display to turn off or choose a more aggressive power saving mode. On the other hand, if you are using a desktop PC and prioritize performance over energy savings, you can set longer times for the display and sleep mode or select the High Performance power plan.
It’s worth noting that some systems might have additional power management settings in the BIOS or UEFI firmware. These settings can offer more customization options and control over power management features. Consulting your computer’s documentation or the manufacturer’s website for guidance on accessing and modifying these settings is advisable.
Optimizing power settings not only helps conserve energy but can also improve performance in certain scenarios. By customizing your power plan to suit your needs, you can ensure that your PC performs optimally while efficiently utilizing power.
Remember to regularly review and adjust your power settings as your needs and usage patterns change. By doing so, you can maximize the efficiency of your PC and achieve the perfect balance between performance and energy conservation.
Adjusting visual effects
Windows operating systems come with various visual effects and animations that enhance the user interface experience. However, these effects can consume system resources and impact overall performance, especially on older or lower-spec PCs. Adjusting visual effects settings can help optimize your PC’s performance and improve responsiveness.
To access visual effects settings in Windows, go to the Control Panel and search for “Performance” or “Visual Effects.” Open the “Performance Options” window, which allows you to customize the visual effects of your computer.
Within the Performance Options window, you will find options to customize visual effects. By default, Windows applies a variety of animations and visual effects to enhance user interaction. However, you can choose to optimize visual effects for performance or customize them individually to your preference.
If you want to optimize for performance, select the “Adjust for best performance” option. This will disable most visual effects and animations, resulting in a snappier and more responsive system. While this option may sacrifice some visual aesthetics, it can significantly improve the overall speed and performance of your PC.
If you prefer a balance between performance and visual appeal, you can select the “Custom” option. This allows you to individually customize which visual effects you want to enable or disable. For example, you can choose to keep smooth scrolling, drop shadows, or other effects that you find visually appealing but disable animations or transparency effects. Experiment with the settings to find the right balance for your needs.
It is also worth mentioning that disabling certain visual effects, such as animations when minimizing and maximizing windows or fading effects, can enhance user experience with a perceived increase in speed and responsiveness.
While adjusting visual effects settings can significantly improve performance, it is also a matter of personal preference. Some users may prioritize visual aesthetics over system performance, while others may prefer a simpler and faster experience.
Remember to periodically review your visual effects settings, especially if you notice a decrease in performance or want to make adjustments based on your changing needs. By customizing visual effects to suit your preferences and system capabilities, you can optimize the performance of your PC while maintaining an enjoyable user experience.
Defragmenting the hard drive
Over time, the files on your computer’s hard drive can become fragmented, meaning that they are scattered across different sectors of the disk. This fragmentation can lead to slower file access times and overall system performance. Performing regular disk defragmentation can help optimize the arrangement of files, resulting in improved efficiency and faster data access.
In Windows, you can utilize the built-in Disk Defragmenter tool to defragment your hard drive. To access this tool, go to the Control Panel and search for “Defragment and Optimize Drives.” Open the tool, and it will display a list of drives on your computer.
Select the drive you want to defragment and click on the “Optimize” or “Analyze” button. The tool will analyze the drive and determine if it needs defragmentation based on the level of fragmentation it detects. If defragmentation is recommended, proceed with the process by clicking on the appropriate button.
It is important to note that the duration of the defragmentation process depends on the size of the drive and the level of fragmentation. Larger, heavily fragmented drives may take longer to defragment. It is advisable to run the defragmentation process during a time when you don’t need to use your computer intensively.
Alternatively, Windows also offers an option to schedule regular automatic defragmentation for your hard drives. This ensures that your drives are continuously optimized without manual intervention. To set up a scheduled defragmentation, go to the “Change settings” option within the “Defragment and Optimize Drives” tool.
In addition to the built-in Windows defragmentation tool, there are also third-party defragmentation software available that offer more advanced features and customization options.
Keep in mind that solid-state drives (SSDs) do not require defragmentation. In fact, defragmenting an SSD can actually reduce its lifespan. Modern versions of Windows automatically detect if a drive is an SSD and will disable or optimize defragmentation accordingly. It is always a good idea to check the documentation of your specific SSD manufacturer for recommendations regarding defragmentation.
By regularly defragmenting your hard drive, you can improve the performance and efficiency of your computer. Defragmentation helps to organize the arrangement of files, reducing the time it takes to access data and improving the overall responsiveness of your PC.
Upgrading hardware components
If your PC is still experiencing slow performance or you’re looking to take it to the next level, upgrading hardware components can provide a significant boost in speed and overall performance. Upgrading specific hardware components allows you to tailor your computer to your specific needs and ensure optimal performance for resource-demanding tasks.
One of the most common hardware upgrades is increasing the amount of RAM (Random Access Memory) in your computer. RAM is responsible for temporarily storing data that your CPU (Central Processing Unit) needs to access quickly. Insufficient RAM can result in slow performance and frequent system slowdowns. Upgrading your RAM allows you to run more applications simultaneously and increases overall system responsiveness.
Another hardware upgrade to consider is replacing your traditional hard drive with a solid-state drive (SSD). Unlike conventional hard drives, SSDs use flash memory technology, which provides faster data access and transfer speeds. Upgrading to an SSD can significantly reduce boot times, improve application loading times, and enhance overall system responsiveness.
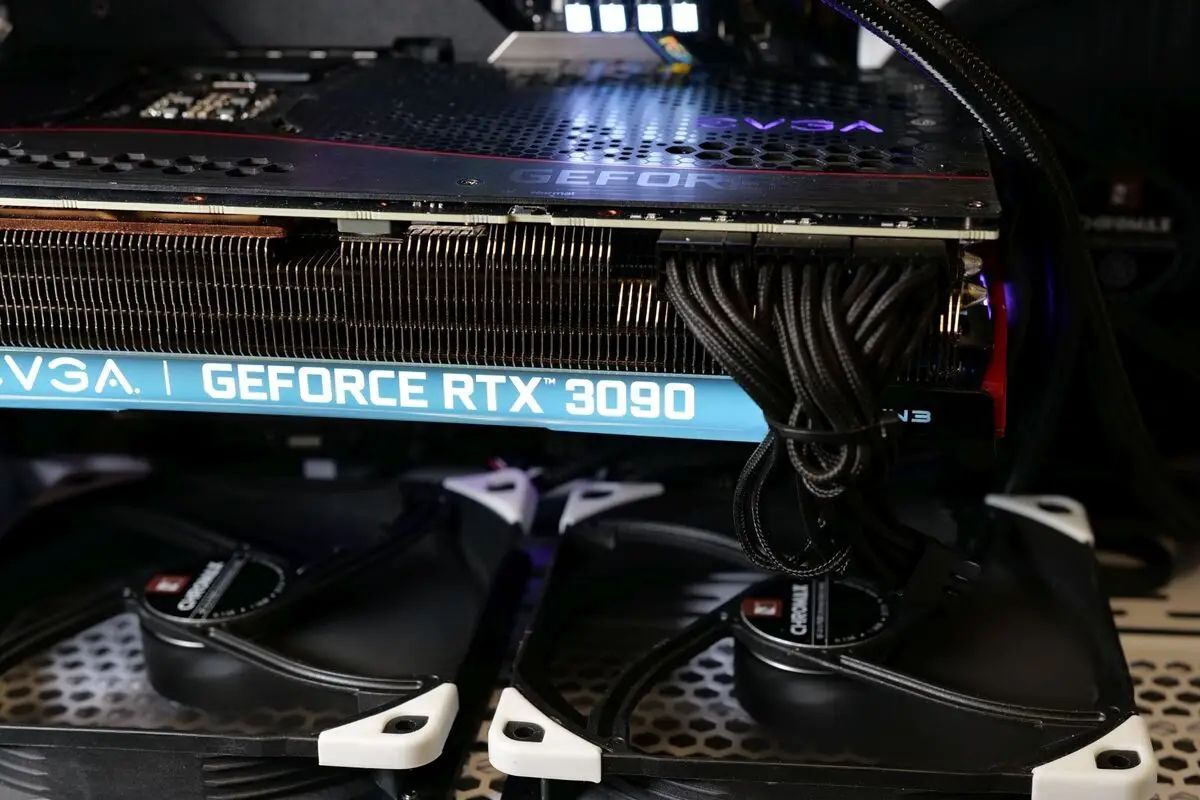
If you’re an avid gamer or work with graphics-intensive applications, upgrading your graphics card can have a significant impact on performance. Newer graphics cards offer improved visual quality, higher resolutions, and smoother gameplay. Upgrading your graphics card can help you achieve better frame rates, allowing for a more enjoyable and seamless gaming or multimedia experience.
Upgrading your CPU can also enhance overall system performance, especially if you engage in tasks that require extensive processing power, such as video editing or 3D rendering. A faster CPU can handle complex calculations more efficiently and speed up tasks that heavily rely on processing capabilities.
Before upgrading any hardware component, it’s important to ensure compatibility with your existing system. Consult your computer’s documentation or the manufacturer’s website for specifications and recommendations regarding compatible upgrades.
Additionally, it’s worth considering the cost-effectiveness of a hardware upgrade compared to purchasing a new computer. Sometimes, upgrading a specific component may not provide a significant performance boost and may be more cost-effective to invest in a new system altogether.
Hardware upgrades can breathe new life into your PC, improving performance and allowing you to handle more demanding tasks smoothly. By carefully selecting and upgrading specific hardware components, you can tailor your computer to meet your needs and enjoy a faster, more efficient computing experience.
Conclusion
Optimizing your PC is essential for maintaining optimal performance, efficiency, and overall user experience. By implementing the strategies discussed in this article, you can significantly improve the speed, responsiveness, and functionality of your computer.
Start by cleaning up your hard drive, removing unnecessary files and programs that clutter your system. This will free up valuable disk space and streamline your computer’s performance. Updating Windows and drivers ensures that your PC is equipped with the latest features, bug fixes, and security enhancements.
Uninstalling unnecessary programs helps reduce system clutter, freeing up resources for more important tasks. Removing malware and viruses is crucial for protecting your computer and data from potential threats, while managing startup programs enables faster boot times and optimized system performance.
Optimizing power settings helps strike a balance between performance and energy efficiency, while adjusting visual effects improves both aesthetics and responsiveness. Defragmenting the hard drive rearranges data for faster access, and upgrading hardware components can provide a substantial performance boost for resource-intensive tasks.
By combining these strategies and regularly maintaining your PC, you can ensure that it operates at its full potential, saving time, improving productivity, and enhancing your overall computing experience.
Remember, PC optimization is an ongoing process. As technology advances and your needs change, it’s important to adapt and fine-tune your computer to meet those demands. Stay proactive, stay informed, and enjoy the benefits of an optimized PC that works seamlessly to support your digital lifestyle.


