Introduction
Welcome to the world of PC fan speed control! Whether you are an avid gamer, a power user, or simply someone who wants a quieter and cooler PC, being able to change the fan speed on your computer can make a significant difference. The fan speed directly affects the cooling performance and noise levels of your PC, and finding the ideal balance is essential.
In this article, we will explore the reasons why you might want to change the fan speed on your PC, the importance of monitoring fan speeds, and various methods to effectively control them. From adjusting BIOS settings to utilizing fan control software and hardware fan controllers, we will discuss multiple options to tailor the fan speed to your specific needs.
Why is this important? Well, a PC that runs too hot can experience decreased performance and stability, while excessive noise from high fan speeds can be distracting and frustrating. By learning to control the fan speed, you can optimize the cooling performance of your PC, reduce noise levels, and potentially extend the lifespan of your components.
Before we dive into the different methods, it’s important to note that changing the fan speed requires some technical knowledge and careful consideration. You need to be aware of the potential risks involved and understand the impact that altering the fan speed may have on your system. However, with the right approach and precautions, you can effectively modify your PC’s fan speed to achieve the desired balance between performance, temperature, and noise.
Ready to take control of your PC’s fan speed? Let’s explore the various methods and considerations in detail, so you can make informed decisions and optimize your computing experience.
Reasons to Change Fan Speed on PC
There are several reasons why you might want to change the fan speed on your PC. Let’s explore the most common ones:
- Noise Reduction: One of the primary motivations for adjusting fan speeds is to reduce noise levels. High-speed fans can generate a significant amount of noise, which can be bothersome, especially in quiet environments. By lowering the fan speed, you can achieve a quieter computing experience without compromising on cooling efficiency.
- Cooling Efficiency: Another important reason to change fan speed is to enhance the cooling efficiency of your PC. Inadequate cooling can lead to high temperatures, which can shorten the lifespan of your components and impact their performance. By increasing the fan speed, you can improve the airflow and dissipate heat more effectively, keeping your system running at optimal temperatures.
- Customization: Changing the fan speed also allows for customization based on your specific needs or preferences. Whether you prioritize performance, silence, or a balance between the two, adjusting the fan speed gives you the flexibility to tailor your PC’s cooling to suit your requirements.
- Overclocking: When overclocking your PC, which involves pushing the performance limits of your components, it is crucial to have adequate cooling. By increasing the fan speed, you can provide better thermal management and ensure stability while pushing your hardware to its maximum potential.
- Energy Efficiency: Adjusting fan speeds can contribute to energy efficiency. By running your fans at lower speeds when the system is not under heavy load, you can conserve power and reduce energy consumption. This is particularly relevant for those conscious of their carbon footprint or seeking to lower their electricity bills.
Understanding these reasons can help you determine why changing fan speeds may be beneficial for your specific use case. Whether you prioritize noise reduction, cooling efficiency, customization, overclocking, or energy efficiency, having control over fan speeds empowers you to optimize your PC’s performance and experience.
Monitoring Fan Speed on PC
Before you can effectively control the fan speed on your PC, it’s important to monitor the current fan speeds. Monitoring allows you to assess the effectiveness of your current cooling setup and make informed decisions about adjusting fan speeds. Here are a few methods to monitor fan speeds:
- BIOS/UEFI: Many motherboards provide the option to monitor fan speeds directly through the BIOS (Basic Input/Output System) or UEFI (Unified Extensible Firmware Interface) settings. By accessing these settings during system startup, you can check the current fan speeds and get a baseline understanding of how your cooling system is operating.
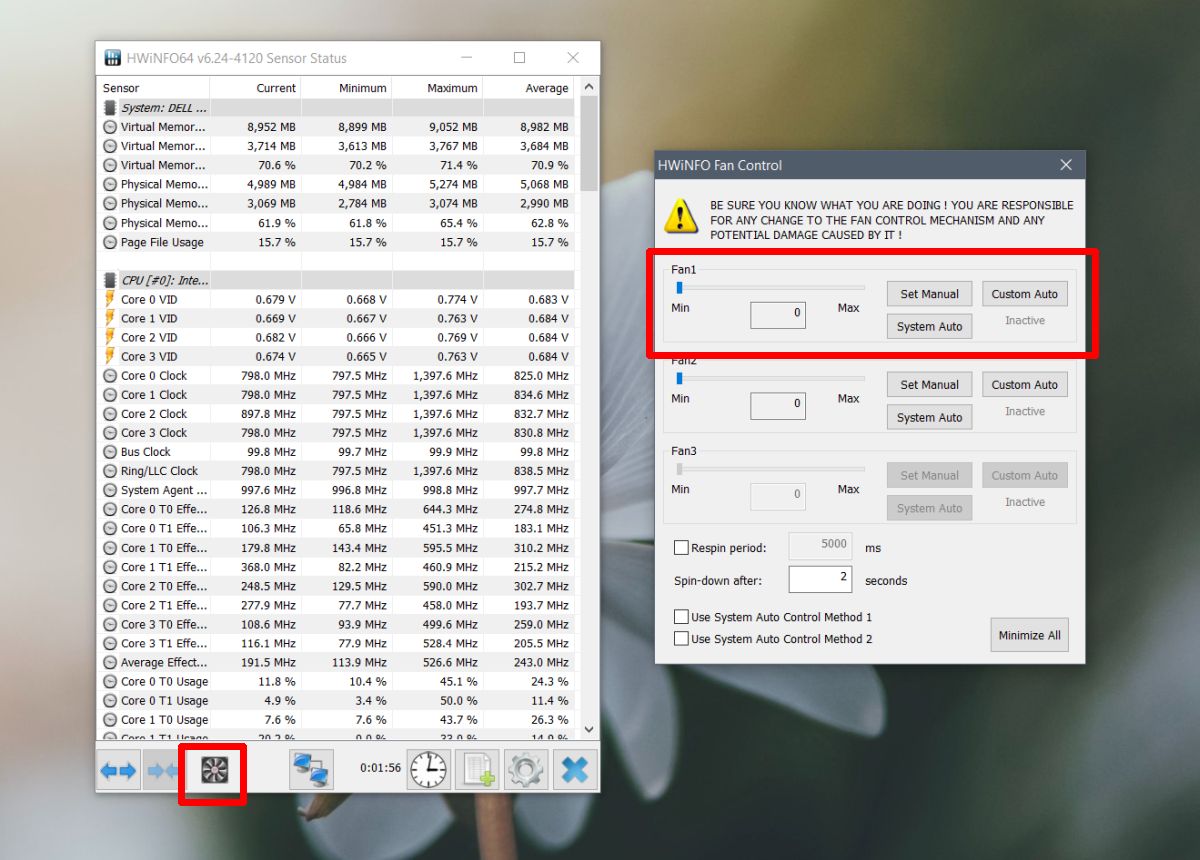
- System Monitoring Software: There are several software applications available that provide real-time monitoring of various hardware parameters, including fan speeds. Programs like HWiNFO, HWMonitor, and Open Hardware Monitor are popular choices for monitoring fan speeds and other system metrics. These applications often provide customizable alerts and displays, allowing you to keep an eye on your fan speeds while working or gaming.
- Motherboard Manufacturer Tools: Some motherboard manufacturers offer dedicated software utilities for monitoring and controlling fan speeds. These utilities are often specific to the brand and model of your motherboard, providing detailed information and control over fan speeds directly within the operating system. Check the manufacturer’s website for any available tools or utility downloads.
- Fan Speed Readings: Some computer cases come with built-in hardware or external devices that display real-time fan speed readings. These devices can be particularly handy if you prefer to have a physical visual representation of your fan speeds without relying on software applications.
By regularly monitoring your fan speeds, you can gain valuable insights into the cooling performance of your PC. This information allows you to identify any potential issues, determine if fan speed adjustments are necessary, and assess the impact of any changes you make to the fan speed settings.
Keep in mind that fan speed monitoring is essential when making adjustments, as it helps you ensure that the desired fan speeds are being achieved and maintained. Monitoring your fan speeds is an important step towards effectively controlling the cooling performance and noise levels of your PC.
Methods to Control Fan Speed on PC
Now that we understand the importance of controlling fan speed and have monitored our current fan speeds, let’s explore various methods to effectively control the fan speed on your PC:
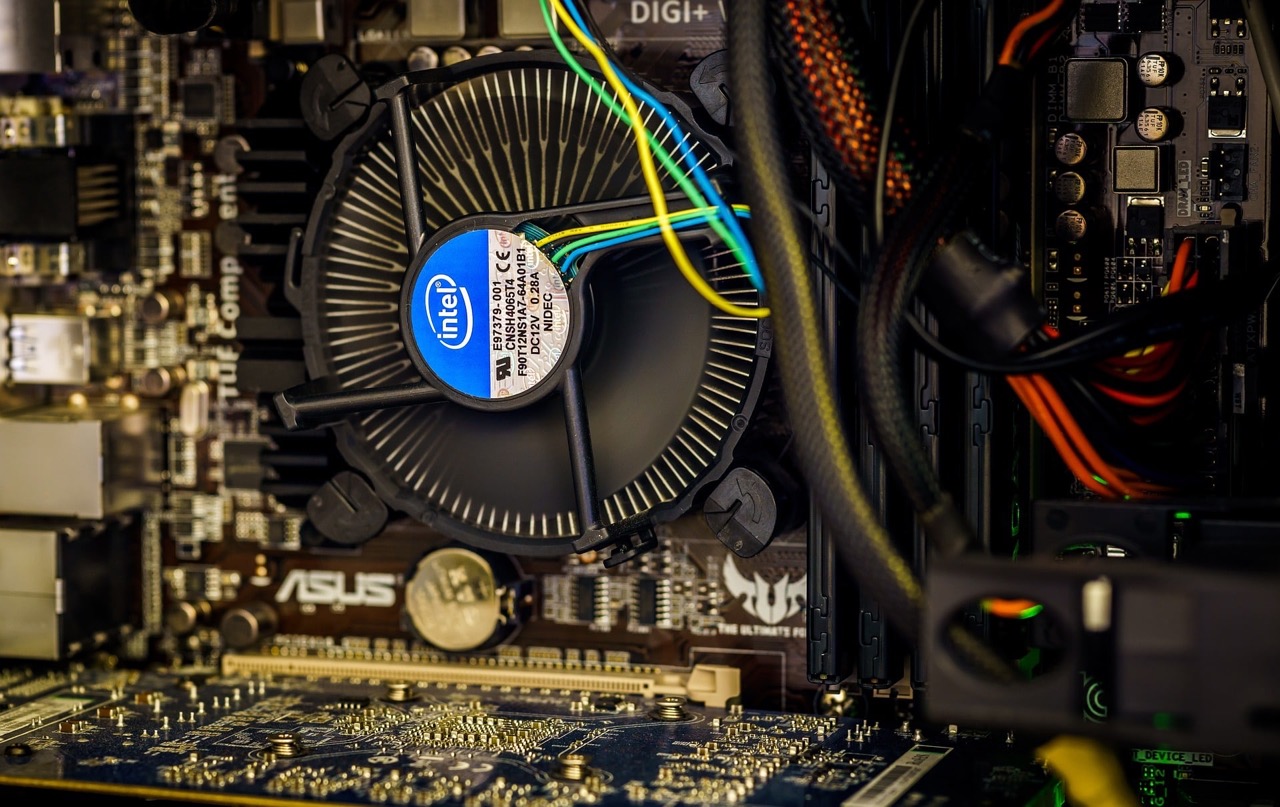
- BIOS Settings: The BIOS or UEFI settings on your motherboard offer a basic but reliable method to control fan speeds. Accessing the BIOS settings during system startup allows you to adjust fan speed curves, where you can define the fan behavior based on temperature thresholds. This method provides direct control over the fans but may have limited customization options depending on your motherboard manufacturer.
- Fan Control Software: There are numerous fan control software options available that provide more extensive control over the fan speed. These software applications, such as SpeedFan, allow you to monitor and adjust fan speeds based on temperature readings from various sensors in your system. They often offer additional features like fan profiles, RPM monitoring, and even the ability to create custom fan curves.
- Using SpeedFan: SpeedFan is a popular software tool specifically designed for controlling fan speeds in Windows. It allows you to manually adjust fan speeds or set up automatic fan control based on temperature readings. With SpeedFan, you can create custom fan curves to tailor the fan speed according to specific temperature ranges, providing a high level of customization and control over your cooling system.
- Creating Custom Fan Curves: Some motherboard manufacturers provide software utilities that allow you to define custom fan curves. These curves map fan speeds to specific temperature thresholds, giving you precise control over the fan speed response. By creating a custom fan curve, you can establish a balance between cooling performance and noise levels based on your preferences or specific requirements.
- Using Hardware Fan Controllers: Hardware fan controllers offer a more direct and physical method to control fan speeds. These devices usually connect directly to your motherboard or fan headers and allow you to adjust fan speeds manually using physical knobs or buttons. Fan controllers offer a hands-on approach to fan speed control and can be an excellent option for those who prefer tactile feedback.
Each of these methods offers different levels of control and customization over fan speeds. It’s essential to choose the method that best suits your needs and technical comfort level. Experimenting with different approaches will help you find the optimal fan speed settings to balance performance, temperature, and noise.
Remember to adjust fan speeds gradually and monitor the impact on system temperatures and stability. Making small incremental changes is recommended to avoid sudden and drastic fluctuations in fan speeds, which may impact cooling performance and potentially cause system instability.
By utilizing these methods to control fan speed, you can achieve improved cooling efficiency, reduced noise levels, and a more customized computing experience.
BIOS Settings
Accessing the BIOS (Basic Input/Output System) or UEFI (Unified Extensible Firmware Interface) settings on your motherboard provides an effective method to control fan speeds. While the options available may vary depending on your motherboard manufacturer and model, here are some general steps to adjust fan speed settings in the BIOS:
- Restart Your Computer: To access the BIOS settings, you’ll need to restart your computer and enter the BIOS during startup. The key to press may vary depending on your motherboard, but commonly used keys are Del, F2, or F10. Refer to your motherboard’s user manual or the manufacturer’s website for specific instructions.
- Enter the BIOS: Once you’re in the BIOS, navigate to the “Hardware Monitor,” “PC Health,” or similar section that provides access to fan speed controls. These options are usually found under the “Advanced” or “Settings” menu.
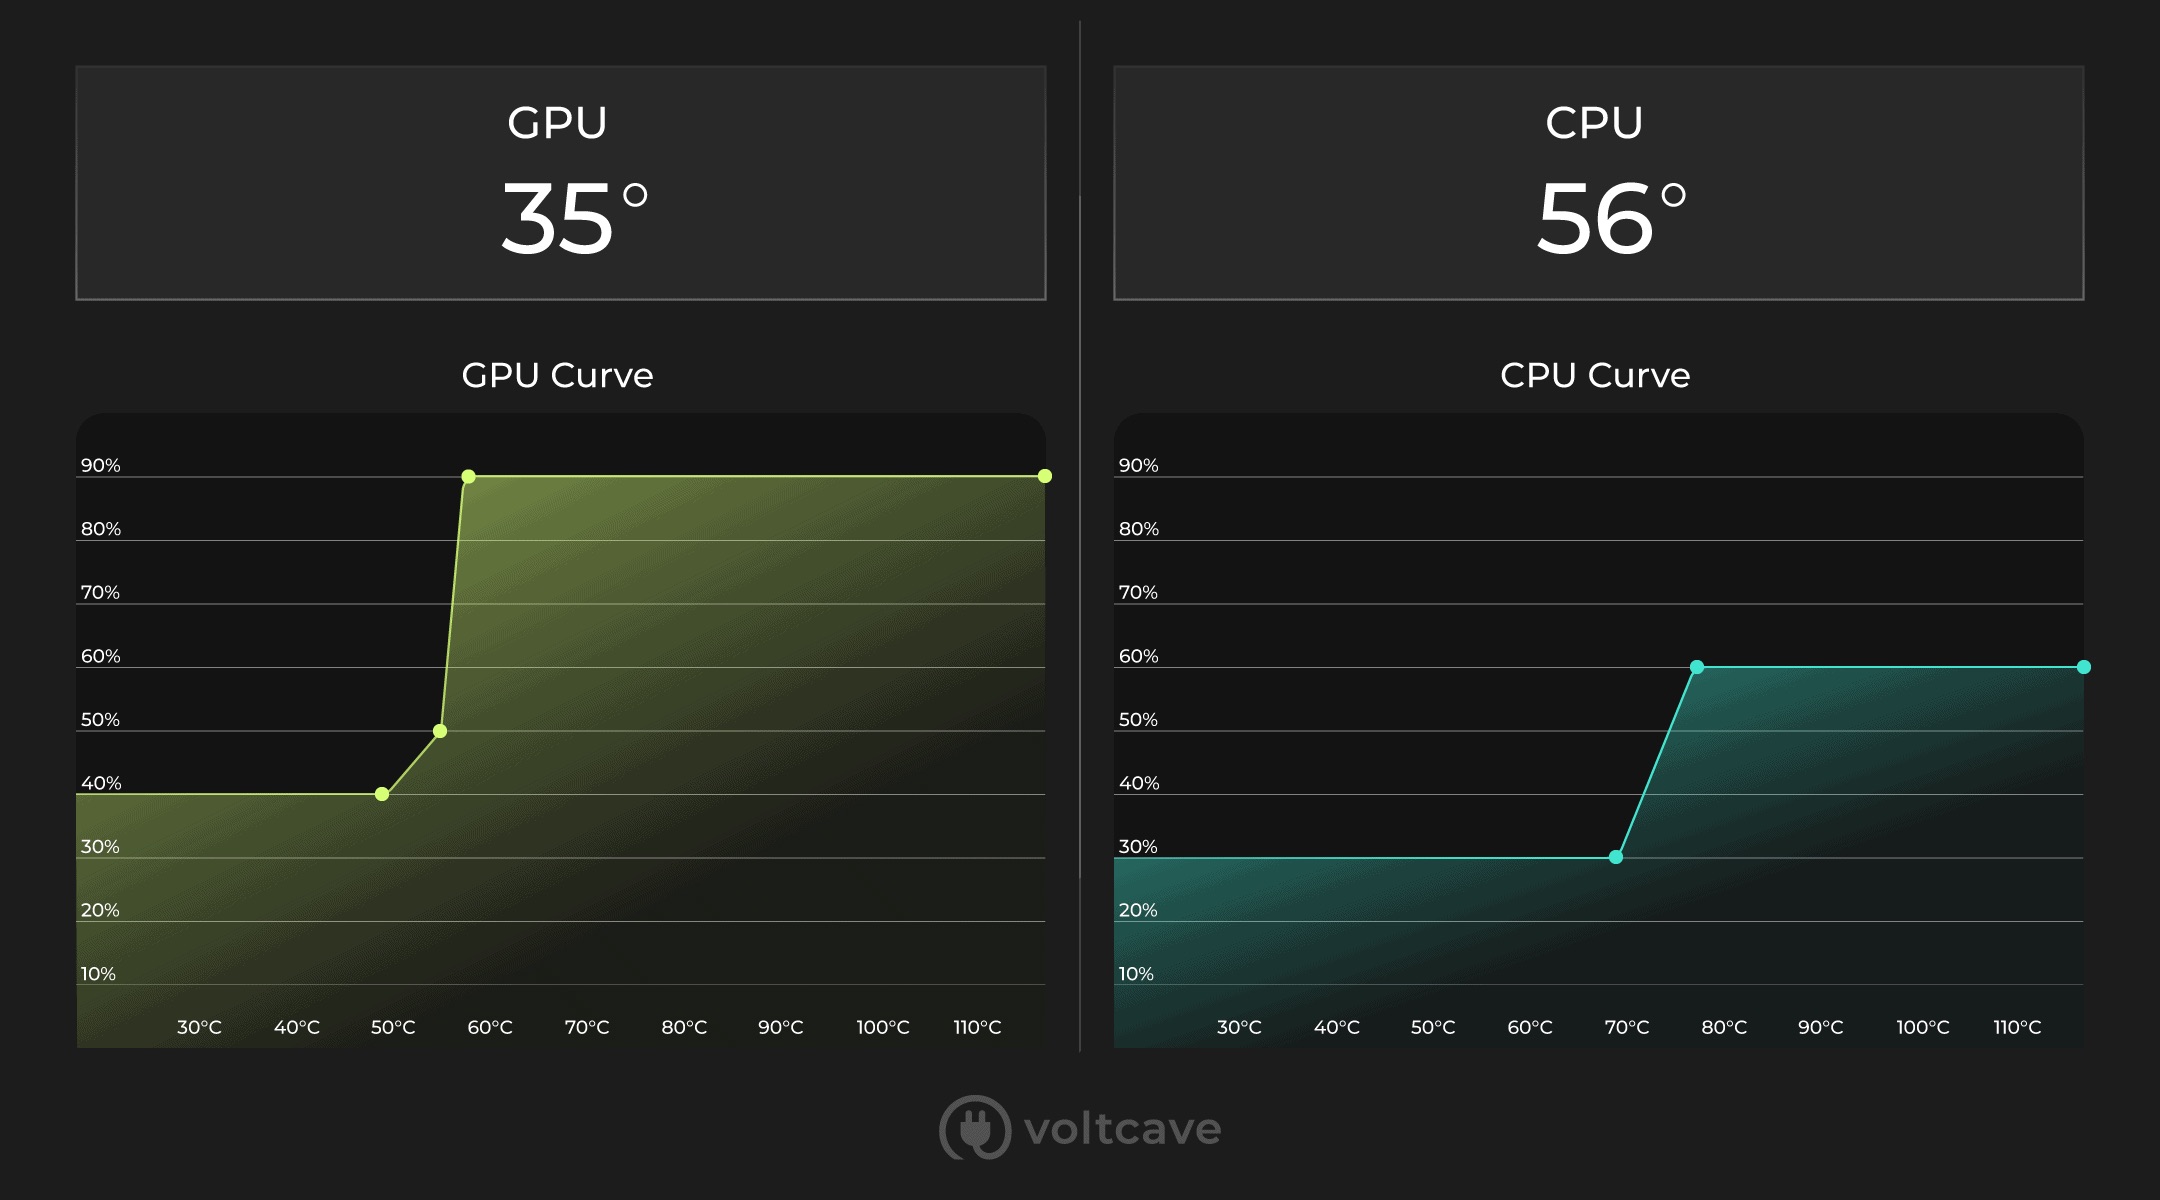
- Adjust the Fan Speed Curves: In the fan speed control section, you’ll see options to adjust the fan speed curves. Fan speed curves define how the fan speed responds to changes in temperature. You can typically make adjustments for each fan connected to your motherboard.
- Set Temperature Thresholds: Set temperature thresholds for each fan curve. These thresholds determine when the fan speed ramps up or down. For example, you can set the fan to run at a lower speed when the temperature is below a certain threshold and increase it gradually as the temperature rises.
- Save and Exit: After making your adjustments, save the changes and exit the BIOS. Your computer will reboot with the new fan speed settings in effect.
It’s important to note that the options available in the BIOS may be limited compared to dedicated fan control software. However, adjusting fan speeds through the BIOS provides a fundamental and reliable method for controlling fan speeds without relying on additional software.
Remember that the exact steps and options in the BIOS can vary depending on your motherboard’s manufacturer and model. It’s recommended to consult your motherboard’s user manual or visit the manufacturer’s website for specific instructions related to your particular setup.
Changing fan speed settings in the BIOS allows for direct control over fan speeds based on temperature thresholds. While it may not offer as much flexibility as software-based options, adjusting fan speeds through the BIOS provides a reliable and straightforward approach to achieve optimal cooling and noise levels for your PC.
Fan Control Software
Fan control software offers extensive control and customization over fan speeds. With these software applications, you can monitor and adjust fan speeds based on temperature readings from various sensors in your system. Let’s take a closer look at how fan control software can help you effectively control fan speeds:
1. Installation and Compatibility: Start by selecting a fan control software that is compatible with your operating system. Popular options like SpeedFan, Argus Monitor, and MSI Afterburner offer support for Windows-based systems. Download and install the software following the instructions provided by the software developer.
2. Opening and Configuring the Software: Launch the fan control software and explore its interface. Most software applications display real-time temperature readings, fan speed information, and other system metrics. Familiarize yourself with the various options and settings available.
3. Automatic Fan Control: Fan control software often provides the option for automatic fan control. This feature adjusts fan speeds dynamically based on temperature fluctuations. The software monitors the temperature values and adjusts the fan speeds accordingly, ensuring that the temperature remains within a specified range. Automatic control can provide a balance between cooling performance and noise levels without requiring manual intervention.
4. Manual Fan Control: Manual control allows you to directly adjust fan speeds using the software’s interface. You can typically adjust fan speeds either by percentage or using a slider. This level of control enables you to fine-tune fan speeds to meet your specific cooling requirements or noise preferences.
5. Creating Fan Profiles: Fan control software often allows you to create custom fan profiles. These profiles define specific temperature thresholds and corresponding fan speeds. By creating profiles, you can personalize the fan speed response to changes in temperature, ensuring optimal cooling performance for different scenarios. For example, you might create a profile for gaming sessions that ramps up the fan speed for enhanced cooling.
6. Scheduling Fan Speed Changes: Some fan control software also offer scheduling options. This allows you to set specific fan speed changes at certain times or under certain conditions. For instance, you can schedule a higher fan speed during intensive tasks or set a lower fan speed during idle periods to minimize noise output.
7. Monitoring and Alerts: Fan control software not only allows you to adjust fan speeds but also provides comprehensive monitoring capabilities. You can keep an eye on temperature readings, fan speeds, and other vital system metrics. Additionally, some software applications allow you to set alerts when certain temperature thresholds are exceeded, ensuring you stay informed about any potential issues.
Fan control software provides a powerful tool for fine-tuning and customizing your PC’s cooling performance. With the ability to monitor temperatures, adjust fan speeds manually or automatically, and create customized profiles, you can optimize cooling efficiency while maintaining an ideal balance between performance and noise levels.
Using SpeedFan
SpeedFan is a popular and versatile software tool specifically designed for controlling fan speeds in Windows-based systems. With its user-friendly interface and comprehensive control options, SpeedFan provides an effective way to manage and adjust fan speeds. Here are the key steps to using SpeedFan:
- Installation and Setup: Start by downloading and installing SpeedFan from the official website. Once installed, launch the application to begin the setup process. SpeedFan will scan your system for compatible sensors and fans.
- Temperature and Fan Speed Monitoring: SpeedFan displays real-time temperature readings and fan speed information on its main interface. You can keep an eye on the temperatures of various components, such as the CPU, GPU, and hard drives, as well as monitor the current fan speeds. This allows you to assess the effectiveness of your cooling system and identify any potential issues.
- Automatic Fan Speed Control: SpeedFan offers an automatic fan speed control feature. By enabling this option, SpeedFan will adjust the fan speeds dynamically based on temperature changes. The software monitors the temperature values and automatically adjusts the fan speeds to maintain the desired temperature range. Automatic control ensures efficient cooling without the need for manual intervention.
- Manual Fan Speed Control: SpeedFan also allows for manual control of fan speeds. By selecting the desired fan, you can adjust its speed using the software’s interface. Fan speeds can be adjusted by percentage or using a sliding scale. This level of control enables you to customize the cooling performance and noise levels based on your preferences or specific requirements.
- Creating Custom Fan Curves: SpeedFan enables you to create custom fan curves, giving you precise control over the fan speed response to changes in temperature. By defining the fan speed at various temperature thresholds, you can tailor the fan’s behavior according to your specific cooling needs. This level of customization allows for optimal cooling efficiency and noise reduction.
- Setting Automatic Fan Speed Profiles: SpeedFan allows you to set up automatic fan speed profiles. These profiles define specific fan speeds for different temperature ranges. For example, you can create a profile that increases the fan speed when the CPU temperature exceeds a certain threshold. By using profiles, you can automate the fan speed adjustment process based on predefined temperature limits.
- Creating Log Files and Alerts: SpeedFan provides the option to create log files of temperature and fan speed data. This allows you to keep a record of system performance over time, aiding in troubleshooting and analysis. Additionally, you can set up alerts in SpeedFan to notify you when specific temperature thresholds are reached, ensuring prompt action if any critical temperature issues arise.
SpeedFan offers a wide range of control and customization options, making it a powerful tool for managing fan speeds and optimizing cooling performance. Whether you prefer automatic control based on temperature readings or manual adjustment using custom fan curves, SpeedFan provides the flexibility and functionality to achieve the desired balance between cooling efficiency and noise levels.
Creating Custom Fan Curves
Creating custom fan curves allows you to have precise control over fan speeds in response to changes in temperature. This level of customization enables you to tailor the cooling performance of your PC to meet your specific needs. Here’s how you can create custom fan curves:
- Use Fan Control Software: To create custom fan curves, you’ll need to utilize fan control software that offers this functionality. Many software applications, such as SpeedFan, offer the ability to define and configure custom fan curves.
- Access Fan Curve Settings: Launch the fan control software and navigate to the fan curve settings or similar options. Here, you’ll find a graphical representation of the fan curve, typically plotting fan speeds (in percentage or RPM) against temperature.
- Define Temperature Ranges: Identify the temperature ranges for which you want to set specific fan speeds. For example, you might have lower fan speeds when the temperature is below a certain threshold and higher speeds as the temperature increases. Divide the temperature range into sections where you want different fan speeds to apply.
- Set Fan Speeds: Indicate the desired fan speeds for each temperature section. This can be done by adjusting the points on the graph or by inputting specific fan speeds manually. You can experiment with different speed settings to find the optimal balance between cooling efficiency and noise levels.
- Save and Apply: Once you have defined and adjusted the custom fan curve to your satisfaction, save the settings and apply them. The fan control software will now use the custom fan curve to adjust the fan speeds based on temperature readings.
- Monitor and Adjust: After applying the custom fan curve, closely monitor the temperatures and fan speeds to ensure they align with your expectations. You may need to make further adjustments to the curve or fan speed settings based on your system’s cooling performance and noise levels.
Creating custom fan curves gives you the flexibility to optimize the cooling performance of your PC based on your specific requirements. It allows for a fine-tuned approach, ensuring that the fan speeds respond accurately to changes in temperature while maintaining a balance between effective cooling and noise reduction.
Experimenting with different custom fan curves can help you find the ideal settings for your system. It’s important to consider factors such as the cooling capacity of your components, the ambient temperature in your environment, and the noise tolerance level you desire. With time and adjustments, you can create custom fan curves that provide optimal cooling performance while keeping noise levels in check.
Using Hardware Fan Controllers
Hardware fan controllers offer a physical and hands-on approach to controlling fan speeds in your PC. These devices provide a convenient way to adjust fan speeds manually, offering direct control without the need for software or BIOS settings. Here’s how you can effectively use hardware fan controllers:
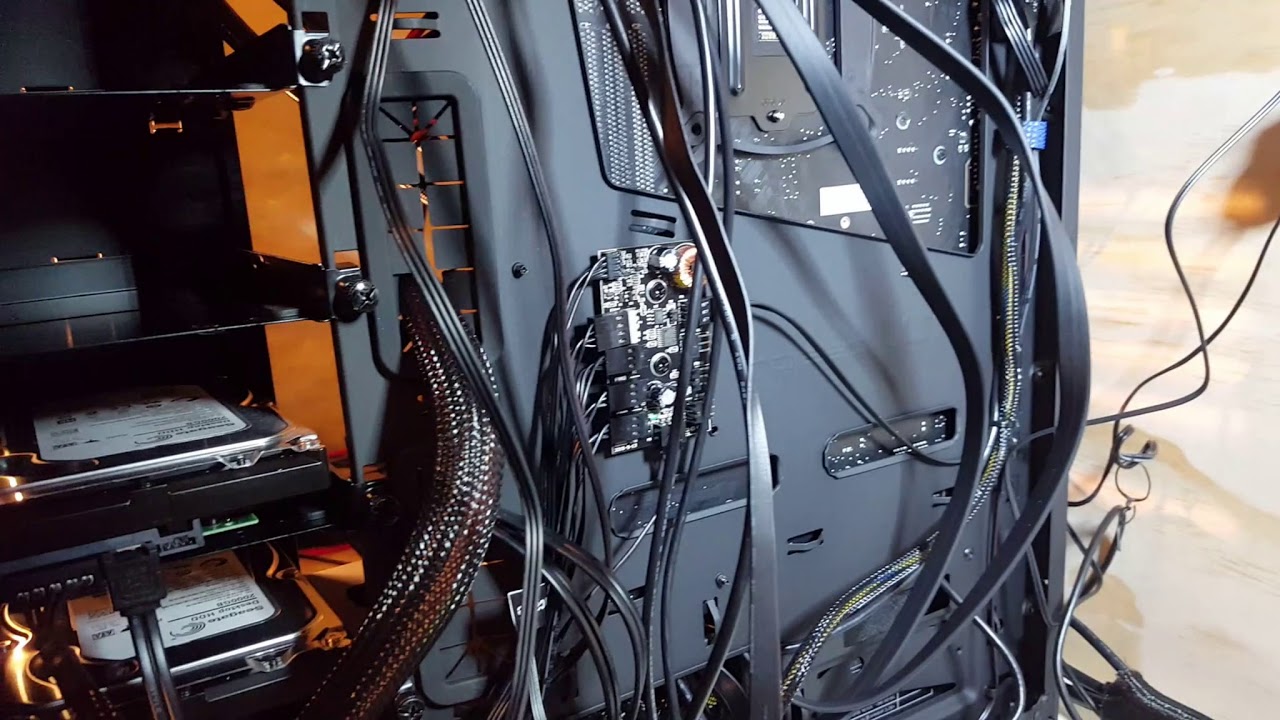
- Select a Fan Controller: Start by identifying a hardware fan controller that suits your needs and is compatible with your PC. Fan controllers come in various forms, such as front panel controllers, expansion card controllers, or external controllers connected via USB. Choose one that matches your system’s requirements and provides the desired number of fan control channels.
- Install the Fan Controller: Install the hardware fan controller into your PC according to the manufacturer’s instructions. This may involve connecting it to fan headers on your motherboard or power supply using the provided cables, or installing it in an available expansion slot.
- Connect the Fans: Connect the fans you want to control to the fan controller. Depending on the type of controller, you may need to use specific types of connectors or adapters to ensure compatibility. Refer to the fan controller’s documentation for guidance on proper fan connections.
- Adjust Fan Speeds: Once the fan controller is properly installed and the fans are connected, you can manually adjust the fan speeds using the controls on the hardware controller. This typically involves turning knobs or pressing buttons to increase or decrease the fan speeds. Observe the impact on cooling and noise levels as you make adjustments.
- Monitor Fan Speeds: Some hardware fan controllers provide visual indicators or LCD displays that show real-time fan speed information. Monitor these displays to ensure that the desired fan speeds are being achieved. You can also use fan monitoring software or BIOS settings to cross-verify the fan speeds.
- Fine-tune Fan Speeds: Experiment with different fan speed settings to find the optimal balance between cooling performance and noise levels. Fine-tuning the fan speeds allows you to achieve a cooling setup that meets your specific requirements, taking into consideration factors such as the ambient temperature, workload, and noise tolerance.
Using hardware fan controllers gives you direct control over fan speeds, allowing you to adjust them manually according to your preferences and system requirements. One of the key advantages of hardware fan controllers is that they offer a physical interface, making it easy to make real-time adjustments without the need for software or BIOS configurations.
Keep in mind that some hardware fan controllers may have limitations, such as a limited number of fan control channels or a lack of advanced features like automatic fan speed adjustment based on temperature. Choose a fan controller that aligns with your needs and consider these factors before making a purchase.
By using hardware fan controllers, you can have a tactile experience in controlling fan speeds, ensuring optimal cooling performance for your PC while maintaining noise levels that suit your preferences.
Factors to Consider Before Changing Fan Speed
Before you make any adjustments to the fan speed on your PC, it’s important to consider several factors to ensure that you make informed decisions. These factors will help you strike a balance between cooling performance, noise levels, and system stability. Here are some key factors to consider:
- Cooling Requirements: Evaluate the cooling demands of your PC. Different components, such as the CPU and GPU, may have varying cooling requirements. Consider the thermal design of your system, including the number and type of cooling solutions, to determine whether adjusting fan speeds is necessary.
- Temperature Monitoring: Use temperature monitoring software or built-in monitoring features to track the temperatures of critical components. This gives you valuable insights into the effectiveness of your current cooling setup and helps you identify any potential overheating issues that might require fan speed adjustments.
- Noise Tolerance: Assess your noise tolerance level. If you value a quiet computing experience, reducing fan speeds can help achieve a quieter operation. However, be aware that lowering fan speeds excessively may result in reduced cooling performance and potentially higher component temperatures.
- System Stability: Understand that altering fan speeds can impact system stability, especially if you overclock your components or push them to their limits. Higher fan speeds can aid in maintaining stable operating temperatures, but make sure your system can handle the increased heat generated by overclocking or other demanding tasks.
- Ventilation and Airflow: Consider the airflow and ventilation within your PC case. Ensure that the fans are properly positioned to provide efficient cooling to critical components. Adjusting fan speeds should complement the airflow design, helping to maintain a balanced and optimized cooling system.
- Hardware Compatibility: Check the compatibility of the fan control methods you plan to use. Some motherboard models may have limitations on fan control options in the BIOS. Additionally, not all fans are compatible with certain fan control software or hardware controllers. Verify compatibility to ensure optimal functionality.
- Manufacturer Recommendations: Review the recommendations and guidelines provided by the manufacturers of your PC components, including the CPU and GPU. They often provide specifications regarding temperature thresholds and fan performance that can help guide your decisions regarding fan speed adjustments.
By carefully considering these factors, you can determine the most appropriate approach to changing fan speed on your PC. It’s essential to strike a balance between cooling efficiency, noise levels, and system stability to ensure optimal performance and longevity of your components.
Precautions and Potential Risks
While adjusting fan speeds can yield several benefits, it is essential to take precautions and be aware of potential risks to ensure the safety and longevity of your PC components. Here are some important precautions to consider:
- System Stability: Changing fan speeds can impact the stability of your system, particularly when overclocking or pushing your components to their limits. Higher fan speeds can help maintain stable temperatures, but be cautious and monitor the impact on system stability during intense workloads or demanding tasks.
- Heat Dissipation: Having lower fan speeds might reduce noise, but it can also result in inadequate heat dissipation. Be sure to keep an eye on temperature readings and ensure that your system is adequately cooled. Components such as the CPU and GPU should operate within safe temperature ranges to prevent damage or decreased performance.
- Fan Compatibility: Not all fans are compatible with software-based fan control or hardware controllers. Check the compatibility of your fans with the selected control method to ensure proper functionality. Incompatible fans may not respond as expected or could potentially damage the fan controller or motherboard.
- Dust Accumulation: Lowering fan speeds can reduce airflow, potentially leading to increased dust accumulation inside your PC. Regular cleaning and maintenance are crucial to maintain optimal cooling performance and prevent overheating or component damage. Ensure proper dust filtration and perform routine cleanings to keep your system running efficiently.
- Warranty Considerations: Modifying fan speeds may void warranties provided by the component manufacturers. Check the warranty terms and conditions for your components before making any changes or adjustments. If in doubt, consult with the manufacturer to understand the impact on warranty coverage.
- Proper Ventilation: Ensure that your PC case has adequate ventilation and airflow. Pay attention to the positioning of fans and the overall design of your cooling system. Improper ventilation can lead to hotspots and hinder effective heat dissipation, which could potentially cause component overheating and reduced lifespan.
- Gradual Adjustments: When making changes to fan speeds, it is generally recommended to make gradual adjustments rather than sudden and drastic changes. This allows you to monitor the impact on temperatures, noise levels, and system stability. Gradual adjustments help avoid sudden temperature spikes or extreme fan speed fluctuations.
By taking these precautions and being mindful of potential risks, you can navigate the process of adjusting fan speeds more safely. It’s important to find the right balance between cooling performance, noise levels, and system stability, ensuring the longevity and reliable operation of your PC components.
Conclusion
Controlling fan speed on your PC is crucial for optimizing cooling performance, reducing noise levels, and maintaining system stability. By adjusting fan speeds, you can strike the right balance between efficient cooling and a quieter computing experience that aligns with your specific needs and preferences.
In this article, we explored various methods to control fan speed, including adjusting settings in the BIOS, utilizing fan control software, creating custom fan curves, and using hardware fan controllers. Each method offers different levels of control and customization, allowing you to find the approach that suits your technical comfort and desired outcomes.
Before changing fan speed, there are essential factors to consider, such as cooling requirements, noise tolerance, system stability, and hardware compatibility. By carefully evaluating these factors, you can make informed decisions to achieve optimal cooling performance without compromising the integrity of your PC components.
It is important to take precautions when adjusting fan speeds to ensure safe operation and prevent any potential risks. Monitoring temperature readings, maintaining proper ventilation, and considering the compatibility of fans and control methods are key steps to mitigate any adverse effects and maintain the overall health of your system.
Remember, making small and gradual adjustments to fan speeds is recommended to monitor the impact on temperatures and system stability effectively. This approach allows you to fine-tune fan speeds and customize your PC’s cooling performance without causing abrupt changes that could jeopardize the stability of your system.
By following the guidelines and precautions outlined in this article, you can effectively control fan speeds, optimize cooling efficiency, reduce noise levels, and ensure the overall longevity and reliable operation of your PC components.