Introduction
Welcome to the fascinating world of PC case fans! These small but mighty components play a crucial role in maintaining optimum temperatures and airflow within your computer. Whether you’re a gaming enthusiast, a professional content creator, or simply a computer enthusiast, keeping your PC cool and quiet is essential for its performance and longevity.
Controlling your PC case fans allows you to customize the cooling system based on your specific needs and preferences. By adjusting fan speeds, you can achieve a balance between noise levels and cooling efficiency. This not only enhances your overall computing experience but also helps to extend the lifespan of your hardware.
In this article, we will explore the various methods and considerations for fan control in your PC case. Whether you’re a tech-savvy enthusiast or new to the world of computer internals, this guide will provide you with the information you need to optimize your fan setup and create a quieter and more efficient computing environment.
Before we dive into the details, it’s important to note that each computer setup is unique, and the methods for fan control may vary. However, by understanding the different types of fans and considering the factors involved, you’ll be well-equipped to make informed decisions about controlling your PC case fans.
So, let’s get started on this journey to explore the ins and outs of PC case fan control, and discover the best strategies to keep your system running cool, quiet, and efficiently.
Why Control Your PC Case Fans?
Controlling your PC case fans is essential for several reasons. Let’s take a closer look at why it’s important to have control over your fan speeds:
- Temperature Management: Effective fan control allows you to manage the temperature inside your PC case. By adjusting fan speeds, you can prevent overheating and ensure that critical components like the CPU and GPU stay within safe operating temperatures.
- Noise Reduction: One common complaint among computer users is the noise generated by fans running at high speeds. By controlling your fans, you can strike a balance between cooling performance and noise levels. By reducing fan speeds when maximum cooling isn’t required, you can enjoy a quieter computing experience.
- Hardware Longevity: Excessive heat can significantly impact the lifespan and performance of your computer’s components. By properly controlling your fans, you can prevent unnecessary wear and tear on your hardware, extending its lifespan and ensuring optimal performance.
- Customization and Optimization: Not all computer setups are the same, and each user may have specific requirements for their cooling system. By controlling your PC case fans, you can tailor the airflow and cooling solution to your specific needs, optimizing the performance of your system.
- Energy Efficiency: Running your fans at maximum speed all the time can consume excess power and result in higher electricity bills. By controlling and adjusting fan speeds based on workload and temperature conditions, you can save energy and reduce unnecessary power consumption.
By now, you can see the significant benefits of controlling your PC case fans. From managing temperatures and reducing noise levels to prolonging hardware lifespan and optimizing your system’s performance, fan control is a must for any computer enthusiast or professional.
Types of PC Case Fans
PC case fans come in various types, each offering unique features and benefits. Understanding the different types can help you make informed decisions when it comes to controlling your PC case fans. Let’s explore the most common types:
- Airflow Fans: These fans are designed to move a significant volume of air through the system. They typically have larger blades and generate high airflow, making them ideal for exhaust or intake purposes.
- Static Pressure Fans: Static pressure fans are designed to help overcome resistance or obstruction in airflow, such as radiator fins or dense heatsinks. They are optimized for delivering concentrated airflow in high-pressure situations.
- Noise-optimized Fans: These fans are engineered for quiet operation, often featuring specialized fan blade designs, rubber padding, and advanced motor technologies to minimize noise levels. They are perfect for those who prioritize a silent computing environment.
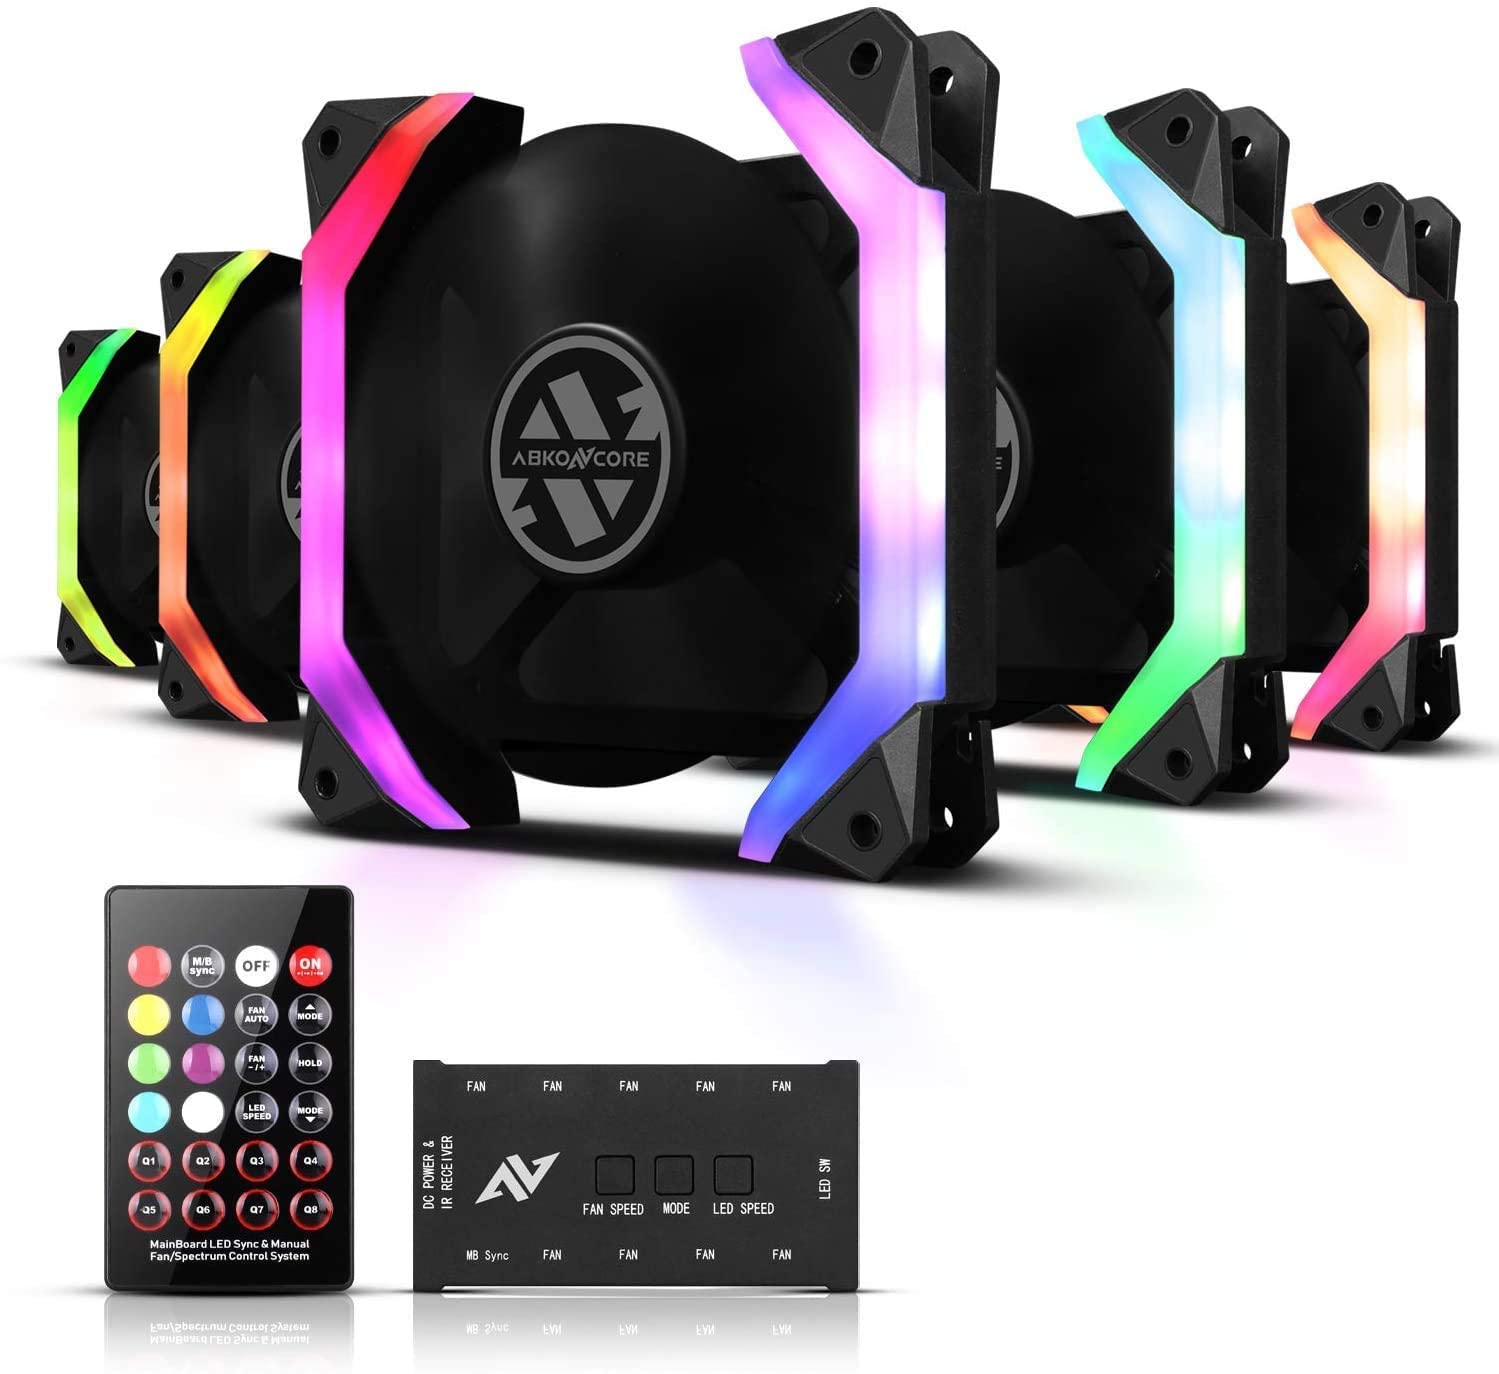
- RGB Fans: RGB (Red, Green, Blue) fans come with additional lighting features, allowing you to add aesthetics to your PC case. These fans often come with software or controllers to customize the lighting effects and colors.
- High-Performance Fans: High-performance fans are designed to deliver maximum airflow and cooling capacity, often at the cost of higher noise levels. These fans are preferred by gamers and overclockers seeking the highest cooling performance.
It’s important to know the specific fan requirements of your PC case and components when choosing the right type of fans. Consider factors such as noise preferences, cooling needs, and available space in your case when deciding on the types of fans to use.
Additionally, keep in mind that PC case fans typically come in different sizes, with 120mm and 140mm being the most common. Make sure to check the compatibility of your case and ensure that the fan mounts align with the chosen fan size.
Now that you have an understanding of the types of PC case fans available, you can select the ones that best suit your needs and begin controlling them for optimal cooling and performance.
Factors to Consider Before Controlling Your PC Case Fans
Before you start controlling your PC case fans, there are several important factors to consider. These factors will help you make informed decisions and ensure that you achieve the desired balance between cooling performance and noise levels. Let’s take a closer look at the key considerations:
- System Temperature: Monitor the temperature of your CPU and GPU under various workloads. This will help you determine the cooling requirements of your system and identify any potential thermal issues that need to be addressed.
- Airflow and Case Design: Understand the airflow dynamics in your PC case and consider the overall design. Evaluate the number and placement of fans, as well as any obstructions that might affect airflow, such as cables or components that block air intake or exhaust vents.
- Noise Tolerance: Determine your tolerance for fan noise. Some users prioritize a silent computing environment, while others may be more tolerant of fan noise in exchange for better cooling performance.
- Component Compatibility: Ensure that your components, such as the motherboard and fans, support the methods of fan control you plan to use. Compatibility issues can arise if the connectors or control methods don’t match.
- Power Supply: Consider the power supply capacity and connectors available for your fans. Different types of control methods require different power connections, so ensure that you have the necessary infrastructure in place.
- Control Flexibility: Assess your level of control flexibility and customization preferences. Some control methods provide more granular control over fan speeds and profiles, while others offer simpler, pre-defined options.
By considering these factors before controlling your PC case fans, you can make informed decisions that align with your specific needs and preferences. This will help you achieve optimal cooling performance while maintaining an acceptable level of noise in your computing environment.
With a clear understanding of the factors involved, you’re now ready to explore the various methods of controlling your PC case fans. Let’s dive into the different options available to you!
Methods to Control Your PC Case Fans
Controlling your PC case fans can be done using various methods, each offering different levels of flexibility and customization. Let’s explore some of the most common methods:
- BIOS Fan Control: Many motherboards provide built-in fan control options within the BIOS settings. This method allows you to set fan curves or specific RPM values based on temperature thresholds. Accessing the BIOS settings and navigating to the fan control section will allow you to configure these settings.
- Manual Fan Control: Some PC cases and fan models offer manual control options, usually in the form of a physical fan controller. These controllers allow you to adjust fan speeds manually by turning knobs or pressing buttons. They provide real-time control over the fans’ performance but may lack advanced features found in other methods.
- Fan Controller Hub: A fan controller hub is a hardware device that connects to your motherboard and manages multiple fan inputs and outputs. It offers more advanced control options, such as setting individual fan speeds, creating custom fan profiles, and monitoring fan performance. Fan controller hubs are typically controlled through dedicated software or directly through the hub itself.
- PWM Fan Control: PWM (Pulse Width Modulation) fan control is a method that utilizes the 4-pin PWM connectors on compatible fans and motherboards. PWM allows for precise control of fan speeds by adjusting the duty cycle of the electrical signal to the fan. This method offers excellent control granularity and is commonly supported by modern motherboards.
- Software Fan Control: Software solutions, such as third-party applications, can provide comprehensive control over your PC case fans. These applications often come with intuitive user interfaces, allowing you to create custom fan profiles, adjust speeds, and monitor temperatures. Examples include SpeedFan, CAM, and MSI Afterburner.
Before implementing any of these methods, ensure compatibility with your hardware and software. Check the documentation of your motherboard, fans, and any additional control devices for specific instructions and requirements. Additionally, consider the level of control, ease of use, and customization options offered by each method to choose the one that suits your needs best.
Remember, fan control is an ongoing process that may require tweaking and adjustments over time. Monitor your system temperatures, noise levels, and overall performance to find the right balance that maximizes cooling efficiency while maintaining a comfortable computing experience.
Now that you have an overview of the different control methods available, you can explore and experiment with the options that best suit your preferences and hardware.
BIOS Fan Control
One of the most common methods for controlling PC case fans is through the BIOS (Basic Input/Output System) settings. Many motherboards offer built-in fan control options that allow you to configure fan speeds based on temperature thresholds. Here’s how you can use BIOS fan control:
- Access the BIOS: Restart your computer and enter the BIOS by pressing a specific key during the boot process. The key to access the BIOS varies depending on the motherboard manufacturer (common keys include Del, F2, or F10).
- Navigate to the Fan Control Section: Once you’re in the BIOS, navigate to the section related to fan control. The location may vary depending on the BIOS version and motherboard model. Look for keywords like “Fan Control” or “Hardware Monitor.”
- Configure Fan Curves or RPM Values: Depending on your motherboard’s BIOS, you’ll have options to configure fan curves or specify the desired RPM values for different temperature levels. Fan curves allow you to set a gradual increase or decrease in fan speed based on temperature changes. RPM values, on the other hand, let you set specific fan speeds for specific temperature thresholds.
- Save and Exit: Once you’ve made the desired changes, save the settings and exit the BIOS. Your computer will reboot with the new fan control settings in effect.
- Monitor and Fine-Tune: After implementing the BIOS fan control, monitor your system temperatures and fan speeds to ensure optimal cooling performance. If necessary, make adjustments to the fan curves or RPM values to achieve the desired balance between cooling efficiency and noise levels.
Using BIOS fan control offers a basic yet effective way to control your PC case fans. However, the level of customization and control options may vary depending on your motherboard’s BIOS. Additionally, some BIOS versions may lack advanced features like individual fan control or real-time monitoring of fan performance.
Before making any changes in the BIOS, refer to your motherboard’s documentation or consult the manufacturer’s website for specific instructions and compatibility information. It’s also worth noting that not all motherboards support fan control through the BIOS. In such cases, alternative methods like software-based control or dedicated fan controller hubs may be necessary.
Now that you have an understanding of BIOS fan control, you can explore this method to adjust your fan speeds and optimize the cooling performance of your PC case.
Manual Fan Control
If you prefer a more hands-on approach to fan control, manual fan control is a viable option. Some PC cases and fan models offer manual control options through physical fan controllers. Here’s how you can manually control your PC case fans:
- Identify a Fan Controller: Check if your PC case or fan model includes a built-in fan controller or if there are separate fan controller devices available for purchase. These controllers often come with knobs or buttons that allow you to adjust fan speeds.
- Connect Fans to the Controller: Connect your case fans or individual fans to the fan controller using the provided cables or connectors. Ensure that the connections are secure and aligned correctly with the respective fan ports on the controller.
- Adjust Fan Speeds: Once your fans are connected to the controller, you can manually adjust their speeds by turning the knobs or pressing the buttons on the controller. Clockwise rotation usually increases fan speed, while counterclockwise rotation decreases it.
- Monitor and Fine-Tune: After adjusting the fan speeds, monitor your system temperatures and overall performance to ensure that the cooling is adequate. If necessary, make further adjustments to the fan speeds to strike a balance between cooling efficiency and noise levels.
Manual fan control provides real-time control over your PC case fans, allowing you to adjust their speeds according to your specific requirements. It’s important to note that manual control lacks the automated intelligence of other control methods.
While manual control offers simplicity and immediate adjustments, it may not be as precise or customizable as other methods. Additionally, manual control doesn’t provide advanced features like temperature-based fan speed adjustments or software monitoring.
Before utilizing manual fan control, ensure that your PC case or fan model supports this feature. Some cases may come with built-in controllers, while others may require the purchase of separate fan controller devices. Consult your case or fan manufacturer’s documentation for specific instructions and compatibility information.
Now that you are familiar with manual fan control, you can explore this method to have direct control over your PC case fans and fine-tune their speeds according to your preferences and requirements.
Fan Controller Hub
If you’re looking for a more advanced and versatile method to control your PC case fans, a fan controller hub can be an excellent choice. A fan controller hub is a hardware device that allows you to manage multiple fans simultaneously, offering increased control flexibility and customization options. Here’s how you can utilize a fan controller hub:
- Choose a Fan Controller Hub: Select a fan controller hub that suits your needs and is compatible with your PC case and fans. Fan controller hubs come in various designs and offer different features, such as individual fan speed control, customizable profiles, and software integration.
- Install the Fan Controller Hub: Follow the manufacturer’s instructions to install the fan controller hub in your PC case. This usually involves connecting the hub to a power source, typically your power supply unit (PSU), and wiring the fans to the hub using the provided cables or connectors.
- Connect the Hub to Your Motherboard: Depending on the fan controller hub, you may need to connect it to your motherboard using a USB header or other supported interface. This allows the hub to communicate with your computer and enables control and monitoring functionalities.
- Software Configuration: Install any necessary software provided by the fan controller hub manufacturer. This software allows you to customize fan profiles, adjust speeds, and monitor fan performance. Follow the software instructions to configure and fine-tune the fan control settings according to your preferences.
- Profile Creation: Utilize the software to create different profiles or presets for your fans. These profiles can be based on temperature thresholds, manual adjustments, or specific usage scenarios. Experiment with different profiles to find the optimal balance between cooling performance and noise levels.
- Monitor and Adjust: After applying the fan control settings, monitor your system temperatures and overall performance to ensure that the cooling is sufficient. If necessary, make adjustments to the fan profiles to achieve the desired balance of cooling efficiency and noise levels.
Fan controller hubs offer greater control precision and flexibility compared to basic methods like manual control. With the ability to control multiple fans simultaneously and customize profiles based on various factors, they provide advanced fan control capabilities.
Remember to check the compatibility of the fan controller hub with your PC case and fans before purchasing. Additionally, consult the manufacturer’s documentation for specific installation and configuration instructions, as well as compatibility information with your motherboard and software.
Now that you have an understanding of fan controller hubs, you can explore this method to gain advanced fan control capabilities and fine-tune your PC case fans for optimal cooling performance.
PWM Fan Control
PWM (Pulse Width Modulation) fan control is a method that utilizes the 4-pin PWM connectors found on compatible fans and motherboards. PWM provides precise and efficient control over fan speeds by adjusting the duty cycle of the electrical signal sent to the fan. Here’s how you can implement PWM fan control:
- Check Compatibility: Ensure that both your motherboard and fans support PWM control. Most modern motherboards and fans offer PWM compatibility, but it’s essential to double-check the specifications of your hardware.
- Connect the Fans: Plug the PWM fans into the PWM headers on your motherboard. These headers are typically labeled with the abbreviation “PWM” and found near the fan connectors. Make sure the connections are secure.
- Access the BIOS: Restart your computer and enter the BIOS setup by pressing the designated key during the boot process. The specific key to access the BIOS varies among motherboard manufacturers (common keys include Del, F2, or F10).
- Navigate to Fan Control: In the BIOS, locate the fan control settings. The exact location may differ depending on your motherboard model and BIOS version. Look for options related to PWM fan control or fan speed management.
- Configure PWM Settings: Adjust the PWM settings according to your preferences and requirements. This typically includes setting fan curves, specifying target temperatures, and assigning fan profiles for various workload conditions.
- Save and Exit: After making the necessary changes, save the BIOS settings and exit. Your computer will restart with the new PWM fan control settings applied.
- Monitor and Adjust: Monitor your system temperatures and fan speeds using monitoring software or BIOS utilities to ensure that the cooling performance is effective. Fine-tune the PWM settings if needed to optimize the balance between cooling efficiency and noise levels.
PWM fan control offers precise and dynamic control over fan speeds based on real-time temperature data. The motherboard continuously adjusts the PWM signal to keep the fan speeds in line with the desired cooling performance.
Keep in mind that the level of control and customization options available may vary depending on your motherboard’s BIOS. Some motherboards offer more advanced features, such as the ability to create custom fan curves or set individual PWM parameters for each fan header.
Make sure to consult your motherboard’s documentation for specific instructions and details pertaining to PWM fan control. Understanding the capabilities of your motherboard and adjusting the PWM settings accordingly will enable you to harness the full potential of this control method.
Now that you have an understanding of PWM fan control, you can leverage this method to achieve precise and efficient control over your PC case fans and optimize the cooling performance of your system.
Software Fan Control
Software fan control provides a convenient and versatile method to manage your PC case fans. By utilizing dedicated software applications, you can customize fan speeds, create profiles, and monitor your system’s temperatures and fan performance. Here’s how you can implement software fan control:
- Choose a Software Application: Select a software application that supports fan control. There are various options available, such as SpeedFan, CAM, MSI Afterburner, and more. Research the features, compatibility, and user reviews to find the software that best suits your needs.
- Install the Software: Download and install the chosen software application onto your computer. Follow the installation instructions provided by the software developer to ensure a successful installation.
- Open the Application: Launch the software application once it is installed. Familiarize yourself with the user interface and available options. Depending on the software, you may have various settings related to fan control, including fan speed adjustment, profile creation, and temperature monitoring.
- Configure Fan Speeds: Use the software interface to adjust the fan speeds according to your preferences and requirements. You may be able to set fixed fan speeds, create custom fan curves based on temperature thresholds, or use pre-configured profiles for specific usage scenarios.
- Create Profiles: Explore the software’s profile creation feature to define different settings for various situations. For example, you can create a profile optimized for gaming or a profile focused on quiet operation during regular tasks.
- Monitor and Adjust: Monitor your system’s temperatures and fan speeds to ensure that the cooling performance meets your expectations. Use the software’s monitoring features to keep track of temperature fluctuations and make adjustments to the fan control settings as needed.
Software fan control allows for greater customization and real-time adjustments, making it a popular choice among enthusiasts and power users. It provides a more intuitive and user-friendly approach compared to BIOS or manual control methods.
Ensure that your software application is compatible with your operating system and hardware components. Check the software developer’s website for updates and additional features that may enhance your fan control experience.
Keep in mind that software fan control relies on the software running in the background, which may consume system resources. It’s important to strike a balance between the fan control features you desire and the impact on system performance.
Now that you have an understanding of software fan control, you can explore the various software applications available to fine-tune your PC case fans and optimize the cooling performance of your system.
Conclusion
Controlling your PC case fans is crucial for maintaining optimal temperatures, reducing noise levels, prolonging hardware lifespan, and customizing your computing experience. By understanding the different methods available, you can effectively manage your fan speeds to achieve the desired balance between cooling performance and noise levels.
In this guide, we explored various methods of controlling PC case fans. BIOS fan control offers basic control options within the motherboard’s settings, while manual control provides a hands-on approach through physical fan controllers. Fan controller hubs offer advanced control capabilities, allowing for precise adjustments and customization. PWM fan control utilizes PWM headers on compatible motherboards and fans to provide dynamic control based on real-time temperature data. Software fan control provides convenient and versatile control over fan speeds through dedicated software applications.
Prior to controlling your PC case fans, consider factors such as system temperature, airflow dynamics, noise tolerance, component compatibility, power supply capacity, and your desired level of control flexibility. These considerations will help you make informed decisions and achieve the optimal balance for your specific needs.
Remember, fan control is an ongoing process that may require fine-tuning over time. Regularly monitor your system’s temperatures and fan performance, and make necessary adjustments to ensure optimal cooling efficiency while maintaining a suitable noise level.
Now equipped with the knowledge of different fan control methods, you can confidently select and implement the approach that suits your preferences and hardware. Enjoy a cooler, quieter, and optimized computing experience with controlled PC case fans!