Introduction
Welcome to our guide on how to clean PC case fans! If you’re an avid computer user, you probably understand the importance of maintaining your computer’s components for optimal performance. While many people focus on cleaning their keyboards, monitors, and other visible parts, it’s easy to overlook the crucial role that PC case fans play in keeping your system cool and preventing overheating.
Case fans are essential components that help circulate air through your computer case, preventing the buildup of heat and ensuring proper ventilation. Over time, dust, dirt, and other debris can accumulate on the fan blades and inside the fan frame, reducing their efficiency and potentially causing your computer to overheat. Regularly cleaning your PC case fans not only improves their performance but also extends their lifespan and keeps your system running smoothly.
In this guide, we will walk you through the step-by-step process of cleaning your PC case fans. We’ll discuss the tools and materials you’ll need, as well as provide detailed instructions on how to properly clean the fan blades, fan frame, and connectors. By following these steps, you can ensure that your PC case fans are free from debris, allowing them to operate at peak performance.
Before we begin, it’s important to note that cleaning your PC case fans may vary depending on the type of fan and computer case you have. It’s always a good idea to consult your computer manufacturer’s documentation or online resources specific to your model for any additional instructions or precautions.
Now, let’s get started on cleaning those PC case fans to keep your computer running cool and efficient!
Why is cleaning PC case fans important?
Regularly cleaning your PC case fans is essential for maintaining the overall health and performance of your computer system. Here are a few reasons why cleaning PC case fans is important:
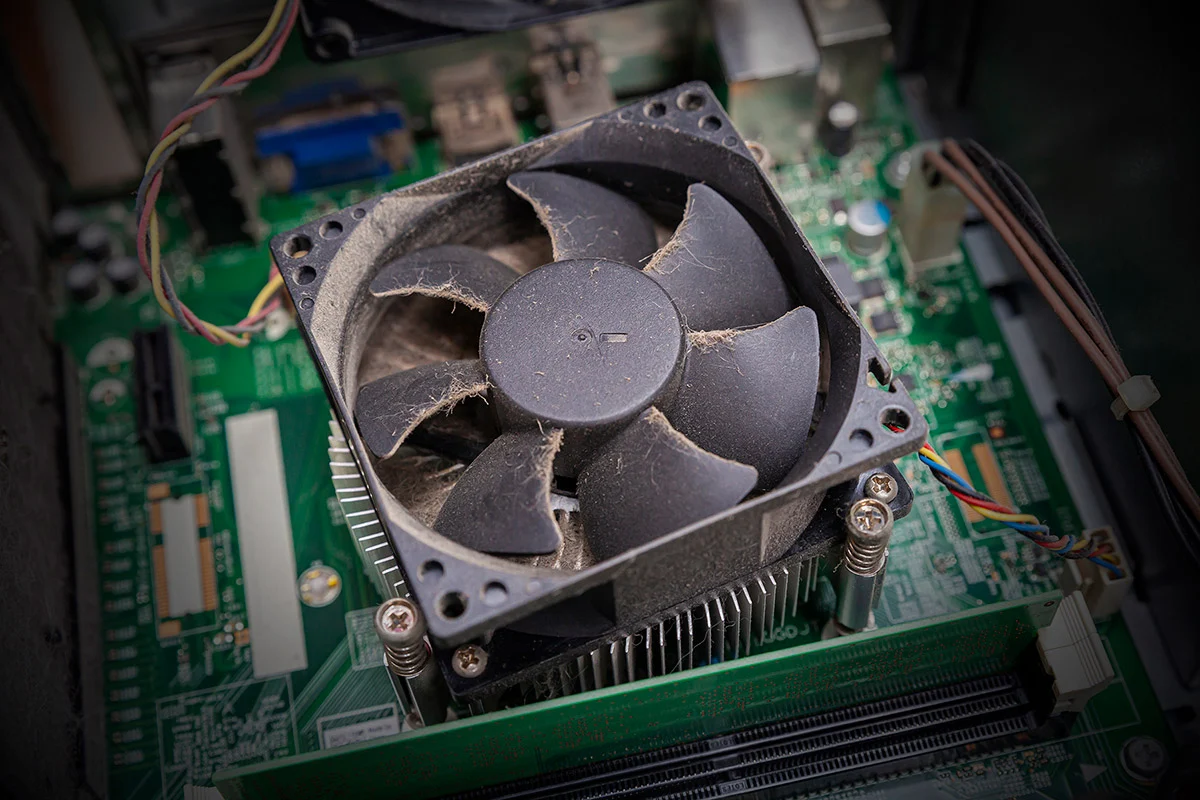
- Preventing overheating: PC case fans play a crucial role in keeping your system cool. Over time, dust and debris can accumulate on the fan blades, reducing their ability to move air efficiently. This buildup can restrict airflow, leading to increased temperatures inside your computer case. By regularly cleaning your PC case fans, you can remove this buildup and help prevent overheating.
- Improving system performance: When PC case fans are covered in dust and dirt, they are less effective at cooling your system. This can lead to increased fan noise and decreased cooling performance, resulting in decreased efficiency and potential performance issues. Cleaning your PC case fans ensures that they can function optimally, helping to maintain the performance and longevity of your computer.
- Extending fan lifespan: Dust and debris can impact the lifespan of your PC case fans by causing them to work harder or leading to premature failure. Regular cleaning removes this debris, reducing strain on the fans and increasing their lifespan. By taking the time to clean your PC case fans, you can save money by avoiding the need for premature fan replacements.
- Reducing noise: Dust buildup on PC case fans can cause them to become unbalanced, resulting in increased noise levels. Over time, the noise can become more noticeable and distracting. By cleaning the fan blades and removing any accumulated debris, you can reduce fan noise and enjoy a quieter computing experience.
- Preventing damage to other components: Dust and dirt that accumulate on PC case fans can eventually find their way into other components, such as the CPU or graphics card. This can lead to overheating and potential damage to these critical components. By regularly cleaning your PC case fans, you can minimize the risk of dust transfer and protect the overall health of your computer system.
As you can see, cleaning your PC case fans is vital for maintaining optimal performance, preventing overheating, reducing noise, and extending the lifespan of your computer components. By incorporating regular cleaning into your computer maintenance routine, you can ensure a cool, quiet, and reliable computing experience.
Tools and materials you will need
Before you begin cleaning your PC case fans, gather the following tools and materials:
- Screwdriver: Depending on your computer case, you may need a Phillips or flathead screwdriver to remove the screws that secure the case panels.
- Cotton swabs or soft-bristled brush: These will be used to clean the fan blades and remove any dust or debris that has accumulated.
- Compressed air: A can of compressed air or an air compressor with a low-pressure nozzle is beneficial for blowing away loose dust and dirt from hard-to-reach areas.
- Isopropyl alcohol or electronic cleaning solution: To remove stubborn dirt or grime from the fan blades, you may need to use a small amount of isopropyl alcohol or an electronic cleaning solution. Ensure that the solution is specifically formulated for electronic components.
- Microfiber cloth or lint-free cloth: Use a soft, lint-free cloth to wipe down the fan blades and clean any residues left behind by the cleaning solution.
- Anti-static wrist strap (optional): If you want to take additional precautions to protect your computer components from electrostatic discharge, an anti-static wrist strap can be used.
It’s important to use caution and handle these tools and materials with care to avoid causing any damage to your computer components. Always follow safety guidelines and instructions provided by the manufacturers of the tools and materials you are using.
Once you have gathered all the necessary tools and materials, you are ready to proceed with the cleaning process. Remember to power off and unplug your computer before opening the case to ensure your safety and prevent any potential damage to the components.
In the next section, we will walk you through the step-by-step process of cleaning your PC case fans to keep them functioning optimally.
Step 1: Power off and unplug your computer
The first step in cleaning your PC case fans is to ensure that your computer is powered off and completely unplugged from the power source. This is crucial for your safety and the protection of your computer components.
Shutting down your computer properly allows the system to close all running programs and processes. It also helps prevent any accidental data loss or damage to your files. Follow these steps to power off your computer:
- Save your work: Make sure to save any open files or documents and close any running applications.
- Shut down your computer: Locate the Start button or the Windows icon on your desktop taskbar. Click on it and select the “Shut Down” option from the menu. Wait for the system to complete the shutdown process.
- Unplug your computer: Once your computer is powered off, reach behind the computer case and unplug the power cable from the electrical outlet. It’s important to completely disconnect the power source to avoid any electrical accidents.
- Ground yourself: To prevent any potential damage to your computer components from static electricity, it’s advisable to ground yourself. You can use an anti-static wrist strap or touch a grounded metal object to discharge any static electricity before handling the inside of your computer case.
By powering off your computer and unplugging it from the power source, you ensure that there is no electrical current flowing through the system. This minimizes the risk of electrocution and protects both you and your computer.
Once you have completed this step, you are ready to move on to the next step of the cleaning process: opening your computer case.
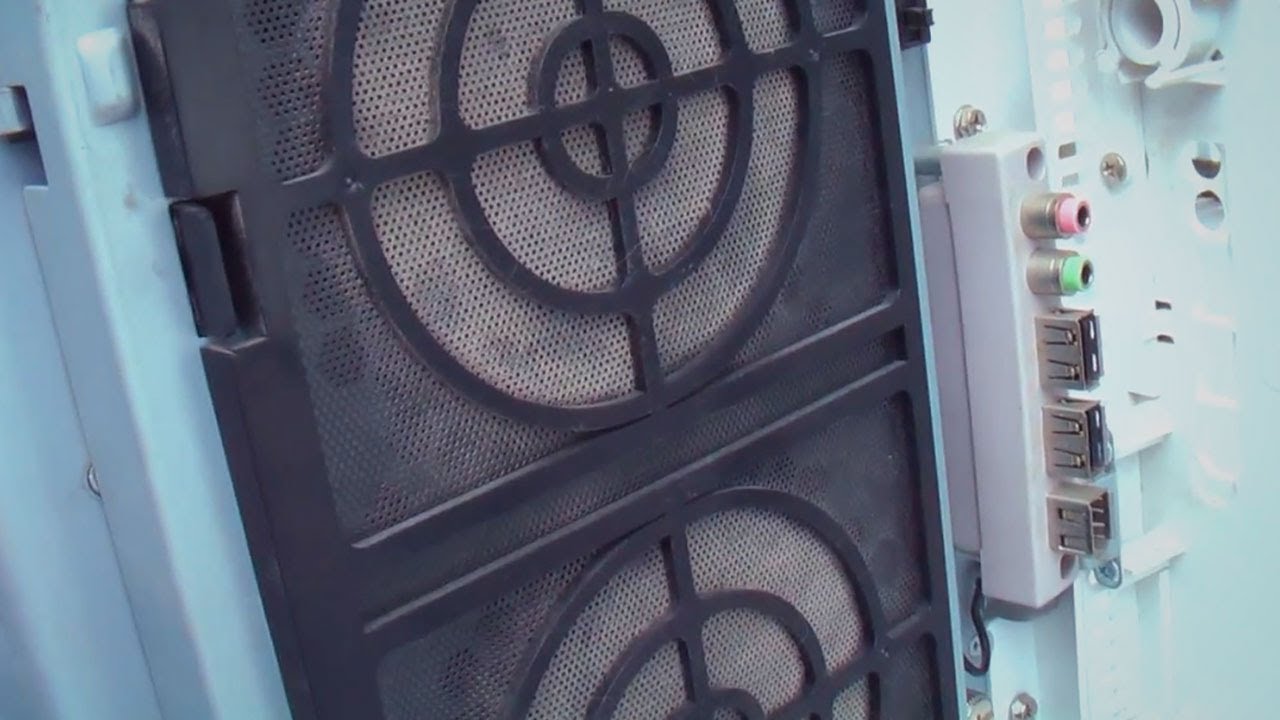
Step 2: Open your computer case
Now that your computer is powered off and unplugged, it’s time to open your computer case to access the PC case fans. Opening the case allows you to safely clean the fans and remove any accumulated dust and debris. Follow these steps to open your computer case:
- Locate the screws: Most computer cases have screws that secure the side panels. These screws are typically located at the back of the case. Look for thumbscrews or Phillips screws and identify the ones that are holding the side panel in place.
- Remove the screws: Use a suitable screwdriver to remove the screws holding the side panel of your computer case. Carefully set the screws aside in a safe place to avoid losing them.
- Slide or lift off the side panel: Once the screws are removed, slide or lift off the side panel of your computer case. The method of removal may vary depending on the case model. Some cases have panels that slide off, while others require lifting or removing clips.
- Set aside the side panel: Place the side panel in a safe and clean area, away from any liquids or potential hazards. You may want to lay it on a soft cloth to prevent scratches.
Opening your computer case may expose internal components, so it’s important to handle it with care. Take note of any cables or connections that may be attached to the side panel and ensure that they are not strained or damaged during the removal process.
By removing the side panel, you gain access to the interior of your computer case, allowing you to proceed with cleaning the PC case fans more effectively. With the case open, you can now locate and remove the case fans. We will cover this step in the next section.
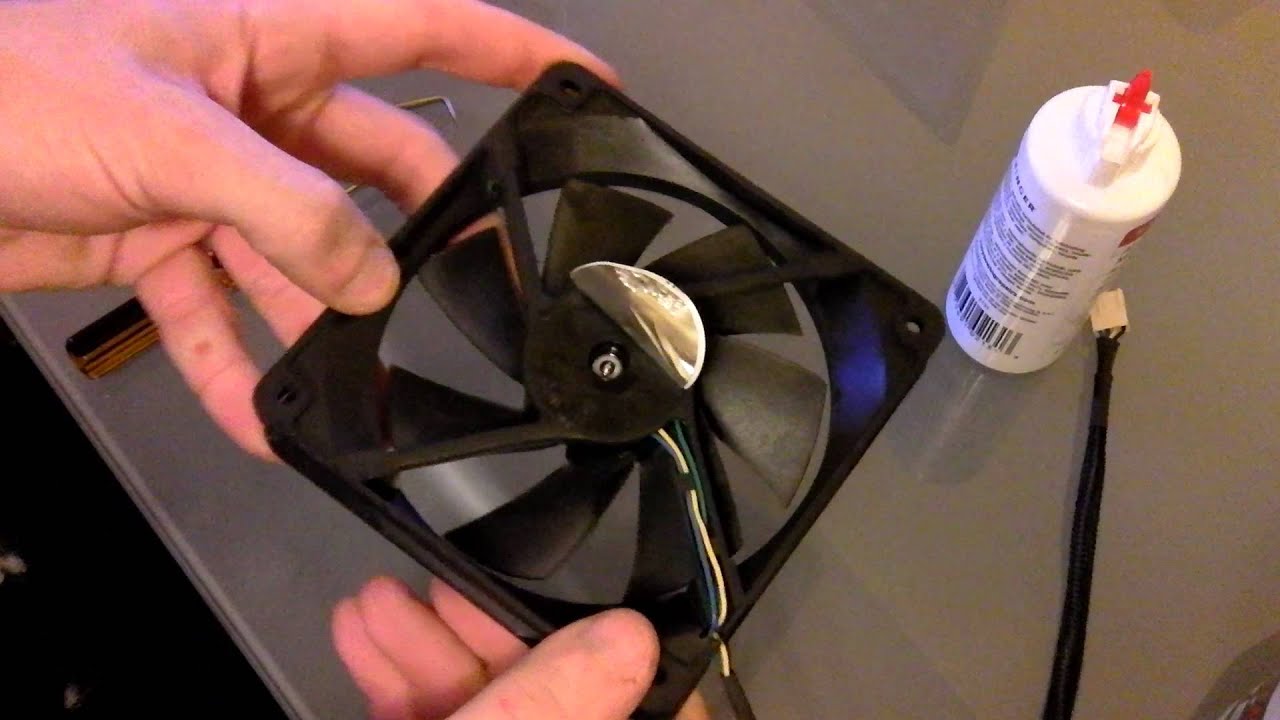
Step 3: Locate and remove the case fans
With your computer case open, it’s time to locate and remove the case fans. Case fans are typically located near the front, back, or sides of the case, depending on the design. Follow these steps to locate and remove the case fans:
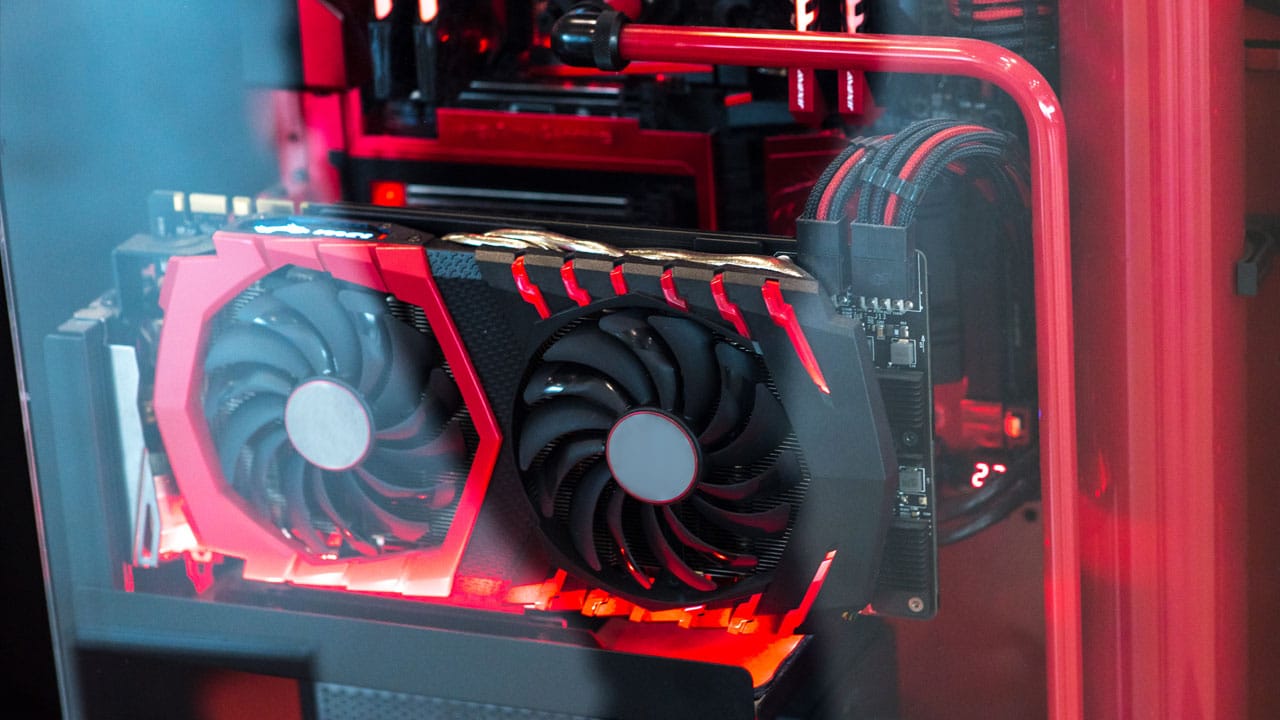
- Identify the case fans: Look inside your computer case and visually locate the case fans. They are usually small, round or square-shaped devices with blades that rotate to circulate air.
- Identify the fan connectors: Take note of how the case fans are connected to the motherboard. The fan connectors are usually located near the fans or on the motherboard itself.
- Disconnect the fan connectors: Gently pull on the fan connector to disconnect it from the motherboard. Some connectors may have a latch or clip that needs to be released before disconnecting. Take care not to pull on the wires as you disconnect the connectors.
- Remove any screws or mounting brackets: Check if the case fans are secured in place by screws or mounting brackets. If there are screws, loosen them using a suitable screwdriver. If there are mounting brackets, release them by pressing or sliding the tabs or clips that hold them in place.
- Remove the case fans: Once the fan connectors and any screws or brackets are disconnected or removed, gently lift the case fans out of their mounting positions. Take care not to bend or damage the fan blades during removal.
It’s essential to handle the case fans delicately to avoid causing any damage to the fans or other components. Take note of the orientation of the case fans as you remove them so that you can reinstall them correctly later.
By following these steps, you have successfully located and removed the case fans from your computer case. The next step will be cleaning the fan blades to remove any dust or debris. We will cover this step in detail in the next section.
Step 4: Clean the fan blades
Now that you have removed the case fans, it’s time to clean the fan blades to remove any accumulated dust and debris. Cleaning the fan blades helps improve the airflow and efficiency of the fans. Follow these steps to clean the fan blades:
- Inspect the fan blades: Take a close look at the fan blades to assess the level of dirt or dust buildup. Look for any stubborn debris that may require more attention during the cleaning process.
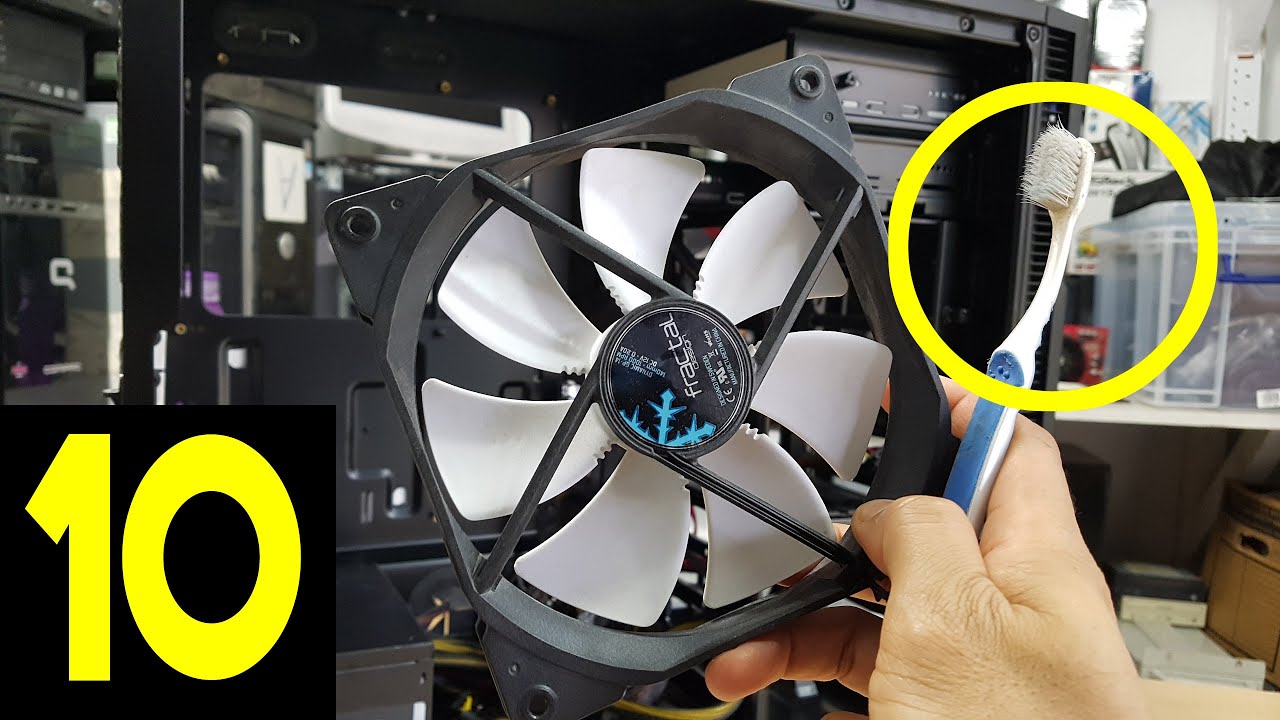
- Use a cotton swab or soft-bristled brush: Gently wipe or brush the fan blades to remove loose dust and debris. Start from the center of the blades and move towards the outer edges. Avoid applying excessive pressure to prevent bending or damaging the blades.
- Use compressed air: If there is stubborn dirt or debris stuck on the fan blades, you can use a can of compressed air or an air compressor with a low-pressure nozzle to blow it away. Hold the can or nozzle a few inches away from the fan blades and aim in short bursts. Be careful not to tilt or shake the can excessively to avoid introducing moisture into the fan motor.
- Use a soft cloth and cleaning solution: If there are residual marks or grime on the fan blades, dampen a soft cloth with a small amount of isopropyl alcohol or an electronic cleaning solution. Gently wipe the blades to remove any remaining dirt or stains. Ensure that the cloth is not dripping wet, as excessive moisture can damage the fan motor or other components.
- Allow the fan blades to dry: After cleaning, allow the fan blades to air dry completely before reinstalling them. This helps prevent any moisture from causing damage to the fan motor.
Take your time while cleaning the fan blades, ensuring that all visible dust and dirt particles are removed. This will promote better airflow and improve the overall performance of the case fans.
With the fan blades cleaned, you are ready to move on to the next step: cleaning the fan frame. We will provide detailed instructions in the following section.
Step 5: Clean the fan frame
After cleaning the fan blades, it’s time to shift your focus to the fan frame. The fan frame is the housing that holds the fan blades and plays a crucial role in maintaining proper airflow. Cleaning the fan frame ensures optimal performance and prevents any obstruction to the airflow. Follow these steps to clean the fan frame:
- Inspect the fan frame: Take a close look at the fan frame and observe any visible dust or debris. Pay attention to the areas around the fan where dust may settle.
- Use compressed air: Use a can of compressed air or an air compressor with a low-pressure nozzle to blow away loose dust and debris from the fan frame. Direct the airflow towards the different parts of the fan frame to ensure a thorough clean. Be cautious not to tilt or shake the can excessively to prevent moisture from entering the fan motor.
- Use a soft brush or cloth: If there are stubborn dirt particles clinging to the fan frame, you can use a soft brush or cloth to gently remove them. Ensure that the brush bristles or cloth are not too abrasive to avoid scratching the fan frame surface.
- Wipe with a damp cloth: If there are any visible stains or marks on the fan frame, dampen a soft cloth with a small amount of isopropyl alcohol or an electronic cleaning solution. Gently wipe the affected areas to remove the dirt or stains. Be mindful not to apply excessive liquid, as it may seep into the fan motor and cause damage.
- Allow the fan frame to dry: After cleaning, allow the fan frame to air dry completely before proceeding with the reinstallation of the case fans. This will prevent any moisture from affecting the fan motor or other components.
Take your time while cleaning the fan frame, paying attention to all visible areas and ensuring that dust and dirt particles are thoroughly removed. By cleaning the fan frame, you optimize the airflow and maintain the efficiency of the case fans.
With the fan frame cleaned, you are ready to move on to the next step: cleaning the fan connectors and cables. We will provide detailed instructions in the following section.
Step 6: Clean the fan connectors and cables
As part of the cleaning process, it’s important to pay attention to the fan connectors and cables. Dust and debris can accumulate in these areas, potentially affecting the connection and performance of the case fans. Cleaning the fan connectors and cables ensures a reliable and uninterrupted airflow. Follow these steps to clean the fan connectors and cables:
- Inspect the fan connectors and cables: Check the fan connectors and cables for any visible dirt or dust buildup. Examine both ends of the connectors and the length of the cables.
- Use compressed air: Use a can of compressed air or an air compressor with a low-pressure nozzle to blow away loose dust and debris from the fan connectors and cables. Direct the airflow into the connectors and along the cables to remove any particles.
- Use a soft brush or cloth: If there are stubborn dirt particles clinging to the connectors or cables, use a soft brush or cloth to gently remove them. Be cautious not to apply excessive pressure or use abrasive materials to prevent any damage.
- Inspect for damage: While cleaning, closely inspect the fan connectors and cables for any signs of damage, such as bent pins or frayed cables. If you notice any damage, it may be necessary to replace the affected components.
- Reconnect the fan connectors: Once the fan connectors and cables are clean and free from debris, carefully reconnect them to their respective slots on the motherboard. Make sure the connectors are securely attached to ensure proper functioning of the case fans.
It’s crucial to handle the fan connectors and cables with care to avoid any undue stress or damage. Take your time during this step and ensure that all connections are secure and free from obstruction.
By cleaning the fan connectors and cables, you maintain the integrity of the electrical connectivity and ensure smooth operation of the case fans. With this step completed, you’re almost done with the cleaning process. The next step is to reinstall the case fans, which will be covered in the next section.
Step 7: Reinstall the case fans
After cleaning the fan blades, fan frame, and fan connectors, it’s time to reinstall the case fans back into your computer case. Reinstalling the case fans properly ensures they are securely in place and able to function effectively. Follow these steps to reinstall the case fans:
- Align the screw holes or mounting brackets: Position the case fans back into their original mounting positions on the computer case. Ensure that the screw holes or mounting brackets of the fans align with the corresponding holes or brackets on the case.
- Secure the case fans: If your case fans are held in place by screws, use a suitable screwdriver to tighten the screws. If your case fans have mounting brackets, ensure that they are secured properly by engaging the tabs or clips.
- Reconnect the fan connectors: Once the case fans are securely in place, reconnect the fan connectors to their respective slots on the motherboard. Ensure that the connectors are properly aligned and fully inserted to establish a reliable electrical connection.
- Double-check the connections: Take a moment to double-check all the connections, including the fan connectors and any other cables or wires that may have been disconnected during the cleaning process. Ensure that everything is properly connected and secured.
- Close the computer case: Once you have verified all the connections, carefully position the side panel of the computer case back into place. Align the panel with the case and slide it or fasten it using the original screws or clips that were removed earlier.
Pay close attention to the orientation of the case fans during reinstallation. Ensure that the fan blades are facing in the correct direction to allow for proper airflow within the computer case.
By reinstalling the case fans securely, you ensure that they can effectively circulate air and maintain optimal cooling performance. With this step completed, you’re almost finished with the cleaning process. The final step is to close the computer case, which will be covered in the next section.
Step 8: Close the computer case
With the case fans successfully reinstalled and all connections double-checked, it’s time to close your computer case. Properly closing the case ensures that all internal components are protected and that your computer is ready to be powered back on. Follow these steps to close the computer case:
- Align the side panel: Position the side panel of the computer case back into place. Align it with the case and ensure that all edges and corners are properly aligned.
- Slide or secure the side panel: Depending on the design of your computer case, you may need to slide the side panel back into place or fasten it using the original screws or clips that were removed earlier. Follow the manufacturer’s instructions for your specific case model.
- Tighten the screws: If your case uses screws to secure the side panel, use a screwdriver to tighten them snugly. Avoid over-tightening, as this may cause damage or strip the screw threads.
- Double-check the closure: Once the side panel is in place, visually inspect the entire perimeter of the case to ensure that it is securely closed. Verify that there are no gaps or loose areas that could potentially allow dust or debris to enter.
- Plug in and power on: With the computer case closed, plug in the power cable and any other peripherals that were disconnected earlier. Once everything is reconnected, you can power on your computer.
After closing the computer case, it’s a good practice to wipe down the exterior of the case with a soft cloth to remove any fingerprints or smudges. This helps keep your computer looking clean and presentable.
Congratulations! You have successfully cleaned and maintained your PC case fans. By regularly cleaning your case fans, you ensure optimal cooling, reduce the risk of overheating, and extend the lifespan of your computer components.
Remember, it’s a good idea to schedule regular cleanings every few months or as needed, depending on the environment your computer is in. Keeping your PC case fans clean will contribute to a cooler and more efficient computer system overall.
Conclusion
Congratulations on successfully cleaning your PC case fans! Regularly cleaning your case fans is a vital aspect of maintaining optimal performance and preventing overheating in your computer system. By following the step-by-step process outlined in this guide, you can ensure that your case fans are free from dust and debris, allowing them to operate efficiently and extend their lifespan.
Throughout this guide, we discussed the importance of cleaning PC case fans and why it is necessary for optimal system performance. We also covered the tools and materials you will need for the cleaning process, as well as detailed instructions for each step.
From powering off and unplugging your computer to opening the case, locating and removing the case fans, and cleaning the fan blades, fan frame, fan connectors, and cables – each step is crucial for a thorough cleaning process. By taking the time to clean these components, you reduce the risk of overheating, improve system performance, and increase the longevity of your computer components.
Remember to exercise caution and handle the components with care throughout the cleaning process. Take note of any specific instructions or precautions provided by your computer manufacturer to ensure that you clean your case fans properly based on your specific model.
By adopting a regular cleaning routine for your PC case fans, you can maintain a cooler and more efficient computer system. Incorporate this cleaning process into your overall computer maintenance practices to keep your system running smoothly for years to come.
Thank you for using this guide, and we hope it has been helpful in assisting you with cleaning your PC case fans. Happy computing!