Introduction
Welcome to our guide on how to clean a case fan! If you’re noticing that your computer’s fan is getting louder or not running as efficiently as before, it’s likely that dust and dirt have accumulated on the fan blades and inside the fan housing. Regularly cleaning your case fan is essential for maintaining optimal performance and preventing overheating issues.
A case fan plays a crucial role in keeping your computer cool by circulating fresh air and removing hot air from the system. When dust and debris build up on the fan, it restricts airflow and causes the fan to work harder, potentially leading to overheating and component damage.
By learning how to clean your case fan properly, you can prolong the lifespan of your computer and improve its overall performance. Don’t worry, cleaning a case fan is a relatively simple task that requires just a few tools and materials. Whether you’re a novice or experienced computer user, follow our step-by-step instructions to get your case fan running smoothly again.
Before we dive into the cleaning process, it’s important to note that your computer should be shut down completely before attempting to clean the case fan. Operating your computer while cleaning the fan can be dangerous and may cause damage to the fan or other components.
Now let’s gather the necessary tools and materials required for cleaning your case fan.
Why Clean Your Case Fan?
Cleaning your case fan is crucial for maintaining the overall health and performance of your computer. Here are a few reasons why regular cleaning is important:
1. Improved Cooling Efficiency: Over time, dust and debris accumulate on the fan blades and inside the fan housing, hampering the airflow. When the fan is clogged, it struggles to circulate air effectively, resulting in reduced cooling efficiency. Cleaning the case fan helps restore optimal airflow and prevents overheating issues.
2. Enhanced Performance: When your computer is running at high temperatures due to a dirty case fan, it may slow down or become sluggish. By cleaning the fan, you can improve the overall performance of your computer, allowing it to run smoothly and efficiently.
3. Prolonged Lifespan of Components: Overheating is one of the primary causes of premature component failure. By regularly cleaning your case fan, you prevent excessive heat buildup and protect sensitive components such as the CPU and GPU from potential damage. This helps extend the lifespan of your computer and saves you money on expensive repairs or replacements.
4. Reduced Noise: Accumulated dust on the fan blades can cause unbalanced rotation, leading to increased noise levels. Cleaning the case fan not only improves performance but also reduces the annoying humming or whirring sounds that may be emitted by a dirty fan.
5. Improved Air Quality: Dust and debris within your computer can contribute to poor air quality in your work or gaming area. Cleaning the case fan helps prevent the spread of dust particles and allergens, creating a healthier and cleaner environment around your computer.
6. Preventative Maintenance: Regularly cleaning your case fan is a simple yet effective preventative measure to avoid potential overheating-related issues. By incorporating this maintenance task into your routine, you can catch any potential problems early on and address them before they escalate into more significant issues.
Now that we understand the importance of cleaning your case fan, let’s move on to the tools and materials you’ll need for the cleaning process.
Tools and Materials Needed
Before you begin the process of cleaning your case fan, gather the following tools and materials:
- Screwdriver: You’ll need a screwdriver to open your computer case and remove the case fan if necessary. The type of screwdriver required will depend on the screws used to secure your computer case, so make sure you have the appropriate size and type.
- Compressed Air Canister: Compressed air is essential for blowing away dust and debris from the case fan and its components. You can find compressed air canisters at most electronics or computer hardware stores. Make sure the canister is specifically designed for use with computers and electronics.
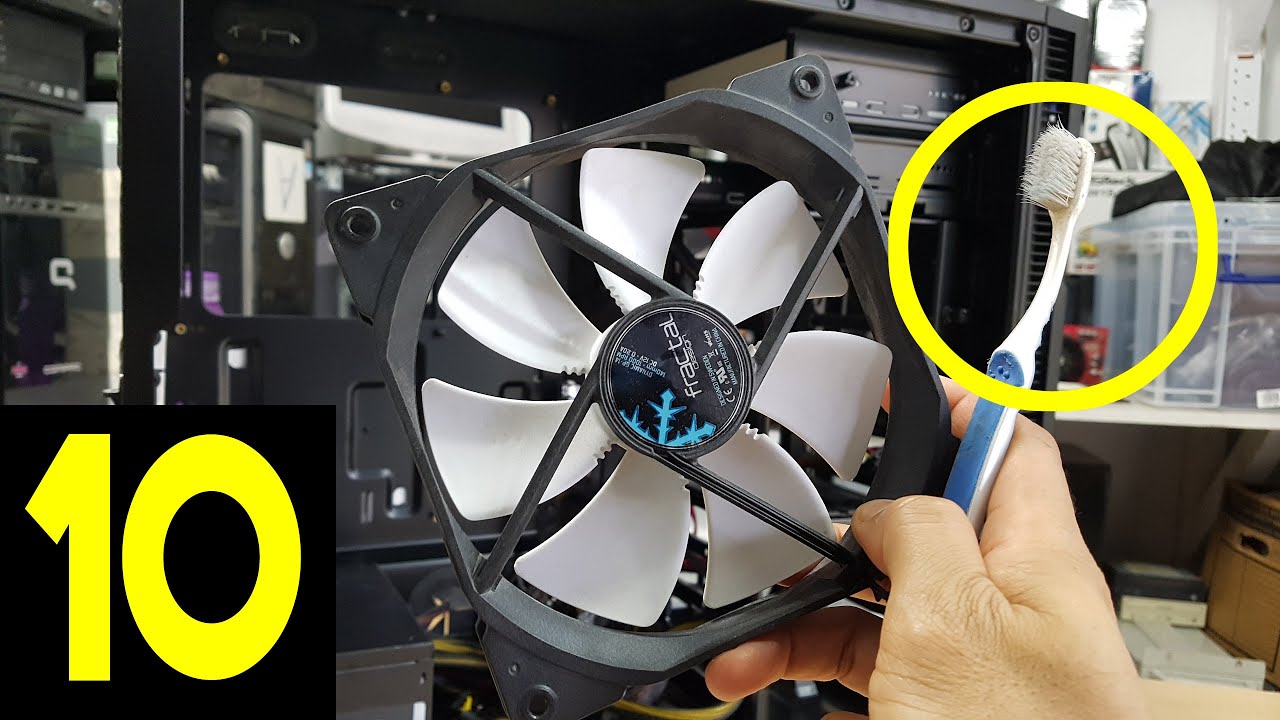
- Soft Brush: A soft-bristled brush, such as a paintbrush or a clean makeup brush, will help remove stubborn dust particles from the case fan blades and housing. Make sure the brush is clean and dry before use.
- Lint-Free Cloth or Microfiber Cloth: A lint-free cloth or microfiber cloth is ideal for wiping down the case fan blades and removing any remaining dust or residue.
- Isopropyl Alcohol: Isopropyl alcohol is recommended for cleaning the case fan as it evaporates quickly and leaves no residue. You can find isopropyl alcohol at most pharmacies or grocery stores.
- Cotton Swabs: Cotton swabs can be used to clean hard-to-reach areas and remove stubborn dirt or grime from the case fan blades or housing. Opt for cotton swabs with a pointed tip for better precision.
- Anti-Static Wrist Strap (optional): If you’re concerned about static electricity damaging your computer components, consider using an anti-static wrist strap. This strap helps discharge any built-up static electricity from your body, protecting sensitive electronic parts.
Having these tools and materials ready will ensure a smooth and efficient cleaning process. Now that you’re equipped, let’s move on to the step-by-step instructions for cleaning your case fan.
Step 1: Shut Down Your Computer
Before you begin cleaning your case fan, it is crucial to shut down your computer completely. Cleaning the fan while the computer is running can be hazardous and may cause damage to both the fan and other components inside your computer.
When shutting down your computer, make sure to close any open programs and save your work. Follow these steps to properly shut down your computer:
- Save Your Work: Before shutting down, save any open files or documents you have been working on. This ensures that you don’t lose any unsaved work during the shutdown process.
- Close Programs: Close all open programs on your computer. You can do this by clicking on the “X” in the top right corner of each program window or using the keyboard shortcuts to close them.
- Logout: If you’re using a multi-user system, log out of your user account. This closes any running processes associated with your account.
- Shut Down: Once all programs are closed and you’re logged out (if applicable), click on the “Start” button or the Windows icon in the bottom left corner of the screen. From the Start menu, choose the “Power” option and then select “Shut Down” or “Turn off” to initiate the shutdown process.
- Wait for Shutdown: Allow your computer some time to complete the shutdown process. The screen may turn black, and you might hear the fans winding down as the computer powers off.
- Unplug Power Cord: Once your computer has fully shut down, unplug the power cord from the wall socket. This ensures that the computer is completely disconnected from the power source.
By following these steps and ensuring that your computer is fully shut down and disconnected from the power source, you can safely proceed to the next steps of cleaning your case fan without any risk of damage. Let’s move on to opening your computer case in the next step.
Step 2: Open Your Computer Case
Now that you’ve shut down your computer and disconnected it from the power source, it’s time to open the computer case and gain access to the case fan. The process of opening a computer case can vary depending on the design and model of your computer, but here are some general steps to follow:
- Locate the Case Screws: Look for the screws that secure the side panel of your computer case. These screws are typically located at the back or side of the case. Depending on the case design, you may need a Phillips-head or a flat-head screwdriver to remove them.
- Remove the Case Screws: Using the appropriate screwdriver, carefully unscrew and remove the screws that secure the side panel of your computer case. Place the screws in a safe place, such as a small container, to prevent them from getting lost.
- Slide or Swivel the Side Panel: Once the screws are removed, gently slide or swivel the side panel to remove it from the case. Some cases may have latches or release buttons that need to be manipulated to remove the panel. Refer to your computer’s user manual or the case manufacturer’s instructions if you encounter any difficulties.
- Set aside the Side Panel: Carefully set aside the side panel in a safe location away from your workspace. Make sure it doesn’t get scratched or damaged during the cleaning process.
Remember that the interior of a computer case can be sensitive, with delicate components and circuitry. Avoid touching any internal components if possible, as it can cause static discharge and potential damage. If you need to handle any internal parts, ground yourself by touching a grounded metal object or wearing an anti-static wrist strap.
Now that your computer case is open, you can move on to the next step, which involves identifying the case fan within your system.
Step 3: Identify the Case Fan
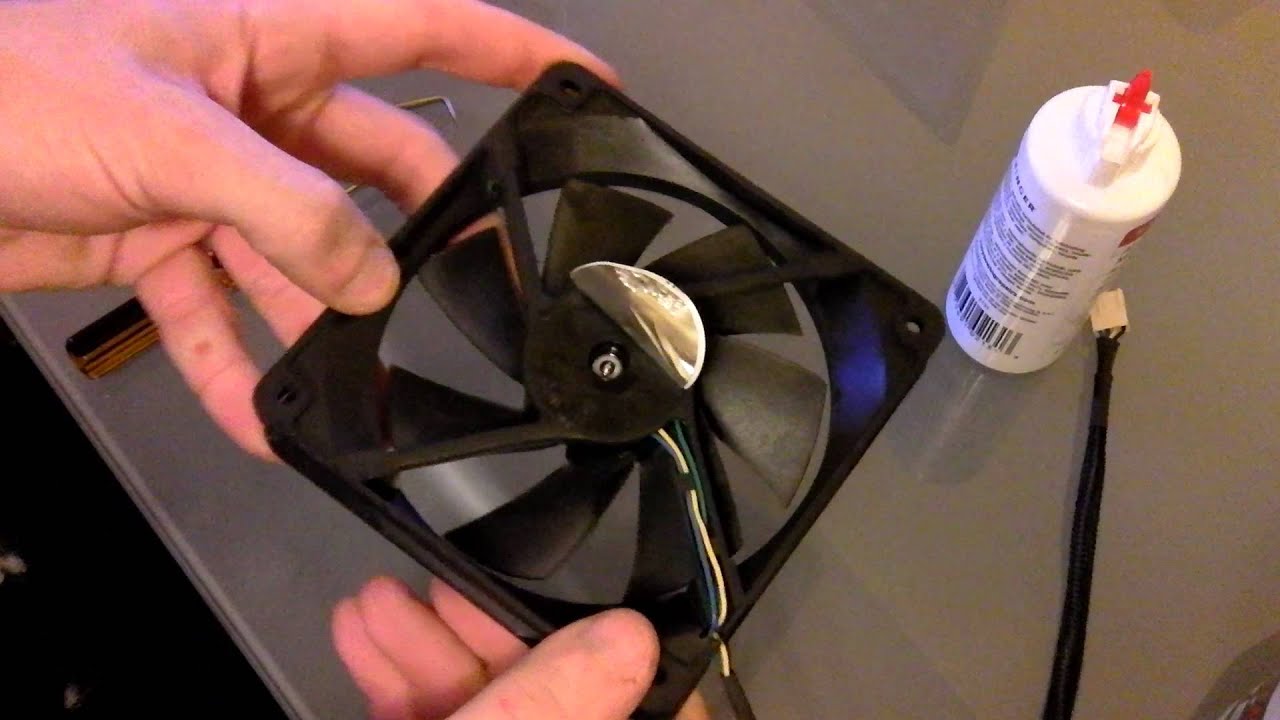
Now that you have opened your computer case, it’s time to locate the case fan. The case fan is responsible for circulating the air inside your computer and keeping it cool. Here’s how you can identify the case fan:
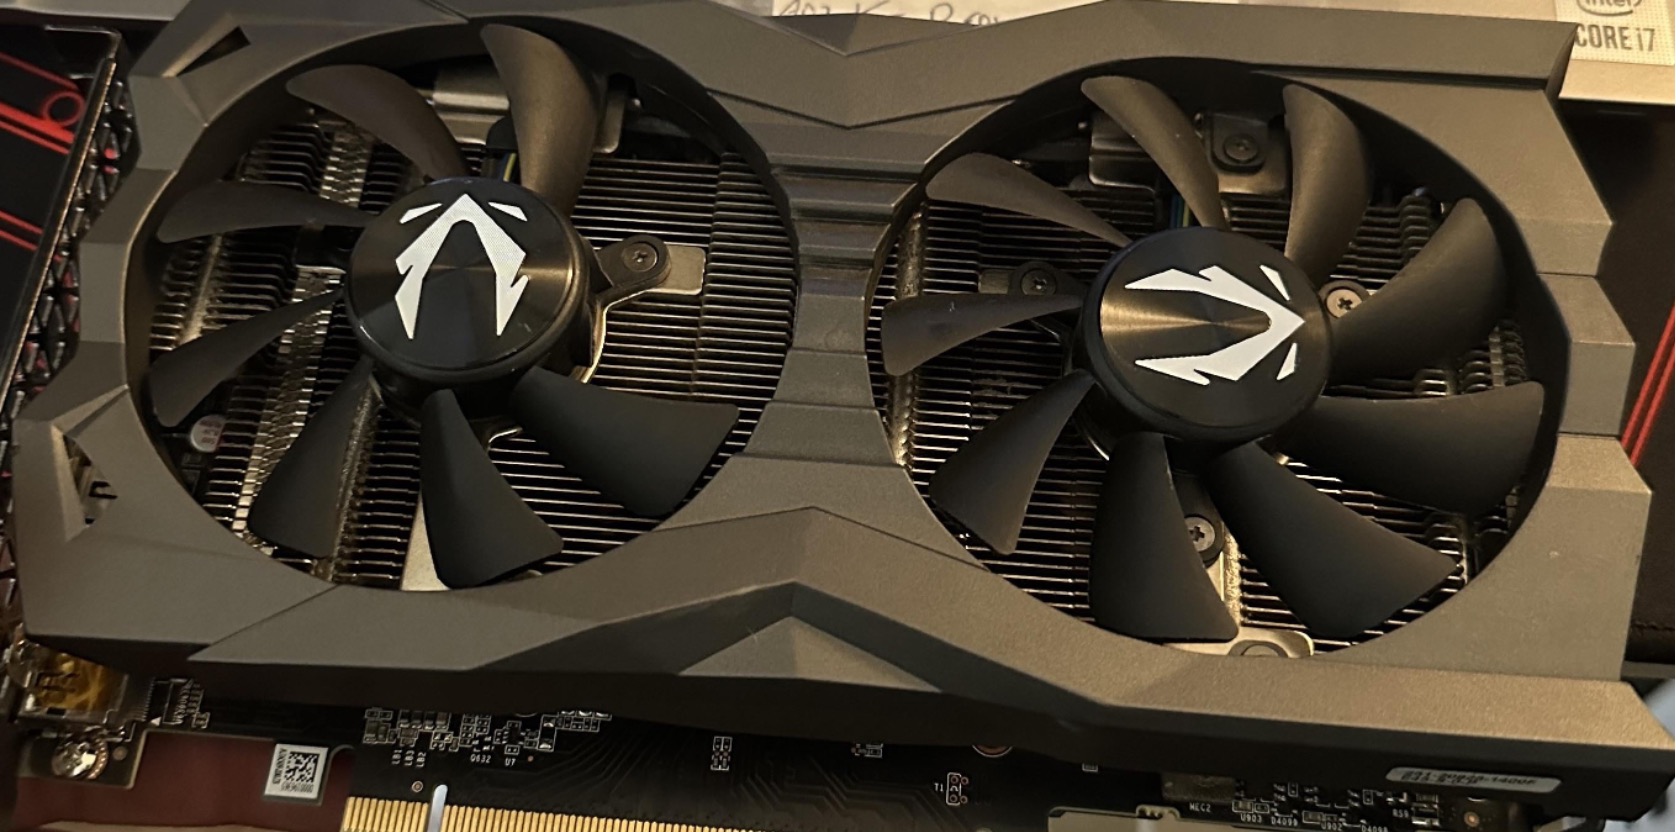
- Look for a Fan: Inside your computer case, search for a fan mounted on either the front, rear, or side panel. The case fan is generally larger than other fans and is easily recognizable by its circular shape.
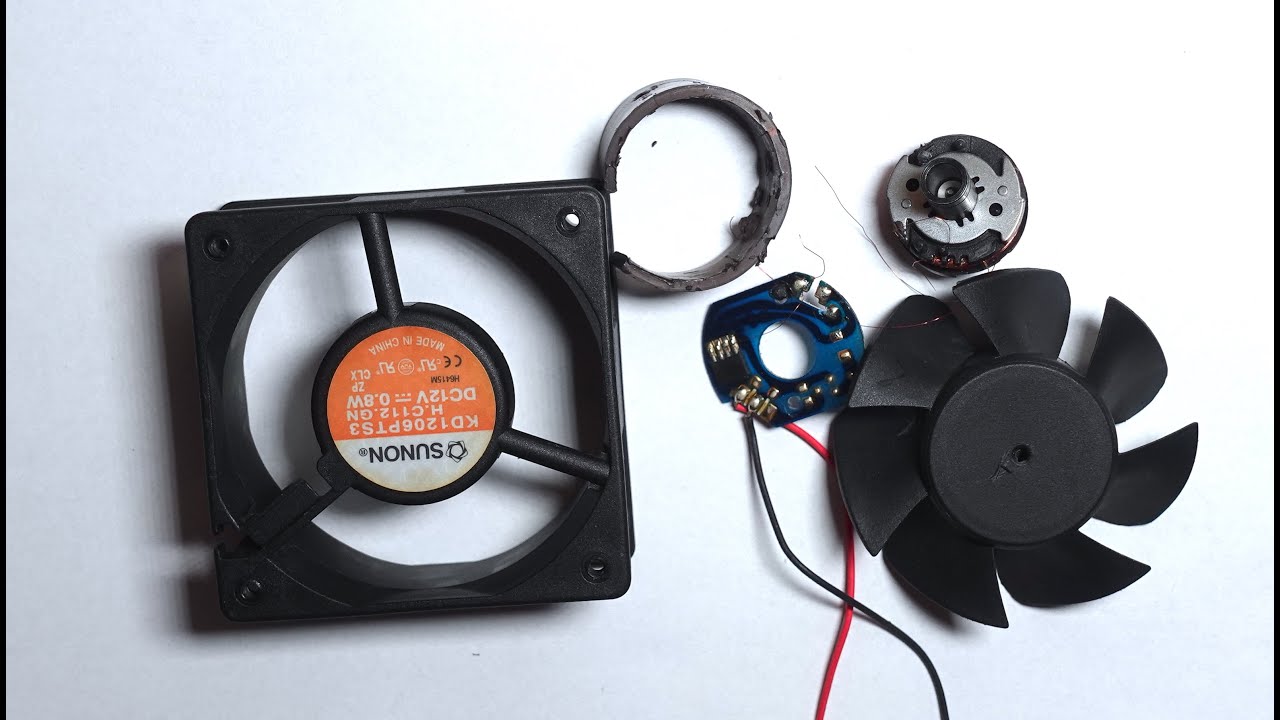
- Check the Fan Labels or Markings: The case fan may have labels, markings, or stickers indicating its make or model. These labels can help you identify the fan and find specific instructions for cleaning or removing it, if necessary.
- Observe the Airflow Direction: Take note of the direction in which the fan blows air. Most case fans are designed to intake cool air from the front or side of the case and expel hot air from the rear. Understanding the airflow direction will help you position the fan correctly when reinstalling it later.
- Identify the Fan Power Connection: Look for a small cable, typically with a plastic connector, connected to the case fan. This power cable supplies the necessary electrical current to the fan and enables it to function. Take note of its location for when you reinstall the fan.
It’s essential to correctly identify the case fan to ensure you clean the right component. Some computer cases may have multiple fans for improved airflow and cooling. If that’s the case for your system, repeat the identification process for each fan.
Bear in mind that not all case fans are easily removable. Some are mounted permanently on the case or may not require removal for cleaning. If your case fan is not removable, you can still clean it in place using compressed air and a soft brush. If, however, your case fan is removable, proceed to the next step to learn how to remove it for cleaning.
Step 4: Remove the Case Fan
Removing the case fan allows for more thorough cleaning of both the fan blades and the fan housing. Not all case fans are designed to be easily removable, so if your case fan cannot be detached, you can still effectively clean it in place using compressed air and a soft brush. However, if your case fan is removable, follow these steps to safely remove it:
- Disconnect the Power Cable: Locate the power cable connected to the case fan. Carefully detach the cable from the motherboard or fan controller by gently pulling on the plastic connector. Be cautious not to yank or force the cable, as it may cause damage to the fan or other components.
- Loosen the Mounting Screws: Take note of the screws that attach the case fan to the case. Depending on the model, there might be 2 to 4 screws holding the fan in place. Use the appropriate screwdriver to loosen the screws but refrain from fully removing them just yet.
- Gently Lift the Fan: With the screws loosened, carefully lift the case fan away from its mounting position. Be mindful of any cables or wires that may still be connected to the fan. Check for any obstructions or cables that need to be gently disconnected or moved aside before fully removing the fan.
- Disconnect Any Additional Cables: In some cases, there may be additional cables or wires connected to the fan, such as fan control cables or RGB lighting cables. If present, gently detach these cables from the fan, taking note of their position for later reinstallation.
- Set Aside the Removed Fan: Once the case fan is fully disconnected, place it on a clean and static-free surface. Keep it in a secure location to avoid accidental damage or contamination during the cleaning process.
Remember that the process of removing a case fan may vary depending on the design and manufacturer of your computer case. It’s important to consult your computer’s user manual or the case manufacturer’s documentation for specific instructions if you encounter any difficulties.
Now that you have removed the case fan, it’s time to move on to the next step: cleaning the fan and its components.
Step 5: Clean the Case Fan
Cleaning the case fan is an essential step in maintaining its optimal performance. By removing dust and debris that has accumulated on the fan blades and inside the fan housing, you can restore proper airflow and prevent overheating issues. Follow these steps to effectively clean the case fan:
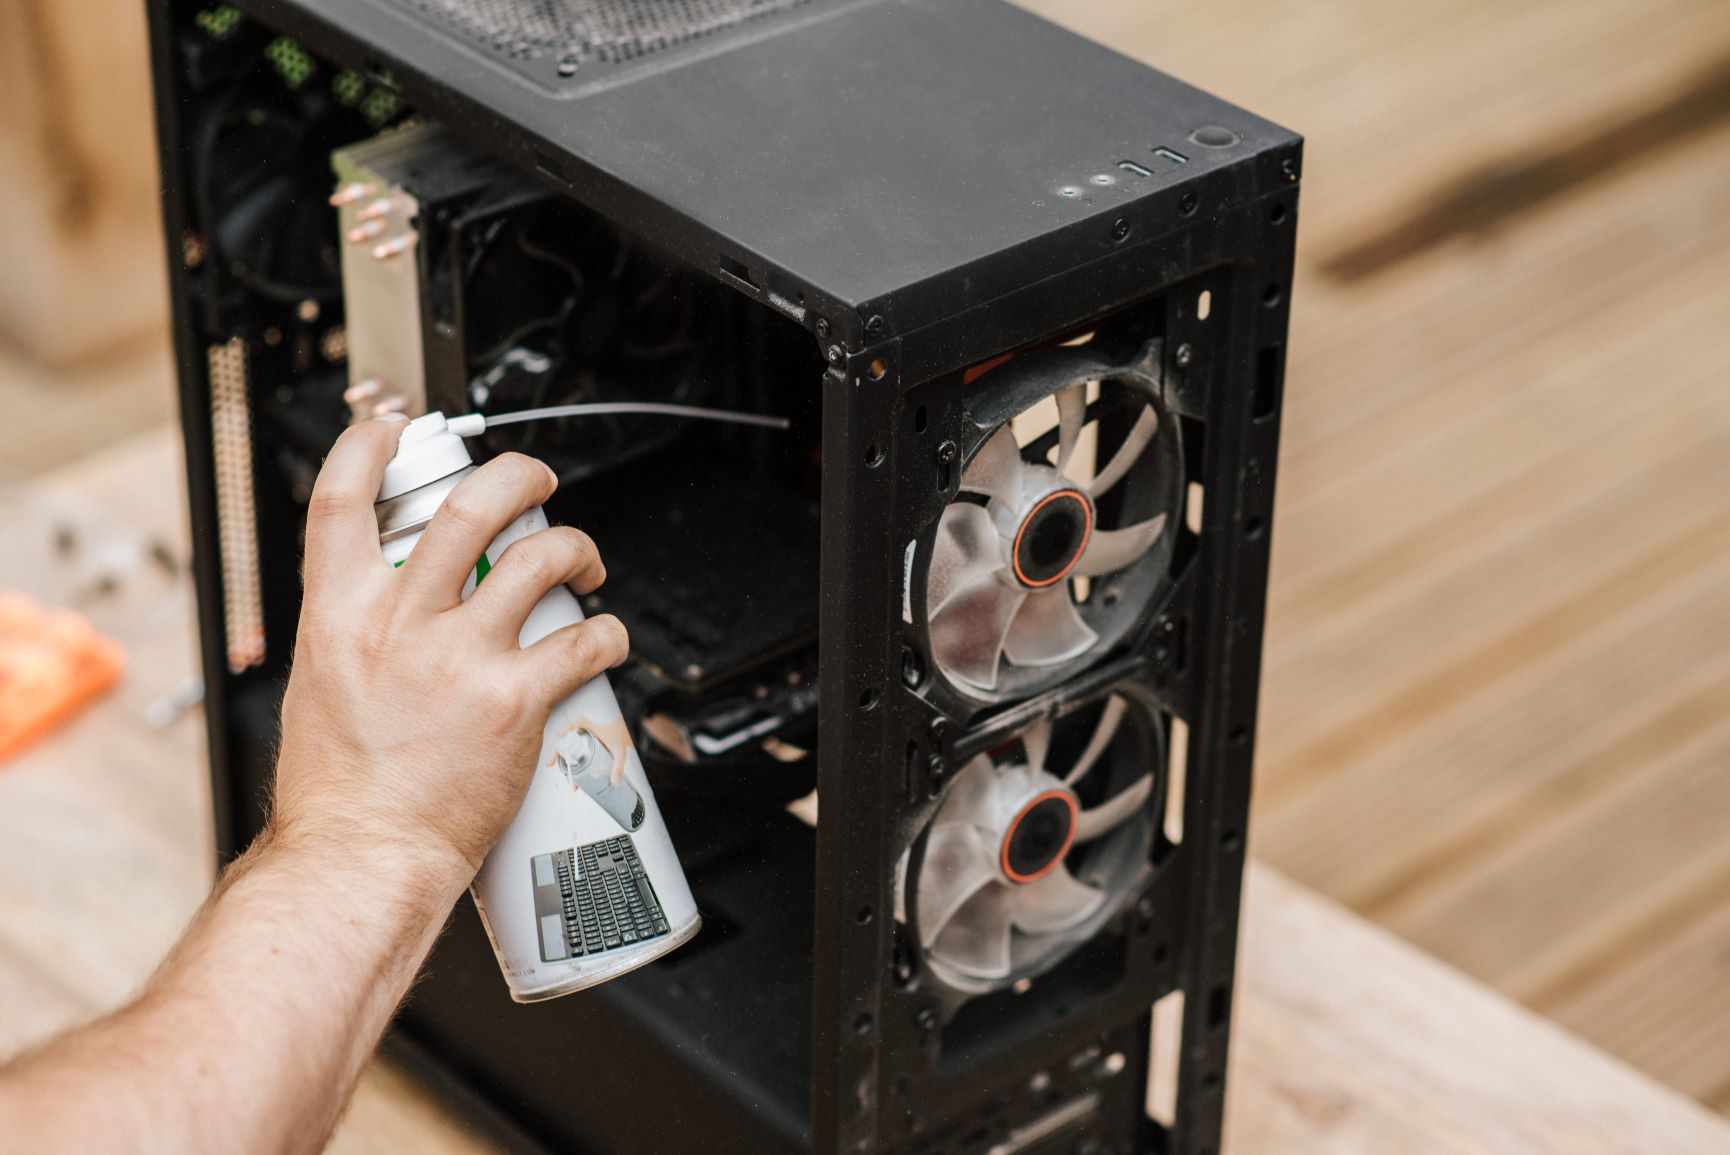
- Use Compressed Air: With the case fan removed, hold the compressed air canister upright and use short bursts of air to blow away loose dust and debris from the fan blades. Direct the airflow towards the blades, moving from the base to the tip of each blade. Ensure you also blow air into the gaps between the blades and around the motor area.
- Use a Soft Brush: After using compressed air, gently brush the fan blades and the surrounding areas with a soft-bristled brush. This will help dislodge any remaining dust or debris. Be thorough but careful not to apply too much pressure, as excessive force could damage the delicate fan blades.
- Repeat as Needed: Depending on the level of dirt buildup, you may need to repeat the process of using compressed air and brushing to ensure all debris is removed. Pay close attention to hard-to-reach areas along the edges of the blades and the areas near the fan motor.
Remember to work in a well-ventilated area and consider wearing a mask to protect yourself from inhaling dust particles.
Once you are satisfied with the cleaning of the fan blades, proceed to the next step to clean the fan housing.
Step 6: Clean the Fan Blades
Now that the case fan is free of loose dust and debris, it’s time to clean the fan blades more thoroughly. This step ensures that any stubborn dirt or residue is completely removed, allowing the fan to operate at its best. Follow these steps to clean the fan blades:
- Dampen a Lint-Free Cloth: Take a lint-free cloth or microfiber cloth and dampen it slightly with isopropyl alcohol. Make sure the cloth is not dripping wet, as excessive moisture can damage the fan.
- Gently Wipe the Fan Blades: Carefully wipe each fan blade with the dampened cloth to remove any remaining dirt or residue. Start from the base of the blade and move towards the tip in a sweeping motion. Be gentle to avoid bending or damaging the blades.
- Use Cotton Swabs for Stubborn Areas: For any hard-to-reach or stubborn areas, use cotton swabs moistened with isopropyl alcohol. These swabs can help you reach into smaller gaps or crevices and remove any dirt or grime more effectively.
- Repeat as Needed: If necessary, repeat the process of wiping the fan blades with the damp cloth and cotton swabs until they are clean and free of any residue. Take your time to ensure a thorough cleaning.
While cleaning the fan blades, be cautious not to apply excessive pressure or get any liquid inside the fan motor. Both can cause damage to the fan and affect its performance.
Once you are satisfied with the cleanliness of the fan blades, proceed to the next step to clean the fan housing.
Step 7: Clean the Fan Housing
After cleaning the fan blades, it’s important to also clean the fan housing to remove any accumulated dust and debris. Cleaning the fan housing ensures that the air intake and exhaust areas are clear, allowing for optimal airflow. Follow these steps to clean the fan housing:
- Use Compressed Air: Hold the compressed air canister upright and use short bursts of air to blow away loose dust and debris from the fan housing. Direct the airflow towards the intake and exhaust areas of the fan housing, as well as any gaps or crevices where dust may have accumulated.
- Brush the Housing: Use a soft-bristled brush to gently brush the inner surfaces of the fan housing. Pay close attention to the areas around the edges and corners, where dust tends to accumulate. Be thorough but gentle to avoid scratching or damaging the fan housing.
- Wipe with a Lint-Free Cloth: Dampen a lint-free cloth or microfiber cloth with isopropyl alcohol and carefully wipe the inner surfaces of the fan housing. This helps remove any remaining dust or residue and ensures a clean and dust-free environment for the fan.
Make sure to clean both the intake and exhaust areas of the fan housing, as unrestricted airflow is essential for efficient cooling. Take your time to clean all visible surfaces and ensure thorough cleanliness.
Once the fan housing is cleaned, move on to the next step to reinstall the case fan.
Step 8: Reinstall the Case Fan
Now that you have cleaned the case fan and its housing, it’s time to reinstall the fan back into your computer case. Properly reinstalling the case fan ensures it functions correctly and provides optimal airflow. Follow these steps to reinstall the case fan:
- Align the Fan: Position the case fan in the appropriate location within the computer case. Align the screw mounting holes on the fan with the corresponding holes on the case where the fan was originally installed. Ensure that the fan is oriented in the correct direction to maintain the proper airflow.
- Secure the Fan: Insert the screws into the mounting holes and tighten them appropriately to secure the case fan in place. Start with one screw and gently tighten it before moving on to the other screws. Be careful not to overtighten, as it may damage the fan or the screw threads.
- Reconnect the Power Cable: Locate the power cable that you disconnected earlier. Connect it back to the appropriate fan header on the motherboard or fan controller. Ensure it is securely attached and properly aligned.
- Reconnect Any Additional Cables: If there were any additional cables or wires attached to the fan, such as fan control cables or RGB lighting cables, now is the time to reconnect them. Double-check that all connections are secure and properly aligned.
Ensure that the case fan is securely fastened and properly connected before proceeding to the next step. A loose fan can cause noise or vibrations and compromise its performance.
With the case fan successfully reinstalled, it’s time to move on to closing your computer case in the next step.
Step 9: Close Your Computer Case
Now that you have reinstalled the case fan and ensured that all connections are secure, it’s time to close your computer case. Properly sealing the case ensures that the internal components are protected and that the fan operates effectively. Follow these steps to close your computer case:
- Align the Side Panel: Position the side panel that you removed earlier back onto the computer case. Make sure it is aligned properly with the edges of the case and any latches or release buttons are in the correct position.
- Slide or Attach the Side Panel: Slide or attach the side panel firmly into place. Depending on the case design, you may need to slide it towards the back of the case and then secure it with screws, latches, or release buttons. Follow your computer case manufacturer’s instructions for the specific method required.
- Tighten the Case Screws: If your computer case is secured with screws, use the appropriate screwdriver to tighten them, ensuring that the side panel is securely fastened. Start with one screw and gradually tighten the others in a diagonal pattern to ensure even pressure.
- Double-Check Connections: Before proceeding, double-check that all internal components are properly connected and secured. Ensure that no cables are trapped or obstructed by the side panel.
Take your time to ensure that the side panel is securely closed and the computer case is properly sealed. A properly closed case prevents dust and debris from entering and helps maintain optimal cooling for your system.
Once your computer case is closed, you’re ready for the final step: restarting your computer.
Step 10: Restart Your Computer
After successfully closing your computer case, it’s time to restart your computer to ensure that everything is functioning properly. Restarting your computer allows the system to recognize the reinstalled case fan and adjust its settings accordingly. Follow these steps to restart your computer:
- Save any Work: Before restarting, save any open files or documents you have been working on to prevent data loss.
- Close Programs: Close all open programs to ensure a smooth restart. You can do this by clicking on the “X” in the top right corner of each program window or using the keyboard shortcuts to close them.
- Click on Restart: Click on the “Start” button or the Windows icon in the bottom left corner of the screen. From the Start menu, choose the “Power” option and then select “Restart.”
- Wait for the Restart: Allow your computer some time to complete the restart process. The screen may go blank, and you might hear the fans starting up as the computer reboots.
- Monitor Fan Operation: Once your computer has finished restarting, pay attention to the case fan operation. Listen for any unusual noises or vibrations that may indicate a problem with the fan. Monitor the temperature of your system using monitoring software or BIOS settings to ensure that the fan is adequately cooling the components.
- Test System Performance: Use your computer as you normally would and observe the system performance. Ensure that the case fan is operating efficiently, providing adequate cooling for a stable and smooth computing experience.
If you notice any issues with the case fan operation or system performance after the restart, double-check the fan connections and ensure that it is seated properly. If problems persist, consult your computer’s user manual or seek professional assistance.
Congratulations! You have successfully cleaned and reinstalled your case fan. By following these steps and performing regular maintenance, you can keep your computer running smoothly and maximize its lifespan.
Tips for Preventing Future Dirt Build-Up
Keeping your case fan clean is essential, but it’s also important to take preventive measures to reduce dirt build-up and maintain optimal airflow. Here are some helpful tips to prevent future dirt build-up:
- Place your Computer in a Clean Environment: Keep your computer in a clean and dust-free area, preferably away from carpets or areas prone to high dust accumulation. This helps minimize the intake of dust into your computer case.
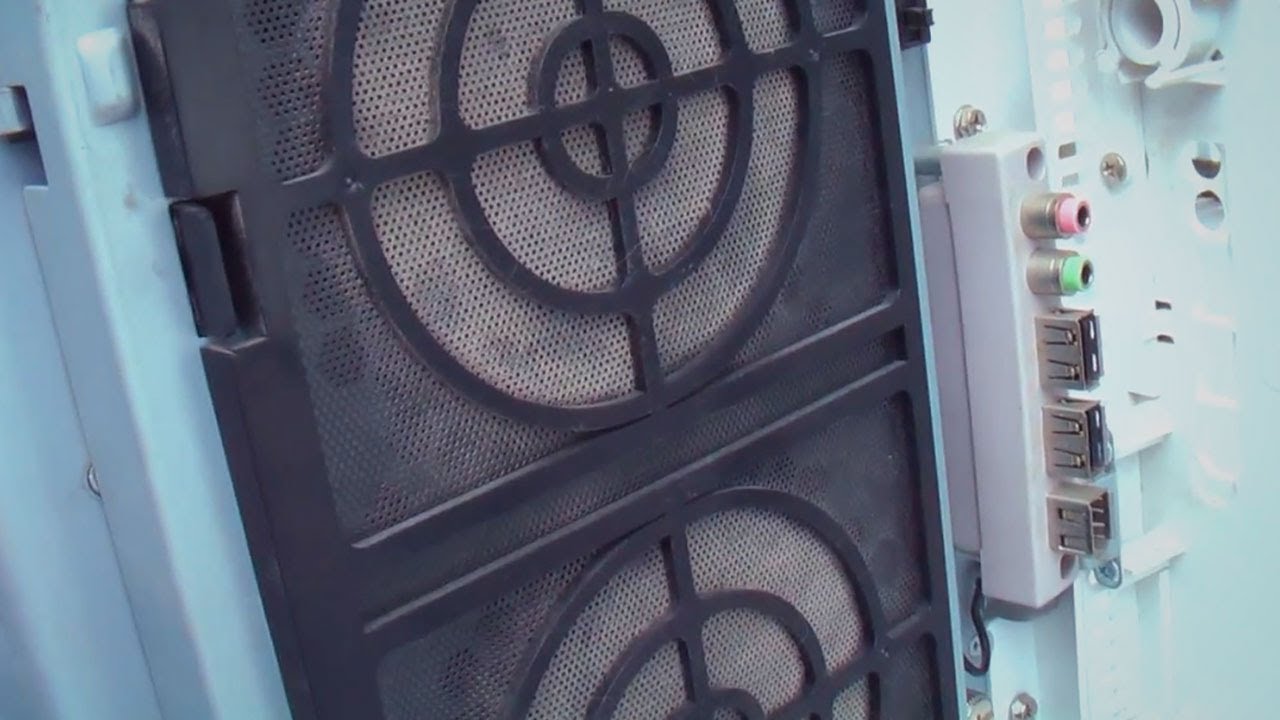
- Use Dust Filters: Consider installing dust filters on your computer case intake vents. These filters act as barriers, trapping dust particles before they can enter and accumulate on the case fan and other components. Regularly clean or replace these filters to maintain their effectiveness.
- Regularly Dust your Computer: Dust the exterior of your computer case regularly using a microfiber cloth or compressed air. This helps prevent dust from settling on the case fan and being pulled into the system.
- Keep your Computer Elevated: Place your computer on a raised surface or use a computer stand to ensure proper ventilation. This helps prevent dust and debris from settling underneath the case, reducing the chance of it being drawn into the system.
- Monitor Indoor Air Quality: Maintain good indoor air quality in the room where your computer is located. Use air purifiers or ensure proper ventilation to minimize the amount of dust and airborne particles present.
- Regularly Clean your Surrounding Area: Dust and clean the area around your computer regularly to reduce the amount of dust that can potentially enter the system. Vacuum or sweep the floors, dust surfaces, and keep the surroundings clean to minimize dust accumulation.
- Follow Regular Maintenance Schedules: Establish a routine for cleaning and maintenance tasks, including periodic case fan cleaning. Set a schedule that aligns with the level of dust accumulation in your environment, such as every three to six months, to ensure consistent performance and cooling efficiency.
- Monitor Temperature and Fan Speed: Use monitoring software or BIOS settings to monitor your computer’s temperature and fan speeds. By keeping an eye on these variables, you can detect any abnormal changes that may indicate a dirt build-up or fan malfunction.
By incorporating these preventive measures into your computer maintenance routine, you can significantly reduce the chances of dirt build-up on your case fan and ensure optimal performance and cooling efficiency for your system.
Conclusion
Cleaning your case fan is a simple yet essential task that can greatly impact the performance and longevity of your computer. By following the step-by-step guide provided in this article, you have learned how to effectively clean your case fan to improve cooling efficiency, reduce noise, and protect your computer components from overheating.
Remember to gather the necessary tools and materials, shut down your computer, and open the case to locate and remove the case fan. Through the use of compressed air, soft brushes, and lint-free cloths, you can clean both the fan blades and the fan housing, ensuring a thorough removal of dust and debris.
After cleaning, reinstallation of the case fan is crucial. Make sure to align and secure the fan properly while reconnecting any necessary power and control cables. Once your computer case is closed and the system is restarted, monitor the fan’s operation and system performance to ensure everything is running smoothly.
To prevent future dirt build-up, consider implementing the tips provided in this guide, such as maintaining a clean environment, using dust filters, regularly dusting your computer, and adhering to a regular maintenance schedule.
By regularly cleaning your case fan and following these preventive measures, you can optimize your computer’s cooling capabilities and extend its lifespan. A clean case fan ensures efficient airflow, prevents overheating, and allows your computer to perform at its best for years to come.