Introduction
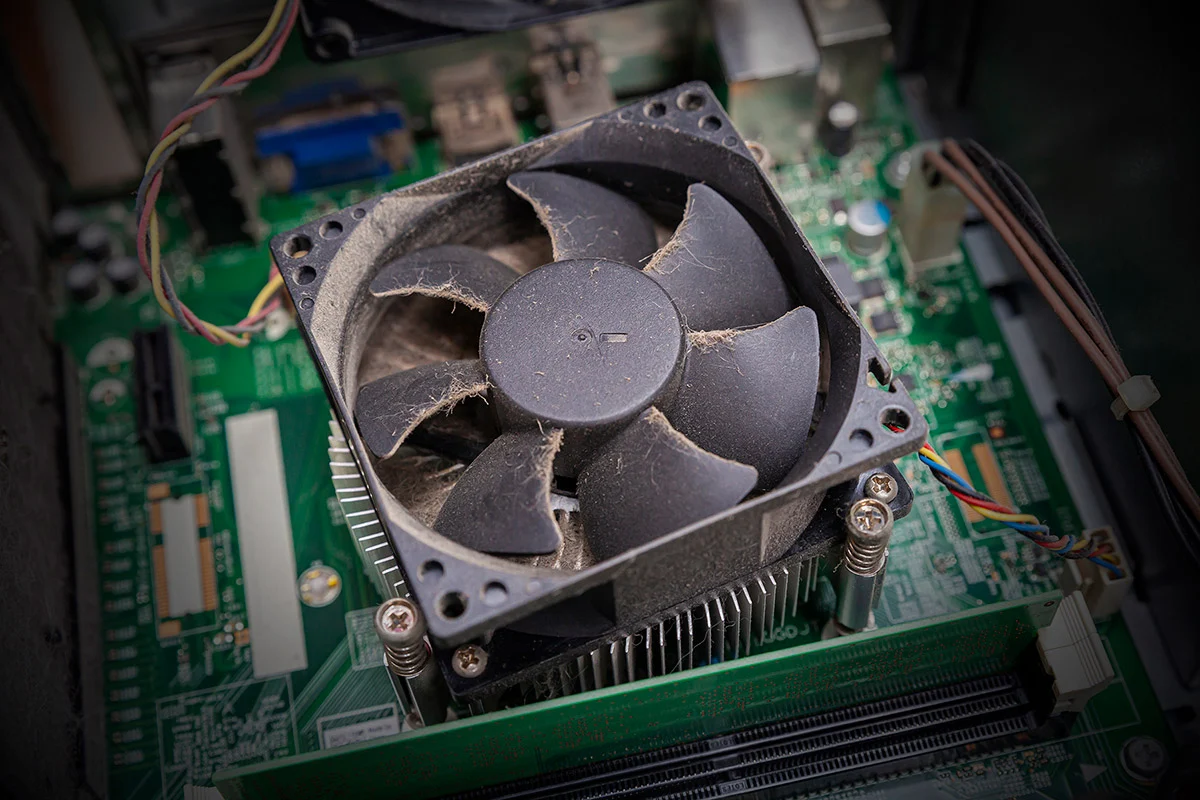
Keeping your computer running smoothly is essential for optimal performance. Over time, dust and dirt can accumulate inside your PC case, especially on the fan. This can lead to overheating issues and decreased efficiency. That’s why it’s important to regularly clean your PC fan to ensure proper airflow and prevent potential damage to your hardware.
Cleaning your PC fan may sound like a daunting task, but with the right tools and a little know-how, it can be a simple and quick process. In this guide, we will walk you through the steps to clean your PC fan effectively. Whether you are an experienced computer enthusiast or a novice user, this guide will help you keep your PC running smoothly and extend its lifespan.
Taking the time to clean your PC fan on a regular basis has several benefits. Firstly, it helps to maintain a stable temperature inside your computer case. When dust and dirt clog up the fan blades and impede airflow, the components can overheat, leading to system instability or even hardware failure. Secondly, a clean fan allows for improved airflow, which in turn increases the overall performance of your computer. When the fan operates efficiently, it helps to cool down the CPU and other critical components, allowing them to run at optimal speeds. Lastly, cleaner components tend to last longer. By removing the dust and dirt that can potentially cause damage, you can extend the life of your PC.
To get started with cleaning your PC fan, you will need a few essential tools. These include a can of compressed air, a soft brush, isopropyl alcohol, lint-free cleaning cloths, and a screwdriver (if necessary). These tools will help you to effectively remove dust and dirt from the fan, blades, and other components of your computer. With the right tools and a little patience, you can easily tackle this task and keep your PC running smoothly.
Why is it important to clean your PC fan?
Regularly cleaning your PC fan is vital for maintaining the overall health and performance of your computer. Here are a few reasons why cleaning your PC fan is important:
- Prevent overheating: Over time, dust and dirt accumulate on the fan blades and inside your computer’s case. This buildup restricts airflow and hampers the fan’s ability to cool down the components effectively. When the fan is unable to cool the system adequately, it can lead to overheating, which can cause system crashes, slow performance, and even hardware damage.
- Extend hardware lifespan: By regularly cleaning your PC fan, you can help prolong the lifespan of your computer’s hardware. When the fan is clogged with dust and dirt, it has to work harder to maintain a stable temperature, putting more strain on the components. Over time, this can lead to premature failure of the CPU, graphics card, and other vital components. By ensuring proper airflow through regular cleaning, you can help prevent unnecessary wear and tear on your hardware.
- Improve performance: A clean PC fan allows for better airflow, which helps to keep the temperature of internal components at an optimal level. When the system is cooled efficiently, the CPU can operate at its maximum speed without thermal throttling. This results in smoother multitasking, faster application load times, and improved overall performance.
- Reduce fan noise: If your PC fan is clogged with dust, it may start making excessive noise as it struggles to spin properly. Cleaning the fan removes the dust buildup and allows it to rotate smoothly, reducing the noise generated. This not only makes your computing experience more pleasant but also indicates that the fan is functioning optimally.
Overall, regular cleaning of your PC fan is essential for preventing overheating, extending the lifespan of your hardware, improving performance, and reducing fan noise. By dedicating a bit of time to this maintenance task, you can ensure that your computer stays cool, runs smoothly, and lasts longer.
Tools you will need
Before you begin cleaning your PC fan, gather the necessary tools to ensure a smooth and effective process. Here are the key tools you will need:
- Compressed air: A can of compressed air is essential for blowing away dust and debris from the fan blades and other hard-to-reach areas inside your computer case. Ensure that the compressed air canister has a nozzle attachment to control airflow direction.
- Soft brush: A soft-bristled brush is useful for gently sweeping away dust from the fan blades, grill, and other components without causing any damage. Look for a brush with synthetic bristles that won’t generate static electricity.
- Isopropyl alcohol: Isopropyl alcohol, also known as rubbing alcohol, is useful for removing stubborn dirt or grime buildup on the fan blades. Make sure to use a high-percentage (at least 70%) isopropyl alcohol for effective cleaning.
- Lint-free cleaning cloths: These cloths come in handy for wiping down the fan blades and other surfaces after using the brush or alcohol. Ensure that the cloths are lint-free to avoid leaving behind any fibers or residue.
- Screwdriver: Depending on your computer case, you may need a screwdriver to open the case and access the fan. Check your computer’s manual or do some research online to determine if you need a screwdriver and what type (e.g., Phillips or flathead) will be required.
Having these tools prepared before you start the cleaning process will save you time and make the entire process more efficient. It’s important to have the right tools to ensure that you can access all the necessary areas, remove the dust effectively, and clean any persistent dirt or grime on the fan blades and other components. By having these tools on hand, you’ll be well-equipped to give your PC fan a thorough cleaning and maintain the optimal performance of your computer.
Step 1: Shut down your computer and unplug it
Before you start cleaning your PC fan, it’s crucial to shut down your computer properly and unplug it from the power source. This ensures your safety and prevents any accidental damage to your computer while you are working on it. Follow these steps to safely shut down and unplug your computer:
- Save your work: Make sure to save any open files or projects you are working on. Closing all programs and saving your work prevents data loss or corruption.
- Shut down your computer: Click on the “Start” button in the bottom left corner of your screen, then select “Shutdown” or “Restart.” Wait until the computer shuts down completely before proceeding to the next step.
- Unplug your computer: Once the computer is completely powered off, unplug the power cord from the back of the computer or from the power outlet. This step ensures that there is no electrical current flowing through the system and reduces the risk of electric shock.
- Ground yourself: Before touching any internal components, it’s essential to ground yourself to discharge any static electricity that may have built up on your body. You can do this by touching a metal object or wearing an anti-static wrist strap.
Shutting down your computer and disconnecting it from the power source is an important step in ensuring your safety during the cleaning process. It protects both you and your computer from any potential electrical hazards and minimizes the risk of damaging sensitive internal components. Remember to follow these steps every time you work on your computer’s hardware and take the necessary precautions to ensure a safe and successful cleaning process.
Step 2: Open your computer case
Once you have safely shut down your computer and unplugged it, you can move on to opening the computer case to access the internal components, including the PC fan. Follow these steps to open your computer case:
- Locate the screws: Examine the exterior of your computer case to identify the screws holding the side panel in place. Typically, there are two screws on the back or side of the case.
- Use a screwdriver: If your case requires a screwdriver, select the appropriate size and use it to remove the screws securing the side panel. Counter-clockwise rotation will loosen and remove the screws.
- Remove the side panel: Gently slide or lift the side panel to remove it from the case. Some cases may have a latch or button release mechanism, so refer to your computer’s manual or manufacturer’s instructions if needed. Set the panel aside in a safe place.
Opening the computer case gives you access to the internal components, allowing you to easily locate and clean the PC fan. As you open the case, be mindful of any wires or cables inside. Take care not to tug on them or accidentally disconnect any connections. Depending on your computer case design, the fan might be located near the front, rear, or side of the case. Locate the fan and examine the level of dust and dirt buildup, which will determine the extent of cleaning required. Now you are ready to proceed to the next step and clean your PC fan effectively.
Step 3: Locate the fan
Once you have successfully opened your computer case, the next step is to locate the PC fan. The fan is responsible for circulating air and cooling down the internal components of your computer. Follow these steps to identify the fan:
- Inspect the interior: Take a moment to assess the interior of your computer case. Look for any visible fans, which are typically positioned near the CPU, graphics card, or power supply unit. In most cases, you will find at least one fan attached to the CPU heatsink or mounted on the rear or front panel of the case.
- Identify the fan cables: Locate the cables connected to the fan. These cables are usually bundled together with other cables coming from various components, such as the motherboard or power supply. The cables will lead you to the fan itself.
- Note the fan’s position and orientation: Observe the position and orientation of the fan. Different cases have different fan placements, so it’s essential to understand how the fan is positioned in your specific case. This will help you access the fan blades and other parts that require cleaning.
Locating the fan is crucial before proceeding with the cleaning process. It allows you to focus on the specific area that needs attention. Remember to exercise caution when handling the fan and its cables, ensuring you don’t accidentally disconnect any connections. Once you’ve successfully identified the fan, you can move on to the next step and begin cleaning it to optimize its performance and maintain a clean and efficient computer system.
Step 4: Remove dust with compressed air
Now that you have located the PC fan, it’s time to remove the accumulated dust and debris using compressed air. Compressed air is an effective tool for dislodging and blowing away dust particles from the fan blades and other hard-to-reach areas. Follow these steps to clean the fan using compressed air:
- Hold the can of compressed air upright: Before using the compressed air, ensure that the can is held in an upright position. This allows the gas to be expelled effectively without spraying any liquid.
- Aim the nozzle at the fan: Position the nozzle of the compressed air can at a safe distance from the fan to avoid causing any damage. Aim the nozzle towards the fan blades and other components that require cleaning.
- Start blowing away the dust: Press the trigger on the compressed air can and release short bursts of air onto the fan blades and surrounding areas. Be sure to cover the entire surface of the fan to dislodge all the dust particles trapped in the blades and the fan housing.
- Work from different angles: While blowing compressed air, try varying the angle and direction of the bursts to ensure all areas of the fan are thoroughly cleaned. This helps to dislodge any stubborn or hard-to-reach dust particles.
As you use the compressed air, you may notice clouds of dust being blown into the air. To prevent the dust from circulating within the computer case and settling on other components, it’s recommended to clean the case in a well-ventilated area or outside if possible. Additionally, remember to hold the can of compressed air upright throughout the process to avoid spraying any liquid propellant onto the fan or other components.
Using compressed air is an effective way to remove loose dust and debris from the PC fan. However, keep in mind that compressed air alone may not eliminate all dirt, especially if it has hardened or become sticky. In such cases, you may need to proceed to the next steps to thoroughly clean the fan blades and surrounding areas.
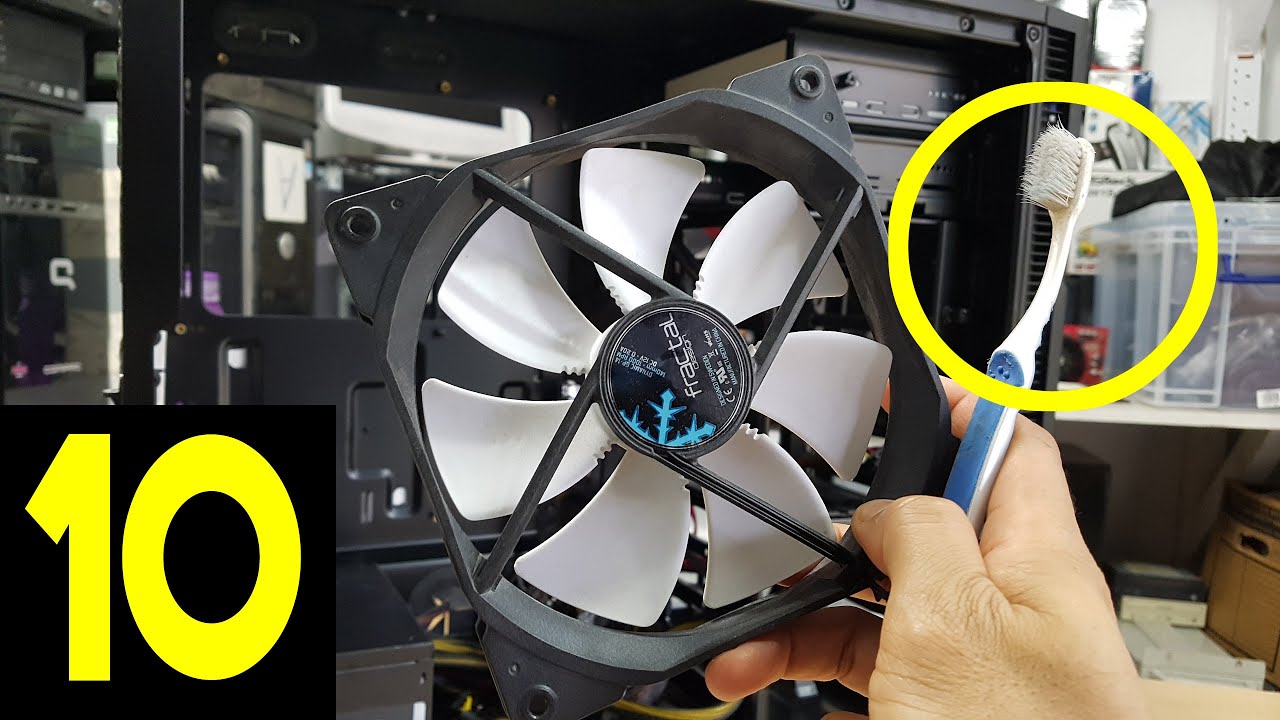
Step 5: Clean fan blades and grills with a soft brush
After removing loose dust with compressed air, it’s time to clean the fan blades and grills more thoroughly using a soft brush. Dust can often accumulate and stick to these surfaces, hindering the fan’s efficiency. Follow these steps to clean the fan blades and grills with a soft brush:
- Select a soft-bristled brush: Choose a brush with soft, synthetic bristles. Avoid using brushes with stiff bristles, as they may scratch or damage the fan blades or other components. A small paintbrush or a dedicated computer cleaning brush works well for this task.
- Gently brush away the dust: Carefully brush the fan blades, grills, and any visible areas with accumulated dust. Use gentle sweeping motions to dislodge any remaining dirt or debris on the fan blades. Make sure to brush in the direction that allows the dust to fall away from the fan rather than pushing it further into the system.
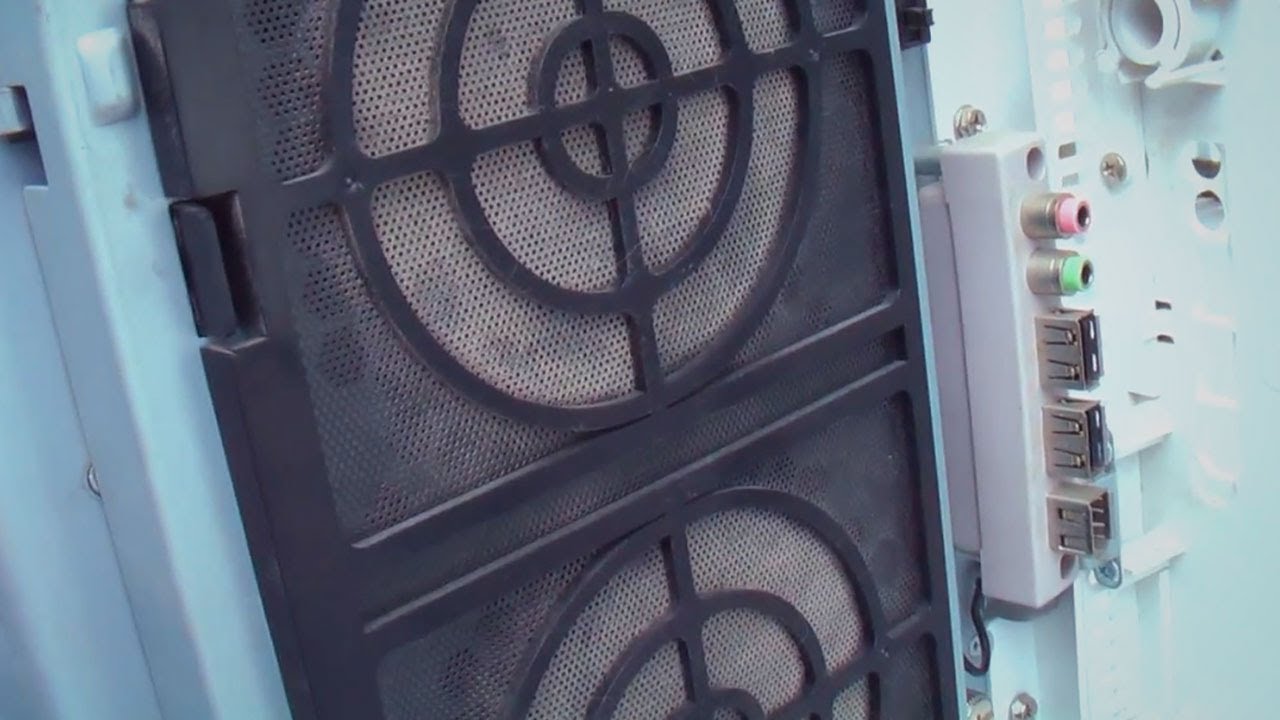
- Pay attention to the grills: Pay special attention to the fan grills or vents where the air enters and exits the fan. These areas often accumulate more dust and can restrict airflow. Brush the grills thoroughly to remove any dust or dirt buildup.
While using the brush, be mindful not to apply excessive force or press too hard on the fan blades or other components. The goal is to remove the dirt without causing any damage. It’s also important to brush carefully around delicate components, such as cables or connectors, to avoid accidentally dislodging or damaging them.
Cleaning the fan blades and grills with a soft brush helps to remove any dust that may be stuck to the surfaces and ensure proper airflow through the fan. Once you’ve completed this step, proceed to the next if you still observe persistent dirt or grime on the fan or its housing.
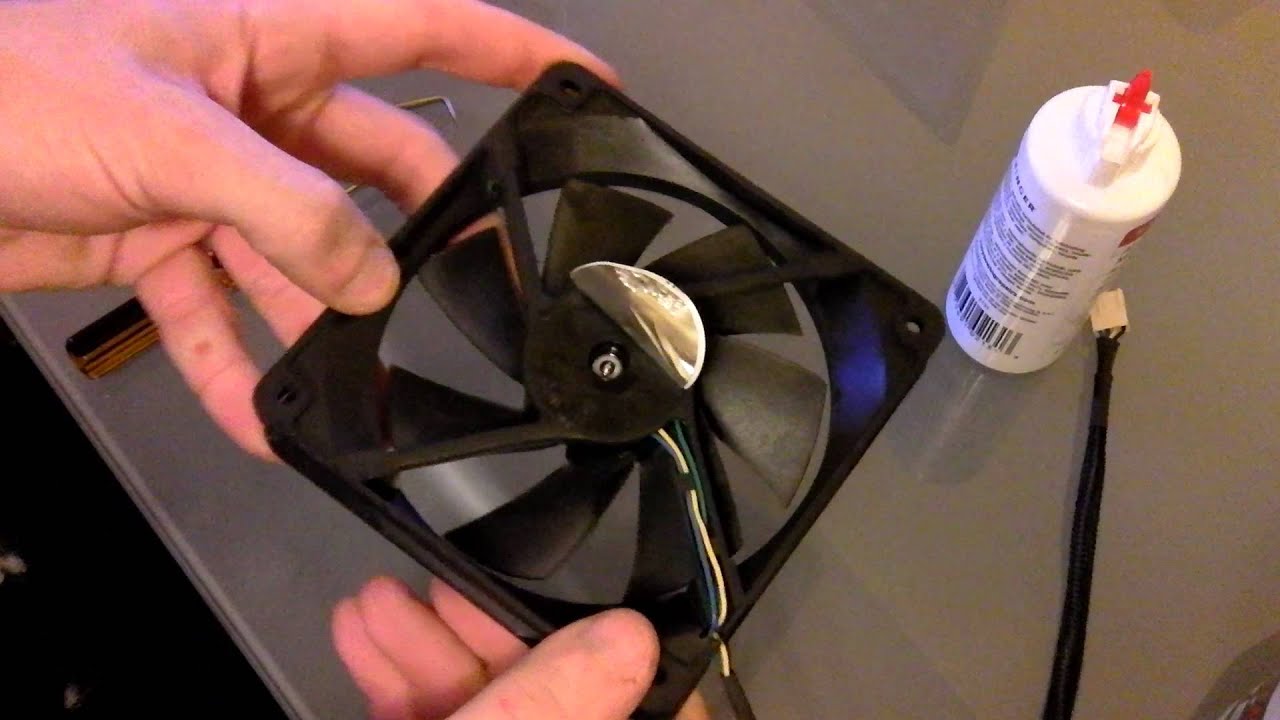
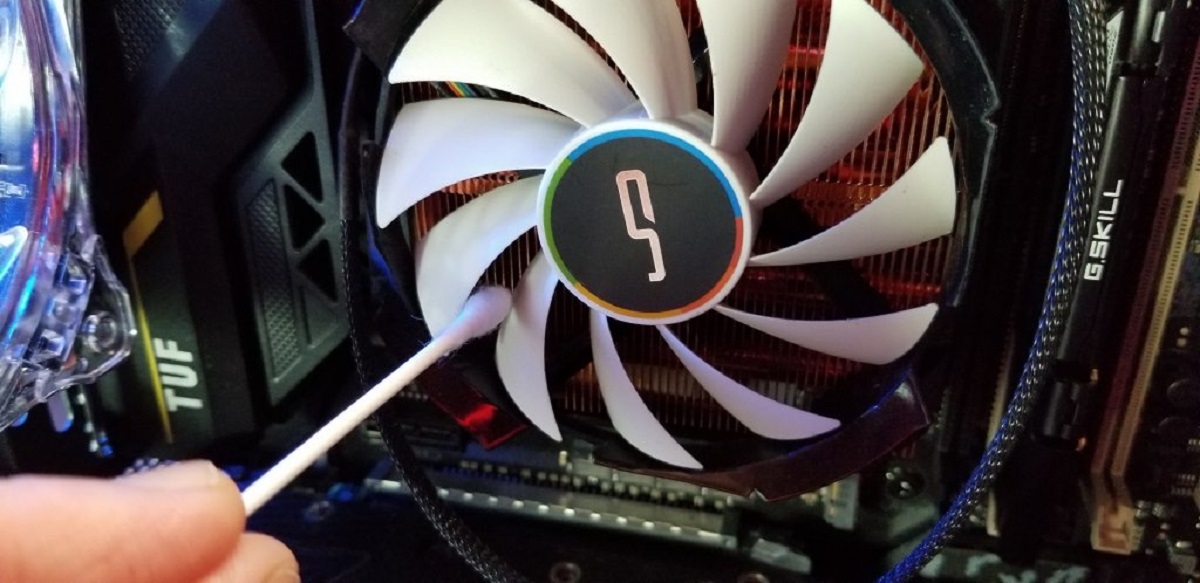
Step 6: Clean persistent dirt with isopropyl alcohol
If you still notice persistent dirt or grime on the fan blades, it’s time to use isopropyl alcohol to clean the affected areas. Isopropyl alcohol is an effective solvent that can help dissolve and remove stubborn dirt or sticky residue. Follow these steps to clean persistent dirt with isopropyl alcohol:
- Dampen a lint-free cleaning cloth: Take a lint-free cleaning cloth and dampen it with isopropyl alcohol. Ensure that the cloth is moist but not dripping wet. It’s important to use a lint-free cloth to avoid leaving behind any fibers or debris.
- Gently wipe the blades: Carefully wipe the fan blades with the damp cloth. Use gentle, circular motions to remove the persistent dirt or grime. Be thorough, paying extra attention to any areas with visible buildup.
- Repeat if necessary: If the dirt is still present after wiping with the alcohol-dampened cloth, you may need to repeat the process a few times. Make sure to use a clean section of the cloth or a fresh cloth each time to avoid spreading dirt back onto the blades.
- Dry the fan thoroughly: Once you’ve cleaned the fan blades, use a dry lint-free cloth or allow the fan to air dry for a few minutes. Ensure that the fan is completely dry before reassembling it and powering on your computer.
Isopropyl alcohol is effective in removing persistent dirt or grime that may have adhered to the fan blades. However, it’s important to use it sparingly and avoid dripping alcohol into the fan or other components to prevent any damage. Exercise caution and be gentle when wiping the fan blades to avoid bending or damaging them.
Cleaning persistent dirt with isopropyl alcohol helps restore the fan’s efficiency and ensures optimal cooling performance. Once you’ve completed this step and the fan blades are clean, you can proceed to the final step and reassemble your computer.
Step 7: Reassemble your computer
Now that you have completed the cleaning process, it’s time to reassemble your computer for normal operation. Follow these steps to ensure a proper reassembly:
- Place the side panel back: Carefully align the side panel with the computer case and gently slide or lower it back into position. Make sure to line up any screw holes with the corresponding openings in the case.
- Secure the side panel: Once the panel is in place, use the screws you removed earlier to secure it back onto the case. Use a screwdriver to tighten the screws securely but don’t overtighten them, as it may damage the case or strip the screw threads.
- Reconnect any disconnected cables: If you had to disconnect any cables during the cleaning process, carefully reconnect them to their respective ports. Double-check that all connections are secure and properly seated.
- Plug in your computer and power it on: Once all the components and cables are properly reconnected, plug in your computer and power it on. Verify that the fan is spinning, indicating that it is functioning correctly after the cleaning process.
Taking the time to reassemble your computer correctly is crucial for ensuring proper functioning and preventing any potential issues. Make sure all cables are connected securely to avoid any loose connections that could impact performance or cause problems.
Congratulations! You have successfully cleaned your PC fan and reassembled your computer. With a clean and properly functioning fan, you can now enjoy enhanced cooling performance and a more efficient computer system. Remember to periodically monitor your PC fan and clean it as needed to maintain optimal performance and prevent the buildup of dust and dirt in the future.
Conclusion
Cleaning your PC fan is a crucial maintenance task that helps optimize airflow, prevent overheating, and extend the lifespan of your computer. By following the steps outlined in this guide, you can effectively clean your PC fan and keep your system running smoothly. Regular cleaning of the fan and other components inside your computer case is recommended to remove dust and dirt buildup, ensuring optimal performance and reducing the risk of hardware damage.
Throughout the cleaning process, it’s important to prioritize safety by shutting down your computer, unplugging it, and taking precautions to avoid damaging any internal components. Use tools like compressed air, soft brushes, and isopropyl alcohol to remove dust and persistent dirt from the fan blades and grills. Remember to reassemble your computer carefully, ensuring that all cables are securely connected before powering it back on.
By keeping your PC fan clean, you can maintain stable temperatures, improve overall performance, and minimize fan noise. Additionally, regularly cleaning your PC fan can help extend the life of your computer’s hardware, saving you time and money in the long run.
Remember to periodically check the condition of your PC fan and clean it as needed. The frequency of cleaning will depend on factors such as the environment in which your computer is located and how often it is used. By incorporating regular cleaning into your computer maintenance routine, you can ensure that your PC fan continues to operate efficiently, keeping your system cool and running at its best.