Introduction
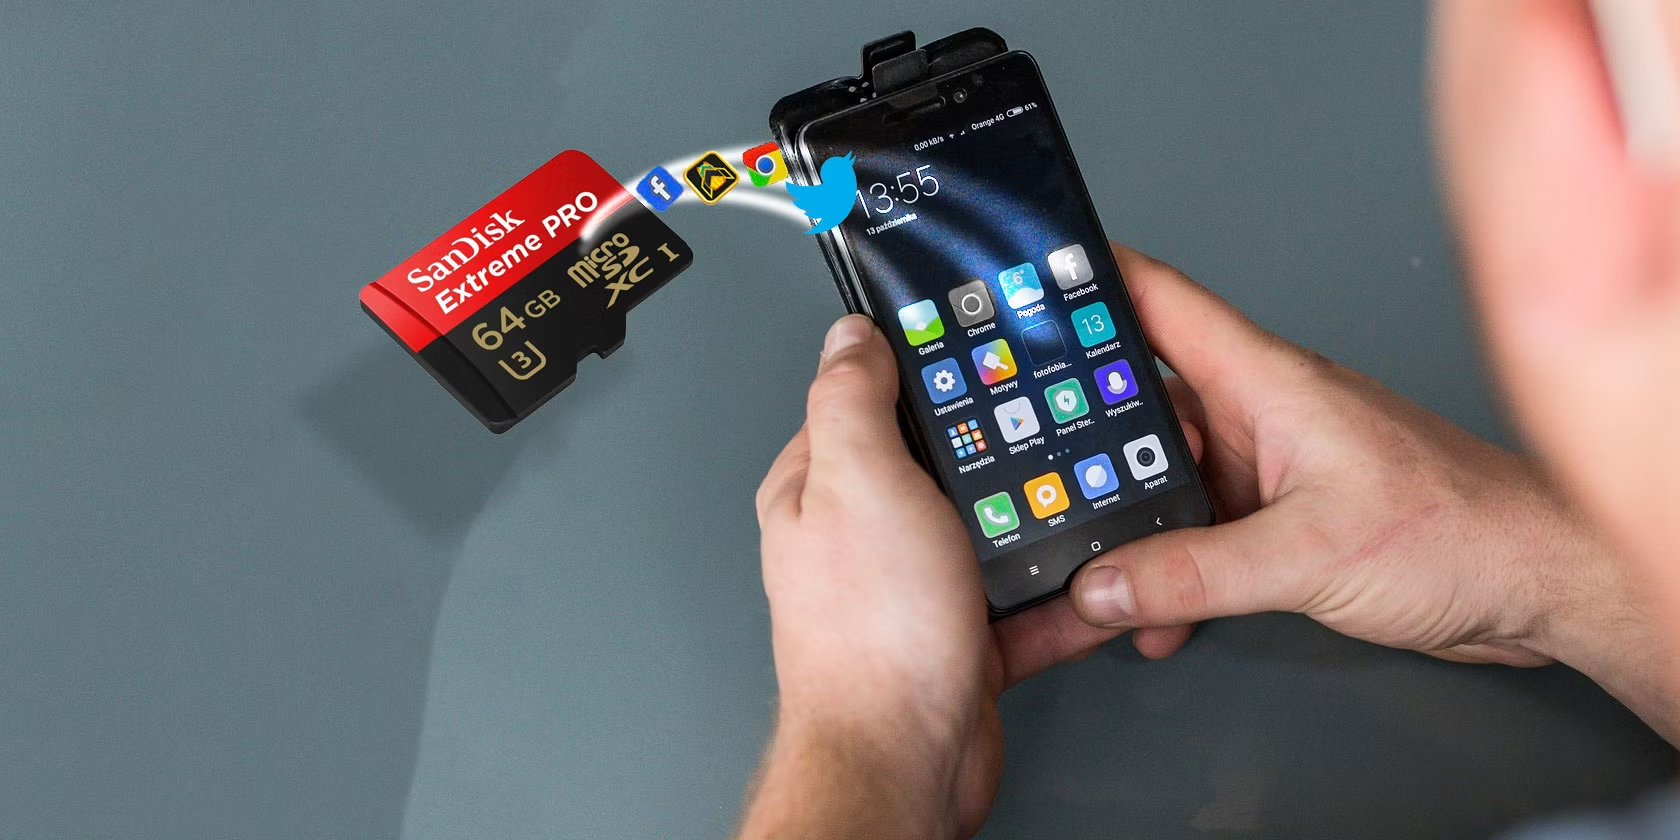
Welcome to the world of Android devices, where the apps, media files, and data we accumulate can quickly fill up the internal storage. When you find yourself running out of space on your device, there’s a simple solution: using an SD (Secure Digital) card. SD cards offer extra storage capacity, allowing you to free up space on your internal storage and keep your device running smoothly.
In this guide, we will explore how to move from internal storage to an SD card. We will look at different methods and steps to transfer various types of data, including photos, videos, music, apps, and app data. We will also discuss how to check if your device supports SD cards and how to properly insert and mount an SD card.
Before we dive into the process, it’s important to note that not all Android devices support SD cards. Some smartphones and tablets come with built-in storage and do not have an option to expand it with an SD card. To determine if your device supports an SD card, follow the steps outlined in the next section.
Once we confirm that your device supports an SD card and you have one available, we can proceed with the steps to move your data. Whether you’re looking to free up space, organize your files, or simply optimize your device’s performance, moving to an SD card can be a game-changer.
So, let’s get started and learn how to make the most of your device’s storage by moving from internal storage to an SD card.
Why Move from Internal Storage to SD Card
Managing storage space is a common challenge for many smartphone and tablet users. As we continuously use our devices to capture photos and videos, download apps, and store media files, the internal storage can quickly fill up, leading to decreased performance and limited space to store new data. This is where the benefits of using an SD card come into play.
Here are some key reasons why you should consider moving from internal storage to an SD card:
- More Storage Capacity: SD cards offer additional storage capacity, allowing you to expand the amount of available space on your device. With a larger storage capacity, you can store more photos, videos, music, and apps without worrying about running out of space.
- Improved Device Performance: By moving data to an SD card, you can free up space on your device’s internal storage, which can have a positive impact on its performance. With more free space, your device can run smoother, launch apps faster, and reduce the risk of experiencing lag or slowdowns.
- Easy File Organization: Having a dedicated external storage option like an SD card allows for better file management and organization. You can create folders and directories specifically for different types of data, making it easier to locate and access files when needed.
- Seamless Data Transfer: Transferring data from internal storage to an SD card is a straightforward process. Whether you’re moving photos, videos, music, or apps, Android provides built-in options and tools that simplify the transfer and ensure your data remains intact.
- Data Backup and Security: Storing your valuable data on an SD card provides an extra layer of security. In case your device malfunctions or you need to perform a factory reset, your important files will be safe on the SD card, ready to be accessed and restored once the issue is resolved.
In essence, moving from internal storage to an SD card allows you to overcome storage limitations, optimize device performance, and maintain better organization and security of your data. Now that you understand the benefits, let’s move on to the next section to determine if your device supports the use of an SD card.
How to Check if your Device Supports SD Card
Before you can start moving data from internal storage to an SD card, it’s important to ensure that your device supports the use of an SD card. While most Android devices have an SD card slot, not all of them are compatible with this additional storage option.
Here are the steps to check if your device supports an SD card:
- Check the device specifications: The easiest way to determine if your device supports an SD card is to refer to its specifications. You can do this by visiting the manufacturer’s website or consulting the user manual that came with your device. Look for information about expandable storage or SD card compatibility.
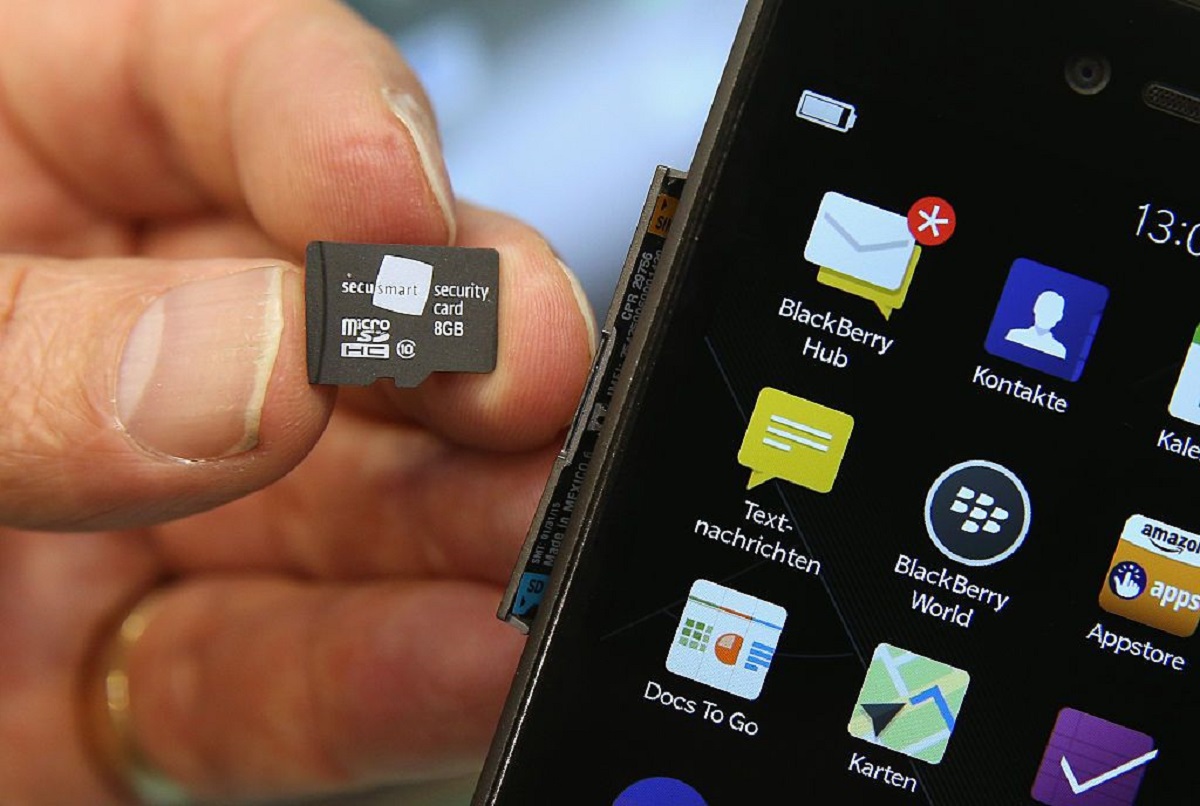
- Look for an SD card slot: Physically inspect your device for an SD card slot. Most Android devices have a small slot, often located on the side or top of the device, where you can insert an SD card. The slot is typically labeled as “SD” or “SD Card.”
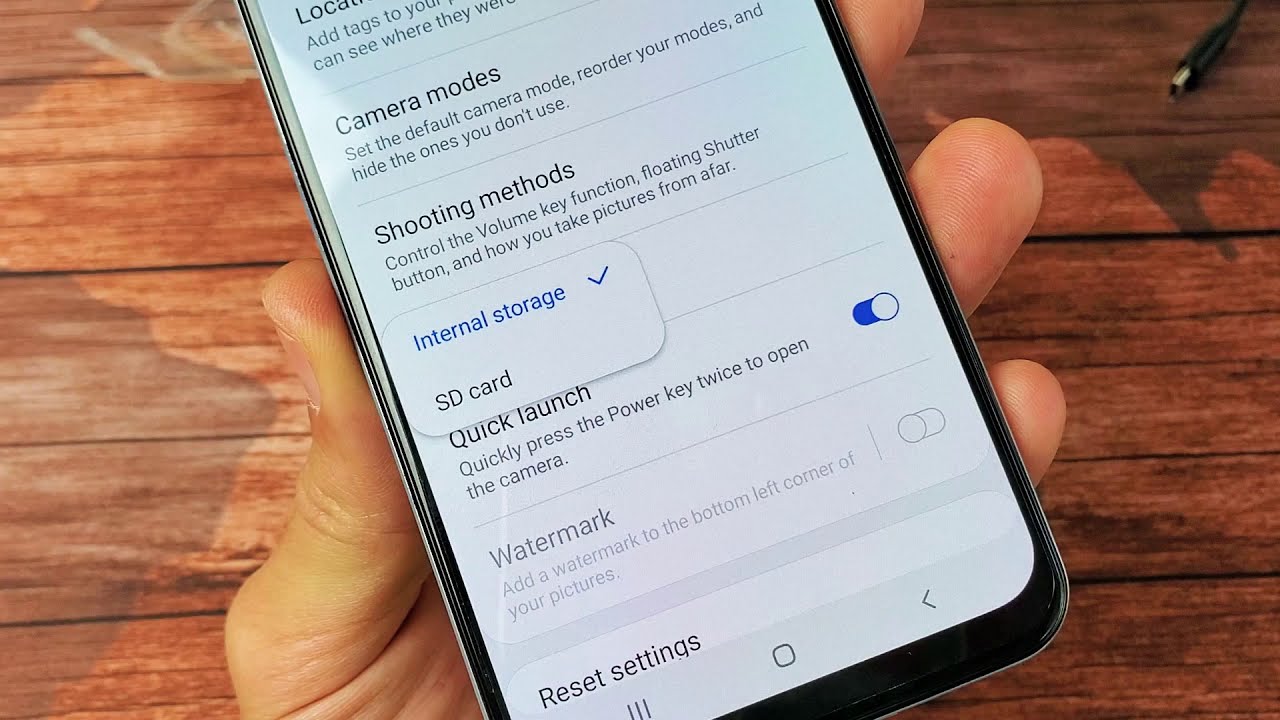
- Access the device settings: On your Android device, go to the Settings app. Look for an option related to storage or memory. This may vary depending on your device model and Android version. Tap on the storage option to view details about your device’s storage capacity and available space.
- Check for an SD card option: Within the storage settings, you should also see an option related to SD card or external storage. Tap on this option, and your device will either display information about the SD card or indicate that there is no SD card inserted or supported.
- Consult with your device’s manufacturer: If you’re still unsure about whether your device supports an SD card, it’s recommended to reach out to the manufacturer’s support team. They can provide accurate information and clarify any doubts you may have.
If, after following these steps, you determine that your device does not support an SD card, you will need to consider alternative solutions for managing your storage space. However, if your device does support an SD card, you’re ready to move on to the next section, where we’ll cover how to properly insert and mount an SD card.
How to Insert and Mount an SD Card
Now that you’ve confirmed that your device supports an SD card, it’s time to learn how to properly insert and mount the card. This step is crucial in preparing the SD card for use and ensuring that your device recognizes it as external storage.
Here’s a step-by-step guide on how to insert and mount an SD card:
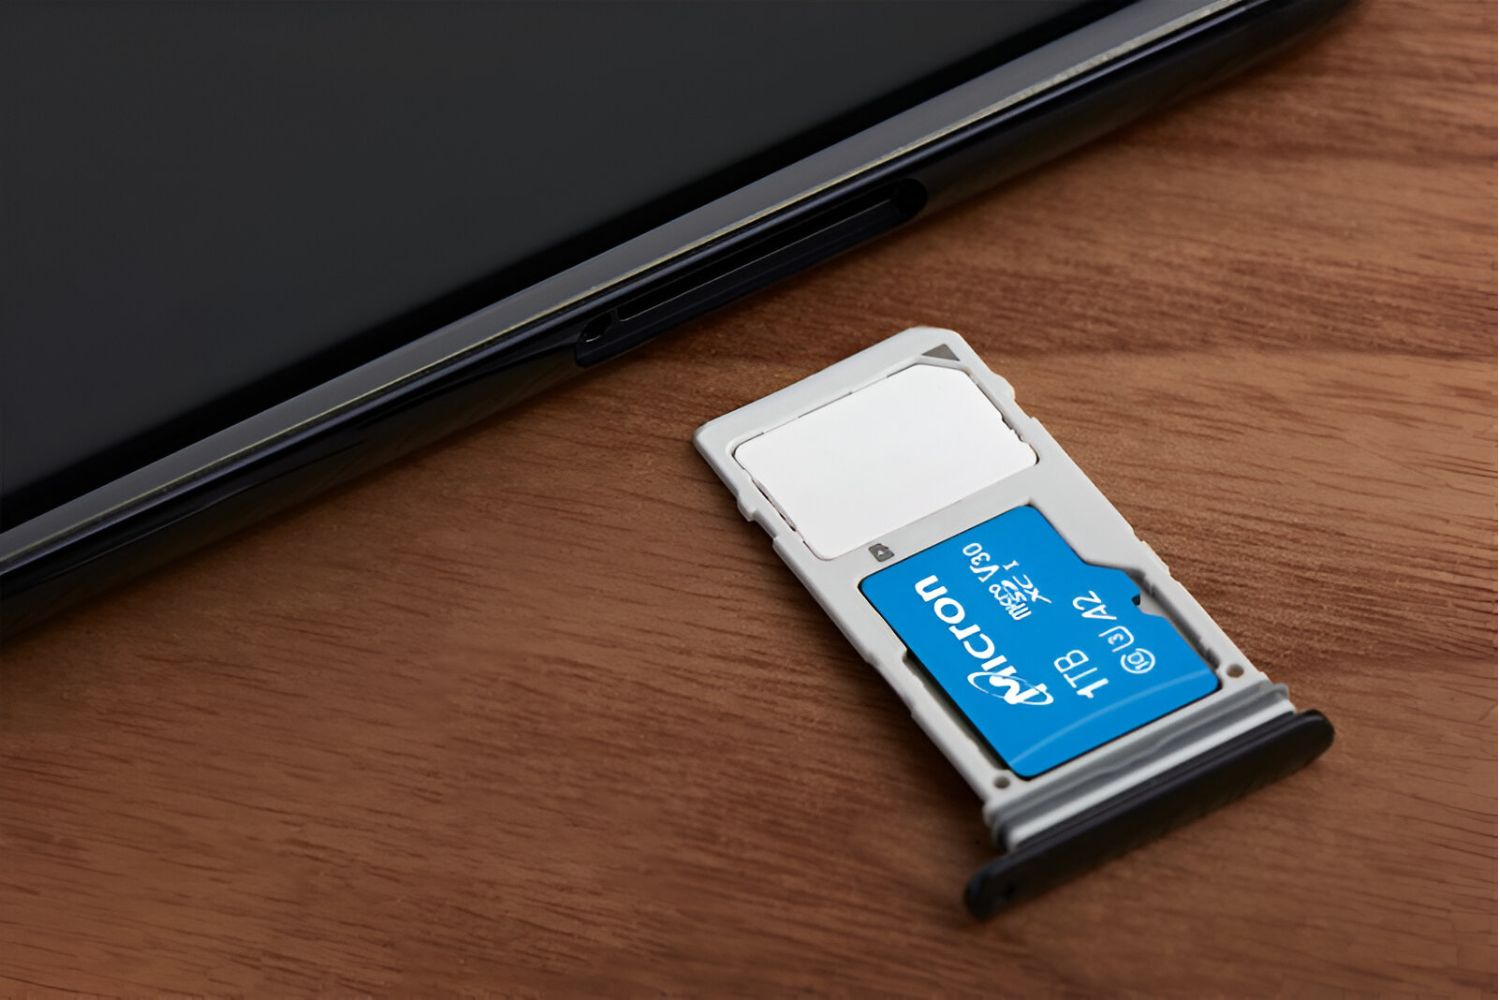
- Locate the SD card slot: Look for the slot on your device where the SD card will be inserted. Typically, it is located on the side or top of the device. In some cases, the slot may be hidden behind a removable back cover.
- Power off your device: Before inserting or removing an SD card, it’s important to power off your device. This ensures that no data is being read or written to the card during the process, reducing the risk of data corruption.
- Open the SD card slot: If your device has a removable back cover, carefully remove it to access the SD card slot. If your device has a sealed design, look for a small tray or slot that can be opened with a SIM card ejector tool or a similar object.
- Insert the SD card: Take your SD card and align it with the slot, ensuring that the metal contacts on the card are facing downwards. Gently insert the card into the slot until it clicks into place or is fully seated.
- Close the slot: If you removed a back cover, carefully place it back onto your device, ensuring it is securely attached. For devices with a tray or slot, gently push the tray back into its original position until it is flush with the device.
- Power on your device: Once the SD card is inserted, power on your device. It will automatically detect the SD card and initialize it for use.
- Mount the SD card: After powering on your device, go to the Settings app and navigate to the storage settings. Look for an option to mount or enable the SD card. Tap on this option to allow your device to recognize and use the SD card as external storage.
Once the SD card is successfully inserted and mounted, it is ready to be used as additional storage for your device. In the next sections, we will explore different methods to transfer data from internal storage to the SD card, including photos, videos, music, apps, and app data.
How to Transfer Data from Internal Storage to SD Card
Now that you have successfully inserted and mounted your SD card, it’s time to transfer data from your device’s internal storage to the SD card. This process allows you to free up space on your device and keep your files organized. In this section, we will cover different methods to transfer various types of data to the SD card.
Moving Photos and Videos to SD Card
To transfer photos and videos from your device’s internal storage to the SD card, follow these steps:
- Open the Gallery or Photos app on your device.
- Select the photos and videos you want to move to the SD card.
- Tap on the Share button or the three-dot menu icon.
- Select the option to Move or Move to SD Card.
- Choose the destination folder on the SD card where you want to move the files.
- Tap on Move or OK to start the transfer process.
Depending on the number and size of the files, the transfer process may take some time. Once completed, the photos and videos will be moved from your device’s internal storage to the specified folder on the SD card.
Moving Music and Audio Files to SD Card
To transfer music and audio files from your device’s internal storage to the SD card, follow these steps:
- Open your preferred Music or File Manager app on your device.
- Navigate to the folder that contains your music and audio files.
- Select the files you want to move to the SD card.
- Tap on the Move or Cut option.
- Navigate to the desired location on the SD card.
- Tap on the Paste or Move Here option to initiate the transfer.
Once the transfer is complete, your music and audio files will be moved to the specified location on the SD card, and you can access them from any compatible music player.
Moving Apps and App Data to SD Card
Not all Android devices support moving apps and app data to the SD card, as this feature depends on the device’s manufacturer and Android version. However, for devices that do support this functionality, you can follow these general steps:
- Go to the Settings app on your device.
- Navigate to the Apps or Application Manager section.
- Select the app you want to move to the SD card.
- Tap on the Storage option within the app settings.
- If the option is available, tap on the Move to SD Card button.
- Follow any additional prompts or instructions to complete the transfer.
It’s important to note that not all app data can be moved to the SD card. Some apps store essential data in the internal storage for proper functioning. Additionally, moving apps to the SD card may result in slightly slower performance when accessing those apps.
By following these methods, you can efficiently transfer various types of data from your device’s internal storage to the SD card. Keep in mind that the specific steps may vary slightly depending on your device model and Android version, so always refer to your device’s user manual or online support resources for accurate instructions.
Moving Photos and Videos to SD Card
One of the primary reasons for running out of storage space on your device is the accumulation of photos and videos. These media files tend to consume a significant amount of storage, but by transferring them to your SD card, you can reclaim valuable internal storage and keep your media organized. Here’s how you can move photos and videos to the SD card:
- Open your device’s gallery app, which might be called “Gallery” or “Photos”.
- Select the photos and videos you want to move. You can either tap and hold on a file to select it, or you can tap the checkbox or the Select All button to choose multiple files at once.
- Look for the options menu, usually represented by three dots or a share icon, and tap on it.
- In the menu that appears, select the option that says “Move” or “Move to SD Card”.
- A new window will open, showing the available storage options. Choose the SD card as the destination.
- Tap on “Move” or “OK” to begin the transfer process. The time it takes to complete will depend on the number and size of the files being moved.
After the transfer is finished, the selected photos and videos will be moved from your device’s internal storage to the specified location on the SD card. You can now access them directly from your gallery app or any other media player that supports the file formats.
Transferring photos and videos to the SD card not only frees up space on your device but also allows for easier management and organization. You can create folders on the SD card to categorize your media files or even save them in existing folders, depending on your preference.
It’s worth noting that some apps may have their own settings to automatically store captured photos and videos directly to the SD card. If you frequently take photos or record videos using a specific app, check its settings to see if there’s an option to save media files directly to the SD card. This can help save time and ensure that new media is stored directly on the external storage.
Keep in mind that regularly backing up your photos and videos, whether through cloud storage or by transferring them to a computer, is always a recommended practice. This helps prevent data loss in case the SD card becomes damaged or corrupted.
By following these steps, you can efficiently move photos and videos from your device’s internal storage to the SD card, freeing up space and organizing your media collection. Next, let’s explore how to transfer music and audio files to the SD card.
Moving Music and Audio Files to SD Card
If you are a music enthusiast or have a large collection of audio files on your device, you may find that they take up a significant amount of space. To free up internal storage and enjoy your music library seamlessly, you can transfer music and audio files to your SD card. Here’s how you can do it:
- Open your preferred file manager app on your device. If you don’t have one, you can download a file manager app from the Google Play Store.
- Navigate to the folder where your music and audio files are stored. This could be the default music folder or any custom folder where you have saved your files.
- Tap and hold on the first file you want to move. A selection menu will appear, allowing you to select multiple files if desired.
- Once you have selected the files, look for the options menu, usually represented by three dots or an icon with vertical ellipsis. Tap on it.
- In the menu that appears, choose the option for “Move” or “Cut”.
- Navigate to the destination folder on the SD card where you want to move the files. If a folder doesn’t exist, you can create one by tapping on the “Create folder” or “New folder” option.
- Tap on “Move here” or “Paste” to initiate the transfer process. The time it takes will vary depending on the number and size of the files.
Once the transfer is complete, your music and audio files will be moved from the internal storage to the specified location on the SD card. You can now access them using any music player app that can scan and play music from the SD card.
Keep in mind that some music player apps allow you to set a default storage location for music files. By accessing the settings of your preferred music player app, you may be able to specify the SD card as the default storage location, making it easier to manage your music library moving forward.
Remember to update your music player’s library or perform a rescan if necessary, so that the app can recognize the new location of your music files on the SD card.
By moving your music and audio files to the SD card, you can free up space on your device’s internal storage and ensure that your music collection remains easily accessible. Next, let’s explore how to move apps and app data to the SD card, if your device supports this feature.
Moving Apps and App Data to SD Card
For devices that support it, moving apps and app data to the SD card can be beneficial for optimizing storage space on your device. Transferring apps to the SD card can help free up internal storage and allow you to install more apps without worrying about reaching storage limits. However, it’s important to note that not all apps can be moved to the SD card. Here’s how you can check if your device supports moving apps and app data to the SD card and how to do it:
- Open the Settings app on your Android device.
- Navigate to the “Apps” or “Application Manager” section, which may be located under the “Device” or “Device Management” category.
- Scroll through the list of installed apps and select the app you want to move to the SD card.
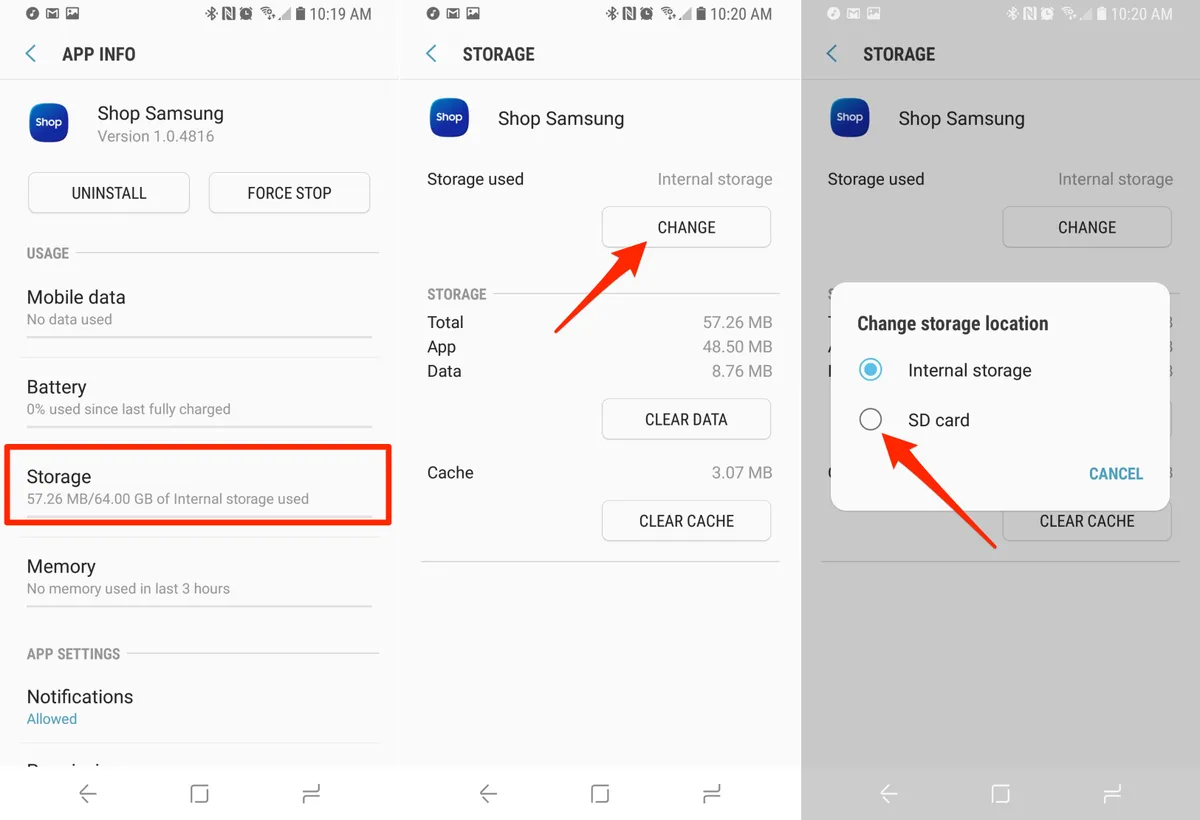
- On the app’s info page, you should see an option called “Storage” or “Storage Usage”. Tap on it.
- If the app supports moving to the SD card, you will find the “Change” or “Move to SD card” option. Tap on it.
- Follow the on-screen prompts to complete the process of moving the app to the SD card.
It’s worth noting that while the app itself can be moved to the SD card, some app data may still remain on the internal storage. This occurs because certain app components are required to function properly and cannot be moved to external storage. Therefore, it’s crucial to ensure that you have enough internal storage available to accommodate any remaining app data.
Additionally, it’s important to be aware that moving an app to the SD card may result in slightly slower performance when accessing it. This is because reading data from the SD card may be slower compared to internal storage. If you notice any significant performance issues with a specific app after moving it to the SD card, you can consider moving it back to the internal storage.
Furthermore, it’s worth noting that not all apps have the native ability to be moved to the SD card. Some apps, especially system apps or certain pre-installed apps, may not provide the option to move them. In such cases, the “Move to SD card” option will be grayed out or not available.
Remember that once an app is moved to the SD card, the app will still remain on your device’s app list. However, the storage space occupied by the app should now be reflected as part of the SD card’s usage rather than the internal storage.
By moving apps and app data to the SD card, you can optimize the use of your device’s internal storage, allowing for more apps to be installed and reducing the risk of running out of storage space. However, it’s important to be mindful of the potential impact on app performance and limitations regarding which apps can be moved to external storage.
Now that you know how to move apps and app data to the SD card (if supported by your device), let’s explore how to change the default storage location for new files.
Changing Default Storage Location for New Files
By default, Android devices save newly created files, such as photos, videos, and downloads, to the internal storage. However, if your device supports an SD card, you can change the default storage location for these files to be directly saved on the SD card. This can help preserve valuable space on your device’s internal storage. Here’s how you can change the default storage location for new files:
- Open the Settings app on your Android device.
- Navigate to the “Storage” or “Storage and USB” section.
- Look for the option called “Default storage location”, “Storage settings”, or similar.
- Tap on the option to change the default storage location.
- Choose the SD card as the preferred storage location for new files.
- Confirm your selection and exit the settings.
After changing the default storage location, any new files you create, such as photos taken with the camera or files downloaded from the internet, will be directly saved to the SD card. This helps ensure that your device’s internal storage remains free for essential system files and apps.
Keep in mind that the exact steps and options may vary depending on your device model and Android version. If you are unable to find the “Default storage location” option in your device’s settings, refer to the device’s user manual or search for specific instructions based on your device model and Android version online.
It’s important to note that not all apps honor the default storage location settings. Some apps may have their own settings to specify the storage location for their data. For example, a camera app may have options to choose where to store captured photos. In such cases, you will need to adjust the settings within those specific apps to ensure that new files are saved to the SD card.
By changing the default storage location for new files to the SD card, you can make the most of the available storage space on your device and ensure that new files are directly saved to the external storage. This can be particularly helpful for devices with limited internal storage capacity.
With these tips in mind, you are now equipped with the knowledge to manage and optimize storage on your Android device. Let’s move on to the last section for some additional tips on managing storage on the SD card.
Tips for Managing Storage on SD Card
Once you’ve successfully moved data to your SD card and changed the default storage location, it’s important to ensure that your SD card is effectively managed to maximize its storage capacity and maintain optimal performance. Here are some tips to help you manage storage on your SD card:
- Regularly organize your files: Take the time to organize files on your SD card into folders and subfolders. This makes it easier to locate and access specific files when needed, preventing clutter and confusion.
- Periodically check for duplicate files: Over time, duplicate files may accumulate on your SD card, unnecessarily occupying storage space. Use a file manager app to scan and remove duplicate files, freeing up valuable space.
- Regularly backup your SD card: Ensure that your important files on the SD card are backed up regularly to prevent data loss in case of accidental deletion, SD card corruption, or device malfunction. You can back up your SD card to a computer, cloud storage, or another external storage device.
- Avoid removing the SD card during data transfer: To prevent potential data corruption and file loss, avoid removing the SD card from your device while transferring data. Always wait for the transfer to complete or use the proper method to eject the SD card before physically removing it.
- Perform regular maintenance: Periodically check your SD card for errors or issues and perform any necessary maintenance tasks. This may include using the built-in storage tools on your device, such as the SD card formatter, to optimize the SD card’s performance and fix any file system errors.
- Be mindful of app updates: When updating apps, some apps may reinstall on your device’s internal storage instead of the SD card. Keep an eye out for such occurrences and manually move the updated apps back to the SD card if necessary.
- Monitor free space on the SD card: Regularly check the available free space on your SD card to ensure that you have sufficient storage for new files. If the card becomes too close to full, consider removing unnecessary files or upgrading to a higher-capacity SD card.
- Use a reliable and compatible SD card: Invest in a quality SD card from a reputable brand to ensure reliability and longevity. Additionally, consider using an SD card that is compatible with your device to avoid potential compatibility issues or performance limitations.
By implementing these tips, you can effectively manage and optimize storage on your SD card, ensuring that it remains a valuable and efficient storage solution for your Android device.
Now that you have successfully learned how to move data from internal storage to the SD card and manage storage effectively, you can enjoy the benefits of increased storage capacity and better device performance. As you continue to use your device, remember to periodically review and maintain storage on the SD card to keep it organized and efficient.
Conclusion
Managing storage on your Android device is crucial for ensuring optimal performance and maximizing available space. By moving data from internal storage to an SD card, you can free up space, organize your files, and avoid running out of storage. Throughout this guide, we have explored various methods to transfer different types of data to the SD card, including photos, videos, music, apps, and app data.
We began by discussing the benefits of using an SD card and how to check if your device supports it. We then covered the steps to properly insert and mount an SD card, ensuring that your device recognizes it as external storage. From there, we delved into transferring photos, videos, music, and audio files to the SD card, providing a step-by-step guide for each type of data.
We also discussed the process of moving apps and app data to the SD card, acknowledging that not all devices support this feature. Additionally, we explained how to change the default storage location for new files and shared tips for effectively managing storage on the SD card, including organization, backup, maintenance, and monitoring of free space.
By following these instructions and implementing the tips provided, you can make the most of your Android device’s storage capacity and ensure a smoother and more organized user experience. Always refer to your device’s user manual or consult the manufacturer’s support resources for specific instructions and compatibility details.
Remember to regularly review and manage storage on your SD card to optimize its performance and prevent unnecessary clutter. With a well-managed SD card, you can enjoy more space for your files and apps, improved device performance, and a seamless user experience.