Introduction
As smartphones continue to advance in capabilities, the demand for storage space to accommodate apps, photos, videos, and other files has also increased. Many Android users have found themselves facing the issue of running out of internal storage space on their devices, which can limit their ability to download and install new apps. However, there is a solution to this problem: moving Android apps to the SD card.
In this article, we will discuss various methods that allow you to move apps from the internal storage of your Android device to the SD card, without the need for rooting your device. These methods will not only free up valuable internal storage space but also enable you to continue installing new apps without worrying about limited capacity.
It is important to note that while moving apps to the SD card can offer more storage space, it may slightly affect the performance of the apps. This is because accessing data from an SD card is generally slower than from the internal storage. However, this performance impact is usually negligible and worth the trade-off for gaining additional storage space.
Before we dive into the methods, let’s explore why moving apps to the SD card is beneficial.
Why Move Apps to SD Card?
Moving apps to the SD card can bring a range of benefits for Android users:
- Expand Internal Storage: One of the main advantages of moving apps to the SD card is that it helps to expand the internal storage capacity of your device. This is particularly useful for devices with limited internal storage or for users who frequently download and install large apps.
- Use SD Card as Portable Storage: When you move apps to the SD card, it effectively becomes an extension of your internal storage. This means that you can also use the SD card to store other types of files such as photos, videos, music, and documents, further maximizing the available space on your device.
- Organize Apps Efficiently: Moving apps to the SD card can also help you organize your apps more efficiently. You can categorize apps based on their usage or type and easily swap out SD cards if you have multiple ones with specific app collections.
- Prevent App Clutter: By moving apps to the SD card, you can declutter your device’s internal storage and keep it reserved for essential system files and apps that cannot be moved. This can help improve the overall performance and responsiveness of your device.
- Conserve Battery: Another advantage of moving apps to the SD card is that it can help conserve battery life. Since accessing data from an SD card consumes less power compared to the internal storage, your device’s battery may last longer when running apps stored on the SD card.
Now that you understand the benefits of moving apps to the SD card, let’s explore the different methods you can use to accomplish this, without the need for rooting your Android device.
Understanding Storage Options on Android
Before you proceed with moving apps to the SD card, it’s important to have a basic understanding of the different storage options available on Android devices. This will help you make informed decisions and troubleshoot any issues that may arise during the process.
When it comes to Android storage, there are two primary types: internal storage and external storage, which includes the SD card. Internal storage is where the operating system, pre-installed apps, and user data are stored by default. On the other hand, the external storage, such as the SD card, provides additional space for storing files, such as photos, videos, music, and apps (if they are allowed to be moved).
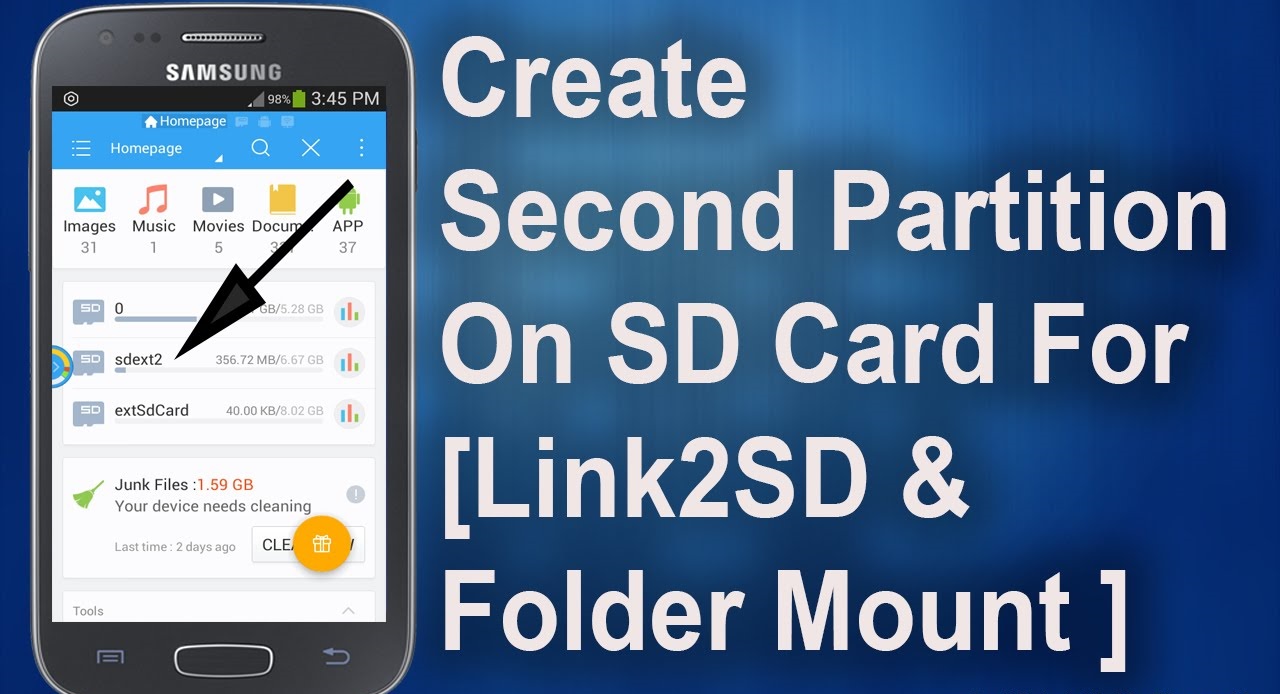
Android devices may have different partitioning methods to separate system files and user data. Some devices have a dedicated internal storage partition and a separate partition for the SD card, while others may treat the SD card as part of the internal storage or offer the option to use the SD card as “portable storage,” where apps can be moved.
It’s important to note that not all apps can be moved to the SD card. Some apps, such as system apps and apps that have services running in the background, are restricted from being moved. However, many user-installed apps can be moved to free up internal storage space.
Additionally, certain Android versions may have specific limitations or features related to moving apps to the SD card. For example, the “Adoptable Storage” feature introduced in Android 6.0 allows the SD card to be adopted as internal storage, merging it with the internal storage and treating it as a unified storage location.
Now that you have a better understanding of the storage options on Android, let’s explore the different methods you can use to move apps to the SD card without rooting your device.
Method 1: Using the Built-in App Manager
One of the easiest ways to move apps to the SD card on your Android device is by utilizing the built-in App Manager. This method is available on most Android devices and doesn’t require the installation of any third-party apps.
Here’s how you can move apps to the SD card using the built-in App Manager:
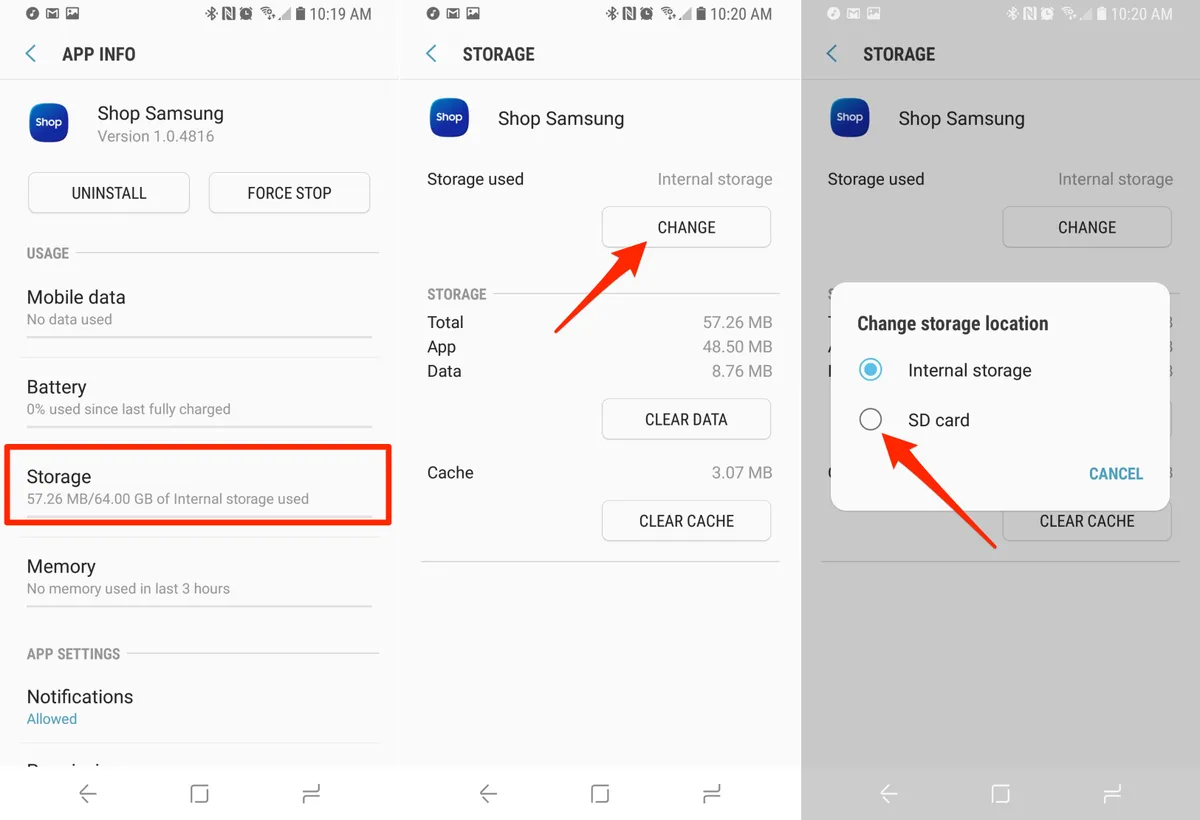
- Open the “Settings” app on your Android device.
- Scroll down and tap on “Apps” or “Applications” (the name may vary depending on your device).
- Look for the app that you want to move to the SD card and tap on it.
- Within the app settings, you should find an option called “Storage” or “Storage & cache.” Tap on it.
- Depending on your device and Android version, you may see an option called “Change” or “Move to SD card.” Tap on it.
- Wait for the app to be moved to the SD card. The time it takes to complete the process may vary depending on the size of the app and the speed of your device.
Once the app has been successfully moved to the SD card, you can check its storage location by going back to the App Manager and viewing the app’s details. It should now indicate that the app is stored on the SD card instead of the internal storage.
It’s worth noting that not all apps can be moved to the SD card using this method. Some apps are designed to be stored only in the internal storage due to their functionality or security requirements. If the “Change” or “Move to SD card” option is grayed out or not available for specific apps, it means that these apps cannot be moved using the built-in App Manager.
Now that you know how to move apps to the SD card using the built-in App Manager, let’s explore another method using third-party apps.
Method 2: Using Third-Party Apps
If the built-in App Manager on your Android device doesn’t offer the option to move certain apps to the SD card, or if you prefer a more streamlined approach, you can utilize third-party apps specifically designed for app management and moving apps to external storage.
Here’s how you can move apps to the SD card using third-party apps:
- Visit the Google Play Store on your Android device and search for “app2sd” or “app manager.”
- Choose a reputable app that suits your needs and has good ratings and reviews.
- Install the chosen app on your device and grant it the necessary permissions to access your apps and storage.
- Launch the app and navigate to the list of installed apps on your device.
- Select the app that you want to move to the SD card.
- Look for an option within the app that allows you to move the selected app to the SD card and tap on it.
- Wait for the app to be moved. The exact time required will vary based on the size of the app and the capabilities of your device.
Third-party apps dedicated to app management often provide additional features and customization options. They may also allow you to batch move multiple apps, clear app data, and uninstall apps directly from within the app manager.
It’s important to note that while third-party apps can facilitate moving apps to the SD card, not all devices and app configurations are supported. Some apps may not be compatible with certain app management apps, or the moving process may not be successful for specific apps due to their unique requirements or restrictions.
Now that you know how to move apps to the SD card using third-party apps, let’s explore another method called “Adoptable Storage” available in Android 6.0 and later.
Method 3: Adoptable Storage (Android 6.0 and later)
If you have an Android device running Android 6.0 Marshmallow or later, you can take advantage of a feature called “Adoptable Storage.” This feature allows you to format your SD card as internal storage and merge it with your device’s internal storage, essentially treating it as a unified storage space.
Here’s how you can use Adoptable Storage to move apps to the SD card:
- Insert an empty SD card into your Android device.
- When prompted, choose to set up the SD card as portable storage or internal storage. Select the “Internal Storage” option.
- Follow the on-screen instructions to format the SD card. Be aware that formatting the SD card as internal storage will erase all data stored on it, so make sure to back up any important files beforehand.
- Once the formatting is complete, your Android device will treat the SD card as internal storage.
- Go to the “Settings” app on your device.
- Scroll down and tap on “Storage & USB” or “Storage” (the name may vary depending on your device).
- Tap on the “SD card” option.
- From the options available, select “Migrate data” to move your existing apps and data to the SD card. Alternatively, you can select “Move data” to move specific apps or files manually.
- Wait for the migration process to complete. The time it takes will depend on the amount of data being moved and the speed of your device.
Once the migration process is finished, your apps and their data will be located on the SD card, effectively freeing up internal storage on your Android device. It’s worth noting that adopting the SD card as internal storage means it will be encrypted and tied to your device, making it inaccessible on other devices without reformatting.
Please note that not all Android devices support the Adoptable Storage feature. Additionally, be aware that adopting an SD card as internal storage may cause slower performance compared to using a dedicated internal storage.
Now that you know how to use Adoptable Storage to move apps to the SD card, let’s explore one more method called ADB (Android Debug Bridge).
Method 4: Using ADB (Advanced)
If you are comfortable with advanced techniques and have a computer at your disposal, you can use the Android Debug Bridge (ADB) to move apps to the SD card. ADB is a versatile command-line tool that allows you to interact with your Android device from a computer.
Here’s how you can use ADB to move apps to the SD card:
- Enable USB debugging on your Android device by going to “Settings,” selecting “About Phone” or “About Device,” and tapping on the “Build Number” seven times. This will enable Developer Options. Now, go back to the main “Settings” screen, select “Developer Options,” and enable “USB Debugging.”
- Connect your Android device to your computer using a USB cable.
- Download and install the ADB tools on your computer. These can be found on the official Android Developers website.
- Open a command prompt or terminal window on your computer and navigate to the location where you installed the ADB tools.
- Enter the command “adb devices” to ensure that your device is recognized by ADB.
- Once your device is recognized, enter the command “adb shell” to access the command-line interface of your Android device.
- Enter the command “pm list packages” to list all installed packages on your device.
- Locate the package name of the app you want to move to the SD card.
- Enter the command “pm set-install-location
” to set the installation location of the app to the SD card. Replace “ ” with the actual package name of the app. - Wait for the command to execute and then enter the command “exit” to exit the ADB shell.
Once you have completed these steps, the app you specified will be installed on the SD card whenever you download or update it. Keep in mind that this method only moves the installation files to the SD card; some app data may still remain in the internal storage.
Using ADB to move apps to the SD card gives you more control and flexibility, but it requires technical knowledge and can be risky if not executed correctly. Be cautious while using ADB and follow instructions carefully.
Now that you have learned how to use ADB to move apps to the SD card, you can choose the method that best suits your needs and requirements.
Conclusion
Running out of internal storage space on your Android device can be frustrating, but with the methods outlined in this article, you can easily move apps to the SD card without the need for rooting. Each method offers its own advantages and considerations.
If your device supports it, using the built-in App Manager is a straightforward way to move apps to the SD card. However, not all apps can be moved using this method.
Third-party apps dedicated to app management provide additional features and flexibility, but compatibility can vary from device to device.
Adoptable Storage, available on Android 6.0 and later, allows you to format your SD card as internal storage, providing a unified storage experience. However, it may slow down performance and restrict the portability of your SD card.
For advanced users, using ADB provides precise control over moving apps to the SD card. But this method requires technical knowledge and carries some risks if not executed correctly.
Before moving apps to the SD card, it’s a good idea to carefully consider the performance impact and potential limitations for certain apps. Some apps may not function optimally when stored on the SD card.
By utilizing these methods, you can effectively free up internal storage space, organize your apps efficiently, and make the most out of the available storage on your Android device.
Remember to regularly manage your apps and storage to maintain optimal performance and ensure a smooth user experience.
So go ahead and explore the methods outlined in this article to reclaim valuable storage space on your Android device and enjoy the freedom to install new apps without constraints.