Introduction
Having a corrupted SD card can be a frustrating experience, especially if it contains important data or media files. Whether it’s due to a system error, physical damage, or some other glitch, a corrupted SD card can prevent you from accessing your files or even render your device unusable. If you’re an Android user facing this issue, don’t worry; there are several methods you can try to fix it.
In this article, we will explore various solutions to help you fix a corrupted SD card on your Android device. These methods range from simple troubleshooting steps to more advanced techniques, so you can choose the one that suits your situation best. It’s important to note that attempting to fix a corrupted SD card might involve formatting the card, which means you may lose all data stored on it. Therefore, it is always recommended to back up your important files before proceeding with any of the methods mentioned here.
Before we delve into the solutions, let’s take a look at some of the possible causes of a corrupted SD card on Android. Understanding the root cause of the issue can help you prevent it from happening in the future.
What Causes a Corrupted SD Card on Android?
A corrupted SD card on an Android device can be caused by various factors. Identifying the cause can help you determine the most appropriate solution and prevent future occurrences. Here are some common causes of a corrupted SD card:
1. File system errors: When the file system on the SD card gets damaged or encounters errors, it can lead to corruption. This can happen due to improper ejection, sudden power loss, or software issues.
2. Physical damage: SD cards can be vulnerable to physical damage, such as bending, water exposure, or excessive heat. Physical damage can disrupt the data stored on the card, resulting in corruption.
3. Virus or malware infections: If your Android device is infected with a virus or malware, it can spread to the SD card and corrupt the files stored on it. It is crucial to have reliable antivirus software installed on your device to prevent such infections.
4. Using the SD card on multiple devices: Using the same SD card on different devices, especially those with different file systems, can lead to compatibility issues and eventual corruption. It is best to format the card before using it on a new device.
5. Insufficient power supply: If your Android device does not have a stable power supply, it can cause sudden shutdowns or power surges that may corrupt the SD card. Ensure that your device is adequately charged or connected to a reliable power source during data transfers.
6. Software glitches: Bugs or glitches in the Android operating system or the applications accessing the SD card can cause data corruption. It is essential to keep your device and apps updated to minimize the risk of software-related issues.
By understanding the potential causes of SD card corruption, you can take precautions to prevent them and minimize the risk of losing your valuable data. Now that we have explored the causes, let’s move on to the solutions to fix a corrupted SD card on your Android device.
Backup Your Data
Before attempting any method to fix a corrupted SD card on your Android device, it is crucial to back up your data. This step is essential because some of the troubleshooting methods might involve formatting the SD card, which will result in the loss of all data stored on it.
Here are a few reliable methods to back up your data:
1. Google Drive or Cloud Storage: Use cloud storage services like Google Drive, Dropbox, or iCloud to upload your important files, photos, and documents. These services offer ample storage space and ensure that your data is accessible from any device with an internet connection.
2. Transfer to a computer: Connect your Android device to a computer using a USB cable and transfer your data manually. You can create a folder on your computer and copy all the files from the SD card to this folder. This method is useful for transferring large files or backing up your entire SD card.
3. External storage: If you have access to another SD card or external storage device, you can move your files from the corrupted SD card to the external device. This way, you’ll have a duplicate copy of your data that is not affected by the SD card corruption.
Remember to double-check that your data has been successfully backed up before proceeding with any of the methods to fix the corrupted SD card. Once you’ve secured your data, you can confidently proceed with the troubleshooting methods mentioned in the following sections.
Now that you’ve backed up your important data, let’s move on to diagnosing the issue and finding the appropriate solution to fix your corrupted SD card on Android.
Diagnose the Issue
Before attempting any fix or troubleshooting method, it’s important to diagnose the issue with your corrupted SD card on your Android device. This step will help you understand the extent of the problem and determine the best course of action to resolve it.
Here are a few steps you can take to diagnose the issue:
1. Check for physical damage: Inspect the SD card for any physical damage like scratches, cracks, or bent contacts. If you notice any physical damage, it’s likely that the card is corrupted due to the damage. In such cases, it may be necessary to replace the SD card.
2. Try the SD card on a different device: Insert the corrupted SD card into a different Android device or a card reader on your computer. If the card works on another device without any issues, the problem may be with your Android device itself. However, if the card doesn’t work on any device, then the issue is likely with the card itself.
3. Test with a different SD card: Alternatively, you can try using a different SD card on your Android device. If the second card works fine, it indicates that the problem lies with your corrupted SD card. However, if the second card also faces issues on your Android device, then the problem may be with the device’s SD card slot or the software.
By performing these diagnostic checks, you can gather valuable information that will help you determine the root cause of the SD card corruption. Once you have a clear understanding of the issue, you can proceed with the appropriate troubleshooting method to fix your corrupted SD card on Android.
Now that you have diagnosed the issue, let’s explore some methods to address the problem and potentially recover your data from the corrupted SD card.
Method 1: Restart Your Device
One of the simplest and most effective troubleshooting methods to fix a corrupted SD card on your Android device is to restart your device. Restarting your device can help resolve temporary glitches or software issues that may be causing the SD card to become corrupted.
Here’s how you can restart your Android device:
1. Press and hold the power button on your device until the power options menu appears.
2. Tap on the “Restart” or “Reboot” option.
3. Wait for your device to power off and then automatically power back on.
After the restart, check if the issue with the corrupted SD card has been resolved. Try accessing the files on the SD card and ensure that they are accessible without any errors.
If restarting your device doesn’t fix the issue, proceed to the next troubleshooting method. However, if the SD card starts working after the restart, it’s still recommended to backup your important data and consider transferring it to a new SD card to avoid future complications.
Remember, restarting your device is a simple yet important step that can often resolve minor software-related issues. It’s always a good starting point before moving on to more complex troubleshooting methods.
Now that you’ve tried restarting your device, let’s explore another method to fix the corrupted SD card on your Android device.
Method 2: Reinsert the SD Card
If you’re facing issues with a corrupted SD card on your Android device, a simple yet effective method to try is reinserting the SD card. Sometimes, the connection between the SD card and the device’s card slot can become loose, causing data transfer errors and corruption. Reinserting the SD card can help establish a more secure connection and resolve the issue.
Follow these steps to reinsert the SD card properly:
1. Power off your Android device before removing the SD card to avoid any potential data loss or damage.
2. Locate the slot where the SD card is inserted. It is usually on the side or back of the device, depending on the model.
3. Carefully remove the SD card from the slot, ensuring not to apply excessive force or bend the card.
4. Inspect the SD card for any visible damage or dirt. Clean the SD card gently using a soft cloth or compressed air if necessary.
5. Align the SD card properly with the slot and insert it back into the device. Ensure that it fits securely and is not loose.
6. Power on your Android device and wait for it to recognize the SD card. It may take a few moments for the device to detect the card and make it accessible.
After reinserting the SD card, check if the issue has been resolved. Try accessing the files on the SD card and ensure that they are accessible without any errors.
If reinserting the SD card doesn’t fix the issue, proceed to the next troubleshooting method. However, it’s always a good idea to periodically check the connection of your SD card to ensure it is inserted properly and securely.
Now that you’ve tried reinserting the SD card, let’s explore another method to fix the corrupted SD card on your Android device.
Method 3: Clean the SD Card and Card Slot
Another method to try when dealing with a corrupted SD card on your Android device is cleaning the SD card and the card slot. Dust, dirt, or debris can accumulate over time and interfere with the proper functioning of the card and the connection between the card and the device. Cleaning these components can help eliminate any potential obstructions and improve the SD card’s performance.
Follow these steps to clean the SD card and card slot:
1. Power off your Android device before removing the SD card to avoid any potential damage and data loss.
2. Gently remove the SD card from the slot by pushing it in and releasing it. Be cautious and avoid applying excessive force or bending the card.
3. Inspect the SD card for any visible dirt, dust, or debris. If you notice any, use a soft, lint-free cloth or a clean cotton swab to gently wipe the card’s contacts and surface. Alternatively, you can also use compressed air to blow off any dust or debris.
4. Examine the card slot on your Android device for any visible dirt or debris. Use a can of compressed air or a soft brush to carefully remove any particles that may be present.
5. Once both the SD card and card slot are clean, reinsert the SD card securely into the slot.
6. Power on your Android device and wait for it to recognize the SD card. Give it a few moments to detect the card and make it accessible.
After cleaning the SD card and card slot, check if the issue with the corrupted SD card has been resolved. Try accessing the files on the card and ensure that they are accessible without any errors.
If cleaning the SD card and card slot doesn’t fix the issue, proceed to the next troubleshooting method. However, it’s a good practice to periodically clean both the SD card and card slot to maintain optimal performance and prevent any potential obstructions from causing corruption.
Now that you’ve tried cleaning the SD card and card slot, let’s explore another method to fix the corrupted SD card on your Android device.
Method 4: Remove and Reinstall the SD Card Driver
If you’re still facing issues with a corrupted SD card on your Android device, it might be worth trying to remove and reinstall the SD card driver. The SD card driver is the software that allows your device to communicate with the SD card and access the data stored on it. Reinstalling the driver can help resolve any software-related issues that may be causing the corruption.
Here’s how you can remove and reinstall the SD card driver:
1. Power off your Android device and remove the SD card from the slot.
2. Go to the “Settings” menu on your device and navigate to the “Storage” or “Memory” section. The exact location of this option may vary depending on your device’s brand and operating system version.
3. Look for the option to “Unmount” or “Eject” the SD card. Tap on this option to safely unmount the card from your device.
4. Once the SD card is unmounted, go to the settings and navigate to the “Apps” or “Application Manager” section.
5. Find the app that handles your external storage or SD card, which is usually named something like “File Manager” or “Storage Settings.” Tap on this app to access its settings.
6. Inside the app’s settings, you should find an option to “Clear cache” or “Clear data.” Tap on this option to clear any cached data related to the SD card driver.
7. After clearing the cache or data, power off your device.
8. Reinsert the SD card into the slot and power on your device.
After reinstalling the SD card driver, check if the issue with the corrupted SD card has been resolved. Try accessing the files on the SD card and ensure that they are accessible without any errors.
If removing and reinstalling the SD card driver doesn’t fix the issue, proceed to the next troubleshooting method. However, it’s a good practice to periodically update your device’s software and drivers to ensure optimal performance and compatibility with your SD card.
Now that you’ve tried removing and reinstalling the SD card driver, let’s explore another method to fix the corrupted SD card on your Android device.
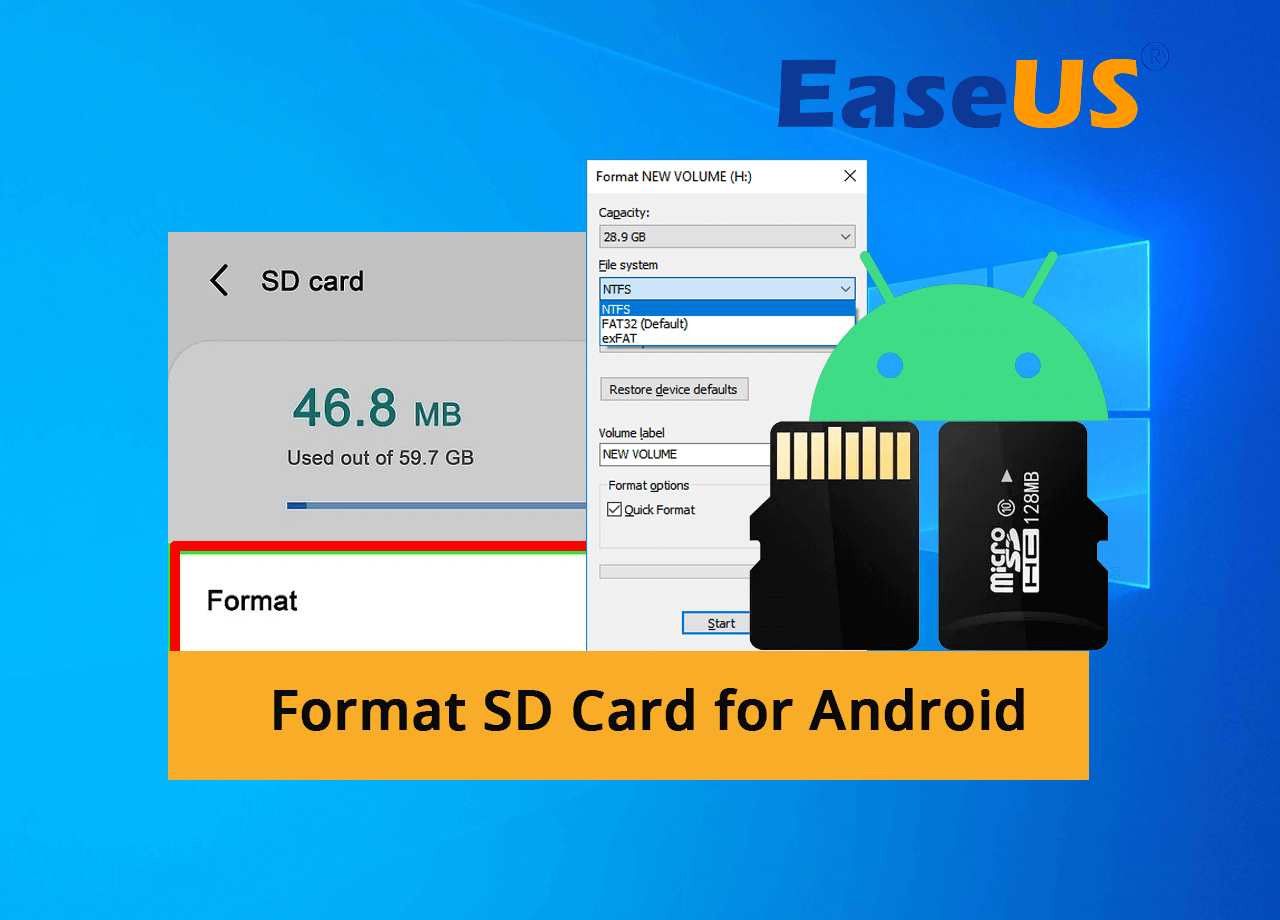
Method 5: Format the SD Card using Android Settings
If the previous methods haven’t resolved the issue with your corrupted SD card on your Android device, you may need to consider formatting the card. Formatting the SD card erases all data on it and creates a new file system, effectively fixing any file system errors or corruption. However, please note that formatting the SD card will result in permanent data loss. Therefore, it’s crucial to have a backup of your important files before proceeding with this method.
Follow these steps to format the SD card using the Android settings:
1. Power on your Android device and go to the “Settings” menu.
2. Navigate to the “Storage” or “Memory” section. The exact location of this option may vary depending on your device’s brand and operating system version.
3. Find the option to manage your SD card or external storage. It is usually labeled as “SD card” or “Portable storage.”
4. Tap on the option to format the SD card. This may be labeled as “Format SD card” or “Erase SD card.”
5. Read the warning message that appears, informing you about the permanent data loss during the formatting process. Make sure you have a backup of your important data and proceed with caution.
6. Confirm the formatting action by tapping on “Format” or “Erase.” The formatting process may take a few minutes, depending on the size of the SD card.
7. Once the formatting process is complete, your SD card will be ready to use. You can now exit the settings menu.
After formatting the SD card, check if the issue has been resolved. Ensure that you can access and store files on the SD card without any errors. If the card continues to exhibit issues, it might indicate a hardware problem, and it’s advisable to replace the SD card.
Now that you’ve tried formatting the SD card using the Android settings, let’s explore another method to fix the corrupted SD card on your Android device.
Method 6: Use Third-Party Recovery Tools
If none of the previous methods have been successful in fixing your corrupted SD card on your Android device and you have important data stored on the card, you may consider using third-party recovery tools. These tools are designed to help recover data from damaged or corrupted storage devices, including SD cards.
Here are the steps to use third-party recovery tools to recover data from a corrupted SD card:
1. Connect your corrupted SD card to a computer using a card reader.
2. Research and choose a reliable and reputable data recovery software that supports SD card recovery. Some popular options include Recuva, EaseUS Data Recovery Wizard, and Disk Drill.
3. Download and install the chosen data recovery software on your computer.
4. Launch the data recovery software and select the option to recover data from an external storage device or SD card.
5. Follow the on-screen instructions provided by the software to scan the corrupted SD card and recover the lost data. The scanning process may take some time depending on the size and condition of the SD card.
6. Once the scanning process is complete, the software will display a list of recoverable files. Preview the recovered files and select the ones you want to restore.
7. Choose a destination folder on your computer to save the recovered files. Avoid saving the files back to the same SD card to prevent overwriting any existing data.
8. Wait for the data recovery software to complete the restoration process and confirm that the files have been successfully recovered and saved to the designated folder on your computer.
Using third-party recovery tools can be a viable option to retrieve your important files from a corrupted SD card. However, keep in mind that the effectiveness of these tools may vary depending on the level of corruption and physical damage to the card. Additionally, some recovery tools may require a paid license for full functionality.
Now that you’ve explored this method, you can determine if it is suitable for your situation. If the data recovery process is successful, you can back up the recovered files and consider replacing the corrupted SD card to avoid future issues.
Conclusion
Dealing with a corrupted SD card on your Android device can be a frustrating experience, but with the right methods and tools, you have a good chance of resolving the issue. In this article, we explored various methods to fix a corrupted SD card on Android, ranging from simple troubleshooting steps to more advanced techniques.
Starting with basic methods such as restarting your device and reinserting the SD card can often resolve minor glitches and connection issues. If these methods don’t work, you can try cleaning the SD card and card slot to eliminate any dirt or debris that may be causing the corruption. Additionally, removing and reinstalling the SD card driver or formatting the SD card using the Android settings may help resolve more complicated software-related problems.
If you have important data on the corrupted SD card, third-party recovery tools can be a valuable option to recover your files. These tools are designed to retrieve data from damaged or corrupted storage devices, including SD cards, though their effectiveness may vary depending on the level of corruption and physical damage.
During the troubleshooting process, it’s crucial to prioritize backing up your data to prevent permanent loss. Regularly backing up your important files can help you avoid the potential frustrations associated with data loss due to a corrupted SD card.
In some cases, if none of the methods mentioned in this article work, it might be necessary to replace the SD card, especially if it has physical damage or is beyond repair.
Remember, prevention is always better than cure. Taking care of your SD card, using reliable antivirus software, and avoiding rough handling or improper ejection can help prevent SD card corruption in the first place.
We hope that the methods and tips discussed in this article have been helpful in addressing your SD card issues. By following the appropriate troubleshooting steps, you can potentially fix a corrupted SD card on your Android device and regain access to your valuable data.


