Introduction
Are you running out of storage space on your Android tablet? Don’t worry – there’s a simple solution! By moving your files to an SD card, you can free up precious internal storage and ensure that you have room for all your important photos, videos, music, and documents.
But how do you go about moving files to an SD card on your Android tablet? It’s actually quite easy, and in this article, we’ll guide you through the process step by step. Whether you’re a tech-savvy user or a beginner, you’ll be able to follow along and successfully transfer your files to the external storage.
Before we dive into the steps, let’s make sure you have an SD card inserted into your Android tablet. This is a small, portable storage device that allows you to expand your tablet’s memory capacity. It’s like having a mini hard drive that you can carry with you wherever you go.
If you haven’t already inserted an SD card, don’t worry – we’ll cover that in Step 1. But if you have, let’s move on to Step 2, where we’ll find the files that you want to transfer. This may include photos, videos, music files, documents, or any other type of file that’s taking up space on your tablet’s internal storage.
Ready to get started? Let’s take a closer look at each step of the process and learn how to move files to an SD card on your Android tablet.
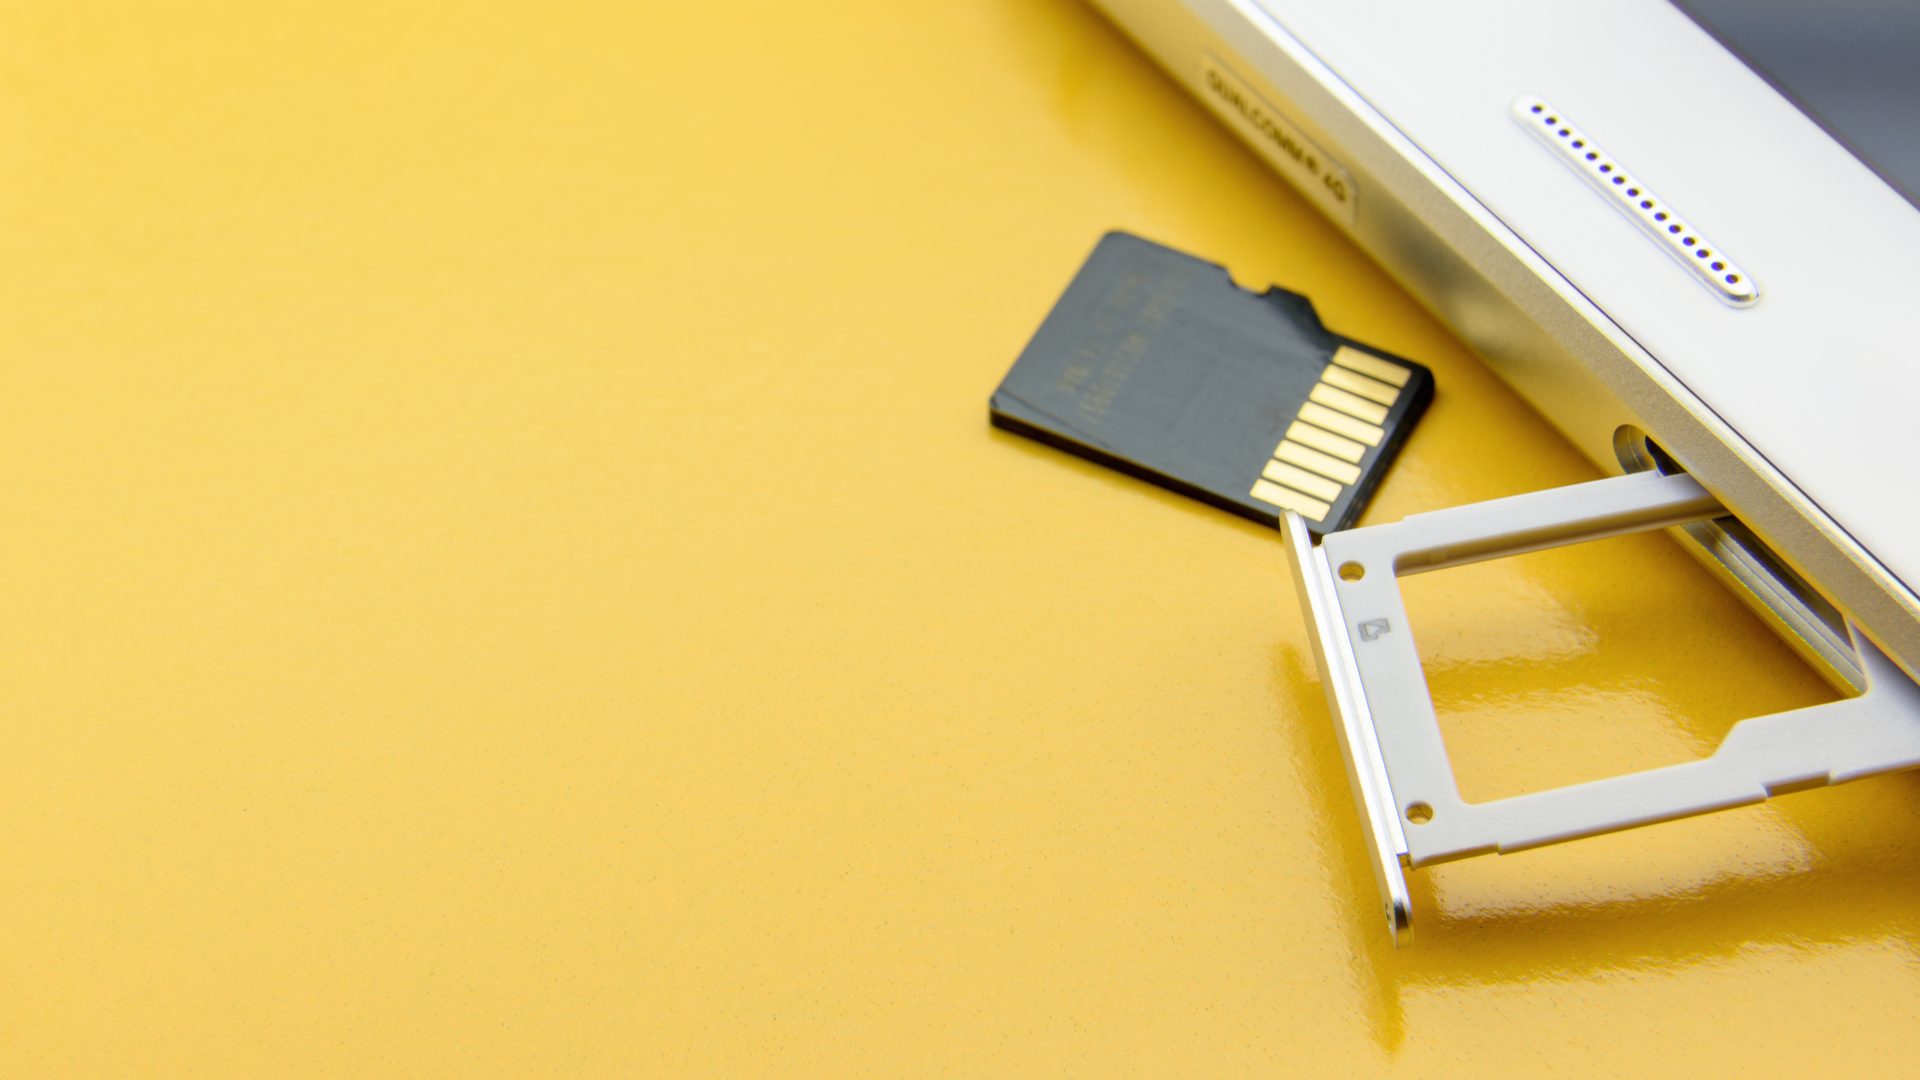
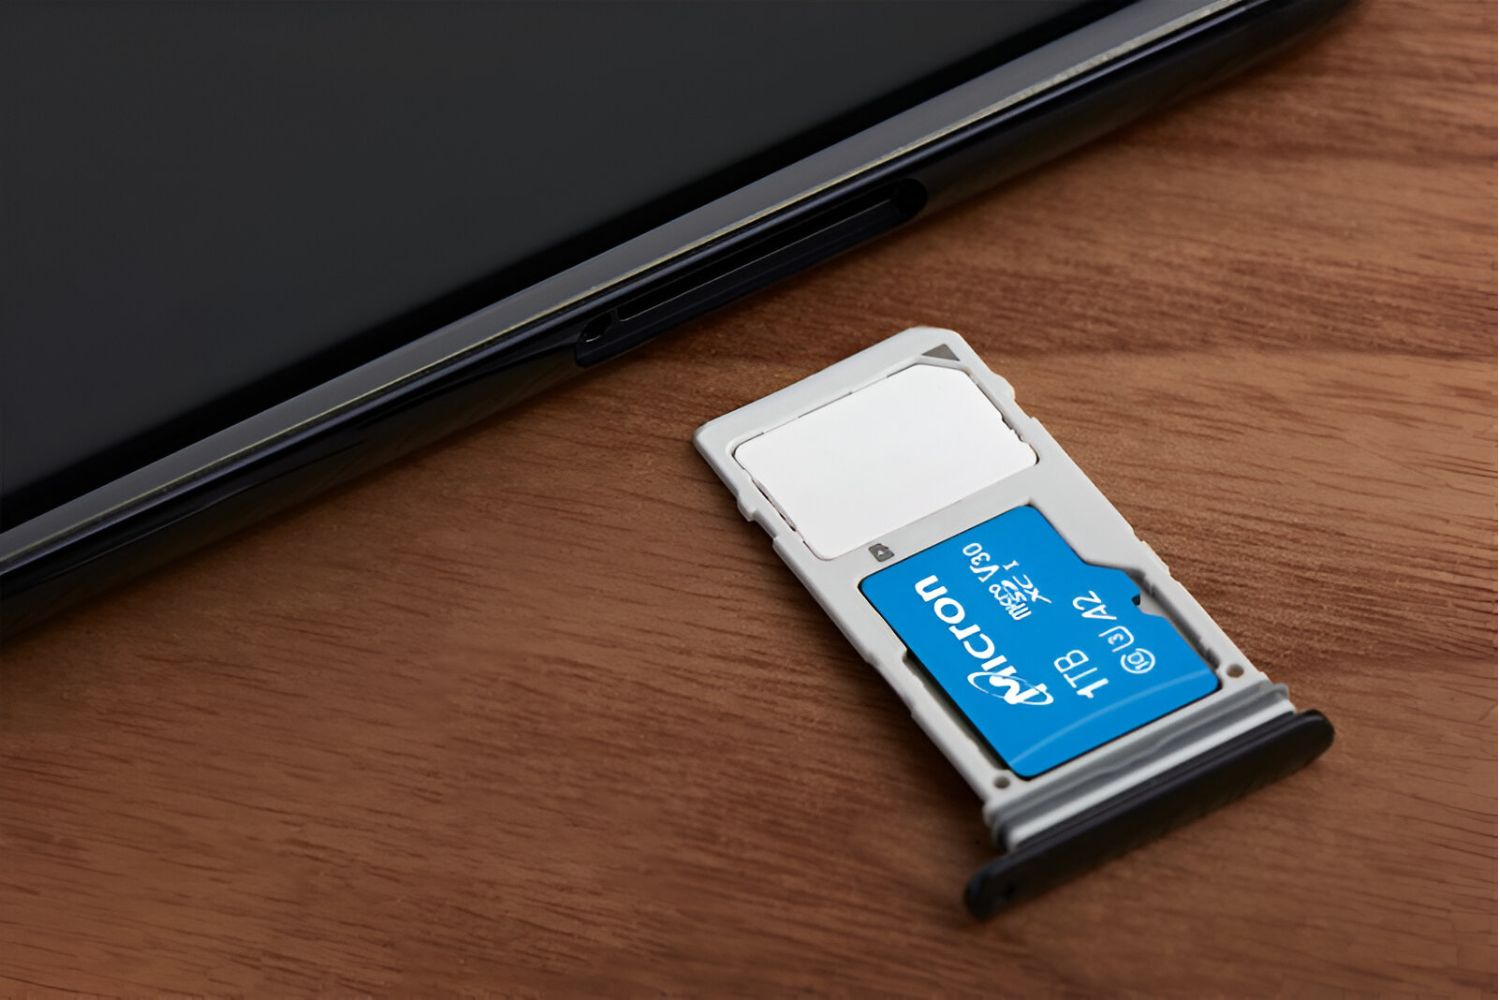
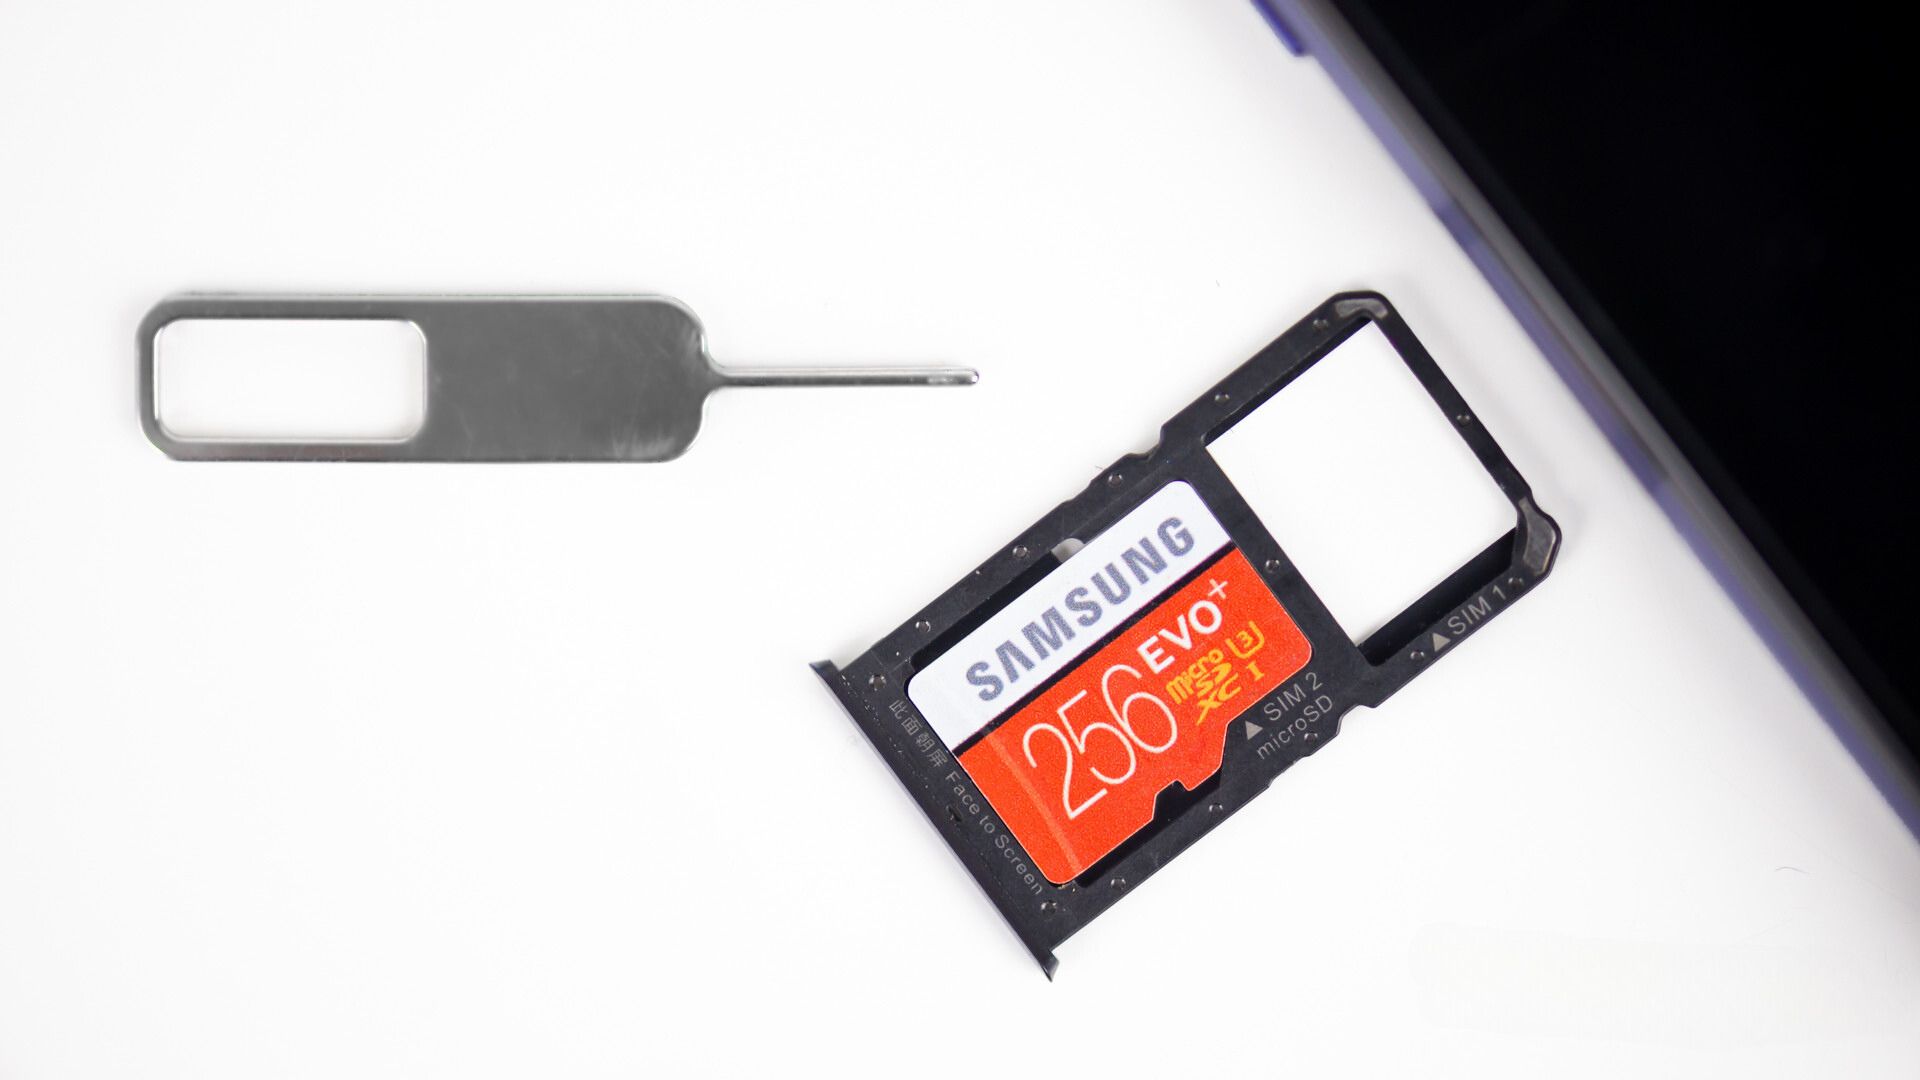
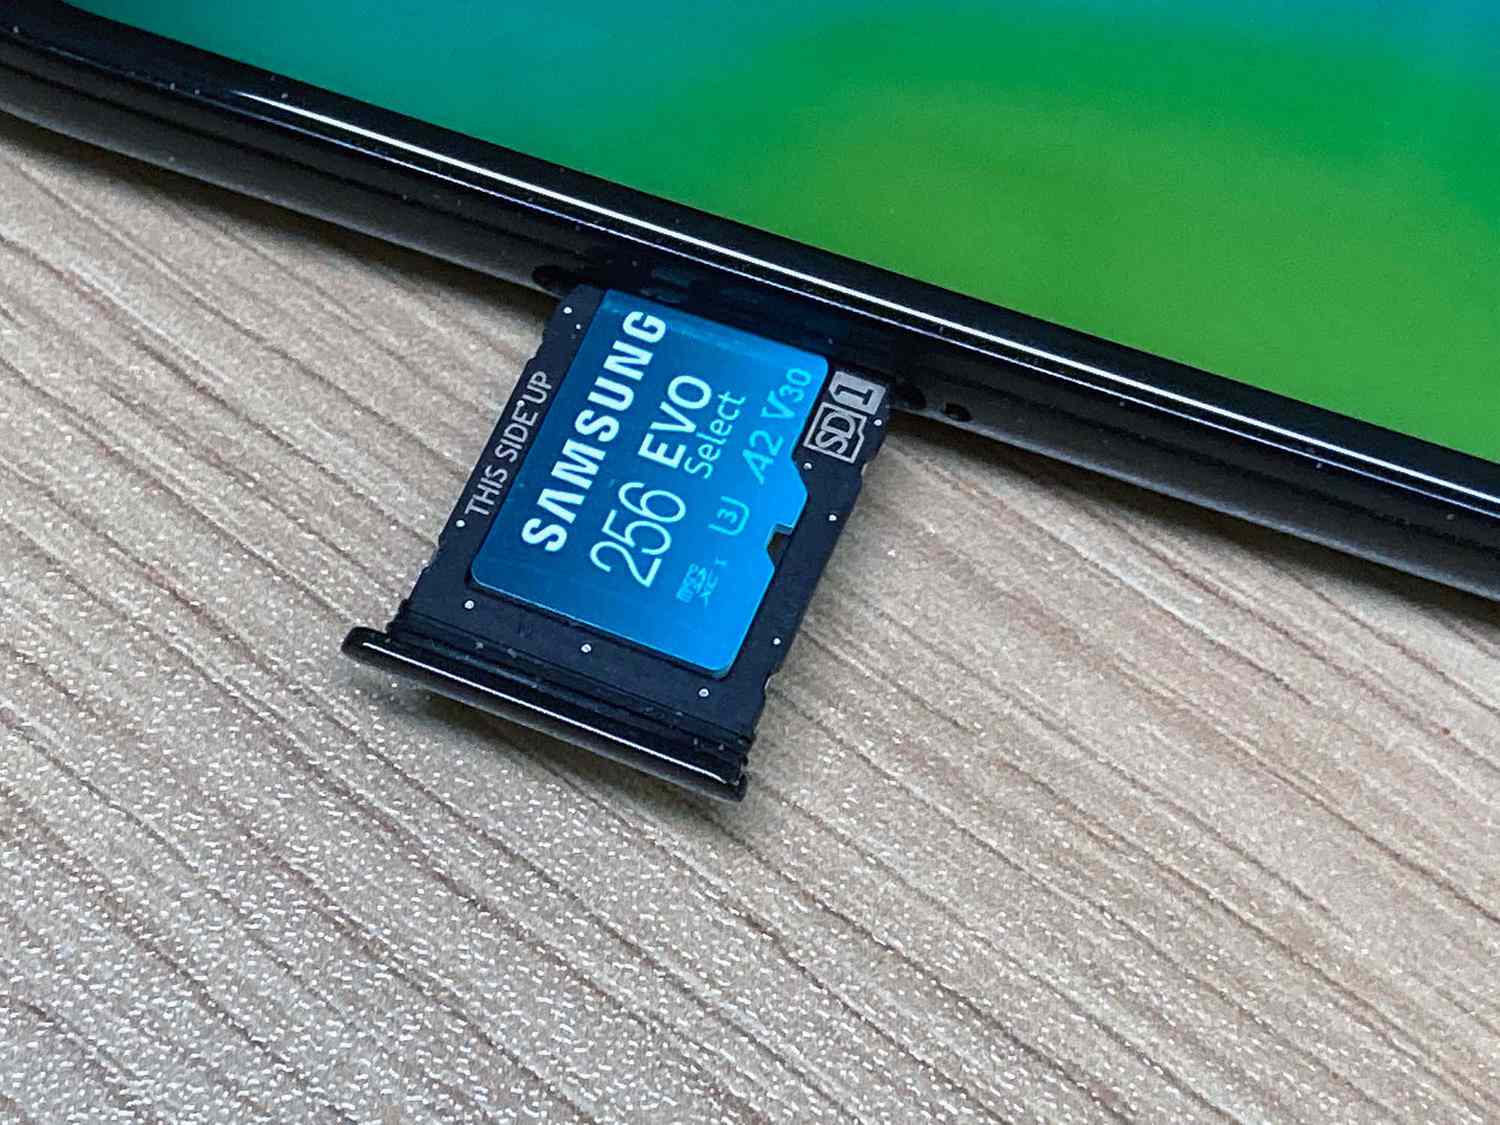
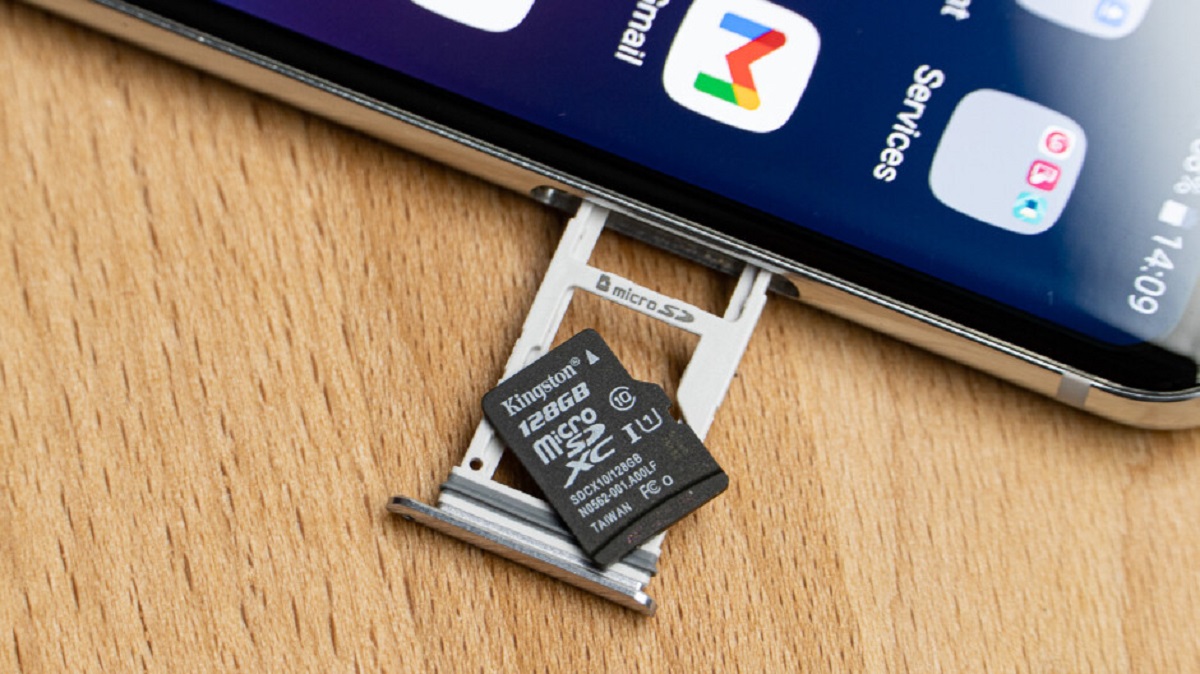
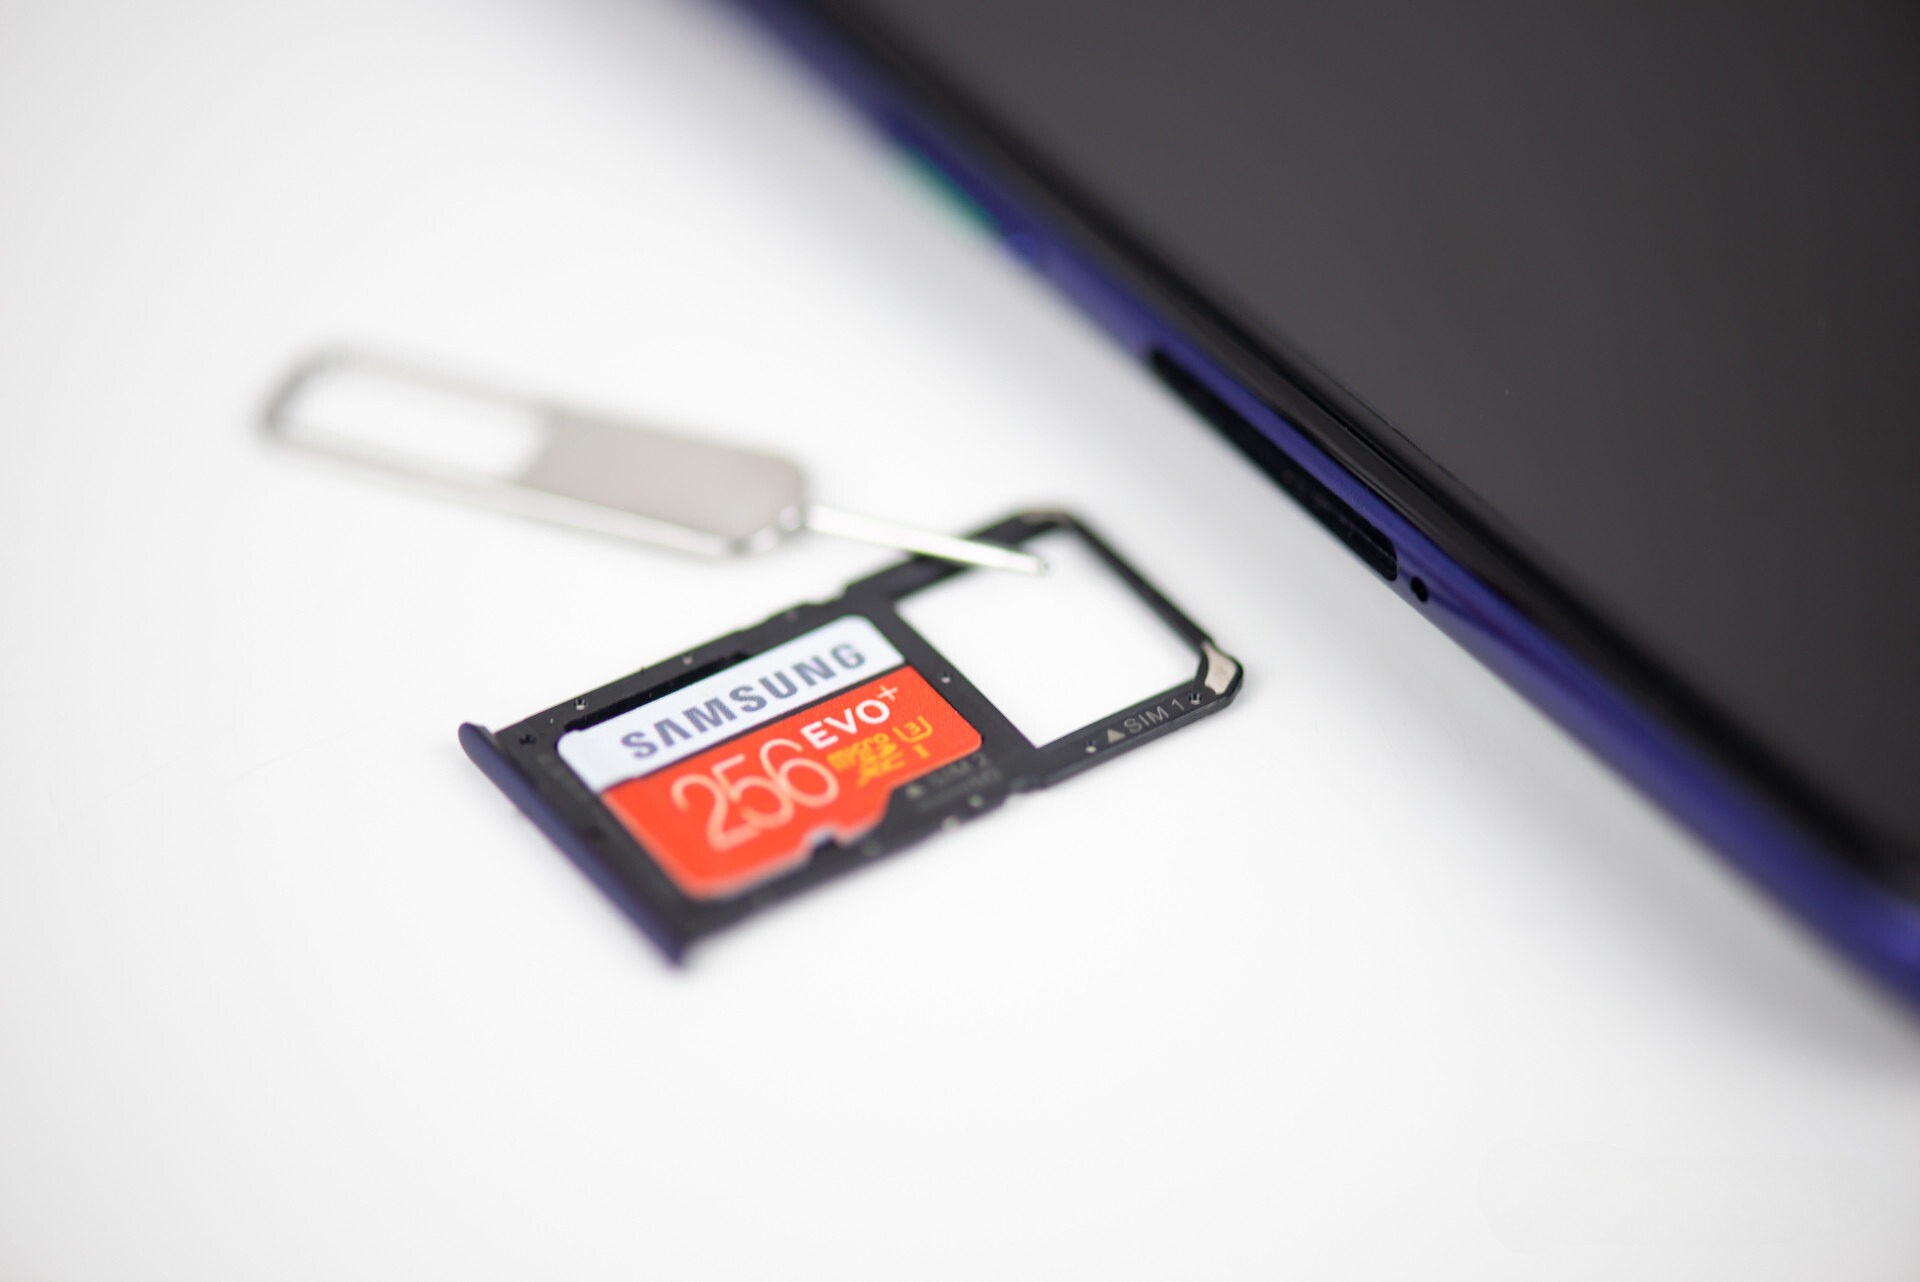
Step 1: Inserting the SD Card
The first step in moving files to an SD card on your Android tablet is to ensure that you have the card properly inserted. Here’s how to do it:
- Locate the SD card slot on your tablet. This is typically found on the side or at the bottom of the device.
- If there’s a small cover protecting the slot, gently remove it with your finger or a small tool, taking care not to damage it.
- Take your SD card and carefully slide it into the slot. Make sure you align the notch on the card with the corresponding notch in the slot.
- Push the card in until you hear or feel a click, indicating that it’s securely in place.
- If your tablet supports it, you may need to format the SD card before using it. This can usually be done by going to the “Settings” or “Storage” menu on your tablet and selecting the option to format the SD card. Follow the prompts on the screen to complete the formatting process.
- Once the SD card is inserted and formatted (if necessary), you’re ready to start moving files to it!
It’s worth noting that not all Android tablets support external SD cards. Some models may have limited or no support for expandable storage. If you’re unsure whether your tablet has an SD card slot or if it supports external storage, refer to the device’s user manual or consult the manufacturer’s website for more information.
Now that you’ve successfully inserted the SD card into your Android tablet, let’s move on to Step 2, where we’ll find and select the files you want to transfer.
Step 2: Finding the Files
Now that your SD card is inserted into your Android tablet, it’s time to locate the files that you want to transfer. This can include photos, videos, documents, or any other type of file stored on your tablet’s internal memory.
Follow these steps to find the files you want to move to the SD card:
- Open the file manager app on your Android tablet. This app is usually pre-installed on your device or can be downloaded from the Google Play Store.
- Navigate to the location where the files are currently stored. This could be the “Internal Storage” or “Device Storage” option.
- Browse through the folders to find the specific files you want to transfer. You may need to open subfolders if the files are organized in a hierarchical structure.
- If you’re unsure where the files are located, you can use the built-in search function within the file manager app. Simply enter the name or type of file you’re looking for, and the app will display any matching results.
As you explore your file manager, you may notice that some files or folders are marked as “system files” or “read-only.” These are usually important system files or files associated with the operating system, and it’s best not to modify or move them to avoid any potential issues with your tablet’s functionality.
Once you have identified the files you want to move, it’s time to proceed to Step 3: selecting the files for transfer. We’ll guide you through this process in the next section.
Step 3: Selecting the Files
Now that you’ve located the files you want to transfer to the SD card on your Android tablet, it’s time to select them. The file selection process may vary slightly depending on your tablet model and the file manager app you’re using, but the general steps remain the same.
Here’s how to select the files for transfer:
- In the file manager app, navigate to the folder where the files you want to move are located.
- Long-press on the first file to initiate the selection mode. On most Android devices, this is done by tapping and holding your finger on the file until a checkmark or selection indicator appears.
- Once the first file is selected, you can either continue selecting individual files by tapping on them, or you can select multiple files at once by dragging your finger across the screen to create a selection box. This will automatically select all the files within the box.
- If you want to select all files in a folder, look for the “Select All” option in the menu or toolbar of the file manager app. This will save you the time and effort of manually selecting each file.
- As you select files, you may notice that they are highlighted or marked with a checkmark. This indicates that they are ready for transfer.
Take a moment to review your selections and make sure you have chosen all the files you want to move to the SD card. If you accidentally selected a file you don’t want to transfer, simply tap on it again to deselect it.
Once you have selected all the desired files, it’s time to proceed to Step 4, where we’ll learn how to actually move the files to the SD card. Keep reading to find out how!
Step 4: Moving the Files to the SD Card
Now that you have selected the files you want to transfer to the SD card on your Android tablet, it’s time to initiate the file transfer process. Follow these steps to move the files:
- In the file manager app, locate the menu or toolbar at the top or bottom of the screen. Look for options such as “Move,” “Copy,” or “Transfer.”
- Select the appropriate option for moving files. The specific wording may vary depending on your file manager app.
- A new screen or dialog box will appear, prompting you to choose the destination for the files. Look for an option that mentions the SD card or external storage.
- Tap on the SD card or external storage option to select it as the destination for the file transfer.
- Review the selected files and the destination folder to ensure everything is correct. If necessary, you can make any adjustments or changes at this stage.
- Once you’re satisfied, confirm the file transfer by tapping on the “Move” or “Copy” button. The file manager app will begin moving the files from the internal storage to the SD card.
- The time it takes to transfer the files will depend on the size of the files and the speed of your device. Larger files may take longer to transfer, so be patient and allow the process to complete.
During the file transfer, it’s important not to interrupt or close the file manager app. Doing so may result in incomplete file transfers or potential data corruption.
Once the file transfer is complete, you can go back to the file manager app and verify that the files have been successfully moved to the SD card. You should see them listed within the SD card or external storage folder you selected.
With the files successfully moved to the SD card, you have now freed up valuable internal storage space on your Android tablet. This will allow you to continue using your device without worrying about running out of room for new files and apps.
Now that you have successfully moved the files to the SD card, let’s move on to Step 5, where we’ll verify the transfer and ensure that everything is in order. Continue reading to find out more!
Step 5: Verifying the Transfer
After moving the files to the SD card on your Android tablet, it’s important to verify that the transfer was successful. This ensures that the files are safely stored on the external storage and can be accessed as needed. Follow these steps to verify the transfer:
- Open the file manager app on your Android tablet.
- Navigate to the location on the SD card where you moved the files. This could be a specific folder or the root of the SD card, depending on your preference.
- Review the files in the destination folder and ensure that all the transferred files are present.
- You can tap on individual files to open and verify their content to make sure they are intact and accessible.
- If you have organized the files into subfolders during the transfer, navigate through the folders to verify that the file structure and hierarchy are maintained.
By verifying the transfer, you can have peace of mind knowing that your files are securely stored on the SD card and can be accessed whenever needed. It’s always a good practice to double-check the transfer to avoid any potential data loss or discrepancies.
If you encounter any issues or notice that some files are missing or inaccessible, you can try repeating the transfer process for those specific files. Make sure to carefully follow the steps outlined in the previous sections to ensure a successful transfer.
With the transfer verified, you have successfully moved your files to the SD card on your Android tablet. Enjoy the extra storage space and the convenience of having your important files easily accessible on an external storage device!
Now that you’re familiar with the process of moving files to an SD card, you can confidently manage your storage space on your Android tablet. Whether you want to free up space for new files or simply keep your device organized, utilizing the SD card as external storage is a great solution.
…
Conclusion
Moving files to an SD card on your Android tablet is a straightforward process that can help you free up valuable internal storage space. By following the steps outlined in this guide, you can easily transfer your files to an external storage device and ensure that they are safe and accessible whenever you need them.
Throughout this article, we covered the necessary steps to successfully move files to the SD card. We began by inserting the SD card into the tablet and ensuring it was properly formatted. Then, we learned how to find the files we wanted to transfer and select them for the move. We then proceeded to move the files to the SD card and verified the transfer to ensure its success.
Remember to properly handle and handle your SD card to avoid damage or data corruption. If you encounter any issues during the transfer process or notice any difficulties accessing the files on the SD card, you can refer to your device’s user manual or seek assistance from the manufacturer’s support channels.
Now that you have the knowledge and confidence to move files to an SD card on your Android tablet, you can enjoy a more organized and spacious device. Utilizing external storage is a great way to keep your tablet running smoothly and efficiently, without worrying about limited storage space.
So go ahead and start transferring your files to the SD card! Enjoy the benefits of having extra room for photos, videos, music, and documents, and make the most out of your Android tablet’s capabilities.
Happy organizing!