Introduction
Modern gaming PCs and high-performance computers often come equipped with powerful graphics cards, also known as GPUs. These GPUs are responsible for rendering stunning graphics and ensuring smooth gameplay. Traditionally, graphics cards have been installed horizontally in the computer case, where they connect to the motherboard. However, a growing trend among PC enthusiasts is to mount their GPUs vertically. Vertical GPU mounting involves placing the graphics card in a vertical orientation using a PCIe riser cable.
Vertical GPU mounting not only adds a visually appealing touch to your PC build but also offers several potential benefits. This practice allows for a clear and unobstructed view of the graphics card, showcasing its design and lighting effects. Additionally, mounting your GPU vertically can help improve airflow within the computer case and potentially reduce temperatures for better overall cooling performance.
Before you decide to venture into mounting your GPU vertically, there are several factors to consider. These include compatibility with your computer case, the length of the graphics card, available PCIe slots, and potential limitations when it comes to expansion cards. It is crucial to carefully assess these aspects to ensure a successful installation and prevent any interference or performance issues.
In this guide, we will walk you through the process of mounting your GPU vertically. We’ll go over the tools and materials you’ll need, as well as provide a step-by-step tutorial to help you with the installation process. Additionally, we’ll provide some troubleshooting tips in case you encounter any problems along the way.
So, if you’re ready to take your PC build to the next level and showcase your GPU in all its glory, let’s dive into the world of vertical GPU mounting.
What is GPU Vertical Mounting?
GPU vertical mounting refers to the practice of installing a graphics card in a vertical orientation within a computer case using a PCIe riser cable. Instead of the traditional horizontal installation where the graphics card connects directly to the motherboard, vertical mounting involves securing the GPU vertically using a bracket or GPU mount.
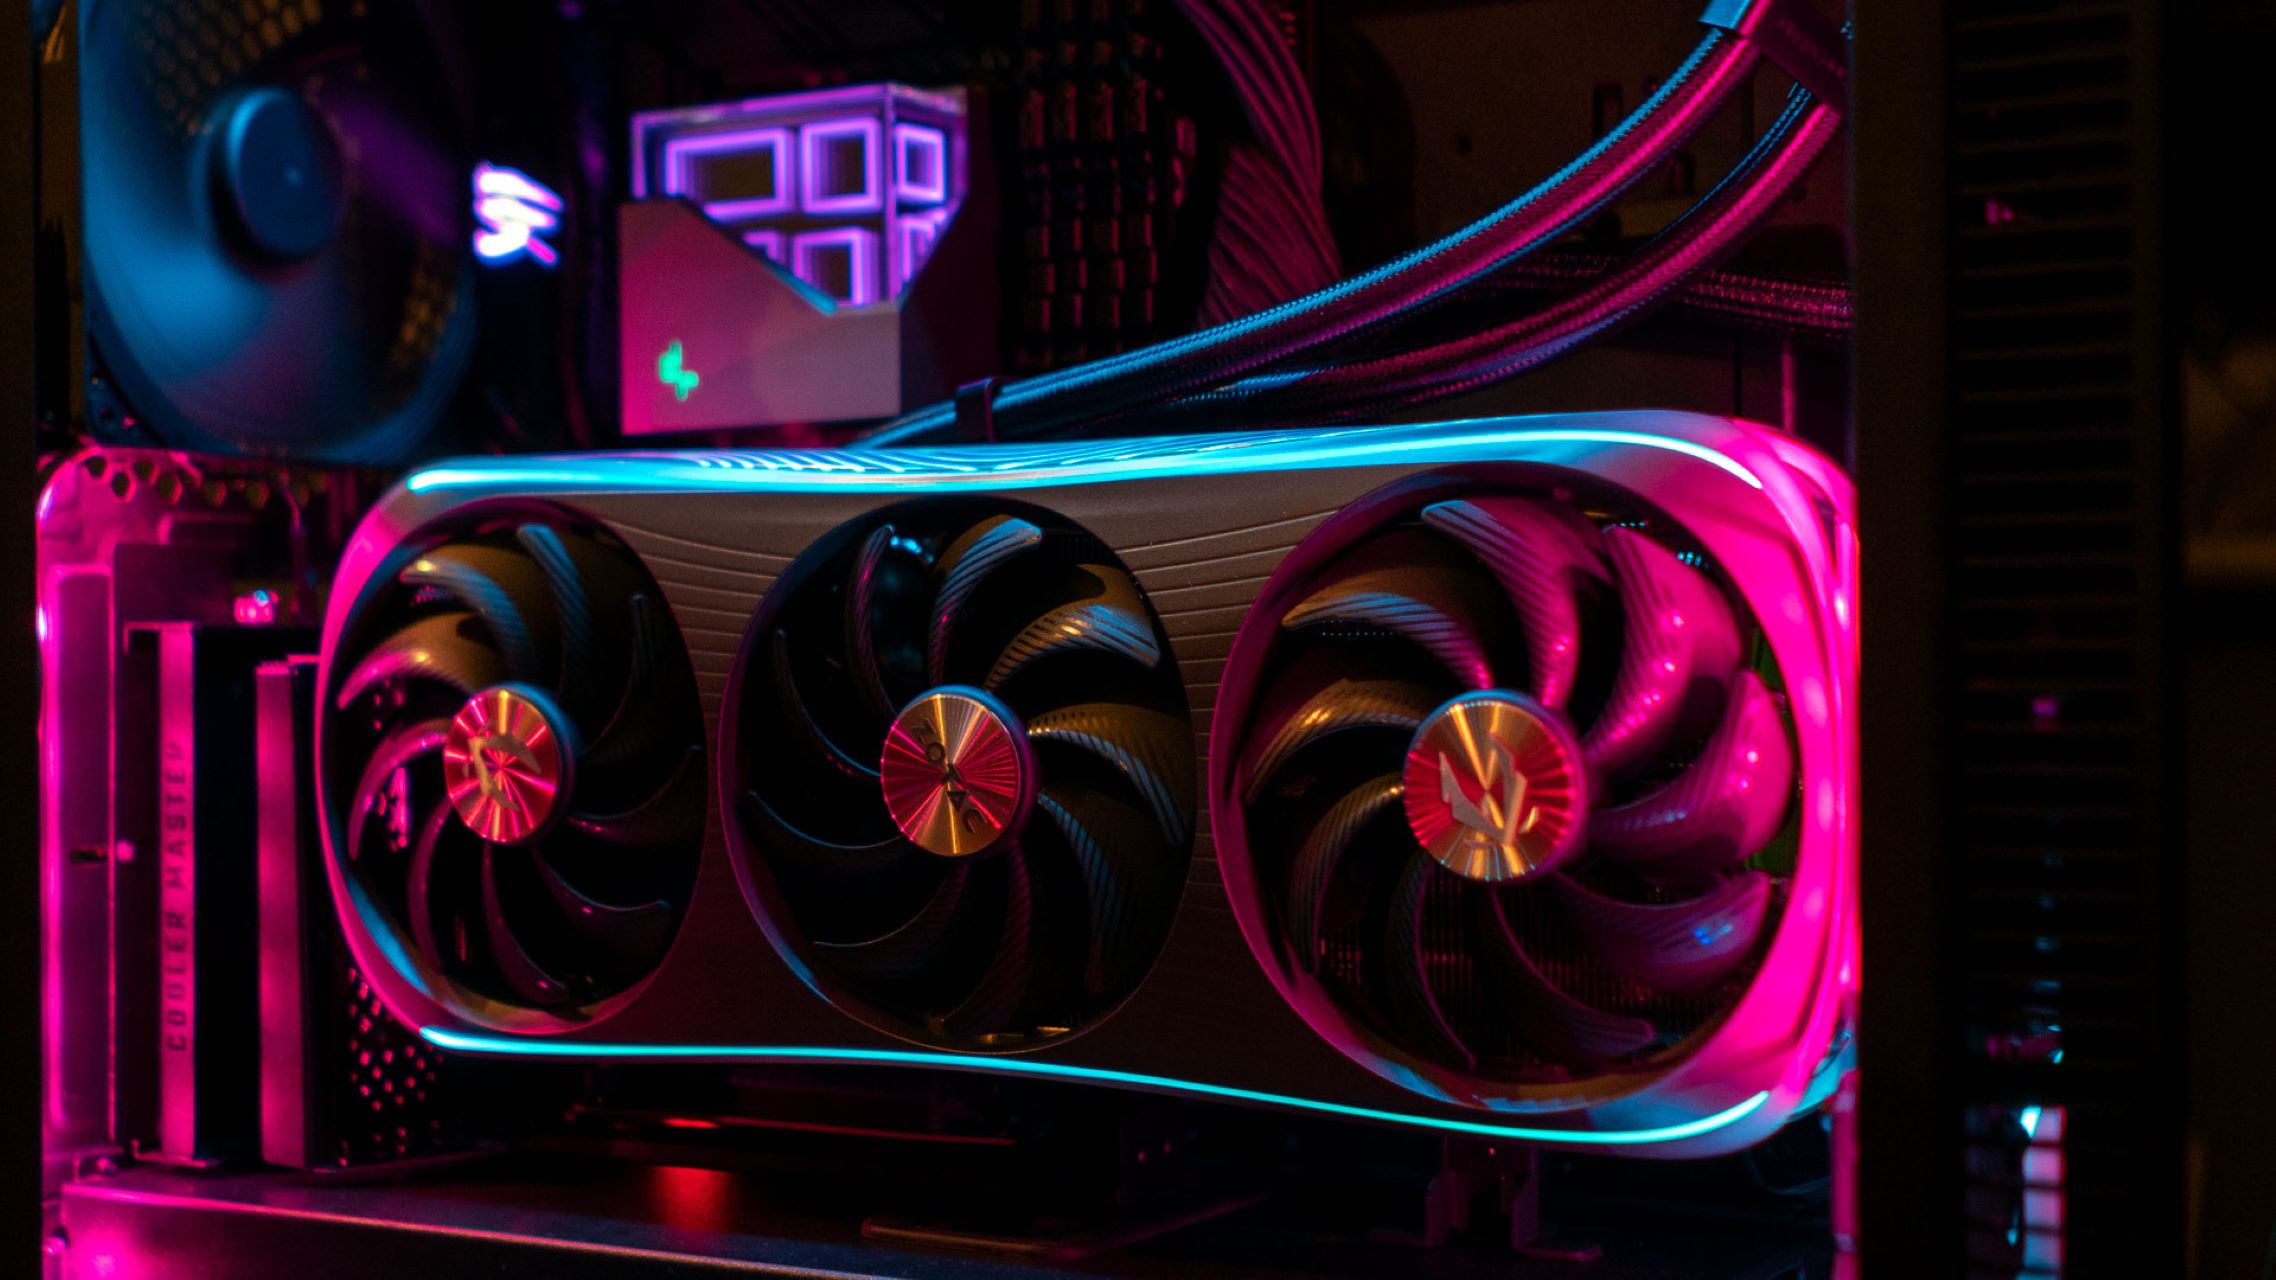
Vertical GPU mounting has gained popularity among PC enthusiasts and gamers due to its aesthetic appeal and potential performance benefits. By positioning the graphics card vertically, it creates a visually stunning centerpiece within the computer case. This allows for unobstructed viewing of the GPU’s design, branding, and any RGB lighting or custom water-cooling solutions.
While the primary purpose of vertical GPU mounting is for aesthetics, it can also have an impact on thermal performance. When a GPU is mounted horizontally, it typically relies on the case’s internal airflow for cooling. However, with vertical mounting, the open area around the graphics card allows for improved air circulation. This can potentially result in lower GPU temperatures and more efficient cooling, especially if the case has dedicated fan vents or additional cooling solutions specifically designed for vertical GPU mounting.
It’s important to note that not all computer cases are compatible with vertical GPU mounting out of the box. Some cases may require additional hardware or modifications, such as brackets or GPU mounts, to facilitate the vertical installation. Furthermore, the length and weight of the graphics card must be taken into consideration, as it needs to fit within the vertical space provided by the case without putting excessive strain on the PCIe slot or causing interference with other components.
Overall, GPU vertical mounting offers PC builders and gamers an opportunity to add a unique aesthetic touch to their system while potentially improving cooling performance. However, it’s essential to thoroughly research and ensure compatibility with your specific case and GPU model before proceeding with the vertical installation.
Why Would You Want to Mount Your GPU Vertically?
Vertical GPU mounting has become a popular choice among PC enthusiasts and gamers for several reasons. Let's explore some of the key advantages and considerations that may influence your decision to mount your GPU vertically.
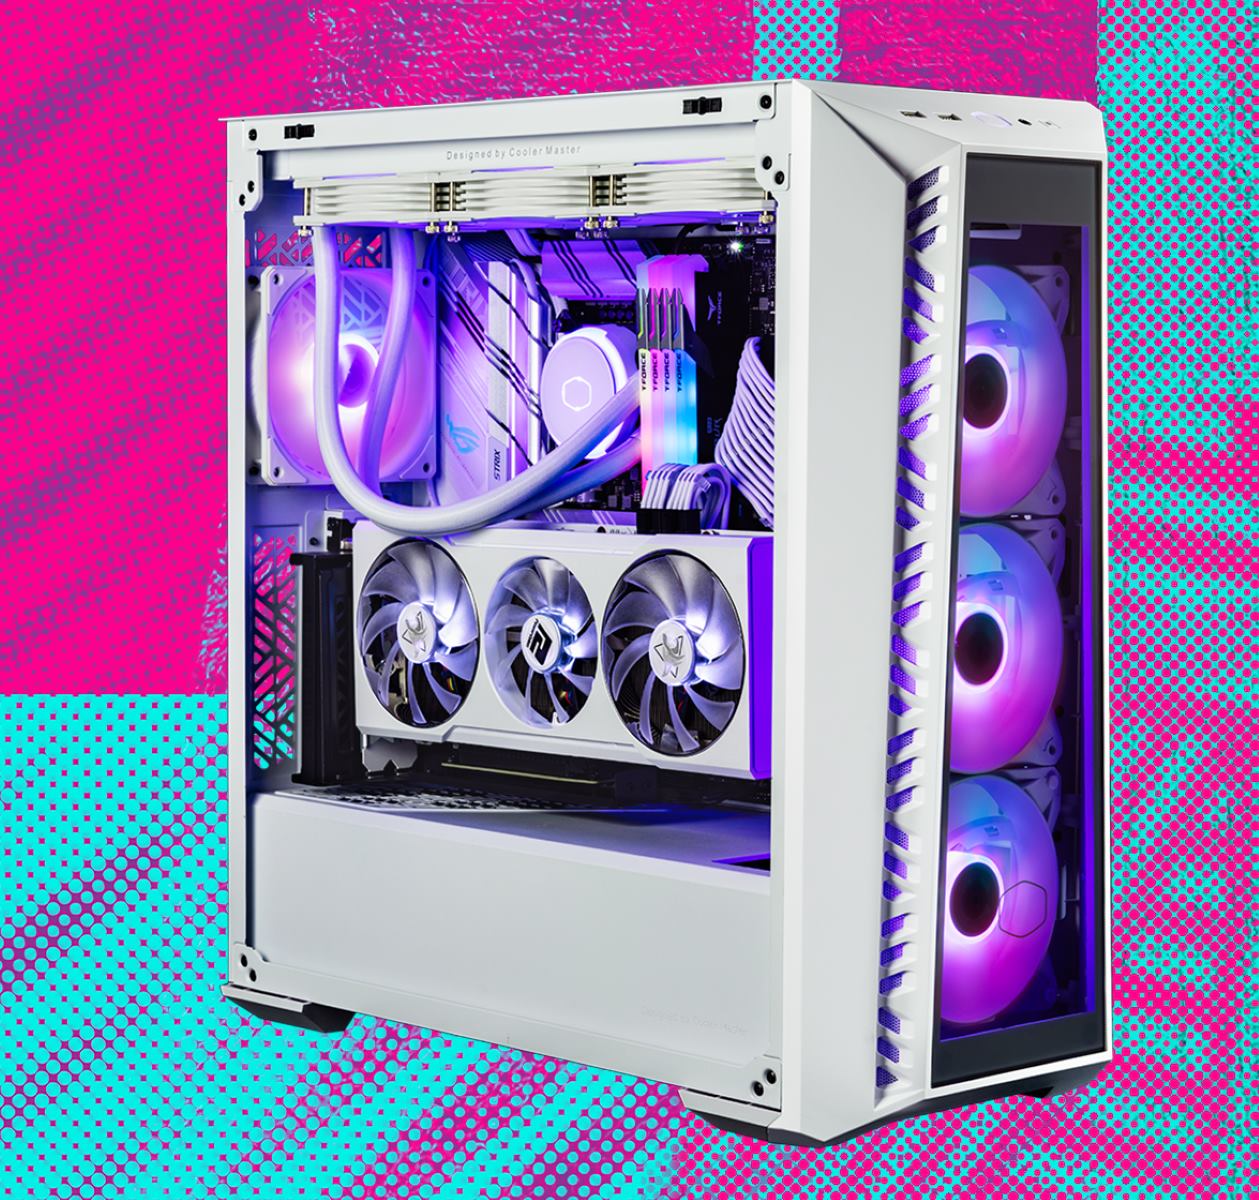
Aesthetic Appeal: One of the primary reasons for choosing vertical GPU mounting is the visual impact it brings to your PC build. When a graphics card is positioned vertically, it becomes a focal point within the case. It allows you to showcase the design, branding, and RGB lighting effects of your GPU. This can create a stunning and eye-catching display that adds a touch of elegance and uniqueness to your system.
Improved Airflow: Horizontal GPU mounting can sometimes restrict airflow within the case, especially when multiple graphics cards are installed in a multi-GPU setup. Vertical mounting, on the other hand, creates additional space around the graphics card, allowing for better ventilation and increased airflow. This can result in improved thermal performance and potentially lower GPU temperatures, leading to better overall system cooling.
Custom Water-cooling: Vertical mounting provides an ideal solution for those who want to incorporate a custom water-cooling loop into their PC build. With a vertically mounted GPU, there is more room for installing water blocks and tubing connections. This allows for more flexibility in designing and showcasing an intricate water-cooling setup without compromising other components or obstructing the view.
Space Optimization: In certain cases, vertical GPU mounting can help optimize space within the computer case. By mounting the graphics card vertically, it can free up horizontal space for other components, such as storage drives or additional expansion cards. This can be particularly beneficial in compact form factor cases or builds where every inch of space matters.
Showcasing Unique GPU Designs: Many graphics card manufacturers produce GPUs with unique and visually appealing designs. Vertical mounting allows you to fully display and appreciate these design elements, including intricate cooling solutions, backplates, or even special editions with custom artwork. Whether you're an enthusiast who appreciates the aesthetics or a dedicated fan of a particular brand, vertical mounting allows you to proudly showcase your GPU.
While vertical GPU mounting offers numerous benefits, it's important to consider compatibility with your specific case and components. Ensure that your case supports vertical mounting or can be modified to accommodate it. Additionally, consider the length, weight, and potential interference with other components when selecting a GPU for vertical installation.
Now that we've explored the advantages of vertical GPU mounting, let's dive into the important factors to consider before proceeding with the installation.
Things to Consider Before Mounting Your GPU Vertically
Before embarking on the process of mounting your GPU vertically, there are several crucial factors to consider. Taking these into account will help ensure a successful installation and prevent any potential issues or limitations. Let’s explore the key considerations before mounting your GPU vertically.
Case Compatibility: Not all computer cases are designed to accommodate vertical GPU mounting out of the box. It’s essential to check if your case supports this configuration or if it requires additional hardware, such as brackets or GPU mounts, for vertical installation. Researching your case’s specifications and compatibility is crucial to avoid any compatibility issues.
GPU Length and Weight: Vertical GPU mounting may impose certain limitations on the length and weight of your graphics card. Before proceeding, ensure that your GPU is within the acceptable dimensions for vertical installation. Excessively long or heavy graphics cards may put strain on the PCIe slot or interfere with other components. It’s also important to check if your chosen GPU is compatible with the vertical mounting brackets or GPU mounts available for your case.
Available PCIe Slots: Vertical GPU mounting often requires the use of PCIe riser cables, which connect the graphics card to the motherboard. Ensure that your motherboard has an available PCIe slot for the cable connection. Additionally, consider other expansion cards you may have, such as sound cards or additional GPUs, as vertical mounting may limit the availability or accessibility of other PCIe slots.
Interference with Other Components: Pay attention to potential interference between the vertically mounted GPU and other components within the case, such as the CPU cooler or RAM modules. Check the available clearance and ensure that the GPU does not obstruct airflow to these components or cause any physical contact that could impact performance or damage sensitive parts.
Cable Management: Vertical GPU mounting introduces additional cable management challenges. The longer PCIe riser cables required for the vertical installation need to be properly routed and secured to avoid sagging or obstructing airflow. Plan your cable management strategy in advance to ensure a clean and organized interior, minimizing any potential cable clutter or hindrance to airflow.
Overall Build Goals: Consider your overall build goals and priorities before deciding to mount your GPU vertically. While it can enhance aesthetics and potentially improve cooling, it may come at the cost of limited expansion options or potential compatibility issues with certain cases or components. Evaluate whether the benefits align with your build vision and requirements.
By carefully considering these factors, you can determine if vertical GPU mounting is the right choice for your system. It is always a good idea to thoroughly research and consult case and component manufacturer specifications, as well as user experiences and reviews, to make an informed decision.
Once you have evaluated these considerations and are confident in proceeding with vertical GPU mounting, it’s time to gather the necessary tools and materials for the installation process, which we will cover in the upcoming section.
Tools and Materials Needed for Vertical GPU Mounting
Before you begin the process of mounting your GPU vertically, it’s important to gather the necessary tools and materials. Having these items ready will ensure a smooth installation and help you avoid any unnecessary delays or complications. Let’s take a look at the tools and materials you’ll need:
Computer Case: You’ll need a computer case that supports vertical GPU mounting or can be modified to accommodate it. Check the specifications of your case to ensure compatibility with vertical installation. If necessary, consider purchasing additional brackets or GPU mounts specifically designed for vertical GPU mounting.
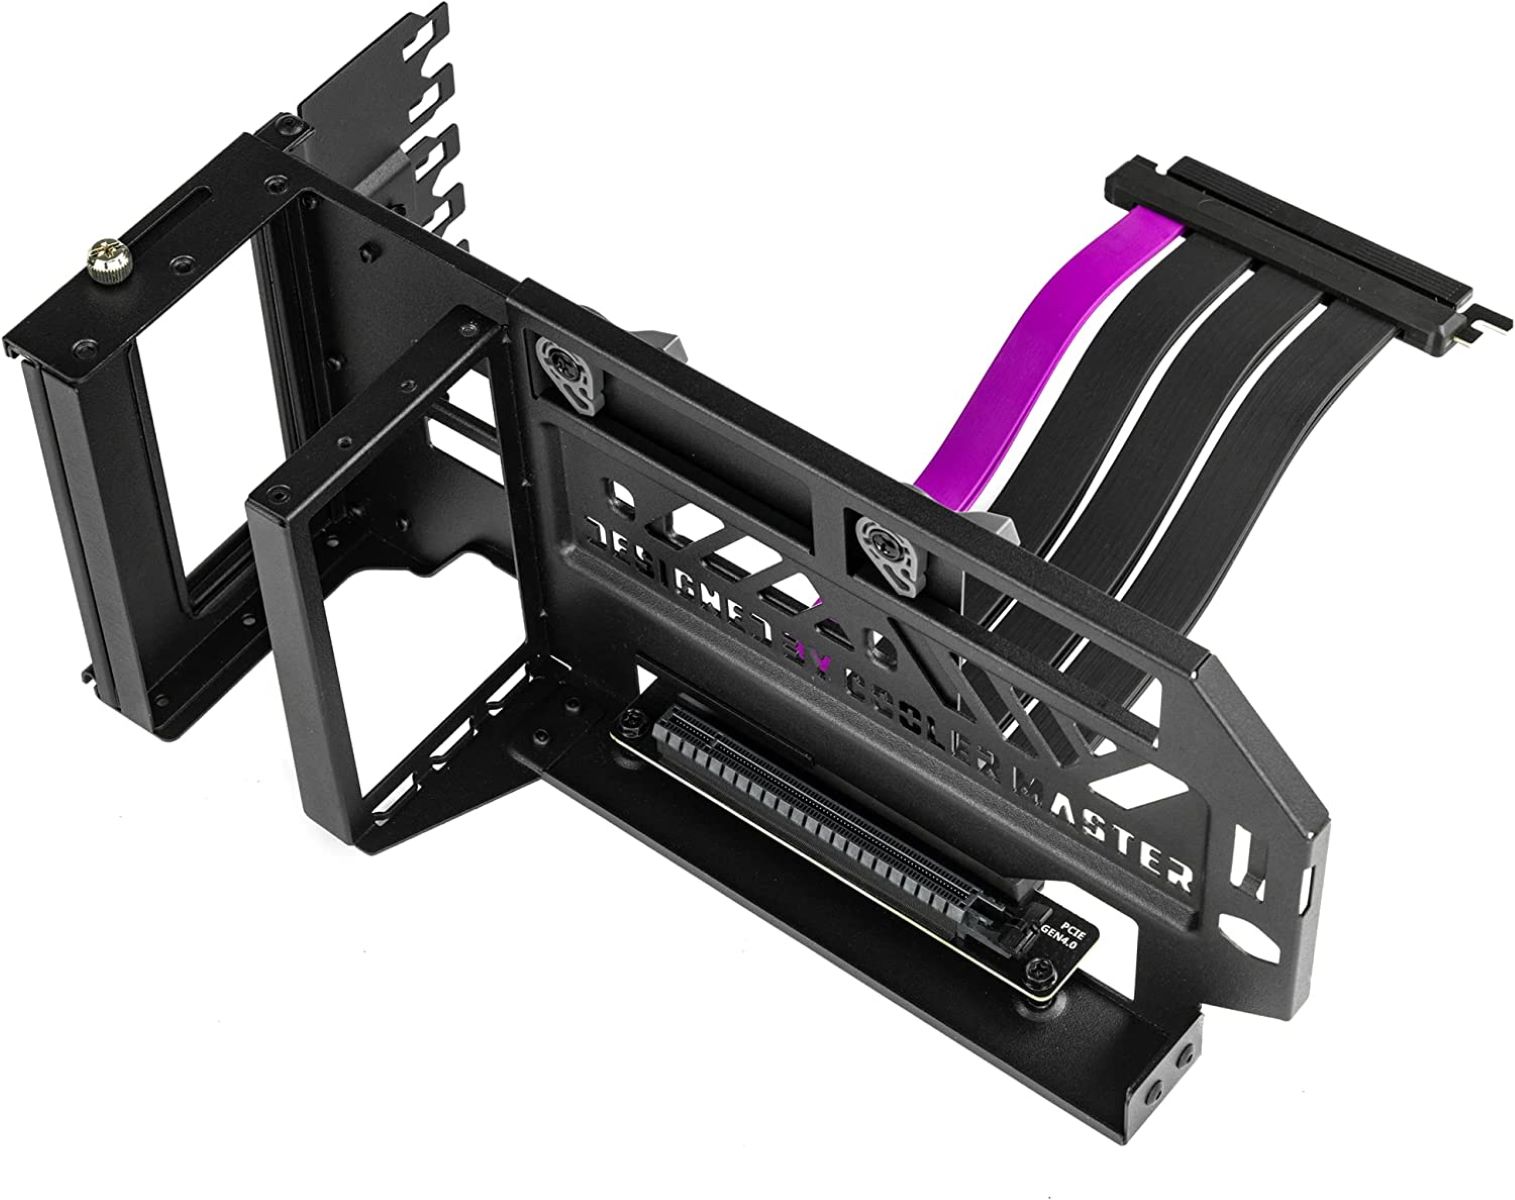
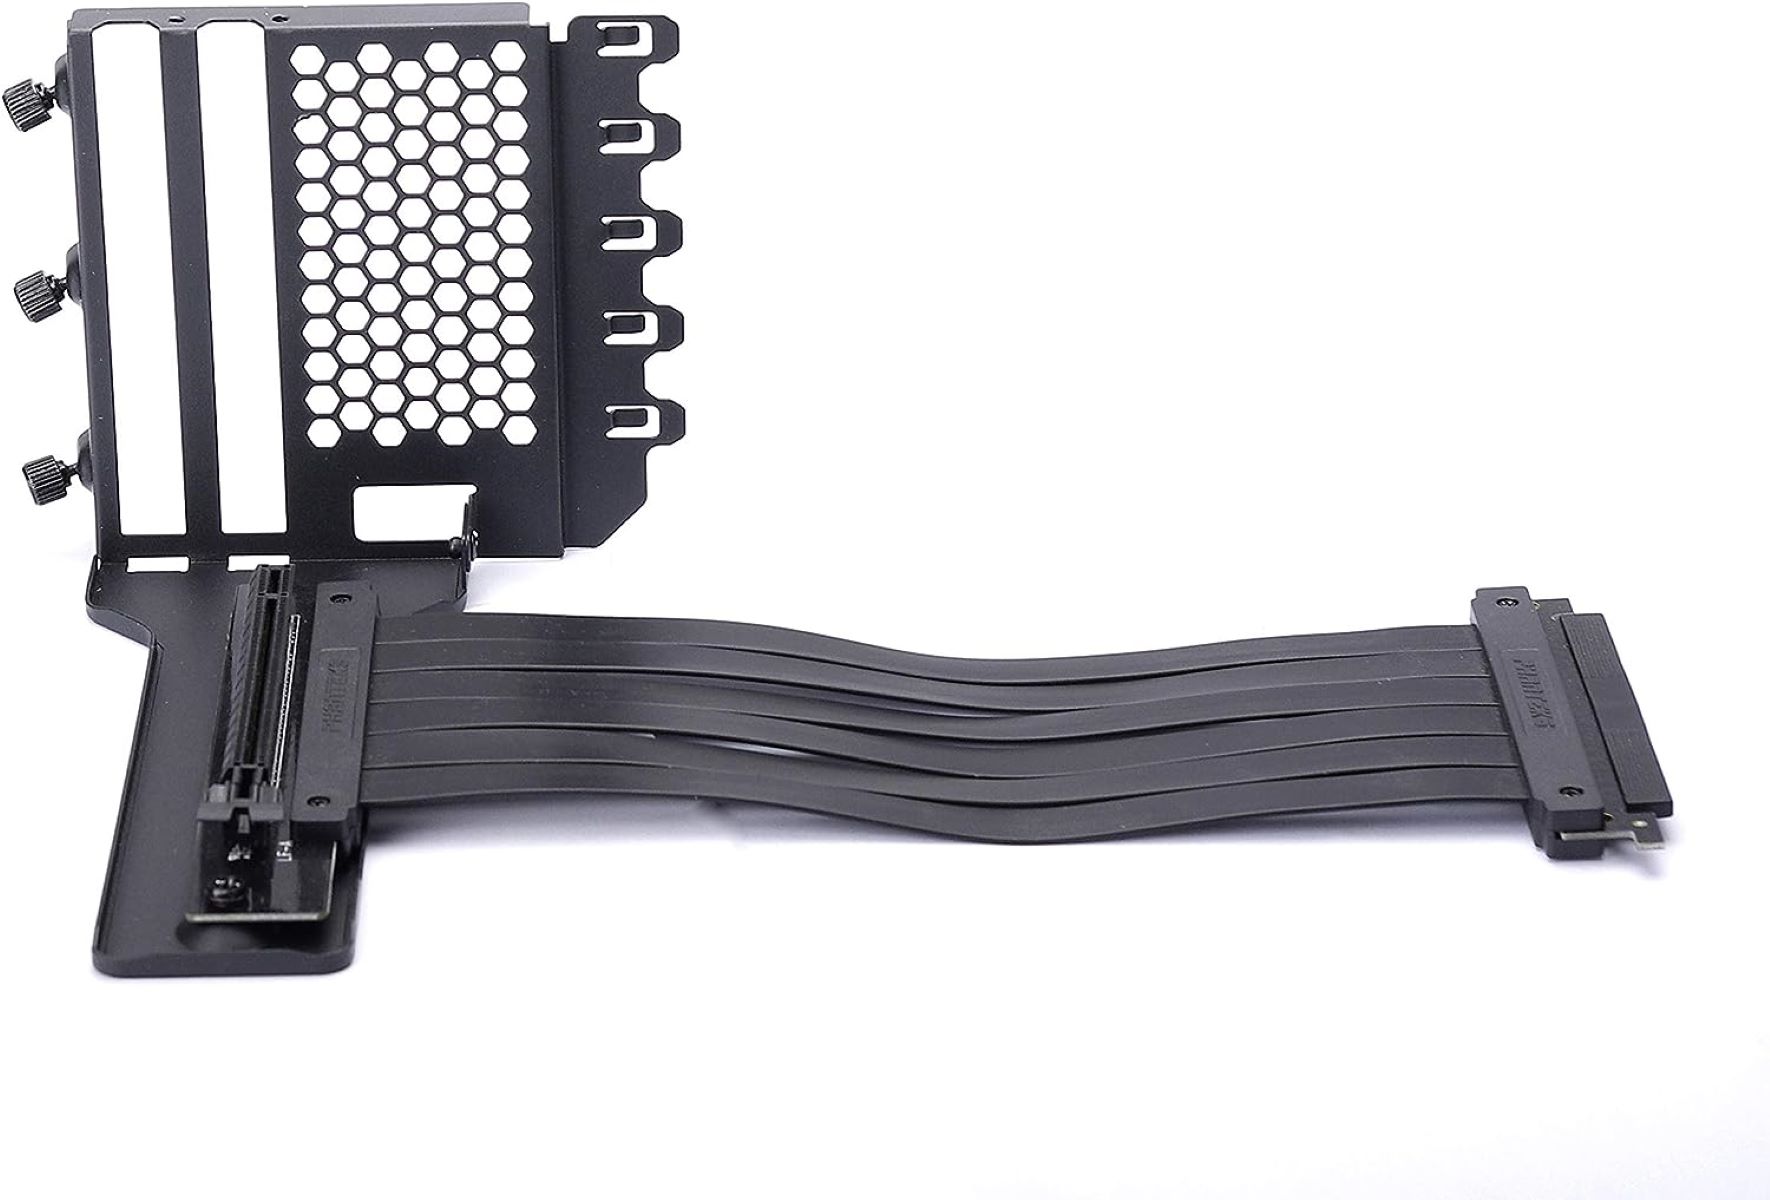
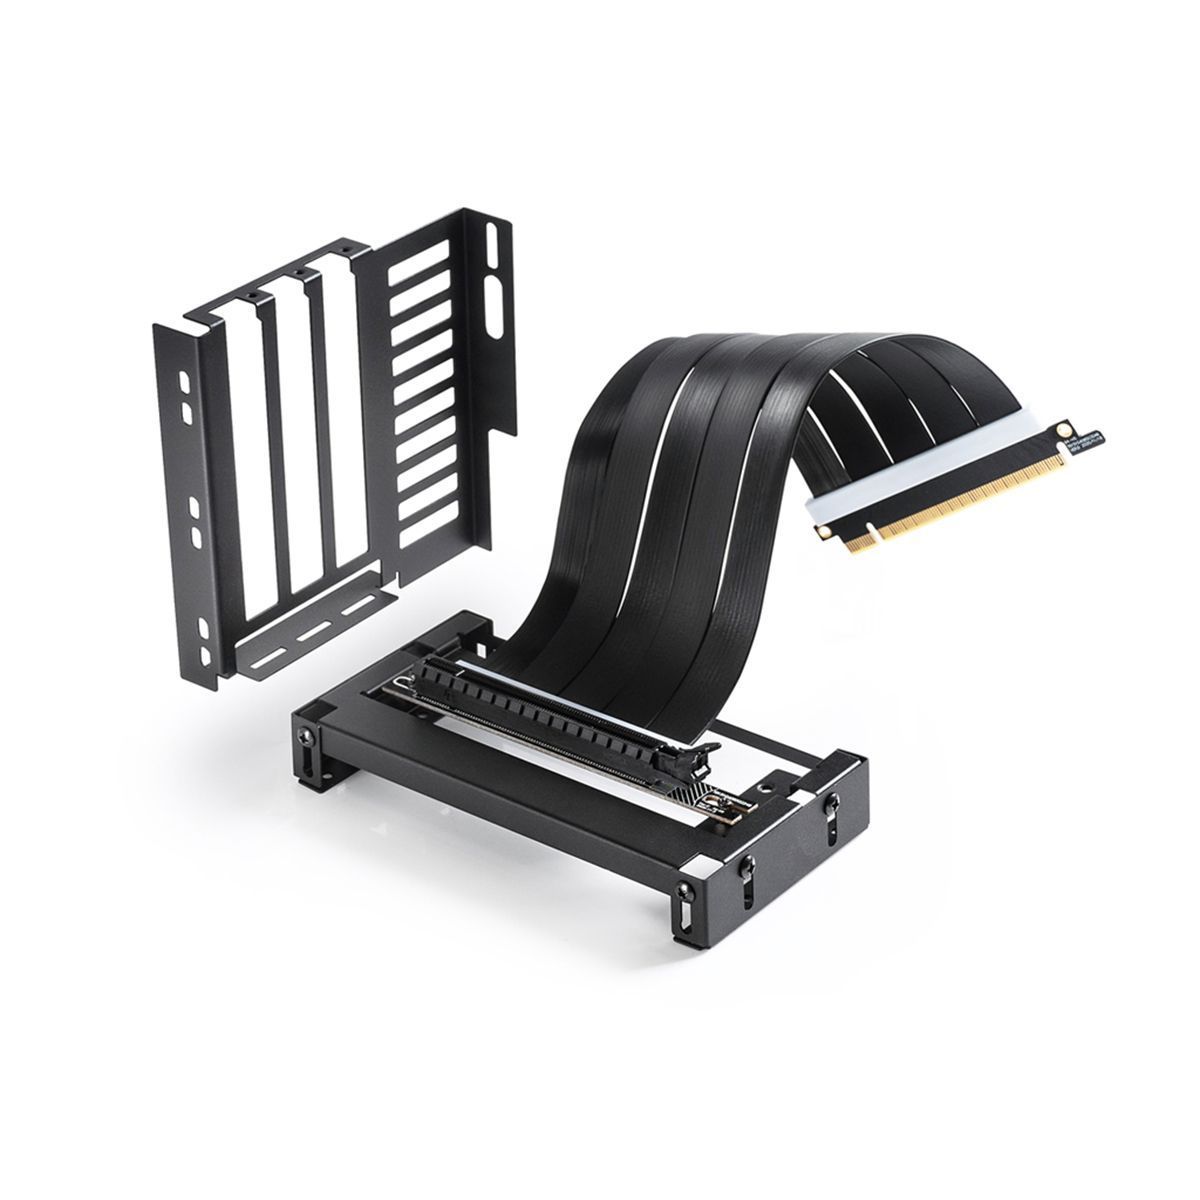
GPU Stand or Bracket: Depending on your case, you may need a GPU stand or bracket to securely hold the graphics card in its vertical position. These accessories are designed to provide stability and prevent any sagging or movement of the GPU. Make sure to select a stand or bracket that is compatible with your GPU and case.
PCIe Riser Cable: A PCIe riser cable is a flexible cable that connects the graphics card to the motherboard. This cable allows the GPU to be mounted vertically and still maintain a connection with the PCIe slot on the motherboard. Ensure that the PCIe riser cable you choose is compatible with your case and provides the necessary length and flexibility for your setup.
Screws and Mounting Hardware: Depending on the case and accessories you are using, you may require additional screws or mounting hardware to secure the GPU stand or bracket and properly attach the GPU to the case. Check the documentation of your case and accessories to determine the specific screws and mounting hardware required.
Anti-Static Wrist Strap: It’s always a good practice to wear an anti-static wrist strap when working inside your computer case. This helps prevent electrostatic discharge (ESD) from damaging sensitive components, including your GPU. An anti-static wrist strap grounds your body to prevent static buildup and discharge during the installation process.
Toolkit: Be sure to have a basic toolkit on hand, including a Phillips screwdriver or any other specialized tools that may be required for installing the GPU stand, attaching the bracket, or securing the PCIe riser cable. Having the appropriate tools readily available will ensure that you can perform the installation smoothly.
Documentation and User Guides: Familiarize yourself with the documentation and user guides for your computer case, GPU stand or bracket, and PCIe riser cable. These resources will provide specific instructions and recommendations for the installation process. Following the manufacturer’s guidelines will help ensure a successful and trouble-free vertical GPU mounting.
By gathering these essential tools and materials, you will be fully prepared to tackle the vertical GPU mounting process. In the next section, we will provide a step-by-step guide to help you through the installation process.
Step-by-Step Guide to Mounting Your GPU Vertically
Now that you have the necessary tools and materials ready, let’s walk through the step-by-step process of mounting your GPU vertically. Follow these instructions carefully to ensure a successful installation:
- Start by preparing your computer case. Make sure it is powered off and unplugged from the electrical outlet for safety.
- If your case requires a GPU stand or bracket for vertical mounting, attach it to the designated area inside the case. Use the appropriate screws or mounting hardware provided with the stand/bracket.
- Next, locate the PCIe slot on the motherboard that you will use for the GPU connection. Keep in mind that this slot needs to be accessible with the PCIe riser cable.
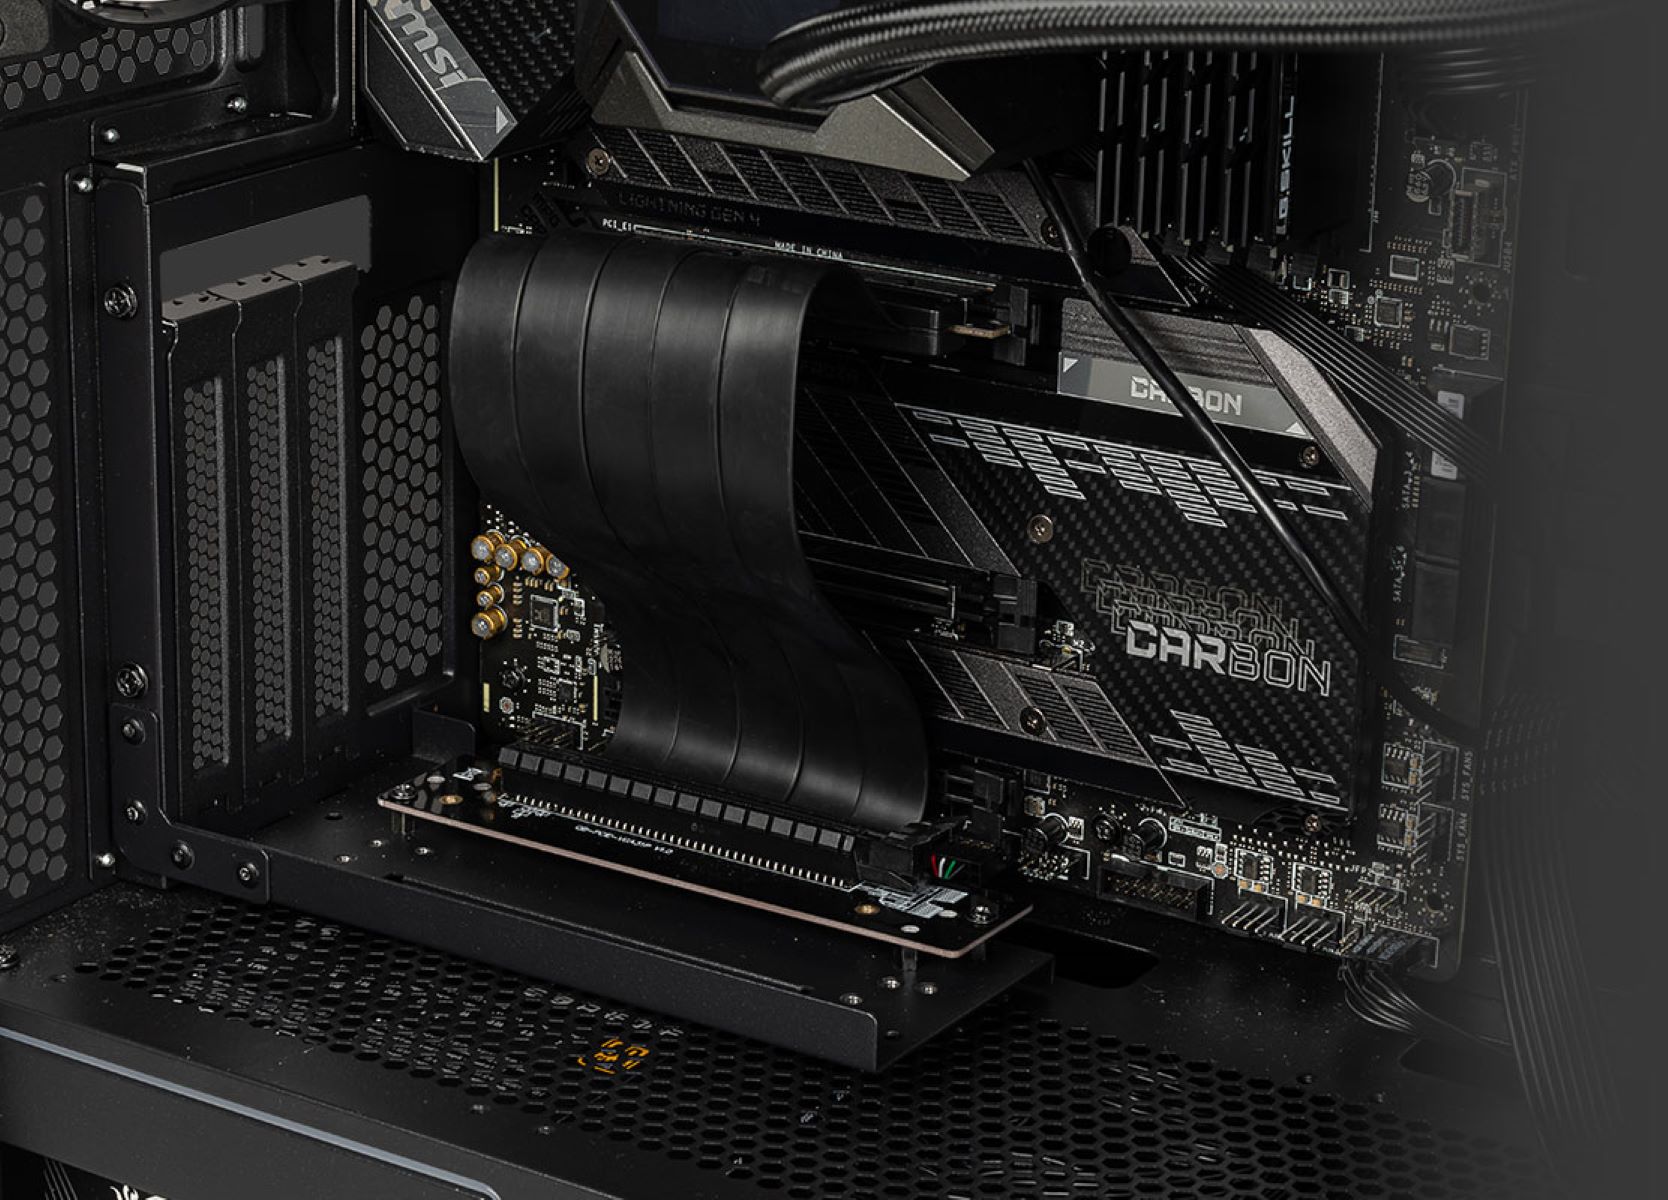
- Attach one end of the PCIe riser cable to the PCIe slot on the motherboard, ensuring a secure connection. Take extra care to align the pins properly and not to apply excessive force.
- Route the PCIe riser cable through the designated opening in the case, ensuring that it is properly positioned and not obstructing other components or cables inside the case.
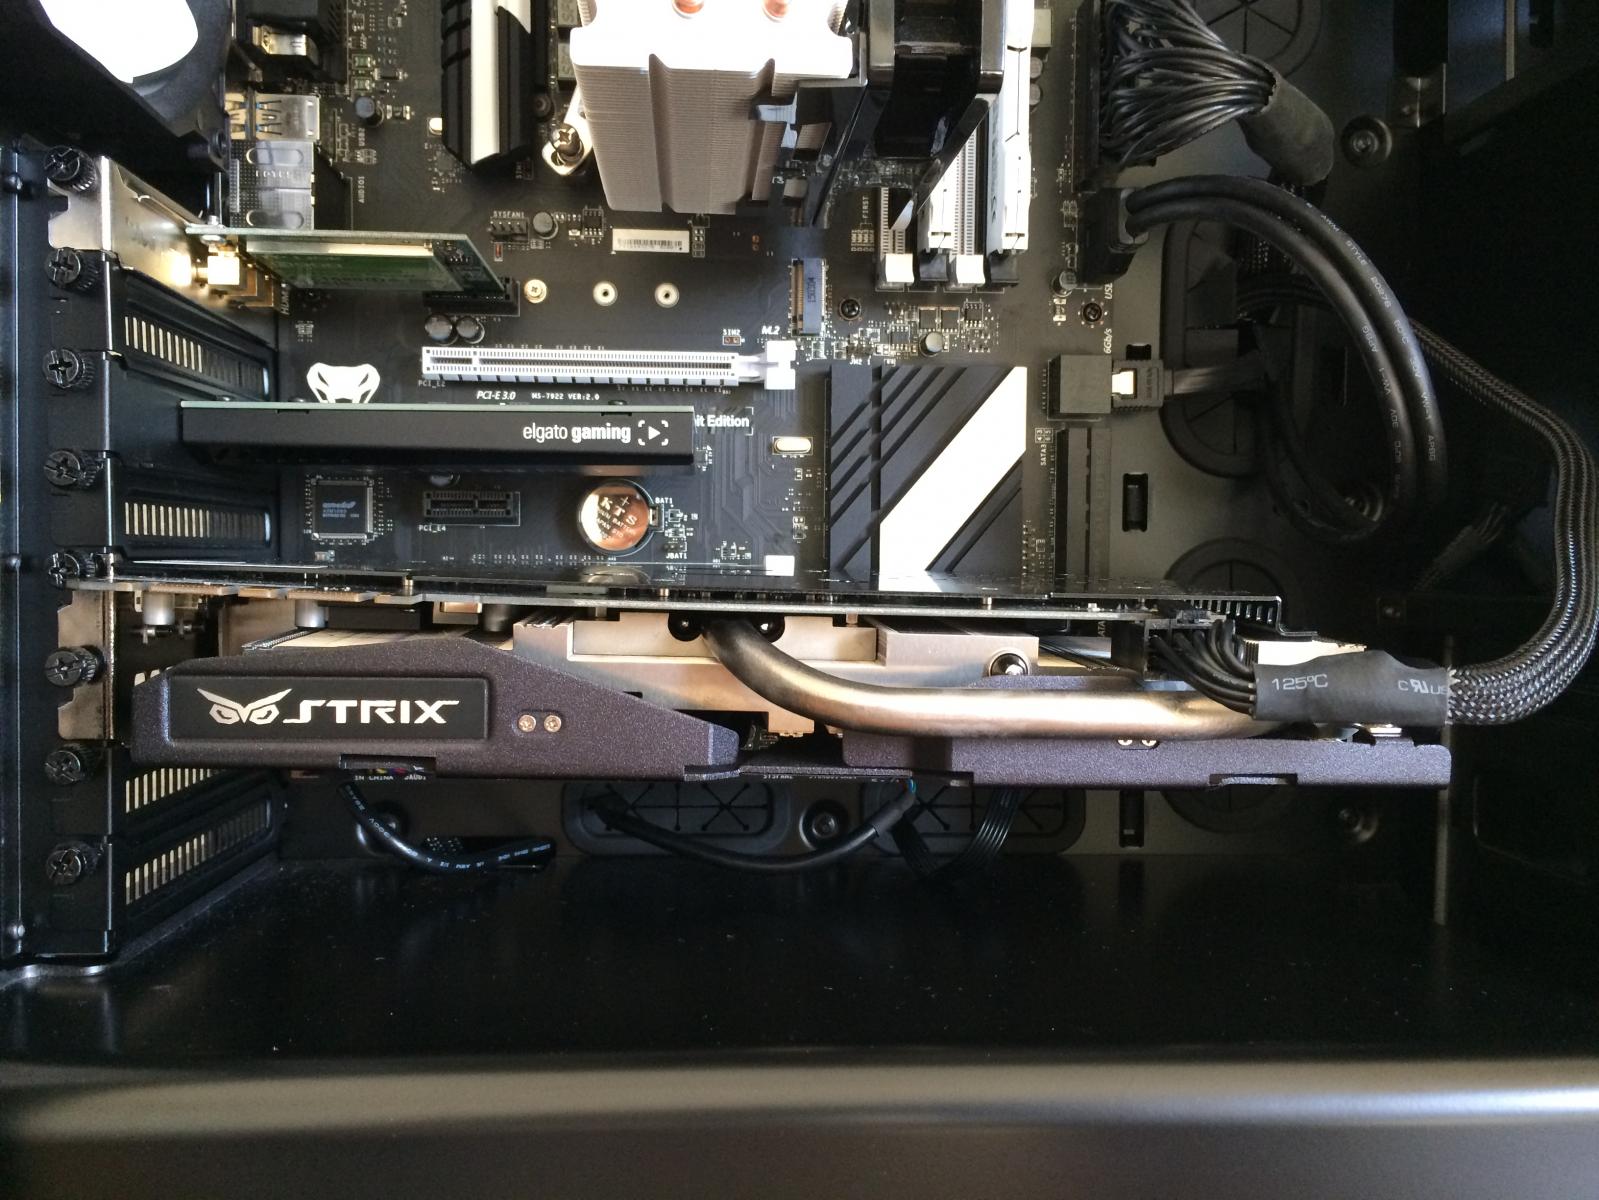
- Attach the other end of the PCIe riser cable to the graphics card. Gently insert it into the PCIe slot on the GPU, aligning the pins and making sure it is fully seated.
- Secure the GPU to the GPU stand or bracket, following the instructions provided with the stand/bracket. Use the appropriate screws or mounting hardware to ensure a sturdy connection.
- Double-check all cable connections, ensuring that the PCIe riser cable is securely attached to both the motherboard and the graphics card.
- Check for any interference or clearance issues with other components, such as the CPU cooler or RAM modules. Make any necessary adjustments to ensure proper airflow and prevent physical contact between components.
- Once you are satisfied with the installation, reassemble the computer case, making sure to secure all panels, screws, and any other removable parts.
- Power on your computer and verify that the GPU is recognized by the system. Install the necessary GPU drivers and software if required.
- Monitor temperatures and performance to ensure that the vertical GPU mounting has not adversely affected cooling or stability. Make any necessary adjustments or fine-tuning as needed.
Following these steps will guide you through the process of mounting your GPU vertically. Remember to consult the documentation provided with your case, GPU stand/bracket, and PCIe riser cable for specific instructions and recommendations.
In the next section, we will provide some troubleshooting tips to help you address any problems you may encounter during or after the vertical GPU mounting process.
Troubleshooting Tips
While mounting your GPU vertically can bring numerous benefits, you may encounter some challenges along the way. Here are some troubleshooting tips to help you address common issues that may arise during or after the vertical GPU mounting process:
Check Connection and Cable Orientation: If your GPU is not being detected or experiencing connectivity issues, first ensure that the PCIe riser cable is securely connected to both the motherboard and the graphics card. Also, double-check that the cable orientation is correct, as some cables have specific directions indicated by arrows or labels.
Verify Graphics Card Compatibility: If you’re experiencing stability issues or unexpected behavior, verify that your graphics card is compatible with vertical GPU mounting. Some GPUs may have limitations or requirements for vertical installation, such as maximum weight or length restrictions.
Confirm Adequate Power Supply: Vertical GPU mounting can impact power delivery to the graphics card due to the extended cable length. Ensure that your power supply unit (PSU) is capable of providing sufficient power to the GPU and that all power cables are connected properly and securely.
Check for GPU Sag: GPU sag, where the graphics card starts to droop due to its weight, is a common concern with vertical mounting. If you notice GPU sag, consider using additional supports or anti-sag brackets to alleviate the strain on the PCIe slot and prevent long-term damage.
Monitor GPU Temperatures: With vertical mounting, the airflow around the graphics card may change, potentially affecting temperatures. Monitor your GPU temperatures during normal usage and stress tests to ensure they remain within acceptable ranges. Adjust case fan speeds or consider additional cooling solutions if necessary.
Address Clearance Issues: If components are obstructing the GPU or causing interference, carefully assess the clearance and adjust their positioning if possible. Ensure that there is sufficient space between the GPU and other components, such as the CPU cooler, RAM modules, or storage drives.
Review Manufacturer Guidelines: Always refer to the documentation and guidelines provided by the case, GPU stand/bracket, and PCIe riser cable manufacturers. These resources may contain specific troubleshooting steps or advice for overcoming common challenges associated with vertical GPU mounting.
Seek Community Support: If you encounter persistent issues, consider reaching out to online communities, forums, or support groups dedicated to PC building. Other users may have encountered similar problems and can provide valuable insights or suggestions to help you troubleshoot and resolve the issue.
Remember, troubleshooting can vary depending on individual hardware configurations and specific case and component choices. If you’re uncertain or experience significant difficulties, it’s always advisable to consult professional help or seek guidance from a trusted PC technician.
By applying these troubleshooting tips, you can overcome potential obstacles and maximize the benefits of mounting your GPU vertically. In the concluding section of the article, we will summarize the key points discussed and provide a final thought on vertical GPU mounting.
Conclusion
Vertical GPU mounting offers PC builders and gamers a visually appealing and potentially performance-enhancing option for showcasing their graphics cards. By installing the GPU in a vertical orientation with a PCIe riser cable, you can create a stunning centerpiece within your computer case, allowing for unobstructed views of the graphics card’s design and lighting effects. Additionally, vertical mounting can facilitate improved airflow and potentially lower GPU temperatures, contributing to better overall system cooling.
Before embarking on vertical GPU mounting, it is essential to consider factors such as case compatibility, GPU length and weight, available PCIe slots, and potential clearance or interference issues. Thoroughly research and plan your installation to ensure compatibility and avoid any potential problems.
During the installation process, gather the necessary tools and materials, including a compatible case, GPU stand or bracket, PCIe riser cable, screws, and a toolkit. Follow a step-by-step guide, ensuring proper connections and taking care to prevent interference with other components. Monitor temperatures and address any troubleshooting issues that may arise, seeking guidance if necessary.
Vertical GPU mounting can truly elevate your PC build, showcasing the unique design and craftsmanship of your graphics card. It allows for creative customization options, such as integrating custom water-cooling loops or optimizing space within the computer case. However, it is important to weigh these benefits against potential limitations, such as restricted expansion options or specific case compatibility requirements.
By carefully considering the pros and cons, researching your specific hardware, and following best practices, you can successfully mount your GPU vertically and enjoy the aesthetic appeal and potential performance enhancements it offers.
So, if you’re looking to add a touch of elegance and uniqueness to your PC build while potentially improving cooling performance, vertical GPU mounting might be the perfect choice for you. Have fun exploring this exciting trend and unleash the full potential of your graphics card.