Introduction
Welcome to our guide on how to make transparencies for an overhead projector! Transparencies are a great tool for presenting information in a clear and visually engaging manner. Whether you are a teacher, trainer, or presenter, knowing how to create your own transparencies can be a valuable skill.
In this article, we will walk you through the step-by-step process of making transparencies that can be used with an overhead projector. From gathering your supplies to printing and laminating the transparency, we will cover all the essential steps to ensure you create professional-looking transparencies.
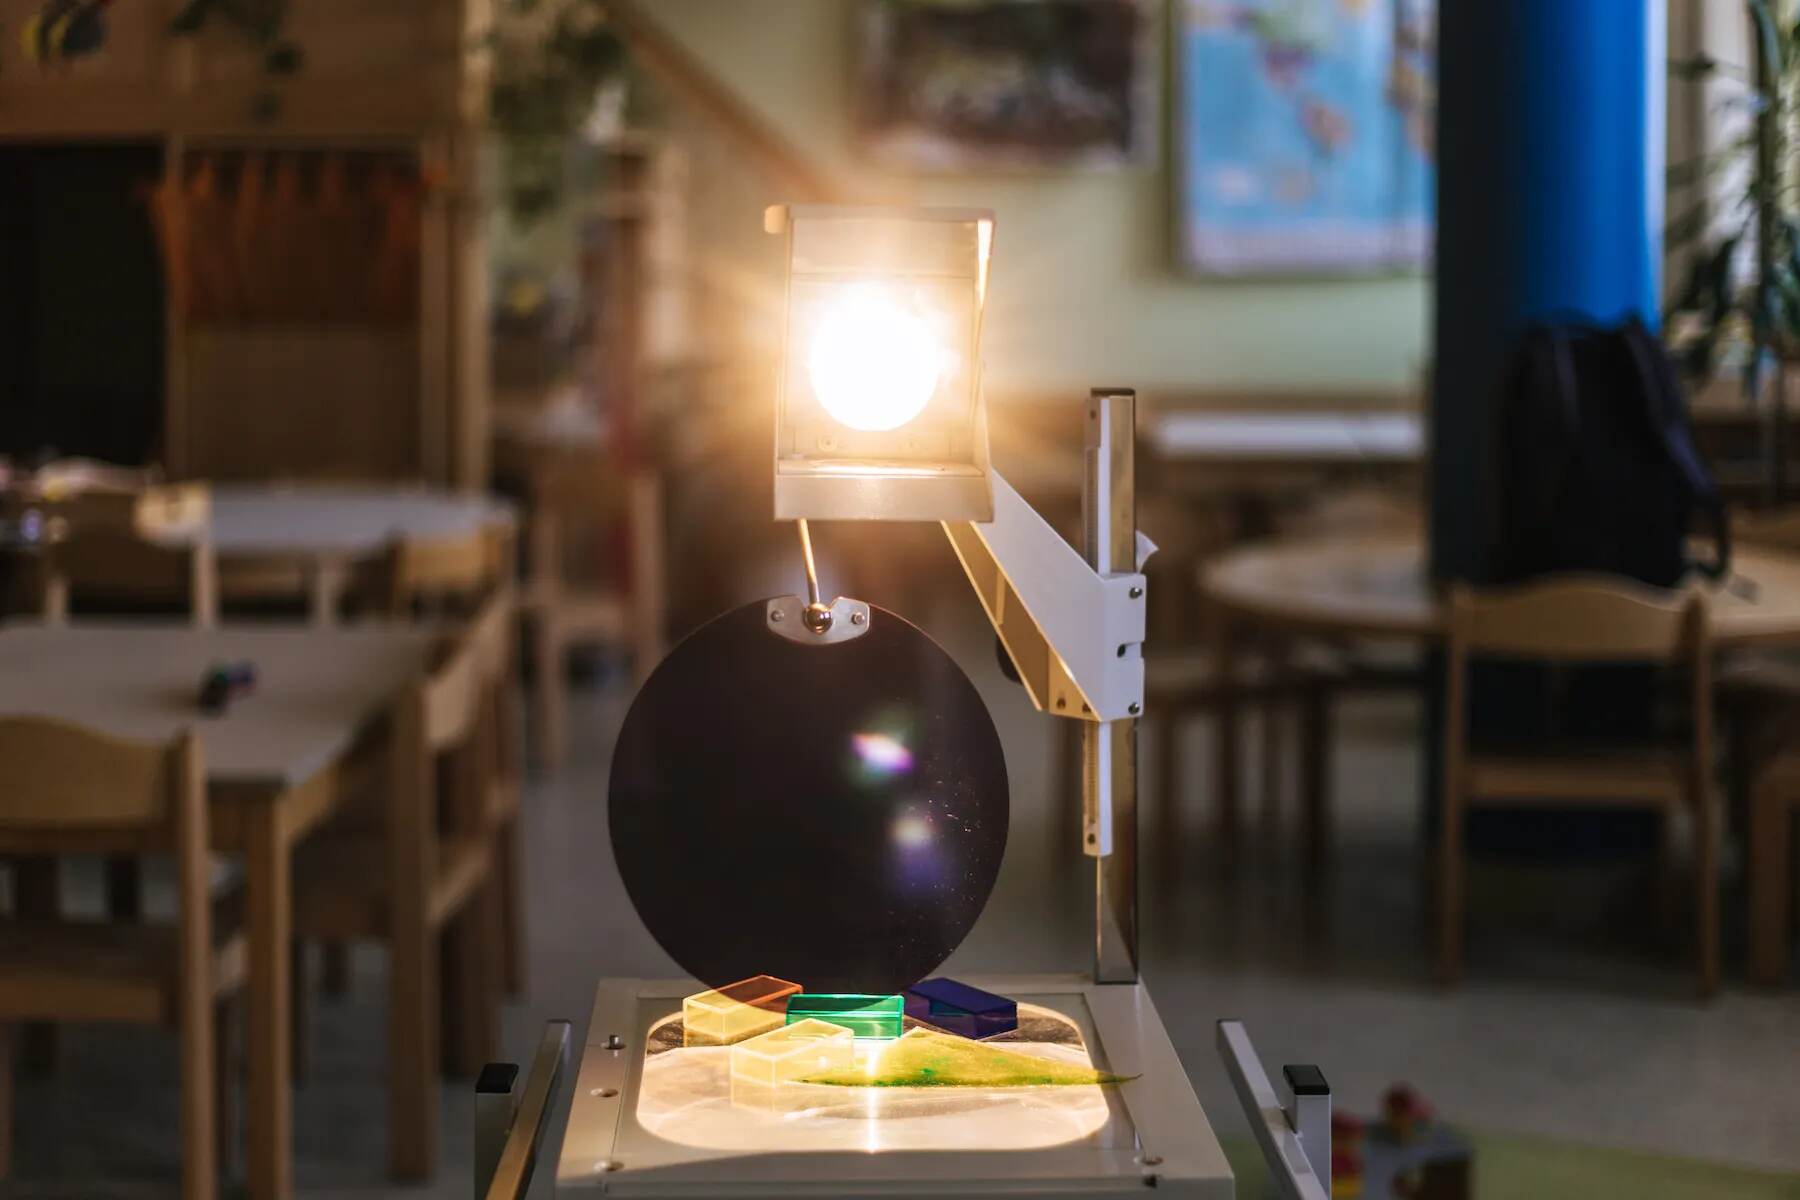
Using an overhead projector can be a fantastic way to enhance your presentations and engage your audience. With transparencies, you can easily display diagrams, charts, images, and text onto a screen or wall, allowing everyone in the room to follow along. By making your own transparencies, you have the freedom to customize the content and create visuals that align with your specific needs.
Whether you want to create transparencies for educational purposes, business presentations, or even artistic projects, this guide will provide you with all the information you need. So, let’s get started by gathering the necessary materials to begin making your own transparencies!
Materials Needed
Before you start making transparencies for your overhead projector, it’s important to gather all the necessary materials. Here’s a list of items you will need:
- Transparency Film: This is the key ingredient for creating transparencies. Ensure that the transparency film is compatible with your printer and suitable for overhead projectors.
- Printer: You will need a printer capable of printing on transparency film. Make sure it is in working condition and has enough ink.
- Computer: A computer with design software or word processing software will be used to create and print your designs on the transparency film.
- Design Software: If you want to create visually appealing designs, consider using graphic design software like Adobe Photoshop or Illustrator. Alternatively, word processing software such as Microsoft Word can also be used for simpler designs.
- Scissors or Paper Cutter: To cut and trim the transparencies to the desired size, you’ll need a pair of sharp scissors or a paper cutter.
- Laminator: While not necessary, a laminator can provide additional protection and durability to your transparencies. If you choose to laminate, make sure you have a laminator machine and laminating pouches.
- Drying Rack or Flat Surface: A drying rack or a flat surface is required for allowing the transparencies to dry after lamination.
Having these materials readily available will make the process of creating transparencies smooth and efficient. Double-check your inventory to ensure you have everything you need before moving on to the next steps.
Step 1: Gather Your Supplies
Before you begin making transparencies for your overhead projector, it’s important to gather all the necessary supplies. Having everything you need on hand will ensure a smooth and efficient process. Here’s a breakdown of what you’ll need:
- Transparency Film: Start by getting the appropriate transparency film for your printer. Make sure it’s compatible with your printer model and suitable for use with overhead projectors. If you’re unsure which type to purchase, consult the manufacturer’s guidelines or ask for assistance at your local office supply store.
- Printer: Check that your printer is in working condition and has enough ink. It’s best to use a dedicated printer for transparency film to avoid any potential compatibility issues. If you don’t have a printer, consider using a print shop or a school or office resource center.
- Computer and Software: You’ll need access to a computer with design software or word processing software. This will allow you to create and print your designs onto the transparency film. Popular design software options include Adobe Photoshop and Illustrator, but simpler designs can be created using programs like Microsoft Word or Google Docs.
- Scissors or Paper Cutter: To ensure your transparencies are the desired size and shape, have a pair of sharp scissors or a paper cutter on hand. This will make the cutting process neater and more precise.
- Laminator (optional): While not essential, laminating your transparencies can add extra protection and durability. If you choose to laminate, make sure you have a laminator machine and laminating pouches available.
- Drying Rack or Flat Surface: If you decide to laminate your transparencies, you’ll need a drying rack or a flat surface to allow them to dry properly. This step is crucial to prevent any smudging or damage to the laminated transparencies.
By gathering these supplies beforehand, you’ll be well-prepared to start creating your own transparencies. Ensure everything is in working order and readily available before moving on to the next step.
Step 2: Prepare Your Design
After gathering the necessary supplies, it’s time to prepare the design for your transparency. Whether you’re creating a presentation slide, an image, or text-based content, following these steps will help you achieve a professional and visually appealing design:
- Decide on the Content: Determine what information you want to convey on your transparency. It could be a graph, a diagram, bullet points, or any other visual representation that supports your presentation or message.
- Choose the Font and Formatting: Consider the readability of your content. Pick a font style and size that is easy to read when projected onto a screen or wall. Ensure that the text is properly aligned and formatted for clarity.
- Create or Import Graphics: If you’re incorporating images or graphics into your design, make sure they are of high quality and support the message you want to convey. Resize and position them appropriately within the design.
- Consider Color: Using color can enhance the visual appeal of your transparency. Choose a color scheme that’s visually pleasing and ensures good contrast between the content and the background.
- Keep it Simple: Avoid cluttering your design with excessive text or unnecessary elements. Keep your design clean and concise to make it easier for the audience to understand and follow along.
- Preview and Proofread: Prior to printing, preview the design on your computer to ensure all elements are correctly positioned and aligned. Double-check for any spelling or grammatical errors before proceeding.
It’s also important to note that depending on the software you’re using, there may be specific guidelines or features for creating designs on transparency film. Refer to the software’s user guide or online tutorials for any additional tips or instructions.
By following these steps, you’ll be well on your way to creating a well-designed transparency that effectively communicates your message and engages your audience. Once you’re satisfied with your design, it’s time to move on to the next step: printing your design onto the transparency film.
Step 3: Print Your Design
Once you have prepared your design, it’s time to print it onto the transparency film. Follow the steps below to ensure a successful printing process:
- Load the Transparency Film: Ensure that your printer is compatible with transparency film and follow the manufacturer’s instructions for loading the film into the printer. It’s crucial to handle the film carefully to avoid smudges or fingerprints.
- Adjust Printer Settings: Open the print settings on your computer and select the appropriate printer. Navigate to the settings for media or paper type and choose transparency film. Adjust any other settings, such as print quality or orientation, to suit your specific requirements.
- Print a Test Page: Before printing the final design, it’s always a good idea to print a test page on regular paper to ensure everything appears as expected. This allows you to make any necessary adjustments or corrections before using the transparency film.
- Print the Final Design: Once you are satisfied with the test page, it’s time to print the final design on the transparency film. Make sure the printer is properly loaded with the transparency film and click the print button. Allow the printer to complete the printing process without any interruptions or disturbances.
- Handle with Care: Once the printing is complete, carefully remove the transparency film from the printer. Avoid touching the printed side to prevent smudging. Place it on a flat surface or in a designated area to dry fully.
It’s worth noting that different printers may have slight variations in the printing process. Be sure to consult your printer’s manual or online resources specific to your printer model for any additional guidance or troubleshooting tips.
By following these steps, you will have successfully printed your design onto the transparency film. The next step is to trim and cut the transparency to the desired size, which we’ll cover in the next section.
Step 4: Cut and Trim
After printing your design on the transparency film, it’s time to cut and trim it to the desired size. Follow these steps to ensure precise and clean edges:
- Let the Transparency Dry: Before starting the cutting process, allow the printed transparency to dry completely. This will ensure that the ink is fully set and avoid any smudging or smearing.
- Measure and Mark: Determine the size and dimensions you want for your transparency. Use a ruler or measuring tape to measure and mark the desired dimensions on the film. Make light pencil markings on the film so that they can be easily erased later.
- Cut with Scissors or Paper Cutter: Using sharp scissors or a paper cutter, carefully cut along the marked lines. Take your time and make precise cuts to ensure the edges are clean and straight.
- Erase Pencil Marks: After cutting, gently erase any pencil marks that may still be visible on the transparency film. Be careful not to smudge or damage the printed design.
- Discard Excess Film: Remove any excess pieces of transparency film that are not part of your final design. Dispose of them properly or save them for future use.
It’s important to note that when handling the transparency film, you should avoid touching the printed side to prevent smudging or damaging the ink. Hold the film by the edges or use clean, dry gloves when necessary.
By following these steps, you will have successfully cut and trimmed your transparency to the desired size. The next step is to laminate the transparency, which can help protect it and prolong its lifespan. We’ll cover the lamination process in the next section.
Step 5: Laminate the Transparency
After cutting and trimming your transparency, you have the option to laminate it for added protection and durability. Laminating will help prevent smudging, fading, or tearing of the transparency. Follow these steps to laminate your transparency:
- Prepare the Laminator: Make sure your laminator machine is plugged in and heated up according to the manufacturer’s instructions. Allow it sufficient time to reach the appropriate temperature.
- Insert the Transparency: Place your transparency into a laminating pouch. Ensure the printed side is facing the pouch’s sealed side. Align the edges of the transparency with the edges of the pouch for uniform lamination.
- Feed the Pouch into the Laminator: Insert the pouch into the laminator, leading with the sealed edge. Follow the specific instructions provided by your laminator for proper feeding, as it may vary between machines.
- Allow the Lamination to Complete: Once the pouch is inserted, the laminator will guide it through and apply heat and pressure to seal the pouch around the transparency. Be patient and allow the laminator to complete the process.
- Collect the Laminated Transparency: As the laminated transparency feeds out of the machine, carefully collect it, ensuring not to touch the freshly laminated surface. Avoid bending or folding the transparency.
If you are working with a larger transparency, you may need to use a larger laminating pouch or feed it through the laminator multiple times, depending on the capacity of your laminator.
Once your transparency is laminated, it will have added protection against moisture, smudges, and general wear and tear. Lamination also enhances the vibrant colors and readability of the printed design.
Remember that laminated transparencies may have a slight reflective quality, so consider the lighting conditions in your presentation environment to avoid any glare or readability issues.
With your transparency successfully laminated, it’s time to allow it to dry completely before handling or storing it. We’ll go over the drying process in the next step.
Step 6: Dry Completely
After laminating your transparency, it’s important to allow it to dry completely before handling or storing it. This step ensures that the laminating film adheres properly and any residual moisture evaporates. Follow these guidelines to ensure your transparency dries effectively:
- Flat Drying Method: Lay your laminated transparency on a clean, flat surface. Make sure the printed side is facing up to avoid any potential damage. Position it in a well-ventilated area away from direct sunlight and excessive humidity.
- Avoid Stacking or Overlapping: Ensure that the laminated transparencies are not stacked on top of one another or overlapping. This prevents them from sticking together or retaining any moisture, which could lead to smudging or damage.
- Patience: Allow sufficient time for the transparency to dry completely. The drying time can vary depending on factors such as the type of laminating film used, the humidity level, and the size of the transparency. It may take several hours to a day for the transparency to dry thoroughly.
- Check for Dryness: To ensure that the transparency is fully dry, gently touch the backside of the laminated film. If it feels cool or slightly moist, it needs more time to dry. Wait until it feels dry to the touch before proceeding.
Be cautious not to handle the transparency while it is still wet or damp, as this may cause damage to the laminated surface. Patience is key during this step to ensure the best results for your transparency.
Once your transparency is completely dry, you can proceed to the final step: properly storing and handling it to maintain its quality and longevity.
Step 7: Store and Handle with Care
After your transparency has dried completely, it’s essential to store and handle it with care to maintain its quality and prevent any damage. Follow these guidelines to ensure your transparency remains in good condition:
- Use Protective Sleeves or Storage Containers: To protect your transparency from dust, scratches, or bends, consider storing it in a protective sleeve or storage container specifically designed for transparencies. These sleeves or containers will keep your transparency flat and shielded from any potential damage.
- Store in a Cool, Dry Place: Choose a storage location that is cool and dry, as excessive heat or moisture can compromise the integrity of the transparency. Avoid storing it in direct sunlight or areas prone to high humidity.
- Avoid Excessive Bending or Folding: Transparencies are more susceptible to damage when bent or folded. Handle them with care, avoiding any unnecessary bending or folding to prevent creases or tears in the film.
- Clean Properly: If your transparency becomes dusty or dirty, use a soft, lint-free cloth to gently wipe the surface. Avoid using harsh chemicals or abrasive materials that could scratch or damage the film.
- Handle with Clean, Dry Hands: Before handling your transparency, make sure your hands are clean and dry. Any moisture, oils, or dirt can transfer onto the film and affect its clarity or cause smudging.
- Avoid Sharp Objects: Keep your transparency away from sharp objects that could puncture or scratch the film. Be mindful of where you store it to prevent accidental damage.
By following these guidelines, you can prolong the lifespan of your transparency and ensure it remains in optimum condition for future use. With proper storage and careful handling, you can confidently rely on your transparency whenever you need to make an impactful presentation or share visual information.
Remember to periodically check on your stored transparencies to ensure they are still in good condition and free from any damage or deterioration. If any issues are detected, take the necessary steps to repair or replace them.
Now that you know how to store and handle your transparency correctly, you’re ready to impress your audience by using your custom-made overhead projector transparencies!
Conclusion
Congratulations! You have successfully learned how to make transparencies for your overhead projector. By following these step-by-step instructions, you can create professional-looking transparencies that enhance your presentations, whether you’re a teacher, trainer, or presenter.
Throughout this guide, we covered the essential steps, from gathering the necessary supplies and preparing your design to printing, cutting, laminating, and properly storing the transparencies. Each step is crucial to ensure the quality, longevity, and effectiveness of your transparencies.
Remember to gather all the required materials, including transparency film, a compatible printer, a computer with relevant software, scissors or a paper cutter, and optionally, a laminator for added protection. Prepare your design thoughtfully with proper content, formatting, and graphics, taking care to keep it simple and easy to read.
Print your design onto the transparency film, adjusting printer settings as needed, and allow it to dry completely before moving on to cutting and trimming. Take your time to ensure precise edges and erase any pencil marks, if applicable.
If desired, laminate your transparency for enhanced durability and protection. Allow it to dry fully before handling or storing it in a cool, dry place, ideally in a protective sleeve or storage container designed for transparencies. When handling your transparency, do so with clean, dry hands and avoid excessive bending or folding.
With these precautions and proper care, your transparencies will be ready whenever you need to share information in a visually engaging and clear manner with your audience.
We hope this guide has been helpful in your journey to create transparencies for your overhead projector. Embrace your newfound skill and enjoy the benefits it brings to your presentations. Good luck, and may your transparencies captivate and educate your audience!