Introduction
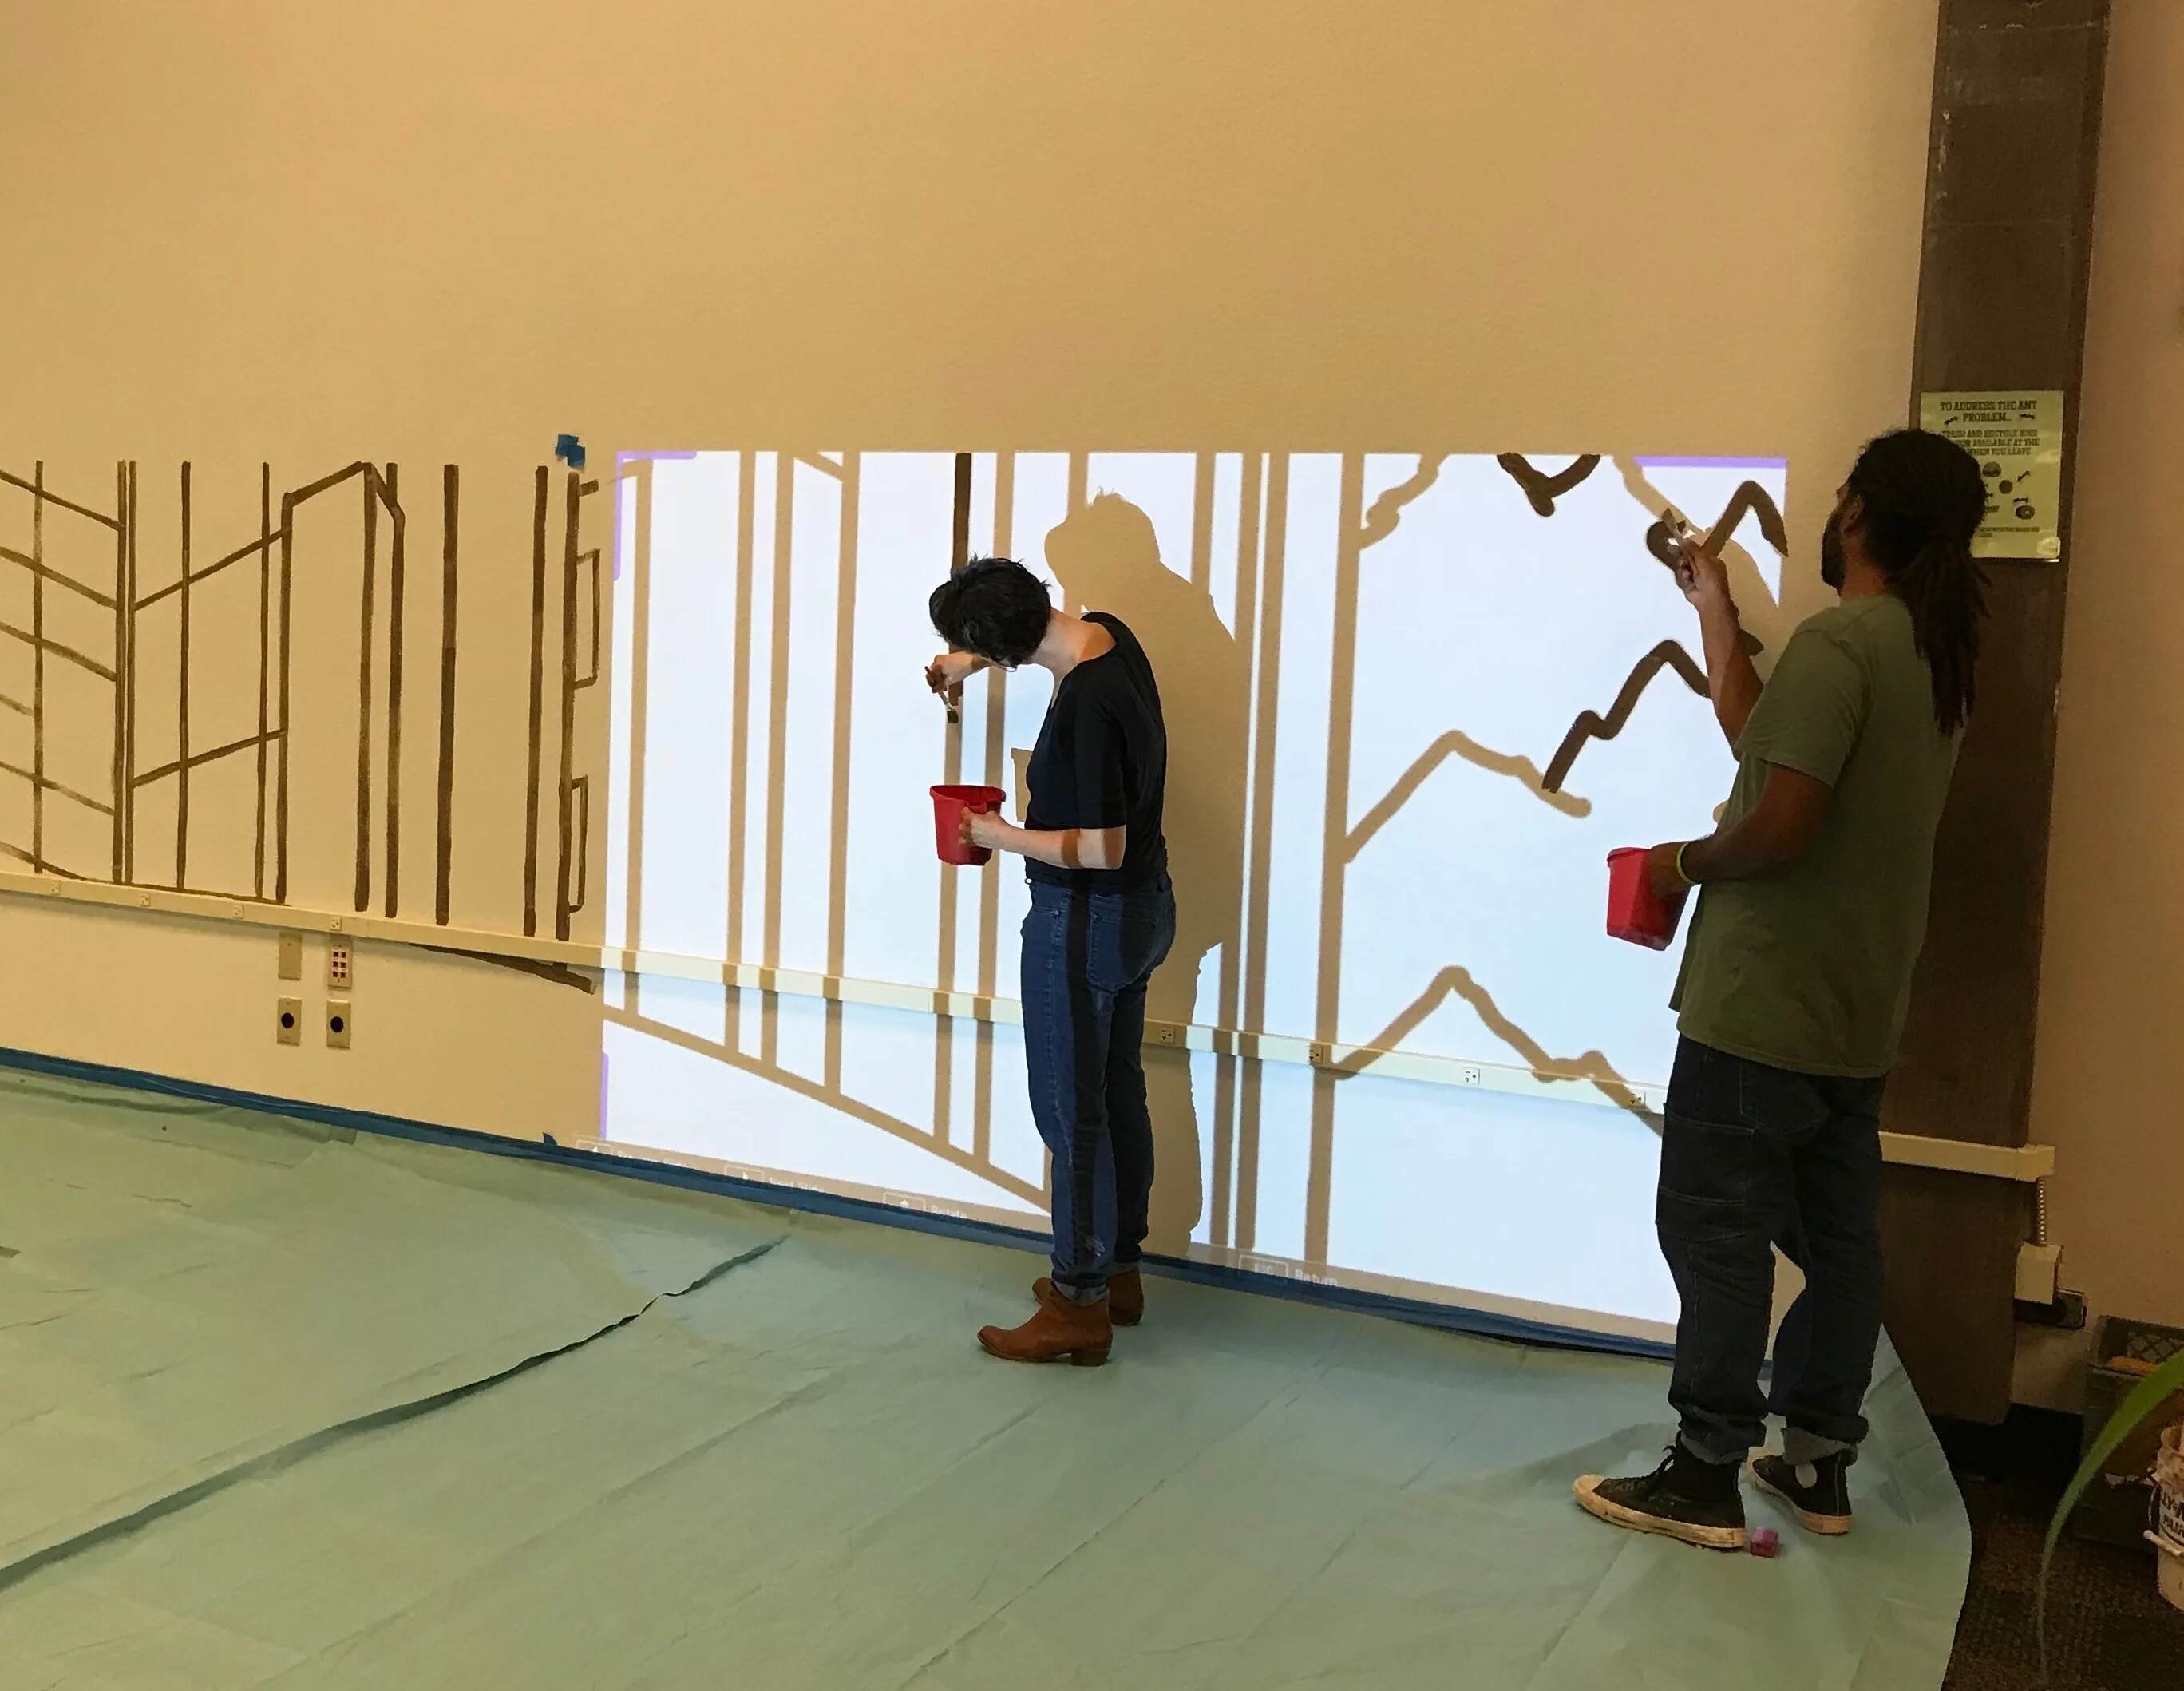
Have you ever wanted to trace an image onto a surface, but don’t have access to a projector? Fear not! In this guide, we will show you an easy and affordable alternative method for projecting an image to trace without a projector. Whether you’re an artist looking to create a detailed drawing or just need to transfer an image for a DIY project, this technique is perfect for you.
Traditionally, projectors have been used to enlarge images and project them onto a surface for tracing. However, not everyone has access to a projector or wants to invest in one. The good news is that you can achieve similar results using simple materials that you may already have at home.
In this step-by-step guide, we will walk you through the process of choosing an image, preparing your surface, and projecting the image using natural light or a lamp. We will also provide tips on how to secure your image for a seamless tracing experience. So, let’s get started on this exciting DIY project!
Materials Needed
Before you begin, gather the following materials:
1. Image to trace: Choose the image you want to project onto your surface. It can be a printed image, a magazine cutout, or even a drawing.
2. Printer (optional): If you have a digital image, you may choose to print it. This step is not necessary if you have a physical image or are comfortable tracing directly from a screen.
3. Transparent sheet or tracing paper: This will serve as the medium to transfer the image onto your surface. Transparent sheets can be found at art supply stores or online.
4. Tape or clips: You will need something to secure your image in place during the projection process. Masking tape or binder clips work great for this purpose.
5. Surface to trace on: Choose the surface on which you want to trace the image. It can be a canvas, paper, fabric, wood, or any other material that you prefer.
6. Natural light or lamp: Depending on the time of day and lighting conditions, you may use natural light coming through a window or a lamp to project the image.
7. Optional: If you are using a lamp, make sure to have an extension cord if needed and a bulb that provides sufficient brightness for clear projection.
These materials are readily available and affordable, making this tracing method accessible to everyone. Once you have everything ready, move on to the next step to choose your image.
Step 1: Choose Your Image
The first step in projecting an image to trace without a projector is to choose the image you want to work with. This can be a photograph, a design, a pattern, or any other visual that you desire to replicate on your surface.
If you have a physical image, such as a magazine cutout or a drawing, you can skip the printing step. However, if you have a digital image or need to resize the image, you may choose to print it. Adjust the size of the image according to your surface and the desired final result.
Keep in mind that complex images with intricate details may be more challenging to trace. For beginners, it’s recommended to start with simpler images to get comfortable with the tracing process.
Consider the subject matter and composition of the image. Is it something that will translate well onto your chosen surface? Is the image clear and well-defined, or does it require any adjustments or enhancements?
Remember that the purpose of tracing is to transfer an image onto your surface for reference, so it doesn’t have to be an exact replica. Feel free to make any modifications or simplifications to suit your artistic vision or project requirements.
Once you have selected your image and, if necessary, printed it, you’re ready to move on to the next step. In the following step, we will discuss how to print or trace your image onto a transparent sheet or tracing paper.
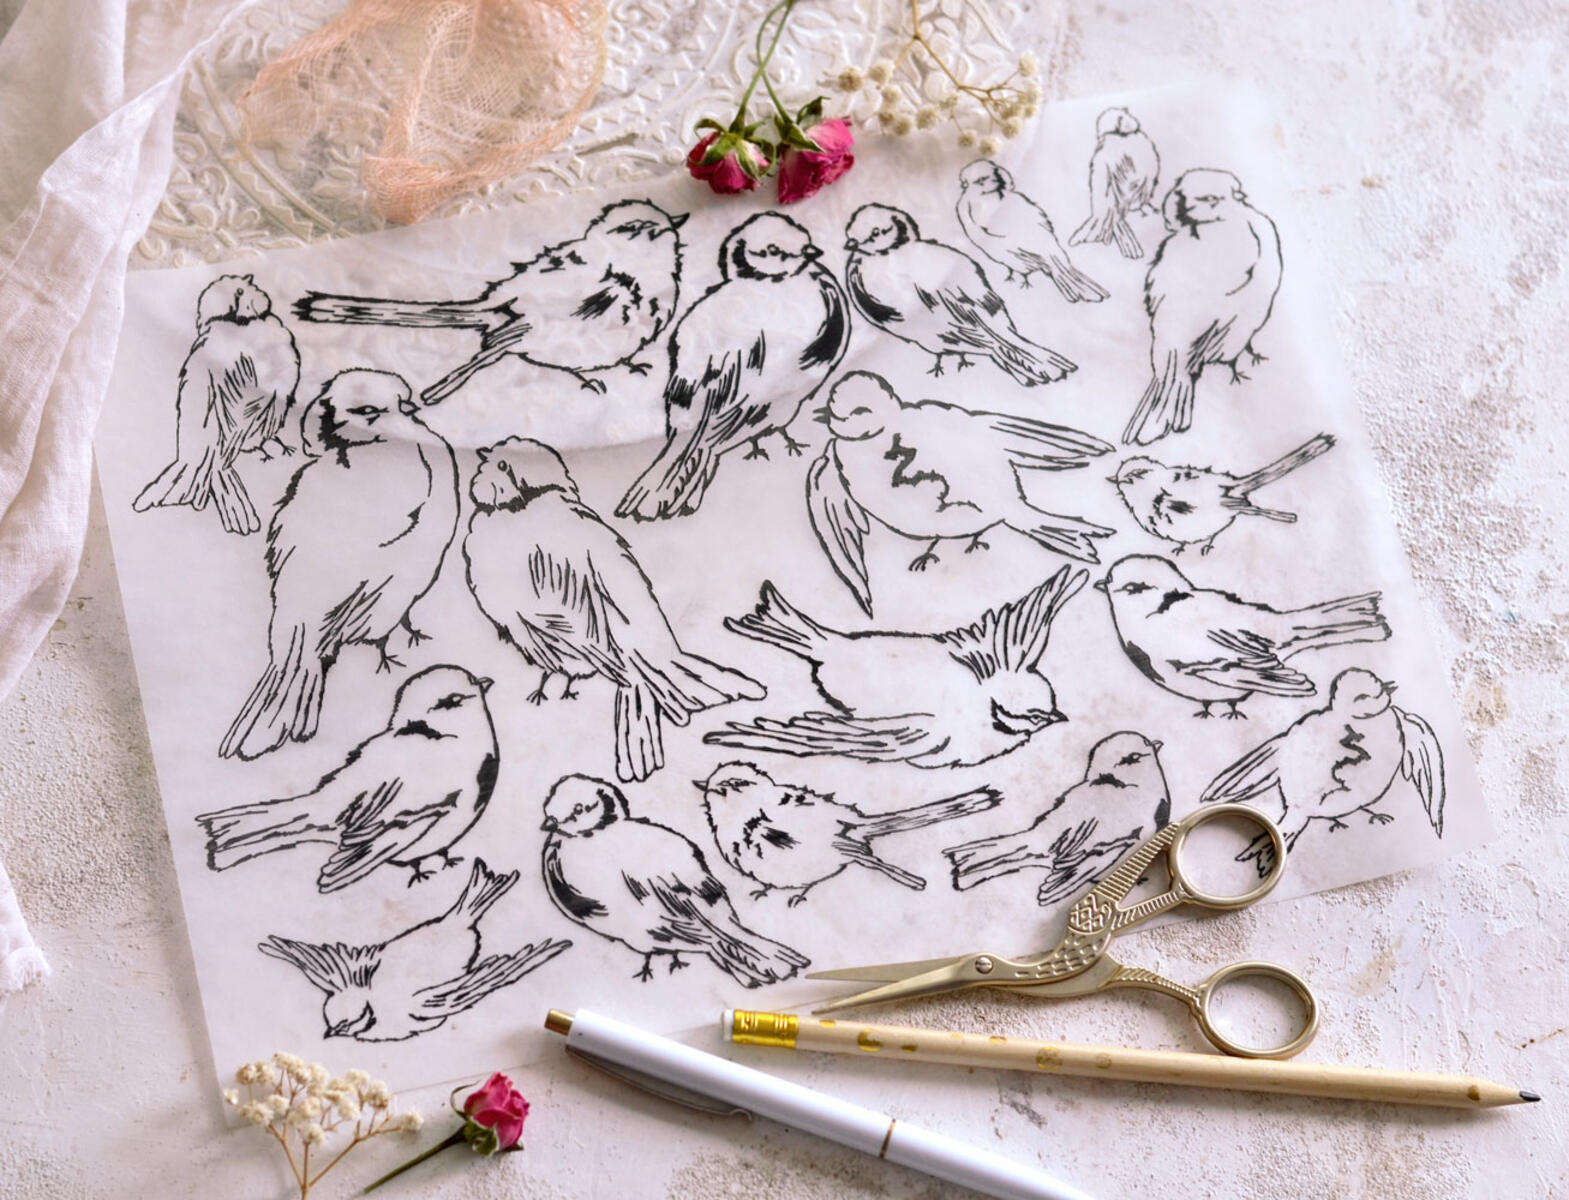
Step 2: Print or Trace Your Image
Now that you have chosen your image, it’s time to transfer it onto a transparent sheet or tracing paper. This step will allow you to project the image onto your desired surface.
If you have a physical image, such as a magazine cutout or a drawing, you can place it directly on the transparent sheet or tracing paper. Make sure the image is centered and secure it in place using tape or clips to prevent any movement during the projection process.
If your image is digital or you need to adjust its size, you can use a printer to print it onto the transparent sheet or tracing paper. Ensure that the image is printed at the desired size and centered on the sheet.
In case you don’t have access to a printer, you can trace the image manually. Place your transparent sheet or tracing paper on top of the image and use a pencil or pen to trace its outline onto the sheet. Be careful to keep your hand steady and trace the lines as accurately as possible. This method may require a bit more patience and focus, but it can yield excellent results.
Remember that when tracing, you only need to capture the main outlines and key details of the image. Avoid getting caught up in every minute detail, as you can always add those in during the actual tracing process.
Once you have either printed or traced your image onto the transparent sheet or tracing paper, you’re ready to move on to the next step. In the following step, we will discuss how to prepare your surface for the projection.
Step 3: Prepare Your Surface
Preparing your surface is a crucial step to ensure a smooth and accurate tracing process. Depending on the type of surface you have chosen, there are a few key considerations to keep in mind.
If you’re working on a canvas, paper, or any other porous surface, it’s essential to prime it beforehand. Priming creates a smooth and level surface, making it easier to trace and ensuring that the image transfers accurately. Use a primer appropriate for the surface material and follow the manufacturer’s instructions for application.
For non-porous surfaces like glass or plastic, make sure to clean the surface thoroughly to remove any dirt, dust, or smudges. This will help to maintain clarity during the projection process and prevent any distractions or distortions in the image.
If you’re working with fabric, consider stretching it tightly over a frame or embroidery hoop to create a taut and stable surface. This will make tracing easier and minimize any fabric movement during the process.
Ensure that your working area is well-lit to provide optimum visibility during the tracing process. Natural light is ideal, so position yourself near a window or in a well-lit room. If necessary, utilize additional lighting such as a desk lamp or overhead light to enhance visibility and make the image projection clearer.
Take a moment to arrange your workspace for convenience and comfort. Place your projected image, tracing surface, and any necessary materials within reach to avoid interruptions or the need for frequent movement.
Now that your surface is properly prepared, you’re ready to move on to the next step. In the following step, we will discuss how to secure your image for projection.
Step 4: Secure Your Image
Securing your image in place is crucial to ensure that it stays in position during the projection process. This will help maintain the accuracy and clarity of the image as you trace it onto your surface.
If you’re using a printed image on a transparent sheet or tracing paper, you can use tape or clips to secure it onto your surface. Place the image where you want it to be projected and use tape to attach the edges of the transparent sheet or tracing paper to the surface. Make sure to tape it down securely, so it doesn’t shift or move while you’re tracing.
If you’re working with a physical image such as a magazine cutout or a drawing, you can use tape or clips to hold it in place on your surface. Again, ensure that the image is centered and securely attached to avoid any movement during the tracing process.
Alternatively, if you have access to an adjustable stand or easel, you can position your image at a comfortable height and angle for projection onto your surface. This can provide a more ergonomic tracing experience, especially for larger or more detailed images.
It’s essential to note that while securing your image, make sure not to obstruct the projected light source. Ensure that the image is flat and taut, allowing the light to pass through and project onto your surface with clarity.
Once your image is securely in place, you’re ready to move on to the next step. In the following step, we will discuss how to project the image using natural light.
Step 5: Projecting using Natural Light
If you prefer to use natural light for projecting the image, follow these steps:
1. Position yourself and your surface near a window or in a well-lit area. Make sure the light is coming from a direction that allows for clear projection onto your surface.
2. Adjust the angle and distance between your image and surface to achieve the desired size and focus of the projected image.
3. Ensure that your surface is flat and positioned parallel to the source of light for optimal projection.
4. Pay attention to the clarity and sharpness of the projected image. If needed, adjust the distance or angle of the image to fine-tune the projection quality.
5. Take breaks as needed to prevent eye strain and maintain focus throughout the tracing process.
Using natural light can create a soft and organic projection, allowing you to trace with ease. It’s important to keep in mind that the availability and intensity of natural light can vary, so consider the time of day and weather conditions for the best results.
Avoid direct sunlight, as it can cause harsh shadows or distort the projection. If necessary, use a sheer curtain or diffuser to soften the light and create a more even projection.
Now that you have successfully projected the image using natural light, you’re ready to move on to the next step. In the following step, we will discuss how to project the image using a lamp or light source.
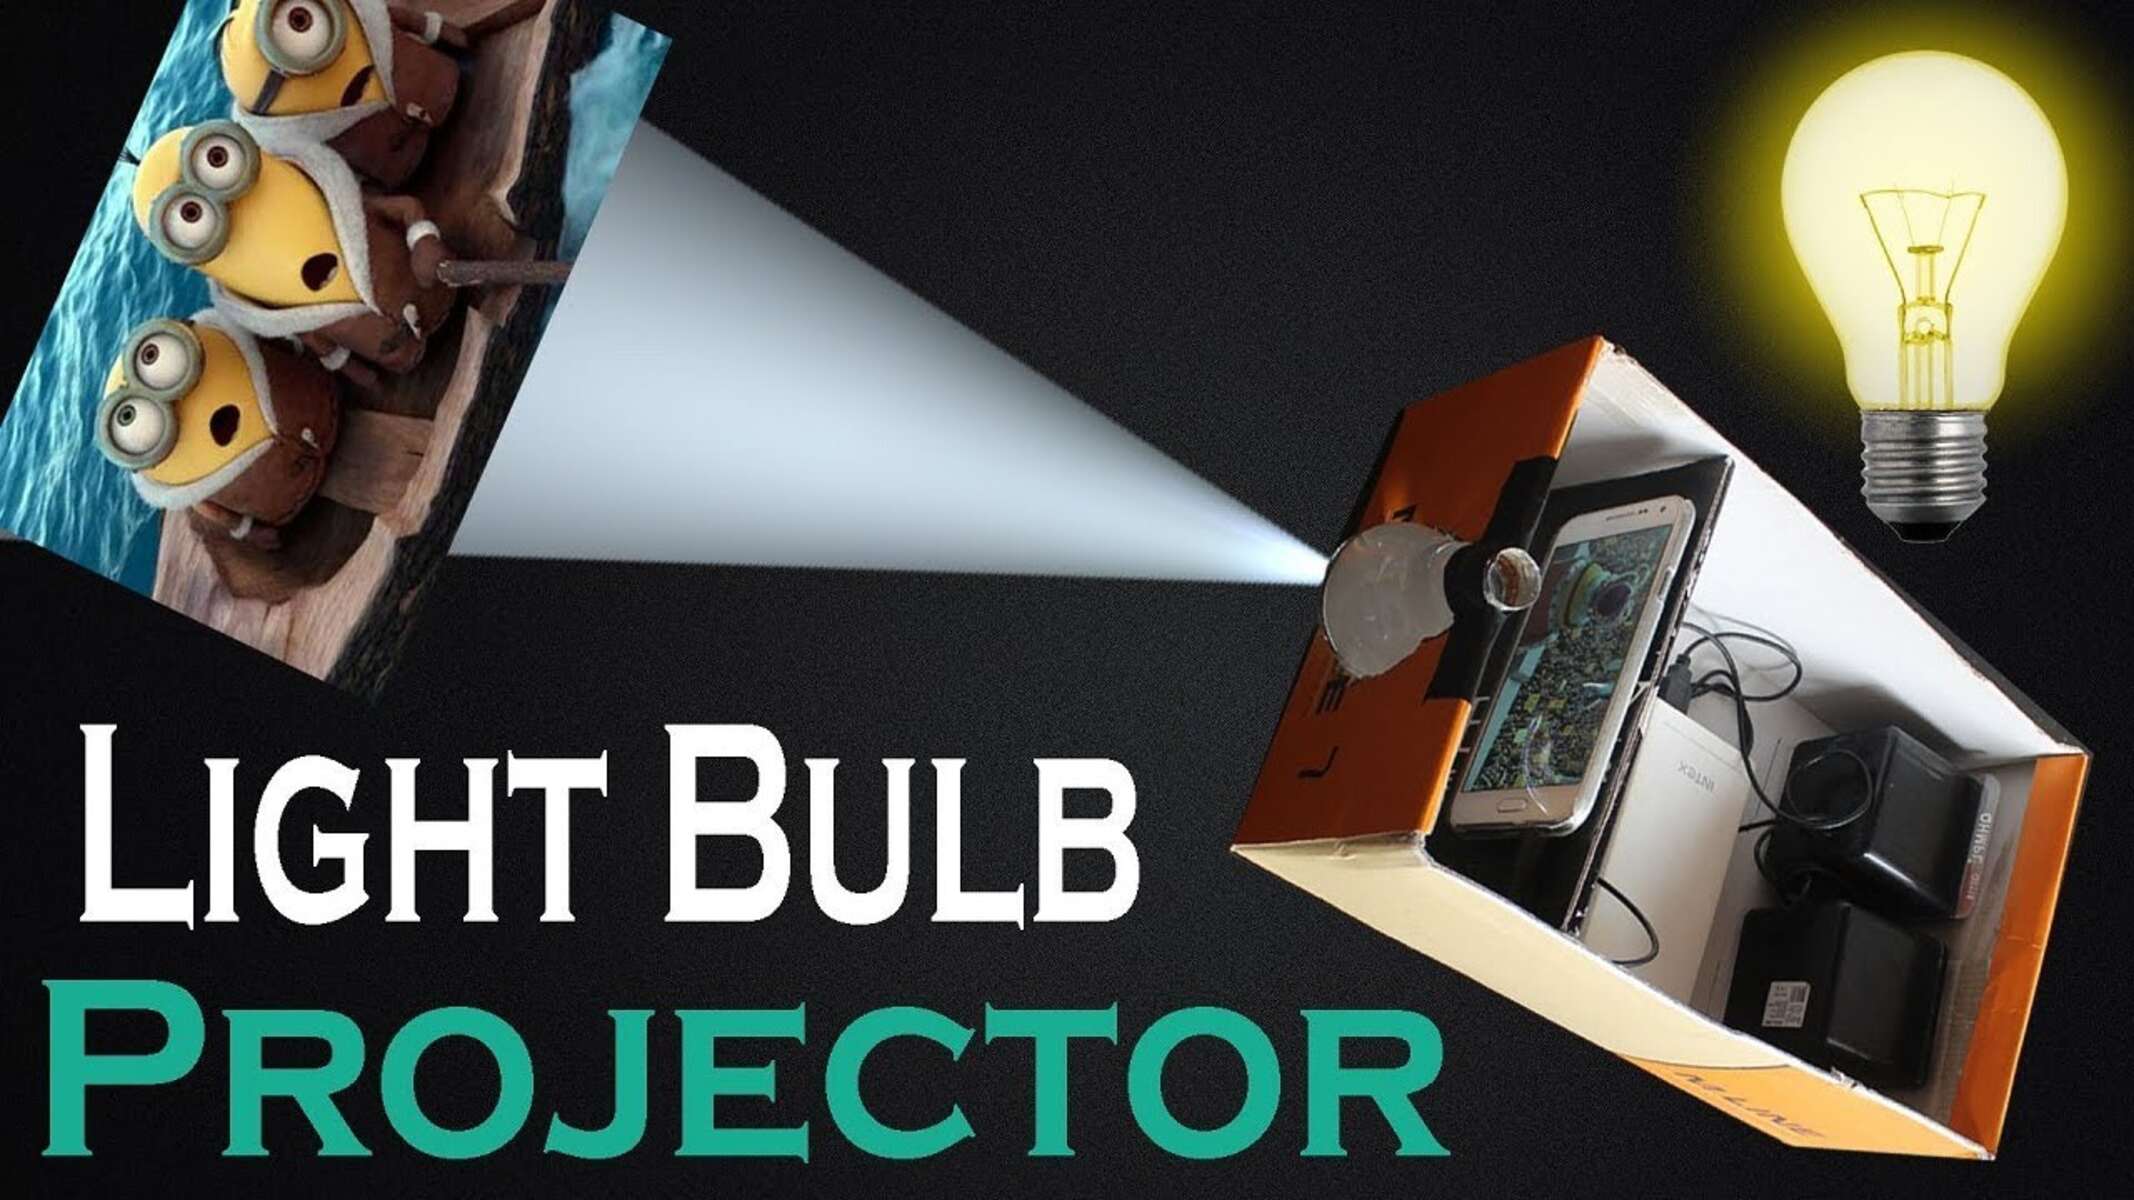
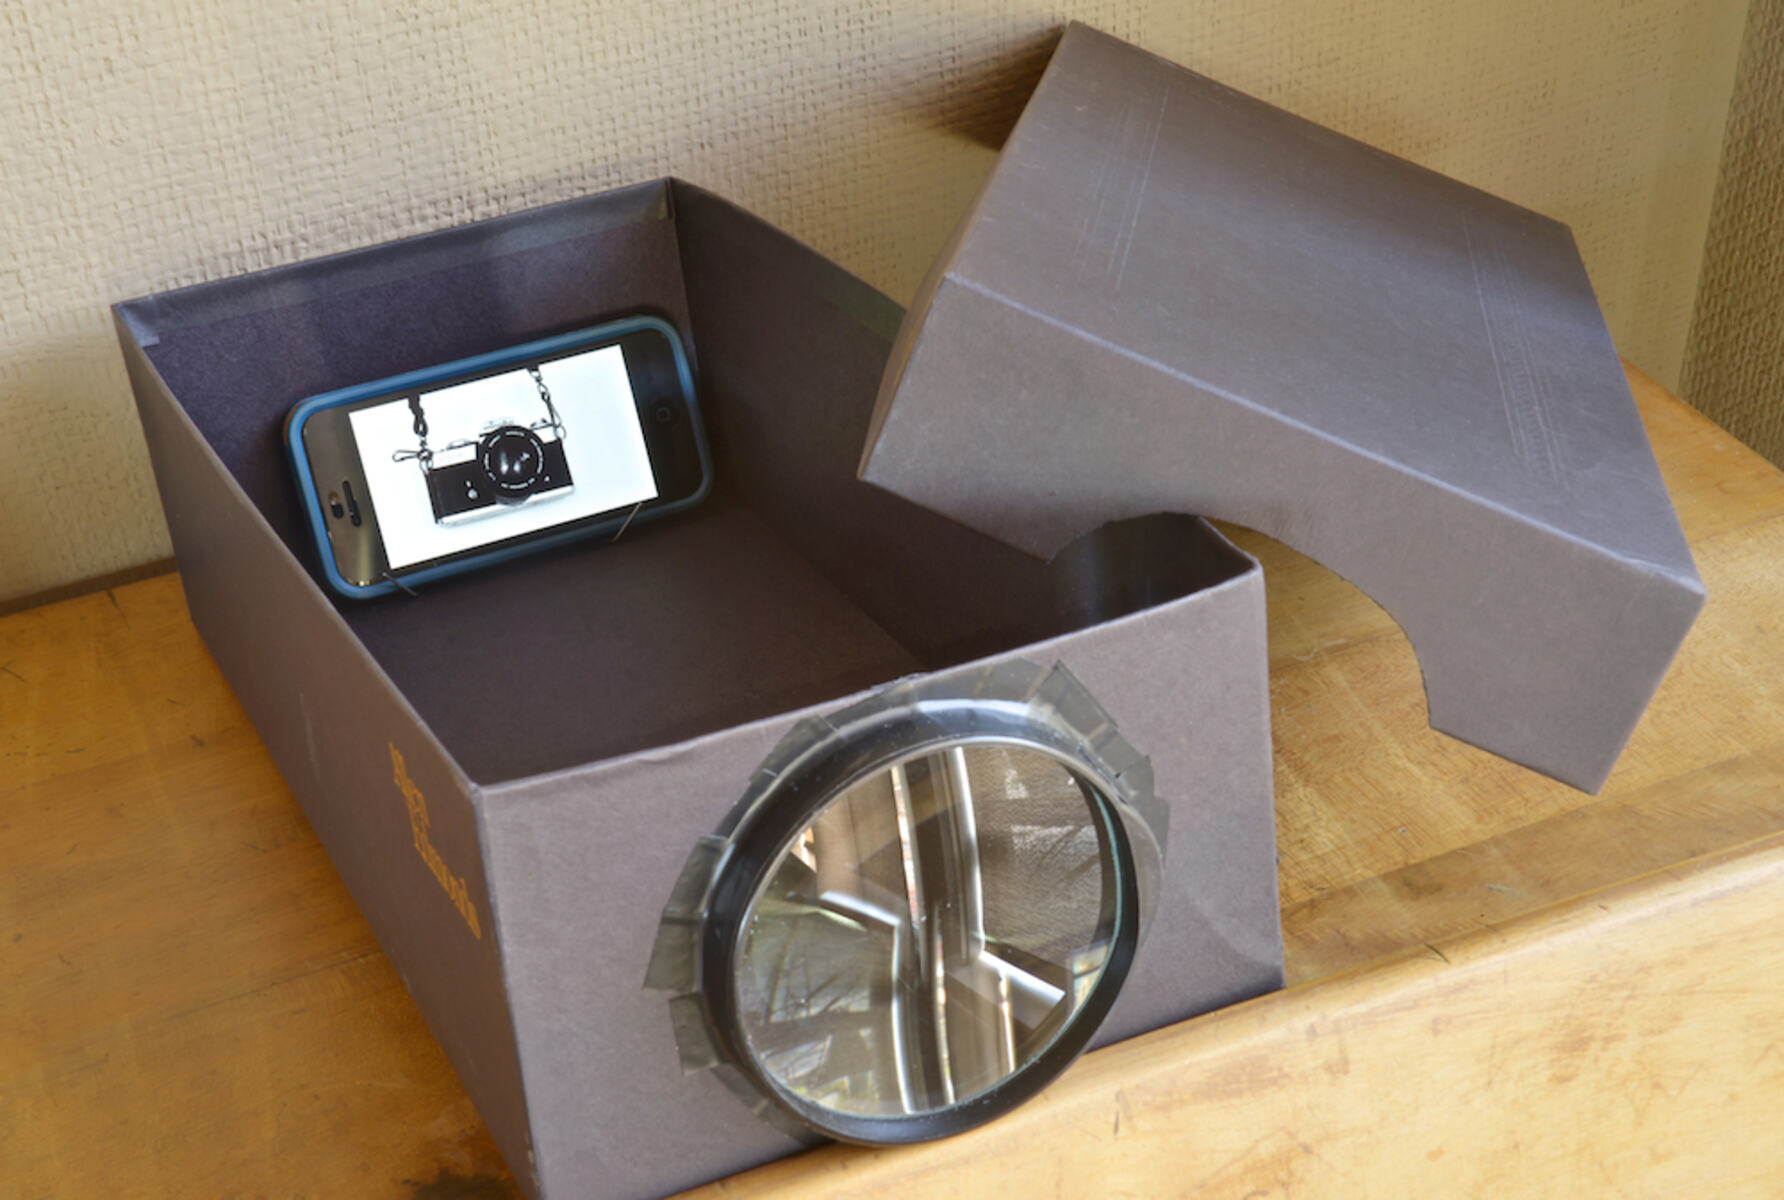
Step 6: Projecting using a Lamp or Light Source
If you prefer to use a lamp or artificial light source for projecting the image, follow these steps:
1. Set up your lamp or light source in a position that allows for clear and focused projection on your surface. Make sure the light is directed towards the image and surface.
2. Adjust the angle and distance between the lamp and your image to achieve the desired size and focus of the projected image.
3. Ensure that your surface is flat and positioned parallel to the projected light for optimal projection.
4. Experiment with the distance, intensity, and direction of the light to achieve the clearest projection possible.
5. Take breaks as needed to prevent eye strain and maintain focus during the tracing process.
When using a lamp or artificial light source, it’s important to consider the brightness and temperature of the light. A lamp with adjustable brightness can be helpful in achieving the desired level of illumination for clear projection.
If your lamp produces a warm or cool light, be mindful of how it may affect the colors and tones of the projected image. Adjust the lamp’s settings or use color-correcting techniques if necessary to maintain accuracy in your tracing.
Remember to position yourself and your surface comfortably to avoid casting any shadows on the projection or obstructing the light source.
Now that you have successfully projected the image using a lamp or light source, you’re ready to move on to the next step. In the following step, we will discuss how to trace the image onto your surface.
Step 7: Tracing the Image
Now that the image is projected onto your surface, it’s time to start tracing. Follow these steps to accurately trace the image onto your desired medium:
1. Begin by anchoring your hand or arm on the surface to maintain stability while tracing. This will help you achieve smooth, precise lines.
2. Use a fine-tipped pencil, pen, or marker to trace the projected image onto your surface. Start with the main outlines and gradually work your way towards the finer details.
3. Take your time and focus on each section of the image, making sure to capture all the essential lines and shapes. Pay attention to the proportions and angles to maintain accuracy.
4. If necessary, periodically step back and assess your progress to ensure that the traced image aligns with your intended vision.
5. If you encounter faint or unclear areas of the projection, gently darken those areas while tracing to enhance visibility and create a more comprehensive line drawing.
6. Once you have completed the tracing, double-check for any missed or inaccurately traced areas. Make any necessary adjustments to ensure a complete and accurate representation of the image.
7. Remove the projected image or turn off the light source to fully reveal your traced image on the surface.
Remember, tracing is a technique that allows you to capture the basic outlines and details of the image, serving as a guide for further artistic or project work. Feel free to add your own creative touches, shading, or color to bring the traced image to life.
Now that you have successfully traced the image onto your surface, you can begin your next steps of painting, coloring, or continuing with your project based on the traced image.
Conclusion
Congratulations! You have successfully learned how to project an image to trace without a projector. By following these step-by-step instructions, you can easily transfer images onto any surface using simple materials and techniques.
Through the process of choosing an image, printing or tracing it onto a transparent sheet, preparing your surface, securing the image, and projecting it using natural light or a lamp, you have acquired the skills to achieve accurate and detailed tracings.
Remember to choose images that are suitable for your project or artistic vision, and take your time during the tracing process to ensure precision. Be mindful of the lighting conditions, whether using natural light or artificial sources, to achieve the best projection quality.
Tracing is an excellent tool for artists, DIY enthusiasts, or anyone looking to create a precise replica or guide for their projects. It allows you to bring images to life on various surfaces including canvas, paper, fabric, and more.
You can now explore a variety of creative possibilities with your newly acquired skill. Use the traced images as references for painting, coloring, embroidery, woodburning, or any other artistic endeavor.
With practice, you will refine your tracing abilities and develop your own style and techniques. So, start tracing and let your imagination run wild!
Have fun exploring the world of tracing and enjoy the satisfaction of creating beautiful and accurate images without the need for a projector. Happy creating!