Introduction
Welcome to the world of DIY projectors! If you’ve ever wanted to enjoy a big-screen movie experience right in the comfort of your own home, but don’t want to spend a fortune on a commercial projector, then this DIY guide is for you. In this article, we will show you how to make a DIY projector without a magnifying glass.
A projector is a device that can display images or videos onto a large surface, such as a wall or a screen. Traditional projectors can be quite expensive, but with a little creativity and resourcefulness, you can create your own budget-friendly version.
By following the steps outlined in this guide, you can turn an ordinary cardboard box into a functioning projector. The key component is a lens, which will magnify and focus the image from your smartphone onto a larger surface. You don’t need a magnifying glass; instead, you can utilize a few clever techniques to achieve the desired projection.
Not only is this DIY project a fun and engaging activity, but it also allows you to customize your projector according to your preferences. Whether it’s for a movie night with friends, a presentation, or simply to enjoy some immersive gaming, this DIY projector will add a whole new level of entertainment to your life.
So, grab your materials and let’s get started! In the following sections, we will guide you through each step of creating your very own DIY projector, providing clear instructions and tips along the way. Let the creativity flow and get ready to experience the magic of your homemade projector!
Materials Needed
Before diving into the process of making your DIY projector, it’s important to gather all the necessary materials. While the list may seem a bit lengthy, rest assured that most of these items are readily available and can be easily found around your house or at a local store. Here are the materials you’ll need:
- A cardboard box – Choose a sturdy box that’s large enough to fit your smartphone and has sufficient space for the projection.
- A lens – Instead of a magnifying glass, you’ll need a lens that can project the image from your smartphone. Look for a lens with a focal length of around 100-150mm to achieve the best results.
- A utility knife or scissors – To cut through the cardboard and create openings for the lens and smartphone holder.
- A ruler or measuring tape – This will help you measure and mark the dimensions accurately.
- Duct tape or adhesive – To secure the components and hold them in place.
- A black fabric or paint – To create a dark interior for better image projection.
- A smartphone holder – You can purchase a smartphone holder or use a makeshift one made from cardboard or a similar material.
- A tripod or stand – Optional but recommended for stabilization and positioning the projector at the desired angle.
- A USB charging cable – To keep your smartphone charged during the projection.
While this is the basic list of materials, feel free to explore additional options to further enhance your DIY projector. For example, you can use decorative materials to personalize the exterior of the projector box or add additional features like built-in speakers or a cooling system for extended usage.
Once you have gathered all the materials, you are ready to embark on the exciting journey of creating your own DIY projector. The following steps will guide you through each stage of the process, ensuring that you achieve the best results possible with your homemade projector.
Step 1: Preparing the Box
The first step in creating your DIY projector is to prepare the cardboard box. This involves creating openings for the lens and the smartphone holder, as well as ensuring that the interior of the box is suitable for optimal projection. Follow these steps:
- Choose a cardboard box that is large enough to accommodate your smartphone and has sufficient space for the projection. It should be sturdy enough to hold the weight of the components and provide stability.
- Using a ruler or measuring tape, measure and mark the dimensions for the openings. One opening should be slightly smaller than the lens diameter, while the other opening should be big enough to hold your smartphone securely.
- Using a utility knife or scissors, carefully cut out the marked openings on the front or top side of the box. Take your time and ensure that the cuts are clean and precise.
- Once the openings are created, check if the lens and smartphone fit properly. Make any necessary adjustments or enlargements to the openings to accommodate the components comfortably.
- To optimize the projection, it’s important to create a dark interior. You can achieve this by painting the inside of the box with black paint or covering it with a black fabric. This will minimize any reflection or light leakage from the sides.
- Allow the paint or adhesive to dry completely before proceeding to the next step. This will ensure that the interior is dark enough to enhance the image quality.
By following these steps, you will have prepared the cardboard box for the next stages of creating your DIY projector. The openings for the lens and smartphone holder are crucial components that will enable the projection process. With the box ready, you’re one step closer to enjoying your very own homemade projector!
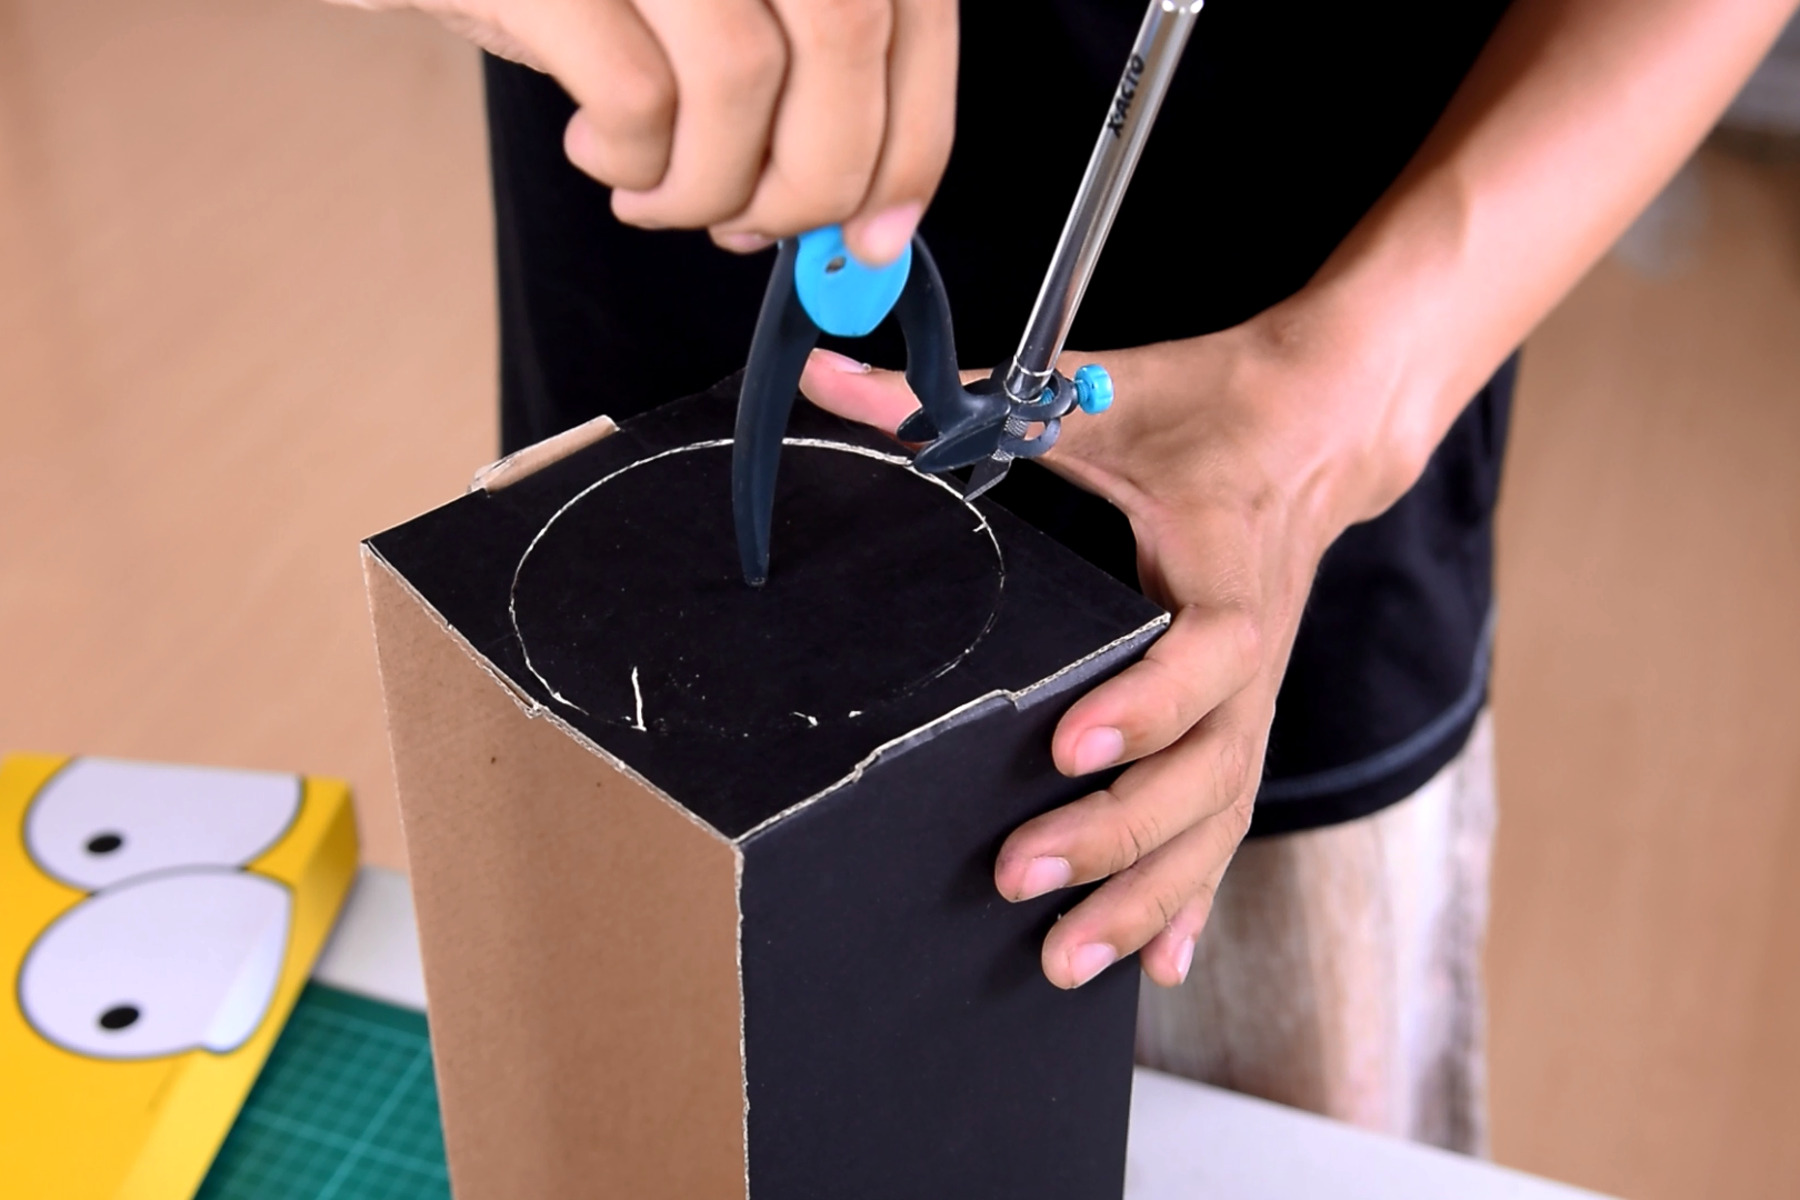
Step 2: Cutting a Hole for the Lens
Now that you have prepared the cardboard box, it’s time to move on to cutting a hole for the lens. This step is essential as the lens will be the key component that magnifies and focuses the image from your smartphone. Follow these instructions:
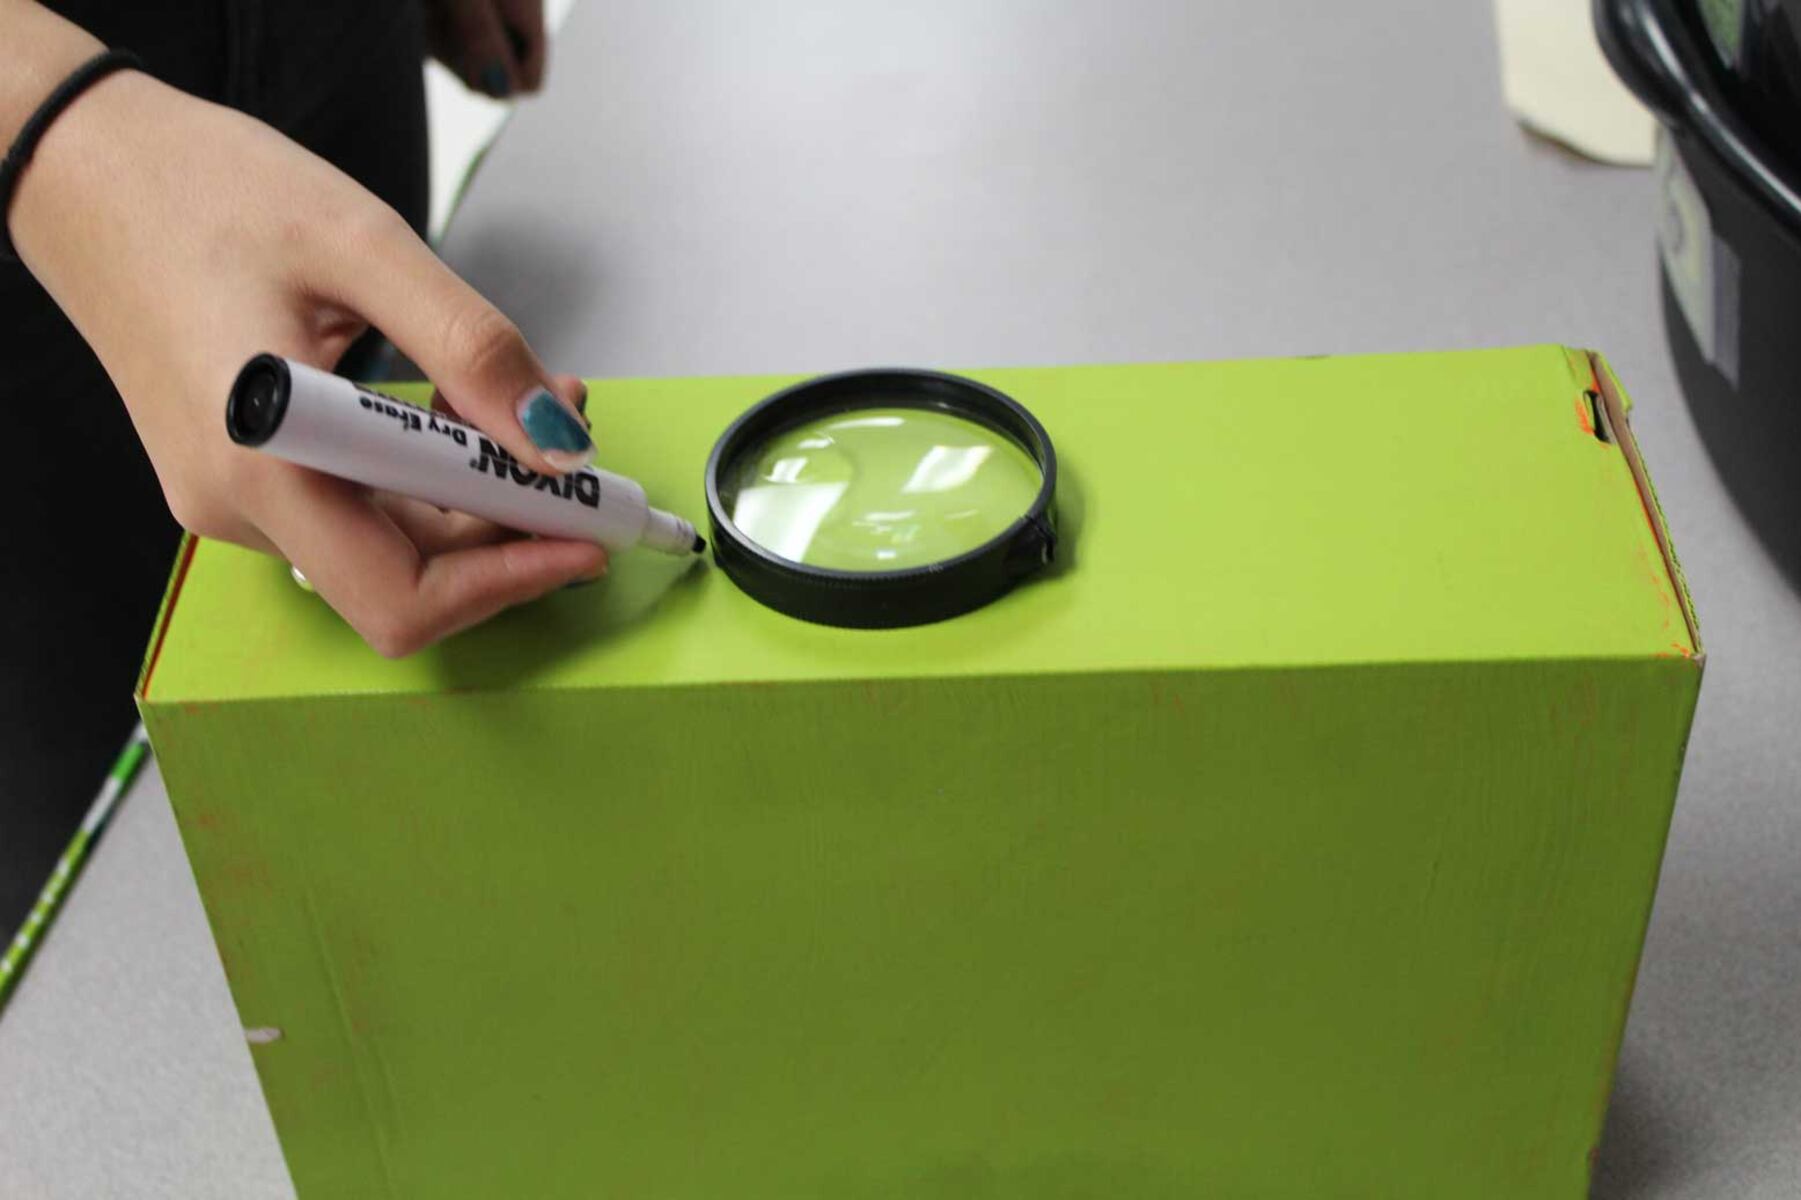
- Place the lens on the front side of the box, aligning it with the previously marked opening. Ensure that the lens is positioned in the center and facing towards the back of the box.
- Using a pencil or marker, trace the outer edge of the lens onto the cardboard. This will serve as a guide for cutting the hole.
- Carefully cut along the traced line using a utility knife or scissors. Take your time and make clean, precise cuts to ensure the lens fits securely.
- Test the fit of the lens by inserting it into the hole. It should fit snugly and not fall out easily. Make any necessary adjustments to the hole size to ensure a secure fit.
- Once the lens is securely fitted, reinforce the edges of the hole with duct tape or adhesive. This will provide additional support and prevent any potential light leakage.
By following these steps, you will have successfully created a hole for the lens in your cardboard box. This opening is crucial as it allows the lens to project and focus the image from your smartphone. With this step completed, you’re now ready to move on to the next stage of creating your DIY projector.
Step 3: Creating the Lens Holder
With the hole for the lens cut out, the next step is to create a sturdy and adjustable holder for the lens. This will ensure that the lens stays in place and allows you to adjust the focus as needed. Follow these instructions:
- Measure and cut a strip of cardboard that is wide enough to cover the hole for the lens and long enough to reach the sides of the box.
- Fold the cardboard strip in half lengthwise to create a crease in the middle. This will make it easier to attach and adjust the holder inside the box.
- Place the folded strip over the hole for the lens, extending it towards the sides of the box. Use small pieces of duct tape or adhesive to secure the strip to the box on both sides.
- Position the lens in the center of the holder strip. Make sure it is aligned with the hole and facing towards the back of the box.
- Secure the lens to the holder strip using either strong adhesive or additional duct tape. Ensure that the lens is held securely but can still be adjusted if needed.
- Test the stability of the lens holder by gently adjusting the lens forward and backward. It should move smoothly without causing the holder to detach from the box.
By following these steps, you will have created a reliable and adjustable holder for the lens. This holder will allow you to position and focus the lens as needed, ensuring that the projected image is clear and sharp. With this step completed, you’re ready to move on to the next stage of building your DIY projector.
Step 4: Mounting the Lens
Now that you have created a lens holder, it’s time to mount the lens securely in place. This step is crucial as it ensures that the lens remains in position and maintains the proper focal length for clear projection. Follow these instructions:
- Place the lens securely in the holder, ensuring that it is centered and facing towards the back of the box.
- Use adhesive or duct tape to secure the lens to the holder. Make sure it is firmly attached and will not move or fall out during use.
- Double-check the alignment of the lens with the hole in the box. It should be centered and positioned correctly for optimal projection.
- Inspect the lens and its surrounding area for any light leaks or gaps. If you notice any, use additional tape or adhesive to seal them off and prevent stray light from affecting the projected image.
- Test the stability of the lens by gently adjusting it forward and backward. It should stay securely in place without any wobbling or detachment.
- Once you’re satisfied with the placement and security of the lens, take a moment to clean it using a microfiber cloth or lens cleaner. This will ensure that the projected image is clear and free from any smudges or dirt.
By following these steps, you will have successfully mounted the lens in your DIY projector. The lens is a crucial component that determines the focus and quality of the projected image. With this step completed, you’re now ready to move on to the next stage of creating your DIY projector.
Step 5: Attaching the Smartphone Holder
Now that you have set up the lens and projection components, it’s time to attach the smartphone holder. This step will allow you to securely position your smartphone and align it with the lens for optimal projection. Follow these instructions:
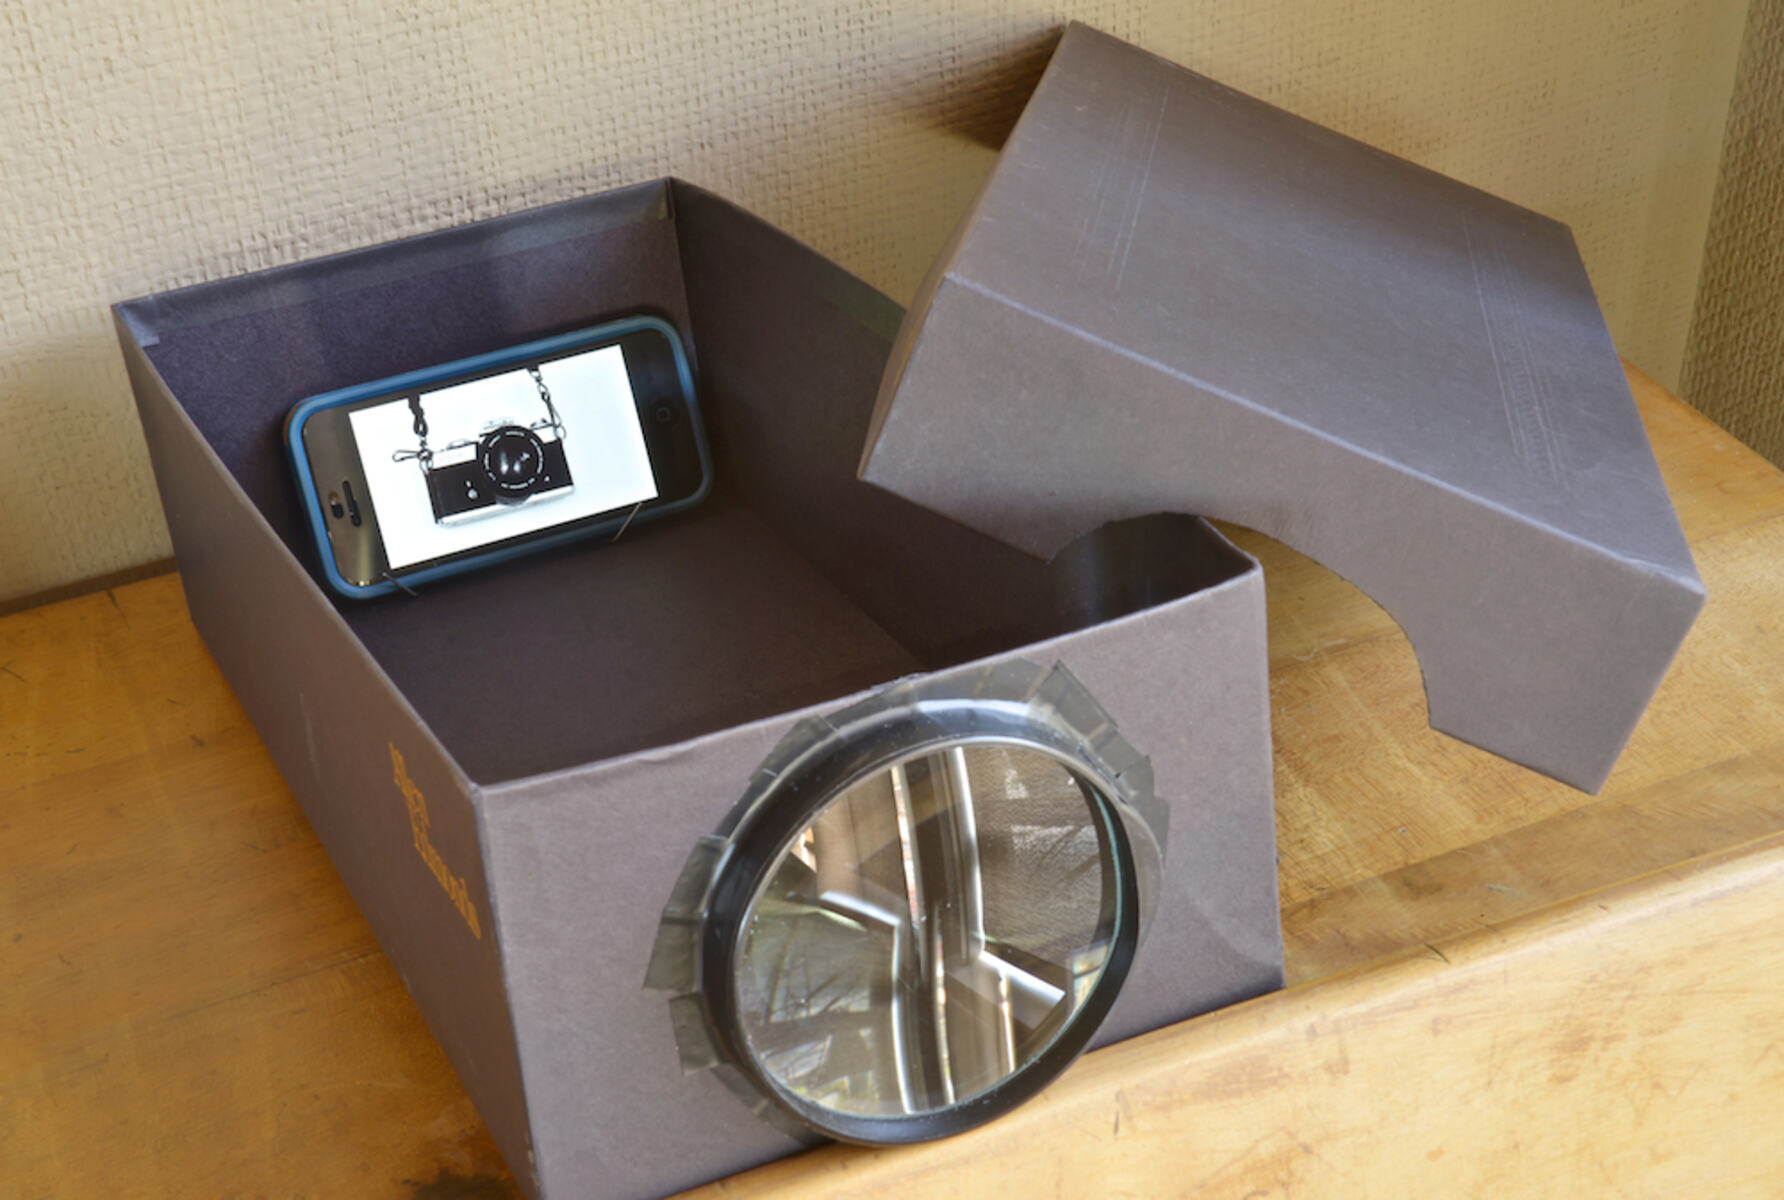
- Take your smartphone holder and position it over the opening in the box created for the smartphone. Ensure that it fits comfortably and securely.
- If your smartphone holder has adjustable arms or grips, adjust them to fit the width and height of your smartphone. This will ensure a snug fit without any risk of the phone slipping or moving during projection.
- Once the smartphone holder is in the desired position, use adhesive or duct tape to secure it to the box. Place it firmly, ensuring that it is stable and won’t detach or move while in use.
- Double-check the alignment of the smartphone holder with the lens. The smartphone’s camera should be aligned with the hole in the box and positioned directly in front of the lens.
- You may also want to consider attaching a small piece of felt or a soft fabric on the smartphone holder to prevent scratches or damage to your device’s surface.
- Test the stability of the smartphone holder by gently adjusting the phone’s position. It should remain securely held without any wobbling or slippage.
By following these steps, you will have successfully attached the smartphone holder to your DIY projector. This holder is an essential component that positions your smartphone correctly in front of the lens, allowing the projected image to be magnified onto a larger surface. With this step completed, you’re now ready to move on to the next stage of assembling your DIY projector.
Step 6: Adjusting the Focus
Now that you have set up the lens and smartphone holder, it’s time to fine-tune the focus of your DIY projector. Proper focus ensures that the projected image is clear and sharp. Follow these instructions to adjust the focus:
- Start by placing your DIY projector in a dimly lit or dark room. This will help enhance the visibility of the projected image.
- Turn on your smartphone and open a video or image that you want to project. Position your smartphone in the holder, ensuring that the camera is aligned with the lens.
- Adjust the distance between your smartphone and the lens to find the optimal focal point. This can be done by gently moving the smartphone closer or further away from the lens.
- As you make these adjustments, observe the projected image on the surface. Look for a focused and clear image without any blurriness or distortion.
- Take your time to find the sweet spot where the image is sharp and well-defined. It may require some trial and error, so be patient during this process.
- Once you achieve the desired focus, make sure to secure the smartphone and lens holder in place to maintain the correct focal length. Use adhesive or duct tape to prevent any accidental movement.
By following these steps, you will be able to adjust the focus of your DIY projector to achieve a clear and sharp image projection. Take your time to find the optimal focal point and make any necessary adjustments. With the focus adjusted, you’re now ready to move on to the next step of connecting your smartphone to the projector.
Step 7: Connecting the Smartphone to the Projector
Now that you have set up the lens and adjusted the focus, it’s time to connect your smartphone to the DIY projector. This step allows you to stream videos, display images, or play games directly onto a larger surface. Follow these instructions to connect your smartphone:
- Start by ensuring that your smartphone is fully charged. This will prevent any interruptions during the projection.
- Connect your smartphone’s charging cable to a power source and plug it into your smartphone. This will ensure that your phone has a constant power supply during the projection.
- Open the video or image you want to project on your smartphone.
- Place your smartphone in the holder, aligning the camera with the lens. Ensure that it is securely positioned and won’t move during projection.
- Make any necessary adjustments to the angle and position of your smartphone to ensure that the projected image is straight and centered.
- Double-check that the focus is still sharp and clear after connecting the smartphone.
- Start the projection by pressing play on your smartphone. The image or video should be projected onto the larger surface in front.
- Use the controls on your smartphone to pause, play, or adjust the volume of the projection. You can also use external speakers or headphones for better audio quality if desired.
By following these steps, you will be able to connect your smartphone to the DIY projector and begin enjoying the larger screen experience. Make sure to keep your smartphone charged and secure in the holder throughout the projection. With everything connected and set up, you’re now ready to move on to the final step of testing the projection.
Step 8: Testing the Projection
Now that you have connected your smartphone to the DIY projector, it’s time to test the projection and ensure that everything is working correctly. This step will allow you to assess the quality of the projected image and make any necessary adjustments before enjoying your projected content. Follow these instructions to test the projection:
- Dim the lights in the room to enhance the visibility of the projected image. The darker the room, the more vibrant the projection will appear.
- Ensure that the surface you are projecting onto is flat and suitable for displaying the image. A white wall or a projector screen is ideal for achieving good image quality.
- Start the video or image on your smartphone and ensure that it is playing correctly.
- Position your DIY projector at an appropriate distance from the projection surface. Experiment with different distances to achieve the desired size and clarity of the image.
- Adjust the focus, if necessary, by gently moving the smartphone closer or further away from the lens. Fine-tune the focus until the image appears sharp and clear.
- Take a moment to observe the projected image. Check for any blurriness, distortion, or other issues that may affect the clarity and quality of the projection.
- Make any necessary adjustments to the angle, position, and focus to achieve the best possible projection quality.
- Take the time to enjoy your DIY projector in action. Experience the immersive feeling of having a larger screen for your favorite videos, images, or games.
By following these steps, you will have successfully tested the projection of your DIY projector. Spend some time experimenting with different settings and distances to find the best configuration for your desired projection size and clarity. With the test complete and any necessary adjustments made, you can now sit back, relax, and enjoy the big-screen experience with your homemade projector!
Conclusion
Congratulations! You have successfully completed the process of creating your very own DIY projector without a magnifying glass. By following the steps outlined in this guide, you have turned a simple cardboard box into a fully functional projector that can display images or videos from your smartphone onto a larger surface. Through creativity and resourcefulness, you have unlocked the world of big-screen entertainment right in the comfort of your own home.
Throughout this DIY journey, you learned how to prepare the box, cut a hole for the lens, create a lens holder, mount the lens, attach the smartphone holder, adjust the focus, connect your smartphone, and test the projection. Each step played a crucial role in ensuring that your DIY projector functions optimally and delivers a clear and immersive viewing experience.
Remember, the beauty of this DIY projector lies in its customizability. You can experiment with different materials, decorations, or additional features to truly make it your own. Whether you choose to decorate the exterior of the box or incorporate built-in speakers, the possibilities for customization are endless.
Now, it’s time for you to sit back, relax, and enjoy the fruits of your labor. Gather your loved ones, invite friends over, or indulge in a solo movie night. Experience the magic of watching your favorite videos, images, or games projected onto a larger screen. Immerse yourself in the stunning visuals and captivating sound that your DIY projector offers.
This project not only provides an entertaining and cost-effective solution for enjoying a big-screen experience at home, but it also sparks creativity and resourcefulness. It encourages you to think outside the box, problem-solve, and explore your DIY skills.
We hope this guide has inspired you to embark on more DIY projects and explore the endless possibilities that await. Remember, the sky’s the limit when it comes to your creativity, and with a little imagination and determination, you can transform ordinary objects into extraordinary creations.
Now, go forth and enjoy your homemade DIY projector to the fullest!