Introduction
Welcome to the world of DIY technology! Have you ever wanted to watch movies or videos on a bigger screen, but didn’t have access to a projector? Well, we have a solution for you – a homemade smartphone projector! With just a few simple materials and some creativity, you can transform your smartphone into a mini home theater.
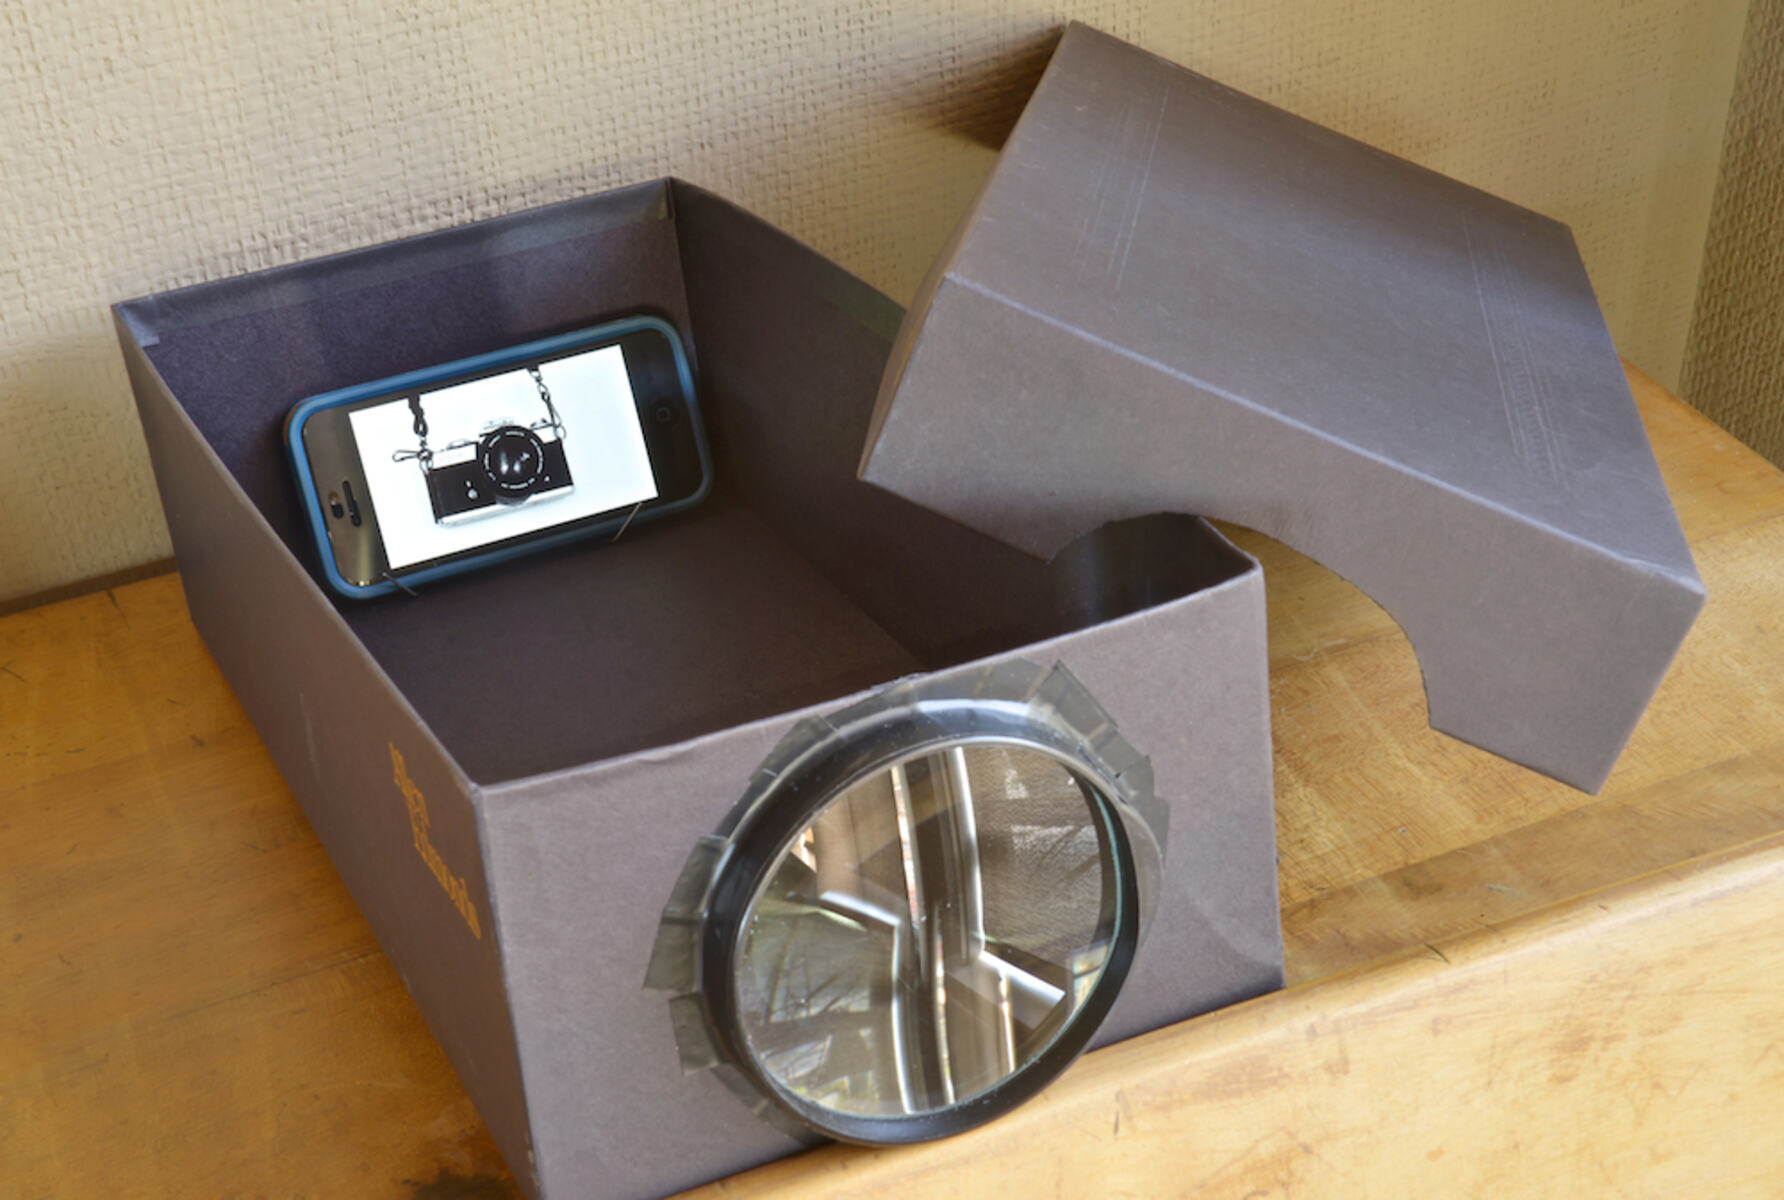
In this step-by-step guide, we will show you how to make your very own smartphone projector using a shoebox and a magnifying glass. Not only is this a fun and hands-on project, but it’s also a great way to repurpose items you may already have at home.
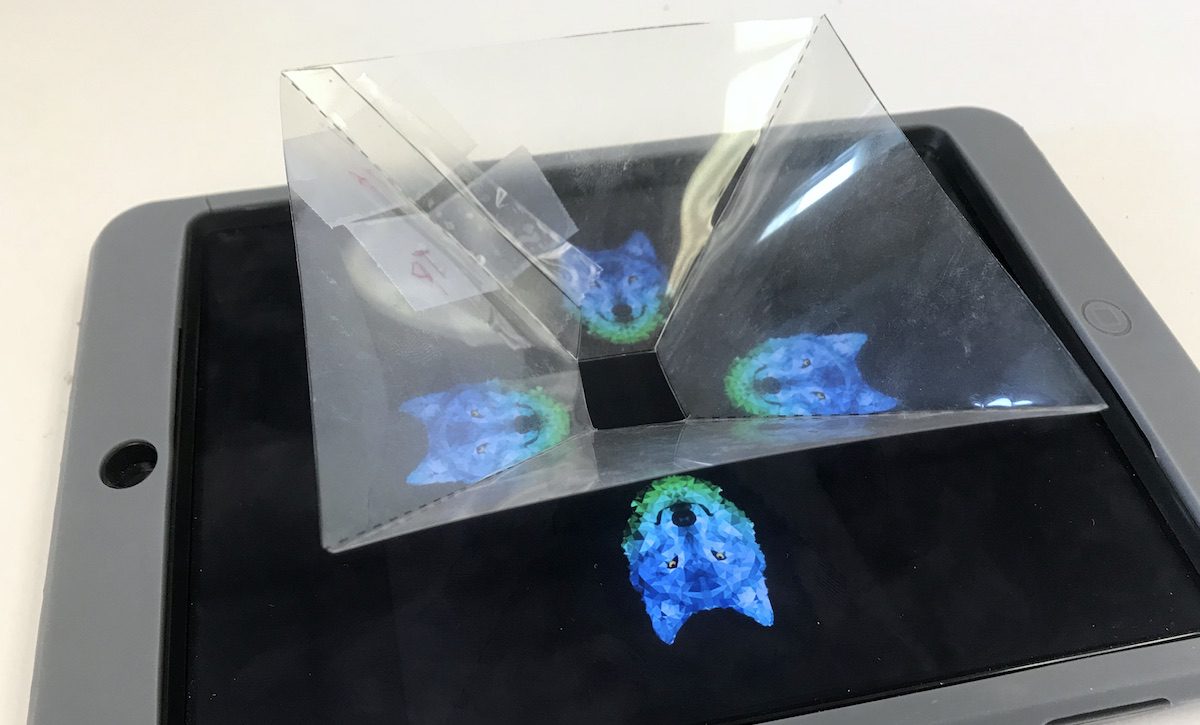
This DIY projector works by magnifying the image on your smartphone screen and projecting it onto a larger surface, such as a wall or a screen. The best part is that it requires no electricity or complicated setup. You can simply place your smartphone inside the projector and start enjoying your favorite movies, videos, or even photos with friends and family.
Whether you want to enhance your movie nights, share vacation photos with loved ones, or even use it for educational purposes, this homemade smartphone projector is a fantastic and budget-friendly option. So, let’s dive in and get started on creating your very own DIY smartphone projector!
Materials Needed
Before we begin, let’s gather all the materials you’ll need for this DIY smartphone projector project:
- A shoebox: Choose a shoebox or any similar-sized box that can accommodate your smartphone.
- A magnifying glass: Look for a magnifying glass with a diameter of around 3-4 inches. You can find these at a local dollar store or online.
- A ruler or measuring tape: This will come in handy for precise measurements.
- A pen or marker: You’ll use this to trace and mark the shape of the magnifying glass and phone holder on the shoebox.
- A utility knife or scissors: You’ll need a sharp tool to cut holes in the shoebox.
- Strong adhesive: Use glue, double-sided tape, or any adhesive that can securely hold the magnifying glass and phone holder in place.
- A cardboard or thick paper: You’ll need this to construct the phone holder.
- A black construction paper or any dark material: This will be used to cover the inside of the shoebox and minimize any light leakage.
These are the essential materials you’ll need to create your homemade smartphone projector. Once you have them all gathered, you’re ready to move on to the next step.
Step 1: Gather the necessary materials
Before we start building our homemade smartphone projector, it’s important to gather all the materials we need. This will ensure that we have everything at hand and can complete the project smoothly. Here’s a quick checklist of the materials you’ll need:
- A shoebox
- A magnifying glass
- A ruler or measuring tape
- A pen or marker
- A utility knife or scissors
- Strong adhesive
- A cardboard or thick paper
- A black construction paper or any dark material
Take a moment to gather all these materials. You may already have some of them lying around the house, while others can be easily found at a dollar store or online. Make sure that the shoebox you choose is sturdy enough and large enough to accommodate your smartphone comfortably.
Once you have all the materials ready, find a clean and well-lit workspace to begin the project. It’s essential to have enough space to work without any distractions. You may want to lay down a newspaper or a protective covering to catch any stray glue or debris.
Now that you’re fully prepared, let’s move on to the next step and start creating your homemade smartphone projector!
Step 2: Prepare the shoebox
Now that we have gathered all the necessary materials, it’s time to prepare the shoebox for our homemade smartphone projector. Follow these steps to get started:
- Begin by removing any stickers, labels, or tape from the shoebox. We want a clean surface to work with.
- Next, if the shoebox has a lid, set it aside as we won’t be needing it for this project.
- Take the black construction paper or any dark material and cover the inside of the shoebox. This will help to block any unwanted light and improve the image quality.
- Use a ruler or measuring tape to measure the length and width of your smartphone. Make a note of these measurements as we will need them later.
- On one of the shorter sides of the shoebox, measure and mark a rectangle using the dimensions of your smartphone’s width and height. This will be the opening where you will insert your smartphone.
- Using a utility knife or scissors, carefully cut along the marked lines to create the smartphone opening. Take your time and be cautious to avoid any accidents.
- Once the opening is cut, check if your smartphone fits snugly inside. If it’s too tight, trim the edges gently until it fits comfortably.
- Now, with the opening prepared, take a moment to check for any sharp edges or rough surfaces inside the shoebox. If needed, use sandpaper or tape to smooth out any rough areas.
By preparing the shoebox properly, we have created the foundation for our homemade smartphone projector. It’s important to take your time and ensure a neat and accurate cut for the smartphone opening. This will ensure that your smartphone fits securely and aligns correctly with the magnifying glass in the next steps.
With the shoebox prepared, we are ready to move on to the next step and cut out the hole for the magnifying glass.
Step 3: Cut out the magnifying glass hole
In this step, we will be cutting out a hole in the shoebox to accommodate the magnifying glass. This is a crucial part of our DIY smartphone projector as it allows the magnifying glass to focus and enlarge the image from the smartphone. Follow these steps to cut out the magnifying glass hole:
- Take the magnifying glass and place it on the shoebox, positioned towards the opposite end of the smartphone opening.
- Using a pen or marker, trace the outline of the magnifying glass onto the shoebox. Make sure to be as accurate as possible to ensure a precise fit.
- Once you have traced the outline, carefully cut along it using a utility knife or scissors. Take your time and make clean, straight cuts to create a hole that matches the shape of the magnifying glass.
- After cutting the hole, test the fit of the magnifying glass. It should fit snugly in the hole, without any gaps or wobbling.
- If necessary, make any adjustments to the hole by trimming the edges to ensure a proper fit. The magnifying glass should be positioned securely and centered within the hole.
By cutting out the magnifying glass hole, we have created a space for it to sit in the shoebox. This will allow the magnifying glass to focus and enlarge the image from your smartphone onto a larger surface.
Remember to handle sharp tools with caution and take your time during the cutting process. It’s important to be precise and create a clean and accurate hole for the magnifying glass.
With the magnifying glass hole cut out, we are now ready to move on to the next step and create the smartphone holder.
Step 4: Create the smartphone holder
Now that we have prepared the shoebox and cut out the magnifying glass hole, it’s time to create a secure holder for your smartphone. This holder will keep your phone in place and ensure that it aligns correctly with the magnifying glass for optimal projection. Follow these steps to create the smartphone holder:
- Take a piece of cardboard or thick paper and measure its width to match the width of your smartphone.
- Draw two parallel lines on the cardboard, slightly wider than your smartphone, with a gap in between. These lines will act as the base of the smartphone holder.
- At the far end of the cardboard, draw two more perpendicular lines that connect to the base. This will form a small rectangle at the end, which will hold the bottom of your smartphone.
- Cut along the lines you have drawn, creating the base and the rectangular holder on the cardboard.
- Fold the cardboard along the base lines to create a standing support for your smartphone. Ensure that the rectangular holder is sticking out towards the top.
- Check the fit of your smartphone by inserting it into the rectangular holder. It should hold your smartphone securely in a horizontal position.
- If needed, make any adjustments to the size of the holder by trimming or folding the cardboard, ensuring a snug fit for your smartphone.
By creating the smartphone holder, we have established a system to keep the phone steady inside the shoebox. This ensures that the smartphone’s screen aligns with the magnifying glass and projects the image properly onto the larger surface.
Take your time to measure and cut the cardboard accurately for a secure smartphone holder. The fit should be snug, preventing any wobbling or movement of the phone during projection.
With the smartphone holder in place, we are now ready to move on to the next step and attach the magnifying glass to the shoebox.
Step 5: Attach the magnifying glass to the box
Now that we have created the smartphone holder, it’s time to attach the magnifying glass to the shoebox. This step is crucial as it allows the magnifying glass to focus and enlarge the image from your smartphone. Follow these steps to securely attach the magnifying glass:
- Apply a generous amount of strong adhesive to the rim of the magnifying glass.
- Carefully place the magnifying glass into the hole we cut out earlier, ensuring that it aligns properly and rests flat against the surface of the shoebox.
- Press down gently on the magnifying glass to allow the adhesive to bond firmly with the shoebox. Hold it in place for a few moments to ensure a strong adhesion.
- Let the adhesive dry completely before proceeding to the next step. This will ensure that the magnifying glass is securely attached and won’t shift or move during use.
By attaching the magnifying glass to the shoebox, we have created the lens system that will focus and enlarge the image from your smartphone. The magnifying glass should be positioned securely and aligned correctly within the hole.
When applying the adhesive, make sure to use enough to create a strong bond, but avoid excessive amounts that may seep through and obstruct the view through the magnifying glass. Also, be cautious when handling the magnifying glass to prevent any scratches or damage.
With the magnifying glass securely attached, we are now ready to move on to the next step and adjust the focus of our homemade smartphone projector.
Step 6: Adjust the focus
Now that we have our smartphone holder and magnifying glass securely in place, it’s time to fine-tune the focus of our homemade smartphone projector. With this step, we’ll ensure that the image projected onto the larger surface is clear and sharp. Follow these steps to adjust the focus:
- Start by placing your smartphone inside the holder, ensuring that it is aligned with the magnifying glass.
- Turn on the flashlight or display a bright image on your smartphone screen.
- Move the shoebox closer or farther away from the projection surface to adjust the focus. You’ll need to find the sweet spot where the image is the clearest and most sharp.
- Keep adjusting the distance until you achieve the desired focus. You may also need to adjust the angle of the shoebox slightly to improve the projection.
- Take your time to play around with the distance and angle until you achieve the best possible image quality for your homemade smartphone projector.
By adjusting the focus, we are maximizing the quality of the projected image. It’s important to find the right balance and position to ensure that the image is clear, bright, and in focus.
Take note of the distance and angle that works best for your setup, as this will help you achieve optimal projection each time you use your homemade smartphone projector.
With the focus adjusted, we’re almost ready to enjoy the fruits of our labor. But before that, let’s move on to the final step and test our homemade smartphone projector.
Step 7: Test your homemade smartphone projector
Now that we have completed the assembly of our homemade smartphone projector, it’s time to put it to the test. In this final step, we will see the results of our hard work and enjoy the magic of a larger screen. Here’s how to test your homemade smartphone projector:
- Find a dark or dimly lit room where you can control the lighting conditions.
- Ensure that the projection surface, whether it’s a wall or a screen, is clean and free from any obstructions or distractions.
- Place your smartphone inside the holder, ensuring a snug fit and alignment with the magnifying glass.
- Turn on your smartphone and open any app or video that you want to project.
- Position the shoebox at the distance and angle determined during the focus adjustment step.
- Dim the lights or turn them off completely to enhance the projected image.
- Once everything is set, press play on your smartphone and watch as the image is projected onto the larger surface.
- Adjust the focus or position as needed to get the best image quality.
Take the time to enjoy your homemade smartphone projector and the immersive experience it provides. Whether you’re watching a movie, sharing a slideshow, or playing a game, you’ll be amazed at the projection quality achieved using simple materials.
Remember, the quality of the projected image may vary depending on factors such as the brightness of your smartphone screen, the lighting conditions in the room, and the quality of the magnifying glass used. Don’t be afraid to experiment and make adjustments to achieve the best results.
Congratulations! You have successfully created your very own smartphone projector. Now, sit back, relax, and enjoy the larger-than-life entertainment!
Conclusion
Congratulations! You have completed the journey of transforming a simple shoebox and magnifying glass into a functional and budget-friendly homemade smartphone projector. By following the step-by-step instructions provided, you have created a device that can project your favorite movies, videos, and images onto a larger screen.
Through this project, you have not only learned how to repurpose everyday objects but also gained insights into the principles of optics and projection. The creative process of building something from scratch and seeing it come to life is truly rewarding.
Now, you have a portable and easily accessible home theater that can accompany you wherever you go. Whether you’re hosting a movie night with friends, sharing vacation photos with family, or even using it for educational purposes, your homemade smartphone projector offers a unique and immersive viewing experience.
Remember, the key to a successful homemade smartphone projector lies in the careful selection of materials, precise measurements, and fine-tuning the focus. Don’t hesitate to experiment and make adjustments to achieve the best results for your specific setup.
So go ahead, gather your materials, unleash your creativity, and embark on the exciting journey of building your homemade smartphone projector. It’s time to enjoy big-screen entertainment from the comfort of your own home!