Introduction
Imagine this scenario – you want to project an image onto a large surface, but you don’t have a projector. Not to worry! There are several alternative methods that can help you achieve the same result without the need for a projector. These methods are cost-effective, easy to set up, and can be used in various settings, whether it’s for a presentation, a movie night, or simply displaying artwork.
In this article, we will explore different ways to project an image without a projector. From utilizing smartphones and laptops to finding suitable surfaces and other creative methods, you’ll discover practical solutions that will enable you to project your desired image with ease.
While projectors are commonly used for image projection, not everyone has access to one. Fortunately, advancements in technology have opened up alternative options that can work just as effectively. Whether you’re a student, a professional, or simply someone who enjoys visual displays, these methods will come in handy.
The key to successfully projecting an image without a projector lies in understanding the right tools and techniques to use. Whether you’re working with a digital image or physical media, there are several factors to consider, such as choosing the right surface and selecting the appropriate device to display the image.
This article will guide you through the entire process, providing step-by-step instructions for each method. By the end, you’ll be equipped with the knowledge and skills to project an image without the need for a traditional projector.
So, whether you’re planning a DIY movie night, a presentation for work, or you simply want to display your digital artwork, read on to discover the methods that will help you project your desired image without a projector.
What You Need
Before you start projecting an image without a projector, there are a few essential items you’ll need to gather. The specific requirements may vary depending on the method you choose, but here is a general list of items you might need:
- Image source: This can be a digital image saved on a device, a physical photograph or artwork, or even a video.
- Device screen: You’ll need a screen to display the image. This could be a smartphone, tablet, laptop, computer, TV, or monitor.
- Connectivity/adapters: Depending on the device you’re using, you may need additional connectors or adapters to connect it to other equipment or surfaces.
- Surface: The surface onto which you’ll project the image plays a crucial role. It should be clean, smooth, and ideally white or a light color for optimal visibility.
- Stable base: If you’re using a device like a smartphone or tablet, you’ll need a stable base or stand to keep it securely in place during the projection.
- Optional accessories: Depending on the method you choose, you may need additional accessories like a tripod, tape, or adhesive to secure the device or image in place.
It’s important to note that while these items are generally required, the specific equipment and accessories you need may vary depending on the method you choose. Therefore, read through the following sections to determine the specific requirements for each method. This will ensure you have everything you need before you start projecting your image.
Now that you have a good understanding of the essentials, let’s move on to the next section, where we’ll discuss choosing the right surface for your image projection needs.
Choosing the Right Surface
When it comes to projecting an image without a projector, selecting the right surface is crucial for optimal visibility and clarity. The surface you choose should be clean, smooth, and offer good reflectivity. Here are a few options to consider:
- Wall: A plain, white or light-colored wall is a common choice for image projection. Make sure the wall is clean and free from any imperfections or textures that could affect the image quality.
- Projection screen: If you’re looking for a more professional setup, consider investing in a portable projection screen. These screens are designed to enhance image clarity and provide a smooth canvas for projection.
- Sheet or fabric: In a pinch, you can use a white sheet or fabric as a makeshift screen. Just ensure that it is taut and free from wrinkles to avoid distorting the image.
- Window or translucent surface: If you have a window or a translucent surface like a shower curtain, you can use it to project an image. The image will be visible from both sides, so keep that in mind when choosing this option.
- Reflector panels: If you’re projecting outdoors during the day, you can use reflector panels to bounce the sunlight onto a surface. This can be effective for outdoor movie screenings or presentations.
Consider the lighting conditions and the size of the surface when making your choice. It’s important to have control over the ambient lighting to achieve the best visibility. Also, ensure that the surface is large enough to accommodate the projected image with ample space around it for a clear view.
Keep in mind that not all surfaces are suitable for image projection. Avoid textured or dark-colored surfaces, as they can disrupt the clarity and visibility of the projected image. Take the time to prepare your chosen surface by cleaning it and removing any distractions or obstructions.
Now that you know how to choose the right surface, let’s move on to the next section, where we’ll discuss the steps to prepare your image for projection.
Preparing Your Image
Before you can project your image without a projector, it’s important to ensure that it is properly prepared for optimal visibility and presentation. Here are some steps to follow:
- Image format: Ensure that your image is in a compatible format for the device you’ll be using. Common formats include JPEG, PNG, and GIF for digital images, and standard-sized photographs or artwork for physical media.
- Image resolution: For digital images, it’s important to use a high-resolution image to maintain clarity and prevent pixelation when enlarging the image for projection. Aim for a resolution of at least 1920×1080 pixels for best results.
- Image editing: If needed, make any necessary adjustments to the image using photo editing software or apps. This could include cropping, resizing, adjusting brightness or contrast, or adding text or overlays.
- Orientation: Consider the orientation of your image and adjust it accordingly. Depending on your projection setup, you may need to rotate or flip the image to ensure it’s displayed correctly on the chosen surface.
- Test the image: Take the time to test the image on the device you’ll be using for projection. This will allow you to make any final adjustments before projecting it onto the chosen surface.
It’s important to note that different devices may have their own specifications and requirements for image preparation. Be sure to refer to the user manual or online resources for specific instructions on how to optimize images for your chosen device.
If you’re working with physical media like photographs or artwork, ensure that they are clean and in good condition before projecting them. Consider using protective sleeves or frames to prevent damage and provide a professional appearance.
By properly preparing your image, you’ll ensure that the projected result is visually appealing and satisfying. Now that your image is ready, let’s explore different methods to project it using various devices.
Using a Smartphone or Tablet
Smartphones and tablets are versatile devices that can serve as excellent alternatives to projectors for image projection. Here are the steps to project an image using a smartphone or tablet:
- Select your image: Choose the image you want to project from your device’s photo gallery or other image storage applications.
- Connect to a larger screen: Depending on the options available, you can either connect your device directly to a larger screen using an HDMI or USB-C cable, or wirelessly mirror your device’s screen onto a compatible television or monitor.
- Adjust display settings: Once connected to a larger screen, access the display settings on your device to ensure that the image is properly scaled and aligned. You may need to adjust aspects such as aspect ratio or screen mirroring settings.
- Position and stabilize your device: Find a stable surface or use a tripod or stand to hold your smartphone or tablet securely in place during projection. Position it in a way that allows for the best visibility and viewing angle.
- Start the projection: Open the image you want to project and set it to full screen mode. Ensure that the device is set to its maximum brightness for optimal visibility.
- Align the image: Use the device’s screen mirroring or display settings to align the projected image onto the desired surface. You may need to adjust the positioning and orientation to ensure the image is projected accurately.
- Enjoy the projection: Once everything is set up, sit back and enjoy the projection of your image. Take the time to adjust any settings or make necessary tweaks for the best viewing experience.
Using a smartphone or tablet for image projection provides a convenient and portable solution. It allows you to project images easily, whether it’s for sharing photos with friends and family, presenting visuals during a meeting, or even streaming movies or videos on a larger screen.
Now that you’ve mastered the method of using smartphones and tablets for image projection, let’s explore another option – using a laptop or computer.
Using a Laptop or Computer
Laptops and computers are powerful tools that can be utilized to project images without the need for a projector. Follow these steps to project an image using a laptop or computer:
- Select your image: Choose the image you want to project and ensure it’s saved on your laptop or computer.
- Connect to a larger screen: Depending on the available ports and connections, you can connect your laptop or computer to a larger screen using an HDMI cable, VGA cable, or wirelessly via screencasting and mirroring options.
- Adjust display settings: Access the display settings on your laptop or computer and configure the external display to extend or duplicate the desktop. Set the resolution and aspect ratio to ensure the image is correctly displayed on the larger screen.
- Position and stabilize your laptop or computer: Place your laptop or computer on a stable surface, ensuring that it is securely positioned and easily viewable. If necessary, use a laptop stand or elevate the screen to achieve the desired height and angle.
- Open the image: Open the image file using an image viewer or presentation software. Adjust the image size and maximize it to fill the screen for optimal projection.
- Align and adjust: Use the display settings on your laptop or computer to align the projected image onto the intended surface. Make any necessary adjustments to the position, size, or orientation to ensure the image is projected accurately.
- Start the projection: Begin the projection of your image by displaying it in full-screen mode. Adjust the brightness and contrast settings if needed to enhance visibility.
Using a laptop or computer for image projection provides flexibility and control over the projection process. It allows you to project images for various purposes, such as giving presentations, showcasing designs or artwork, or simply enjoying multimedia content on a larger screen.
Now that you’ve learned how to project images using a laptop or computer, let’s explore another method – using a television or monitor.
Using a Television or Monitor
Televisions and monitors can be excellent alternatives to traditional projectors for image projection. Here’s how to project an image using a television or monitor:
- Connect your device: Depending on the available ports and connections, connect your device (such as a laptop, computer, smartphone, or tablet) to the television or monitor using HDMI, VGA, DVI, or other suitable cables.
- Power on the television or monitor: Ensure that the television or monitor is turned on and set to the correct input source that corresponds to the connected device.
- Adjust the display resolution: Open the display settings on your device and adjust the screen resolution to match that of the connected television or monitor. This will ensure proper projection and optimal image quality.
- Select and open the image: Choose the image you want to project and open it on your device. Make sure the image is set to full-screen mode for a seamless projection experience.
- Position the television or monitor: Set up the television or monitor in a suitable location, ensuring it is stable and easily viewable from the desired projection area. Adjust the screen angle and height, if possible, for better visibility.
- Adjust image settings: Use the settings on your device and the television or monitor to fine-tune the image quality. This could involve adjusting the brightness, contrast, and other settings to optimize the projection.
- Start the projection: Once everything is set up, begin the projection by playing the image in full-screen mode on your device. The image will be displayed on the connected television or monitor.
Using a television or monitor for image projection provides a larger and clearer display compared to smaller devices. It’s an ideal option when showcasing images in a living room, conference room, or any space with a television or monitor readily available.
Now that you’ve learned how to use a television or monitor for image projection, let’s explore some other methods you can consider if you don’t have access to these devices.
Other Methods to Project Image Without Projector
If you don’t have a projector, don’t worry! There are alternative methods you can use to project an image. While these may not offer the same level of quality and flexibility as a dedicated projector, they can still be effective in certain situations. Here are a few other methods to consider:
- Use a smartphone magnifier: Smartphone magnifiers, also known as phone projectors or screen magnifiers, can enlarge the screen of your smartphone to create a mini projection. These devices use magnifying lenses to project and enlarge the image onto a flat surface.
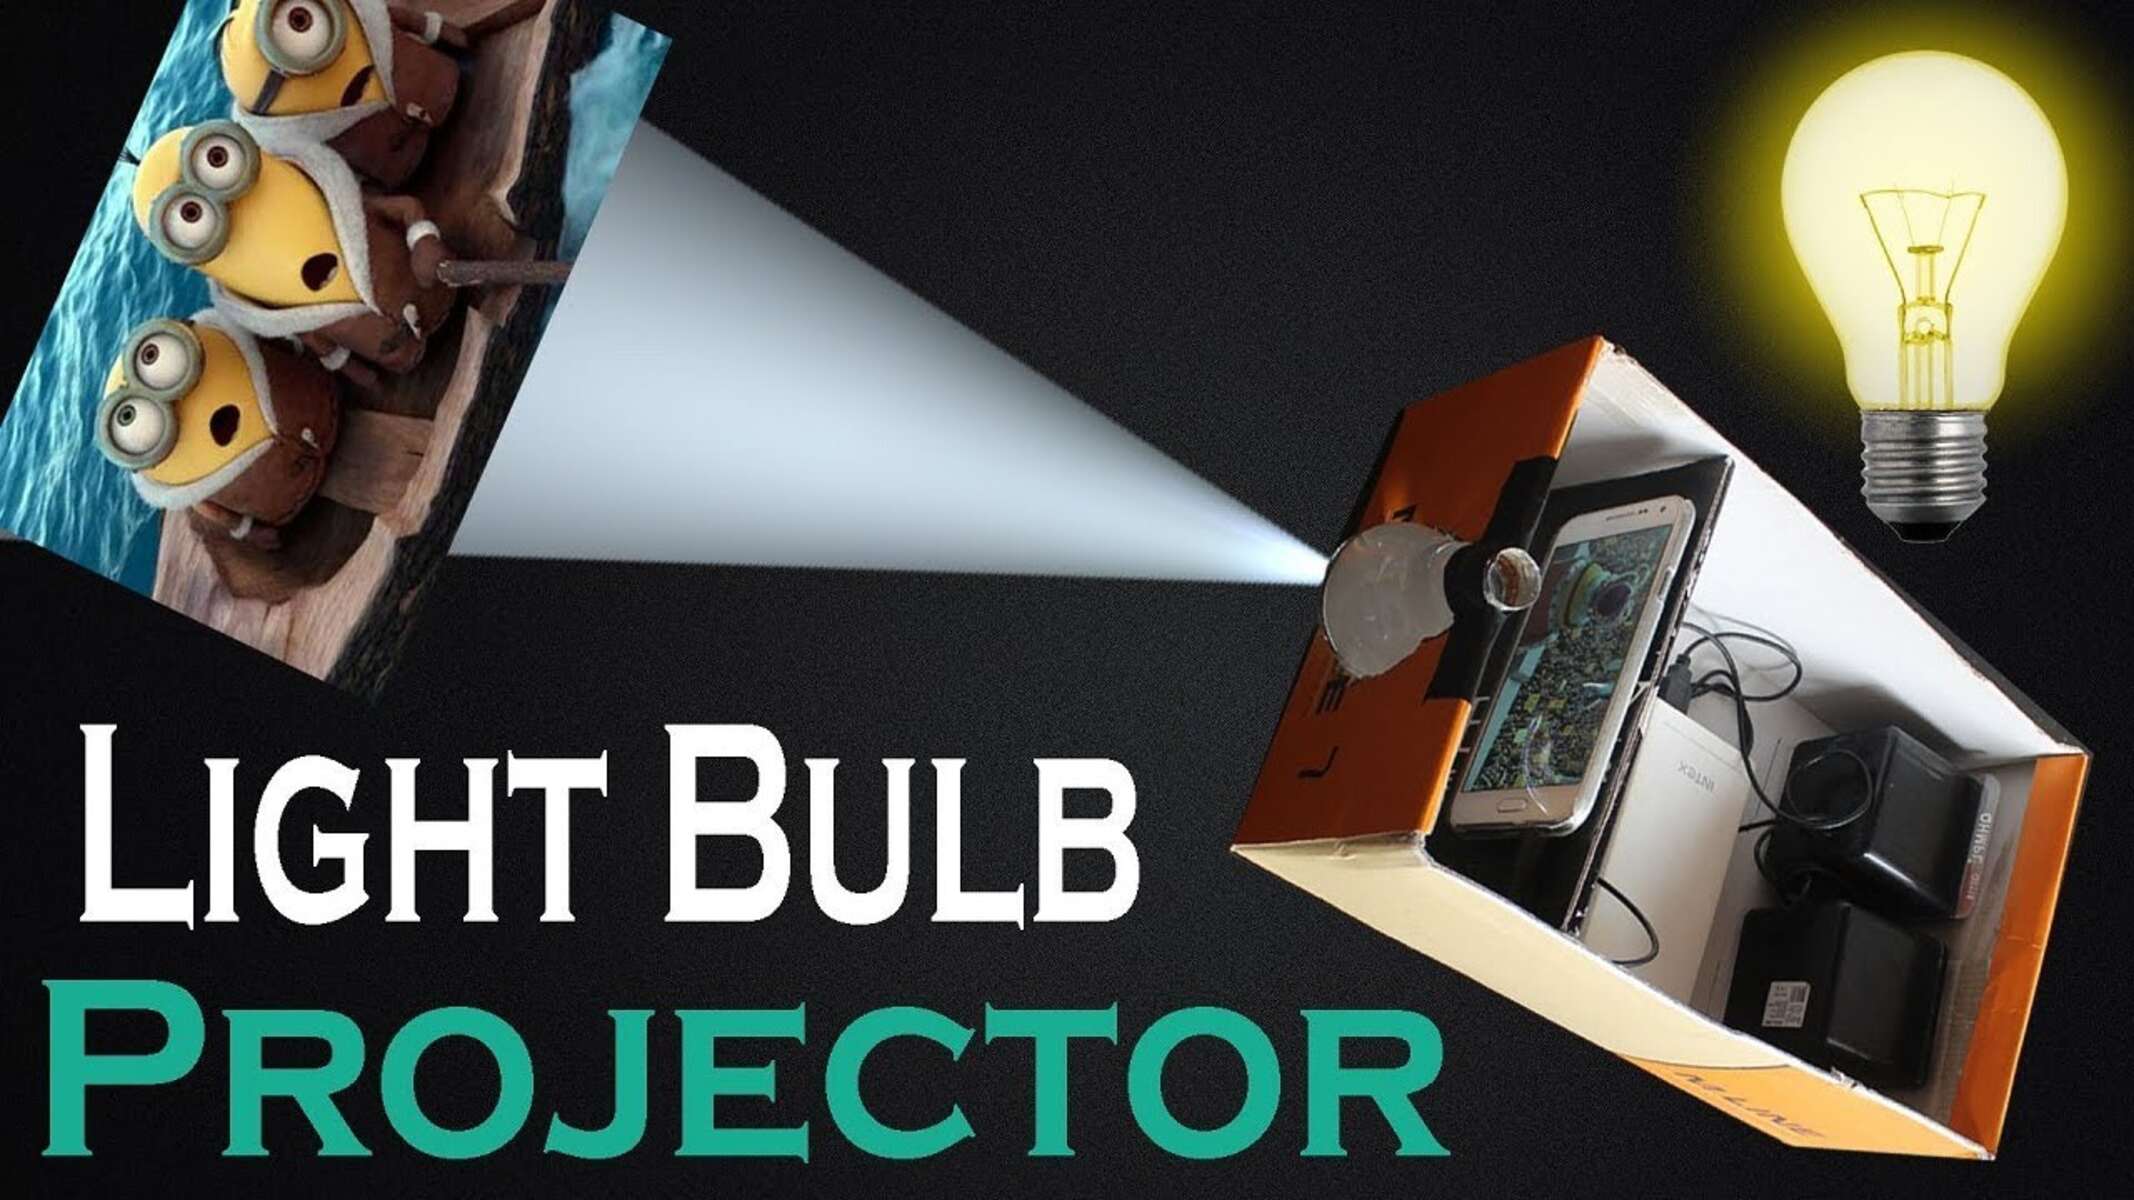
- Make a DIY projector: With a little creativity and resourcefulness, you can create a DIY projector using household items. One popular method involves using a shoebox, a magnifying glass, and a smartphone to project the image onto a wall or screen.
- Use a hand-held projector: Hand-held projectors are compact devices that can be used to project images directly from a memory card or USB drive. They are portable and easy to set up, making them a convenient option for on-the-go image projection.
- Try a lightbox: Lightboxes are used primarily for tracing or viewing slides, but they can also be repurposed for image projection. Place your image on the lightbox, turn on the light source, and position a translucent screen or fabric in front of it to amplify the projection.
- Opt for overhead projection: If you have access to an overhead projector, you can use it to project physical images or documents onto a surface. Simply place the image on the glass surface of the overhead projector and adjust the focus and position to project the image.
These alternative methods may not provide the same level of image quality and versatility as a dedicated projector, but they can be useful when you need a quick and temporary solution for image projection. Experiment with different methods to find the one that suits your needs and available resources.
Now that you’ve explored alternative methods for image projection without a projector, let’s recap what we’ve covered in this article.
Conclusion
Projecting an image without a traditional projector is not only possible but also an exciting adventure that opens up a world of creative possibilities. In this article, we have explored various methods to project an image using different devices and surfaces.
Starting with smartphones and tablets, we learned how these portable devices can be used to project images onto larger screens. By connecting them to a television or monitor, we can enjoy enhanced visuals for presentations, movie nights, or simply sharing photos and videos with friends and family.
Moving on to laptops and computers, we discovered how their versatility allows us to connect them to external displays and project images with ease. This method is especially beneficial for professional presentations, showcasing artwork, or enjoying multimedia content on a larger scale.
We also explored the option of utilizing television screens and monitors as alternatives to projectors. With the correct connections and settings, we can harness the power of these devices to display our images with clarity and detail.
Additionally, we discussed other creative methods, such as using smartphone magnifiers, DIY projectors, handheld projectors, lightboxes, and overhead projectors. These methods provide valuable alternatives that can be utilized in various settings, whether at home, in the classroom, or during small gatherings.
Each method offers its own advantages and considerations, allowing you to select the most suitable approach based on your specific needs and available resources. By understanding the steps involved and considering factors like image preparation, surface selection, and device compatibility, you can successfully project an image without a traditional projector.
So, whether you’re a student, a professional, or simply someone who enjoys visual displays, exploring these alternative methods will broaden your horizons and enhance your ability to project images without the need for a projector.
Now that you have a wealth of knowledge at your disposal, it’s time to get creative and start projecting your desired images using the methods discussed in this article. Enjoy the experience and let your imagination run wild as you bring your images to life on the big screen.


