Introduction
Having a clear and crisp image is crucial when using a projector, whether for business presentations, educational purposes, or enjoying a movie night at home. However, sometimes projectors can produce blurry or fuzzy images, which can be frustrating and diminish the overall viewing experience.
Fortunately, there are several steps you can take to make your projector clearer and improve the image quality. From simple cleaning techniques to adjusting the projector’s settings, these tips will help you achieve a sharper and more vibrant image.
In this article, we will guide you through the process of making your projector clearer. We will explore various methods and techniques that can significantly enhance the visual output of your projector. By following these steps, you can enjoy a more immersive and enjoyable projection experience.
So, if you’re tired of squinting at a blurry projection or struggling to decipher the details on the screen, let’s dive into the world of clearer projectors and discover how to optimize their performance.
Clean the Lens
One of the most common reasons for a blurry image on a projector is a dirty lens. Over time, dust, fingerprints, and smudges can accumulate on the lens, obstructing the light path and causing the image to appear unclear or hazy.
To make your projector clearer, start by gently cleaning the lens. Here’s how:
- Turn off the projector and unplug it from the power source to ensure your safety.
- Use a soft, lint-free cloth to wipe away any visible dirt or dust particles from the lens surface. Be gentle and avoid applying excessive pressure to prevent scratching the lens.
- If there are stubborn smudges or fingerprints, dampen the cloth slightly with a small amount of lens cleaning solution or isopropyl alcohol. Again, be cautious not to saturate the cloth with liquid.
- Gently wipe the lens in a circular motion, starting from the center and moving outward. Repeat as necessary until the lens is clean.
- Allow the lens to air dry before turning the projector back on.
Regularly cleaning the lens of your projector will help maintain optimal image clarity. Aim to clean it every few weeks or whenever you notice a decrease in image quality.
Remember, a clean lens ensures that the light passes through without any hindrance, resulting in a sharper and more defined projected image.
Adjust the Focus
Another key factor that can affect the clarity of your projector’s image is the focus. If the projector’s focus is not properly adjusted, the image may appear blurry or out of focus.
To make your projector clearer, follow these steps to adjust the focus:
- Start by ensuring that the projector is displaying an image on the screen or surface.
- Locate the focus ring or control on the projector, usually located near the lens or on the top panel.
- If your projector has an on-screen menu, navigate to the “Focus” or “Sharpness” option using the projector’s remote control.
- Adjust the focus ring or use the menu settings to fine-tune the focus. Start by turning the focus ring or selecting the menu option to make the image as sharp as possible.
- Make subtle adjustments while observing the image on the screen. Look for any blurriness or lack of sharpness and continue to tweak the focus until the image appears clear and well-defined.
- Take your time with this process and don’t rush. It may require a few tries to achieve the perfect focus.
By adjusting the focus correctly, you can ensure that the projected image is sharp and crisp. This step is particularly important when setting up the projector for the first time or when changing the projection distance.
Remember to regularly check and readjust the focus if necessary, especially if you move or reposition the projector.
With a properly adjusted focus, your projector’s image will be much clearer, allowing you to fully enjoy your viewing experience.
Position the Projector Correctly
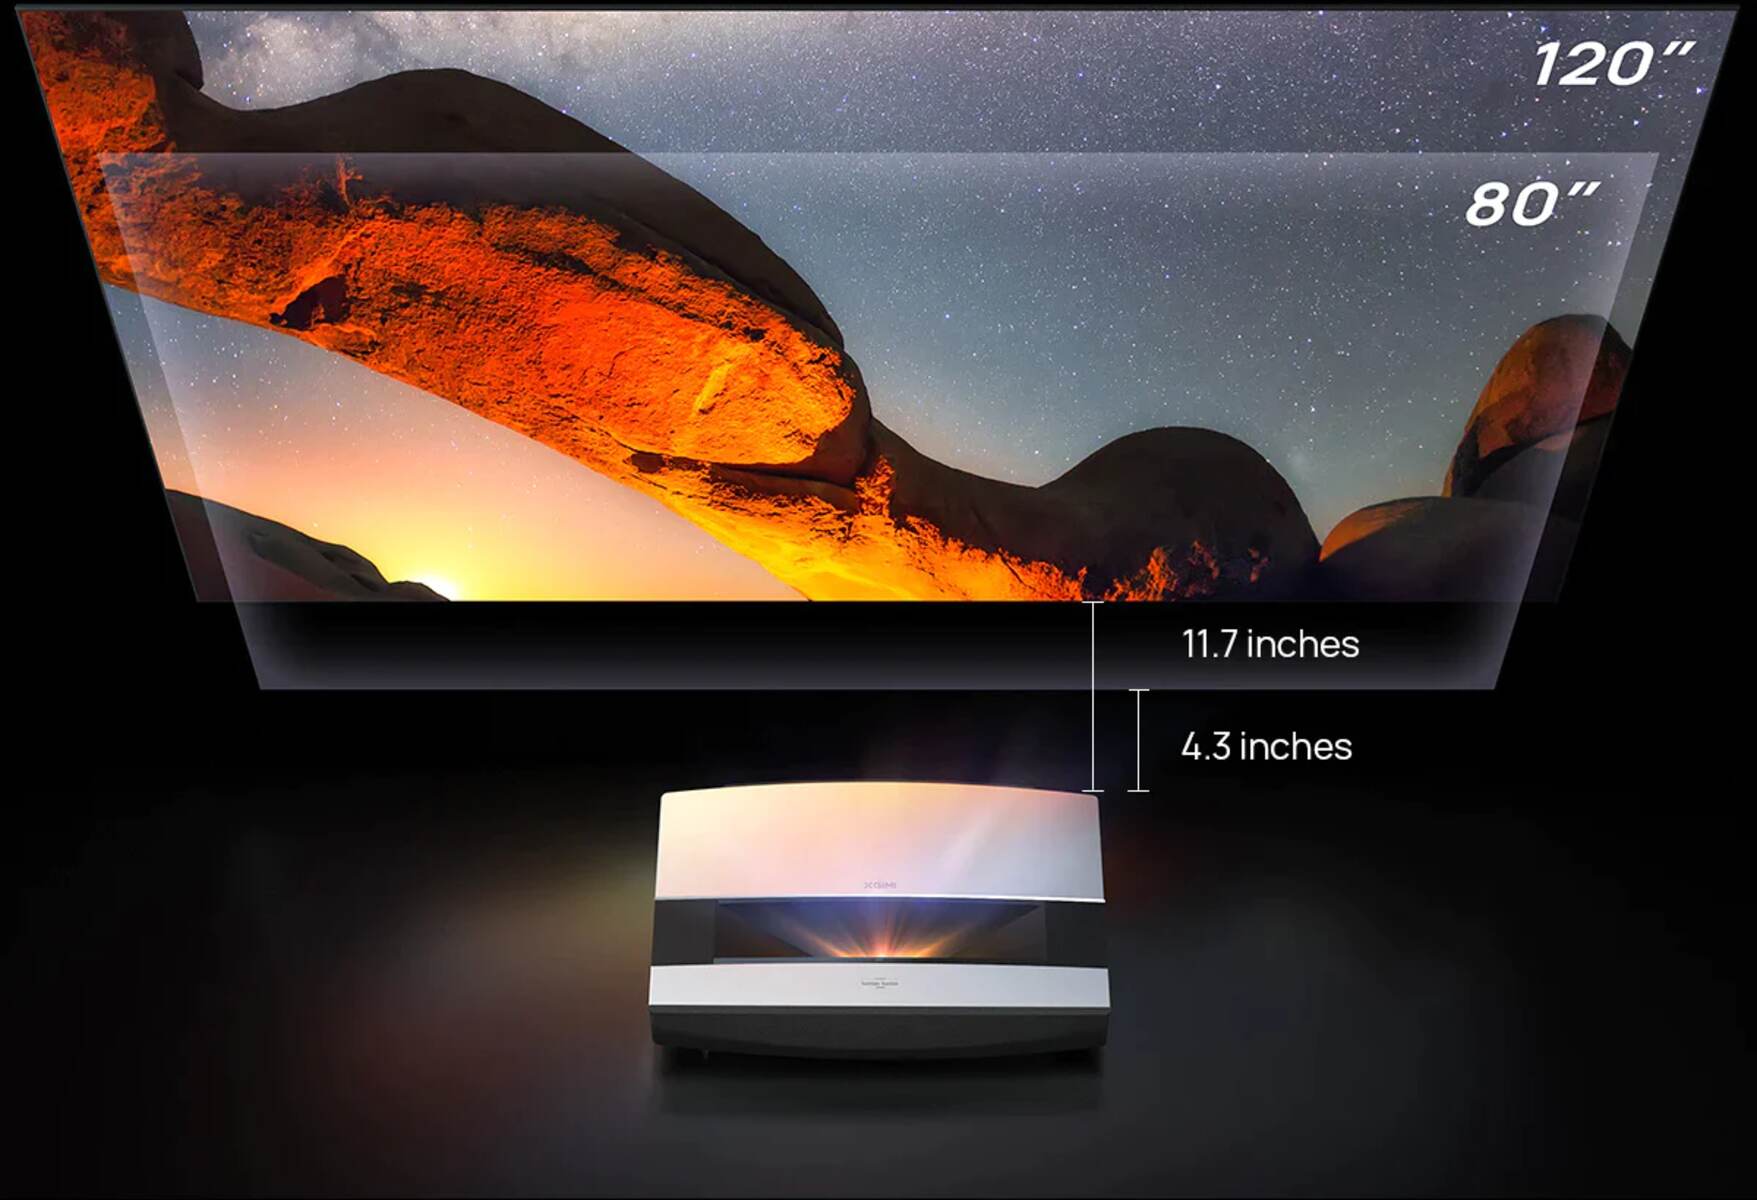
The position of the projector plays a crucial role in ensuring a clear and sharp image. Placing the projector at the right distance and angle will help minimize distortion and improve the overall clarity of the projected image.
Follow these guidelines to position your projector correctly:
- Consider the projector’s throw ratio, which refers to the distance between the projector and the screen or surface. Consult the projector’s manual or specifications to determine the recommended throw ratio for optimal image quality.
- Ensure that the projector is placed on a stable surface or mounted securely to prevent any vibrations or movement that could impact image clarity.
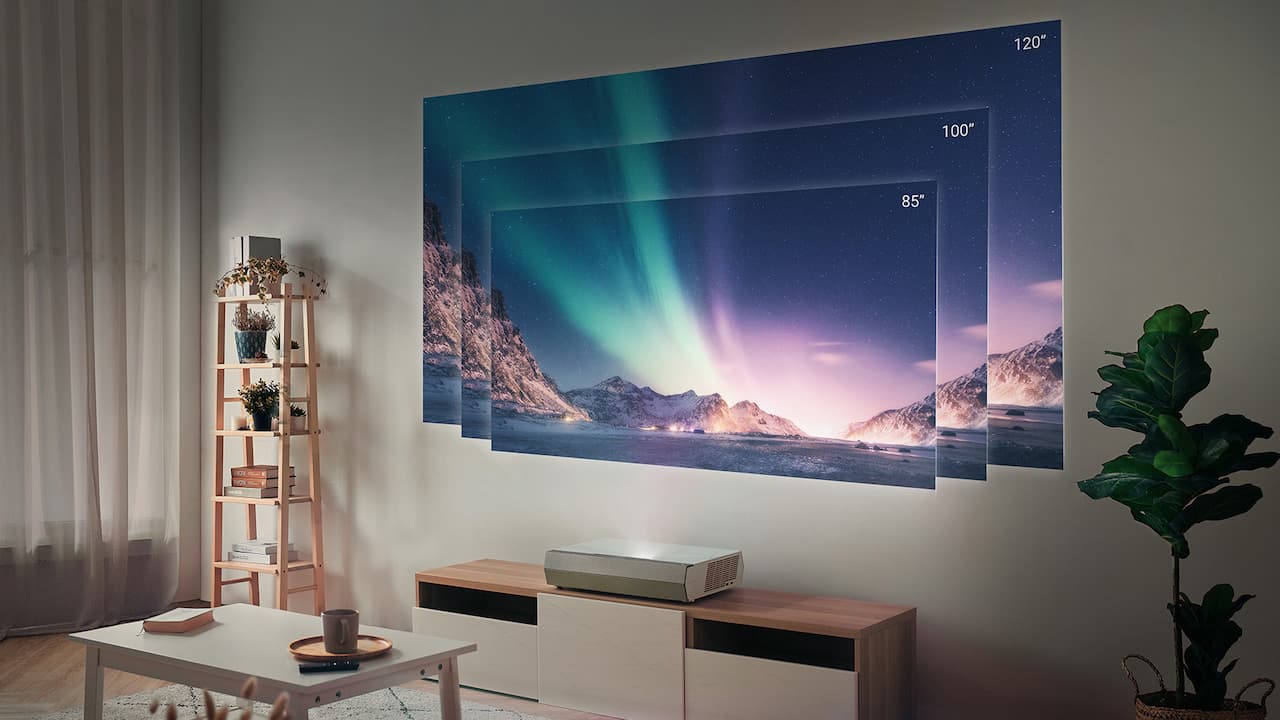
- Position the projector at a suitable distance from the screen or projection surface. Avoid placing it too close or too far, as this can result in a blurry or distorted image. Refer to the projector’s manual for the recommended distance based on the desired screen size.
- Adjust the projector’s height and angle to ensure that the image is projected evenly and without any keystone distortion. Use adjustable projector mounts or stands to achieve the desired projection angle.
- Avoid obstructing the projector’s ventilation ports, as this can cause the projector to overheat and impact its performance. Leave sufficient space around the projector for proper airflow.
- Consider the ambient lighting conditions in the room. Excessive ambient light can wash out the projected image and reduce clarity. Dimming the lights or using blackout curtains can help improve image visibility.
By positioning the projector correctly, you can enhance the clarity and sharpness of the projected image. Take the time to carefully set up the projector in the optimal location, ensuring an enjoyable viewing experience.
Use a Higher Quality HDMI Cable
The type of HDMI cable you use to connect your projector to the video source can have a significant impact on the clarity of the image. Low-quality or outdated HDMI cables may not be able to transmit the full resolution or data bandwidth required for a clear and sharp picture.
If you’re experiencing blurriness or poor image quality with your projector, consider upgrading to a higher quality HDMI cable. Here’s why:
Bandwidth: Higher quality HDMI cables are designed to support higher data bandwidth, allowing for the transmission of higher resolution signals. This is especially important if you’re using a projector with a high resolution, such as 4K or HDR.
Signal Quality: Superior HDMI cables minimize signal loss and interference, resulting in a cleaner and crisper image. They provide better shielding against electromagnetic interference (EMI) and ensure a more stable connection.
Durability: Higher quality HDMI cables are often built with better materials and construction, making them more durable and less prone to breakage or signal degradation over time. This means you will have a reliable and long-lasting cable for your projector setup.
When shopping for a higher quality HDMI cable, look for cables that are labeled as “High-Speed” or “Premium High-Speed.” These cables are certified to meet the performance standards required for Ultra HD or 4K video transmission.
Remember to choose a suitable length for your setup, ensuring that the cable is long enough to reach your video source without excessive slack or tension. Excessively long cables can introduce signal degradation, so it’s best to avoid unnecessarily long lengths.
By using a higher quality HDMI cable, you can ensure that the image signal is transmitted accurately and efficiently, resulting in a clearer and more detailed projection.
Optimize the Image Settings
Properly configuring the image settings on your projector can make a significant difference in the clarity and overall quality of the projected image. Many projectors offer a range of settings that can be customized to optimize the image for your specific needs and viewing environment.
Here are some tips to help you optimize the image settings:
- Brightness and Contrast: Adjusting the brightness and contrast settings can greatly impact the clarity and visibility of the image. Ensure that the brightness is set at an appropriate level for the ambient lighting conditions in the room. Experiment with the contrast setting to find the right balance between bright whites and deep blacks.
- Color Temperature and Saturation: Fine-tuning the color temperature and saturation settings can help enhance the vibrancy and accuracy of the colors in the image. Aim for a natural and well-balanced color reproduction.
- Sharpness: Use the sharpness setting to enhance the edge definition and overall sharpness of the image. Be cautious not to over-sharpen, as it can result in artificial-looking images or introduce unwanted artifacts.
- Aspect Ratio: Adjust the aspect ratio to match the native aspect ratio of your content. This will prevent distortion and ensure that the image maintains its intended proportions.
- Keystone Correction: If your projector has keystone correction capabilities, use them to correct any distortion caused by the projection angle. However, it’s best to position the projector correctly to minimize the need for excessive keystone correction.
Take the time to explore the settings menu on your projector to familiarize yourself with the available options. It can be helpful to refer to the projector’s manual for detailed instructions on adjusting the various image settings.
Remember that optimal image settings may vary depending on the content being projected and the specific preferences of the viewer. Experiment with different settings and make adjustments based on your personal preferences and the specific requirements of each viewing session.
By carefully optimizing the image settings, you can achieve a clearer and more visually pleasing projection, enhancing the overall viewing experience.
Adjust the Projector’s Resolution
Adjusting the resolution settings on your projector is another effective way to improve the clarity and sharpness of the projected image. The resolution refers to the number of pixels that make up the image and can significantly impact the level of detail and overall visual quality.
Follow these steps to adjust the projector’s resolution:
- Access the projector’s menu or settings panel using the remote control or buttons on the projector.
- Navigate to the resolution settings option. This may be listed as “Resolution,” “Display Settings,” or something similar.
- Select the desired resolution from the available options. Higher resolutions, such as 1080p or 4K, offer greater detail and clarity, but ensure that your projector is capable of supporting the chosen resolution.
- Save the changes and exit the settings menu.
When adjusting the resolution, it’s important to consider the capabilities of your projector and the resolution of the source content. If the projector’s resolution is set higher than the source content, the image may look pixelated or distorted. Conversely, if the projector’s resolution is set lower than the source content, the image may appear blurry or lack detail.
Ensure that the resolution setting is matched to the resolution of your content to maintain the best possible image quality. If you’re unsure of the native resolution of your projector, consult the user manual or specifications provided by the manufacturer.
Additionally, if you’re using a computer or media player as the video source, check the display settings on the device itself. Make sure that the output resolution of the device matches the native resolution of the projector for optimal image clarity.
By adjusting the projector’s resolution to match the content being displayed, you can enhance the overall sharpness and detail of the projected image, providing a more immersive viewing experience.
Use Proper Lighting in the Room
The lighting conditions in the room where your projector is set up can have a significant impact on the clarity and visibility of the projected image. To ensure the best possible image quality, it’s important to use proper lighting techniques that enhance the projection without causing glare or washout.
Follow these tips to achieve proper lighting in the room:
- Avoid Direct Light on the Screen: Position the screen or projection surface away from windows or other light sources that could directly shine on it. Direct light can cause reflections, washout, and reduce the contrast of the projected image.
- Install Blackout Curtains: If your room has windows that cannot be entirely blocked, consider installing blackout curtains or blinds. These can effectively block out external light sources and create a dark environment that enhances the projection’s visibility.
- Dim the Ambient Lighting: Reduce the overall brightness in the room by dimming the lights or using lower-intensity bulbs. This helps to create a darker environment, allowing the projected image to stand out and reducing the chance of washout or image degradation.
- Indirect Ambient Lighting: If complete darkness is not desired, use indirect ambient lighting. This can be achieved by placing soft, diffuse lighting fixtures around the room, such as wall sconces or floor lamps. This type of lighting adds a subtle glow without directly illuminating the screen.
- Consider Bias Lighting: Bias lighting is a method of placing a source of light behind the screen or around the perimeter of the viewing area. This creates a soft backlight that reduces eye strain and enhances contrast perception, improving the overall visual experience.
Proper lighting in the room helps to create an optimal environment for enjoying your projector’s output. By minimizing external light sources and controlling the ambient lighting, you can maximize image clarity and ensure that the projected image stands out without distractions.
Experiment with different lighting setups and find the balance that works best for your specific viewing space.
Replace the Projector Bulb if Necessary
Over time, the bulb or lamp in your projector will gradually degrade, resulting in a decrease in brightness and overall image quality. If you notice that your projector’s image has become dim or lacks clarity, it may be time to replace the bulb.
Here are some signs that indicate it’s time to replace the projector bulb:
- Dim Image: If the projected image appears significantly dimmer than before, even after adjusting the brightness settings, it’s a clear indication that the bulb is nearing the end of its lifespan.
- Flickering or Cycling On and Off: If the projector is experiencing frequent flickering, or if it powers off and on intermittently, it could be a sign that the bulb is reaching the end of its life.
- Image Quality Issues: When the bulb is approaching the end of its lifespan, you may notice reduced clarity, distortion, or color shifts in the projected image.
- Hours of Use: Projector bulbs have a limited lifespan, typically measured in hours of use. Consult the projector’s manual or the manufacturer’s specifications to determine the average lifespan of the bulb. If your projector has exceeded that recommended lifespan, it’s time for a replacement.
Replacing the projector bulb is a straightforward process, but it varies depending on the specific model. Here’s a general guide:
- Refer to the projector’s manual for specific instructions on how to replace the bulb. It may involve removing a cover or panel and carefully replacing the old bulb with a new one.
- Ensure that the replacement bulb is compatible with your projector model.
- Handle the new bulb with care, using gloves or a cloth to avoid touching the glass surface directly. Oils from your fingertips can damage the bulb and affect its performance.
- Follow the provided instructions to install the new bulb, making sure it is securely seated and properly aligned.
- Reattach any covers or panels that were removed during the replacement process and ensure they are securely in place.
- Reset the lamp hour counter on the projector to accurately track the usage of the new bulb.
Replacing the projector bulb when it is necessary will restore the brightness and image quality, providing a clearer and more vibrant projection. Be sure to purchase a genuine replacement bulb from a reputable source to ensure optimal performance and longevity.
Clear Any Obstructions
Obstructions in the path of the projector can block the projection and affect the clarity and quality of the image. It’s essential to ensure that there are no objects or obstacles interrupting the light path between the projector and the projection surface. By clearing any obstructions, you can improve the overall clarity of the projected image.
Here are some steps to clear any obstructions:
- Remove Objects Near the Projection Surface: Make sure there are no objects placed in front of or near the projection surface that could block or interfere with the projected image. Move any furniture, décor, or other items that may obstruct the light path.
- Check for Shadows: Shadows can also impact the clarity of the image. Position the projector and any objects in the room in a way that avoids casting shadows on the projection surface. This may require adjusting the placement of lamps, furniture, or other light sources.
- Inspect the Projection Surface: Ensure that the projection surface itself is clean and clear of any dust, debris, or smudges. Wipe the surface with a soft, lint-free cloth to remove any potential obstructions that may affect image clarity.
- Check for Interference from Other Devices: Certain devices or appliances in the vicinity of the projector can emit electromagnetic interference (EMI) that can disrupt the signal and impact image quality. Keep other electronic devices at a reasonable distance from the projector to reduce the risk of interference.
- Remove Cable Interference: Tangled or poorly routed cables can obstruct the projection path and introduce interference. Ensure that all cables are neatly organized and free from any obstructions or entanglements.
By clearing any obstructions, you allow the projector to project the image freely without hindrance, resulting in a clearer and more focused projection. Regularly check for any new objects or obstacles that may have inadvertently appeared in the projection path to maintain optimal image quality.
Keep the Projector Cool and Well-Ventilated
Maintaining proper temperature control and ventilation for your projector is crucial for ensuring optimal performance and image clarity. Overheating can lead to reduced brightness, color accuracy, and even damage to the internal components. Therefore, it is essential to keep the projector cool and well-ventilated at all times.
Consider the following tips to maintain the ideal temperature and ventilation for your projector:
- Check the Operating Environment: Ensure that the room or space where the projector is installed maintains a suitable temperature range. Extreme temperatures, high humidity, or excessive dust can negatively affect the projector’s performance.
- Keep Air Vents Clear: The projector’s air vents are designed to allow heat to dissipate. Ensure that the vents are not obstructed by objects, dust, or other debris. Regularly clean the vents to prevent the buildup of dust and ensure proper airflow.
- Provide Adequate Space: Leave sufficient space around the projector to allow for proper air circulation. Avoid placing the projector in enclosed cabinets or tight spaces that restrict airflow.
- Use Additional Cooling Options: For projectors that tend to generate more heat, you can consider using external cooling solutions such as fans or cooling pads. These can help dissipate excess heat and keep the projector at an optimal operating temperature.
- Monitor Lamp Usage: Projector bulbs can contribute to the overall heat generated. When using the projector for prolonged periods, monitor the lamp usage, and avoid exceeding the recommended operating hours specified by the manufacturer.
By keeping the projector cool and well-ventilated, you can ensure that it operates at its best, maintaining image quality and prolonging the lifespan of the internal components. Regularly check the projector’s temperature and take necessary measures to address any overheating issues.
Remember to consult the manufacturer’s guidelines and recommendations regarding the operating temperature range and ventilation requirements specific to your projector model.
Conclusion
Having a clear and vibrant image is crucial for a satisfying projector experience, whether you’re using it for presentations, educational purposes, or entertainment. By following the tips outlined in this article, you can improve the clarity and sharpness of your projector’s image.
Start by cleaning the lens to remove any dirt or smudges that may be obstructing the light path. Adjust the focus to ensure that the image is crisp and well-defined. Position the projector correctly, taking into account the throw ratio and ambient lighting conditions. Use a higher quality HDMI cable to ensure optimal signal transmission.
Optimizing the image settings, such as brightness, contrast, color temperature, and sharpness, will further enhance the visual quality. Adjusting the projector’s resolution to match the content being displayed will ensure maximum sharpness and detail.
Take into consideration the lighting in the room, making sure to avoid direct light on the projection surface and creating a suitable viewing environment with proper lighting techniques. If necessary, replace the projector bulb to restore brightness and image quality. Clear any obstructions that could interfere with the projection path, and keep the projector cool and well-ventilated to prolong its performance and lifespan.
By implementing these techniques, you can enjoy a clearer and more vibrant projection, enhancing your overall viewing experience. Experiment with these steps, adapt them to your specific setup, and always refer to your projector’s manual for model-specific instructions.
Now, armed with these valuable tips, go ahead and elevate the clarity of your projector for stunning visuals and an immersive viewing experience!