Checking RAM Speed on Windows
If you want to make sure that your RAM is running at its full speed on a Windows operating system, there are several methods you can try. By following these steps, you will be able to check the speed and ensure optimal performance.
1. Using Task Manager:
You can start by opening the Task Manager by right-clicking on the taskbar and selecting “Task Manager” from the menu. Then, navigate to the “Performance” tab and click on “Memory” from the left sidebar. Here, you will find important information about your RAM, including the speed.
2. Using System Information:
An alternative method is to use the System Information utility. To access it, press the Windows key + R to open the Run dialog box. Then, type “msinfo32” and press Enter. In the System Information window, expand the “Components” section and click on “Memory”. Look for the “Speed” information to determine the RAM speed.
3. Using Command Prompt:
You can also use the Command Prompt to check RAM speed. Simply press the Windows key + R, type “cmd” and press Enter to open the Command Prompt. In the command prompt window, type “wmic memorychip get speed” and press Enter. The displayed speed will indicate the operating speed of your RAM.
4. Using Third-Party Software:
If you prefer a more detailed analysis, there are various third-party software options available. Tools like CPU-Z and Speccy can provide comprehensive information about your RAM, including its speed, timings, and other important details.
By following these methods, you can easily check the speed of your RAM on a Windows system. It’s important to ensure that your RAM is running at its full speed to optimize overall system performance.
Checking RAM Speed on macOS
Checking the speed of your RAM on a macOS system is a straightforward process. By following these steps, you can easily determine the speed of your RAM and make sure it’s running at its full potential.
1. Using the Apple Menu:
Start by clicking on the Apple logo in the top-left corner of the screen and selecting “About This Mac” from the dropdown menu. In the pop-up window, click on “System Report”. In the left sidebar, under the “Hardware” section, click on “Memory”. Here, you’ll find detailed information about your RAM, including its speed.
2. Using Terminal:
If you prefer using the Terminal, you can access the information about your RAM speed through a simple command. Open the Terminal from the Applications folder or by searching for it in Spotlight. Once the Terminal is open, type the following command and press Enter:
system_profiler SPMemoryDataType
You’ll be presented with a detailed report summarizing your system’s memory information, including the RAM speed.
3. Using Third-Party Apps:
There are several third-party applications available in the Mac App Store that can provide detailed information about your RAM. One popular app is MacTracker, which offers a comprehensive overview of your system’s hardware specifications, including RAM speed and other relevant details.
By utilizing these methods, you can easily check the speed of your RAM on a macOS system. It’s important to ensure that your RAM is operating at its full speed to optimize the performance and responsiveness of your Mac.
Checking RAM Speed on Linux
If you are using a Linux-based operating system and want to check the speed of your RAM, there are a few methods you can use to gather this information. By following these steps, you can easily determine the speed of your RAM on a Linux system.
1. Using the dmidecode Command:
One way to check the RAM speed on Linux is by using the “dmidecode” command. Open the terminal and type the following command:
sudo dmidecode -t 17
This will display detailed information about your RAM modules, including the speed.
2. Using the lshw Command:
Another command-line tool you can use is “lshw”. Open the terminal and run the following command:
sudo lshw -C memory
Look for the “speed” attribute, which indicates the speed of your RAM.
3. Using System Monitor:
Many Linux distributions come with a System Monitor utility that displays system information, including RAM speed. Look for the system details or memory information section in the application to find the RAM speed.
4. Using CPU-Z:
Although CPU-Z is primarily a Windows tool, it can also be installed and used on Linux systems using Wine. CPU-Z provides comprehensive hardware information, including RAM speed, timings, and other relevant details.
By utilizing these methods, you can easily check the speed of your RAM on a Linux system. It’s important to ensure that your RAM is operating at its full speed to optimize the performance and responsiveness of your Linux machine.
Checking RAM Speed on BIOS
One of the most reliable methods to check the speed of your RAM is through the BIOS (Basic Input Output System) settings. By accessing the BIOS, you can gather accurate information about your RAM speed and adjust settings if necessary. Follow these steps to check the RAM speed on your BIOS:
1. Restart your computer:
Start by restarting your computer. As soon as it starts booting, press the key specified by your computer manufacturer to enter the BIOS settings. This key is typically shown on the boot screen or in the computer’s manual.
2. Access the BIOS settings:
Once you’re in the BIOS settings, navigate to the “Memory” or “DRAM Configuration” section. The exact location and naming may vary depending on your computer’s BIOS version and manufacturer.
3. Locate the RAM details:
Within the memory settings, you should find information about your RAM modules, including the speed. Look for a field named “DRAM Frequency” or “Memory Clock Speed” to find the speed of your RAM.
4. Adjust settings if needed:
If your RAM speed does not match the advertised speed, you can try enabling the XMP (Extreme Memory Profile) option. This option automatically adjusts the settings to match the manufacturer’s recommended speed. However, it’s worth noting that not all motherboards support XMP.
5. Save changes and exit:
Once you have checked the RAM speed or made any adjustments, save your changes and exit the BIOS settings. Your computer will then continue to boot up as normal.
By following these steps, you can effectively check the speed of your RAM through the BIOS settings. This method provides accurate information and allows you to optimize your RAM’s performance if necessary.
Enabling the XMP Profile in BIOS
The XMP (Extreme Memory Profile) is a feature available in many BIOS settings that allows you to optimize the performance of your RAM by configuring its settings to match the manufacturer’s recommended specifications. Enabling the XMP profile can ensure that your RAM is running at its full speed and stability. Follow these steps to enable the XMP profile in your BIOS:
1. Restart your computer:
Start by restarting your computer. As it begins to boot up, press the key specified by your computer manufacturer to enter the BIOS settings. This key is typically shown on the boot screen or in the computer’s manual.
2. Access the BIOS settings:
Once you’re in the BIOS settings, navigate to the “Memory” or “DRAM Configuration” section. The exact location and naming may vary depending on your computer’s BIOS version and manufacturer.
3. Find the XMP option:
Look for an option labeled “XMP” or “Memory Profile” within the memory settings. This option might be located in various submenus, such as “AI Tweaker”, “Overclocking”, or “Advanced BIOS Features”.
4. Enable the XMP profile:
Select the XMP option and choose the appropriate profile for your RAM. Most modern RAM modules have at least one XMP profile available with different speed and timing configurations. Select the desired profile that matches the specifications of your RAM.
5. Save changes and exit:
Once you enable the XMP profile, save your changes and exit the BIOS settings. The computer will then continue to boot up with the optimized RAM settings.
Enabling the XMP profile in the BIOS ensures that your RAM runs at its rated speed, stability, and performance levels. However, it’s important to note that not all motherboards or RAM modules support XMP. If you encounter any issues or instability after enabling the XMP profile, you may need to adjust the settings manually or choose a different profile option.
Updating Motherboard Drivers
Updating the drivers for your motherboard is an essential step to ensure that your RAM and other hardware components are running optimally. Outdated motherboard drivers can lead to compatibility issues, performance degradation, and even stability problems. Here’s how you can update your motherboard drivers:
1. Identify your motherboard:
Start by identifying the make and model of your motherboard. You can usually find this information printed on the motherboard itself or in the documentation that came with your computer. Alternatively, you can use system information utilities or third-party software to determine your motherboard model.
2. Visit the manufacturer’s website:
Once you have identified your motherboard, visit the manufacturer’s website. Look for a support or downloads section where you can find the latest drivers for your specific motherboard model.
3. Download the latest BIOS and chipset drivers:
The BIOS and chipset drivers are critical for the proper functioning of your motherboard and RAM. Download the latest versions provided by the manufacturer and save them to a convenient location on your computer.
4. Install the drivers:
Open the downloaded driver files and follow the installation instructions provided by the manufacturer. Typically, this involves running an installer and following the on-screen prompts. Make sure to install the BIOS and chipset drivers from the downloaded files.
5. Restart your computer:
After the installation is complete, restart your computer to allow the changes to take effect. Your motherboard drivers and the associated performance improvements will now be active.
Regularly updating your motherboard drivers is essential for maintaining the compatibility, stability, and performance of your RAM and other hardware components. It’s recommended to check for driver updates periodically, as manufacturers often release new versions to address issues and improve overall system functionality.
Troubleshooting RAM Speed Issues
If you’re experiencing issues with your RAM speed, there are several troubleshooting steps you can take to identify and resolve the problem. Here are some common methods to troubleshoot RAM speed issues:
1. Check RAM compatibility:
Make sure that your RAM modules are compatible with your motherboard. Check the manufacturer’s specifications for your motherboard and ensure that your RAM meets the required speed and capacity. Mismatched or incompatible RAM can result in performance issues.
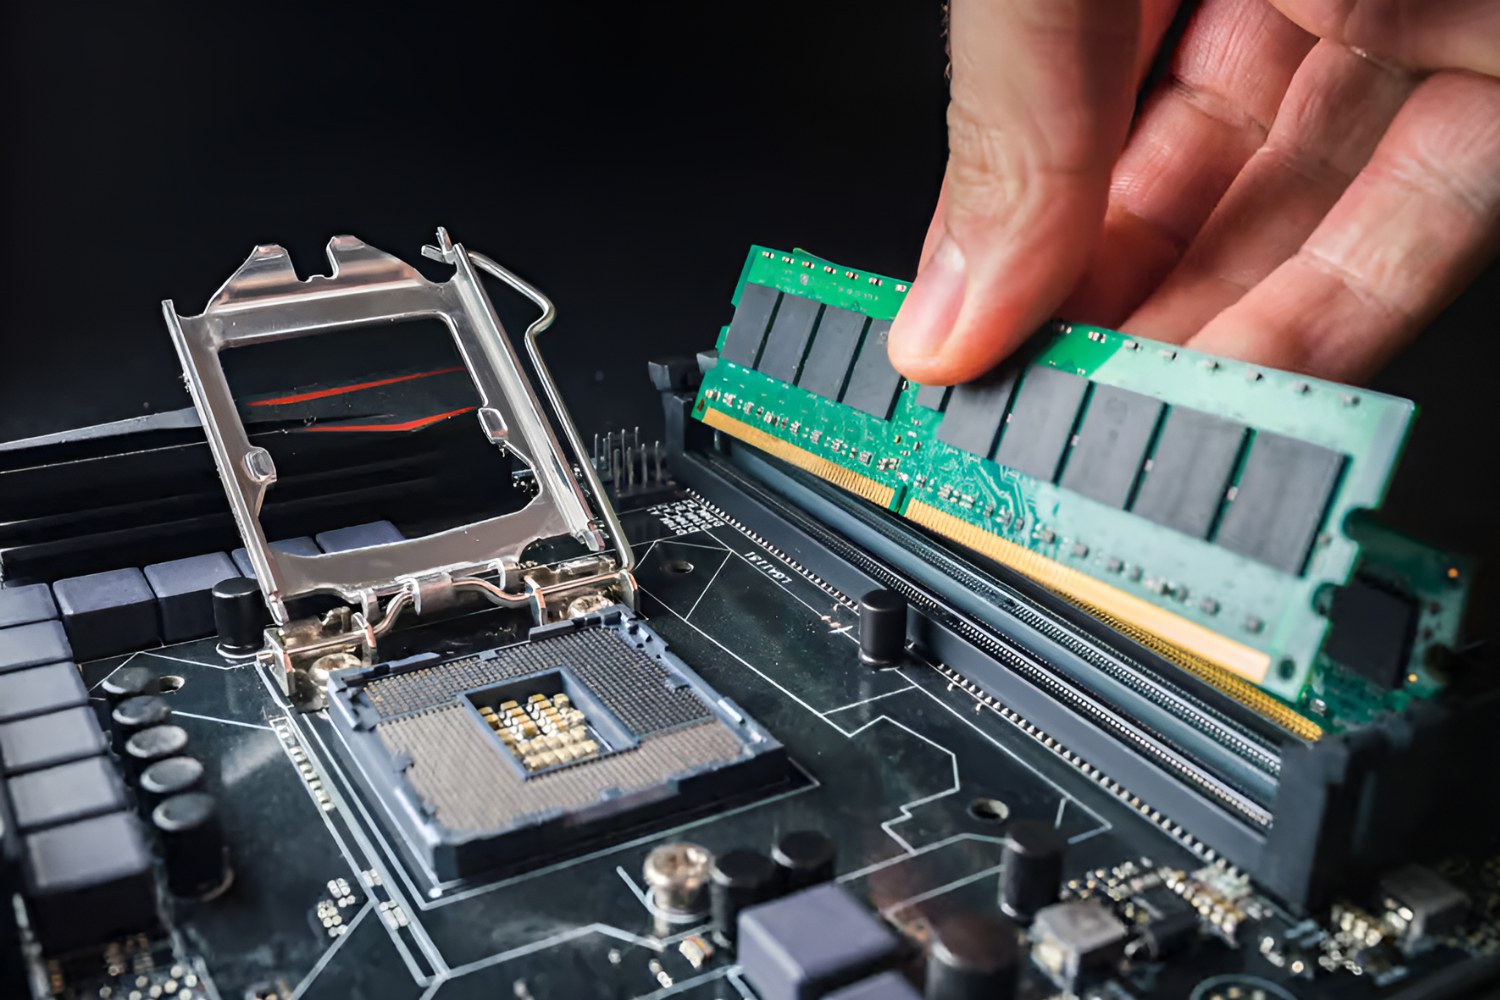
2. Reseat the RAM modules:
Remove and reseat the RAM modules in their slots. Sometimes, loose connections can cause speed problems. Ensure that the modules are securely seated in the slots and that the latches are locked in place.
3. Clean RAM contacts:
If you notice any dust or debris on the RAM contacts, use a clean, soft cloth to gently clean them. Dirty contacts can lead to connectivity issues and affect the overall speed and performance of your RAM.
4. Test individual RAM modules:
Try testing each RAM module individually to identify if any one module is causing the speed issues. Remove all but one module and then test your system. Repeat this process for each module to identify any faulty or problematic RAM.
5. Update firmware and drivers:
Ensure that you have the latest firmware updates installed for your motherboard. Additionally, update the drivers for your motherboard chipset and BIOS to ensure compatibility and optimal performance.
6. Check for BIOS updates:
Visit the manufacturer’s website to check for any BIOS updates for your motherboard. Updating your BIOS to the latest version can improve RAM compatibility and stability, as well as provide performance enhancements.
7. Adjust RAM settings in BIOS:
Enter your BIOS settings and check if the memory timings and voltage settings are correct. Incorrect settings can significantly impact RAM speed. If necessary, consult your motherboard’s manual or manufacturer’s support for guidance on adjusting these settings.
8. Consult professional help:
If you have tried the above troubleshooting steps and are still experiencing issues with your RAM speed, it may be helpful to seek professional assistance. A computer technician or specialist can provide further diagnostics and recommend appropriate solutions.
By following these troubleshooting steps, you can identify and address issues related to RAM speed. Remember to exercise caution when making changes to your BIOS settings and consult the appropriate resources if needed.
Conclusion
Ensuring that your RAM is running at its full speed is crucial for optimizing the performance and responsiveness of your computer. By following the methods outlined in this article, you can easily check the speed of your RAM on different operating systems, such as Windows, macOS, and Linux.
On Windows, you can use Task Manager, System Information, Command Prompt, or third-party software to check the RAM speed. On macOS, you can access the information through the Apple Menu, Terminal, or third-party apps. Linux users can utilize the dmidecode command, the lshw command, System Monitor, or third-party software.
Additionally, accessing your BIOS settings allows you to find accurate information about your RAM speed and make adjustments if necessary. Enabling the XMP profile in BIOS can optimize your RAM’s performance, but it’s important to ensure compatibility and stability with your motherboard.
Updating your motherboard drivers and BIOS, as well as troubleshooting common RAM speed issues, can further enhance your RAM’s performance. By checking RAM compatibility, reseating modules, cleaning contacts, and testing individual modules, you can identify and resolve potential problems.
Remember to consult the manufacturer’s documentation and seek professional assistance if needed. Keeping your RAM running at its full speed will contribute to a smoother and more efficient computing experience.