Introduction
Welcome to the world of Samsung tablets! These versatile devices are perfect for work, entertainment, and staying connected with friends and family. One of the great features of Samsung tablets is the ability to expand storage using an SD card. With an SD card, you can store more apps, photos, videos, and files without worrying about running out of space on your tablet’s internal storage.
In this guide, we will show you how to make your Samsung tablet use an SD card as additional storage. Whether you have just purchased a new tablet or you’ve had one for some time, adding an SD card is a simple and effective way to increase your device’s storage capacity. We will walk you through the steps of checking compatibility, inserting the SD card, formatting it, setting it as default storage, moving files to the SD card, and managing it.
By the end of this article, you will have all the information you need to make the most out of your Samsung tablet’s SD card slot. So let’s get started!
Step 1: Checking Compatibility
Before you begin, it’s essential to check if your Samsung tablet is compatible with an SD card. Most Samsung tablets are compatible with microSD cards, but it’s always a good idea to verify this information in your tablet’s user manual or on the manufacturer’s website. Here’s how you can check the compatibility:
- Refer to the user manual: The user manual that came with your tablet should provide information on the supported storage options. Look for a section dedicated to storage or expandable memory.
- Visit the manufacturer’s website: If you don’t have access to the user manual, you can visit the website of your tablet’s manufacturer. Look for your tablet model and check the specifications to see if it supports an SD card.
- Identify the SD card slot: Locate the SD card slot on your tablet. Depending on the model, it may be on the side, top, or bottom of the device. The slot is usually labeled with “SD” or “microSD.”
If your tablet is compatible with an SD card and you have one available, you’re ready to move on to the next step. If not, you can still follow along to learn more about SD cards and their benefits, and consider upgrading to a tablet that supports expandable storage in the future.
Now that you have confirmed the compatibility of your tablet with an SD card, let’s move on to the next step: inserting the SD card into your Samsung tablet.
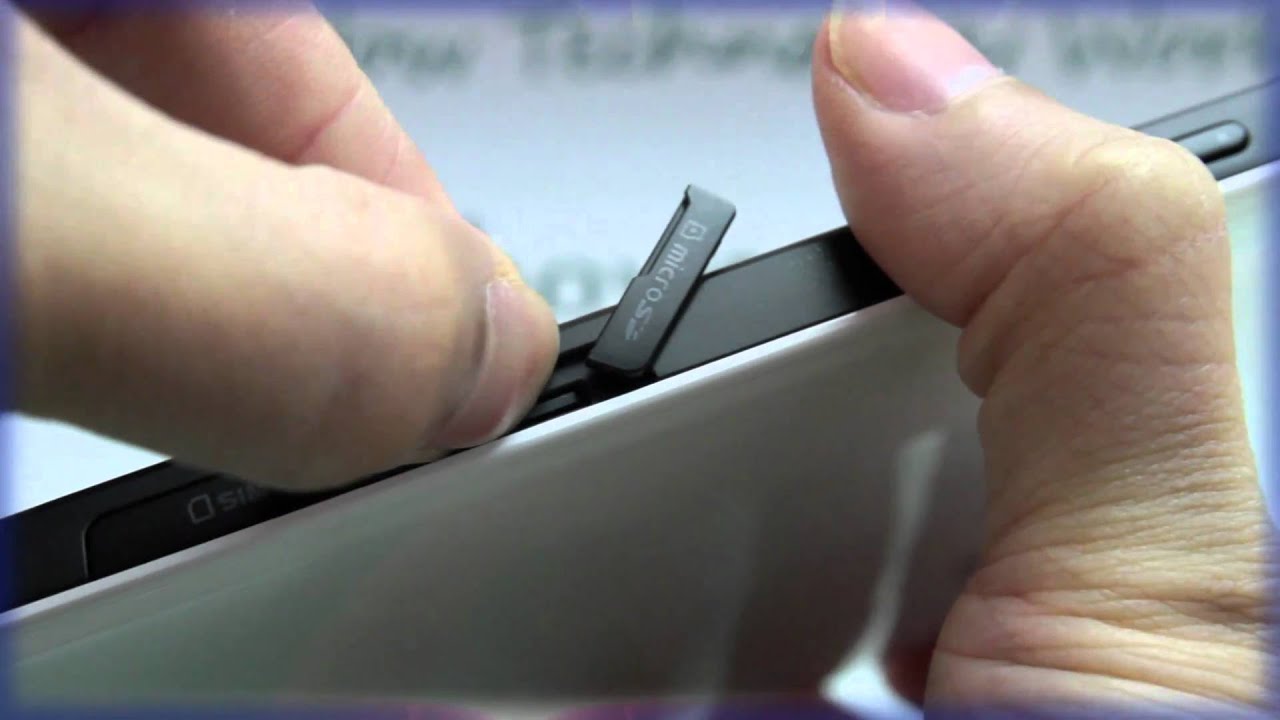
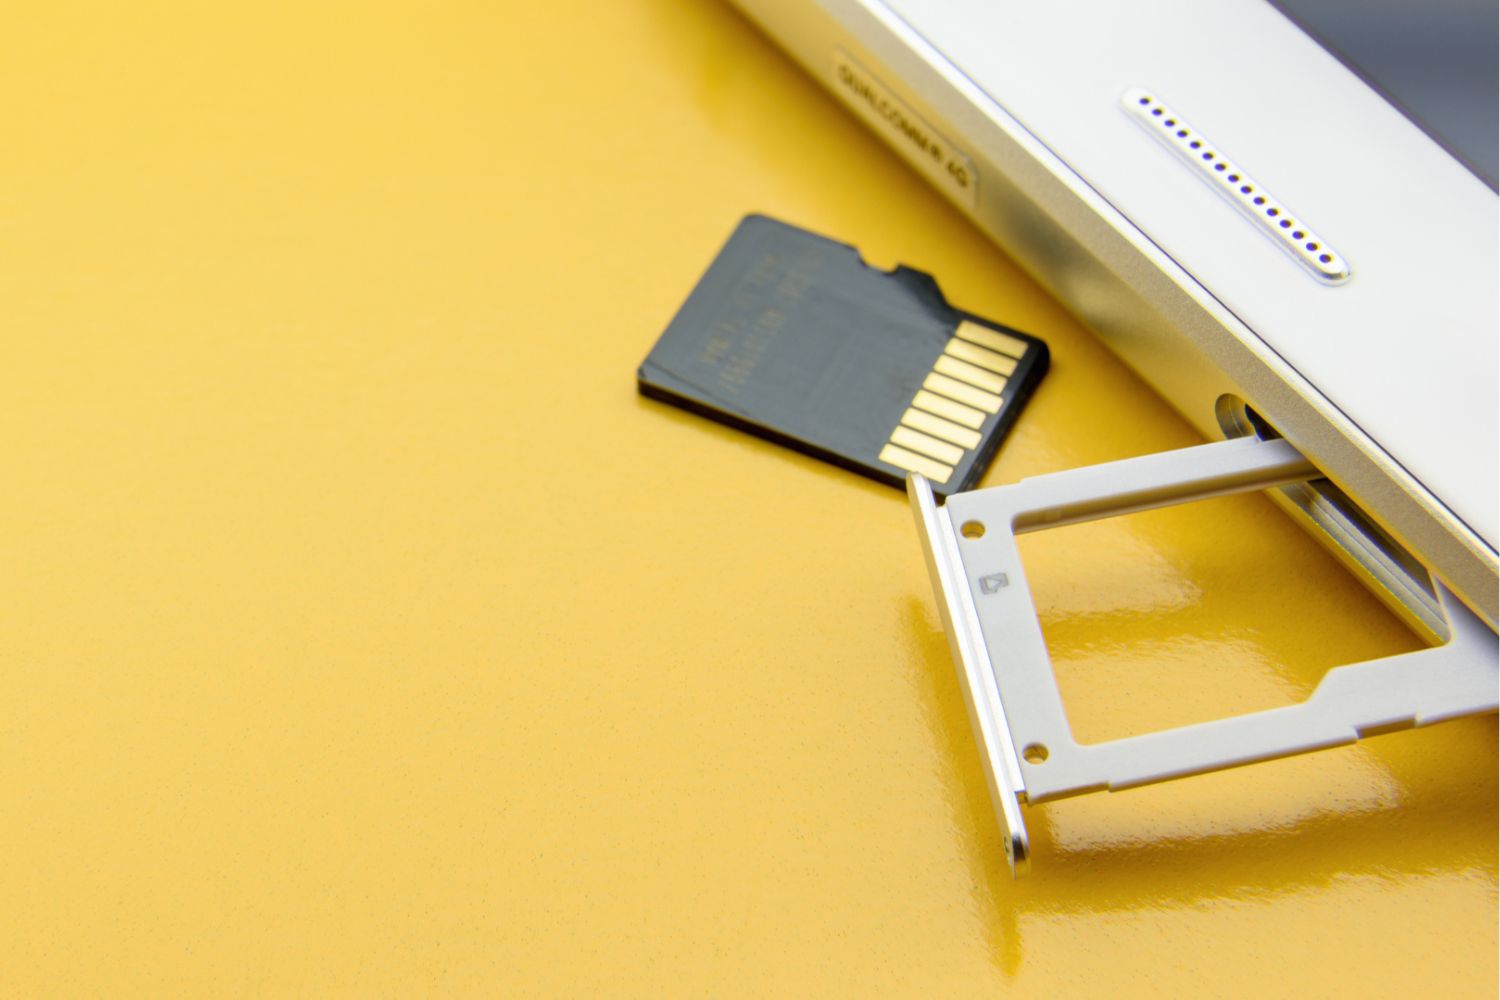
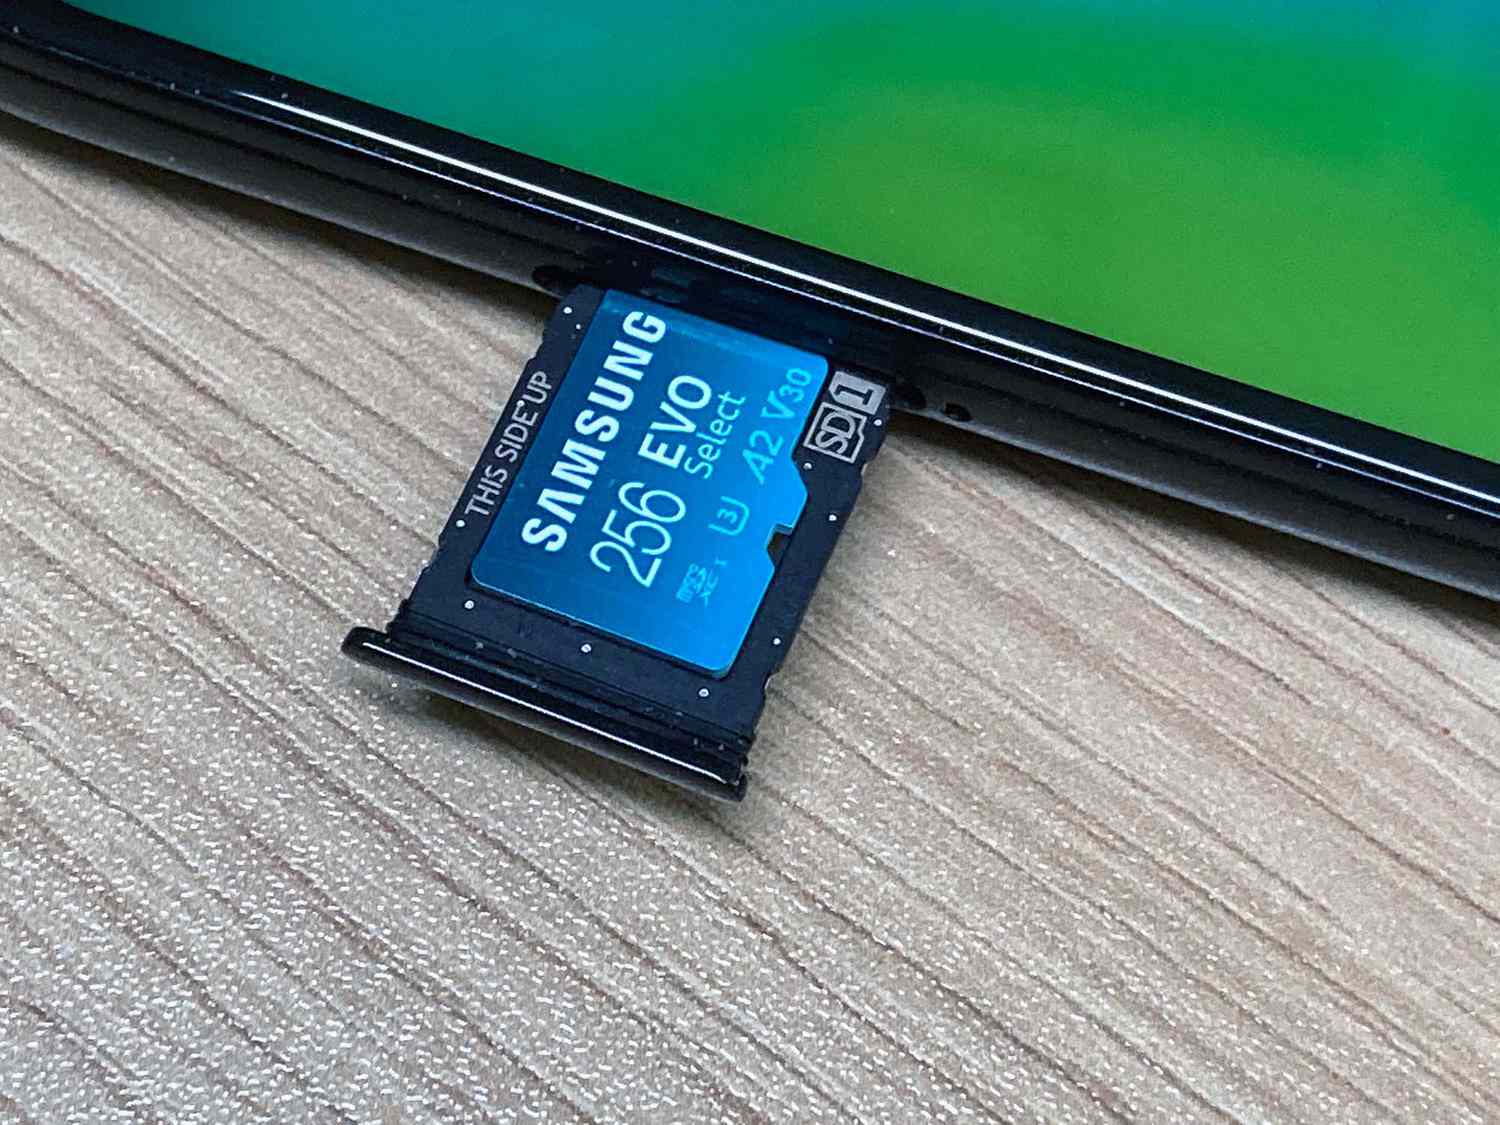
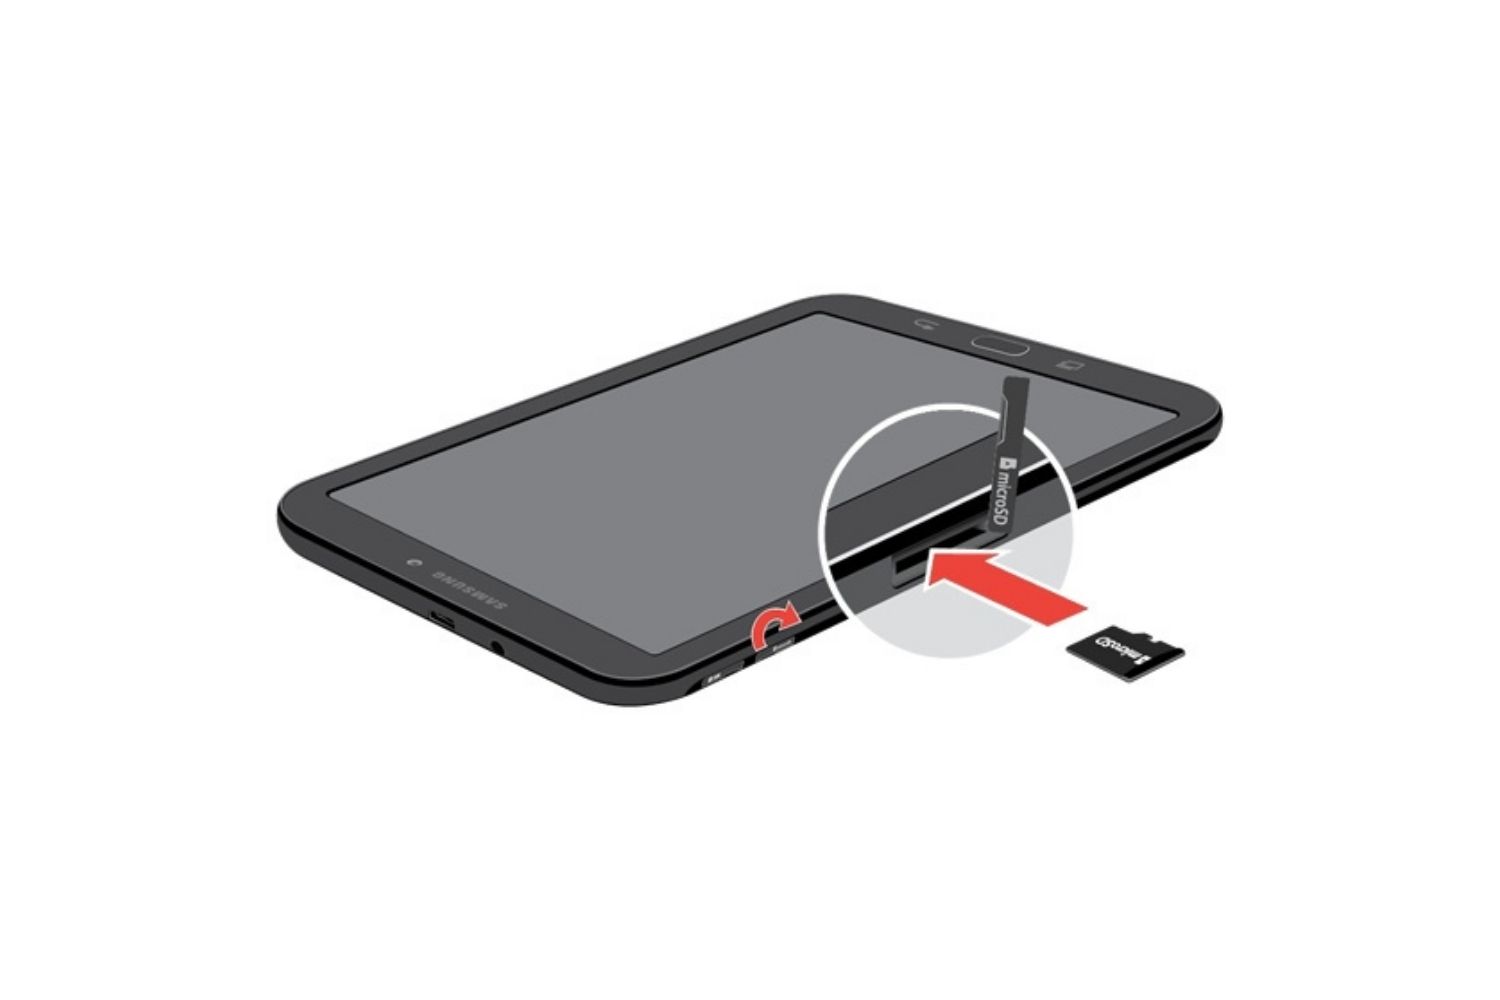
Step 2: Inserting the SD Card
Inserting an SD card into your Samsung tablet is a straightforward process. Follow these steps to ensure a successful insertion:
- Power off your tablet: Before you insert the SD card, it’s important to turn off your tablet. This will prevent any potential damage to the device or the SD card.
- Locate the SD card slot: Find the SD card slot on your tablet. It is typically located on the side, top, or bottom of the device. Check your tablet’s user manual or the manufacturer’s website if you’re having trouble locating it.
- Prepare the SD card: Take your SD card and make sure it is in good condition. Remove any packaging or protective covers if necessary.
- Insert the SD card: Gently insert the SD card into the designated slot on your tablet. Make sure the gold contacts on the SD card are facing down and aligning with the contacts in the slot.
- Secure the SD card: Once the SD card is fully inserted, push it in until it clicks or locks into place. This ensures that the card is properly seated and will not accidentally pop out.
- Power on your tablet: With the SD card securely inserted, power on your tablet. It will automatically detect the newly inserted SD card.
Congratulations! You have successfully inserted the SD card into your Samsung tablet. Now it’s time to move on to the next step: formatting the SD card.
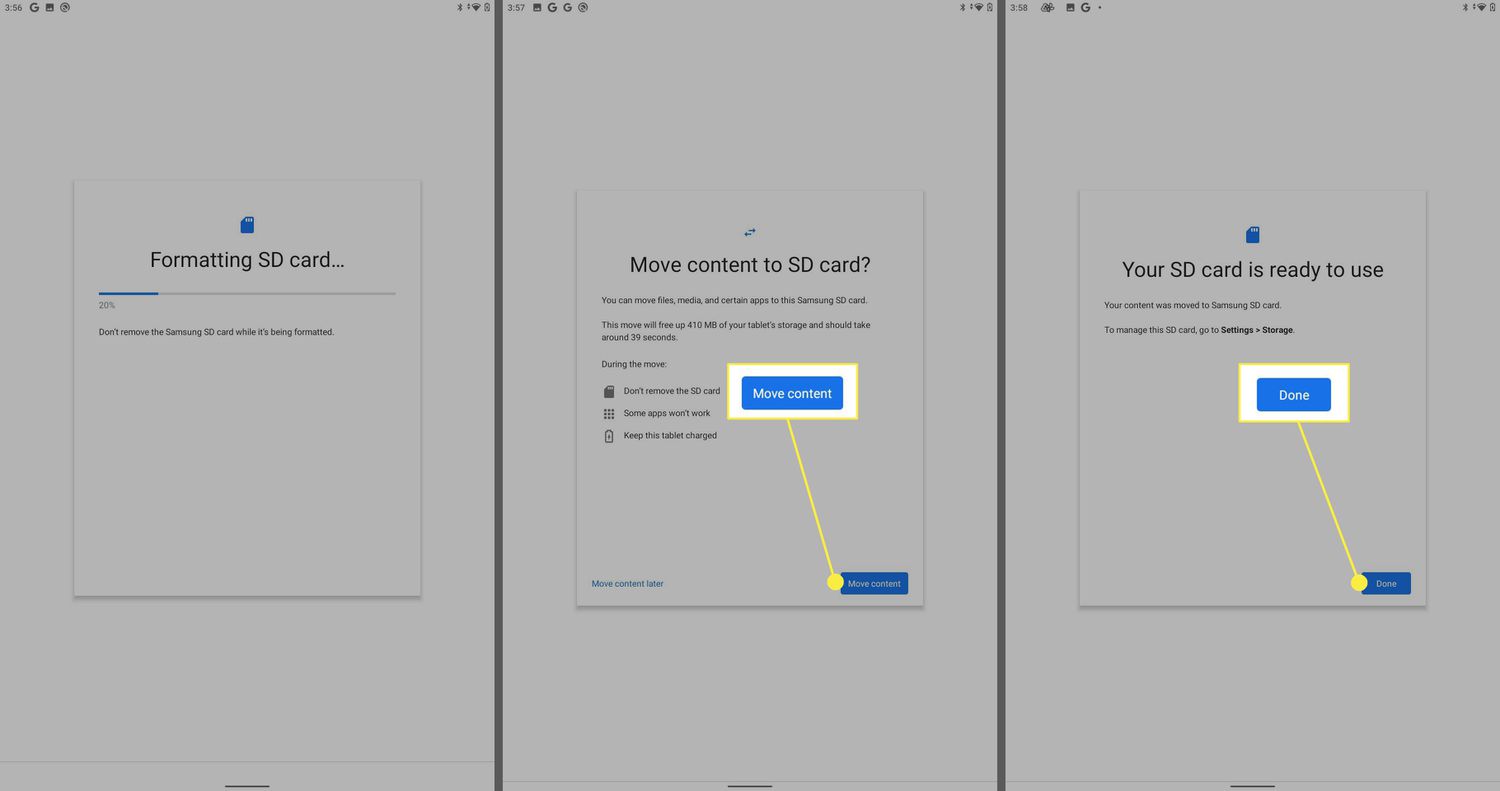
Step 3: Formatting the SD Card
Formatting the SD card is an important step to ensure compatibility and optimize its performance with your Samsung tablet. By formatting the SD card, you prepare it for use and remove any existing data or file system. Here are the steps to format your SD card:
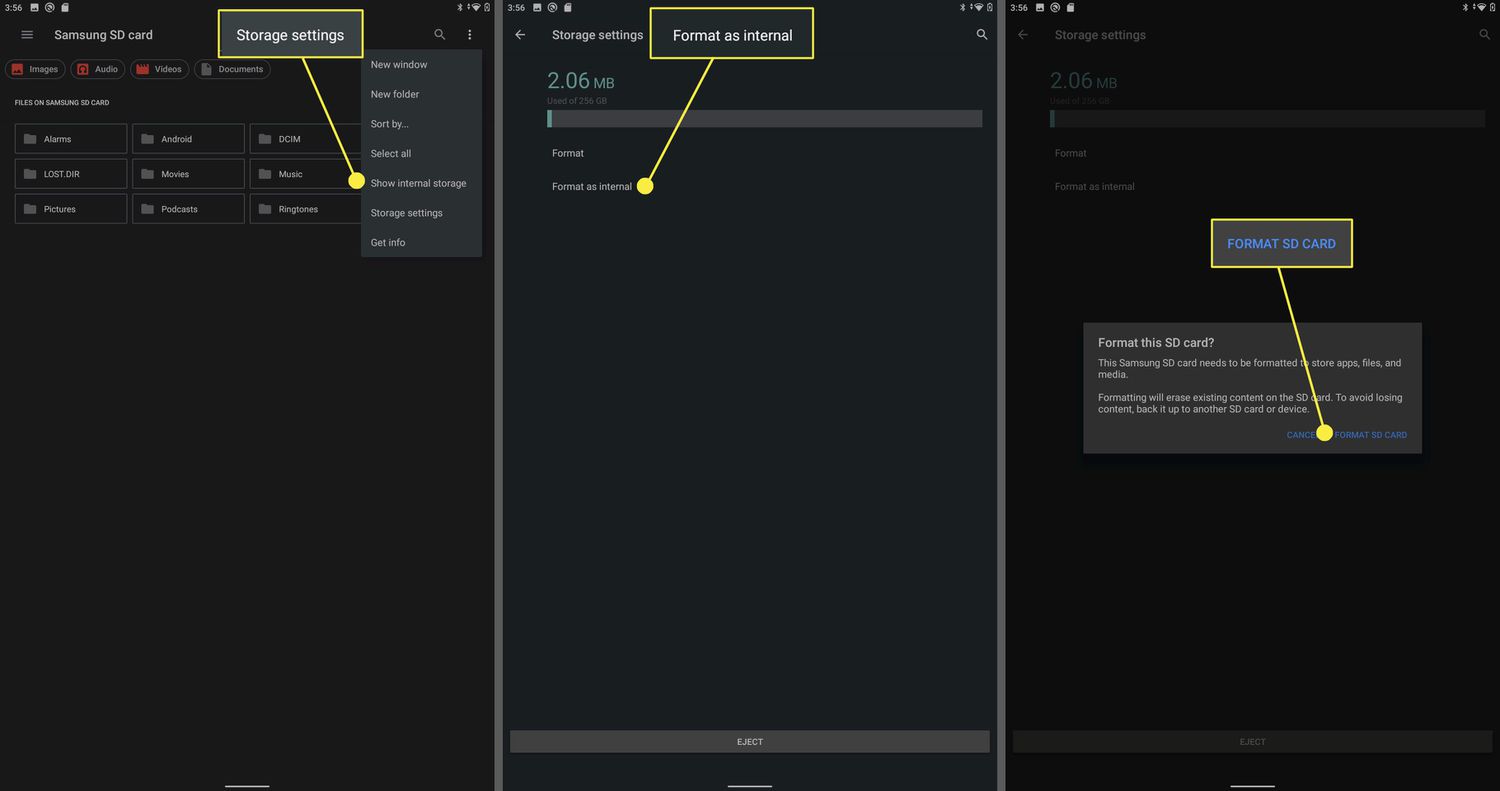
- Access the settings: Open the settings menu on your Samsung tablet. You can usually find it by swiping down from the top of the screen and tapping the gear-shaped icon.
- Navigate to Storage: In the settings menu, look for the “Storage” or “Device Care” option. The exact name may vary depending on your tablet model and Android version.
- Select the SD card: Once you’re in the storage settings, you should see a list of available storage options. Tap on the SD card option to access its specific settings and information.
- Tap on Format: Within the SD card settings, you will find an option to format the card. Tap on it to begin the formatting process.
- Confirm the formatting: A warning message will appear, informing you that formatting will erase all data on the SD card. Make sure you have backed up any important files before proceeding. If you’re ready to proceed, tap on “Format” or “Erase” to confirm.
- Wait for the process to complete: The formatting process may take a few moments. Your tablet will indicate the progress, and once it’s done, you will receive a notification.
Formatting the SD card ensures that it is properly prepared for use with your Samsung tablet. It creates a file system that is compatible with your device and enables you to store files and install apps on the SD card. Now that your SD card is formatted, it’s time to move on to the next step: setting the SD card as the default storage option.
Step 4: Setting the SD Card as Default Storage
Setting the SD card as the default storage option on your Samsung tablet allows you to save new files, install apps, and capture photos and videos directly to the SD card. This helps free up space on your tablet’s internal storage and ensures that your SD card is utilized to its fullest potential. Follow these steps to set the SD card as the default storage:
- Access the settings: Open the settings menu on your Samsung tablet by swiping down from the top of the screen and tapping the gear-shaped icon.
- Navigate to Storage: Look for the “Storage” or “Device Care” option in the settings menu, depending on your tablet model and Android version.
- Tap on the SD card: Within the storage settings, you should see the option for the SD card. Tap on it to access its specific settings and information.
- Select “Storage settings”: In the SD card settings, you will find an option labeled “Storage settings” or “Storage configuration.” Tap on it to proceed.
- Choose “SD card”: On the storage settings screen, you will see the available storage options. Choose the “SD card” option to set it as the default storage.
- Confirm your selection: A confirmation message will appear, informing you that setting the SD card as the default storage will use it for new photos, videos, and app installations. Tap on “Confirm” or “OK” to finalize your selection.
By setting the SD card as the default storage option, you ensure that new files and apps are automatically saved to the SD card instead of the tablet’s internal storage. This helps manage storage space more efficiently and allows you to make the most of your SD card’s capacity. Now that you have set the SD card as the default storage, let’s move on to the next step: moving existing files to the SD card.
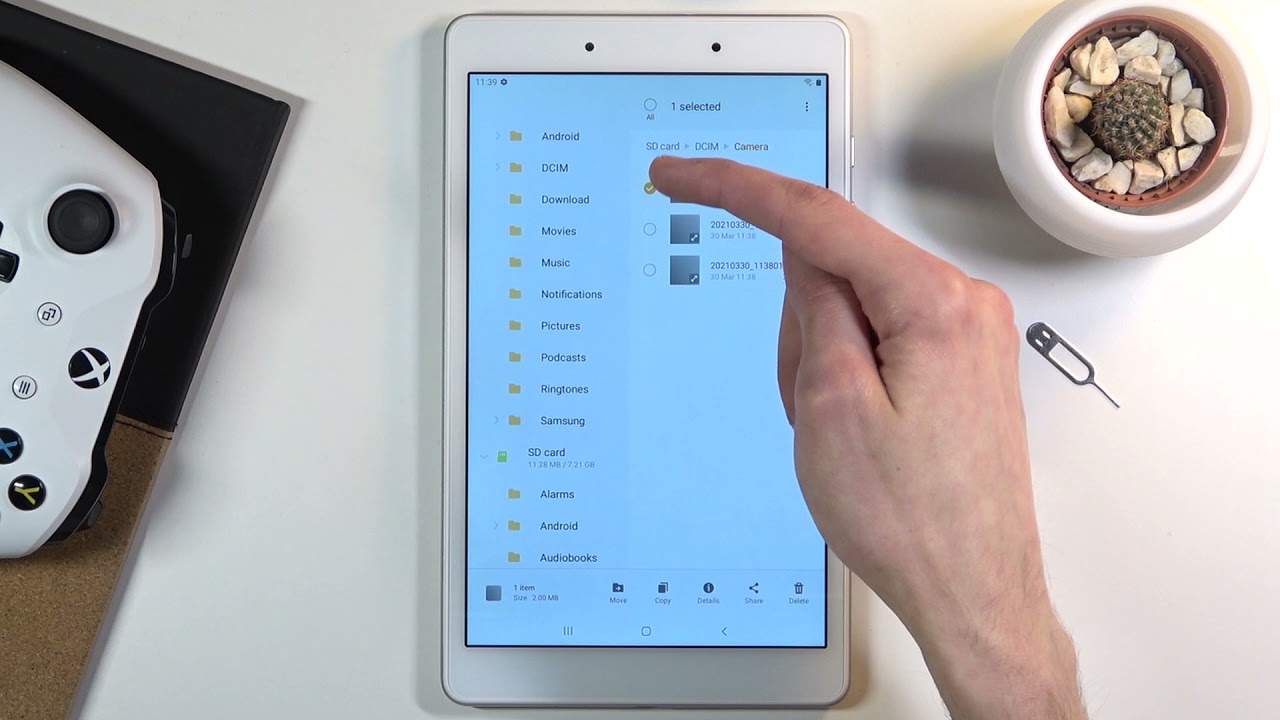
Step 5: Moving Files to the SD Card
Now that the SD card is set as the default storage on your Samsung tablet, it’s time to transfer existing files from the internal storage to the SD card. This will help free up space on your tablet and ensure that your files are safely stored on the expandable memory. Follow these steps to move files to the SD card:
- Open the Files app: Locate the “Files” app on your Samsung tablet. It is the default file manager app and is usually represented by a folder icon.
- Choose the files to transfer: Browse through your internal storage and select the files you want to move to the SD card. You can choose individual files, multiple files, or entire folders.
- Tap on “Move” or “Cut”: Once you have selected the files, tap on the “Move” or “Cut” option. This will initiate the process of moving the selected files from the internal storage to the SD card.
- Navigate to the SD card: In the file selection menu, navigate to the SD card to choose the destination folder where you want to move the files. You can create a new folder on the SD card if needed.
- Confirm the file transfer: After selecting the destination folder, tap on “Move” or “Paste” to confirm the file transfer. The files will be moved from the internal storage to the SD card.
- Verify the file transfer: Once the file transfer is complete, you can go to the SD card folder and verify that the files are successfully moved. They will no longer be present in the original location in the internal storage.
By moving files to the SD card, you can free up valuable space on your tablet’s internal storage and keep your files safe and organized. Remember to regularly check the internal storage and move files to the SD card as needed to maintain optimal storage capacity. With your files successfully moved to the SD card, let’s move on to the next step: managing your SD card.
Step 6: Managing Your SD Card
Managing your SD card is crucial for maintaining its performance and maximizing its storage capacity on your Samsung tablet. Here are some tips and techniques to effectively manage your SD card:
- Regularly check storage usage: Keep an eye on the storage usage of your SD card. This will help you identify any unnecessary or large files that may be taking up valuable space.
- Delete unwanted files: If you come across files on your SD card that you no longer need, make sure to delete them. This will free up space for new files and keep your SD card organized.
- Move apps to the SD card: Some apps can be moved from the internal storage to the SD card. This can be done by going to the app’s settings in the Application Manager and selecting the “Move to SD card” option if available.
- Backup your SD card: It’s always a good idea to back up the files on your SD card. Regularly transfer important files to another storage device or use a cloud storage service to ensure that you have a copy in case of any data loss or SD card failure.
- Handle with care: When removing or inserting the SD card, make sure to power off your tablet first. Additionally, avoid touching the gold contacts on the SD card, as any damage to these contacts can lead to connectivity issues.
- Update firmware: Keep your tablet’s firmware up to date. Firmware updates often include improvements and bug fixes that can enhance the performance and compatibility of your tablet with the SD card.
By following these tips and techniques, you can effectively manage your SD card and ensure that it performs optimally for the long term. Regular maintenance and organization will help you make the most of your device’s expanded storage capacity. Now that you are familiar with managing your SD card, you have successfully completed all the steps in utilizing the SD card on your Samsung tablet!
Conclusion
Congratulations! You have learned how to make the most of your Samsung tablet’s SD card slot. By checking compatibility, inserting the SD card, formatting it, setting it as the default storage option, moving files to the SD card, and managing it effectively, you have expanded your device’s storage capacity and improved its performance.
An SD card allows you to store more apps, photos, videos, and files without worrying about running out of space on your tablet’s internal storage. With the flexibility and convenience of an SD card, you can enjoy uninterrupted access to your favorite content and capture memorable moments without limitations.
Remember to regularly check the compatibility of your tablet with an SD card, follow the correct steps for inserting and formatting the SD card, and set it as the default storage option. Be mindful of managing your SD card by moving files, deleting unwanted data, and backing up important files to ensure the optimal use of your tablet’s storage capacity.
Now that you are equipped with the knowledge and steps to utilize the SD card on your Samsung tablet, you can take full advantage of the additional storage and enjoy a seamless experience with your device. Whether it’s for work, entertainment, or staying connected, your Samsung tablet is ready to fulfill your needs with the added convenience and capacity provided by the SD card.
So go ahead, unlock the full potential of your Samsung tablet with an SD card, and embark on an incredible journey of productivity, creativity, and enjoyment!