Introduction
Welcome to the world of tablets, where you can enjoy the convenience of a portable device that allows you to browse the internet, stream movies, play games, and so much more. However, as you use your tablet for various tasks, you may notice that it starts to slow down and struggle to keep up with your demands. The culprit behind this sluggishness is often insufficient RAM (Random Access Memory).
RAM plays a vital role in the performance of your tablet. It is the temporary storage space that allows the device to run multiple apps and processes simultaneously. When RAM becomes limited, your tablet may experience lags, freezes, and even crashes. Fortunately, there are ways to increase the RAM on your tablet and optimize its performance.
In this article, we will explore various methods to boost the RAM on your tablet. Whether you have an Android or iOS device, these tips and tricks are applicable to most tablets. By implementing these techniques, you can enjoy a smoother and faster tablet experience.
Before we delve into the solutions, it’s important to note that increasing RAM on a tablet is not the same as physically adding more RAM. Unlike desktop computers, tablets generally have fixed hardware specifications, including a limited amount of RAM. Therefore, the methods we will discuss focus on optimizing the existing resources and freeing up memory.
So, if you’re ready to give your tablet a performance boost, let’s dive into the various ways you can increase RAM and unleash its full potential!
Understanding RAM
Before we explore the methods to increase RAM on your tablet, let’s take a moment to understand what RAM actually is and how it affects your device’s performance.
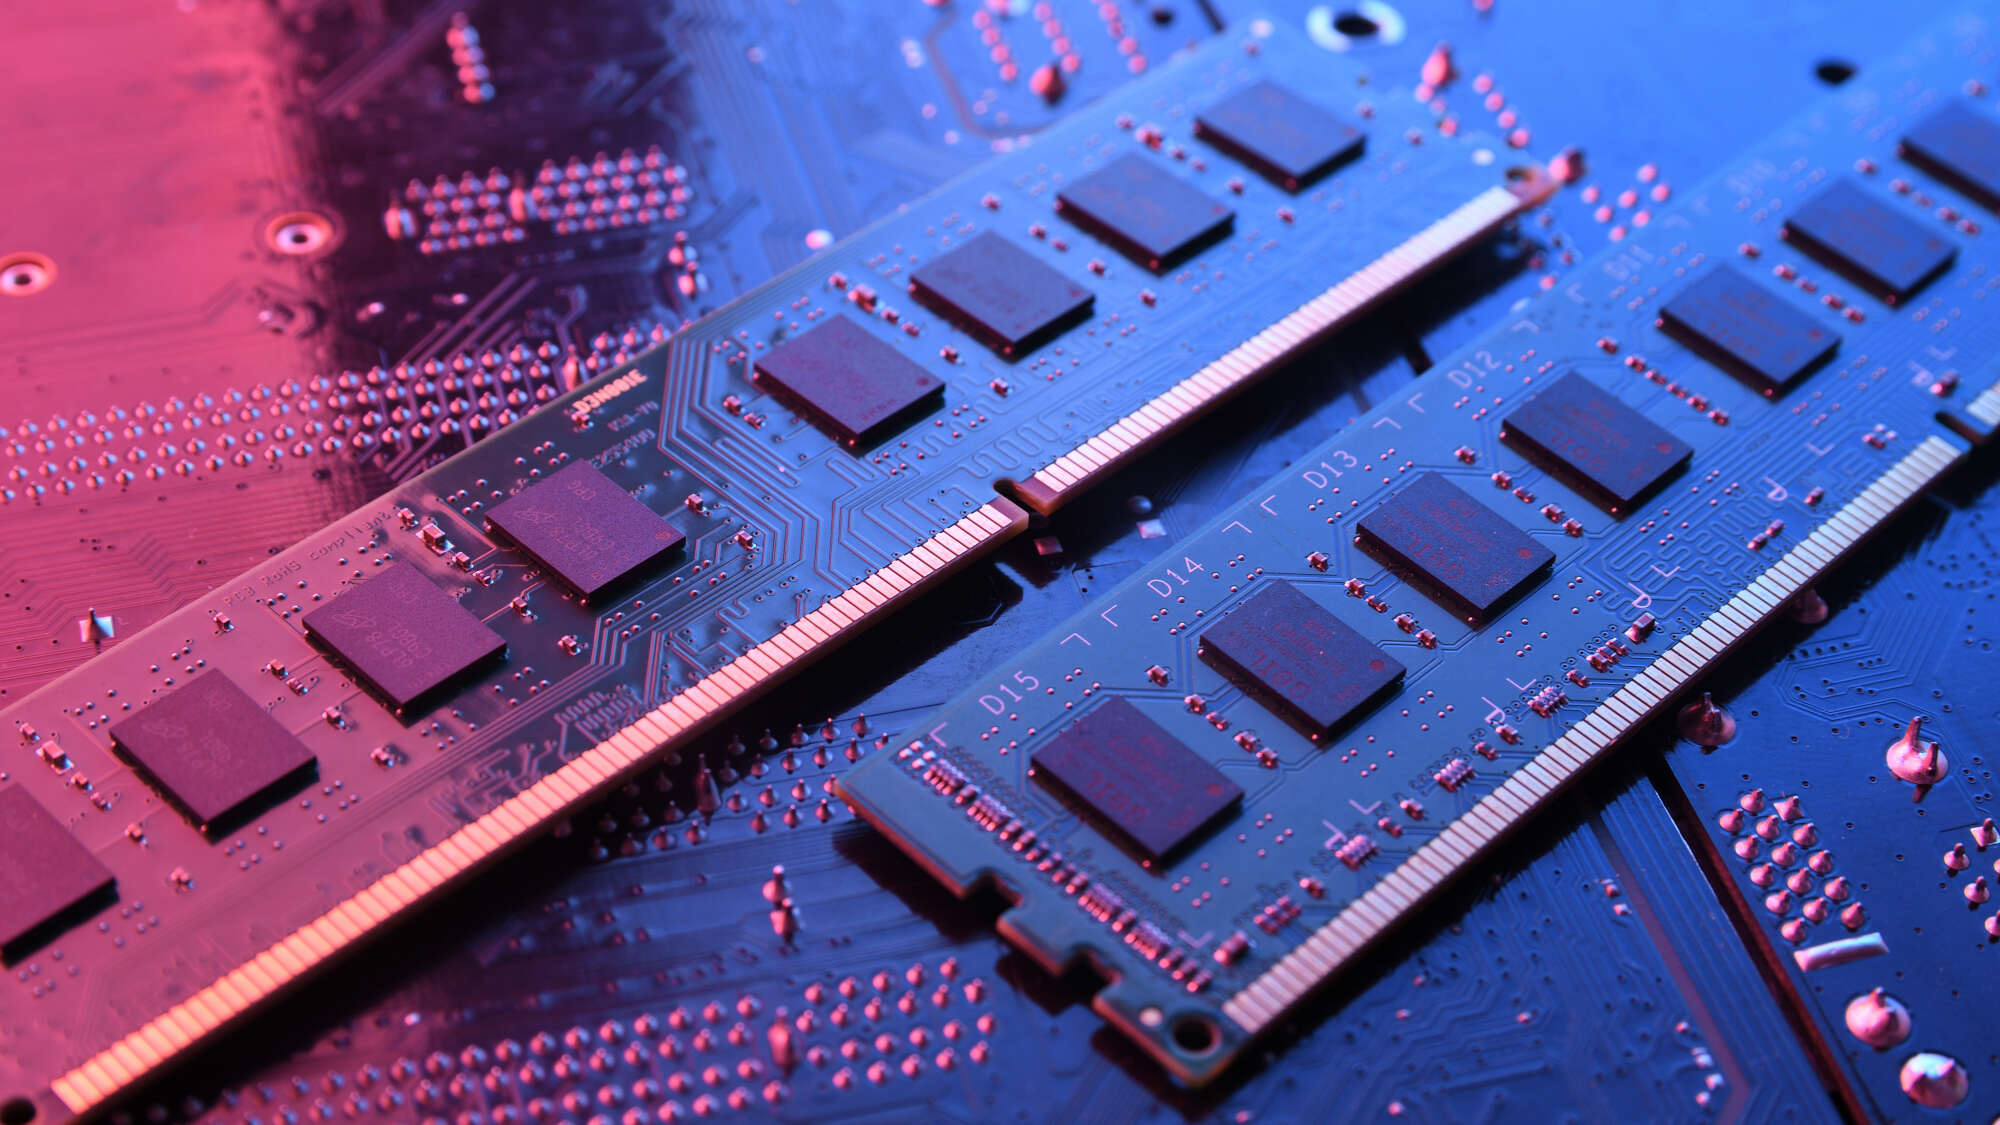
RAM, or Random Access Memory, is the temporary storage space in your tablet that holds data and instructions that the processor needs to access quickly. It acts as a bridge between the processor and the storage, enabling fast and efficient data retrieval. Think of RAM as a workspace where your tablet’s operating system and apps can temporarily store and access information as needed.
When you open an app or perform any task on your tablet, the relevant data is loaded into RAM. The more RAM your tablet has, the more data it can store in its working memory. This allows for seamless multitasking and smoother app performance.
However, if your tablet has limited RAM, it can lead to performance issues. When the available RAM gets filled up, the tablet has to start swapping data back and forth between RAM and the internal storage, which is significantly slower. This process, known as “swapping” or “paging,” can cause delays and make your tablet feel sluggish.
It’s important to note that RAM is different from the storage capacity of your tablet, such as the internal storage or an external SD card. RAM is used for temporary data storage, while storage capacity is where your files, apps, and operating system are stored long-term.
To put it simply, RAM directly impacts the speed and efficiency of your tablet. The more RAM your device has, the better it can handle multiple tasks simultaneously without experiencing a performance bottleneck.
Now that you have a basic understanding of RAM and its role in tablet performance, let’s delve into the methods you can use to increase the available RAM on your device and optimize its overall performance.
Why Increase RAM on a Tablet?
Now that we understand the importance of RAM in a tablet’s performance, let’s explore why you should consider increasing the RAM on your device.
1. Improved Multitasking: Increasing the RAM on your tablet allows you to multitask more efficiently. With more RAM, you can run multiple apps simultaneously without experiencing slowdowns or crashes. This is especially useful if you regularly use resource-intensive apps or perform tasks that require a lot of processing power.
2. Enhanced App Performance: Insufficient RAM can result in sluggish app performance. By increasing the RAM, you provide your tablet with the necessary resources to store and access app data quickly. This leads to smoother app launches, faster response times, and an overall improved user experience.
3. Reduced Lag and Freezing: One of the frustrating experiences on a tablet is when it starts lagging or freezing during use. This can be caused by low RAM availability. By increasing the RAM, you reduce the chances of lags and freezes, ensuring a more seamless and enjoyable tablet experience.
4. Better Gaming Experience: Gaming on a tablet can be a lot of fun, but it requires a significant amount of RAM to run graphics-intensive games smoothly. By increasing the RAM, you provide your device with the necessary resources to handle demanding games, resulting in improved frame rates, reduced loading times, and an overall enhanced gaming experience.
5. Future-Proofing: As technology progresses, new apps and software updates often require more resources to run smoothly. By increasing the RAM on your tablet, you future-proof your device, ensuring that it can handle the upcoming advancements and updates without compromising on performance.
Overall, increasing the RAM on your tablet can significantly enhance its performance and ensure that it keeps up with your demands. Whether you use your tablet for work, entertainment, or a combination of both, having sufficient RAM is essential for smooth and efficient operation.
Now that we understand the benefits of increasing RAM on a tablet, let’s explore the various methods you can use to accomplish this and optimize your device’s performance.
Restart Your Tablet
One of the simplest and often overlooked methods to increase the available RAM on your tablet is to restart it. Restarting your device helps clear the RAM by closing all running apps and processes, freeing up memory for better performance. Here’s how you can do it:
1. Close all apps: Before restarting your tablet, make sure to close all apps running in the background. This ensures that no unnecessary processes are consuming RAM resources.
2. Press and hold the power button: Locate the power button on your tablet and press and hold it until the power menu appears on the screen. The location of the power button may vary depending on your tablet’s make and model.
3. Select “Restart” or “Reboot”: From the power menu, select the option to restart or reboot your tablet. This will initiate the restarting process.
4. Wait for the tablet to restart: Allow your tablet to complete the restart process. This may take a few moments, but once it’s done, your device will boot up with a fresh state and a cleared RAM.
Restarting your tablet periodically can help alleviate performance issues caused by excessive RAM usage. It clears out any temporary files and memory leaks that can accumulate over time. Additionally, restarting can resolve minor software glitches that may be impacting the overall performance of your tablet.
Make it a habit to restart your tablet at least once a week or whenever you notice a significant drop in performance. This will ensure that your tablet’s RAM is refreshed and ready to handle your tasks efficiently.
Incorporating this simple step into your tablet maintenance routine can go a long way in improving its performance. However, if restarting your tablet doesn’t provide the desired boost in RAM, don’t worry. There are more methods to explore, and we’ll cover them in the upcoming sections.
Close Unnecessary Apps and Processes
One of the most effective ways to increase the available RAM on your tablet is by closing unnecessary apps and processes. Many times, we leave apps running in the background, consuming valuable system resources. By closing these apps, you can free up RAM and improve your tablet’s performance. Here’s how you can do it:
1. Open the app switcher: On most Android devices, you can access the app switcher by tapping the square or recent apps button at the bottom of the screen. On iOS devices, double-press the home button or swipe up from the bottom of the screen and pause in the middle until the app switcher appears.
2. Swipe away or close apps: In the app switcher, you’ll see a list of all the apps currently running in the background. Swipe horizontally or vertically (depending on your device) to dismiss or close the apps you no longer need.
3. Clear recent apps: Some Android devices offer a “clear all” or “close all” button in the app switcher. Tapping this button will close all the apps at once, freeing up significant amounts of RAM.
Additionally, you can also close background processes and services that may be running on your tablet. Here’s how:
1. Go to the Settings menu: Open the Settings app on your tablet, usually represented by a gear icon.
2. Find “Apps” or “Applications”: Look for the section in the Settings menu that lists all the installed apps on your tablet.
3. Select a specific app: Tap on an app that you no longer need or use frequently.
4. Force stop or disable: In the app settings, you’ll find options to “Force Stop” or “Disable” the app. Force stopping will immediately stop the app’s background processes, while disabling will prevent the app from running altogether.
By closing unnecessary apps and stopping background processes, you can reclaim RAM that was previously occupied by these idle applications. This allows your tablet to allocate more resources to the apps you actively use, resulting in improved performance and responsiveness.
Remember to only close apps and processes that you are familiar with and confident in closing. Closing essential system processes or apps that provide important functionality may cause issues with your tablet’s operation.
Next, let’s explore another method to increase RAM on your tablet – clearing the cache.
Clear Cache
Clearing the cache can help increase the available RAM on your tablet by removing temporary files and data that can build up over time. These files are stored in the cache to help improve app performance, but they can also consume valuable memory. Clearing the cache can help optimize your tablet’s performance. Here’s how you can do it:
1. Open the Settings menu: Go to the Settings app on your tablet, typically represented by a gear icon.
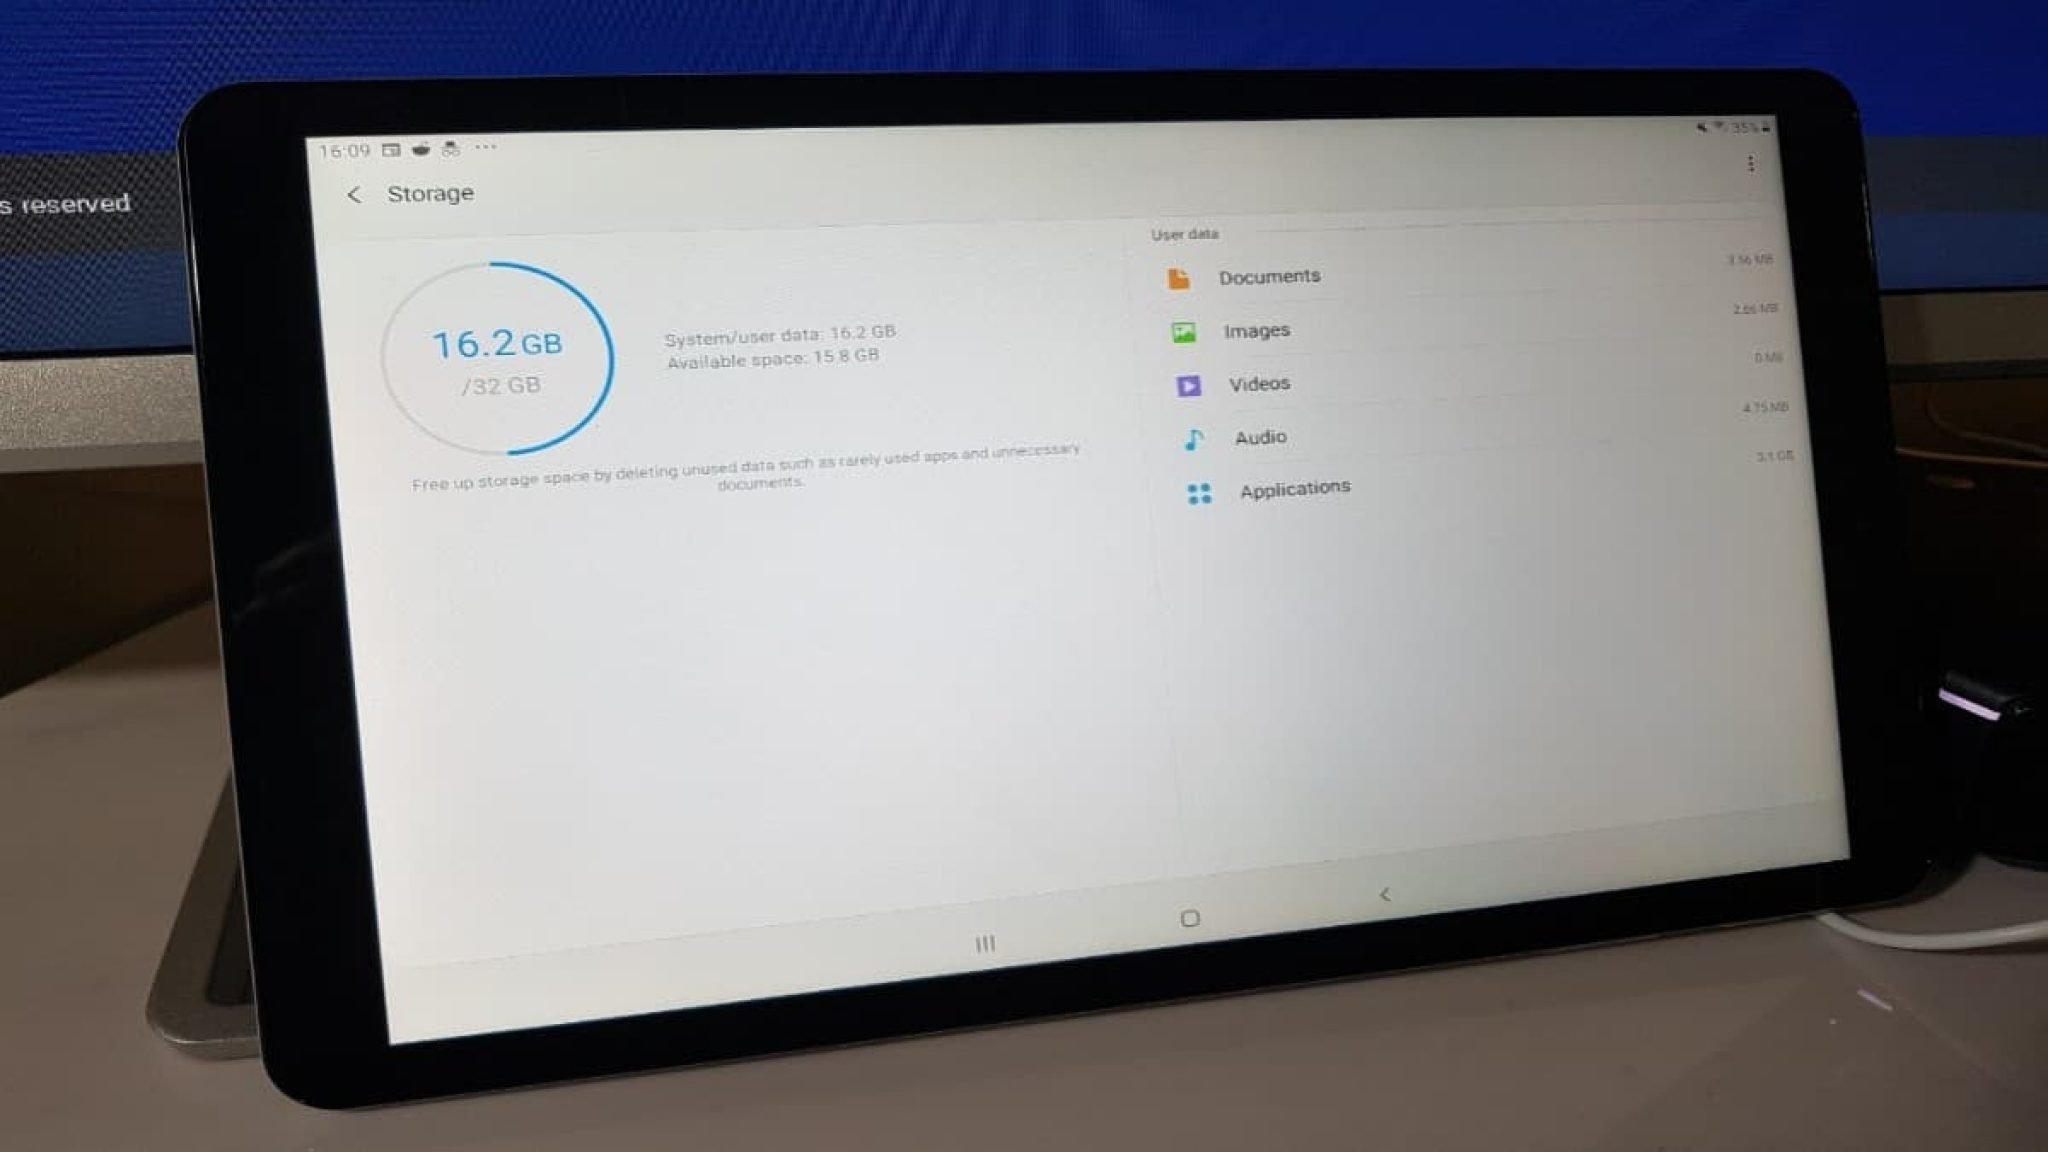
2. Find “Storage” or “Storage & USB”: Look for the section in the Settings menu that pertains to storage settings.
3. Clear the cache: Within the storage settings, you should find an option to clear the cache. Tap on it to initiate the clearing process.
4. Confirm the action: A prompt may appear seeking confirmation to clear the cached data. Confirm the action to proceed.
Clearing the cache removes temporary files, app data, and other unnecessary files that can clog up your tablet’s memory. By doing so, you can free up valuable space and improve the RAM availability.
Alternatively, you can also clear the cache for individual apps. Follow these steps:
1. Go to the Settings menu: Open the Settings app on your tablet.
2. Find “Apps” or “Applications”: Locate the section in the Settings menu that lists all the installed apps on your tablet.
3. Select a specific app: Tap on an app that you want to clear the cache for.
4. Clear cache: In the app settings, you should find an option to clear the cache specifically for that app. Tap on it to clear the cache.
By clearing the cache, you remove temporary files associated with specific apps, which can help boost their performance and free up additional RAM.
It’s worth noting that after clearing the cache, some apps may take slightly longer to launch the first time you use them, as they need to rebuild the cache. However, subsequent launches should be faster and more responsive.
Clearing the cache periodically, especially for apps that you frequently use and those that tend to store a large amount of cache data, can help maintain optimal tablet performance.
Next, let’s explore another method to increase RAM on your tablet, which involves disabling or uninstalling unused apps.
Disable or Uninstall Unused Apps
One of the most effective ways to increase the available RAM on your tablet is by disabling or uninstalling unused apps. Many tablets come preloaded with various apps that you may never use, and these apps can consume valuable system resources. By disabling or removing these unused apps, you can free up RAM and optimize your tablet’s performance. Here’s how:
1. Open the Settings menu: Go to the Settings app on your tablet, typically represented by a gear icon.
2. Find “Apps” or “Applications”: Look for the section in the Settings menu that lists all the installed apps on your tablet.
3. Select an app to disable or uninstall: Tap on an app that you no longer need or use frequently.
4. Disable the app: In the app settings, you should find an option to disable the app. Disabling an app will stop it from running in the background and consuming RAM. This option may not be available for all apps, especially system apps that are critical for the proper functioning of your tablet.
5. Uninstall the app: If disabling is not an option, you can choose to uninstall the app altogether. This completely removes the app from your tablet, freeing up valuable storage space and RAM.
Repeat these steps for all the unused apps on your tablet. By doing so, you can declutter your device, reduce RAM usage, and create a more streamlined tablet experience.
It’s important to note that disabling or uninstalling certain system apps or apps that are essential for the proper functioning of your tablet may cause unintended issues. Exercise caution when disabling or uninstalling apps, and only remove those that you are sure are unnecessary or unwanted.
Regularly reviewing your installed apps and removing any that you no longer need or use can help keep your tablet’s resources optimized. It’s a good practice to periodically assess your app usage and make adjustments to ensure that your tablet’s RAM is being utilized efficiently.
Now that we’ve explored how to disable or uninstall unused apps, let’s move on to the next method to increase RAM on your tablet – adjusting animation and transition settings.
Adjust Animation and Transition Settings
Another method to increase the available RAM on your tablet is by adjusting animation and transition settings. By reducing or disabling these visual effects, you can free up system resources and allocate more RAM to the apps and processes that matter most. Here’s how you can do it:
1. Open the Settings menu: Go to the Settings app on your tablet, typically represented by a gear icon.
2. Find “About phone” or “About tablet”: Look for the section in the Settings menu that provides information about your device.
3. Locate “Build number” or “Software information”: Scroll down and find the “Build number” or “Software information” section. This section may be located under “System” or something similar.
4. Enable Developer options: Tap on the “Build number” or “Software information” multiple times (usually around 7 times) until a message appears, indicating that you have enabled Developer options.
5. Go back to the main Settings menu: Once you have enabled Developer options, go back to the main Settings menu.
6. Find “Developer options”: Look for the newly unlocked “Developer options” section in the Settings menu. It should appear above or below the “About phone” or “About tablet” section.
7. Disable or reduce animation and transition scales: Within the “Developer options” menu, you’ll find options to adjust animation and transition scales. Look for “Window animation scale,” “Transition animation scale,” and “Animator duration scale.” By default, these settings are usually set to 1x or higher. Reduce or disable them to reduce the visual effects and improve performance. For example, setting them to 0.5x or turning them off completely can speed up the transitions and reduce RAM usage.
By adjusting these settings, you can minimize the visual effects and transitions that can consume RAM resources. This allows your tablet to allocate more memory to running apps and processes, resulting in improved performance and responsiveness.
Keep in mind that reducing animation and transition settings will make the user interface appear snappier but may sacrifice some visual appeal. Experiment with different settings to find the balance that works best for you.
Now that we’ve covered adjusting animation and transition settings, let’s move on to the next method – using a task killer app.
Use a Task Killer App
Using a task killer app is another method to increase the available RAM on your tablet and improve its performance. These apps help you identify and close resource-hogging processes and apps, freeing up memory in the process. Here’s how you can use a task killer app:
1. Install a task killer app: Search for a reliable task killer app on your app store and install it on your tablet. There are many options available, such as Task Manager, Advanced Task Killer, or Greenify.
2. Launch the task killer app: Open the task killer app on your tablet.
3. Identify resource-intensive apps and processes: The task killer app will provide you with a list of running apps and processes. Look for apps or processes that are consuming a significant amount of RAM.
4. Close unnecessary apps: Select the apps that you no longer need or that are using excessive resources and tap on the “Kill” or “End” button to close them. This action will terminate the selected apps and free up RAM.
5. Configure auto-killing settings (optional): Some task killer apps allow you to configure auto-killing settings. These settings automatically close or prevent certain apps from running in the background, optimizing RAM usage. Customize these settings according to your preferences and device specifications.
Using a task killer app offers a convenient way to manage your tablet’s memory and ensure that resources are allocated efficiently. However, it’s important to note that task killer apps may not always be necessary, as modern operating systems have built-in mechanisms to manage app processes and allocate RAM effectively.
Before using a task killer app, consider closing apps manually using the app switcher or following the previous methods mentioned in this article. In some cases, task killer apps can inadvertently close essential background processes or interfere with the system’s optimization algorithms.
Always use task killer apps judiciously and be cautious when dealing with system processes. It’s recommended to research and choose a reputable task killer app to ensure proper functionality and compatibility with your tablet’s operating system.
Now that we’ve explored using a task killer app, let’s move on to the next method – installing a RAM optimization app.
Install a RAM Optimization App
Installing a RAM optimization app is another method to increase the available RAM on your tablet and optimize its performance. These apps are specifically designed to identify and close unnecessary background processes, clear cache, and manage RAM usage efficiently. Here’s how you can use a RAM optimization app:
1. Install a RAM optimization app: Search for a reputable RAM optimization app on your app store and install it on your tablet. Some popular options include Clean Master, CCleaner, or RAM Booster.
2. Launch the RAM optimization app: Open the RAM optimization app on your tablet.
3. Run a scan: Use the app’s scanning feature to analyze your tablet’s current RAM usage and identify any unnecessary background processes or cache files.
4. Optimize the RAM: Once the scan is complete, the app will provide you with options to optimize the RAM. This may involve closing unnecessary apps, clearing cache, or freeing up memory by other means.
5. Follow the app’s recommendations: The RAM optimization app will suggest specific actions to improve your tablet’s RAM usage. Follow these recommendations to optimize your device’s performance.
6. Set up automatic optimization (optional): Some RAM optimization apps offer the option to schedule automatic optimization at regular intervals. Consider enabling this feature to ensure your tablet’s RAM is consistently maintained and optimized.
RAM optimization apps can be a quick and convenient way to manage your tablet’s RAM and boost its performance. However, as with task killer apps, it’s important to note that modern operating systems already have built-in mechanisms to manage RAM effectively.
Before using a RAM optimization app, try implementing the previous methods mentioned in this article, such as closing unnecessary apps and adjusting animation settings. These methods can often provide sufficient RAM optimization without the need for additional apps.
It’s essential to choose a reputable RAM optimization app from a trusted developer to ensure the app’s functionality, compatibility, and reliability. Research and read reviews before installing any RAM optimization app to make an informed decision.
Now that we’ve explored using a RAM optimization app, let’s move on to the next method – using an SD card as virtual RAM.
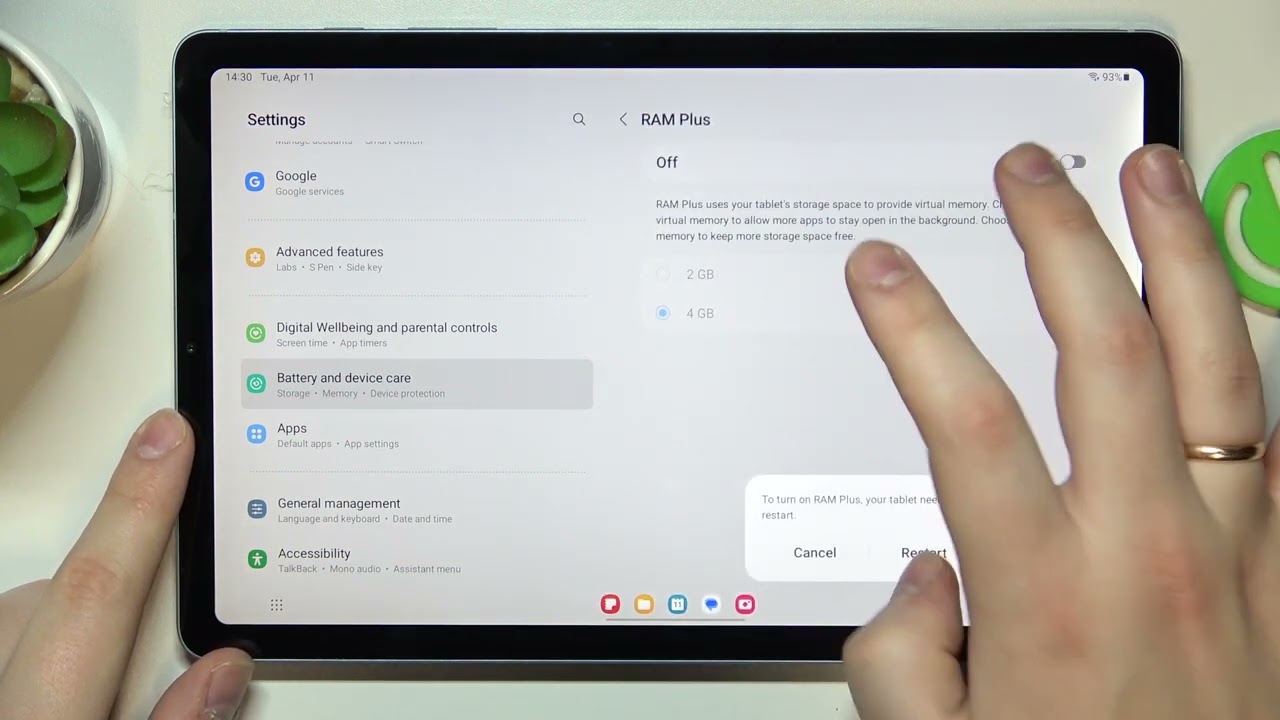
Use an SD Card as Virtual RAM
If your tablet has limited internal RAM, you can expand its memory by using an SD card as virtual RAM. By configuring your tablet to utilize the SD card as additional memory, you can improve the device’s multitasking capabilities and overall performance. Here’s how you can use an SD card as virtual RAM:
1. Insert the SD card: Ensure that your tablet supports expandable storage via SD card and insert the SD card into the appropriate slot.
2. Format the SD card (if required): If the SD card is brand new or has not been formatted for use with your tablet, go to the Settings menu, find the Storage or Storage & USB section, and format the SD card as internal storage. This process may vary depending on your tablet’s operating system and manufacturer.
3. Enable Adoptable Storage (if available): If your tablet offers the Adoptable Storage feature, you can treat the SD card as an extension of your internal storage. This ensures that the SD card is used seamlessly to augment the tablet’s RAM. To enable this feature, go to the Settings menu, find the Storage or Storage & USB section, and follow the instructions to set up Adoptable Storage.
4. Allocate space for virtual RAM: If your tablet does not offer Adoptable Storage or you prefer to use the SD card solely for virtual RAM, go to the Settings menu, find the Developer options (accessed by tapping the Build number multiple times as explained earlier), and locate the option called “Limit background processes” or “Don’t keep activities.” Set this option to limit the background processes or prevent activities from staying in the background, thereby prioritizing RAM usage.
5. Set the SD card as virtual RAM: To set the SD card as virtual RAM, go to the Settings menu, find the Developer options, locate the option called “Memory” or “Memory management,” and select the option to use the SD card as additional RAM. Follow the on-screen instructions to complete the process.
By using an SD card as virtual RAM, you expand the available memory for your tablet, allowing it to handle more apps and processes simultaneously. This can improve multitasking capabilities, reduce app crashes and slowdowns, and enhance overall performance.
It’s important to note that using an SD card as virtual RAM may result in slightly slower data access compared to internal RAM. Therefore, it is recommended to use a high-speed and reliable SD card to ensure optimal performance.
Now that we’ve covered using an SD card as virtual RAM, let’s move on to the next method – resetting your tablet to factory settings.
Reset Your Tablet to Factory Settings
If your tablet continues to experience performance issues, even after trying various methods to increase RAM, you may consider resetting it to factory settings. Resetting your tablet to its original factory settings erases all data and downloaded apps, providing a fresh start and potentially improving its performance. Here’s how you can reset your tablet:
1. Backup your data: Before proceeding with a factory reset, it’s crucial to back up any important data, such as photos, videos, documents, and app data. You can use cloud storage services, external storage devices, or a computer to create a backup.
2. Open the Settings menu: Go to the Settings app on your tablet, typically represented by a gear icon.
3. Find “Backup & Reset” or “System”: Look for the section in the Settings menu that relates to backup and reset options or general system settings.
4. Factory reset: Within the “Backup & Reset” or “System” section, locate the option to perform a factory reset. The label may vary depending on your tablet’s operating system or manufacturer, but it generally includes the term “reset” or “restore.”
5. Confirm the factory reset: Before proceeding, you will receive a warning about erasing all data. Carefully read the information and confirm your intention to perform the factory reset.
6. Follow the on-screen instructions: The tablet will guide you through the process of resetting it to factory settings. This may involve a series of prompts and possibly entering your device’s lock screen PIN or password.
7. Wait for the tablet to reset: Once initiated, the tablet will begin the process of resetting itself. This can take a few minutes, and the device may restart multiple times. Allow the tablet to complete the reset process without interruption.
After resetting your tablet to factory settings, it will be restored to its original state when you first purchased it. This means that all your data, apps, settings, and accounts will be wiped from the device. You will need to set up your tablet again, reinstall apps, and restore data from the backup you created earlier.
A factory reset can effectively resolve various performance issues, including those related to RAM constraints. However, it should be considered as a last resort, as it completely erases all data and settings on your tablet.
Now that we’ve covered resetting your tablet to factory settings, let’s summarize what we’ve learned in this article and provide some closing thoughts.
Conclusion
In conclusion, increasing the RAM on your tablet can significantly enhance its performance and ensure smoother multitasking. While physical RAM upgrades may not be possible on most tablets, there are various methods you can use to optimize the available RAM and improve overall performance.
We began by understanding the role of RAM in a tablet’s performance and why increasing it is essential. Insufficient RAM can lead to slow performance, lagging, and freezing, making it crucial to explore ways to boost RAM availability.
We discussed simple yet effective methods such as restarting your tablet, closing unnecessary apps and processes, and clearing cache. These methods help free up RAM resources and optimize performance without any additional tools or apps.
Furthermore, we explored more advanced techniques, including adjusting animation and transition settings, using task killer apps, installing RAM optimization apps, utilizing an SD card as virtual RAM, and resetting your tablet to factory settings. These methods provide additional options for managing and optimizing RAM usage to maximize your tablet’s potential.
Remember to exercise caution when using task killer apps and RAM optimization apps, as they may not always be necessary and can interfere with the operating system’s built-in mechanisms for managing resources.
Lastly, if all else fails, resetting your tablet to factory settings can provide a clean slate and potentially resolve persistent performance issues. However, this should be considered a last resort, as it erases all data and customized settings on your tablet.
By implementing these techniques, you can enhance the RAM availability on your tablet and ensure a smoother and more efficient user experience. Experiment with different methods to find the combination that works best for your specific tablet model and usage patterns.
Remember to back up your data before making any significant changes to your tablet’s settings or performing a factory reset to avoid losing important information.
With these tips, you’ll be able to optimize your tablet’s RAM and unleash its full potential, enjoying a seamless and responsive performance for all your browsing, gaming, and multitasking needs.