Introduction
The .htaccess file is a crucial component of managing a website and optimizing its performance. It is a configuration file used by Apache web servers to control various aspects of website functionality, such as redirects, rewrites, password protection, custom error pages, and more.
Understanding how to create and utilize the .htaccess file can greatly enhance a website’s usability, security, and overall performance. In this article, we will explore the basics of creating and utilizing the .htaccess file in PHP, with a focus on various techniques and functionalities that can be implemented to improve website management and user experience.
Whether you are a beginner or an experienced web developer, mastering the use of .htaccess can empower you to take control of your website’s behavior and performance. So, let’s dive in and explore the power and versatility of the .htaccess file and how it can contribute to an exceptional user experience.
What is .htaccess file?
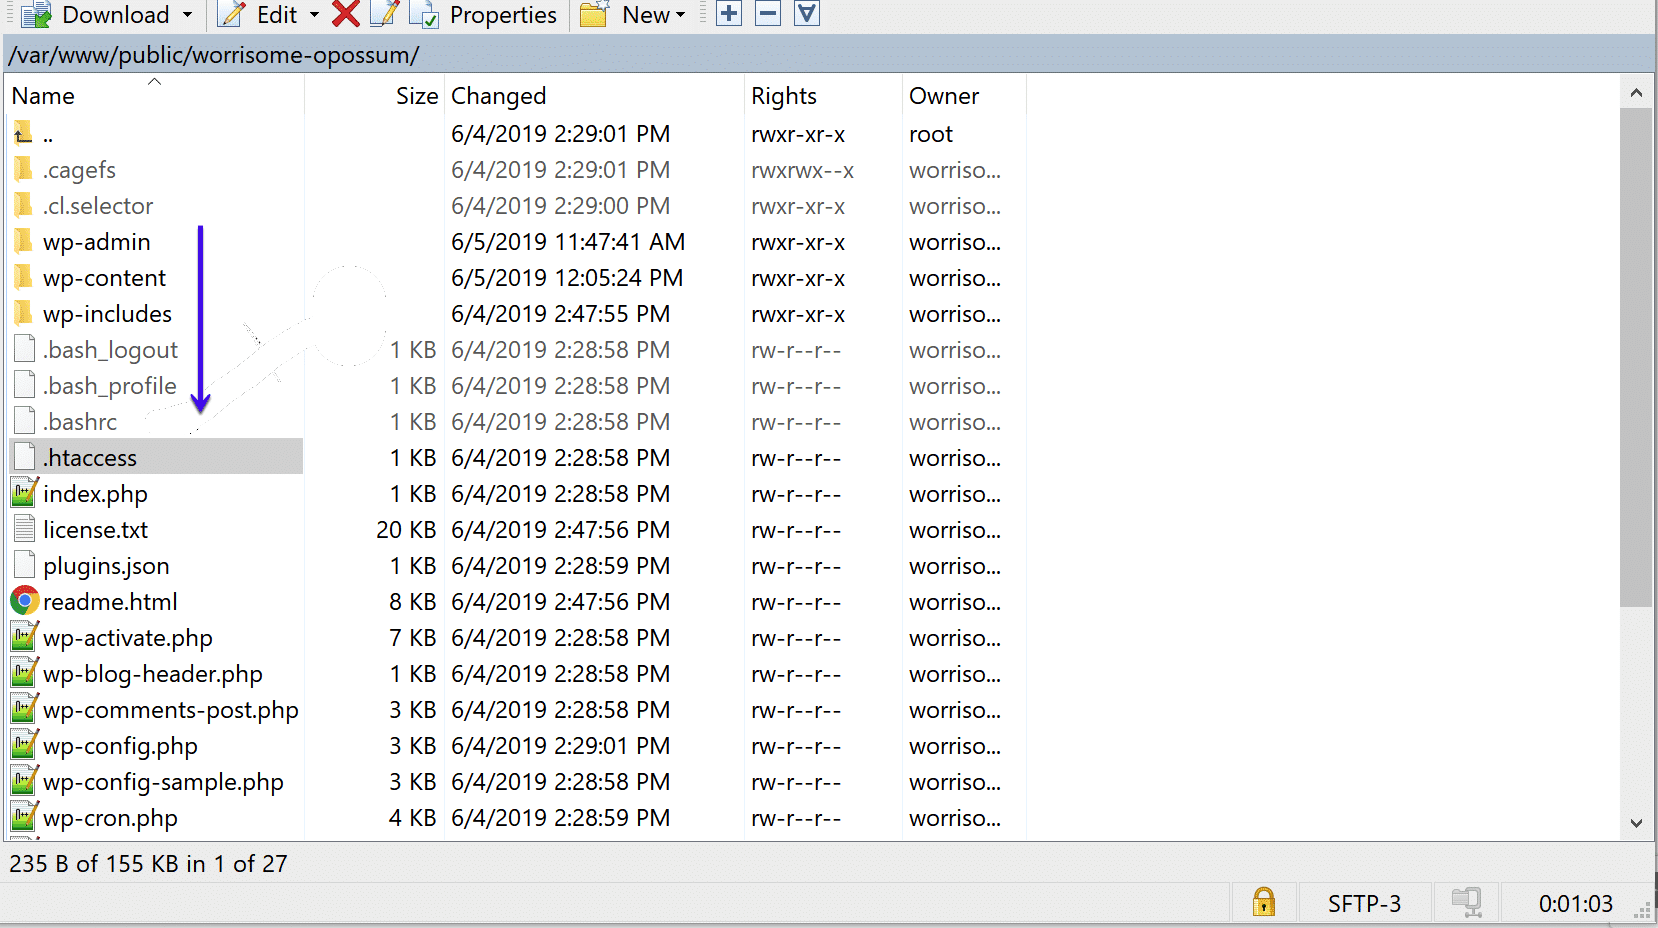
The .htaccess file is a configuration file that is used by the Apache web server to control website behavior on a per-directory basis. It allows webmasters to override the default server configuration settings and define specific rules for their directories. The name “.htaccess” stands for “hypertext access,” and it is a hidden file that resides in the root directory of a website.
The .htaccess file uses a simple and flexible syntax that allows developers to modify various aspects of website functionality. It can be used to implement redirects, rewrites, password protection, custom error pages, MIME types, directory listings, access control, and much more. This makes it an essential tool for managing and enhancing a website’s performance and security.
One of the key advantages of the .htaccess file is that it applies its rules and settings to the directory in which it is located, as well as all subdirectories within it. This means that you can have different configurations for different directories within your website, providing a high level of flexibility and customization options.
It is important to note that the .htaccess file is specific to the Apache web server and is not applicable to other web servers like Nginx or Microsoft IIS. If you are using a different web server, you will need to consult the documentation for that server to determine the equivalent file or configuration method.
In summary, the .htaccess file is an integral part of website management on Apache servers. It allows webmasters to tailor the behavior of their websites, implementing various settings and rules on a per-directory basis. Understanding how to create and utilize the .htaccess file effectively can greatly enhance a website’s functionality, security, and overall user experience.
Creating a .htaccess file
Creating a .htaccess file is a straightforward process. You can create the file using a plain text editor, such as Notepad or Sublime Text. Start by opening a new text file and saving it with the name “.htaccess” (including the dot at the beginning) in the directory where you want the rules to be applied.
Once you have created the file, you can start adding your desired configurations and rules. It is important to note that the .htaccess file uses a specific syntax, so you must correctly format your rules to ensure they are interpreted correctly by the web server.
To begin, let’s consider some common use cases for creating a .htaccess file:
- Redirects: You can use the .htaccess file to set up redirects from one URL to another. This is useful when you have changed the URL structure of your website or need to redirect users from outdated or incorrect URLs.
- Rewrites: URL rewriting is a powerful feature of the .htaccess file that allows you to modify the appearance and behavior of URLs. You can rewrite URLs to make them more user-friendly, concise, and easier to remember.
- Password Protection: The .htaccess file enables you to password protect certain directories on your website, restricting access to authorized users only. This is particularly useful for sensitive areas that contain private information.
- Blocking IP Addresses: If you want to restrict access to your website from specific IP addresses or ranges, the .htaccess file allows you to easily block them. This can be helpful in preventing malicious attacks or unwanted traffic.
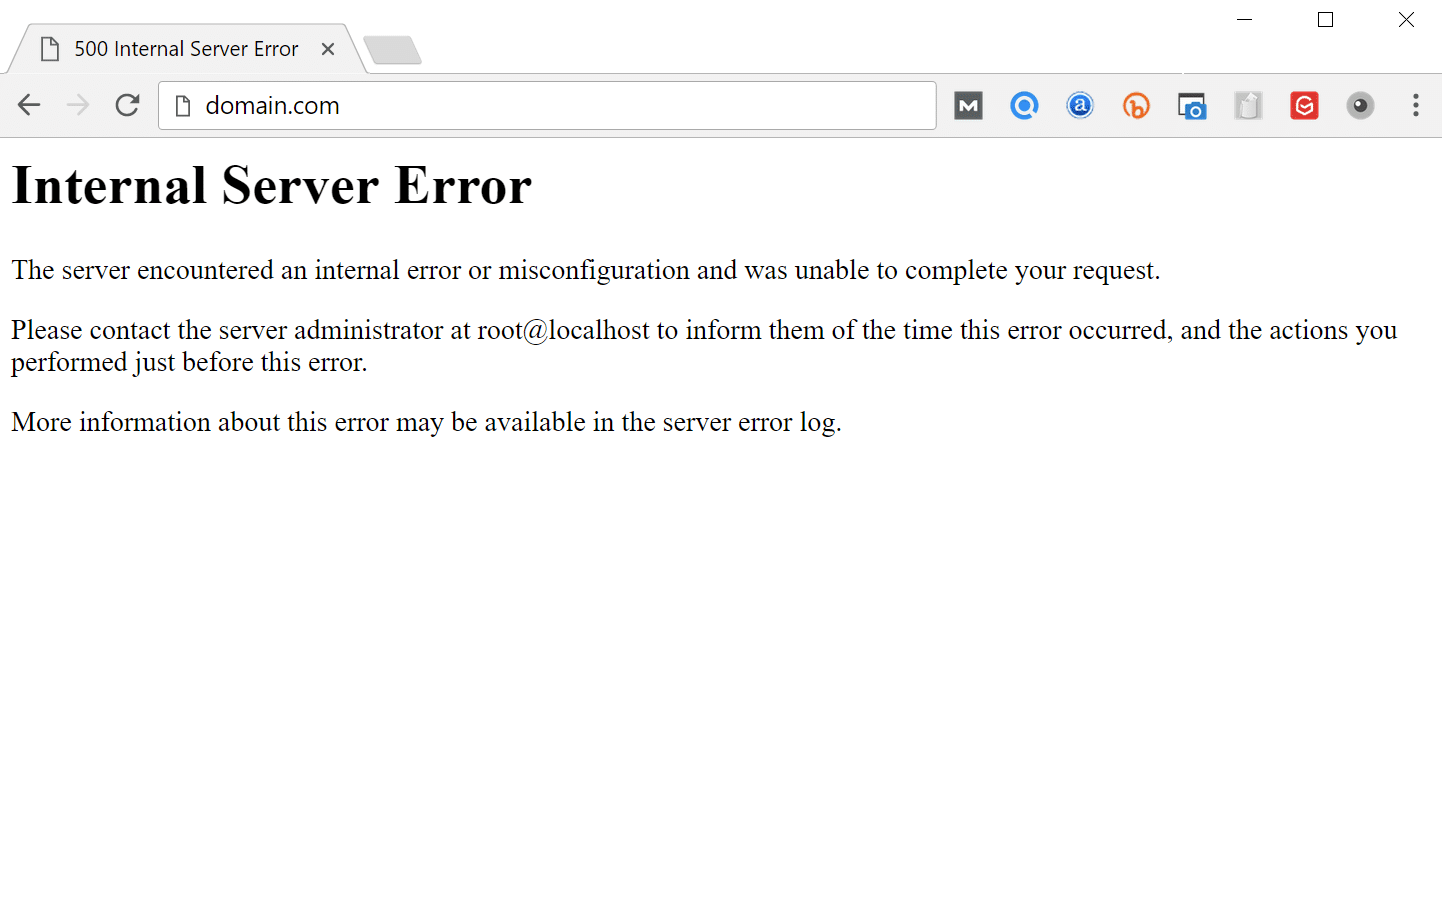
- Custom Error Pages: You can create custom error pages using the .htaccess file, which will be displayed when visitors encounter HTTP errors on your website. This provides a more personalized and informative user experience.
- Optimizing Website Performance: Through the .htaccess file, you can implement various optimizations to improve your website’s performance, such as enabling compression, caching, and browser caching.
These are just a few examples of what you can achieve with the .htaccess file. The possibilities are extensive, and you can experiment with different configurations to suit your specific needs and objectives.
In the next sections, we will dive deeper into the syntax and usage of the .htaccess file, exploring the different functionalities and their implementation.
Basic Syntax
The .htaccess file uses a straightforward syntax that consists of directives and parameters. Directives are instructions that tell the web server how to handle certain aspects of the website, while parameters provide specific values or conditions for the directives.
Each directive in the .htaccess file must be written on a separate line. The syntax is as follows:
[directive] [parameter/s]
For example, let’s consider a redirect directive:
Redirect /old-page.html /new-page.html
In this example, “Redirect” is the directive, and “/old-page.html” and “/new-page.html” are the parameters. This directive tells the server to redirect any requests from the old-page.html URL to the new-page.html URL.
It is important to note that the .htaccess file is case-sensitive, so make sure to use the correct capitalization for directives and parameters. Additionally, comments can be added by using a “#” symbol at the beginning of the line. Comments are ignored by the server and are helpful for documenting your configurations.
Here are a few key aspects to keep in mind when working with the .htaccess syntax:
- Whitespace: Whitespace (spaces, tabs, line breaks) is generally ignored by the server, so you can use it to enhance readability and organize your directives.
- Quotes: Use quotes (“”) around parameters if they contain spaces or special characters. This ensures that they are interpreted correctly by the server.
- Flags: Some directives may have optional flags that modify their behavior. Flags are enclosed in square brackets ([ ]). For example: “RewriteRule pattern substitution [flags]”.
- Regular Expressions: Regular expressions are commonly used to match and manipulate patterns in URLs. They allow for more flexible and powerful rule definitions.
To ensure that your .htaccess file is correctly interpreted by the server, it is important to validate its syntax and encoding. There are various online tools and validators available that can help you validate your .htaccess file and identify any syntax errors or issues.
Now that we have covered the basic syntax of the .htaccess file, let’s explore some of the common functionalities and their usage in the following sections.
Redirects
Redirects are a common use case for the .htaccess file. They allow you to redirect or forward users from one URL to another. This can be useful in scenarios where you have changed the structure of your website, moved content to a new location, or need to redirect traffic from outdated or incorrect URLs.
There are different types of redirects that you can implement using the .htaccess file. Let’s explore a few of the most commonly used ones:
- 301 Redirect: A 301 redirect is a permanent redirect. It informs search engines and web browsers that the requested URL has permanently moved to a new location. This helps to preserve search engine rankings and ensures that users are directed to the correct page. To implement a 301 redirect, you can use the “Redirect” directive with the status code 301. For example:
Redirect 301 /old-page.html /new-page.html
- 302 Redirect: A 302 redirect is a temporary redirect. It indicates that the requested URL has been temporarily moved to a different location. Use a 302 redirect when you expect the original URL to be restored in the future. To implement a 302 redirect, you can use the “Redirect” directive with the status code 302. For example:
Redirect 302 /old-page.html /temporary-page.html
- Wildcard Redirect: A wildcard redirect allows you to redirect multiple URLs that match a specific pattern. This is useful when you want to redirect all pages under a particular directory. You can use the “RedirectMatch” directive with regular expressions to specify the pattern. For example:
RedirectMatch 301 /products/(.*) /new-category/$1
- Redirect to External URL: The .htaccess file also allows you to redirect users to external URLs. This can be handy when you want to direct visitors to a different website or web page. Use the “Redirect” directive and provide the full URL to redirect to. For example:
Redirect /old-page.html http://www.example.com/new-page.html
Redirects are a powerful tool for managing website traffic and ensuring a seamless user experience. By implementing redirects correctly, you can maintain the flow of visitors, avoid broken links, and improve search engine optimization for your website.
Remember to test your redirects thoroughly to ensure they are working as intended. Clear your browser cache and try accessing the old URLs to verify that they are being redirected to the new URLs properly. Additionally, check for any unintended redirect loops that may cause issues.
Now that we have covered redirects, let’s move on to exploring another important functionality of the .htaccess file: rewrites.
Rewrites
Rewrites are a powerful feature of the .htaccess file that allow you to modify the appearance and behavior of URLs on your website. They provide a way to make URLs more user-friendly, concise, and easier to remember, while also enhancing search engine optimization.
The “mod_rewrite” module is responsible for handling URL rewriting in the Apache web server. It uses a flexible and expressive syntax that allows you to define rewrite rules based on regular expressions. These rules redirect or internally rewrite certain URLs without changing the visible URL in the user’s browser.
Let’s explore some of the common use cases for URL rewriting using the .htaccess file:
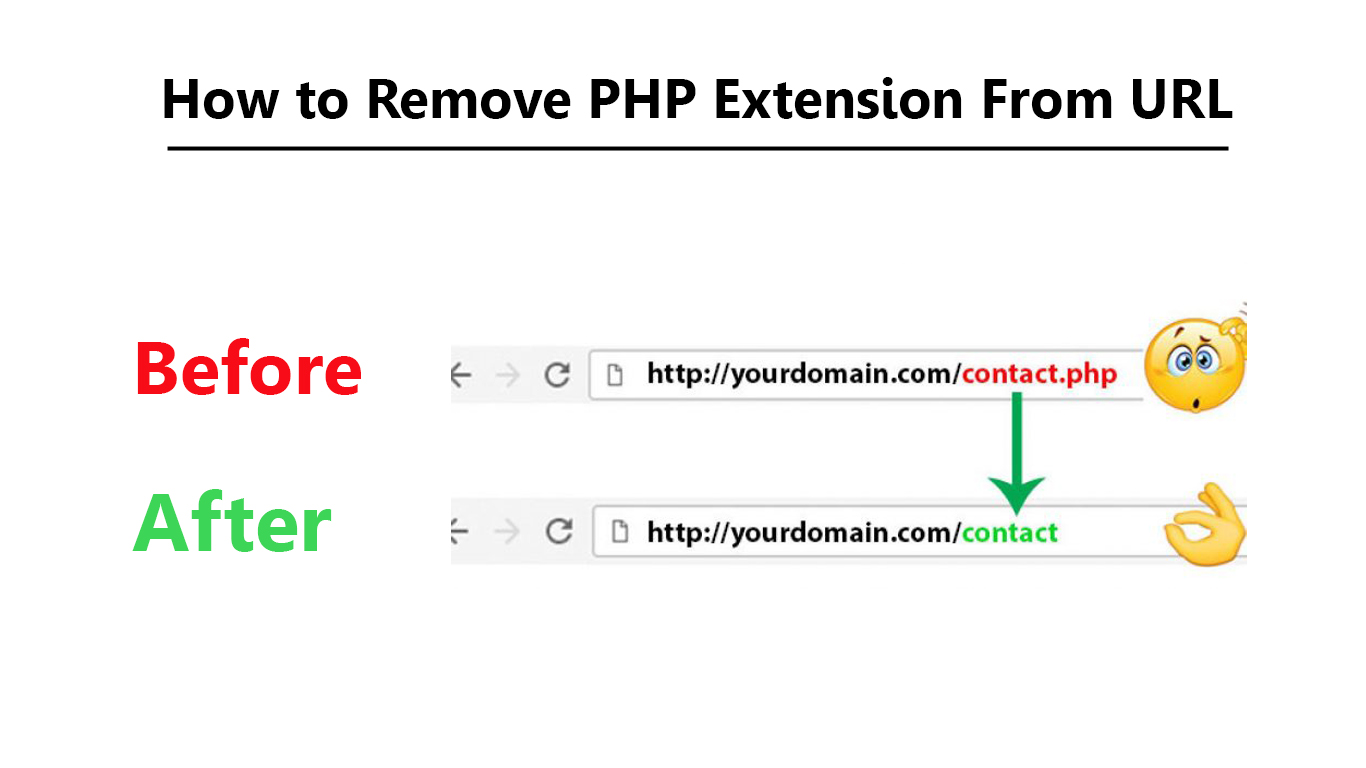
- Remove File Extensions: You can use URL rewriting to remove file extensions such as “.php” or “.html” from your URLs. This can create cleaner and more user-friendly URLs. For example:
RewriteRule ^about$ about.php [L]
- Redirect to a Different File: Rewrites can be used to internally redirect requests to a different file or script. This can be useful when you want to maintain a specific URL structure but handle the request differently behind the scenes. For example:
RewriteRule ^blog/(.*)$ article.php?slug=$1 [QSA,L]
- Implement Vanity URLs: Vanity URLs are customized and memorable URLs that redirect to specific content on your website. You can use URL rewriting to create vanity URLs for marketing purposes or to improve the navigability of your site. For example:
RewriteRule ^promotions$ special-offers.php [L]
- Redirect Non-www to www or Vice Versa: You can use URL rewriting to enforce consistency in your website’s URL structure. Redirecting requests from the non-www version to the www version, or vice versa, can help avoid duplicate content issues and improve search engine optimization. For example:
RewriteCond %{HTTP_HOST} ^example.com$ [NC]
RewriteRule ^(.*)$ http://www.example.com/$1 [R=301,L]
Remember, when using rewrite rules, it is important to handle potential conflicts and ensure the rules do not create infinite loops. You can use conditions (RewriteCond) to specify additional criteria for when the rule should be applied, such as checking the user agent or the query string.
Regular expressions play a crucial role in URL rewriting. They allow you to match patterns in the requested URLs and capture specific parts for use in the rewritten URLs. Regular expressions can be complex, so it is recommended to test and validate your patterns to ensure they function as intended.
By utilizing the power of URL rewriting, you can enhance the structure, accessibility, and search engine friendliness of your website’s URLs. Additionally, it can improve the overall user experience by providing clean and user-friendly URLs.
Now that we have explored URL rewriting, let’s move on to another important functionality of the .htaccess file: password protection.
Password Protection
Password protection is a crucial feature that allows you to restrict access to specific directories or web pages on your website. It ensures that only authorized users can view the protected content, adding an extra layer of security to your website.
Using the .htaccess file, you can implement password protection by utilizing the “mod_auth” module. This module provides the functionality to prompt users for a username and password when attempting to access the protected area.
To get started with password protection, follow these steps:
- Create a Password File: Begin by creating a file that will store the username and encrypted password. This file is commonly referred to as the “.htpasswd” file. You can use online tools or the htpasswd tool provided by Apache to create this file. For example:
htpasswd -c /path/to/.htpasswd username
- Protect the Directory: Next, open your .htaccess file and add the necessary directives to protect the desired directory or webpage. Use the “AuthType”, “AuthName”, and “AuthUserFile” directives, specifying the path to your .htpasswd file. For example:
AuthType Basic
AuthName “Restricted Area”
AuthUserFile /path/to/.htpasswd
Require valid-user
After implementing these steps, anyone attempting to access the protected area will be prompted to enter a username and password. Only those users with valid credentials will be granted access.
It is essential to choose strong passwords and update them regularly to maintain the security of your protected area. You can also create multiple user accounts with different levels of access by adding additional entries to the .htpasswd file.
Remember to secure both the .htaccess and .htpasswd files to prevent unauthorized access. Set appropriate file permissions to restrict access to these files and ensure they are not accessible to the public.
Password protection is a valuable tool for securing sensitive areas of your website or limiting access to exclusive content. It can be utilized for member-only sections, administrative areas, or any other content that requires restricted access.
Now that we have covered password protection, let’s move on to another important functionality of the .htaccess file: blocking IP addresses.
Blocking IP Addresses
Blocking specific IP addresses or ranges can be crucial for enhancing website security and protecting against malicious activity. With the .htaccess file, you have the ability to block access from specific IP addresses, preventing them from accessing your website or certain directories.
To block an IP address using the .htaccess file, follow these steps:
- Determine the IP Address: Identify the IP address or range that you want to block. You can find the IP address of a particular user or locate IP ranges associated with unwanted traffic using server logs or online IP lookup tools.
- Open your .htaccess file: Open the .htaccess file from the root directory of your website using a text editor.
- Add blocking rules: Add the necessary directives to block the desired IP address/es. Use the “Deny” directive followed by the IP address or range that you want to block. For example:
Deny from 123.456.789.0
Deny from 192.168.0.0/24
You can add multiple “Deny” directives to block multiple IP addresses or ranges.
Once the .htaccess file is updated, any request coming from the blocked IP address/es will be denied access to your website or specified directories. The denied users will typically receive an error message or be redirected to a custom error page.
Blocking IP addresses can be an effective measure against various types of attacks, such as spam, brute force attacks, or unauthorized access attempts. However, it is essential to periodically review and update your blocked IP list to ensure that legitimate users are not inadvertently blocked as well.
It’s worth noting that blocking IP addresses through the .htaccess file is a server-side solution and does not prevent the blocked IP addresses from accessing the server itself. To block IP addresses at the server level, additional server configuration may be required.
By effectively blocking unwanted IP addresses, you can enhance the security of your website and protect it from potential threats or malicious activity. However, it’s important to implement blocking measures judiciously and in accordance with your specific needs.
Now that we have covered IP address blocking, let’s move on to another valuable functionality of the .htaccess file: customizing error pages.
Customizing Error Pages
When visitors encounter errors while browsing your website, it is important to provide them with informative and user-friendly error pages. With the .htaccess file, you can customize and create your own error pages to deliver a more personalized experience and assist users in navigating through errors.
To customize error pages using the .htaccess file, follow these steps:
- Create your custom error pages: Start by designing and creating the error pages you want to display. These can be HTML pages that match the look and feel of your website and contain helpful information for each specific error.
- Open your .htaccess file: Open the .htaccess file from the root directory of your website using a text editor.
- Add directives for custom error pages: Add the necessary directives to direct the server to use your custom error pages. Use the “ErrorDocument” directive followed by the appropriate error code and the path to the corresponding error page. For example:
ErrorDocument 404 /errors/404.html
You can add multiple “ErrorDocument” directives to customize error pages for different types of errors.
- Upload your custom error pages: Upload your custom error pages to your website’s server, ensuring they are accessible at the specified paths mentioned in the “ErrorDocument” directives.
Once the .htaccess file is updated with the custom error page directives, visitors who encounter corresponding errors will be directed to your customized error pages instead of the default server error pages. This enables you to provide a more relevant and user-friendly experience.
Custom error pages should include helpful information and guidance to assist users in resolving the error or finding alternate resources. They can also provide links to other sections of your website or contact information for further assistance.
Remember to regularly test your custom error pages to ensure they are working as intended. You can do this by purposely triggering different types of errors and verifying that the corresponding customized pages are indeed displayed.
By customizing error pages with the .htaccess file, you can enhance the usability of your website and mitigate user frustration when encountering errors. It presents an opportunity to provide valuable information and resources, improving the overall user experience.
Now that we have covered customizing error pages, let’s move on to exploring another important functionality of the .htaccess file: optimizing website performance.
Optimizing Website Performance
Optimizing website performance is crucial for providing a fast and enjoyable user experience. With the .htaccess file, you can implement various optimizations that can significantly improve the speed and efficiency of your website.
Let’s explore some key optimizations that you can implement using the .htaccess file:
- Enabling Compression: By enabling compression, you can significantly reduce the file sizes of your website’s resources, such as HTML, CSS, and JavaScript files. This reduces the amount of data that needs to be transferred between the server and the user’s browser, resulting in faster page load times. You can use the “mod_deflate” module to enable compression. For example:
SetOutputFilter DEFLATE
- Browser Caching: Browser caching allows you to specify how long a browser should cache certain resources, such as images, CSS files, and JavaScript files. This means that subsequent visits to your website will not require the browser to re-download the same resources, resulting in faster page rendering. You can use the “mod_expires” module to configure browser caching. For example:
ExpiresActive On
ExpiresByType text/css “access plus 1 month” - Minifying CSS and JavaScript: Minification is the process of removing unnecessary characters and whitespace from CSS and JavaScript files, reducing their file sizes. This can be done using various online tools or build processes. By minifying your CSS and JavaScript files, you can reduce the amount of data that needs to be downloaded, resulting in faster page load times.
- Limiting Image Hotlinking: Image hotlinking occurs when other websites use the images hosted on your website by directly linking to them. This can consume your server’s bandwidth and slow down your website. The .htaccess file allows you to prevent image hotlinking by denying access to images from specific websites or domains. For example:
RewriteEngine on
RewriteCond %{HTTP_REFERER} !^$
RewriteCond %{HTTP_REFERER} !^http(s)?://(www\.)?example.com [NC]
RewriteRule \.(jpg|jpeg|png|gif)$ – [NC,F,L]
Implementing these optimizations can significantly enhance your website’s performance and improve user satisfaction. However, it’s important to consider the specific needs and requirements of your website and test the optimizations to ensure they do not cause any conflicts or issues.
Regular monitoring and performance testing are key to maintaining optimal website performance. Keep an eye on loading times, server response times, and user experience metrics to identify areas for improvement and make necessary adjustments.
Optimizing website performance is a continuous process. As technology evolves and user demands change, it is important to stay informed about new techniques and best practices to ensure your website provides the best possible performance.
Now that we have explored optimizing website performance, let’s wrap up with a summary of what we’ve discussed so far.
Conclusion
The .htaccess file is a powerful tool for managing and enhancing the functionality, security, and performance of your website. From redirects to rewrites, password protection to blocking IP addresses, custom error pages to performance optimizations, the .htaccess file offers a wide range of functionalities that can greatly improve the user experience and overall effectiveness of your website.
Creating and utilizing the .htaccess file allows you to have granular control over various aspects of your website’s behavior on a per-directory basis. It empowers you to implement redirects, rewrite URLs, password protect sensitive areas, block unwanted IP addresses, customize error pages, and optimize website performance.
Understanding the basic syntax and rules of the .htaccess file is essential to effectively utilize its functionalities. By applying redirects and rewrites, you can ensure that users are seamlessly redirected to the correct URLs and enjoy clean and user-friendly URLs. Password protection and IP blocking offer extra layers of security, safeguarding your website against unauthorized access and malicious activity.
Customizing error pages allows you to provide informative and helpful messages when visitors encounter errors, enhancing their experience and guiding them through any issues. Optimizing website performance through compression, caching, and minification can significantly improve loading times and user satisfaction.
Remember to always keep security and performance in mind as you make modifications to your .htaccess file. Regularly test and validate your configurations, monitor website performance, and stay up-to-date with best practices to ensure your website is running at its best.
With the knowledge and application of the .htaccess file, you have the ability to take control of your website’s behavior and deliver an exceptional user experience. So, start exploring and experimenting with the functionalities of the .htaccess file, and watch as your website becomes more secure, efficient, and user-friendly.