Introduction
When running a WordPress website, you may come across situations where certain tasks or processes take longer than expected to complete. This could be due to the default PHP time limit set on your server. The PHP time limit determines the maximum amount of time a PHP script can run before it times out.
Having a limited PHP time limit can be problematic, especially if you are working with resource-intensive plugins or themes, or if you need to perform complex operations like importing/exporting large amounts of data. If a PHP script exceeds the time limit, it will be terminated, resulting in incomplete or failed tasks.
In order to ensure smooth functioning of your WordPress website and prevent any timeouts, it is essential to increase the PHP time limit. This will give your website more time to carry out resource-intensive tasks without interrupting the process.
In this article, we will explore various methods to increase the PHP time limit in WordPress, including modifying the .htaccess file, the wp-config.php file, and the php.ini file. We will also discuss a plugin that simplifies the process. So, let’s dive in and learn how to effectively increase the PHP time limit for your WordPress site.
What is PHP time limit and why is it important?
The PHP time limit is a setting in your server’s configuration that determines the maximum execution time for a PHP script. This limit is implemented to prevent scripts from running indefinitely, which can have a negative impact on server performance. When a PHP script reaches the time limit, it is terminated by the server.
The PHP time limit is important because it helps to maintain the stability and performance of your WordPress website. By restricting the execution time of PHP scripts, the server can allocate resources efficiently, ensuring that other processes and requests are not delayed or affected.
There are various scenarios where the PHP time limit becomes relevant. For example, when you install or update plugins, themes, or WordPress itself, the server may need more time to complete the operation, especially if these processes involve large files or complex operations. Without increasing the PHP time limit, these tasks might fail or result in incomplete installations or updates.
Furthermore, certain plugins or custom code may require additional time to carry out specific tasks. This could include performing data imports or exports, generating reports, or executing resource-intensive calculations. Increasing the PHP time limit allows these processes to run without interruptions, ensuring their successful completion.
It is worth noting that the PHP time limit is not a setting that should be increased indiscriminately. While it can be tempting to set a high value to accommodate any task, it is important to consider the server’s resources and limitations. Increasing the time limit unnecessarily can lead to slower overall performance and potential resource conflicts with other websites hosted on the same server.
In the following sections, we will explore different methods to increase the PHP time limit in WordPress. This will allow you to optimize the execution of specific tasks on your website while considering the capabilities and constraints of your server environment.
Checking the current PHP time limit
Before you can proceed with increasing the PHP time limit in WordPress, it’s important to know the current time limit set on your server. There are several ways to check the PHP time limit, depending on your access and familiarity with different tools.
One way to check the PHP time limit is by creating a PHP file and accessing it through your web browser. Follow these steps:
- Create a new file with a .php extension, for example, check-time-limit.php.
- Open the file in a text editor and add the following code:
php
- Save the file and upload it to the root directory of your WordPress installation using a file transfer protocol (FTP) client or your hosting provider’s file manager.
- Open your web browser and navigate to http://yourdomain.com/check-time-limit.php, replacing ‘yourdomain.com’ with your actual domain name.
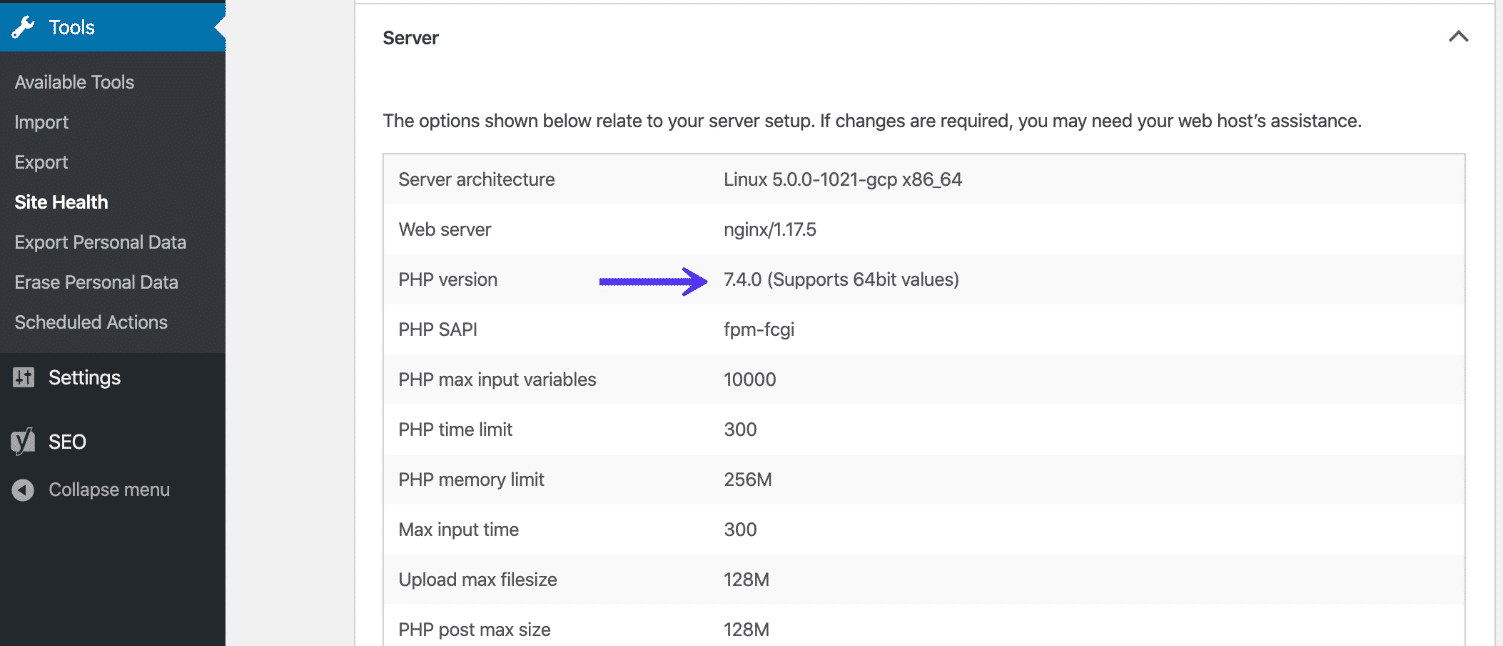
- The page will display detailed information about your PHP configuration. Look for the “max_execution_time” value, which represents the current PHP time limit.
- Note down the value, as you will need it later when increasing the PHP time limit.
Alternatively, if you have access to your server’s command-line interface, you can use the following command to check the PHP time limit:
bash
php -i | grep “max_execution_time”
This command will display the PHP time limit value in your server’s console or terminal.
Once you have determined the current PHP time limit, you can proceed to increase it using one of the methods discussed in the following sections. Remember that different hosting environments may have restrictions on modifying PHP settings, so choose a method that is suitable for your specific setup.
Increasing PHP time limit in WordPress using .htaccess
If you have access to your WordPress site’s root directory and the server allows the modification of .htaccess files, you can increase the PHP time limit by adding some code to the .htaccess file.
Follow these steps to increase the PHP time limit using .htaccess:
- Using a text editor, open the .htaccess file located in the root directory of your WordPress installation. If you can’t find the .htaccess file, it may be hidden. Ensure that you have enabled the option to show hidden files in your file manager or FTP client.
- At the bottom of the file, add the following code:
apache
php_value max_execution_time 300
This code sets the PHP time limit to 300 seconds (5 minutes). You can change the value to suit your needs.
- Save the .htaccess file and upload it back to the root directory of your WordPress installation, replacing the existing file if prompted.
- Refresh your website and perform the task that previously exceeded the time limit. It should now execute without timing out.
Keep in mind that modifying the .htaccess file incorrectly can cause issues with your website. Ensure that you make a backup of the original .htaccess file before making any changes and double-check the code you’re adding to avoid any syntax errors or conflicts with existing directives.
If you are unsure about modifying the .htaccess file or encounter any issues, it is recommended to seek assistance from your hosting provider or a developer with experience in server management.
Increasing PHP time limit in WordPress using wp-config.php file
If you have access to the wp-config.php file of your WordPress installation, you can also increase the PHP time limit by adding a line of code to this file.
Here are the steps to increase the PHP time limit using wp-config.php:
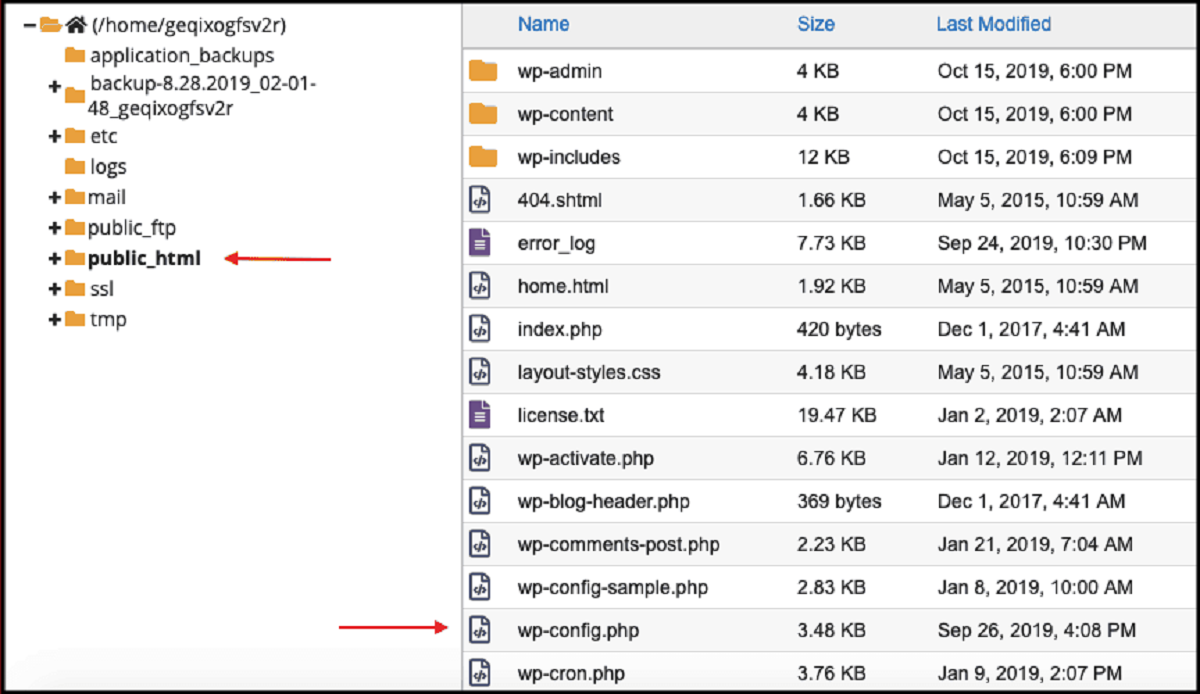
- Open the wp-config.php file using a text editor.
- Locate the section that contains the database information, typically near the top of the file.
- Just above the line that says “/* That’s all, stop editing! Happy blogging. */”, add the following code:
php
set_time_limit(300);
This code sets the PHP time limit to 300 seconds (5 minutes). You can modify the value as per your requirements.
- Save the changes to the wp-config.php file.
- Upload the modified wp-config.php file back to the root directory of your WordPress installation, replacing the existing file if necessary.
- Visit your WordPress website and perform the task that previously exceeded the time limit. It should now execute without timing out.
Remember to make a backup of the wp-config.php file before making any modifications. This will allow you to revert to the original version in case of any issues.
Increasing the PHP time limit through the wp-config.php file is a convenient method, but it may not work in all server configurations. If you encounter any issues or the changes don’t take effect, it is recommended to explore alternative methods or consult with your hosting provider for assistance.
Increasing PHP time limit in WordPress using php.ini file
If you have access to the php.ini file on your server, you can increase the PHP time limit by modifying the configuration settings in this file. This method is particularly useful if you have a dedicated server or VPS (Virtual Private Server) hosting.
Here’s how you can increase the PHP time limit using the php.ini file:
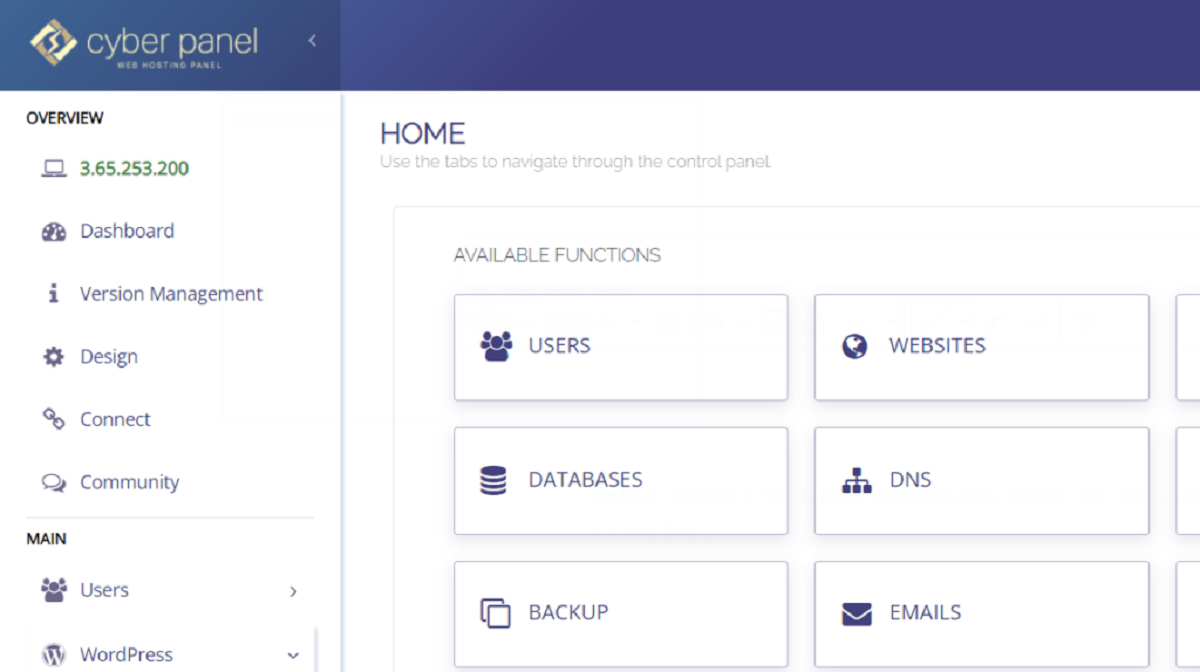
- Locate the php.ini file on your server. The file is usually located in the root directory of your PHP installation.
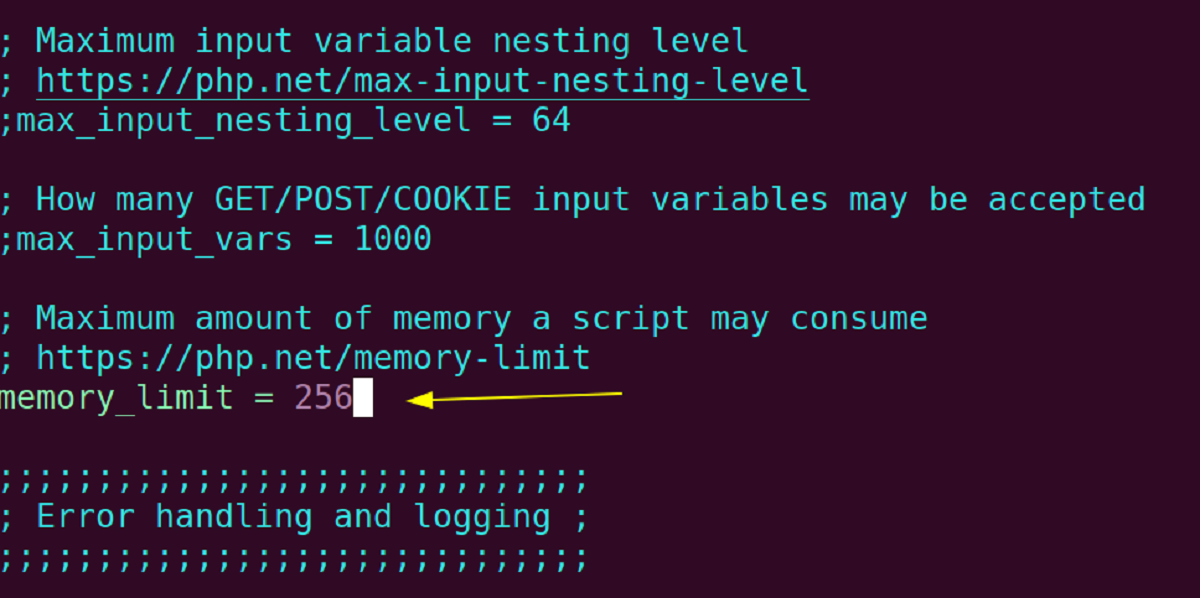
- Open the php.ini file using a text editor.
- Search for the line that starts with “max_execution_time”.
- Modify the value next to “max_execution_time” to increase the time limit. For example, you can set it to 300 to allow for 300 seconds (5 minutes) execution time.
- Save the changes to the php.ini file.
- If necessary, restart your web server for the changes to take effect.
After following these steps, the PHP time limit on your server will be increased. This will provide more time for PHP scripts to run without timing out.
It’s important to note that modifying the php.ini file requires server-level access and may not be possible on shared hosting environments. In such cases, you can explore other methods to increase the PHP time limit or contact your hosting provider for assistance.
Also, keep in mind that changing the php.ini file affects all PHP scripts on your server. Therefore, consider the resource limitations and impacts on other websites or applications hosted on the same server before making any modifications.
If you are unsure about editing the php.ini file or need further assistance, it is recommended to consult with a server administrator or contact your hosting provider for guidance.
Increasing PHP time limit in WordPress using a plugin
If you prefer a simpler and more user-friendly method to increase the PHP time limit in WordPress, you can utilize a dedicated plugin. There are several plugins available that allow you to adjust various PHP settings, including the time limit, without the need for manual coding or server access.
Follow these steps to increase the PHP time limit using a plugin:
- Login to your WordPress admin dashboard.
- Go to the “Plugins” section and click on “Add New”.
- In the plugin search bar, type in “PHP Time Limit”.
- Review the search results and choose a plugin that suits your needs. Take note of the plugin’s ratings, reviews, and compatibility with your version of WordPress.
- Click on the “Install Now” button next to the chosen plugin and then select “Activate” to activate the plugin.
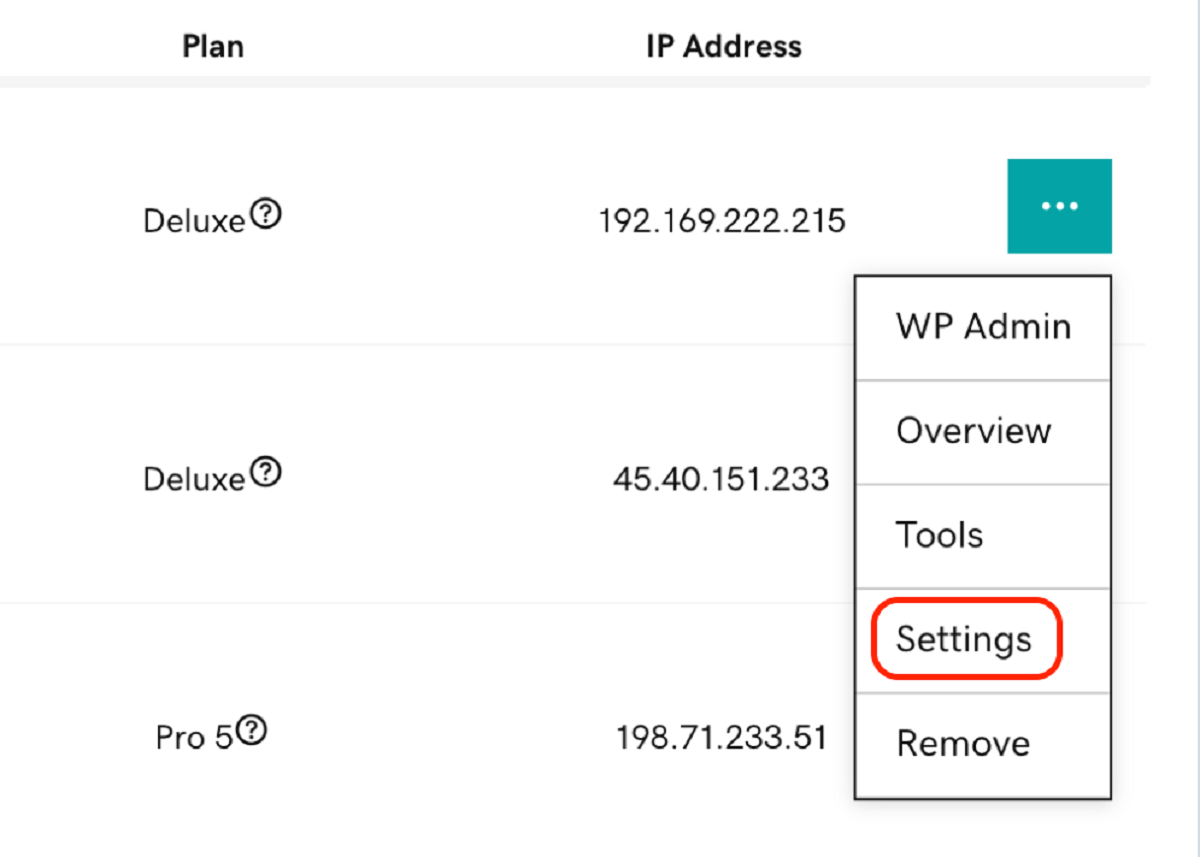
- Once the plugin is activated, go to the plugin’s settings page, which is typically found in the “Settings” or “Tools” section of your WordPress dashboard.
- Locate the option to set the PHP time limit and adjust it according to your requirements. Some plugins may also have additional settings related to PHP optimization.
- Save the changes to update the PHP time limit.
The advantage of using a plugin is that it provides a user-friendly interface to modify PHP settings, including the time limit, without requiring any technical knowledge or access to server files. However, it’s important to choose a reputable plugin from trusted sources and regularly update it to ensure compatibility with the latest version of WordPress.
Keep in mind that while using a plugin can be convenient, installing too many unnecessary plugins can impact your website’s performance. It’s best to only install plugins that are essential for your site’s functionality and regularly evaluate and remove any unused or outdated plugins.
If you encounter any issues or limitations with a specific plugin, you can explore alternative plugins or consider the other methods mentioned in this article to increase the PHP time limit for your WordPress site.
Testing the increased PHP time limit
After implementing any method to increase the PHP time limit in WordPress, it’s crucial to verify whether the changes have taken effect. Testing the increased PHP time limit ensures that your website can now handle resource-intensive tasks without timing out.
Here are some steps to test the increased PHP time limit:
- Perform the task or process that previously exceeded the PHP time limit. This could be importing or exporting a large amount of data, running a resource-intensive plugin, or executing a long-running operation.
- Observe the task closely and note if it completes successfully or if any errors occur.
- If the task completes without any issues, it indicates that the PHP time limit increase was successful.
- If the task still times out or encounters errors, you may need to consider increasing the time limit further or exploring additional optimizations for the specific task.
- It’s also recommended to monitor your website’s performance after increasing the PHP time limit. Keep an eye on server resource usage, page loading times, and overall website responsiveness. If you notice any significant negative impacts, it may be necessary to revisit the time limit adjustment or explore other performance optimizations.
Remember that increasing the PHP time limit should be done cautiously, considering the capabilities and constraints of your server environment. It’s essential to find a balance between allowing ample time for resource-intensive tasks and ensuring optimal performance for your website.
If you encounter any difficulties during the testing process or still experience issues with timing out tasks, it’s advisable to seek assistance from your hosting provider or consult with a WordPress developer who is experienced in server management and performance optimization.
By thoroughly testing the increased PHP time limit and monitoring your website’s performance, you can ensure a smooth and efficient running of resource-intensive tasks on your WordPress site.
Conclusion
Increasing the PHP time limit in WordPress is essential for ensuring smooth execution of resource-intensive tasks and preventing timeouts. By allowing PHP scripts to run for a longer duration, you can complete tasks such as importing/exporting large amounts of data, running complex operations, or utilizing resource-intensive plugins without interruption.
In this article, we explored different methods to increase the PHP time limit in WordPress. We discussed modifying the .htaccess file, the wp-config.php file, and the php.ini file. We also explored the option of using a plugin to adjust the time limit conveniently through the WordPress admin dashboard.
However, when implementing any of these methods, it’s crucial to exercise caution and consider the limitations and resource constraints of your server environment. Increasing the PHP time limit blindly or setting it to an excessively high value can impact overall server performance and potentially cause conflicts with other websites hosted on the same server.
Before making any modifications, it’s recommended to check the current PHP time limit on your server to understand the baseline. Additionally, thorough testing of the increased time limit is important to ensure that the changes have taken effect and that resource-intensive tasks now run smoothly without timing out.
Remember to regularly monitor your website’s performance after increasing the PHP time limit and make any necessary adjustments if you notice any negative impacts. It’s also important to balance the time limit increase with other performance optimizations to ensure optimal functionality and responsiveness of your WordPress site.
By carefully increasing the PHP time limit and optimizing your website’s performance, you can ensure a seamless user experience and confidently handle resource-intensive tasks on your WordPress site.