Introduction
Welcome to the world of Google Sheets, your go-to tool for creating schedules and organizing your daily tasks. Whether you’re a student managing your study plan, a professional juggling multiple projects, or just someone who loves to stay organized, Google Sheets provides a simple and effective way to create and customize schedules that suit your needs.
In this guide, we will walk you through the process of making a schedule on Google Sheets, step by step. From creating a new spreadsheet to formatting the calendar, adding dates, time slots, tasks, and even adding color and formatting, you’ll be equipped with all the necessary tools to design a visually appealing and functional schedule.
Google Sheets offers numerous features that make it an ideal platform for scheduling. With its cloud-based nature, you can access your schedule from anywhere and collaborate with others in real-time. You can also easily print or export your schedule for offline use or to share with colleagues, friends, or family members.
Whether you’re an experienced user or completely new to Google Sheets, this guide will provide you with the necessary instructions to create and customize your schedule to suit your unique needs. So, let’s dive in and discover the power of Google Sheets in helping you stay organized and on top of your tasks!
Creating a New Spreadsheet
Before we start creating our schedule on Google Sheets, we need to create a new spreadsheet. Follow these simple steps to get started:
1. Open Google Sheets: Launch your web browser and navigate to sheets.google.com. Sign in to your Google account if you haven’t already.
2. Click on “+ New”: Once you’re on the Google Sheets homepage, click on the “+ New” button in the top-left corner of the screen. A drop-down menu will appear.
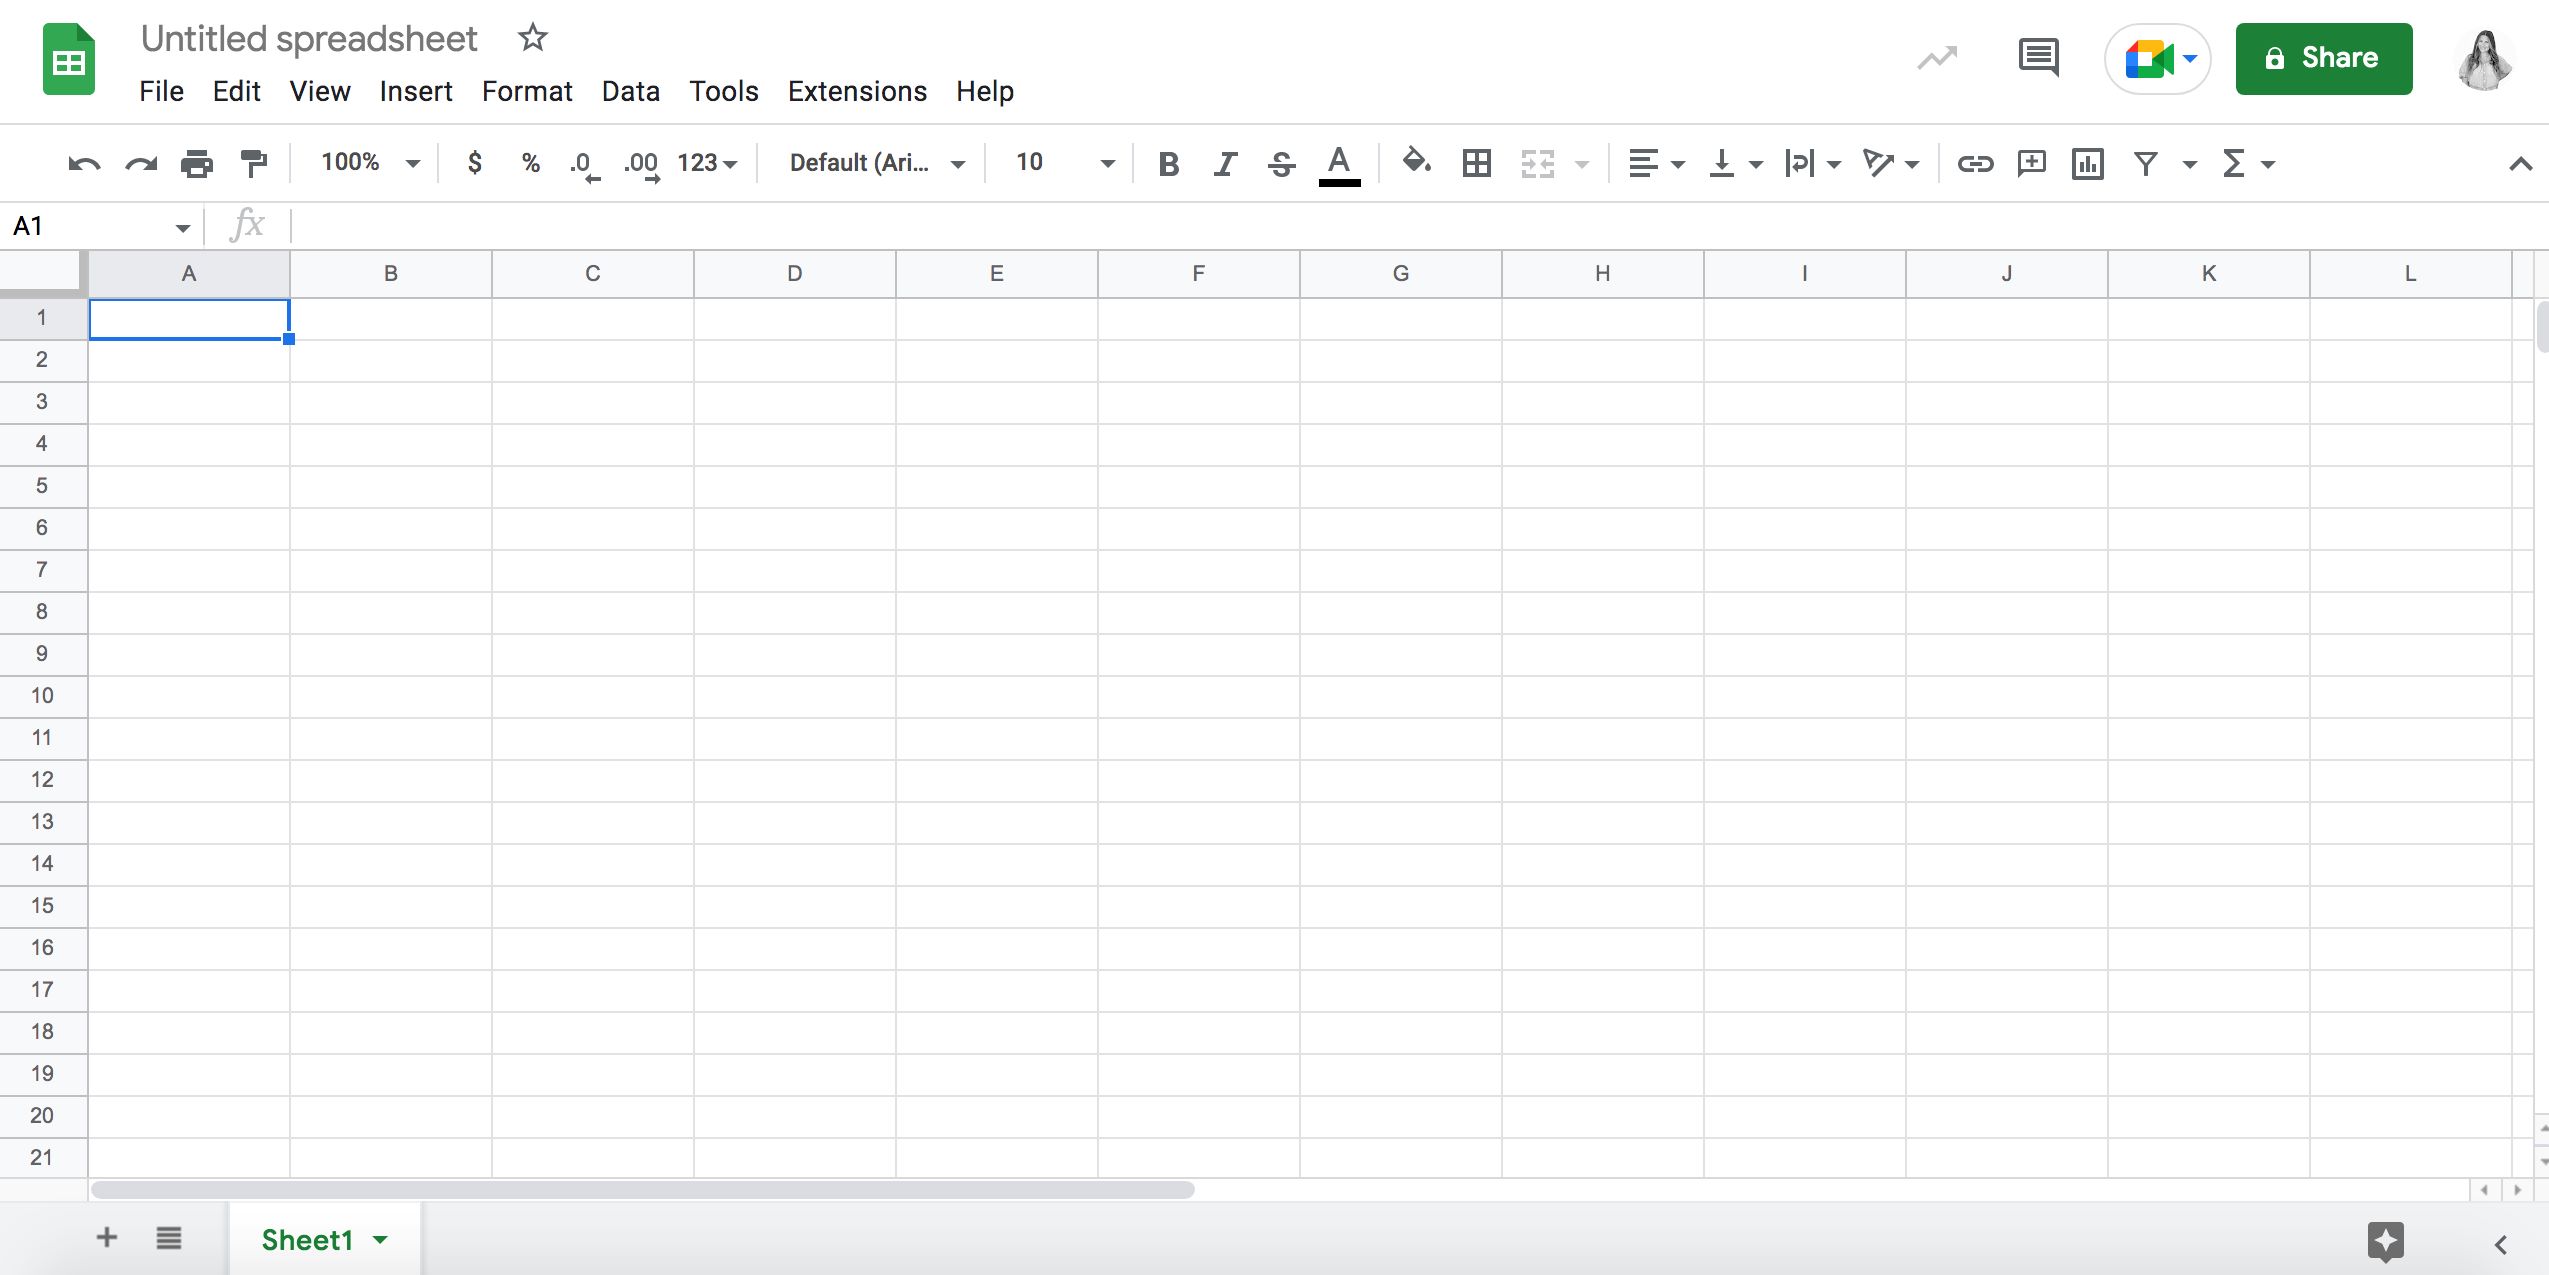
3. Select “Blank Spreadsheet”: From the drop-down menu, select “Blank Spreadsheet.” A new tab will open with a blank spreadsheet.
4. Customize the Title: Rename your spreadsheet by clicking on the default title “Untitled Spreadsheet” at the top-left corner. Give it a descriptive name that represents your schedule, such as “Weekly Planner” or “Work Schedule.”
That’s it! You’ve successfully created a new spreadsheet on Google Sheets. Now let’s move on to the next section where we’ll learn how to name and organize sheets within our spreadsheet.
Naming and Organizing Sheets
When working with a schedule on Google Sheets, it’s important to organize your sheets and give them meaningful names to easily navigate through different sections. Let’s explore how to name and organize your sheets:
1. Sheet Names: By default, your newly created spreadsheet will have one sheet named “Sheet1.” To change the name, double-click on the sheet name at the bottom-left corner of the screen and enter a new name. For example, you can name it “Monthly Calendar” or “Task Tracker.”
2. Add New Sheets: To add additional sheets to your spreadsheet, click on the “+” icon located at the bottom-left corner of the screen, next to the sheet names. Each sheet can represent a different aspect of your schedule, such as daily tasks, weekly goals, or monthly plans.
3. Reorder Sheets: To change the order of your sheets, simply click on a sheet name and drag it to the desired position. This allows you to prioritize and arrange your sheets based on their importance or the order of events.
4. Duplicate Sheets: To create a copy of a sheet, right-click on the sheet name and select “Duplicate.” This can be useful if you want to have multiple versions of a particular schedule or experiment with different formatting options without affecting the original sheet.
By naming and organizing your sheets, you can easily navigate through your schedule and find the specific information you need. It also helps in maintaining a well-structured and professional-looking spreadsheet. In the next section, we’ll explore how to format the calendar in your Google Sheets schedule.
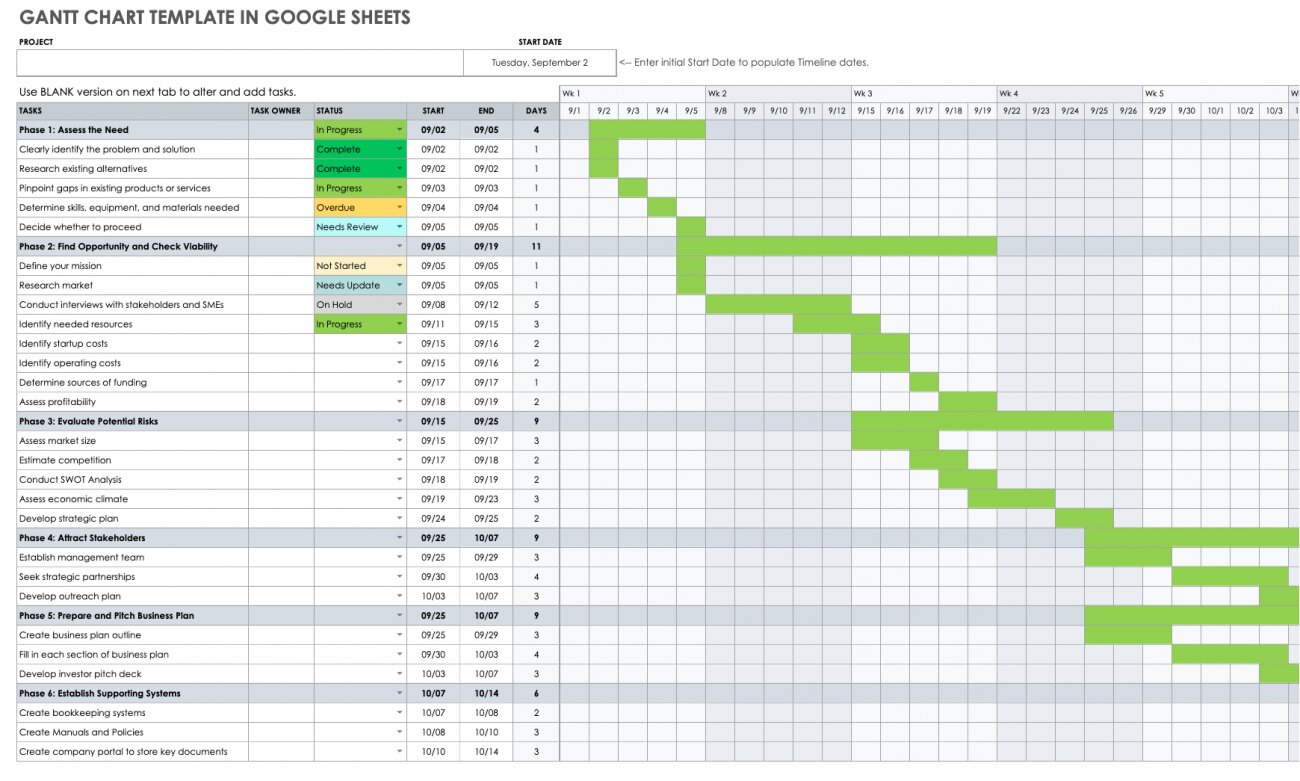
Formatting the Calendar
Now that you have created and organized your sheets, it’s time to format the calendar in your Google Sheets schedule. Formatting the calendar will make it visually appealing and easier to read. Follow these steps to format your calendar:
1. Resize Rows and Columns: Adjust the size of rows and columns to make the calendar cells large enough to accommodate your schedule details. To resize a row or column, place your cursor on the line between two rows or columns, click, and drag to the desired size.
2. Merge Cells: Use the merge cells feature to combine multiple cells into one. This is useful for creating headings or spanning cells for longer events or tasks. Select the cells you want to merge, right-click, and choose “Merge cells.”
3. Apply Borders: Adding borders around cells can help differentiate dates, days of the week, or specific sections of your calendar. To apply borders, select the cells you want to add borders to, click on the “Borders” icon in the toolbar, and choose the desired border style.
4. Format Dates: Format the dates in your calendar to match the desired display format. Select the cells containing the dates, right-click, choose “Format cells,” and select the appropriate date format from the options provided.
5. Apply Conditional Formatting: Conditional formatting allows you to automatically apply visual cues to your schedule based on specific criteria. For example, you can use conditional formatting to highlight overdue tasks or upcoming deadlines. Select the cells you want to apply conditional formatting to, click on “Format” in the toolbar, and choose “Conditional formatting” to set the rules.
By formatting your calendar, you can make it aesthetically pleasing and easier to navigate. In the next sections, we’ll learn how to add dates, days of the week, and time slots to your Google Sheets schedule.
Adding Dates
One of the essential elements of a schedule is adding dates to your Google Sheets calendar. By having dates clearly displayed, you can easily track and plan your activities. Follow these steps to add dates to your schedule:
1. Select the Cell: Start by selecting the cell where you want to display the date. For example, you may choose cell A2 to represent the first date of your schedule.
2. Enter the Date Manually: If you already know the exact date you want to add, simply type it into the selected cell in the format that matches your chosen date display format.
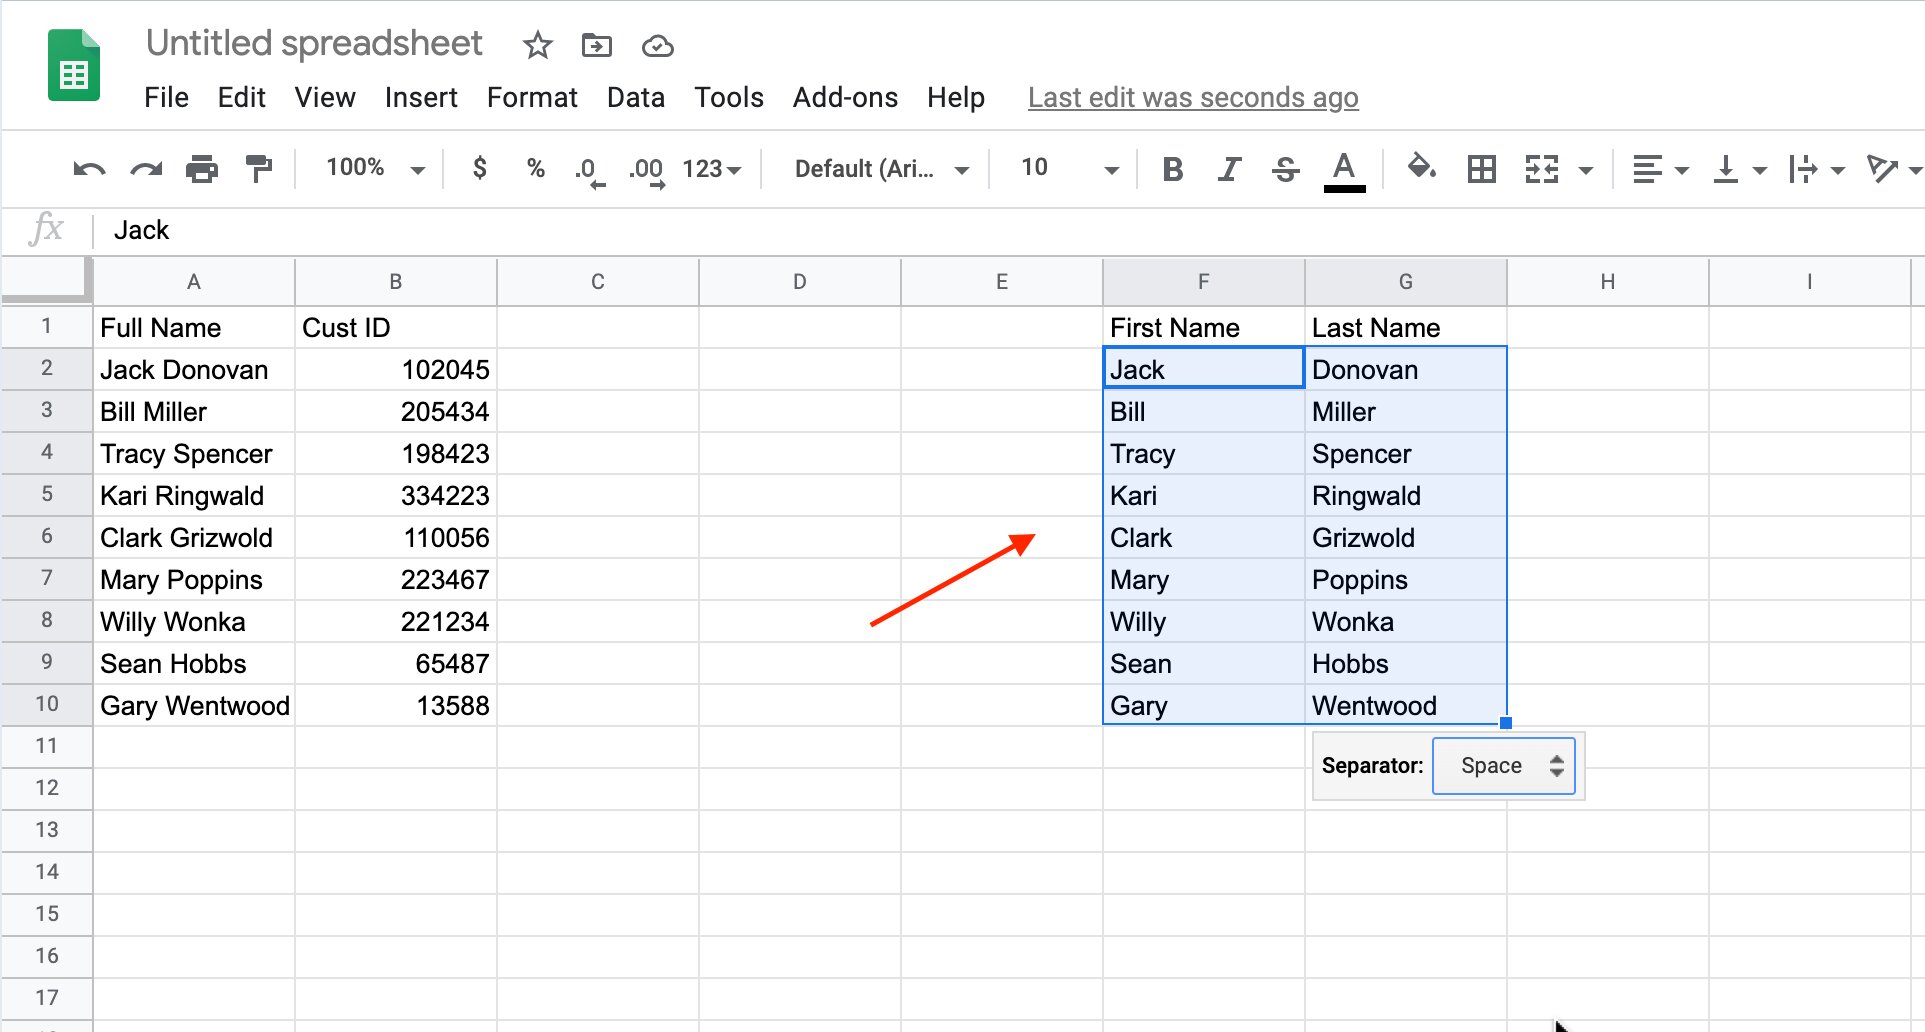
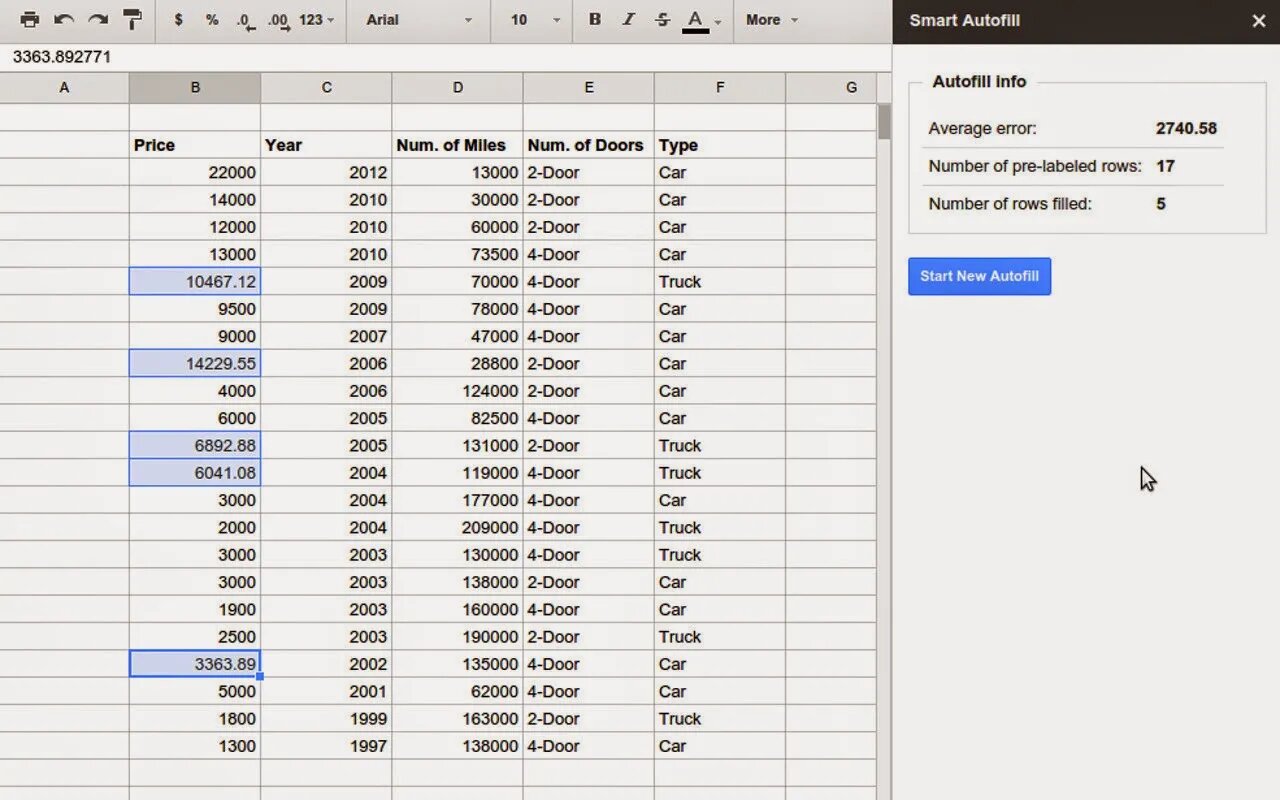
3. Use the AutoFill Feature: Alternatively, you can use the AutoFill feature to quickly populate a series of dates. Enter the starting date in the selected cell and then click and drag the small blue square in the bottom right corner of the cell to fill the adjacent cells with the sequential dates.
4. AutoFill Options: When using the AutoFill feature, you may see a small popup box with AutoFill options. This allows you to choose between different date series, such as weekdays only, weekends only, or custom intervals. Select the option that suits your requirements.
By adding dates to your Google Sheets schedule, you create a clear timeline for your activities. In the next section, we’ll explore how to add the days of the week to your calendar, making it even more comprehensive and informative.
Adding Days of the Week
Adding the days of the week to your Google Sheets schedule is crucial for creating a comprehensive and organized calendar. Including the days of the week allows you to easily identify which day corresponds to a specific date. Follow these steps to add the days of the week:
1. Select the Cell: Start by selecting the cell where you want to display the days of the week. For example, you may choose cell B1 to represent the first day of the week.
2. Enter the First Day: Type the name of the first day of the week in the selected cell. For example, if your week starts on a Monday, enter “Monday.”
3. AutoFill the Rest of the Days: Once you have entered the first day of the week, you can use the AutoFill feature to populate the rest of the days. Hover your cursor over the bottom-right corner of the selected cell until it turns into a small blue square. Click and drag the square to fill the adjacent cells, automatically completing the days of the week.
4. Customize the Days of the Week: If you prefer to use abbreviations or a different language for the days of the week, manually change the labels in the cells accordingly. Simply select the cell and modify the text to your desired format.
By adding the days of the week to your Google Sheets schedule, you create a clear and organized structure for your calendar. In the next section, let’s explore how to add time slots to your schedule, allowing you to allocate specific time periods for your tasks and activities.
Adding Time Slots
Adding time slots to your Google Sheets schedule allows you to allocate specific time periods for your tasks and activities. This helps in better planning and staying on track with your daily schedule. Follow these steps to add time slots to your schedule:
1. Select the Cells: Begin by selecting the cells where you want to add the time slots. Typically, you would choose a column to represent the time and select the corresponding rows for each day of the week.
2. Enter the First Time Slot: In the selected cells, enter the first time slot of the day. For example, if you want to start with 9:00 AM, enter “9:00 AM” in the first cell.
3. Use the AutoFill Feature: To quickly populate the rest of the time slots, use the AutoFill feature. Click and drag the small blue square in the bottom-right corner of the first cell to fill the adjacent cells with the sequential time slots. You can either increment the time by minutes or by hours, depending on the granularity you prefer.
4. Customizing Time Formats: If you want to customize the time formats to match your preference, right-click on the selected cells and choose “Format cells.” From there, select the desired time format from the available options or create a custom format.
5. Adjust Cell Heights: To ensure that the time slots are easily readable, you may need to adjust the cell heights to accommodate the time values. Simply click and drag the separation line between rows to increase or decrease the height as needed.
By adding time slots to your Google Sheets schedule, you can effectively allocate your time and stay organized throughout the day. In the next section, let’s explore how to add tasks or events to your schedule, making it more actionable and informative.
Adding Tasks or Events
To make your Google Sheets schedule more actionable and informative, it’s essential to add tasks or events to specific time slots. This allows you to clearly see what needs to be done and when. Follow these steps to add tasks or events to your schedule:
1. Select the Cell: Start by selecting the cell corresponding to the desired time slot and day where you want to add the task or event.
2. Enter the Task or Event: Type in the task or event details directly into the selected cell. For example, if you have a meeting at 10:00 AM, enter “Meeting with Team” in the cell corresponding to that time slot.
3. Resize the Cell: If the task or event text exceeds the width of the cell, you may need to resize the cell to make sure all the information is visible. Click and drag the cell’s borders to adjust its size accordingly.
4. Use Color Coding or Formatting: To visually differentiate tasks or events, you can use color coding or formatting options. Select the cell or cells containing the task or event, and choose a font color, background color, or other formatting options from the toolbar. This can help you quickly identify different types of tasks or events at a glance.
5. Drag and Copy: If you have recurring tasks or events, you can easily duplicate them by dragging and copying. Select the cell containing the task or event, click and drag the small blue square in the bottom-right corner of the cell, and fill in the adjacent cells with the copied task or event.
By adding tasks or events to your Google Sheets schedule, you create a clear plan of action for each time slot. This enables you to allocate your time efficiently and stay organized throughout the day. In the next section, we’ll explore how to add color and formatting to your schedule, enhancing its visual appeal and readability.
Adding Color and Formatting
Adding color and formatting to your Google Sheets schedule can greatly enhance its visual appeal and readability. By using different fonts, colors, and formatting options, you can make important information stand out and create a more organized and visually appealing layout. Follow these steps to add color and formatting to your schedule:
1. Select the Cells: Start by selecting the cells or range of cells that you want to format. This can be a specific section of your schedule, such as the headers, dates, or task/event cells.
2. Choose Formatting Options: Google Sheets offers a variety of formatting options in the toolbar. You can change font styles, font sizes, and font colors to make text more prominent and readable. Additionally, you can apply bold or italic formatting to highlight important information.
3. Apply Cell Background Colors: To visually differentiate sections or specific cells, you can apply background colors. Select the cells you want to format, click on the “Fill color” icon in the toolbar, and choose a color from the palette. This can be helpful for categorizing different types of tasks or events or distinguishing days of the week.
4. Utilize Conditional Formatting: Conditional formatting can be a powerful tool to automatically format cells based on specific criteria. For example, you can highlight tasks that are overdue or color-code cells based on priority. Access the conditional formatting options by clicking on “Format” in the toolbar and selecting “Conditional formatting.”
5. Experiment with Formatting: Don’t be afraid to experiment with different formatting options to find a style that suits your preferences and makes your schedule visually appealing. Play around with different fonts, font sizes, colors, and formatting styles until you achieve the desired look.
By adding color and formatting to your Google Sheets schedule, you can improve its visual organization and make important information more noticeable at a glance. In the next section, we’ll explore how to sort and filter your schedule, allowing you to easily navigate and prioritize your tasks.
Sorting and Filtering
Sorting and filtering your Google Sheets schedule can significantly enhance your ability to navigate through tasks and prioritize your activities. These features allow you to reorganize and view your schedule in different ways based on specific criteria. Follow these steps to sort and filter your schedule:
1. Sorting:
– Ascending Order: To sort your schedule in ascending order based on a specific column, select the entire range of cells you want to sort. Then, click on the “Data” tab in the toolbar, choose “Sort range,” and select the column you want to sort by. This option is useful for arranging tasks or events chronologically or in alphabetical order.
– Descending Order: Similar to ascending order, select the range of cells and click on “Sort range” in the “Data” tab. However, this time, choose the column and select “Descending” to sort in reverse order. This is helpful when you want to prioritize tasks or events from the most recent or highest priority to the lowest.
2. Filtering:
– AutoFilter: AutoFilter allows you to quickly filter your schedule based on specific criteria. Select the range of cells you want to filter, click on the “Data” tab, and choose “Create a filter.” Small dropdown arrows will appear next to each column header. Click on these arrows to access filtering options and choose the desired criteria to display only the relevant information.
– Custom Filter: In addition to the AutoFilter, you can create custom filters to refine your schedule further. Click on the dropdown arrow next to the desired column header, select “Filter by condition,” and specify the criteria you want to use. This option is useful for filtering tasks or events based on specific dates, keywords, or other conditions.
By utilizing the sorting and filtering options in Google Sheets, you can easily prioritize and view your schedule based on specific criteria. This allows for efficient time management and better focus on essential tasks. In the next section, we’ll explore how to share and collaborate on your Google Sheets schedule.
Sharing and Collaborating
Google Sheets provides powerful features for sharing and collaborating on your schedule with others. Whether you need to work on a project with colleagues or share your schedule with friends and family, these options allow for seamless collaboration. Follow these steps to share and collaborate on your Google Sheets schedule:
1. Share Your Schedule:
– Click on the “Share” button in the top right corner of the Google Sheets interface.
– Enter the email addresses or names of the people you want to share the schedule with.
– Choose the level of access you want to grant them, such as “Can edit,” “Commenter,” or “Viewer.”
– Optionally, add a personal note to the invitation.
– Click on the “Send” button to share the schedule.
2. Collaborate in Real-Time:
– When collaborators access the shared schedule, they can view and edit the schedule simultaneously with you.
– Changes made by collaborators are automatically synced and updated in real-time, allowing for seamless collaboration and teamwork.
– Collaborators can leave comments and suggestions in specific cells to provide feedback or communicate with each other.
3. Version History and Tracking Changes:
– Google Sheets keeps a record of all changes made to the schedule, allowing you to access previous versions of the sheet.
– You can view the version history by clicking on “File” in the toolbar and selecting “Version history.”
– Additionally, you can track changes made by specific collaborators by enabling the “Show edit history” feature. Click on “Tools” in the toolbar, select “Review suggested edits,” and enable the feature to see the edit history.
4. Revoking Access and Managing Permissions:
– If you want to revoke access or change permissions for collaborators, click on the “Share” button again.
– From there, you can remove individual collaborators, change their access levels, or disable link sharing.
By sharing and collaborating on your Google Sheets schedule, you can work together with others, receive feedback, and ensure everyone is on the same page. In the next section, we’ll explore how to print and export your schedule for offline use or sharing with others.
Printing and Exporting
Google Sheets provides convenient options for printing and exporting your schedule, allowing you to have a hard copy or share the schedule in different formats. Whether you need a physical copy or want to send the schedule as a file, these options make it easy to access and distribute your schedule. Follow these steps to print and export your Google Sheets schedule:
1. Printing Your Schedule:
– Click on “File” in the toolbar and select “Print” from the drop-down menu.
– Adjust the print settings, such as paper size, orientation, and margins, as per your requirements.
– Preview the printed version by clicking on “Print preview” to ensure everything appears as desired.
– Click on the “Print” button to print your schedule.
2. Exporting as PDF:
– Click on “File” in the toolbar and select “Download” from the drop-down menu.
– Choose the “PDF Document” option. The schedule will be converted into a PDF file.
– Save the PDF file to your computer or device, and it can be shared or printed as needed.
3. Exporting as Excel or CSV:
– Click on “File” in the toolbar and select the appropriate format under “Download” to export as Excel (.xlsx) or CSV (.csv).
– The schedule will be downloaded as a file that can be opened and edited in Excel or other spreadsheet programs.
– Save the exported file to your computer or device for further use or sharing.
4. Printing or Exporting Specific Sheets:
– If you have multiple sheets in your schedule, you can choose to print or export specific sheets only.
– Click on the sheet you want to print or export, then follow the above steps to print or export that particular sheet.
By utilizing the printing and exporting options in Google Sheets, you can easily obtain physical copies or share your schedule with others in different formats. In the next section, we’ll conclude our guide and summarize what we’ve covered throughout this article.
Conclusion
Creating and organizing a schedule on Google Sheets can be a game-changer in terms of staying organized and on top of your tasks. Throughout this guide, we’ve covered the essential steps to help you set up a functional and visually appealing schedule.
We started by creating a new spreadsheet and naming and organizing the sheets within it. Then, we learned how to format the calendar, adding dates, days of the week, and time slots. Furthermore, we explored how to add tasks or events, apply color and formatting, and even sort and filter the schedule to prioritize and navigate through your activities.
Google Sheets also offers convenient features for sharing and collaborating on your schedule. You can easily share your schedule with others, collaborate in real-time, and track changes made by different collaborators. This promotes efficient teamwork and ensures everyone is on the same page.
Additionally, we discussed how to print and export your schedule. Whether you need a physical copy or want to share the schedule in different file formats, Google Sheets allows for quick and easy printing or exporting as a PDF, Excel, or CSV file.
By following these steps and utilizing the features and functionalities of Google Sheets, you can create a well-organized and efficient schedule that meets your specific needs. Whether you’re a student, professional, or simply someone who wants to stay organized, Google Sheets can be your trusted tool for managing your time and tasks.
So, go ahead and start creating your own schedule on Google Sheets today. Stay organized, stay productive, and enjoy the benefits of an efficient and well-planned schedule!