Introduction
Welcome to the world of Google Sheets, a powerful and versatile tool for organizing and analyzing data. One of the handy features Google Sheets offers is the ability to sort multiple columns simultaneously. Whether you’re working with a large dataset or trying to find patterns in your data, sorting multiple columns can make your life a whole lot easier by helping you quickly arrange and compare values.
Sorting multiple columns in Google Sheets allows you to prioritize and arrange your data based on multiple criteria. This can help you identify trends, find outliers, or simply organize your data in a more meaningful way. Whether you’re managing finances, planning a project, or analyzing survey responses, mastering the art of sorting multiple columns can save you time and enhance your data analysis skills.
In this article, we’ll walk you through the step-by-step process of sorting multiple columns in Google Sheets. We’ll explore how to select the data range, open the sort menu, choose the columns to sort, determine the sort order, and apply the sorting to your data. Additionally, we’ll provide you with some helpful tips to optimize your sorting experience and ensure accurate results.
Why Sorting Multiple Columns is Useful
Sorting multiple columns in Google Sheets is a powerful technique that allows you to gain deeper insights and effectively analyze your data. Here are a few reasons why sorting multiple columns can be incredibly useful:
- Better Data Organization: Sorting multiple columns allows you to arrange your data in a logical and meaningful way. Whether you need to sort by date, alphabetical order, numerical values, or any other criteria, organizing your data helps you see patterns and relationships more easily.
- Identify Trends and Patterns: By sorting multiple columns, you can quickly identify trends and patterns within your data. For example, you can sort sales data by date and product category to see which products are selling the most and track the performance over time.
- Compare and Contrast Data: Sorting multiple columns enables you to compare and contrast different attributes within your dataset. For instance, you can sort students’ grades by subject and by their performance to identify areas of improvement or to see if there are any correlations between subjects.
- Find Outliers or Anomalies: Sorting multiple columns helps you detect outliers or anomalies in your data. By sorting numerical values, you can easily spot values that are significantly higher or lower than the rest, which may require further investigation.
- Quick Decision Making: When working with large datasets, sorting multiple columns can help you make faster decisions. You can sort by specific criteria, such as sorting a customer database by the most recently purchased items to identify potential upselling opportunities.
By utilizing the power of sorting multiple columns in Google Sheets, you can unlock the full potential of your data and make informed decisions based on relevant insights and patterns.
Step 1: Selecting the Data
Before you can sort multiple columns in Google Sheets, you need to select the data range that you want to sort. Here’s how you can do it:
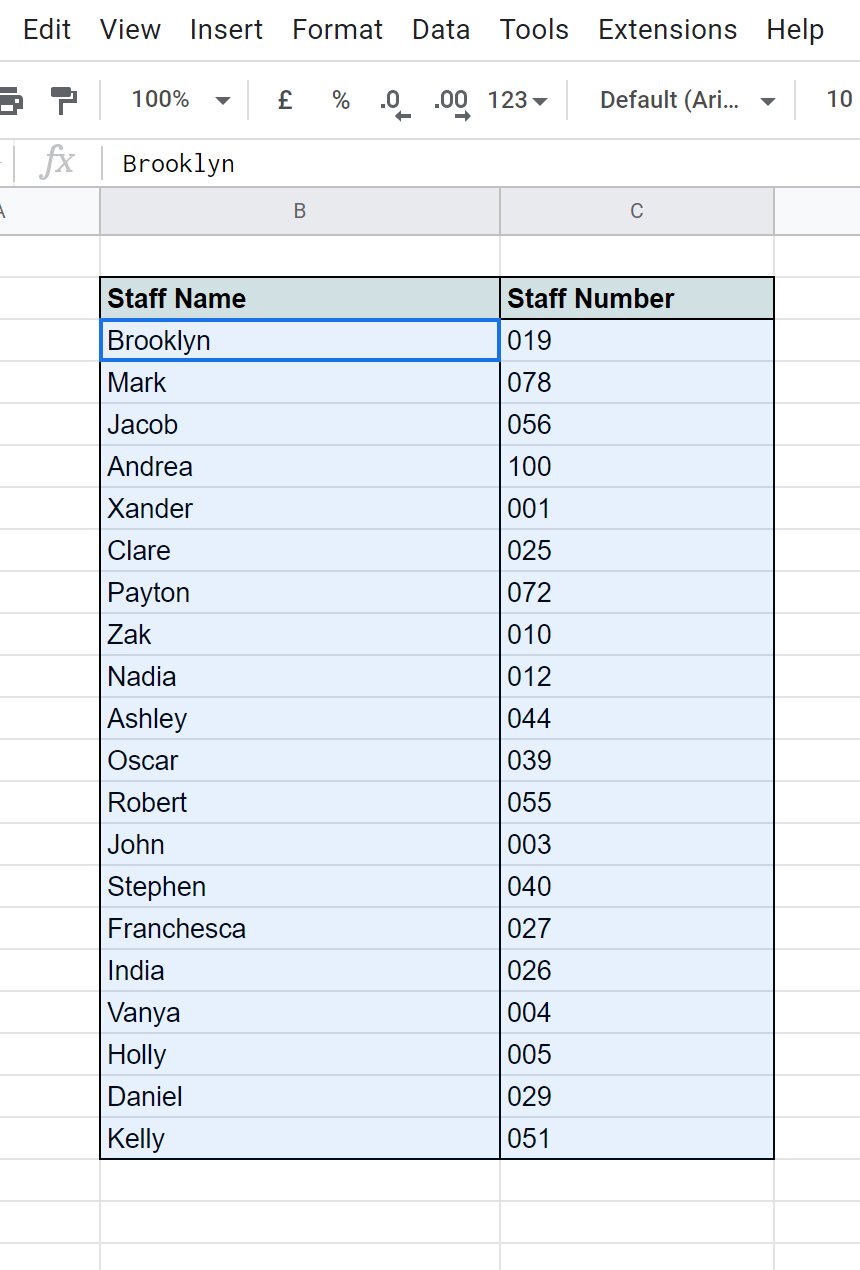
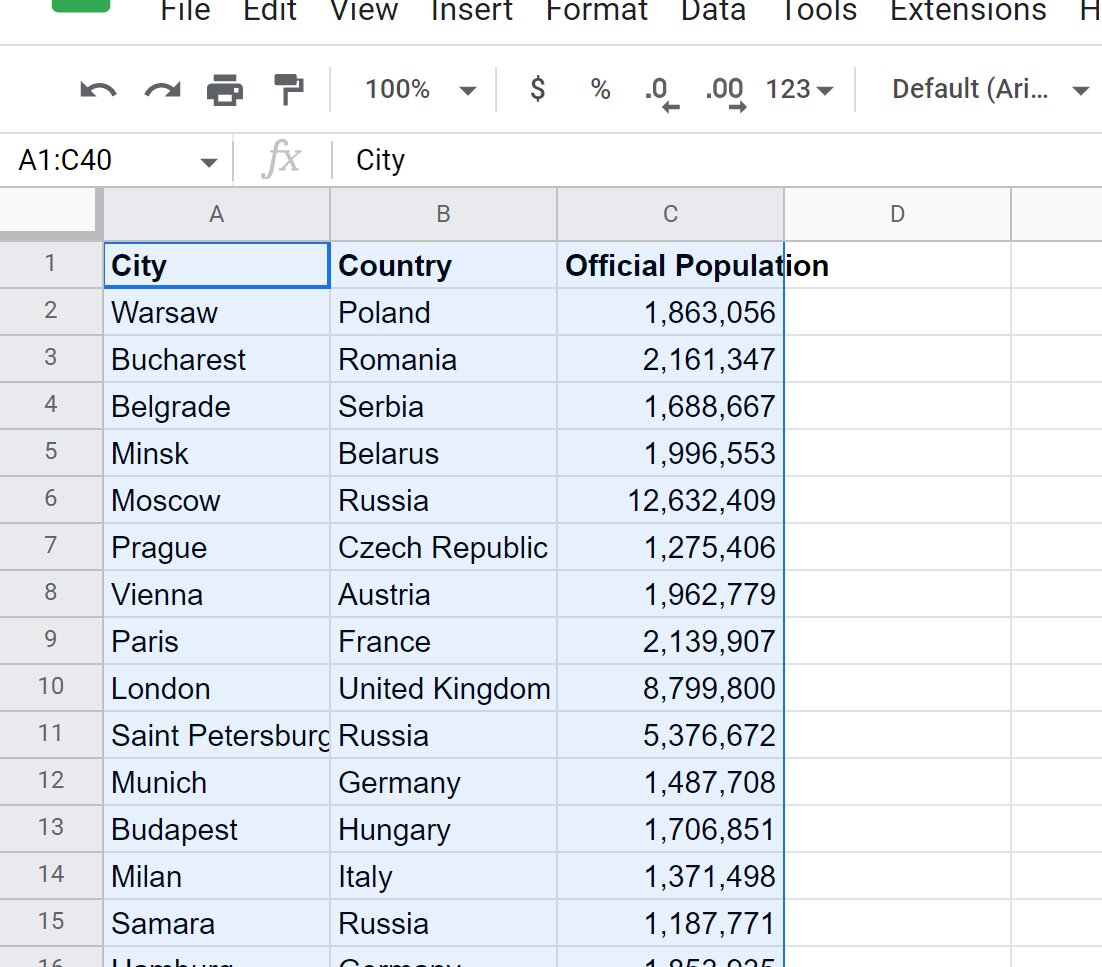
- Open your Google Sheets document and locate the data you want to sort.
- Click and drag your cursor to select the entire range of data that you want to sort. You can select multiple columns by dragging your cursor across the column headers or by holding down the “Shift” key and clicking on each column individually.
- Ensure that you have included all the columns and rows that you want to sort in your selection. If you accidentally select extra columns or rows, you can simply click and drag to deselect them.
Once you have selected your data range, you are ready to move on to the next step and start sorting multiple columns in Google Sheets. Remember that the accuracy and effectiveness of your sorting will depend on selecting the correct data range.
Step 2: Opening the Sort Menu
Now that you have selected the data range, it’s time to open the sort menu in Google Sheets. The sort menu is where you’ll find the options to specify your sorting criteria. Here’s how you can open the sort menu:
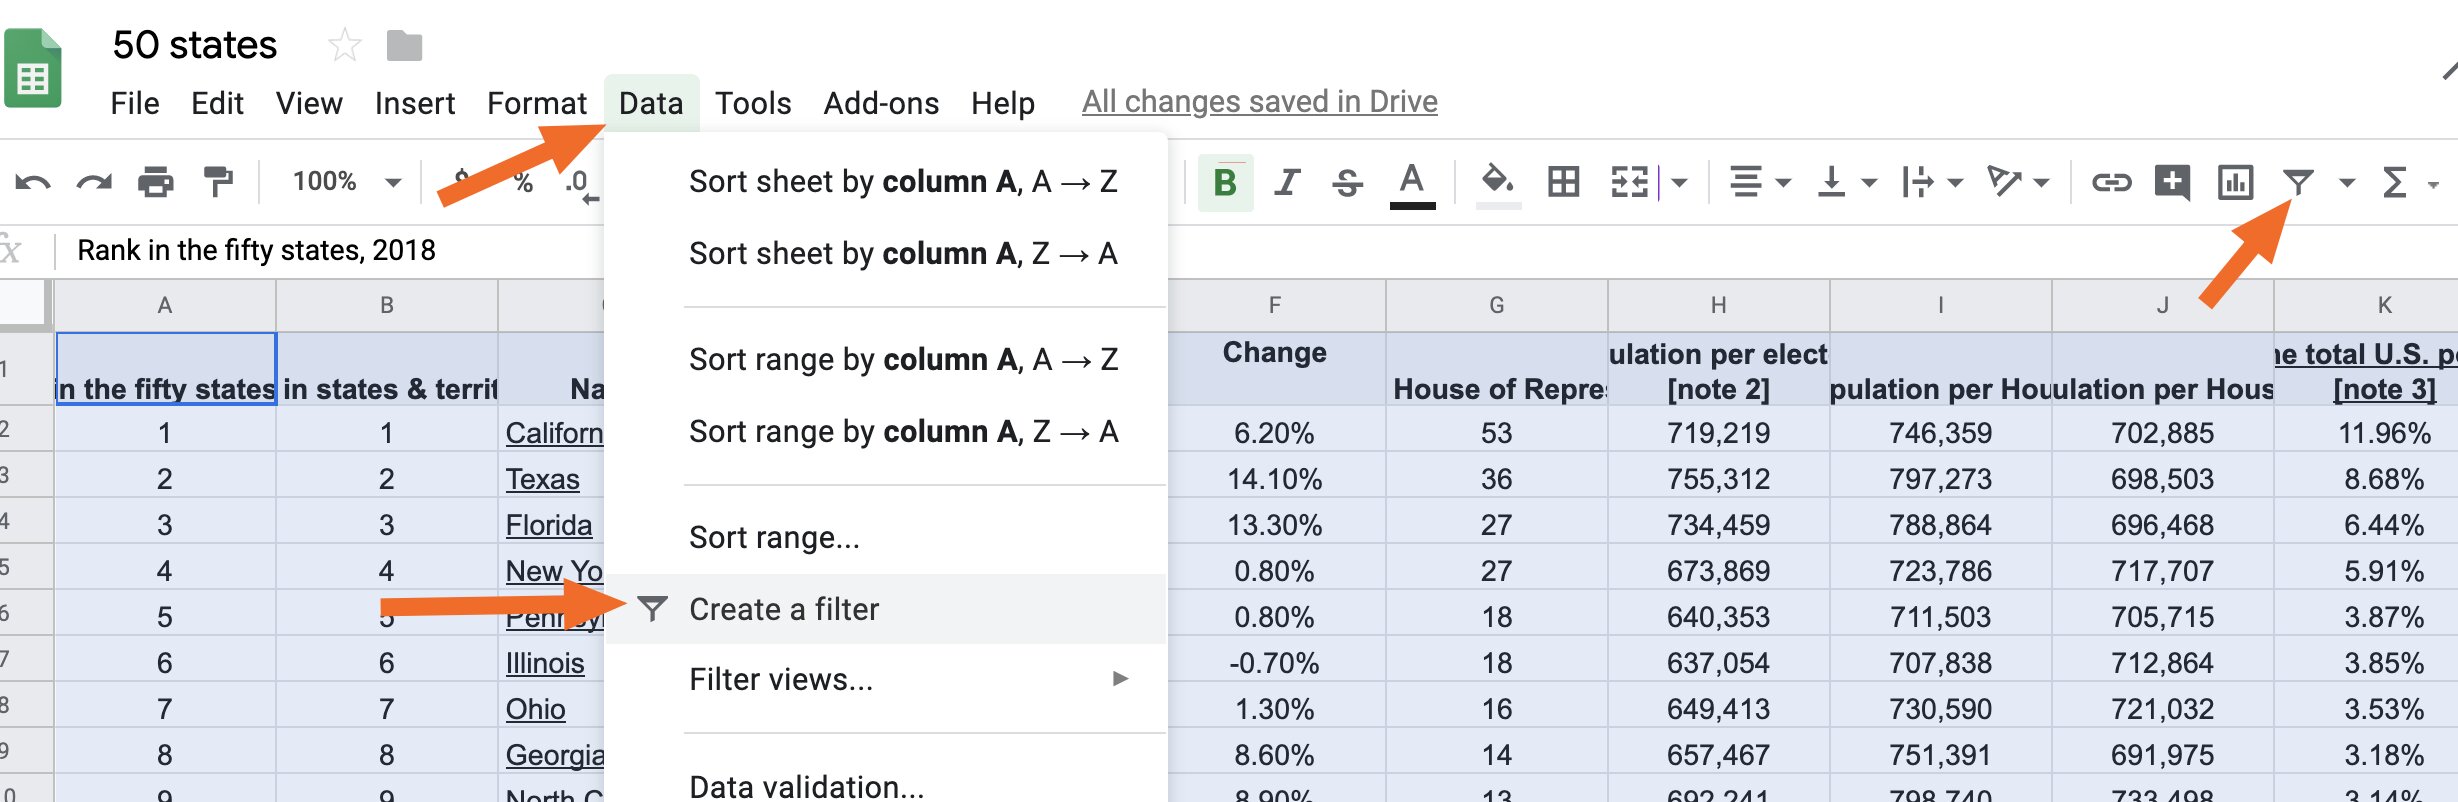
- With your data range selected, navigate to the toolbar at the top of the Google Sheets window.
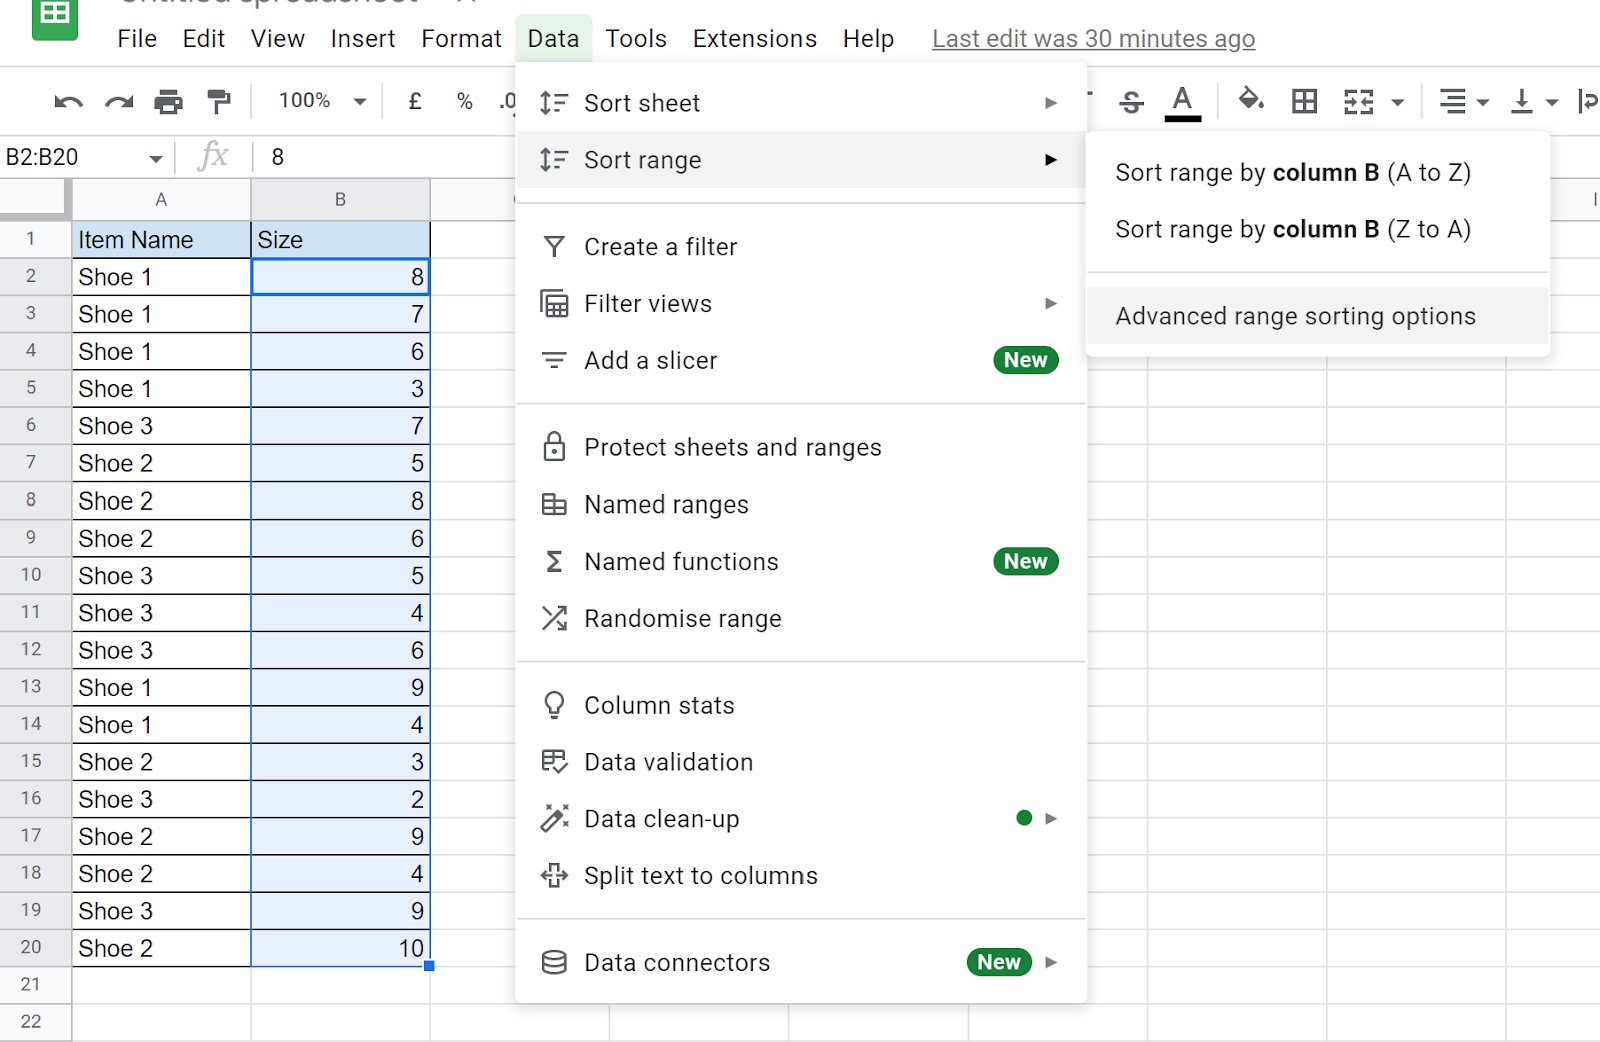
- Locate the “Data” tab in the toolbar and click on it. A drop-down menu will appear.
- In the drop-down menu, navigate to the “Sort Range” option and click on it. The sort menu will now open on the right side of your screen.
The sort menu is where you can specify the columns to sort, the sort order, and any additional sorting options that you may need. Take a moment to familiarize yourself with the sort menu as we move on to the next step of choosing the columns to sort.
Step 3: Choosing the Columns to Sort
After opening the sort menu, you can now choose the columns that you want to sort in your Google Sheets document. Here’s how you can do it:
- In the sort menu, you will see a list of columns with checkboxes next to them. These checkboxes represent the columns in your selected data range.
- Scroll through the list of columns and check the boxes next to the columns you want to include in the sorting process. You can select multiple columns by checking each box individually.
- The order in which you check the boxes will determine the priority of the sort. If you check multiple boxes, the sorting will be applied based on the topmost checked column first, followed by the next checked column, and so on.
- If you want to sort in descending order instead of ascending order, click the “Descending” option located below the column list.
Choosing the columns to sort is an important step as it determines the criteria by which your data will be arranged. Take your time to select the desired columns and set the desired sort order before proceeding to the next step.
Step 4: Determining the Sort Order
Once you have chosen the columns to sort in your Google Sheets document, the next step is to determine the sort order. The sort order specifies whether the data should be sorted in ascending or descending order based on the selected columns. Here’s how you can determine the sort order:
- In the sort menu, you will find two radio buttons labeled “Ascending” and “Descending”.
- If you want your data to be sorted in ascending order (e.g., from smallest to largest, A to Z, oldest to newest), leave the “Ascending” option selected.
- If you want your data to be sorted in descending order (e.g., from largest to smallest, Z to A, newest to oldest), select the “Descending” option.
The sort order is essential for arranging your data in the desired sequence. It allows you to prioritize the sorting based on your needs, whether you want to identify the highest values or the lowest values, or arrange your data in reverse alphabetical order.
Take a moment to choose the appropriate sort order that aligns with your data analysis goals before moving on to the next step of applying the sort.
Step 5: Applying the Sort
Now that you have selected the columns to sort and determined the sort order in your Google Sheets document, it’s time to apply the sort and see the results. Here’s how you can do it:
- In the sort menu, review your selected columns and sort order to ensure they are correct.
- Click the “Sort” button at the bottom of the sort menu. Google Sheets will apply the sorting criteria to your selected data range.
- After applying the sort, you will notice that your data is rearranged based on the selected columns and sort order. The sorted columns will be indicated by an arrow icon next to the column header.
Applying the sort instantly rearranges your data, making it easier to analyze and find the information you need. You can now visually identify any trends, patterns, or outliers that may exist within your sorted data.
If you want to change the sort criteria or revert back to the original order of your data, you can simply reopen the sort menu, modify the settings, and reapply the sort as needed.
Congratulations! You have successfully applied the sort to multiple columns in Google Sheets. Now you can proceed to explore and analyze the sorted data to gain valuable insights.
Tips for Sorting Multiple Columns
Sorting multiple columns in Google Sheets can be a powerful tool for data analysis. To enhance your sorting experience and get the most accurate results, here are some helpful tips:
- Plan Ahead: Before you start sorting, consider the specific criteria and goals you have in mind. This will help you select the appropriate columns and sort order.
- Use Headers: Make sure your data has clear headers. Headers provide context and make it easier to understand the sorting results.
- Select the Correct Range: Double-check that you have selected the correct range of data to sort. Incorrect selection may lead to inaccurate results.
- Avoid Merged Cells: Sorting may not work properly if you have merged cells within your selected range. Unmerge the cells before applying the sort.
- Consider Primary Sorting: If you have multiple columns selected for sorting, think about which column should be the primary sort column. This determines the hierarchical order of the sorting.
- Use Custom Sort: Explore the “Custom Sort” option in the sort menu for more advanced sorting options, such as sorting by custom formulas or sorting based on specific conditions.
- Undo and Redo: If you’re not satisfied with the sorting results, remember that you can always use the “Undo” button or keyboard shortcut (Ctrl + Z) to revert back to the previous state.
- Document Changes: If you’re working on a shared Google Sheets document, communicate any changes you make to the sorting to ensure everyone is aware of the adjustments.
By applying these tips, you can improve the accuracy, efficiency, and effectiveness of your sorting process in Google Sheets and achieve better insights from your data.
Conclusion
Sorting multiple columns in Google Sheets is a valuable skill that allows you to organize and analyze your data more effectively. By following the step-by-step process outlined in this guide, you can effortlessly sort multiple columns and gain valuable insights from your data.
We started by emphasizing the importance of sorting multiple columns and how it can enhance data organization, trend identification, comparison, and decision-making. Then, we walked through each step, from selecting the data range and opening the sort menu to choosing the columns, determining the sort order, and applying the sort.
In addition, we provided useful tips to optimize your sorting experience, such as planning ahead, using headers, selecting the correct range, and considering the primary sort column. We also highlighted the benefits of utilizing the custom sort option, being mindful of merged cells, and utilizing the undo and redo features.
Now that you have learned how to sort multiple columns in Google Sheets, you can confidently apply this technique to organize and analyze your data efficiently. Sorting multiple columns will help you uncover patterns, identify outliers, and make data-driven decisions with ease.
So go ahead, explore the power of sorting multiple columns in Google Sheets and take your data analysis skills to the next level.