Introduction
Autofill is a powerful feature in Google Sheets that allows you to quickly and easily fill in a series of cells with repetitive patterns or values. Whether you need to autofill a column with numeric sequences, dates, days of the week, or even custom lists, Google Sheets has you covered. This time-saving feature eliminates the need for manual data entry and ensures accuracy, making it an invaluable tool for professionals, students, and anyone working with spreadsheets.
In this article, we’ll explore how to effectively use Autofill in Google Sheets. We’ll cover various scenarios, including autofilling numeric sequences, dates, days of the week, and months. We’ll also delve into how to create custom autofill lists and even autofill formulas. Additionally, we’ll explore techniques for dragging and filling to autofill across multiple columns and rows.
Whether you’re new to Google Sheets or a seasoned user, mastering the Autofill feature will greatly enhance your productivity and efficiency when working with spreadsheets. So let’s dive in and discover how to harness the power of Autofill in Google Sheets.
Using Autofill in Google Sheets
Autofill in Google Sheets is a simple and intuitive feature that can save you a great deal of time and effort when populating cells with repetitive data. To use Autofill, first, select the cell or range of cells that contain the initial value you want to autofill. Then, click and drag the small blue square in the bottom right corner of the selected cell to autofill the adjacent cells with the desired pattern.
One of the most common uses of Autofill is to create numeric sequences. Google Sheets makes it easy to generate a series of numbers by simply dragging the autofill handle. For example, if you enter the number 1 in the first cell, then drag the handle down, Google Sheets will automatically generate a sequence of incrementing numbers. Alternatively, you can also use the autofill handle to create decrementing sequences by dragging it upward.
Autofill is also extremely helpful when it comes to generating dates in Google Sheets. You can start by entering the initial date, then use the autofill handle to quickly populate the adjacent cells with a range of dates. For example, if you enter a date as “01/01/2022”, you can drag the handle down to fill in subsequent dates like “01/02/2022”, “01/03/2022”, and so on. Similarly, dragging the autofill handle horizontally will populate the adjacent cells with dates in chronological order.
In addition to numeric sequences and dates, Autofill can also be used to generate days of the week. Google Sheets recognizes the pattern of days and can autofill them accordingly. For instance, if you enter “Monday” in a cell and then drag the autofill handle, Google Sheets will fill in the adjacent cells with the days of the week in the correct order – “Tuesday”, “Wednesday”, and so on. This can be particularly handy when creating schedules or organizing data based on specific days of the week.
Autofill in Google Sheets also allows you to generate months effortlessly. By entering the name of a month and dragging the autofill handle, Google Sheets can automatically fill in the adjacent cells with the subsequent months. For example, if you enter “January” and then drag the handle, Sheets will populate the cells with “February”, “March”, “April”, and so on.
Next, let’s explore how to create custom autofill lists in Google Sheets.
Autofilling Numeric Sequences
One of the most common uses of Autofill in Google Sheets is to generate numeric sequences effortlessly. Whether you need a simple incremental sequence or a more complex pattern, Autofill can handle it. To autofill a numeric sequence, follow these steps:
- Select the cell that contains the initial value of your sequence.
- Hover your cursor over the small blue square in the bottom right corner of the selected cell.
- Click and hold the left mouse button, then drag the handle down or across to autofill the adjacent cells with the desired numeric sequence.
Google Sheets is smart enough to recognize the pattern and autofill the subsequent cells accordingly. For example, if you enter the number 1 in the first cell and drag the autofill handle downward, Sheets will automatically fill in the adjacent cells with incrementing numbers – 2, 3, 4, and so on. Likewise, dragging the handle horizontally will generate a sequential pattern in the adjacent cells.
In addition to simple incremental sequences, Google Sheets allows you to create more complex patterns. For instance, you can generate a series of even or odd numbers by starting with the appropriate initial value and using the autofill handle to complete the sequence. Similarly, you can create multiples of a specific number or even create more intricate patterns by inputting the desired starting point and increment.
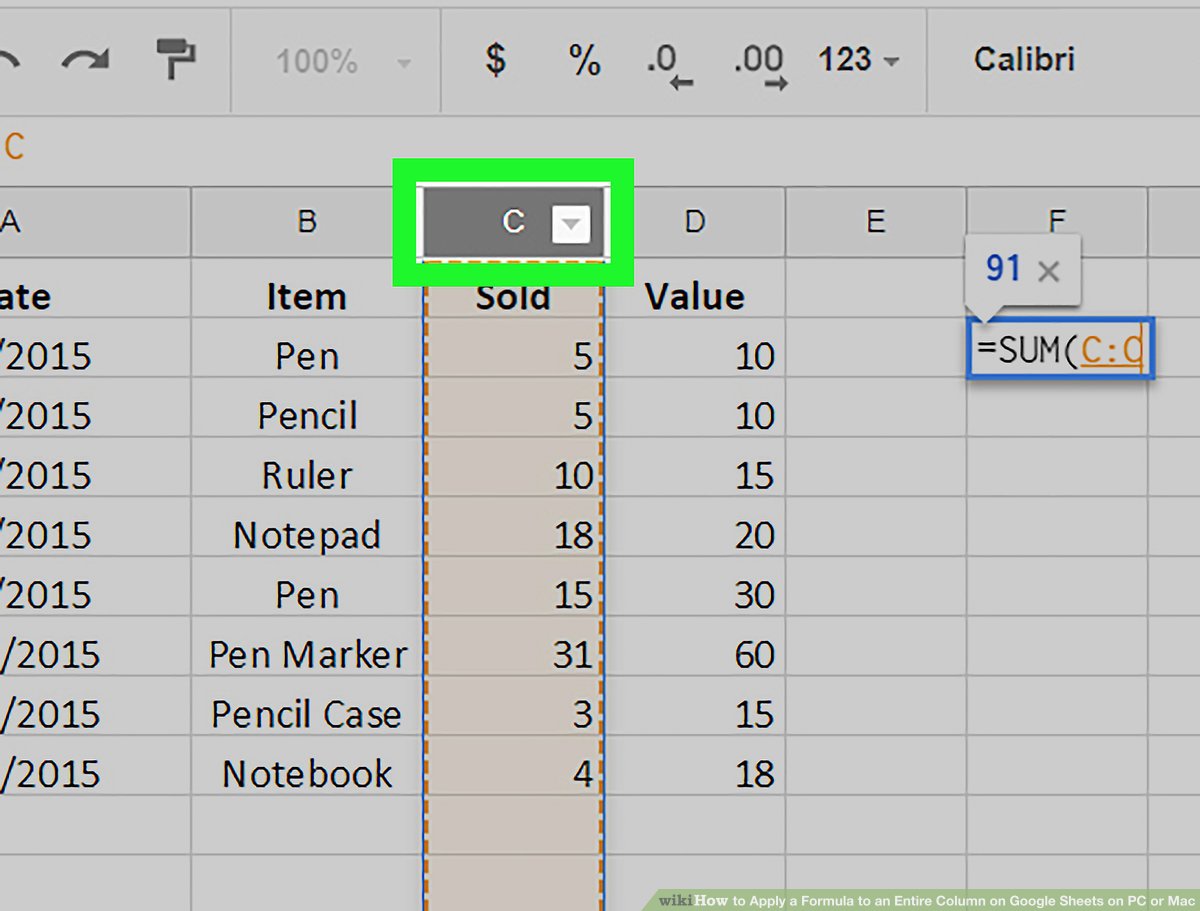
Furthermore, Autofill can be an excellent tool for populating cells with formulas that involve numeric sequences. For example, if you have a formula that calculates the sum of a specific sequence of numbers, you can enter the formula in the first cell, drag the autofill handle, and Google Sheets will automatically adjust the cell references in the formula to correspond to the correct cells in the sequence. This saves you the time and effort of manually inputting the formula in each cell.
By taking advantage of the Autofill feature in Google Sheets, you can quickly and accurately generate numeric sequences, whether they are simple or complex. This is particularly useful when working with large datasets or performing calculations that involve a series of numbers. Now that you’ve mastered autofilling numeric sequences, let’s explore how to autofill dates in Google Sheets.
Autofilling Dates
Autofilling dates in Google Sheets is a breeze with the powerful Autofill feature. Instead of manually typing in each date, you can quickly populate a range of cells with dates by using the autofill handle. Follow these steps to autofill dates:
- Enter the initial date in the first cell of the range.
- Hover your cursor over the small blue square in the bottom right corner of the selected cell.
- Click and hold the left mouse button, then drag the handle down or across to autofill the adjacent cells with dates.
Google Sheets will recognize the date pattern and autofill the subsequent cells with the appropriate dates. For instance, if you enter “01/01/2022” in the first cell and drag the autofill handle downward, Sheets will automatically generate a sequence of dates such as “01/02/2022”, “01/03/2022”, “01/04/2022”, and so on. Similarly, dragging the handle horizontally will populate the adjacent cells with dates in chronological order.
When autofilling dates, Google Sheets also provides several options for adjusting the pattern. For example, if you want to autofill only weekdays, you can set the initial date as a weekday, such as “Monday”, and drag the autofill handle to generate the adjacent weekdays. This is particularly useful when creating a work schedule or tracking activities on specific days of the week.
Furthermore, you can choose to autofill dates with a specific interval by adjusting the initial date and the increment. For example, if you want to generate dates every two days, you can enter the starting date and drag the autofill handle while holding the Ctrl key. Google Sheets will then populate the adjacent cells with the desired dates.
Additionally, Autofill can be combined with formulas to automatically calculate dates based on specific criteria. For instance, if you have a formula that adds a certain number of days to a starting date, you can enter the formula in the first cell, drag the autofill handle, and Google Sheets will automatically adjust the cell references in the formula to correspond to the correct cells in the date sequence.
By utilizing the Autofill feature for dates in Google Sheets, you can quickly and accurately populate cells in your spreadsheet, saving time and ensuring consistency. Now that you’ve learned how to autofill dates, let’s explore how to autofill days of the week.
Autofilling Days of the Week
Autofilling days of the week in Google Sheets is a convenient way to populate cells with the days in a specific order. Instead of manually typing each day, you can use the Autofill feature to quickly generate a sequence of days. Follow these steps to autofill days of the week:
- Enter the name of the first day of the week in the first cell of the range.
- Hover your cursor over the small blue square in the bottom right corner of the selected cell.
- Click and hold the left mouse button, then drag the handle down or across to autofill the adjacent cells with the days of the week.
Google Sheets will recognize the pattern and autofill the subsequent cells with the correct days of the week. For example, if you enter “Monday” in the first cell and drag the autofill handle downward, Sheets will automatically fill in the adjacent cells with the following days – “Tuesday”, “Wednesday”, “Thursday”, and so on. Similarly, dragging the handle horizontally will generate the days of the week in the correct order.
Autofilling days of the week can be particularly useful when creating schedules, organizing data based on specific weekdays, or analyzing trends over time. By automating the process of populating cells with days, you can save time and ensure accuracy in your spreadsheet.
In addition to the default order of weekdays (Monday to Sunday), Google Sheets allows you to customize the sequence of days. For instance, if you need to start with Saturday or Sunday, you can choose the appropriate day as the initial value and use the autofill feature to generate the remaining days in the desired order.
Furthermore, you can adjust the pattern of autofilled days by specifying a different interval. For example, if you want to autofill every other day of the week, you can enter the starting day and drag the autofill handle while holding the Ctrl key. Google Sheets will then populate the adjacent cells with the appropriate days, skipping the ones in between.
By leveraging the Autofill feature to autofill days of the week in Google Sheets, you can streamline your workflow and enhance the organization of your spreadsheet. Now that you’ve learned how to autofill days of the week, let’s explore how to autofill months.
Autofilling Months
Autofilling months in Google Sheets is a powerful feature that allows you to quickly populate cells with a sequence of months. Instead of manually entering each month, you can use the Autofill feature to generate them automatically. Follow these steps to autofill months:
- Enter the name of the first month in the first cell of the range.
- Hover your cursor over the small blue square in the bottom right corner of the selected cell.
- Click and hold the left mouse button, then drag the handle down or across to autofill the adjacent cells with the months of the year.
Google Sheets will recognize the pattern and autofill the subsequent cells with the correct months. For example, if you enter “January” in the first cell and drag the autofill handle downward, Sheets will automatically fill in the adjacent cells with the months in the correct order – “February”, “March”, “April”, and so on. Similarly, dragging the handle horizontally will generate the months in the correct order.
Autofilling months can be incredibly helpful when working with data that is organized by month or conducting analyses that involve trends over time. By automating the process of filling cells with months, you can save time and ensure accuracy in your spreadsheet.
In addition to the default order of months (January to December), Google Sheets allows you to customize the sequence of months. This flexibility is especially useful if you’re working with a non-calendar or fiscal year. By choosing a different starting month as the initial value, you can use the autofill feature to generate the remaining months in the desired order.
Furthermore, you can adjust the pattern of autofilled months by specifying a different interval. For instance, if you want to skip every other month, you can enter the starting month and drag the autofill handle while holding the Ctrl key. Google Sheets will then populate the adjacent cells with the appropriate months, skipping the ones in between.
By leveraging the Autofill feature to autofill months in Google Sheets, you can efficiently organize and analyze your data. Whether you’re tracking monthly trends, creating financial statements, or conducting any other type of analysis, autofilling months will streamline your workflow and enhance the accuracy of your spreadsheets. Now that you’ve learned how to autofill months, let’s explore how to create custom autofill lists.
Autofilling Custom Lists
Google Sheets allows you to create and autofill custom lists, providing flexibility and convenience when populating cells with specific values. This feature is particularly useful when you have a set of values that need to be repeated or when you want to customize the order of autofilled data. Follow these steps to autofill custom lists in Google Sheets:
- Enter the first value of your custom list in the first cell of a range.
- Select the range of cells that you want to autofill with the custom list.
- Go to the “Data” menu and select “Data Validation.”
- In the data validation dialog box, choose “List of items” as the criteria and enter the custom list values separated by commas.
- Click “Save” to apply the custom list to the selected range.
Once you have created the custom list, you can use the Autofill feature to populate cells with the values in the defined order. Simply drag the autofill handle to autofill the adjacent cells with the custom list items.
Creating custom lists in Google Sheets gives you the flexibility to autofill cells with any set of values you need. This can be beneficial when working with repetitive data, such as product names, employee names, or any other categorical information. By defining your own custom lists, you can save time and ensure consistency in your spreadsheet.
Furthermore, custom lists can be extremely useful in scenarios where you want to autofill cells with a specific sequence or pattern that is not covered by the default autofill options. By creating a custom list and applying it, you can easily generate a series of values in the desired order. For example, you could create a custom list with the order of months but include additional labels or abbreviations.
Autofilling custom lists in Google Sheets allows you to streamline your data entry process and ensure accuracy in your spreadsheets. By creating and using custom lists, you can save time and effort while maintaining consistent and organized data. Now that you’ve learned how to autofill custom lists, let’s explore how to autofill formulas.
Autofilling Formulas
Autofilling formulas in Google Sheets is a powerful feature that allows you to quickly apply formulas to a range of cells, saving time and effort in your data analysis and calculations. Instead of manually entering the same formula in multiple cells, you can use the Autofill feature to automatically adjust the cell references and apply the formula to the desired range. Here’s how:
- Enter the formula in the first cell of the range where you want to apply it.
- Hover your cursor over the small blue square in the bottom right corner of the selected cell.
- Click and hold the left mouse button, then drag the handle down or across to autofill the adjacent cells with the formula.
Google Sheets will adjust the cell references in the formula automatically, ensuring that each cell in the range contains the correct formula. This is a huge time-saver when dealing with complex calculations or large data sets.
Autofilling formulas is particularly useful when you have a formula that involves a repetitive pattern or requires calculations based on adjacent cells. For example, if you have a formula that calculates the average of a range of cells, you can enter the formula in the first cell and quickly autofill it to calculate the averages for other ranges.
Another handy application is using formulas to generate series or patterns of values, such as date ranges, incrementing numbers, or calculations based on specific criteria. By utilizing autofill with formulas, you can dynamically apply complex calculations to different cells with ease.
Furthermore, autofilling formulas is not only limited to filling cells vertically or horizontally. You can also use the autofill feature to fill formulas diagonally and even in non-linear patterns, depending on your specific needs.
By leveraging the Autofill feature to autofill formulas in Google Sheets, you can save time, ensure consistency, and streamline your data analysis process. Whether you’re performing complex calculations or applying formulas to large data sets, Autofill is a valuable tool in your spreadsheet arsenal. Now that you’ve learned how to autofill formulas, let’s explore how to use drag and fill to autofill across multiple columns and rows.
Autofilling with Drag and Fill
Autofilling with drag and fill is a powerful technique in Google Sheets that allows you to quickly fill a range of cells with a specific pattern or series of values. By using the mouse to drag and fill, you can extend the pattern across multiple columns and rows effortlessly. Here’s how to autofill with drag and fill:
- Enter the initial value or pattern in the first cell of the range you want to autofill.
- Hover your cursor over the small blue square in the bottom right corner of the selected cell.
- Click and hold the left mouse button, then drag the handle in the desired direction to extend the autofill range.
- Release the mouse button to complete the autofill.
Google Sheets will automatically adjust the pattern and fill in the range based on the drag direction. This technique is useful when you want to extend a series, replicate a pattern, or duplicate a formula across multiple cells.
Autofilling with drag and fill allows you to quickly populate cells with a wide range of values. For example, you can autofill months, days of the week, sequential numbers, or even complex formulas. It’s a great time-saver when working with large datasets or performing repetitive tasks in your spreadsheet.
Moreover, drag and fill provides flexibility in choosing the autofill direction. You can drag the handle horizontally, vertically, or even diagonally, depending on the arrangement of your data and the desired pattern. This flexibility allows you to customize the autofill process to fit your specific needs.
When using drag and fill, Google Sheets also provides additional options for autofilling. For instance, if you want to repeat a specific pattern rather than extending a series, you can enable the “Auto Fill Options” button that appears after you release the mouse button. This provides you with various options, such as copying values only, filling formatting only, or filling the series without formatting.
By mastering the technique of autofilling with drag and fill in Google Sheets, you can enhance your productivity, save time, and easily extend patterns or values across multiple cells. Now that you’ve learned how to use drag and fill, let’s explore how to autofill across multiple columns and rows.
Autofilling Across Multiple Columns and Rows
Autofilling across multiple columns and rows in Google Sheets allows you to quickly populate cells with a specific pattern or series of values in a larger area. By using the Autofill feature and combining it with drag and fill, you can easily extend the pattern or values across multiple columns and rows in your spreadsheet. Here’s how:
- Select the range of cells that contain the initial values or pattern you want to autofill.
- Hover your cursor over the small blue square in the bottom right corner of the selected range.
- Click and hold the left mouse button, then drag the handle in the desired direction to extend the autofill across multiple columns and rows.
- Release the mouse button to complete the autofill.
Google Sheets will adjust the pattern or values and fill in the range based on the drag direction, extending it across the selected range. This technique is particularly helpful when you need to populate a large area of the spreadsheet with repetitive data or a specific sequence.
Autofilling across multiple columns and rows allows you to efficiently apply patterns or values to a larger dataset, saving you time and effort. For example, if you have a column with a series of numbers, you can select that column, drag the autofill handle across multiple columns, and Sheets will automatically fill in the corresponding values in each consecutive column. Similarly, you can autofill across multiple rows to quickly replicate the pattern or values horizontally.
In addition, when autofilling across multiple columns and rows, Google Sheets provides options to further customize the autofill behavior. For instance, you can choose to autofill only the values or include formatting, depending on your specific requirements. These customization options give you more control over how the autofill operation is applied to the selected range.
By leveraging autofilling across multiple columns and rows in Google Sheets, you can streamline your data entry process, ensure consistency in larger datasets, and effortlessly extend patterns or values across the desired range. Now that you’ve learned how to autofill across multiple columns and rows, let’s explore common troubleshooting issues with Autofill.
Troubleshooting Common Issues with Autofill
While autofill is a powerful feature in Google Sheets, you may encounter some common issues when using it. Understanding these issues and how to troubleshoot them will help you effectively use autofill and overcome any obstacles that may arise. Here are some common issues and their solutions:
1. Incorrect pattern recognition: Sometimes, Google Sheets may not recognize the pattern or sequence correctly, leading to incorrect autofill results. To address this, double-check the initial values and ensure they follow a consistent pattern. If necessary, correct any inconsistencies or gaps in the data to allow Sheets to accurately recognize the desired pattern.
2. Unexpected changes in values: In some cases, when autofilling formulas or calculations, the resulting values may unexpectedly change. This can happen when the formula references absolute cell references ($) instead of relative references. To resolve this, adjust the cell references in the formula to be relative, allowing them to adapt and update correctly during autofill.
3. Limited population of custom lists: Custom lists created for autofill may not populate as expected if the range of cells to be autofilled is larger than the range specified in the custom list. In such cases, review the range of the custom list and ensure that it encompasses the entire range where you want the values to be autofilled.
4. Cell formatting not applied: If you’re autofilling cells with specific formatting, such as colors or font styles, you may encounter issues where the formatting is not replicated correctly. This can happen when the “Auto Fill Options” dialog does not appear after dragging the autofill handle. To resolve this, double-click the autofill handle after dragging to reveal the “Auto Fill Options” dialog and choose the “Fill Formatting Only” option to ensure that the formatting is applied correctly.
5. Inconsistent data ranges: When autofilling across multiple columns or rows, inconsistencies in the data range selection can lead to unexpected results. Ensure that you have selected the correct range before dragging the autofill handle. Making sure the initial values or formula is in the correct location within the selected range can also prevent errors.
By being aware of these common issues and their solutions, you can effectively troubleshoot any problems that may arise when using autofill in Google Sheets. Overcoming these obstacles will allow you to harness the full potential of autofill and optimize your productivity while working with spreadsheets. Now that you’re equipped with troubleshooting knowledge, let’s summarize what we’ve learned throughout this article.
Conclusion
Autofill is a powerful feature in Google Sheets that allows you to quickly and efficiently populate cells with patterns, sequences, formulas, and custom lists. By leveraging the Autofill feature and its capabilities, you can save valuable time, improve accuracy, and enhance your overall productivity when working with spreadsheets.
In this article, we explored the various aspects of using Autofill in Google Sheets. We learned how to autofill numeric sequences, easily generate dates and days of the week, create custom lists for autofill, apply formulas with Autofill, use drag and fill to extend patterns across multiple cells, and troubleshoot common issues that may arise during autofilling.
Whether you need to create a sequence of numbers, fill dates, assign days of the week, generate months, populate cells with custom lists, automate formulas, or extend patterns across multiple columns and rows, the Autofill feature in Google Sheets provides the tools and flexibility to accomplish these tasks efficiently.
By utilizing the tips and techniques shared in this article, you’re now equipped with the knowledge to maximize the potential of Autofill in Google Sheets. Take advantage of this feature to streamline your workflow, improve accuracy, and spend more time on analysis and insights rather than manual data entry.
So, start leveraging the power of Autofill in Google Sheets and unlock new levels of productivity and efficiency in your spreadsheet workflows.