Introduction
Google Sheets is a powerful tool for organizing and analyzing data. It allows users to create, edit, and collaborate on spreadsheets online. In certain situations, you may need to protect your sheet and prevent others from making changes. However, there might also be instances where you want to unlock a sheet to make edits or share it with others.
In this article, we will explore different methods to unlock a sheet in Google Sheets. Whether you have forgotten the password, need to make changes, or want to share the sheet with collaborators, we’ve got you covered. By following the steps outlined below, you will be able to unlock your sheet and regain full control over your data.
Before we begin, it is important to note that in order to unlock a sheet, you must have the necessary permission. If you are not the owner of the sheet or do not have edit access, you may not be able to unlock it. Make sure you have the required permissions before attempting to unlock a sheet.
Now, let’s dive into the various methods you can use to unlock a sheet in Google Sheets.
Method 1: Using the Google Sheets Interface
If you are the owner of the sheet or have edit access, one of the simplest ways to unlock a sheet is by using the Google Sheets interface. Follow the steps below to unlock a sheet:
- Open the Google Sheets document that contains the locked sheet.
- Navigate to the sheet you want to unlock.
- Click on the sheet tab at the bottom of the document to select it.
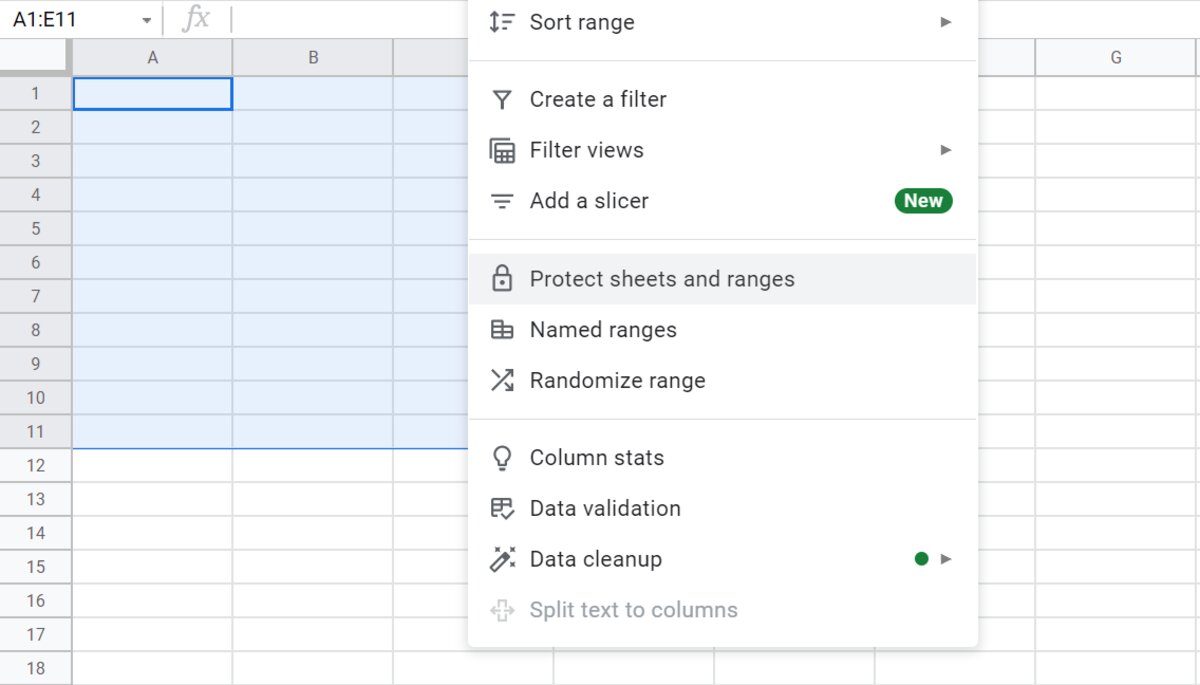
- Go to the “Data” menu at the top of the screen and select “Protected sheets and ranges.”
- A sidebar will appear on the right side of the screen. In the sidebar, you will see a list of all the protected sheets and ranges in your document.
- Find the sheet you want to unlock and click on it to select it. You will see a small padlock icon next to the selected sheet.
- Click on the “Remove” button to remove the protection from the sheet. A confirmation dialog will appear.
- Click “OK” to confirm the removal of the protection. The sheet will be unlocked, and you will be able to edit it.
Using the Google Sheets interface is a straightforward and user-friendly method to unlock a sheet. However, this method requires that you have the necessary access and permissions to make changes to the document.
Now that you know how to unlock a sheet using the Google Sheets interface, let’s move on to the next method.
Method 2: Using the Protect Sheets Feature
If you want to lock specific cells or ranges within a sheet while still allowing editing in other areas, the “Protect sheets” feature in Google Sheets can help you achieve this. Here’s how you can use this feature to unlock a sheet:
- Open the Google Sheets document containing the protected sheet.
- Select the sheet you want to unlock.
- Click on the “Data” menu at the top of the screen, and then select “Protect sheets and ranges.”
- In the sidebar that appears on the right side of the screen, you will see a list of all the protected sheets and ranges in your document.
- Locate the protected sheet you want to unlock and click on it to select it.
- Click on the “Remove” button to remove the protection from the sheet. A confirmation dialog will appear.
- Click “OK” to confirm the removal of the protection. The sheet will now be unlocked and editable.
The “Protect sheets” feature provides greater control over the protection of your sheet, allowing you to specify which cells or ranges to lock. This method ensures that your data remains secure while still enabling you to make necessary edits when needed.
Now that you are familiar with using the “Protect sheets” feature to unlock a sheet, let’s move on to the next method.
Method 3: Using the Google Apps Script
If you’re comfortable with coding or want to automate the process of unlocking a sheet, you can utilize Google Apps Script to achieve this. The following steps will guide you through the process:
- Open the Google Sheets document that contains the locked sheet.
- Click on the “Tools” menu at the top of the screen, and then select “Script editor.”
- A new tab will open with the Google Apps Script editor.
- In the script editor, delete any existing code and replace it with the following:
- Click on the “Save” button to save the script.
- Close the script editor tab and return to the Google Sheets document.
- Click on the “Extensions” menu at the top of the screen, select “Apps Script,” and then choose “unlockSheet.”
- A prompt will appear asking for authorization. Click “Review Permissions” and follow the prompts to grant the necessary permissions.
- After granting the permissions, the Google Apps Script will run and unlock the specified sheet.
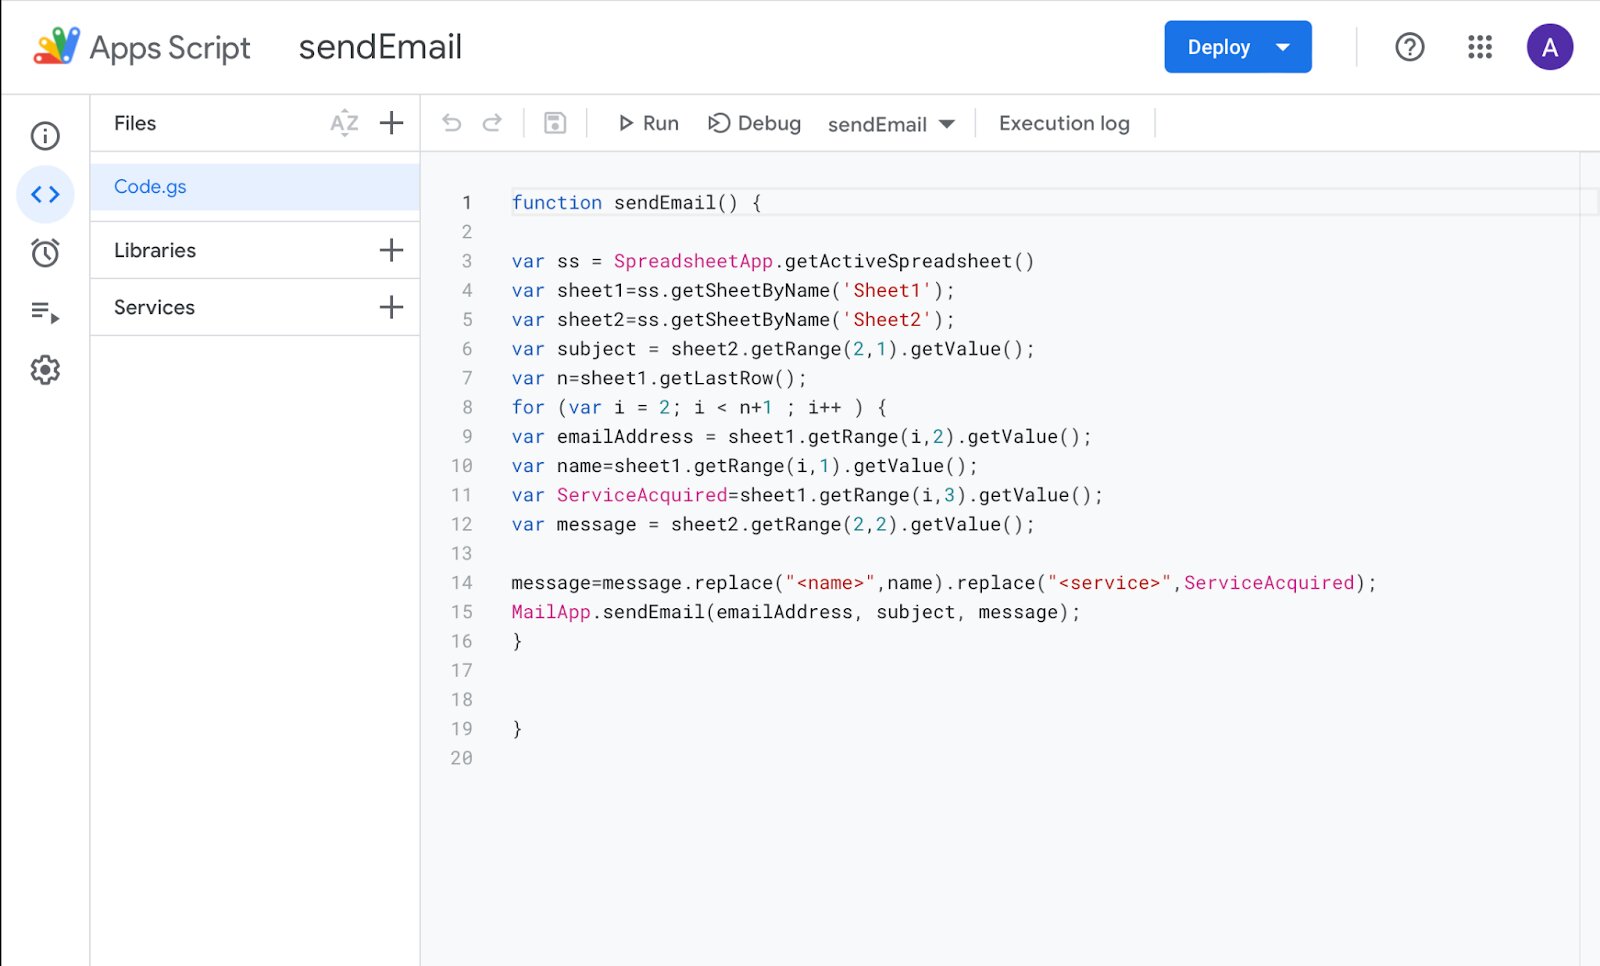
javascript
function unlockSheet() {
var sheet = SpreadsheetApp.getActiveSpreadsheet().getSheetByName(“Name of Locked Sheet”);
sheet.protect().remove();
}
Make sure to replace “Name of Locked Sheet” with the actual name of the sheet you want to unlock.
Using Google Apps Script allows you to automate repetitive tasks and unlock sheets with minimal effort. This method is especially useful if you have multiple sheets to unlock or if you need to regularly unlock sheets in your workflow.
Now that you know how to unlock a sheet using Google Apps Script, let’s wrap up the article.
Conclusion
Unlocking a sheet in Google Sheets is a straightforward process that can be achieved using different methods depending on your specific needs. Whether you prefer using the Google Sheets interface, the “Protect sheets” feature, or Google Apps Script, you have a range of options to regain access and control over your locked sheets.
In this article, we explored three methods for unlocking a sheet in Google Sheets:
- Using the Google Sheets interface, which allows you to remove the protection from a sheet by following a few simple steps.
- Utilizing the “Protect sheets” feature, which enables you to lock specific cells or ranges while still allowing editing in other areas of the sheet.
- Utilizing Google Apps Script to automate the process of unlocking a sheet, particularly useful if you have multiple sheets to unlock or if you need to regularly unlock sheets.
Remember to ensure proper permissions and access rights before attempting to unlock a sheet. It’s also a good practice to make a backup of your sheet before making any changes.
By following the methods outlined in this article, you can unlock sheets in Google Sheets and make necessary edits or share them with collaborators. Unlocking a sheet allows you to have greater control over your data and harness the full potential of Google Sheets for your productivity and collaboration needs.
We hope this article has provided you with the guidance and tools necessary to unlock your sheets in Google Sheets. So go ahead, unlock your sheets, and unleash the true power of your data!