Preparing for the Installation
Before you begin installing Mac OS on your new SSD, there are a few essential steps you need to take to ensure a smooth and successful installation process. Follow these guidelines to prepare yourself and your computer for the upgrade:
1. Verify Compatibility: Check whether your Mac system is compatible with the version of Mac OS you intend to install. Visit the Apple website or consult the documentation to confirm compatibility.
2. Check Hardware Requirements: Make sure your Mac meets the minimum hardware requirements stated by Apple for the version of Mac OS you are installing. This includes sufficient RAM, processor speed, and available storage space.
3. Update Software: It is always advisable to update your existing Mac OS to the latest version before installing on the new SSD. This ensures compatibility and minimizes the risk of any issues during the installation process.
4. Create a Backup: Before proceeding with any major system changes, it is crucial to create a full backup of your data. This will serve as a safety net in case anything goes wrong during the installation process. Use Time Machine or any reliable backup software to create a complete backup of your Mac.
5. Make a List of Installed Apps: Take note of all the applications you currently have installed on your Mac. This will help you easily reinstall them after the installation of the new SSD. Ensure you have the necessary installation files or access to them online.
6. Gather Important Documents: Collect any important files, documents, or media that you want to transfer to the new SSD. Organize them in a separate folder to make the migration process more efficient.
7. Disconnect External Devices: Unplug any external devices connected to your Mac, such as printers, scanners, or hard drives. This prevents any interference during the installation process and ensures a smoother transition to the new SSD.
8. Get a USB Flash Drive: You will need a USB flash drive with sufficient storage capacity to create a bootable installer for Mac OS. Make sure the drive is formatted correctly and is compatible with your Mac.
By following these preparatory steps, you will be well-equipped and ready to install Mac OS on your new SSD. Taking the time to ensure compatibility, backup your data, and gather necessary files and documents will make the installation process much smoother and less stressful.
Backing Up Your Data
Prior to installing Mac OS on your new SSD, it is crucial to create a backup of all your important data. This ensures that even if something goes wrong during the installation process, you won’t lose any valuable information. Follow these steps to back up your data effectively:
1. Time Machine: Mac users have a built-in backup solution called Time Machine. Connect an external hard drive to your Mac and set it up as a Time Machine backup source. This will enable you to create automatic backups of your entire system, including files, applications, and settings.
2. Select Backup Frequency: Access the Time Machine preferences in your Mac’s System Preferences panel. Choose the frequency of backups, whether it’s hourly, daily, or weekly, depending on your needs and available storage space on the backup drive.
3. Run an Initial Backup: This step is crucial if you haven’t used Time Machine before or if you want to ensure you have the latest data backed up. Initiate an immediate backup to capture your current system state and all your files.
4. Verify Backup Success: After the initial backup, double-check that everything is backed up successfully. Open the Time Machine interface to browse through your files and folders to ensure they are all included in the backup.
5. Check External Drive: Confirm that the external backup drive has enough free space to accommodate your data. If needed, delete unnecessary files or transfer some files to another location to make room for the backup.
6. Offline Backup: Consider making a separate offline backup of your most essential data using an external hard drive or cloud storage. This adds an extra layer of protection in case of any unforeseen issues during the installation process.
7. Store Backup in a Safe Place: Keep your backup drive or offline backup in a secure location, preferably away from your computer. This safeguards your data against theft, fire, or other potential disasters.
8. Test the Backup: Before proceeding with the installation, it is recommended to restore a few files or folders from your backup to ensure the data is intact and accessible. This gives you peace of mind knowing you can successfully recover your data if required.
By following these steps, you can create a comprehensive backup of your data, giving you the confidence to proceed with the installation of Mac OS on your new SSD. Remember to double-check and verify the integrity of your backup before proceeding to ensure a smooth and worry-free installation process.
Creating a Bootable Installer
To install Mac OS on your new SSD, you will need a bootable installer. This allows you to install the operating system without an internet connection and provides a convenient way to perform a clean installation. Follow these steps to create a bootable installer:
1. Download the Installer: Visit the Mac App Store and download the installer for the version of Mac OS you want to install. Make sure the installer is saved in the Applications folder.
2. Format the USB Drive: Connect a USB flash drive with at least 12GB of available storage. Open the Disk Utility app and select the USB drive from the sidebar. Click on the “Erase” tab and format the drive as “Mac OS Extended (Journaled)”. Give it a name like “Bootable Installer” for easy identification.
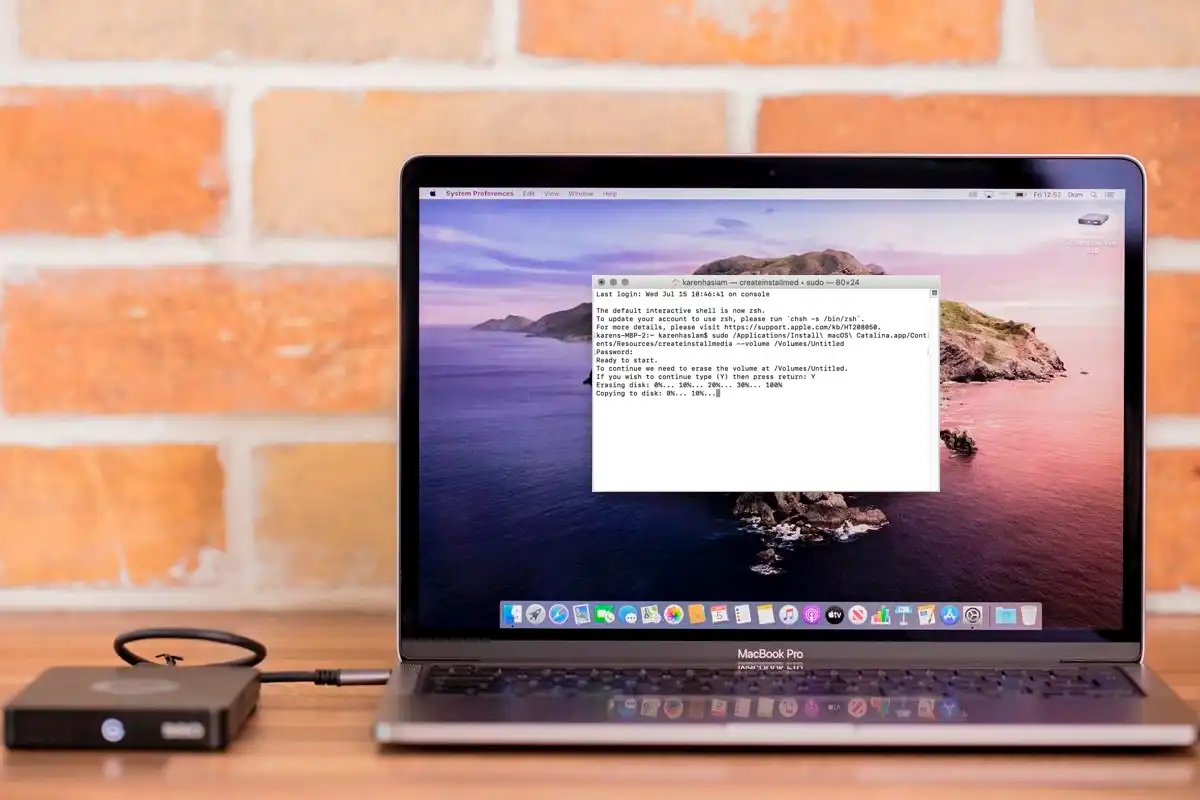
3. Create the Bootable Installer: Open the Terminal app (found in the Utilities folder within the Applications folder) and paste the following command: sudo /Applications/Install\ macOS\ [version].app/Contents/Resources/createinstallmedia --volume /Volumes/BootableInstaller --applicationpath /Applications/Install\ macOS\ [version].app Replace “[version]” with the specific version of Mac OS you downloaded.
4. Authenticate and Begin: Press Enter and enter your administrator password when prompted. The process of creating the bootable installer will begin, and it may take some time to complete. Do not interrupt the process.
5. Verify the Bootable Installer: After the process finishes, your USB drive will be transformed into a bootable installer. To verify its functionality, restart your Mac while holding down the Option key. The bootable installer should appear as a startup disk option in the boot menu.
6. Eject the USB Drive: Once you have confirmed the successful creation of the bootable installer, eject the USB drive from your Mac. This will protect it from any accidental modifications or data loss.
By following these steps, you can create a bootable installer for your desired version of Mac OS. This will serve as a handy tool for installing the operating system on your new SSD, ensuring a clean and efficient installation process.
Installing the New SSD
Now that you have prepared the necessary tools and created a bootable installer, it’s time to install the new SSD in your Mac. Follow these steps to successfully install the new SSD:
1. Power Down: Shut down your Mac and disconnect all cables and external devices from it. Ensure it is completely powered off before proceeding.
2. Access the Internal Drive: Depending on your Mac model, you may need to remove the bottom panel or access the drive bay to reach the internal drive slots. Refer to the user manual or online resources for specific instructions for your Mac model.
3. Identify the Drive Slots: Locate the drive slots where the existing drive (or drives) is installed. Note which slots are currently occupied.
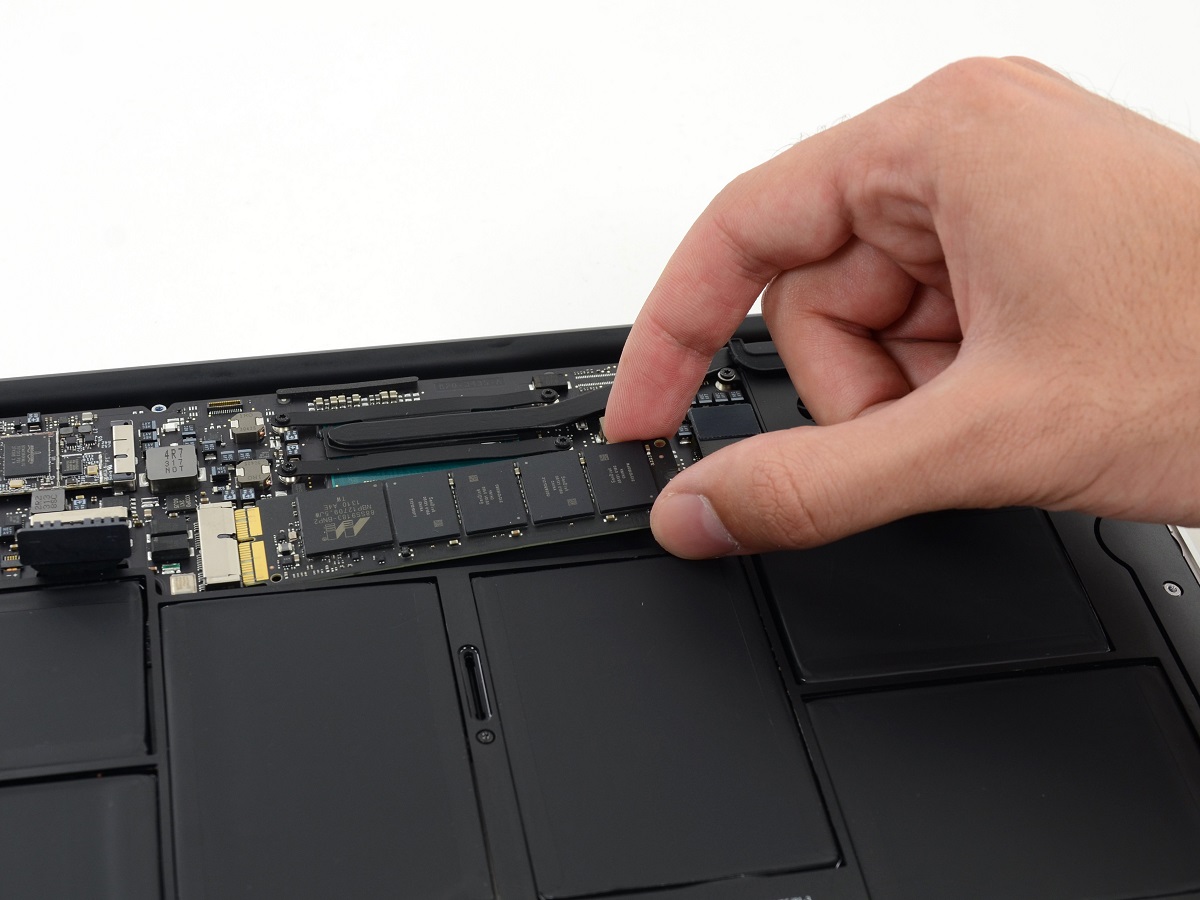
4. Remove Existing Drive (Optional): If you are replacing an existing drive, carefully disconnect the cables and remove it from its slot. Be gentle and avoid pulling or yanking on the cables to prevent any damage.
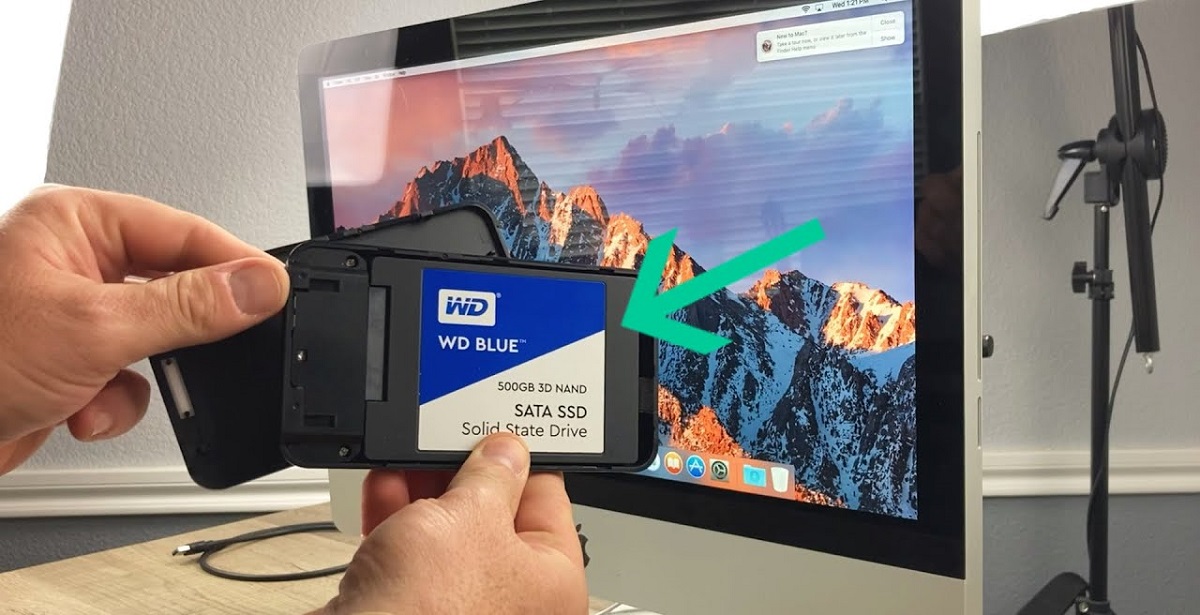
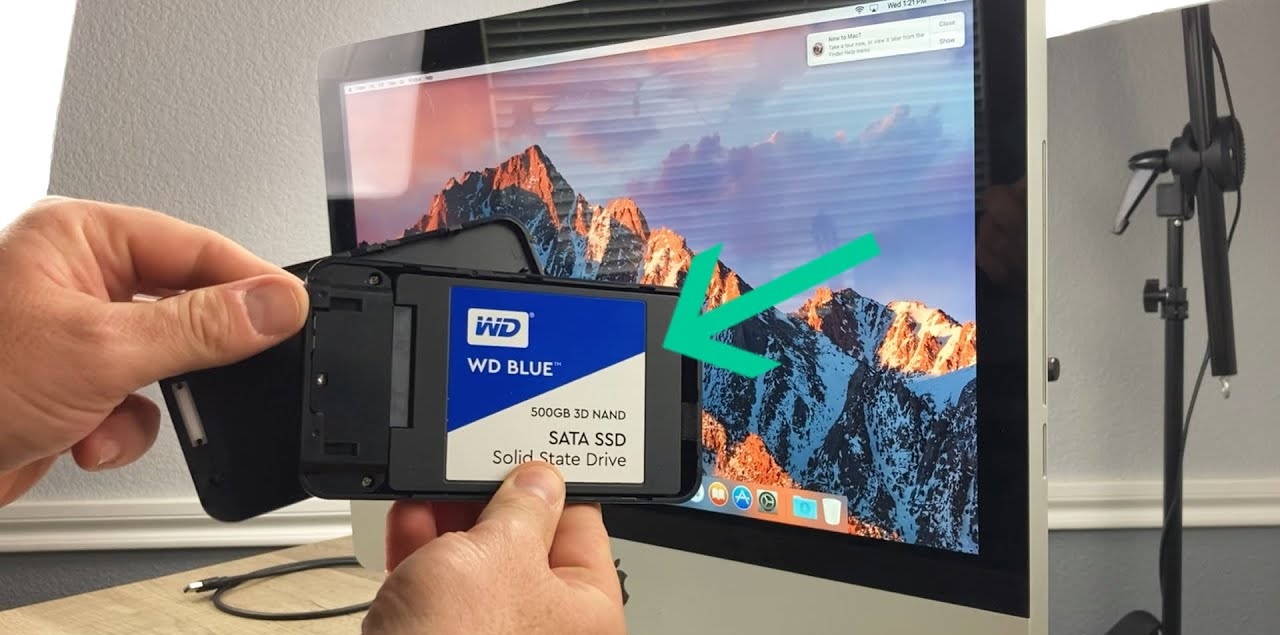
5. Install the New SSD: Take the new SSD and align it with the empty drive slot. Gently and firmly insert the drive until it is securely connected in the slot. If necessary, use the screws provided to secure the drive in place.
6. Reconnect Cables: If you removed any cables during the process, carefully reconnect them to the new SSD. Ensure they are inserted fully and securely to avoid any connection issues.
7. Replace the Panel or Close the Drive Bay: If you removed a panel to access the internal drive slots, carefully replace it and secure it in place. If you accessed the drive bay, close it according to the manufacturer’s instructions.
8. Power On: With the new SSD now installed, reconnect the power cable and any other necessary connections. Press the power button to turn on your Mac.
By following these steps, you can successfully install the new SSD in your Mac. Ensure that it is securely connected, and all cables are properly reconnected before proceeding to the next step of booting from the installer and installing Mac OS on the new SSD.
Booting from the Installer
Once the new SSD is installed in your Mac, you need to boot from the bootable installer to initiate the installation process for Mac OS. Follow these steps to boot from the installer:
1. Connect the Bootable USB: Plug in the USB drive containing the bootable installer into an available USB port on your Mac.
2. Power on Your Mac: Press the power button to turn on your Mac, and immediately hold down the Option key on your keyboard. This will bring up the startup disk selection screen.
3. Select the Bootable Installer: On the startup disk selection screen, you should see a list of available startup disk options. Look for the bootable installer drive you just connected and select it using the arrow keys on your keyboard.
4. Begin the Startup Process: Once you have selected the bootable installer, press the Enter (or Return) key on your keyboard. Your Mac will now begin the startup process from the bootable installer.
5. Wait for the Installer to Load: It may take a few moments for the bootable installer to load, so be patient. You will eventually be greeted with the macOS Utilities window.
6. Proceed with the Installation: From the macOS Utilities window, you have several options. You can choose to install a new copy of macOS, restore from a Time Machine backup, access the Disk Utility to format the new SSD, or even access Terminal for advanced tasks.
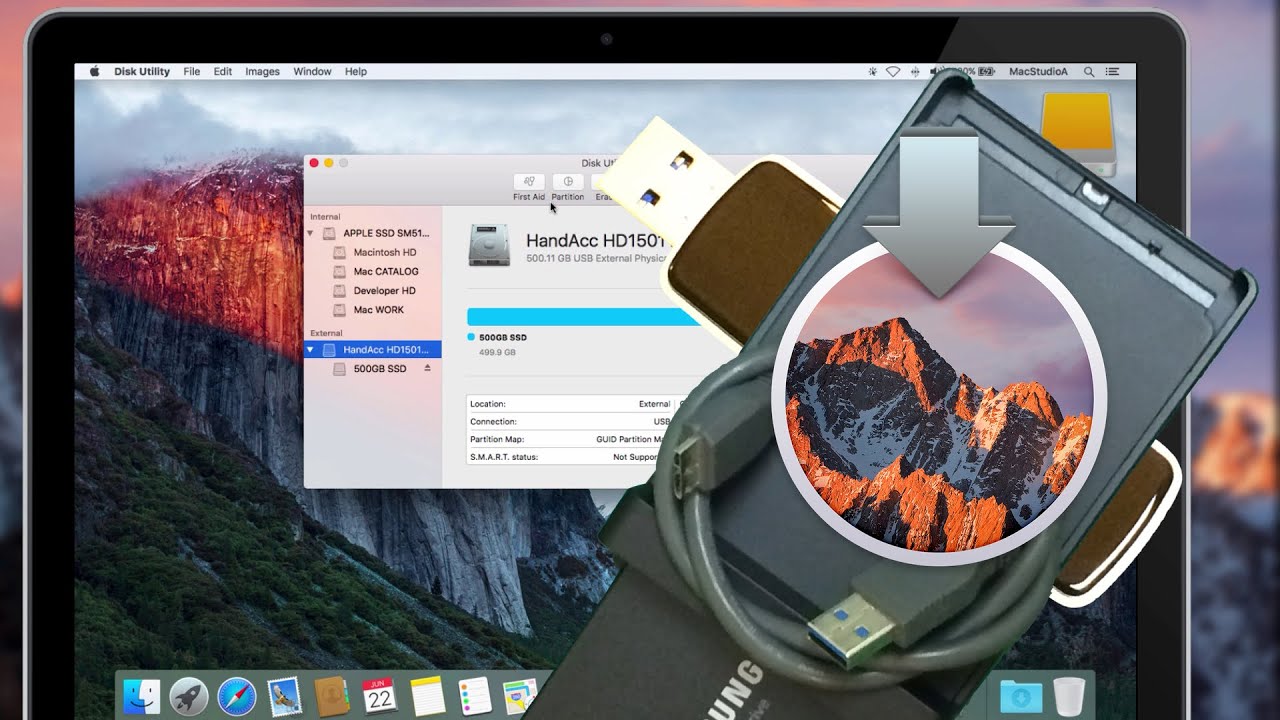
7. Select Disk Utility (Optional): If you need to format the new SSD, select Disk Utility from the macOS Utilities window. Follow the on-screen instructions to format the SSD to your desired file system format (usually APFS or Mac OS Extended).
8. Start the Installation: Once your new SSD is formatted (or if it was already pre-formatted), exit Disk Utility and return to the macOS Utilities window. Choose the option to Install macOS to begin the installation process.
By following these steps, you can successfully boot your Mac from the bootable installer and initiate the installation process for Mac OS on your new SSD. Make sure to carefully follow the on-screen instructions during the installation process to ensure a smooth and trouble-free upgrade.
Formatting the New SSD
Before you can install Mac OS on your new SSD, you need to format the drive to ensure it is compatible and ready for the installation process. Follow these steps to format the new SSD:
1. Access Disk Utility: Boot your Mac from the bootable installer as instructed in the previous section and wait for the macOS Utilities window to appear. From there, select Disk Utility and click Continue.
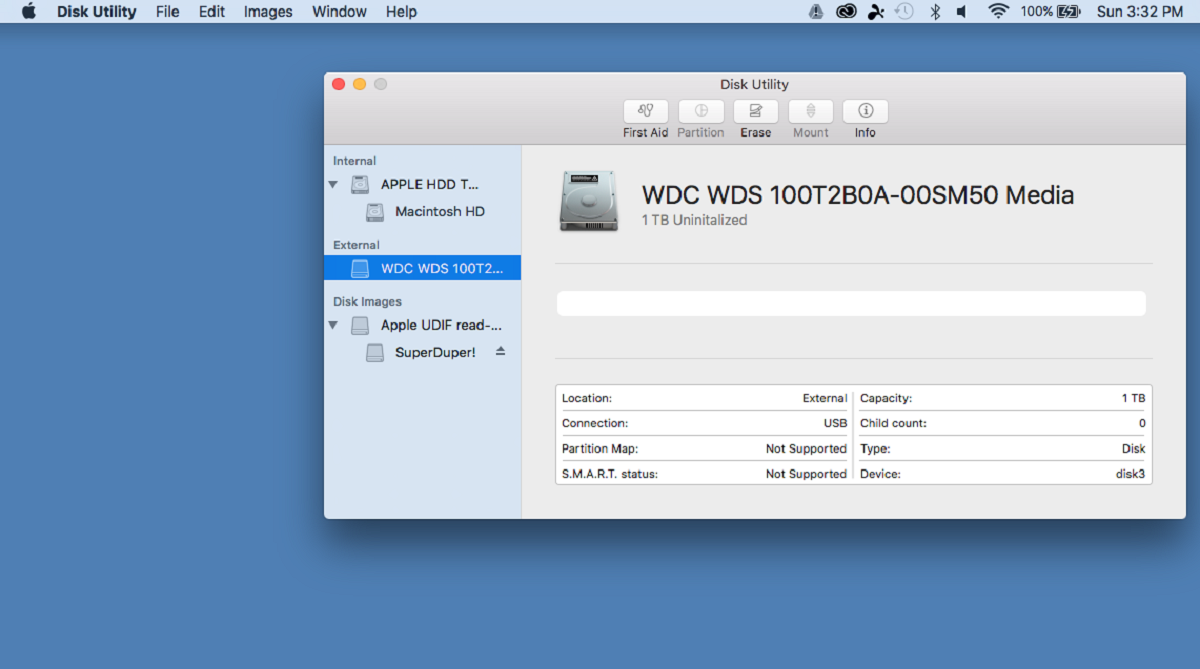
2. Select the New SSD: In the Disk Utility window, you will see a list of available drives and volumes. Locate your new SSD in the left sidebar and select it.
3. Erase the SSD: Click on the Erase button at the top of the Disk Utility window. A new window will open, allowing you to configure the formatting options for the SSD.
4. Choose the File System Format: In the format selection dropdown menu, choose the desired file system format for your new SSD. The recommended format for newer Mac systems is APFS (Apple File System). However, for older Macs or specific requirements, you may need to choose Mac OS Extended (Journaled).
5. Name the SSD: Enter a name for the SSD in the Name field. Choose a name that is descriptive and easy to identify. This name will be used to identify the SSD during the installation process.
6. Partition Scheme (Optional): If necessary, select the desired partition scheme. Most modern Mac systems use the GUID Partition Map, which is suitable for most scenarios.
7. Confirm and Erase: Double-check that all settings and selections are correct, as formatting the SSD will permanently erase all existing data. Once you are certain, click the Erase button to begin the formatting process.
8. Wait for the Format to Complete: The formatting process may take a few minutes to complete. The progress will be displayed in the Disk Utility window. Once the format is finished, the SSD will be ready for Mac OS installation.
By following these steps, you can properly format your new SSD using the Disk Utility tool. Ensure that you choose the correct file system format and partition scheme that aligns with your Mac’s requirements. Once the formatting is complete, you are ready to proceed with installing Mac OS on the newly formatted SSD.
Installing Mac OS
Now that your new SSD is formatted and ready, it’s time to proceed with installing Mac OS. This section will guide you through the installation process:
1. From the macOS Utilities window: In the macOS Utilities window, click on the option to “Install macOS” and then click on the “Continue” button.
2. Agree to the terms: Read through the “Software License Agreement” and click on the “Agree” button to proceed.
3. Select the destination: From the list of available drives, select the newly formatted SSD as the installation destination. Click on the “Install” button.
4. Wait for installation: The installation process may take some time, depending on the speed of your Mac and the version of macOS being installed. You can monitor the installation progress, which will be displayed on the screen.
5. Customize the installation: If you want to customize the installation, click on the “Customize” button before proceeding. You can choose specific features and options to install or exclude during the process.
6. Provide your Apple ID (optional): You may be prompted to enter your Apple ID and password during the installation process. This step is optional, but it allows you to connect your Mac to your Apple ID and access additional features and services.
7. Restart your Mac: Once the installation process is complete, your Mac will automatically restart. Make sure to disconnect the bootable installer USB drive from your Mac before the restart.
8. Set up your Mac: After the restart, you will be guided through the initial setup process. Follow the on-screen instructions to set up your Mac, including creating a user account, setting up Wi-Fi, and agreeing to the privacy settings.
By following these steps, you can successfully install Mac OS on your new SSD. Make sure to have a stable internet connection during the installation process to download any required updates. Once the installation is complete, you can enjoy the benefits of a fresh Mac OS installation on your newly installed SSD.
Transferring Data to the New SSD
After successfully installing Mac OS on your new SSD, you can now transfer your data from the old drive to the new SSD. Follow these steps to transfer your data:
1. Migration Assistant: Launch the Migration Assistant tool on your Mac. You can find it in the “Utilities” folder within the “Applications” folder.
2. Choose Migration Method: Select the option to transfer data from another Mac, Time Machine backup, or another disk. Choose the option that applies to your situation.
3. Connect the Old Drive: If you are transferring data from an old drive, connect it to your Mac using an appropriate connection method (e.g., USB, Thunderbolt, or SATA). Ensure the drive is recognized by your Mac.
4. Select the Source Disk: In the Migration Assistant, choose the old drive or backup source as the location from which you want to transfer data.
5. Choose What to Transfer: Select the particular files, user accounts, settings, or applications that you want to transfer to the new SSD. You have the option to transfer everything or manually select specific items.
6. Begin the Transfer: Once you have made your selections, click on the “Continue” button to start the data transfer process. The time required for the transfer will depend on the amount of data being transferred.
7. Monitor the Progress: You will see a progress bar indicating the status of the data transfer. Allow the process to complete without interruption.
8. Restart and Verify: Once the transfer is complete, restart your Mac. Verify that all your transferred data, including files, settings, and applications, are accessible and functioning properly on the new SSD.
By following these steps, you can successfully transfer your data from the old drive or backup to the new SSD. This ensures that all your important files, user accounts, and settings are seamlessly transitioned to the new SSD, allowing you to continue working without any disruption.
Finalizing the Installation
After transferring your data to the new SSD, there are a few final steps to take to ensure everything is set up correctly. Follow these steps to finalize the installation of Mac OS on your new SSD:
1. Check for Updates: Open the App Store and navigate to the Updates tab. Check for any available updates for Mac OS and your installed applications. Keeping your system and applications up to date is crucial for security and optimal performance.
2. Reinstall Applications: If you didn’t transfer your applications during the data transfer process, reinstall them from the original source or using installation files you saved. Make sure you have valid licenses or login credentials for each application.
3. Reset Settings and Preferences: Review and reset any system preferences, configurations, or settings as needed. This ensures that your Mac is personalized and set up according to your preferences.
4. Set Up Cloud Services: If you use cloud services such as iCloud, Dropbox, or Google Drive, enable and configure them on your Mac. This allows for seamless syncing and access to your files across multiple devices.
5. Test Functionality: Take some time to test the functionality of your Mac and ensure everything is working as expected. Open various applications, browse the web, and perform tasks to confirm that your Mac is running smoothly on the new SSD.
6. Organize Files and Documents: Arrange and organize your transferred files and documents on the new SSD to maintain a clean and efficient file structure. This will make it easier to locate and access your files in the future.
7. Backup the New SSD: Now that everything is set up on your new SSD, create a backup using Time Machine or any other reliable backup solution. Regularly backing up your data is essential for protecting against potential data loss.
8. Enjoy Your New SSD: With the installation and setup process complete, you can now fully enjoy the benefits of a fast and efficient Mac experience on your new SSD. Take advantage of the enhanced performance and responsiveness offered by your upgraded storage.
By following these final steps, you can ensure that your installation of Mac OS on the new SSD is fully finalized and optimized. Take the time to personalize your settings, reinstall applications, and organize your files to make the most of the new SSD and your Mac’s capabilities.
Conclusion
Installing Mac OS on a new SSD can significantly improve the performance and overall experience of your Mac. By following the steps outlined in this guide, you can successfully navigate through the installation process and enjoy the benefits of a faster and more responsive system.
Starting with careful preparation, including verifying compatibility, updating software, and creating backups, ensures a smooth transition to the new SSD. Creating a bootable installer gives you the convenience and flexibility to initiate the installation process offline.
Once the new SSD is installed, booting from the installer allows you to format the drive and initiate the installation of Mac OS. Configuring the file system format and partition scheme ensures compatibility and efficient utilization of your new SSD.
Transferring your data and finalizing the installation ensures that your files, applications, and settings are seamlessly transitioned to the new SSD. Verifying the functionality of your Mac, updating software, and optimizing settings completes the installation process.
With the installation and setup complete, you can revel in the enhanced performance and reliability offered by your new SSD. Take advantage of the improved speed and responsiveness to boost productivity and enjoy a more seamless computing experience.
Remember, it’s always important to maintain regular backups and keep your system updated to ensure data security and ongoing performance. By installing Mac OS on a new SSD, you have taken a significant step towards optimizing your Mac for both work and play.
Now that you have the knowledge and steps to install Mac OS on a new SSD, feel free to embark on this journey and enjoy the benefits of a faster and more efficient Mac experience!